I love a good DIY project that takes something ordinary or even discarded and turns it into a unique treasure. A few weeks ago, I was sorting through some old kitchen utensils to donate when I stumbled upon a wire hand whisk. My four-year-old son noticed it too and asked if he could keep it. He wanted me to turn it into a butterfly, but as I started pulling it apart, it looked more like a flower to me. And that’s when the idea hit me: why not turn this whisk into a beautiful spring flower?
With some brainstorming, a bit of help from my sister, and a few materials, I created something truly special. Here’s how I turned a simple whisk into charming spring flowers, step by step.
Materials You’ll Need
Before diving into the process, let’s talk about the materials I used. Each of these is essential for achieving the best results, and I’ll share some of my personal tips on why they work well.
- Wire Whisks: The foundation of the flower. You can use any old wire whisk lying around or pick up some inexpensive ones from a dollar store. The whisk’s loops create perfect petal shapes.
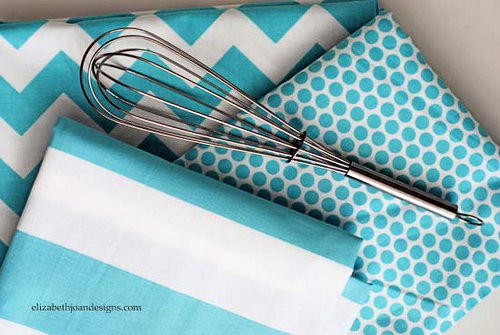
- Fabric Strips: Choose different colors and patterns to wrap around the petals. I used a mix of solid muslin and patterned fabrics for a layered look that adds depth and texture.
- Liquid Stitch Glue: This fabric adhesive is a must for securing the fabric around the petals. It dries clear and provides a strong hold, which is crucial for long-lasting DIY decor.
- Scissors: Essential for cutting fabric strips to the right size.
- Long Fabric Strips for Flower Centers: These will be rolled and glued to form the flower’s center, adding a finished, polished look to each bloom.
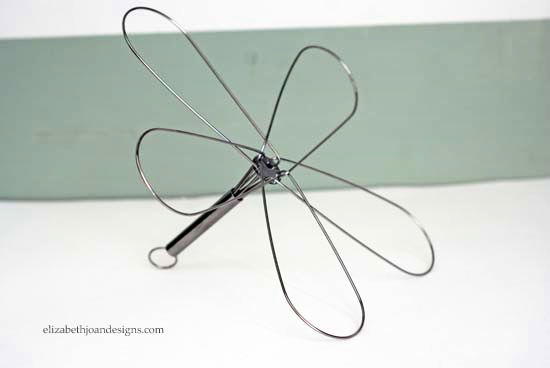
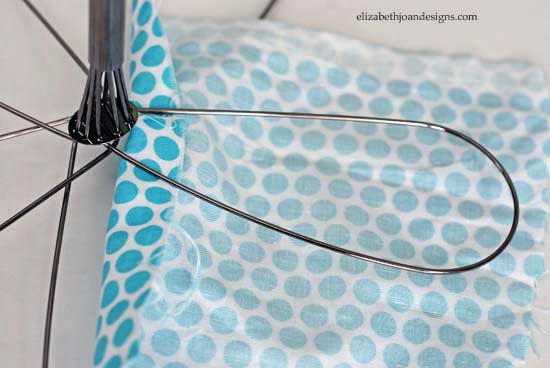
Step 1: Preparing the Whisk Petals
The first thing I did was grab the whisk and carefully pull apart each wire loop from the grouping. This step may take a bit of muscle, so be patient. I wanted to create a natural petal shape, which meant bending the wires outward evenly to mimic the form of a blooming flower.
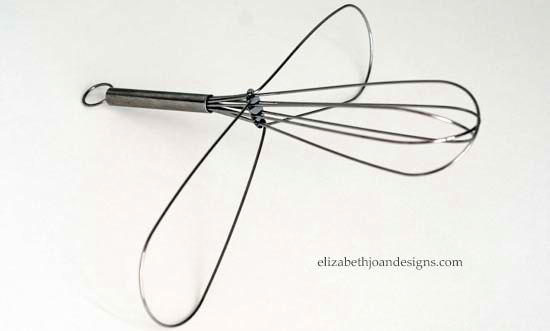
One tip I discovered here is to bend slowly and evenly. You don’t want to force the wires too much in one go; instead, ease them outward bit by bit to avoid breaking them.
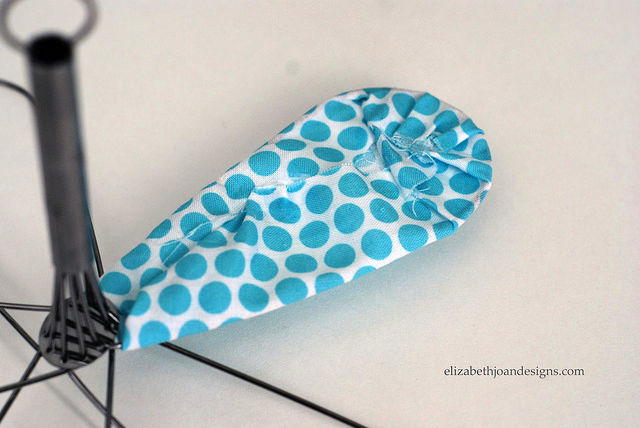
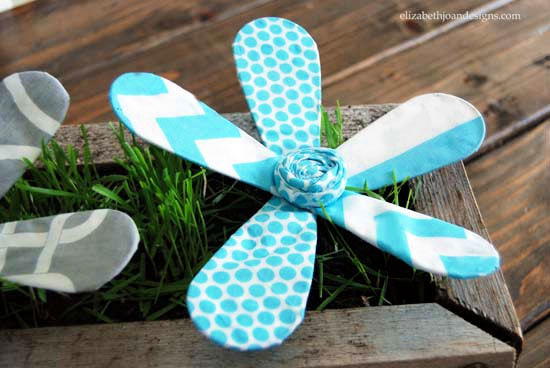
Step 2: Wrapping the Petals with Fabric
Now comes the fun part—adding color and personality to your flower! I cut small strips of fabric and wrapped them around each petal, securing the ends with liquid stitch glue. I quickly realized that lighter fabrics, like white, could be a bit see-through when wrapped around the metal wires. For a more opaque look, I wrapped the petals first with plain white muslin and then added my patterned fabric on top. This extra layer really made the colors pop and gave the petals a fuller, more professional appearance.
My sister Erin gave me the tip of using the “magic number of three” when selecting fabrics—mixing three different patterns or colors for a balanced, eye-catching design. I took her advice to heart, and the results were stunning.
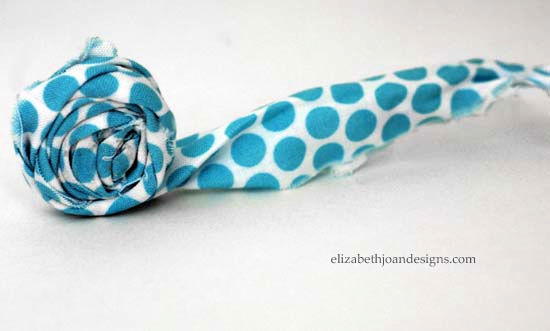
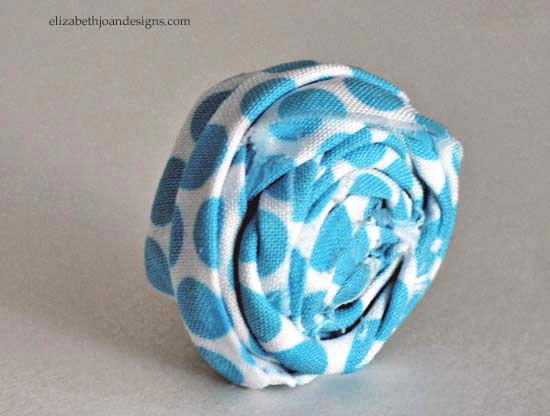
Step 3: Creating the Flower Centers
After wrapping all the petals, I was left with the question of how to finish the center of the flower. I brainstormed with Erin over the phone, and after several minutes of back-and-forth, we came up with the idea of making small rolled fabric flowers for the centers.
To create these, I cut long strips of fabric, rolled them tightly, and glued them in place. These fabric flowers were then attached to the center of each whisk flower. The result? A beautiful, layered flower with a rustic, handmade feel.
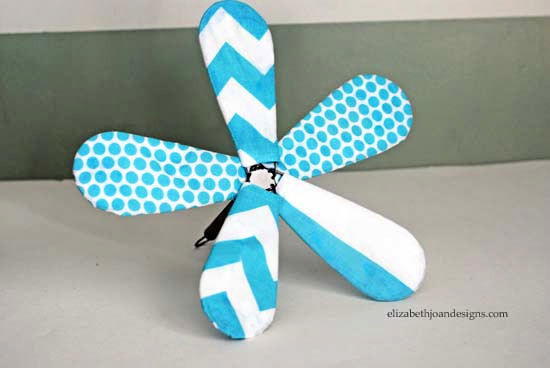
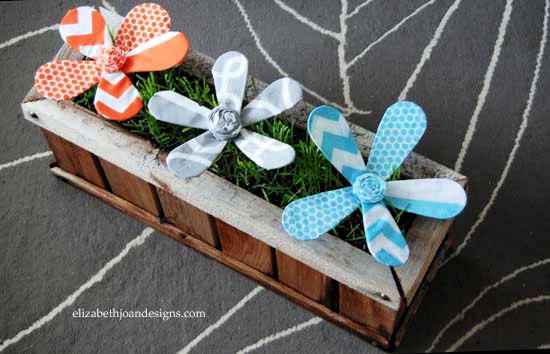
Step 4: Repeating the Process for More Flowers
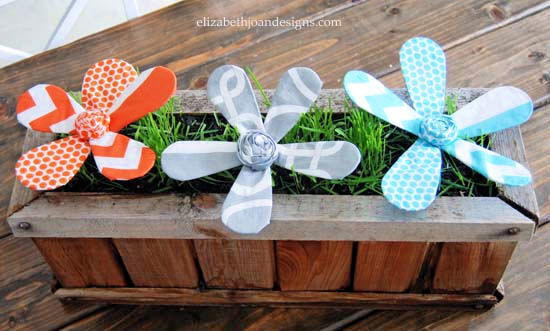
I didn’t stop at just one flower. The process was so enjoyable and the results so lovely that I decided to make three flowers, just like Erin suggested. I repeated all the steps above until I had a trio of beautiful, fabric-wrapped flowers. They looked amazing grouped together, each one unique yet cohesive in style.
Final Touches and Display Ideas
These DIY spring flowers turned out to be a delightful addition to my home decor. They brought a splash of color and a touch of whimsy to my space, making them perfect for spring and summer decorating. You can place them in a vase, attach them to a wreath, or even use them as unique party decorations or Mother’s Day gifts. The possibilities are endless.
Lessons Learned and Tips for Success
Looking back on this project, here are a few things I learned:
- Take Your Time with the Petals: Bending the whisk wires slowly and evenly is key to avoiding breakage and getting a natural shape.
- Layer Your Fabrics: If your fabric is too thin or transparent, double-layering with muslin underneath adds opacity and depth.
- Experiment with Colors and Patterns: Don’t be afraid to mix and match different fabrics. The variety adds visual interest and makes each flower unique.
- Glue Carefully: Liquid stitch glue is strong but can be a bit messy. Use a small brush or your fingers to apply it neatly.
Conclusion
Transforming an old wire whisk into a beautiful flower was a rewarding project that combined creativity, upcycling, and a bit of engineering. I hope my journey inspires you to look at ordinary objects around your home in a new light and see the potential for something beautiful. Remember, crafting is all about experimenting, having fun, and making something that brings joy to you and those around you.