Struggling to find space for all your bathroom essentials? We’ve gathered 15 clever DIY bathroom floating shelves to help you declutter and organize your space. From sleek, modern designs to rustic, woodsy accents, our guide offers a variety of styles to fit any bathroom’s decor. Not only will these DIY shelves save you money, but they’ll also add a touch of sophistication and functionality to your home.
Ready to enhance your bathroom with stylish and practical solutions? Our guide on easy-to-build bathroom floating shelves is just what you need. With cost-effective tips and customizable options, you’ll learn how to optimize your space and achieve a personalized look. Dive into our step-by-step instructions and discover how to make the perfect storage for your sanctuary. Keep reading to turn those bathroom blues into a creative adventure!
Why Consider DIY Bathroom Floating Shelves
- Cost-Effective: Building your own bathroom floating shelves is a budget-friendly alternative to purchasing pre-made units. By sourcing materials yourself and using tools you may already have or can borrow, you save money without sacrificing style or functionality.
- Customization: One of the biggest advantages is the ability to tailor the shelves to your specific needs and space. Whether you require narrow shelves for a small bathroom or desire a rustic wood finish to match your decor, DIY gives you the freedom to choose dimensions, materials, and finishes that perfectly suit your taste.
- Space Optimization: Floating shelves are excellent for maximizing storage in tight spaces. They take up minimal room while offering ample surface to organize toiletries, towels, and decor. This is especially beneficial in smaller bathrooms where floor space is limited.
- Personal Satisfaction: The process of making something with your own hands brings a sense of accomplishment. Once installed, these shelves will serve as a daily reminder of your craftsmanship and effort, adding personal value that store-bought alternatives simply cannot match.
- Enhanced Aesthetics: Floating shelves contribute to a clean, uncluttered look in your bathroom, as they don’t have visible brackets or supports. This minimalist design can make your bathroom appear larger and more modern.
- Learning Opportunity: Taking on a DIY project like this can be a great learning experience, enhancing your woodworking skills and giving you the confidence to tackle more ambitious home improvement tasks in the future.
How to Choose the Right Materials for Your Bathroom Floating Shelves
When selecting materials for your bathroom floating shelves, you want to ensure that they are not only aesthetically pleasing but also suitable for the bathroom environment, which is often humid and wet. Here’s a simple guide to help you make the best choice:
Consider the Moisture Resistance
- Use treated or sealed wood: Opt for wood that has been treated or sealed to prevent water damage.
- Consider synthetic materials: Materials like PVC or acrylic can also be good options as they naturally resist moisture.
Think About the Weight Capacity
- Study your items: Consider what you will place on the shelves. If you plan on storing heavier items, you’ll need sturdy materials that can bear more weight.
- Check the material’s strength: Make sure the material you choose can support the weight of your bathroom essentials without sagging or breaking.
Match Your Bathroom Decor
- Complement your style: Choose materials that match the existing decor of your bathroom, whether it’s modern, rustic, or industrial.
- Finish and color: Select the right finish and color that will blend in or stand out as desired in your bathroom’s color scheme.
Durability and Maintenance
- Easy to clean: The shelves should be easy to wipe down and clean without requiring special products.
- Long-lasting: Invest in materials that are known for their longevity to avoid frequent replacements.
How to Install Your DIY Bathroom Floating Shelves
Installing floating shelves can seem daunting, but with the right tools and a bit of patience, you can add storage and style to your bathroom. Here’s how to do it step by step:
Step 1: Gather Your Tools and Materials
- Drill
- Level
- Stud finder
- Screws and anchors
- Shelf brackets (if not using a hidden bracket system)
- Your chosen shelving material, cut to size
Step 2: Find and Mark the Studs
- Use a stud finder: Locate the studs in your wall to ensure your shelves will be securely anchored.
- Mark the spots: Once you find the studs, use a pencil to mark where your shelf brackets will go.
Step 3: Attach the Brackets
- Line them up: Hold the brackets against the wall, lining them up with your marks.
- Drill pilot holes: Before screwing in the brackets, drill pilot holes to prevent the wood from splitting.
- Secure the brackets: Screw the brackets into the studs, making sure they are level.
Step 4: Place Your Shelves
- Slide on the shelves: If you’re using a bracket system with a ledge, simply place your cut shelving material on top.
- Secure the shelf: For hidden brackets, slide the shelf onto the supports and use screws underneath to secure it in place.
Step 5: Style Your Shelves
- Arrange your items: Place your bathroom essentials, decorations, or storage containers on the shelves.
- Balance the load: Distribute weight evenly across the shelf to maintain stability.
By following these steps and tips, you can confidently add stylish and functional floating shelves to your bathroom. Remember to take your time, measure twice, and don’t hesitate to ask for help if you need it. Your new bathroom storage solution is just a DIY project away!
Frequently Asked Questions (FAQs) About DIY Bathroom Floating Shelves
What materials do I need to build bathroom floating shelves?
To build bathroom floating shelves, you will typically need:
- Lumber or plywood cut to your desired size
- Screws and anchors suitable for your wall type
- Shelf brackets (hidden bracket system is optional)
- A drill and level
- A stud finder
- Sandpaper, stain, or paint (for finishing)
How do I ensure my floating shelves are moisture-resistant?
Choose materials that are treated or sealed to withstand moisture. Opt for synthetic materials like PVC or acrylic, which naturally resist moisture. Alternatively, apply a waterproof sealant to your wooden shelves to protect them from humidity and water damage.
Can floating shelves hold heavy items?
Yes, but you must ensure that the shelves and the wall brackets used are designed to support the weight. It’s crucial to anchor the shelves to wall studs and use sturdy materials for both the shelf and the brackets. Always check the manufacturer’s weight capacity for the hardware you use.
How can I match my floating shelves with my bathroom decor?
- Select materials and finishes that complement your existing bathroom style.
- Choose colors that either blend with your color scheme or provide an accent.
- Consider the overall aesthetic, whether you want a modern, rustic, or industrial look.
Is it hard to install floating shelves by myself?
With basic DIY skills, you can install floating shelves yourself. Use a level to ensure they’re straight, a stud finder to mount them securely, and follow detailed instructions for the best results. Don’t hesitate to ask for help if you’re unsure about the process.
Can I customize the size of my floating shelves?
Absolutely! One of the benefits of DIY shelves is that you can cut the wood to fit any specific length or width you need, making them perfect for odd-sized spaces or specific storage needs.
How do I maintain and clean my floating shelves?
To maintain your shelves, dust them regularly and wipe them down with a damp cloth as needed. Use cleaners appropriate for the shelf material and finish. For wooden shelves, avoid excessive water exposure to prevent warping.
How do I find the studs in my wall to install the shelves?
Use a stud finder to locate the studs in your wall. Once you find them, mark the locations with a pencil where you’ll attach your shelf brackets. Always double-check with a small drill hole to confirm the stud’s location.
Can I paint or stain my floating shelves after they’re installed?
It’s easier to paint or stain your shelves before installation, but if needed, you can do it afterward. Just be sure to protect the surrounding area with painter’s tape and drop cloths to avoid spills and drips.
How do I ensure my floating shelves are level during installation?
Use a level when installing your brackets and again when placing your shelf on the brackets. Adjust as needed before securing the shelf in place. Being meticulous during this step is key to a professional-looking installation.
By considering these FAQs, you can approach your bathroom floating shelves project with confidence and make a functional, stylish addition to your bathroom. Remember, patience and preparation are your best tools for a successful DIY endeavor!
DIY Bathroom Floating Shelves
Learn how to make stylish and functional bathroom floating shelves with this easy DIY tutorial. Upgrade your bathroom storage and add a touch of elegance to your space. Perfect for organizing essentials and displaying decorative items.
1. Easy Steps to Build Bathroom Floating Shelves
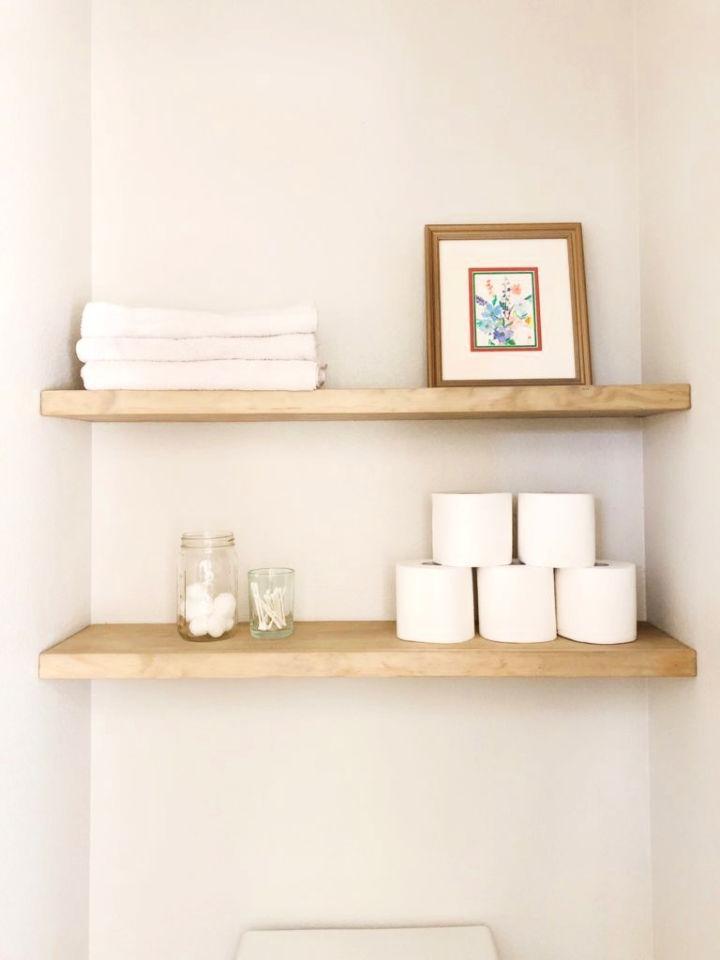
Discover how to make sleek, thin floating shelves with Angela Rose Home‘s step-by-step guide. Ideal for adding a stylish storage solution to any room, this tutorial takes you through the process from marking your studs to the final attachment of the shelf front.
Using basic materials like pine boards and plywood, you can achieve a custom-built look without the bulkiness of traditional shelving. Perfect for DIY enthusiasts, this instructive and engaging walkthrough ensures a smooth project with professional-looking results. Transform your space with floating shelves that are both functional and chic.
2. DIY Floating Shelves for Small Bathroom
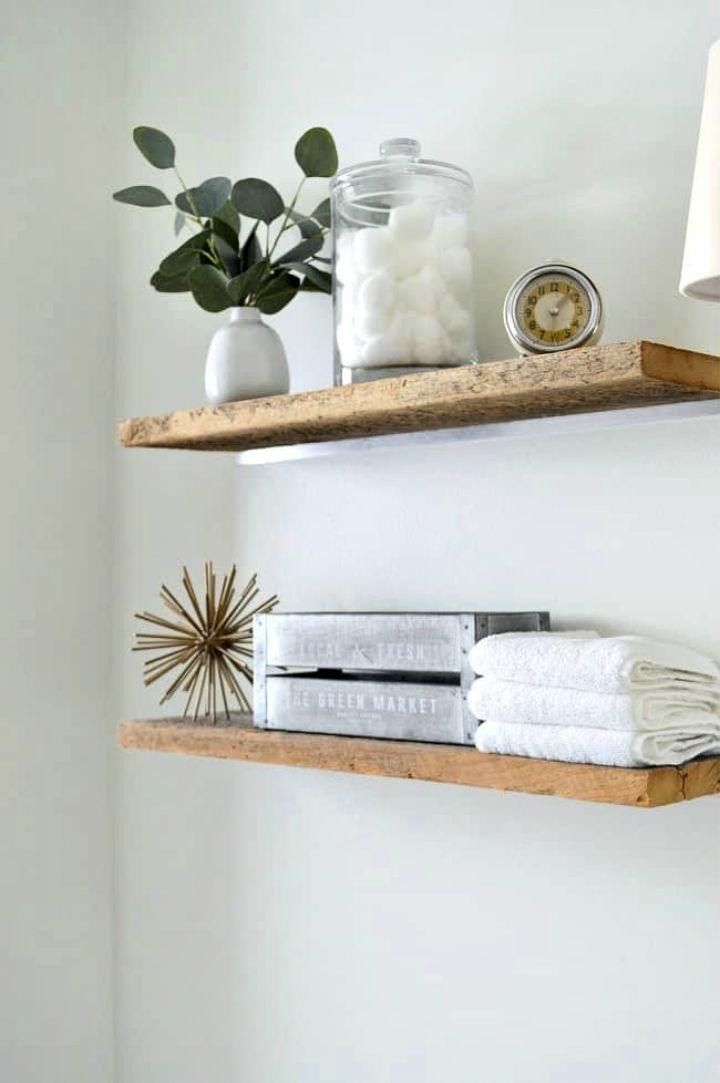
Transform your small bathroom with a touch of rustic charm by making your own DIY floating shelves. Chatfield Court offers an easy-to-follow guide on crafting these shelves from scratch, using old barn wood and an affordable aluminum strip. This project not only enhances the aesthetic of your space but also provides the practicality of added storage.
Perfect for those with limited room, these sturdy shelves can hold your bathroom essentials and a bit of decor, infusing warmth into your home. Dive into the step-by-step instructions and elevate your bathroom with this clever storage solution.
3. Homemade Rustic Wood Bathroom Floating Shelves
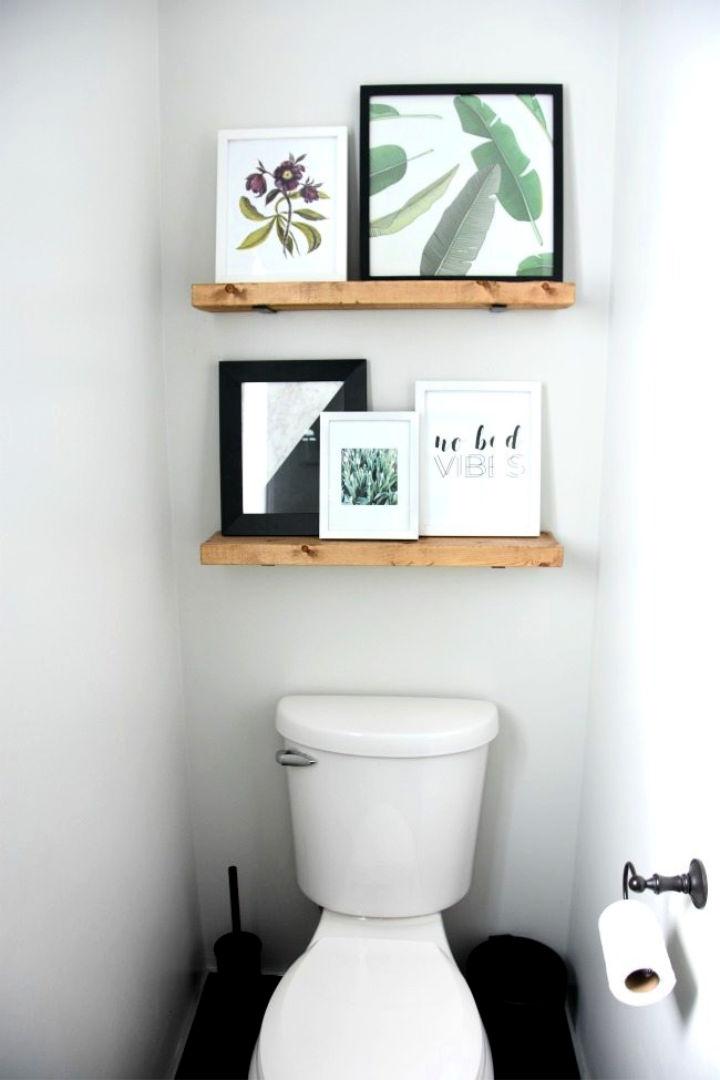
Transform your space with easy-to-install DIY floating shelves, as guided by Gemma Bonham-Carter on THE SWEETEST DIGS. This step-by-step tutorial simplifies the process, making it accessible for anyone to add a touch of wood warmth and functional art display to their home.
With a focus on straightforward techniques, you’ll learn how to measure, cut, and stain lumber, then mount it with hidden supports for that clean, floating look. Style your shelves with personalized art for a custom finish that enhances any room.
4. How to Make Bathroom Floating Shelves
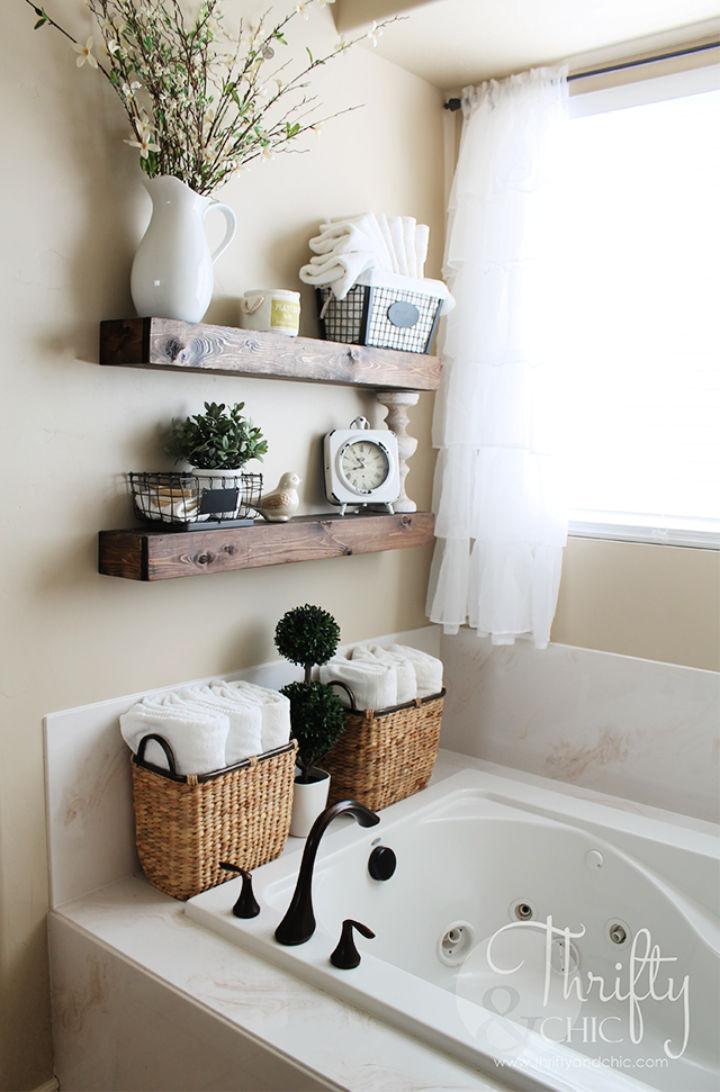
Transform your bathroom with a chic and thrifty DIY update using Floating shelves, as showcased on Thrifty and Chic. Learn to craft stylish storage solutions that enhance your space without breaking the bank. Alicia’s step-by-step guide makes it easy to make functional decor with a farmhouse touch.
By using simple materials like 1×6 and 1×4 boards, you can assemble elegant shelves that provide a perfect mix of form and function. Add a personalized touch to your bathroom while keeping essentials neatly organized. This project proves that you can achieve a fresh look on a budget, with each shelf costing as little as $7. Follow the instructive and engaging tutorial for an enjoyable DIY experience that yields beautiful and budget-friendly results.
5. Inexpensive DIY Bathroom Floating Shelves
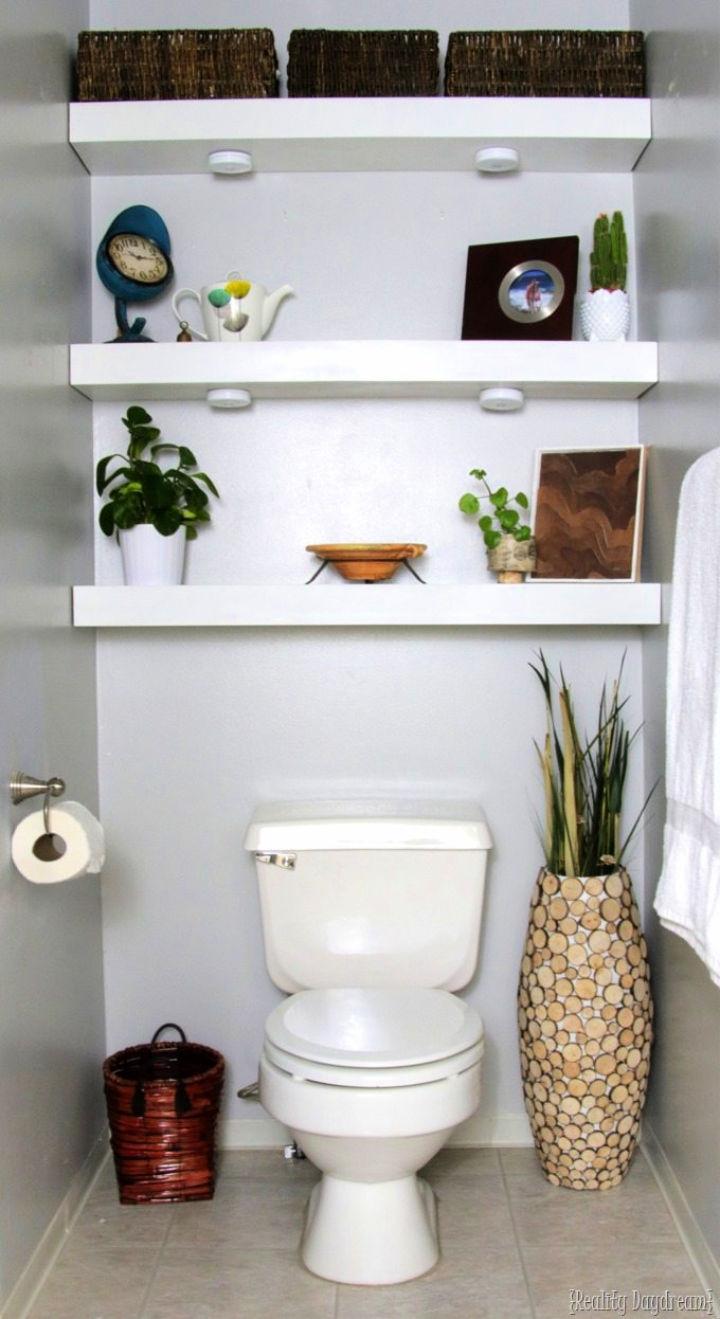
Transform any nook in your home with custom DIY floating shelves, courtesy of Reality Day Dream. The tutorial provides a clear, step-by-step guide to making stylish and functional storage space that appears to effortlessly float above your furnishings. From precise measurements to the final glossy white paint, every detail is covered to ensure a smooth project flow.
Perfect for spaces above a toilet or any small area, these shelves add a chic touch while keeping your essentials organized. With helpful instructions and practical tips, even those new to DIY can confidently tackle this project and elevate their home decor.
6. Making Bathroom Floating Shelves in a Nook
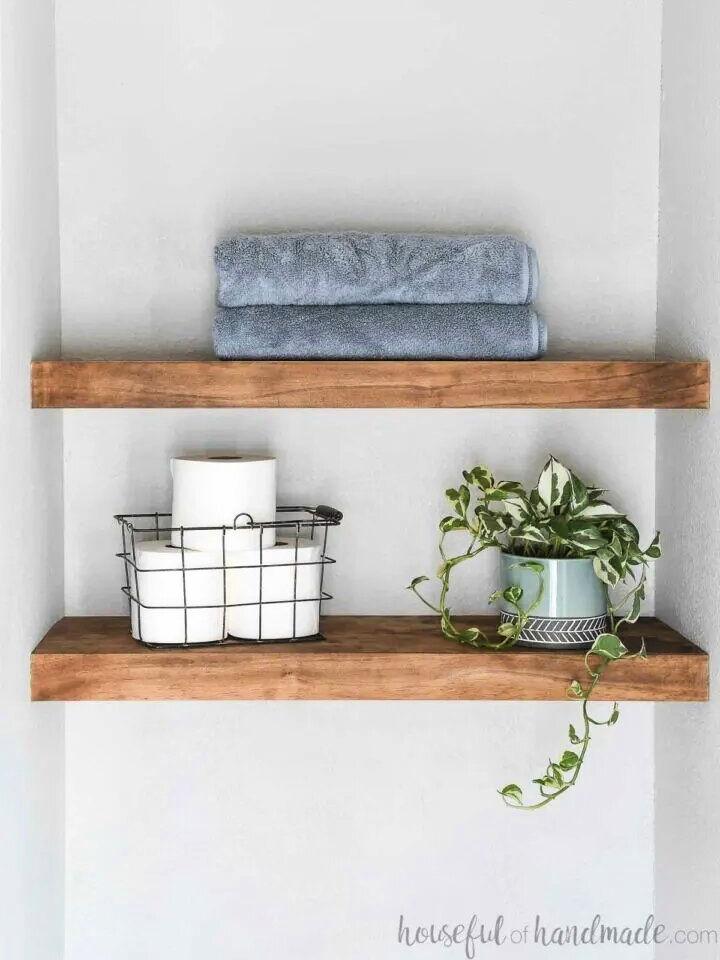
Transform any nook or alcove in your home into a practical storage area with easy-to-build DIY floating shelves. Houseful of Handmade provides a comprehensive tutorial that guides you through making these elegant and functional shelves. In just an afternoon, you can enhance a three-sided space with custom shelves ideal for organizing or displaying items. The process is straightforward, from building a sturdy frame to finishing the shelves with a perfect fit. With this helpful and engaging guide, even those new to DIY projects can confidently craft beautiful floating shelves tailored to their space.
7. Affordable DIY Floating Bathroom Shelves
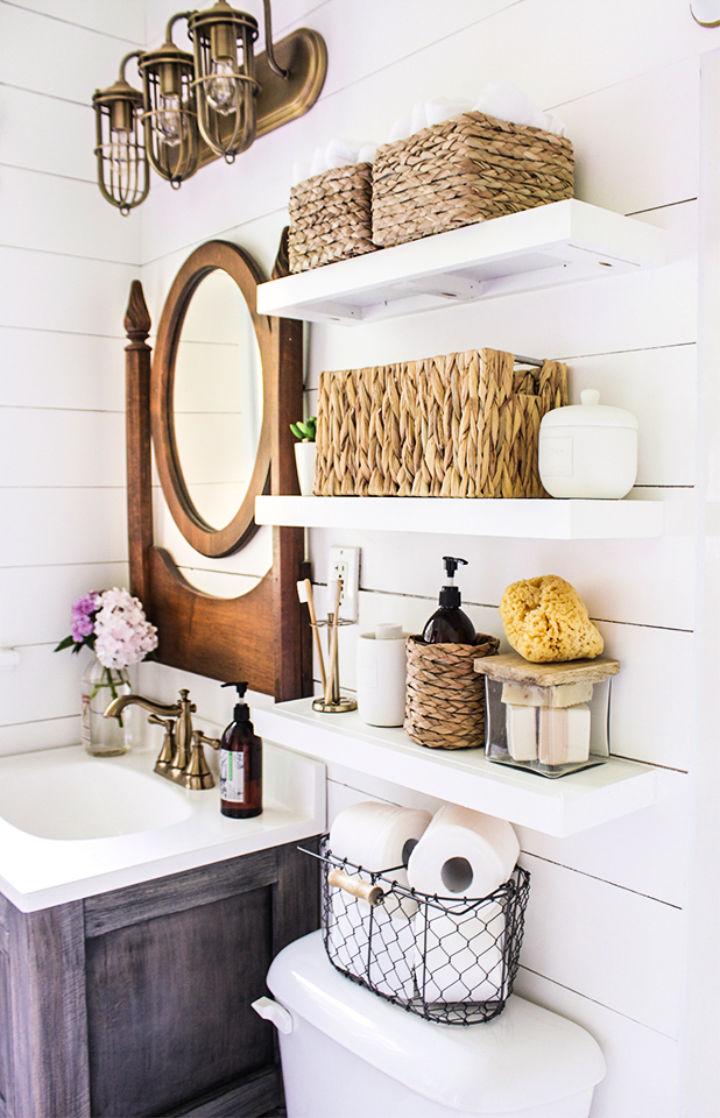
Transform your bathroom space with a set of three DIY floating shelves, courtesy of Rachel’s guide on Shades of Blue Interiors. For around $20-$30, you can make stylish and functional storage above your toilet or in any nook of your home. With clear dimensions, a comprehensive shopping list, and a step-by-step process, this tutorial ensures an enjoyable crafting experience.
Customize the shelves with your choice of paint or stain to match your decor. These narrow shelves not only elevate the look of your bathroom but also offer a practical solution for organizing essentials. Engage in this simple yet rewarding project and add a personal touch to your living space.
8. How to Build Rustic Wood Floating Shelves
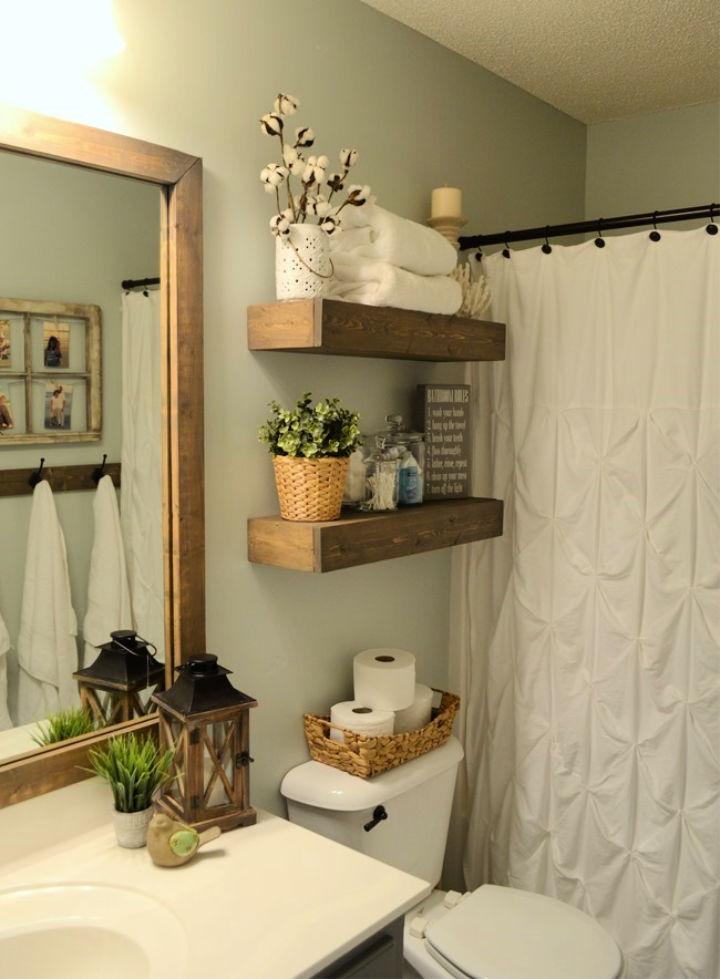
Transform your guest bathroom with a touch of rustic charm by making your own DIY rustic wood floating shelves. Our guide provides an engaging, step-by-step approach, ensuring an easy and enjoyable crafting experience. By using simple materials such as 1×8 boards for depth and 2x2s for sturdy wall braces, you can assemble and stain these shelves to bring warmth and a farmhouse feel to your space.
With a cost-effective budget and no advanced tools required, these shelves are perfect for adding functional style to any room. Follow our helpful tips to secure your shelves and achieve a polished look that complements your home’s decor. Join us in this creative endeavor and add a personal touch to your living space today. The Frugal Home Maker
9. Handmade Bathroom Floating Shelf
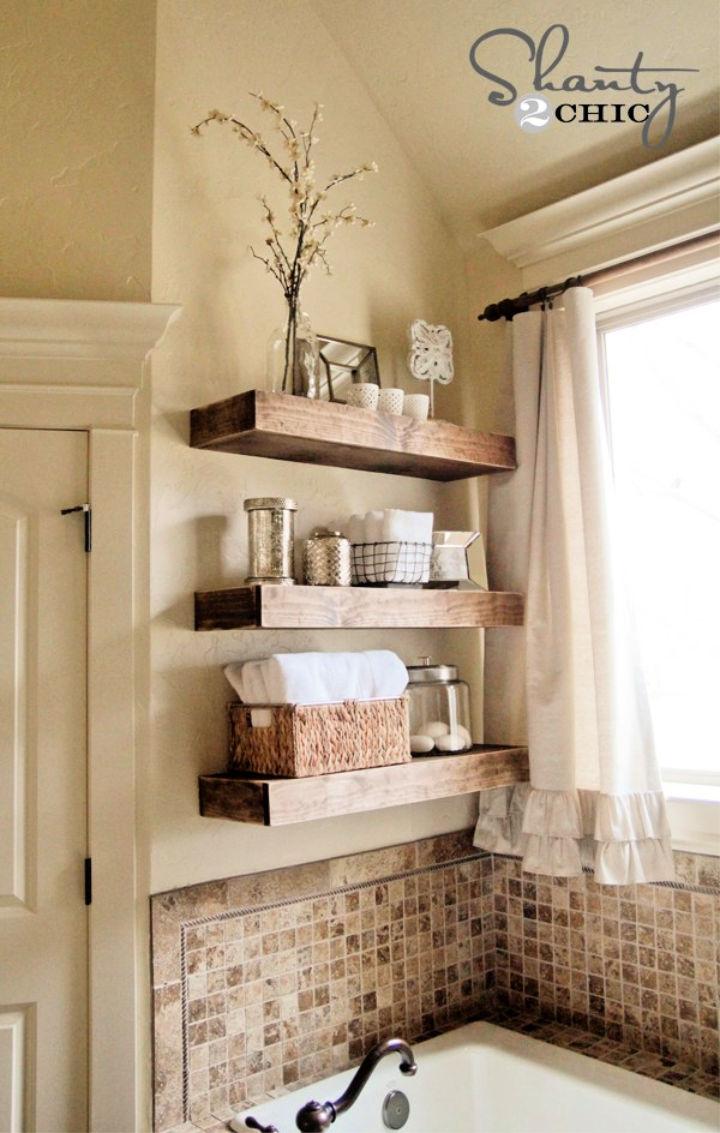
Ready to enhance your space with a touch of style? Shanty 2 Chic offers an engaging and instructive guide to making your own DIY Floating Shelves. With clear, easy-to-follow instructions, free plans, and a helpful video tutorial, you’ll be able to assemble these sturdy and chic shelves in about an hour.
Perfect for any room in your home, these shelves are not only functional but also add a personalized touch to your decor. Dive into the project with confidence, knowing that these shelves are designed to be strong enough for everyday use. Get your tools ready, and let’s start building those eye-catching floating shelves today!
10. DIY Bathroom Floating Shelves for Extra Storage
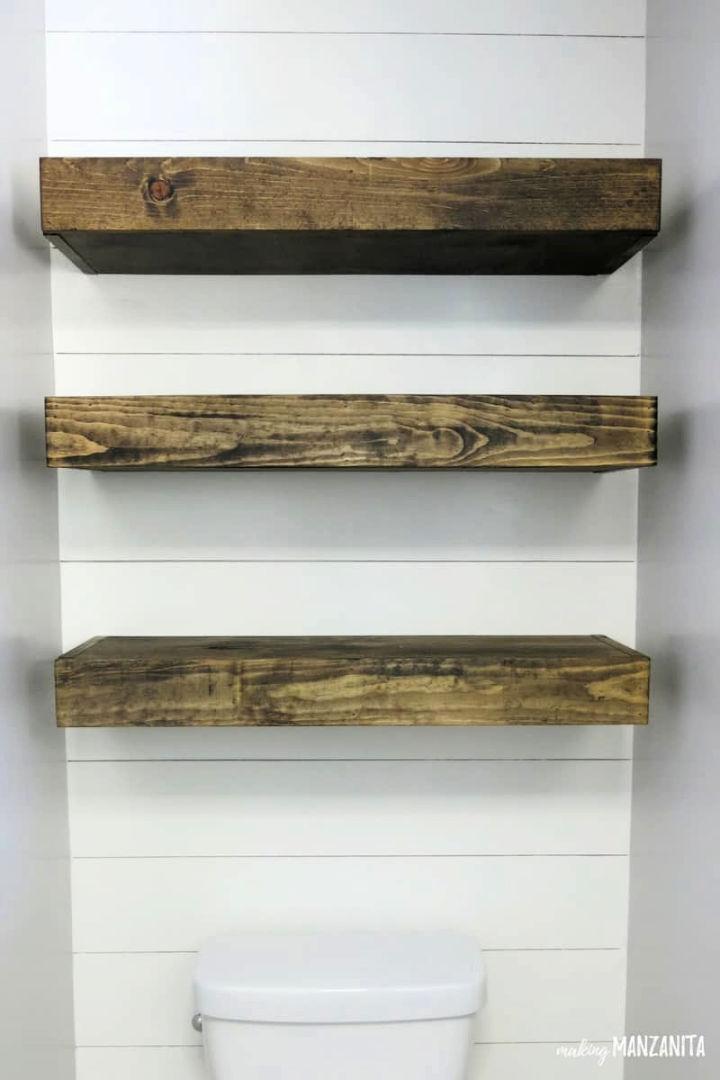
Transform your bathroom with practical and stylish floating shelves, perfect for maximizing storage in small spaces. Making Manzanita offers a comprehensive tutorial to guide you through crafting your own bathroom floating shelves above the toilet. With a clear step-by-step process, you’ll learn how to build a sturdy base, cut and attach boards, and achieve a seamless finish with staining techniques.
This DIY project not only enhances your bathroom’s functionality but also infuses a touch of farmhouse charm into your decor. Equip yourself with basic tools and materials, and get ready to make additional storage that complements your bathroom’s aesthetic.
11. Make Your Own Bathroom Floating Shelves
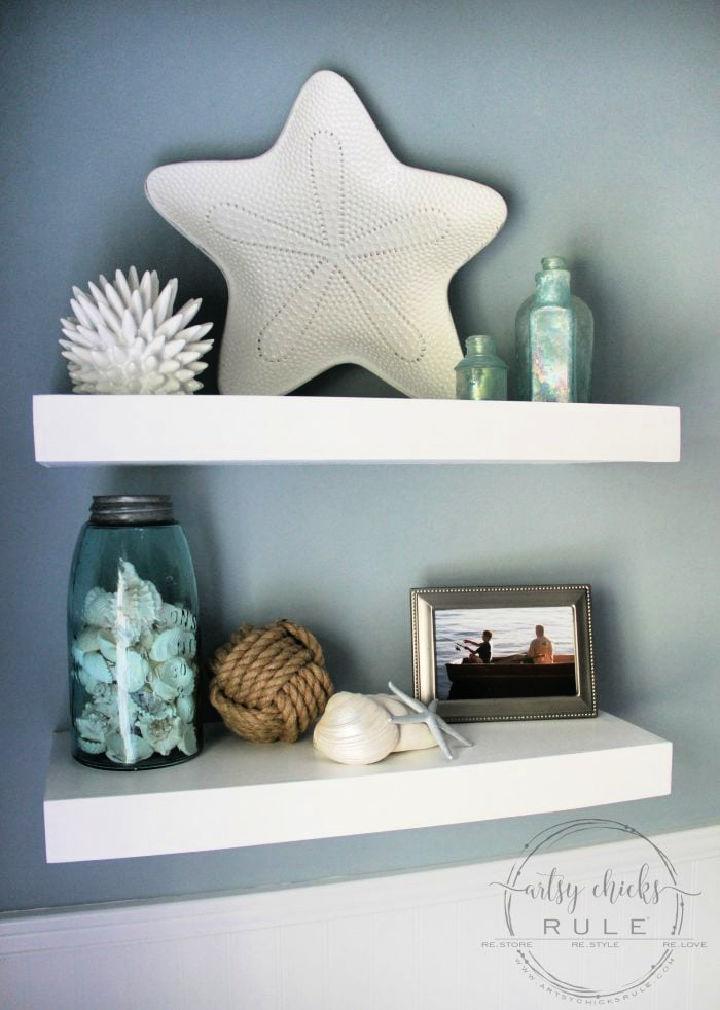
Transform your living space with a touch of personal flair using this easy-to-follow DIY Floating Shelves tutorial from Artsy Chicks Rule®. Ideal for showcasing photos and keepsakes, these shelves offer a stylish storage solution that doesn’t overpower your cherished items. Gather a few wood pieces, some basic tools, and get ready to make a practical yet elegant feature for any room.
This guide provides a step-by-step process, ensuring a smooth and satisfying project outcome. Whether sprucing up a bathroom, bedroom, or living area, these floating shelves add a seamless look that’s both sturdy and charming. Get ready to elevate your home’s aesthetics with this simple and engaging weekend project.
12. How to Make Floating Shelves – Step by Step
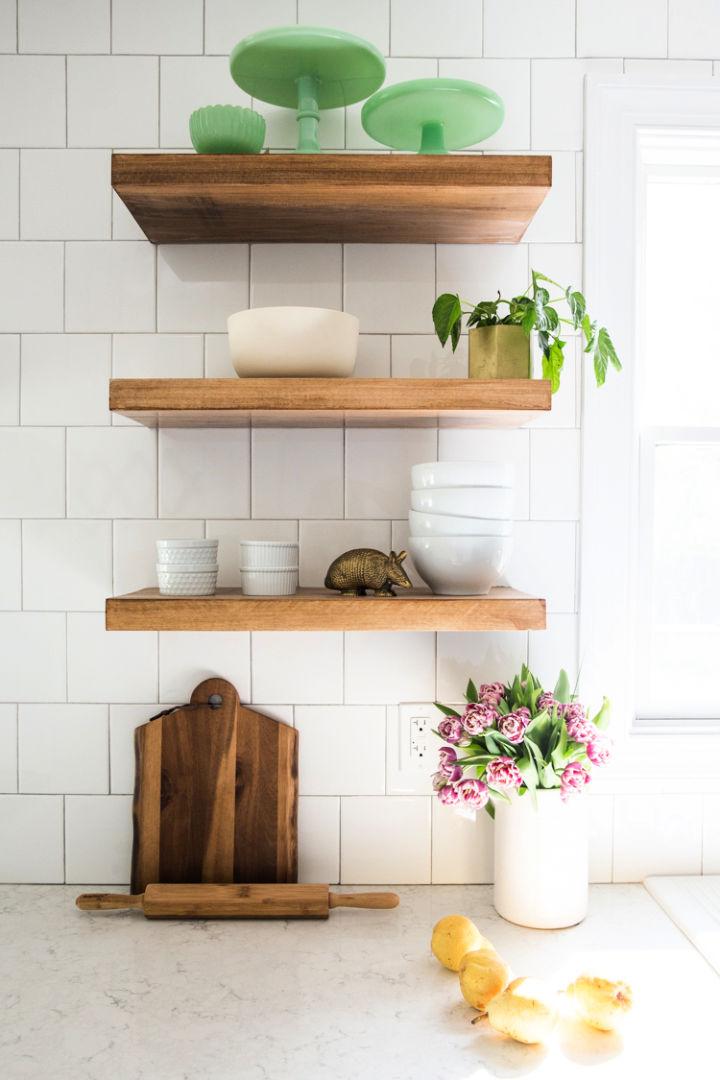
Transform your kitchen space with DIY floating shelves that blend functionality and style. Live Free Creative Co’s Miranda guides you through the process, from selecting the right lumber to the final touches of styling your shelves. With detailed instructions on choosing materials, cutting lumber, and installing brackets, this tutorial is perfect for those ready to tackle a more advanced project.
Learn how to make custom shelves that fit your space perfectly, offer practical storage, and enhance your home’s aesthetic. By following these steps, you can achieve sturdy, beautiful floating shelves that make a statement in any kitchen.
13. DIY Industrial Style Pipe Bathroom Floating Shelves
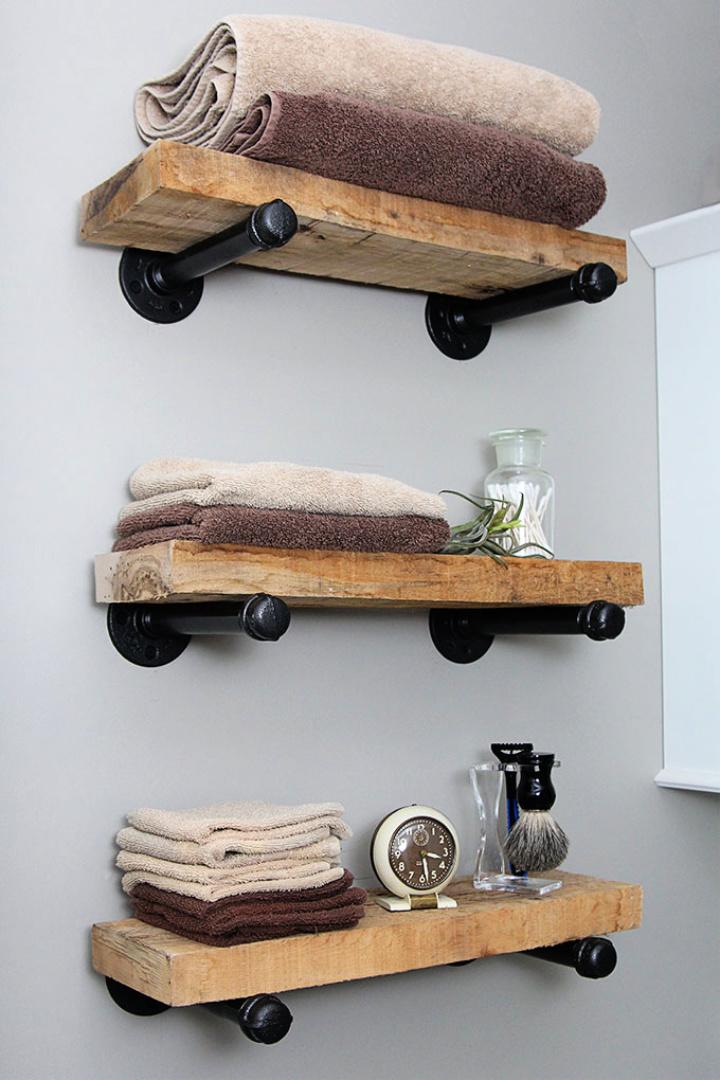
Transform your home decor with a touch of industrial charm by making your own DIY industrial pipe shelves. House of Hawthornes provides an easy-to-follow tutorial that guides you through the process of assembling stylish and functional shelving.
Ideal for adding a farmhouse flair, these shelves are not only visually appealing but also practical and affordable. With a list of materials you can easily find at your local home improvement store, this project promises to elevate your interior space. Get ready to measure, screw, and paint as you build sturdy and attractive pipe shelves that are sure to impress.
14. Dad Dominic’s Rustic Bathroom Floating Shelf
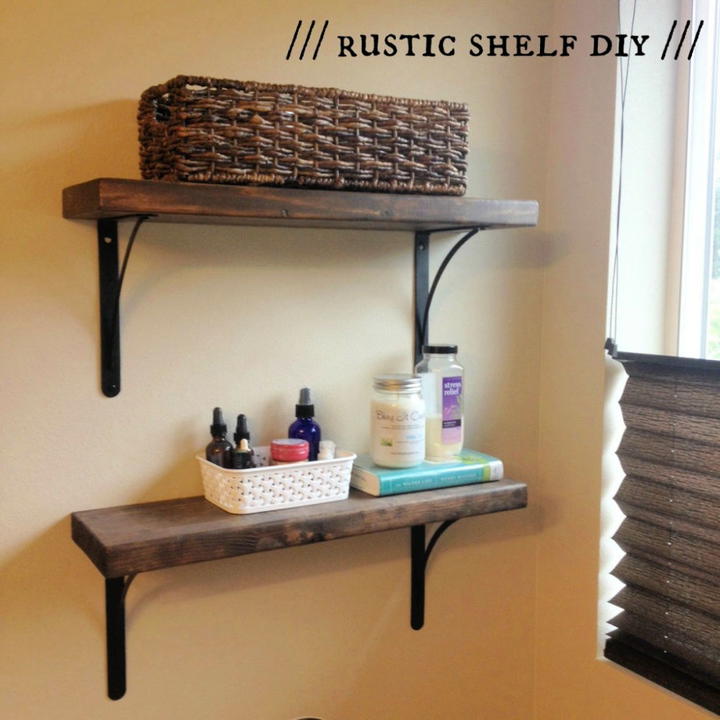
Get ready to add a touch of rustic charm to your home with That Dad Dominic’s DIY guide for crafting beautiful shelves. Dominic’s step-by-step instructions on That Mama Gretchen make it simple to make your own custom wooden shelves that are both stylish and functional.
With a list of supplies, detailed directions, and helpful tips, you’ll learn how to distress wood for that sought-after barn look, apply stain and polyurethane for a professional finish, and securely install your new shelving. Perfect for any room in the house, these shelves serve as a practical and chic storage solution. Transform your space with this easy and rewarding project today!
15. Make Wooden Bathroom Floating Shelves
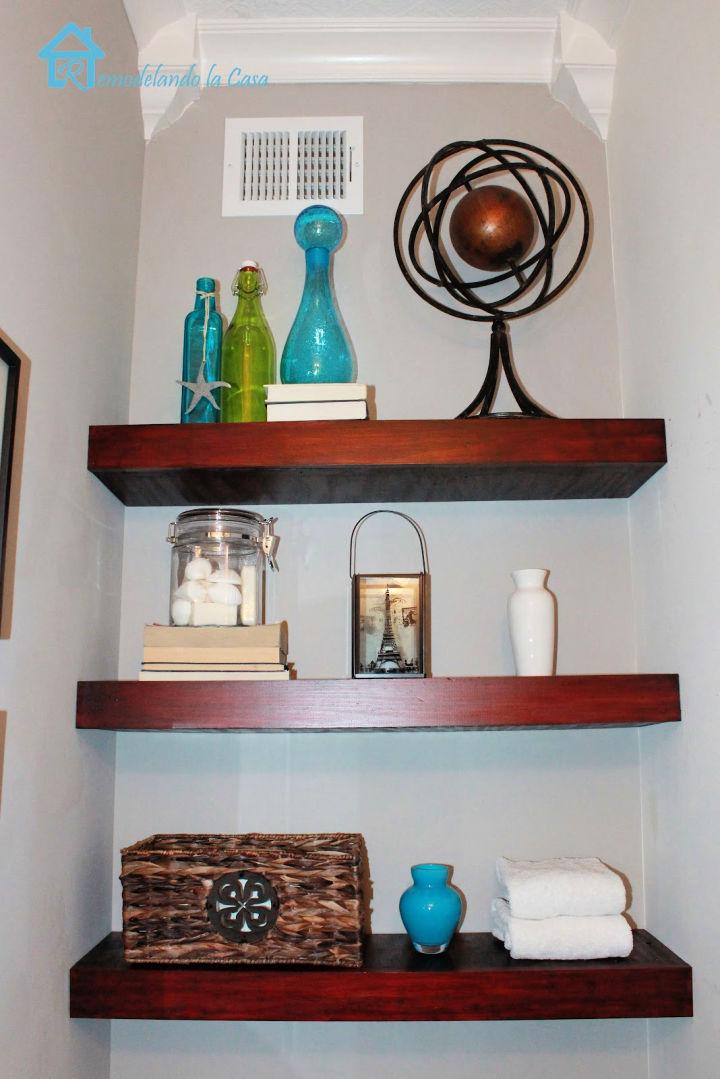
Looking to enhance your home with practical, stylish storage? Remodelando la Casa presents an engaging guide on how to build your own floating shelves. These wall-mounted wonders are not just visually appealing but also offer ample space to store and display your items.
The tutorial walks you through each step, from installing cleats to crafting the shelf panels, ensuring a smooth DIY experience. By following these instructions, you’ll make a functional and attractive addition to any room, perfect for organizing books, decorative items, or essentials. Dive into this helpful resource and transform your space with custom-made floating shelves.
Conclusion:
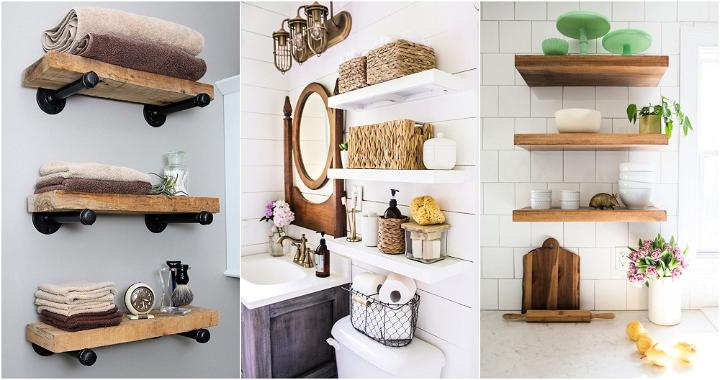
In conclusion, our compilation of “15 easy bathroom floating shelves ideas” is your ultimate resource for enhancing storage and style in your bathroom. These DIY projects not only serve as a functional addition to your space but also bring customized elegance to your home decor. With our straightforward guides and practical advice, making your own floating shelves becomes a seamless and fulfilling experience. Get ready to transform your bathroom with these clever, cost-effective solutions that promise to declutter and elevate your sanctuary.
