Making your own DIY archery target can be both a rewarding and practical project. If you love archery, making a custom target tailored to your specific needs can enhance your practice sessions. Not only does it give you the freedom to choose your materials and size, but it also allows you to save money in the process. Making a homemade archery target is not just about crafting; it’s about adding a personal touch to your archery experience. Discover 10 cheap DIY archery target ideas with easy step-by-step instructions.
In this guide, we will walk you through the essentials of building a simple and effective DIY archery target. From understanding the basics to choosing the right materials, and following a step-by-step construction process, you’ll find all the information needed to get started. Additionally, we’ll share tips to ensure your target withstands the test of time. Stay tuned for the next sections where we delve deeper into each step, ensuring your DIY archery target project hits the bullseye in terms of durability and functionality.

Why Build Your Own Archery Target?
Building your own archery target can be incredibly rewarding and practical for several reasons:
- Cost-Effective: Purchasing archery targets can be expensive, especially if you are practicing frequently and need to replace them often. DIY targets can be made from affordable or recycled materials, significantly cutting down costs.
- Customization: Making your own target allows you to tailor its size, density, and design to fit your specific training needs. Whether you’re a beginner or an experienced archer, you can adjust the specifications to challenge your skill level appropriately.
- Sustainability: By using repurposed materials such as old carpet, foam, or cardboard, you are making an environmentally friendly choice. You’re giving a second life to items that might otherwise end up in a landfill.
- Convenience: With a homemade target, you can practice anytime without the need to travel to a range. This accessibility can help you maintain a regular practice schedule and improve your skills more quickly.
- Craftsmanship: There’s a certain satisfaction that comes from building something with your own hands. Completing a DIY project like an archery target can provide a sense of accomplishment and pride in your craftsmanship.
- Learning Experience: The process of designing and constructing your own target can be a valuable learning experience. You’ll gain knowledge in areas such as material properties, structural integrity, and design considerations.
Making your own archery target is not only helpful for your wallet and the environment, but it also enhances your archery practice, caters to your individual preferences, and can be a fun and educational project.
How to Build a Simple and Effective DIY Archery Target
Archery is a sport that sharpens your focus, improves your coordination, and can be immensely satisfying. However, practicing archery requires a target, and not everyone has the budget to buy a high-end one. Fortunately, you can build a simple yet effective DIY archery target using materials that are often readily available at home or can be acquired inexpensively. This guide will walk you through making your own archery target, ensuring it’s both durable and reliable for your practice sessions.
Understanding the Basics
Before we dive into the construction process, it’s crucial to understand what makes a good archery target. A wellconstructed target should:
- Stop arrows effectively without causing damage to the arrows.
- Withstand repeated use, ensuring longevity.
- Be easy to pull arrows from, saving you time and effort.
Choosing Your Materials
For a simple DIY archery target, you can use:
- Old Foam Mats or Carpet: These materials are excellent for stopping arrows and are usually easy to compress.
- Cardboard Boxes: Large, sturdy boxes can serve as the frame or outer shell of your target.
- Plastic Wrap or Duct Tape: These are used to hold the compressed materials together and give the target a smooth finish.
Step-by-Step Guide to Building Your Archery Target
Prepare the Core Material
- Gather Foam or Carpet: Collect a significant amount of foam floor mats, old carpet pieces, or even layered cardboard.
- Cut to Size: Ensure all pieces are roughly the same size for uniform compression. A size of about 2 feet by 2 feet is a good starting point for a target.
Compress Your Material
- Layer Your Materials: Stack your foam, carpet, or cardboard layers on top of each other until you reach your desired thickness.
- Compress the Materials: Use clamps or a homemade press to compress the materials tightly. The more compressed, the better it will stop arrows.
Secure the Target
- Wrap It Up: Once compressed, wrap the entire block with plastic wrap, stretch film, or duct tape. This keeps the target compressed and adds a layer of weather resistance.
- Add a Target Face: You can paint a target, use a printed design, or even draw one with markers directly on the front.
Final Touches
- Test the Density: Shoot a few arrows into the target to ensure it stops them effectively without allowing them to pass through.
- Adjust if Necessary: If the arrows penetrate too deeply or not enough, adjust the compression or add more layers to the material.
Tips for Maintenance and Longevity
- Rotate Your Target: Regularly turn your target to ensure even wear and tear.
- Keep It Dry: Store your target in a dry place to prevent the materials from degrading.
- Repair as Needed: If the outer wrapping begins to tear, rewrap it to keep the target intact.
By following this guide, you’ll make a durable and effective archery target, allowing you to practice your skills without breaking the bank. Remember, the key to a good DIY project is patience and creativity. Don’t hesitate to experiment with different materials and sizes to find what works best for you. Happy shooting!
DIY Archery Target FAQs
Building your own archery target can be a rewarding project. Here, we’ve compiled answers to some of the most frequently asked questions to help you get started and make the most out of your DIY endeavor.
What materials are best for making a DIY archery target?
The best materials for making a DIY archery target include:
- Old foam floor mats
- Scrap carpet pieces
- Cardboard
- Compressed paper or A4 paper stacks
- Old clothes or fabric for stuffing
How do I make an archery target last longer?
To make your archery target last longer, consider the following tips:
- Regularly rotate your target to ensure even wear and tear.
- Store your target in a dry place to prevent mold and material breakdown.
- Cover your target with a weather-resistant material if it will be kept outdoors.
- Reinforce the target with duct tape or additional layers as needed.
Can I make a weather-resistant DIY archery target?
Yes, you can make a weather-resistant DIY archery target by:
- Using materials like foam mats that do not easily absorb water.
- Wrapping the target in a thick plastic sheet or tarp.
- Applying a waterproof sealant to the outer layer of the target.
How can I ensure my DIY archery target is safe to use?
To ensure your DIY archery target is safe to use, follow these guidelines:
- Make sure the target is thick and dense enough to stop arrows effectively.
- Place the target against a safe backdrop to catch any missed shots.
- Regularly inspect the target for wear and tear that could affect its stopping power.
- Always follow standard archery safety practices when shooting.
Can I make a portable DIY archery target?
Yes, to make a portable DIY archery target:
- Use lightweight materials like foam or compressed paper.
- Add handles or straps for easy carrying.
- Design the target in a smaller, manageable size.
- Consider making a target that can be disassembled and reassembled easily.
What is the most cost-effective material for a DIY archery target?
The most cost-effective material for a DIY archery target is usually compressed paper or cardboard because they are readily available and often free. Repurposing old carpets or foam mats you already have at home can also be very economical.
How do I repair a DIY archery target?
To repair a DIY archery target:
- Patch holes with similar materials used in the original construction.
- Reinforce the structure with additional layers on the front and back.
- Wrap the entire target in duct tape or another strong tape to hold it together and provide extra durability.
Making your own archery target is not only a fun project but also a practical solution for practicing your archery skills. With the right materials and a bit of creativity, you can build a target that meets your specific needs and lasts through many practice sessions.
10 Homemade DIY Archery Target Ideas
Discover 10 homemade DIY archery target ideas for your next practice session. Improve your aim and accuracy with these affordable options.
1. Making an Ultra Durable Foam Archery Target
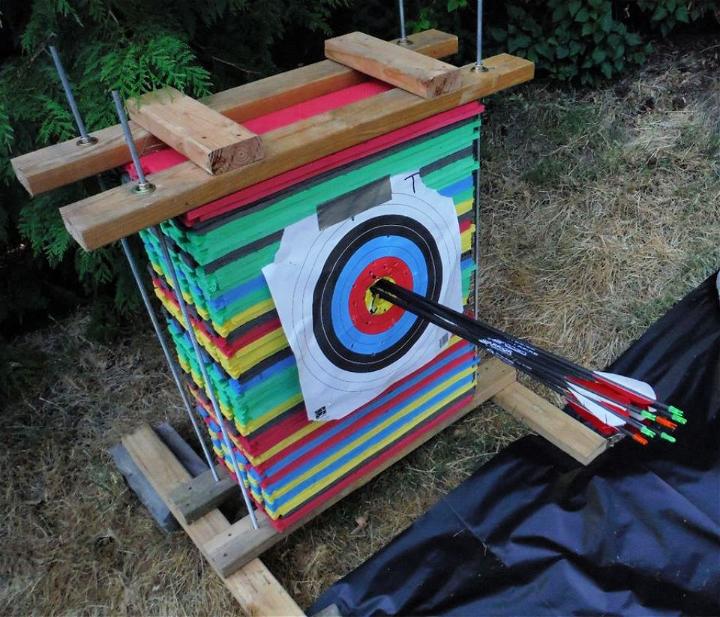
Make a robust, ultra-durable foam archery target with ease by following this instructive guide from Instructables. Ideal for archers of all skill levels, this DIY target is not only sizeable, ensuring a large enough area for practice, but it also offers longevity, as you can rearrange the foam to extend its life. The target withstands powerful shots without deteriorating in wet conditions, unlike straw bales.
Gather simple materials like foam floor mats, wood, screws, and threaded rods, and with tools such as a saw, drill, and grinder, you’ll craft a target that’s cost-effective and reliable. Perfect your aim with this homemade archery essential that promises hours of shooting fun.
2. Homemade Archery Target
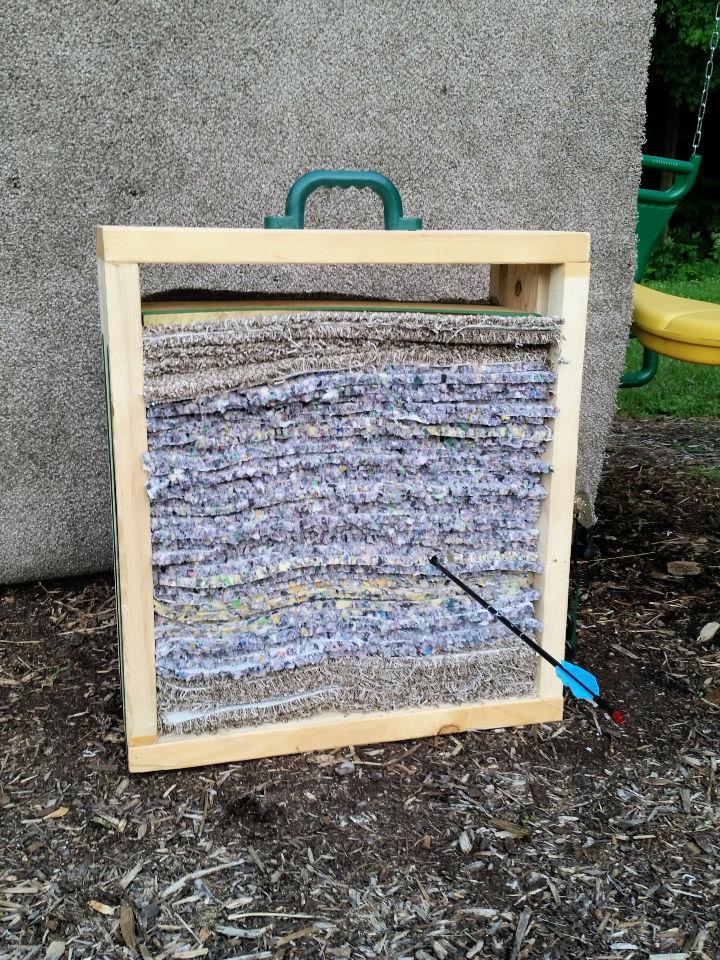
Constructing a DIY archery target is an engaging project that can be accomplished with common household items. Mama’s Geeky offers a step-by-step guide that transforms simple materials like a 2×10 board, carpet padding, and ratchet straps into a durable target perfect for honing your archery skills.
The process involves cutting and assembling the wood into a frame, layering strips of carpet for arrow cushioning, and securing the structure with straps for optimal compression. Not only is this a cost-effective solution, but it also gives new life to leftover materials. Follow these instructions, and you’ll soon be ready to practice your aim with a homemade target that’s stood the test of time.
3. DIY Economical Archery Target
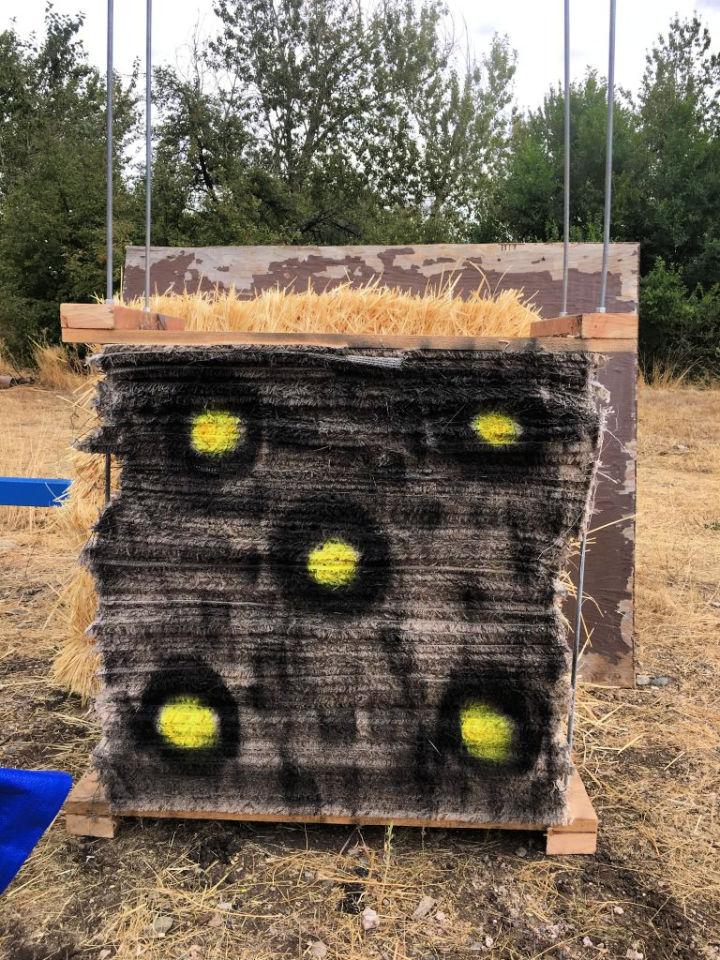
Building a durable archery target for compound bows is a practical and cost-effective project for enthusiasts who want to hone their skills at home. Hunt Fish Harvest provides an instructive guide on crafting a DIY stacked carpet archery target that’s robust and can withstand frequent use. With easily accessible materials like scrap carpet, wood, and threaded rods, you can make a target that’s easy on your wallet and tough enough to be left outside.
The step-by-step instructions ensure a straightforward assembly process, allowing for easy arrow removal and adjustable compression. Perfect your aim with a homemade target that promises longevity and reliability for your archery practice sessions.
4. DIY Archery Target Using Cardboard Box
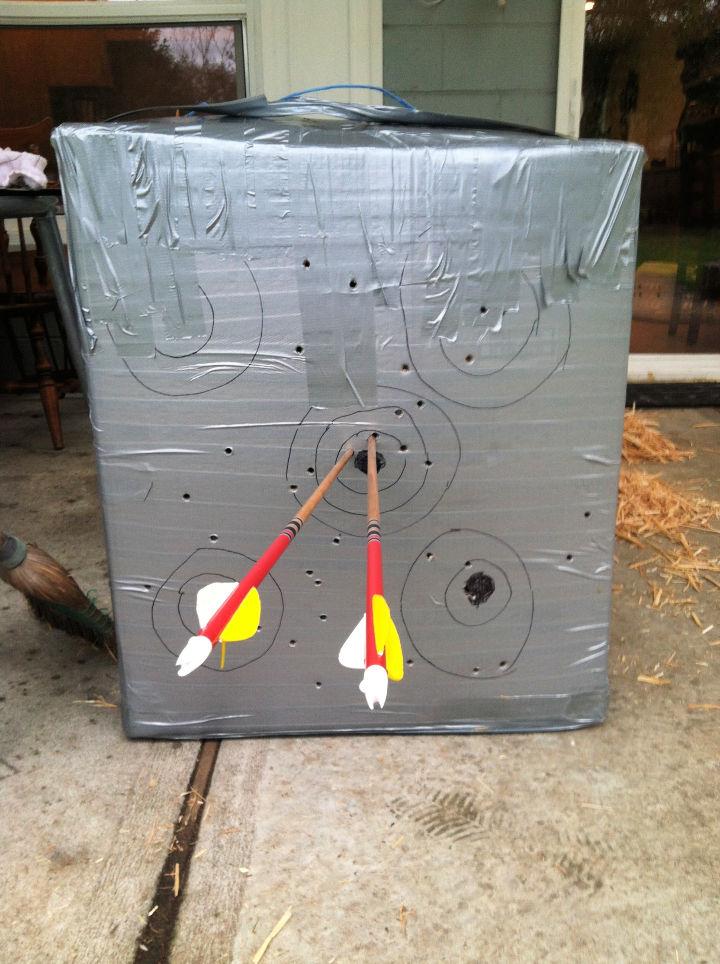
Making a DIY archery target can be a fun and cost-effective way to practice your shooting skills right in your backyard. Rose City Archery Blog provides an engaging guide to building your own target using inexpensive materials like cardboard boxes and pallet wrap.
With a straightforward approach, Jon Dykes demonstrates how a bit of creativity and resourcefulness can result in a sturdy, functional archery target for just $7. Ideal for traditional archery enthusiasts, this guide makes practice more accessible and affordable, allowing you to hone your skills without breaking the bank. Plus, it’s a project that’s as satisfying to complete as it is useful.
5. Homemade Archery Target
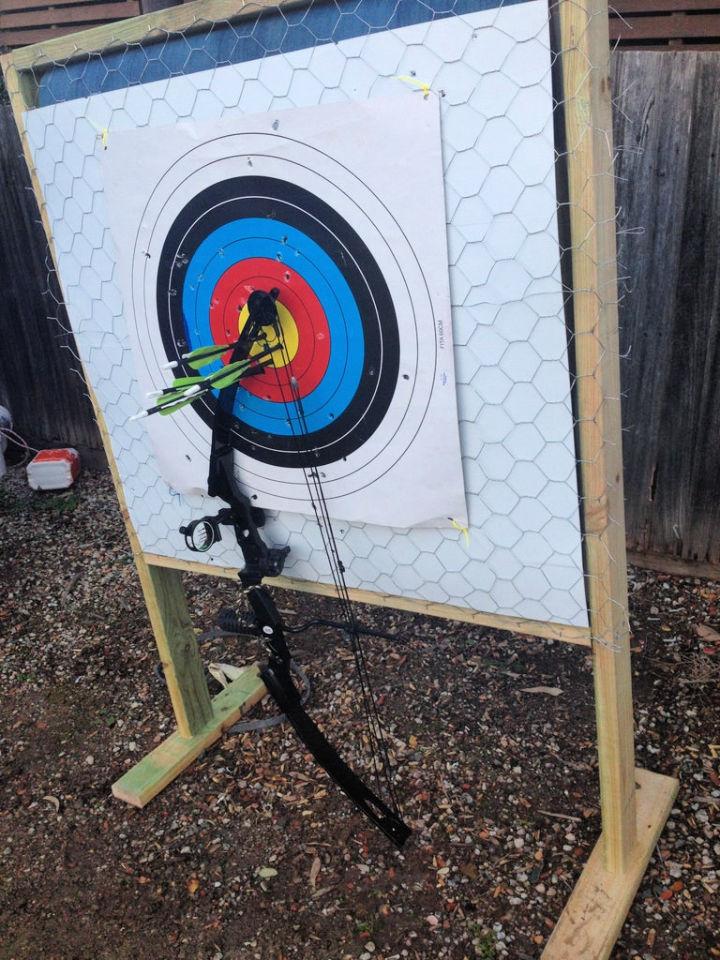
Discover how to make your own archery target with this Instructables guide. Perfect for archery enthusiasts looking to practice their aim, this DIY project utilizes an old foam mattress, treated pine, chicken wire, and plastic cardboard to construct a durable 1m square target. Ideal for use with a 55-pound bow, this target ensures arrows are safely stopped approximately 5 inches from the back.
The instructions are clear and concise, providing a step-by-step process that is both engaging and easy to follow. Crafting your own archery target not only saves money but also offers the satisfaction of personalizing your archery experience.
6. Suburban Outdoor Archery Range
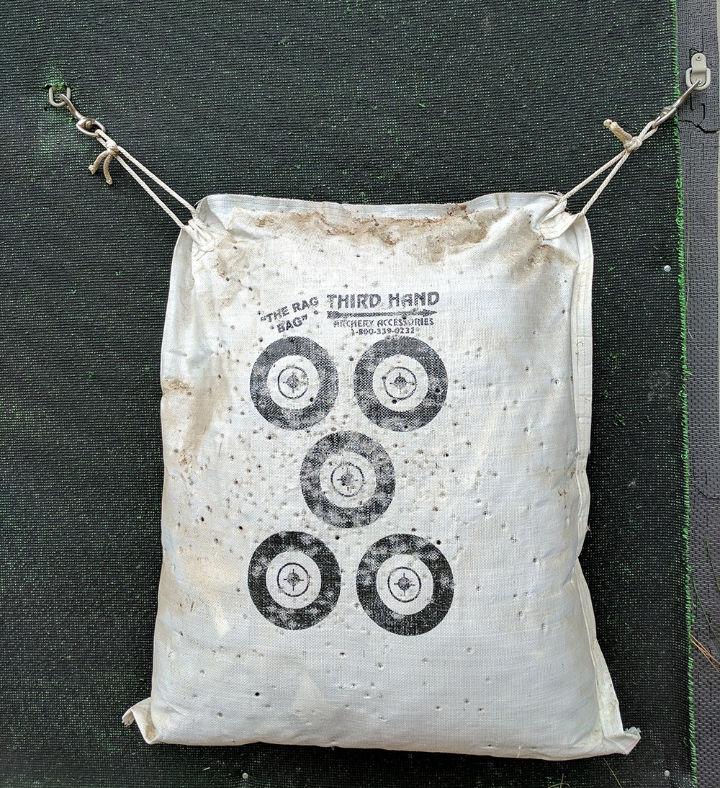
Ready to set up your suburban outdoor archery range? Surviving Prepper guides you through crafting a personal shooting space, even within the confines of a big city backyard. Learn how to construct a sturdy backstop, choose the right targets, and implement sound-dampening techniques for a neighbor-friendly practice area. Discover the ease of adding permanent distance markers to hone your skills accurately. With practical advice and detailed steps, you’ll make a convenient and enjoyable archery experience right outside your door.
7. DIY Archery Target Used A4 Sized Papers
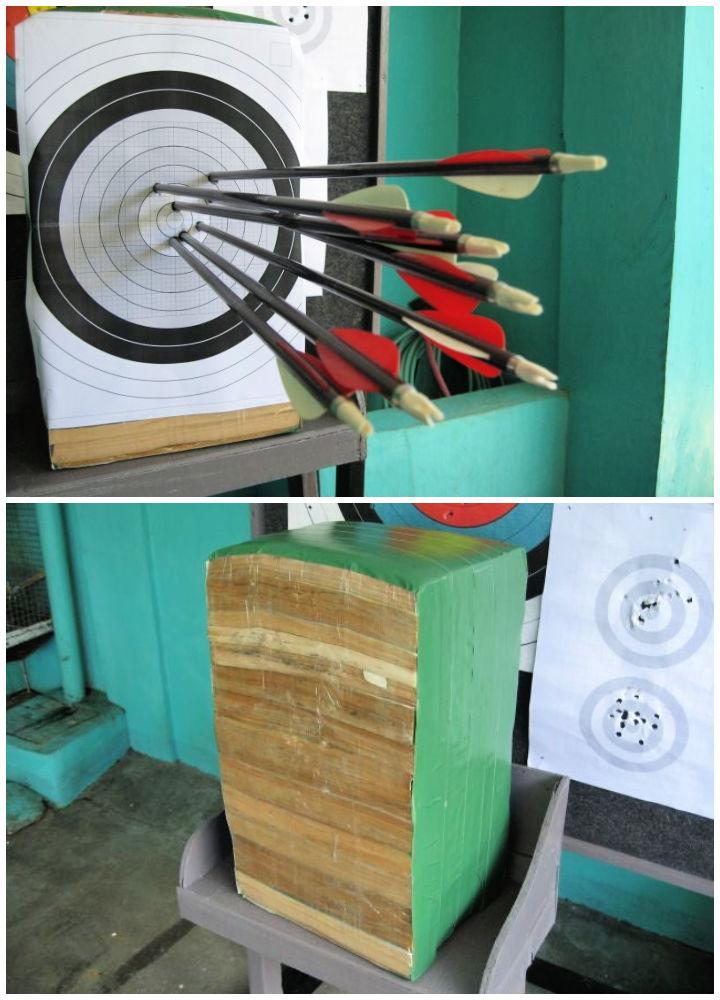
Transform your surplus A4 paper into a functional archery target with this DIY guide from Instructables. By stacking and compressing scrap paper, you make an eco-friendly target that’s perfect for honing your archery skills. The step-by-step instructions are clear and easy to follow, making the process enjoyable and straightforward.
With materials like used papers, ring binders, and packing tape, you’ll craft a sturdy and reliable target. Plus, the added bonus of waterproofing ensures durability for outdoor practice. Ideal for archers of all levels, this homemade target is a cost-effective solution that recycles office waste into a valuable training tool.
8. How to Make an Archery Target from Scrap Materials
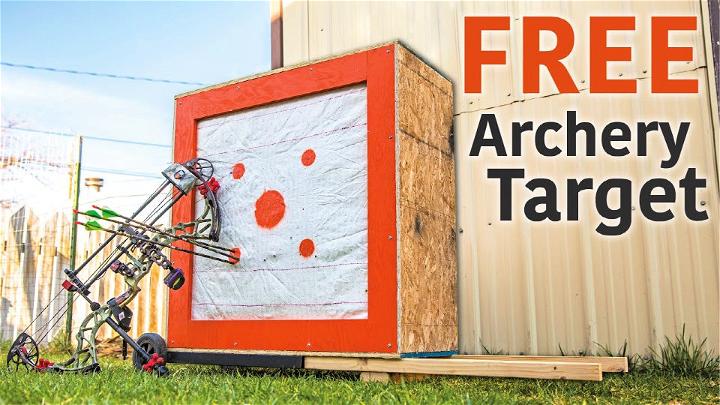
Craft your own archery target using recycled materials with this engaging DIY project! Dive into making a sturdy, cost-effective target made primarily from scrap wood, old workbenches, and other easily accessible materials. Your essential tools include a radial arm saw, table saw, pocket hole jig, and a few basic supplies like screws and glue.
Follow simple yet precise instructions to construct and assemble the target, incorporating innovative techniques such as pocket hole joinery for quick assembly. This project offers an excellent opportunity to upcycle materials, resulting in a functional and durable archery target that is ideal for honing your skills. Embrace the satisfaction of building with sustainability in mind and enjoy your personalized, homemade archery target.
9. How to Make an Archery Target
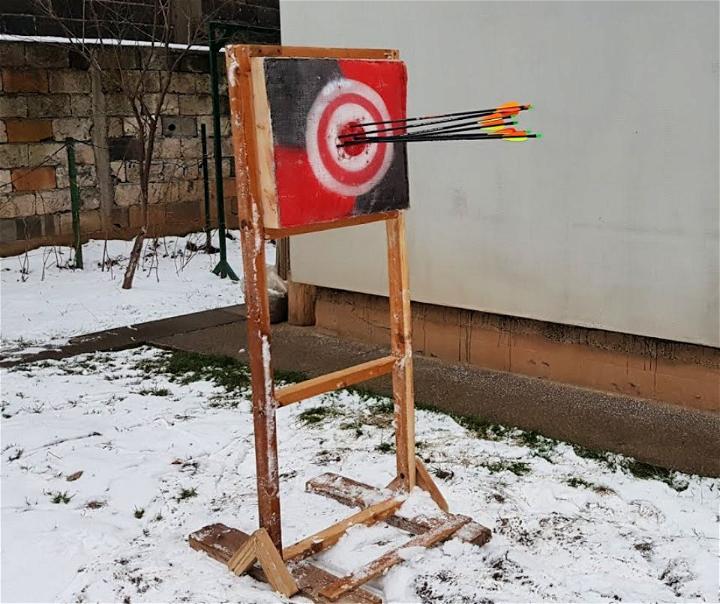
Making an archery target from scrap materials is not only an economical choice but also an excellent way to recycle and repurpose. YouTube provides a wealth of tutorials, and one such video by WM DIY guides viewers through the process of crafting a durable and cost-effective target.
In the video, you’ll learn how to utilize common items that might otherwise be discarded, transforming them into a functional piece for your archery practice. The instructions are clear, making the project accessible for those with basic DIY skills. By following the step-by-step tutorial, you’ll end up with a reliable archery target, perfect for honing your skills without breaking the bank.
10. Homemade Cardboard Archery Target
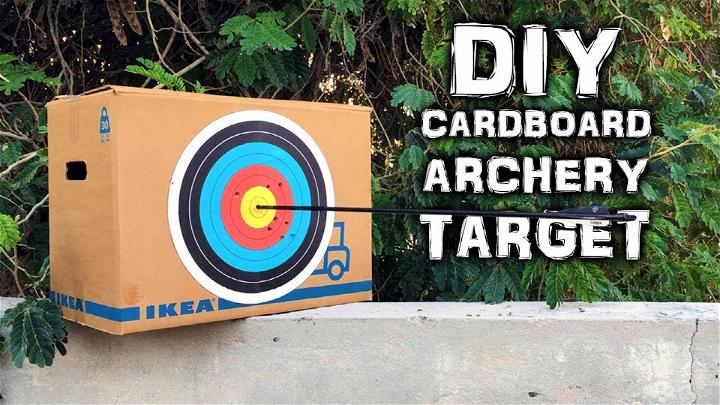
Craft your own durable and cost-effective DIY Archery Target using simple cardboard! This project transforms a basic 30kg IKEA packing box into a robust, double-sided shooting target ideal for archery enthusiasts. With 34 layers of cardboard, cut to fit and bound tightly with packing tape and glue, this target offers excellent arrow stopping power. Adding extra cardboard scraps enhances structural integrity.
Complete with a printed archery target on each side, this creation is lightweight, portable, and resists toppling under impact. Perfect for those seeking an affordable, homemade solution for their archery practice, this DIY target proves that simplicity and resourcefulness can yield impressive results.
Conclusion:
In conclusion, embarking on the project of making a 10 homemade DIY archery target can be a highly gratifying experience that combines practicality with personalization. We’ve explored the essentials, from selecting the right materials to step-by-step construction tips and maintenance advice. By putting in the effort to build your own DIY archery target, you not only tailor the practice to your preferences but also potentially enhance your archery skills through consistent, customized practice.
Remember, a well-made DIY archery target not only provides a sturdy backdrop for your arrows but also marks the beginning of countless hours of engaging, rewarding practice. So, grab your tools and get ready to transform simple materials into your next favorite homemade archery target.
