Celebrate life’s special milestones with a personal touch by making your very own DIY birthday banner. Ideal for any party, whether it’s for children, parents, partners, or friends, a handcrafted banner brings an unmatched level of charm and joy. Learn how to make a banner with our guide of 20 DIY birthday banner ideas, complete with FREE printable templates. Not only are these banners cost-effective, but they also allow for endless customization to match your desired color themes and style.
Making your own birthday banner is a rewarding experience that results in a unique and heartfelt addition to your celebration. As you dive into these creative DIY birthday banner ideas, you’ll find they are not only straightforward but also brimming with possibilities to reflect your personal flair. So, gather your supplies, and let’s get started on a decoration that’s sure to become the centerpiece of any birthday bash. Ready to unleash your creativity? Continue reading for inspiring designs that await your artistic touch.
Why Make Your Own Birthday Banner?
Making your own birthday banner is more than just a crafty endeavor; it’s a way to add a personal touch to a celebration. Here’s why you should consider making one:
- Personalization: Unlike store-bought banners, a DIY project allows you to tailor colors, themes, and messages to the birthday person’s tastes.
- Cost-Effective: Making your own banner can be cheaper than purchasing pre-made decorations. Use materials you already have at home to keep costs down.
- Fun Activity: It’s a great opportunity to engage in a fun and creative activity with friends or family members, making the lead-up to the party enjoyable.
- Memorable Keepsake: A handmade banner serves as a special keepsake for the birthday person, reminding them of the effort and love put into their day.
- Eco-Friendly: By using recyclable or reusable materials, you’re making an environmentally friendly choice that reduces waste.
- Flexibility: A DIY approach gives you the flexibility to adjust the size and shape of your banner to fit the party space perfectly.
- Skill Building: Crafting a banner can help you learn new skills or improve existing ones, such as cutting, gluing, sewing, or even digital design if you’re printing templates.
- Sense of Accomplishment: There’s a unique satisfaction in seeing your handcrafted decoration displayed at the party, enhancing the festive atmosphere.
By making your own birthday banner, you contribute a piece of yourself to the celebration, making it all the more special and cherished.
How to Choose the Perfect DIY Birthday Banner
Selecting the ideal DIY birthday banner can be both an enjoyable and creative process. To ensure you pick the best option that suits your party’s theme and atmosphere, follow these helpful tips for a reliable and successful party decoration.
- Theme Matching: Align your banner with the overall party theme. If you’re throwing a unicorn-themed party, look for templates that feature magical elements, or opt for a more elegant design for sophisticated soirees.
- Color Coordination: Choose colors that complement your party’s color scheme. A cohesive color palette enhances the visual appeal of your celebration space.
- Skill Level: Be honest about your crafting abilities. If you’re a beginner, opt for simpler designs with fewer intricate details. For experienced crafters, more complex designs can offer a rewarding challenge.
- Time Commitment: Consider the amount of time you can dedicate to creating the banner. If you’re short on time, a printable template or a design with fewer pieces may be the best choice.
- Space Considerations: The size of your party venue should influence the scale of your banner. For larger spaces, a bigger banner with bold letters will stand out, while a smaller, more delicate design is suitable for intimate gatherings.
- Material Choice: Decide on the type of material based on the banner’s intended longevity. For a one-time event, paper might suffice, but for a keepsake or reusable banner, consider sturdier materials like cardstock or fabric.
- Custom Elements: Adding a personal touch can make the banner more meaningful. Consider including the birthday person’s name, age, or photos to create a memorable centerpiece for the party.
By taking these factors into account, you’ll be well on your way to choosing a DIY birthday banner that is not only beautiful and unique but also practical and suited to your celebration’s needs. Remember, the most important aspect is that it brings joy to the birthday person and adds to the festive atmosphere of their special day.
How to Make a DIY Birthday Banner
Making a DIY birthday banner is a fun way to add a personalized touch to a special celebration. With a few simple materials and some creativity, you can make a unique banner that stands out and makes your event even more memorable. Here’s a step-by-step guide to help you craft your very own birthday banner.
Step 1: Gather Your Supplies
Before you start, make sure you have all the necessary materials. Here’s a basic list to get you started:
- Cardstock or heavy-duty paper in various colors
- Scissors or a craft knife
- A ruler or a straight edge
- Adhesive, such as glue or double-sided tape
- Hole punch (if stringing the banner)
- String, yarn, or ribbon (if stringing the banner)
- Printable templates (optional, for those who prefer using a guide)
- Embellishments like glitter, stickers, or markers (optional)
Step 2: Design Your Banner
Decide on the message you want to convey. A simple “Happy Birthday” is classic, but feel free to get creative. Consider adding the birthday person’s name or age for a more personalized touch.
Step 3: Cut Your Pennants or Letters
Once you have your design, it’s time to cut out your pennants (triangular flag shapes) or letters. Use a ruler to measure and mark your paper, ensuring each piece is uniform. For letters, you can draw freehand, use stencils, or print out letters and trace them onto your paper.
Step 4: Arrange Your Design
Lay out your pennants or letters in order on a flat surface. This step helps you visualize the final look and make any necessary adjustments before attaching them together.
Step 5: Attach the Elements
If you’re using a string or ribbon, punch holes in the top corners of each pennant or letter. Thread your string through the holes, ensuring there’s enough space between each piece. If you’re attaching the elements directly to a surface, use adhesive to secure them in place.
Step 6: Embellish Your Banner
Now’s the time to get creative! Add any embellishments you like. Glitter, stickers, and colorful markers can all add a festive touch to your banner. Just remember to let any glue or paint dry before hanging.
Step 7: Hang Your Banner
Find the perfect spot for your banner. It could be above the party table, across a doorway, or on a wall as a backdrop. Make sure it’s secure and visible to all your guests.
Tips for a Perfect DIY Birthday Banner:
- Use Quality Materials: Choose cardstock or heavy-duty paper to ensure your banner holds up during the party.
- Keep it Legible: Make sure your letters are big enough and spaced well, so your message is easy to read.
- Stay Consistent: Use the same font size and style for a cohesive look.
- Double-Check Spelling: It might seem obvious, but make sure all words are spelled correctly before you start cutting.
- Recycle and Reuse: After the party, don’t throw your banner away! Reuse it for future celebrations or repurpose the materials for another craft project.
Crafting a DIY birthday banner is an enjoyable and rewarding experience that adds a unique flair to any celebration. Follow these simple steps, and you’ll have a beautiful, handmade decoration that’s sure to impress!
Frequently Asked Questions About DIY Birthday Banners
Get answers to commonly asked questions about DIY birthday banners. Find out how to make personalized banners for your next celebration.
What materials do I need to make a DIY birthday banner?
To make a DIY birthday banner, you typically need:
- Cardstock or heavy-duty paper in various colors
- Scissors or a craft knife
- A ruler or a straight edge
- Adhesive (such as glue or double-sided tape)
- A hole punch (if stringing the banner)
- String, yarn, or ribbon (if stringing the banner)
- Printable templates (optional for guidance)
- Embellishments like glitter, stickers, or markers (optional)
Can I make a birthday banner without a printer?
Yes, you can make a birthday banner without a printer by drawing and cutting out letters by hand, or by using stencils.
How can I ensure my DIY birthday banner looks professional?
To ensure your DIY birthday banner looks professional:
- Use quality materials and choose heavy-duty paper or cardstock.
- Keep letters legible, big enough, and spaced well.
- Maintain consistency in font size and style.
- Double-check spelling before cutting.
- Add embellishments carefully, allowing glue or paint to dry.
Is it cheaper to make a birthday banner at home?
Making a birthday banner at home can be cost-effective as it allows you to use materials you may already have and eliminates the need to purchase pre-made decorations.
What are some creative ideas for DIY birthday banners?
Creative ideas for DIY birthday banners include:
- Photo banners featuring the birthday person’s pictures
- Themed banners, like a unicorn or superhero design
- Using various textures such as felt, fabric, or burlap
- Adding three-dimensional elements like pom-poms or paper flowers
How can I make my DIY birthday banner stand out?
To make your DIY birthday banner stand out:
- Use bright, contrasting colors
- Incorporate unique patterns or prints
- Add glitter or metallic elements for sparkle
- Use themed decorations to match the party’s theme
Can I reuse my DIY birthday banner?
Yes, if you make your banner with durable materials and store it properly, you can reuse it for future celebrations.
How can I attach my birthday banner to the wall without causing damage?
You can attach your birthday banner to the wall using:
- Removable adhesive hooks or strips
- Washi tape, which is less likely to damage paint
- Stringing the banner across a curtain rod if it’s near a window
Are there any eco-friendly options for making a birthday banner?
For an eco-friendly birthday banner:
- Use recyclable or biodegradable paper
- Opt for natural materials like cotton fabric or burlap
- Repurpose old decorations or fabrics
- Make a banner that can be reused for multiple occasions
By keeping these tips and ideas in mind, you can make a personalized and memorable birthday banner that adds a special touch to any celebration.
20 DIY Birthday Banner Ideas with Free Printable Templates
Discover 20 creative DIY birthday banner ideas with free printable templates. Make your next celebration extra special with these fun and customizable decorations.
1. How to Make a Birthday Banner
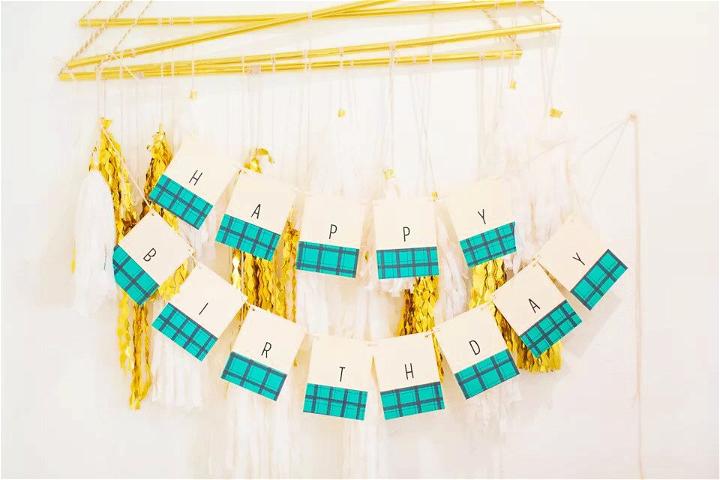
Making a festive birthday banner adds a personal touch to any celebration, and The Spruce Crafts offers an easy-to-follow guide for crafting one without the need for fancy tools. With just card stock, patterned paper, and a few embellishments, you can design a customized piece that will make the birthday person feel extra special.
Hang it with pride and watch as it becomes a charming focal point of the party decor. This DIY project is not only simple but also a creative way to express your affection, ensuring the birthday festivities are uniquely memorable.
2. Printable Black and Gold Birthday Banner
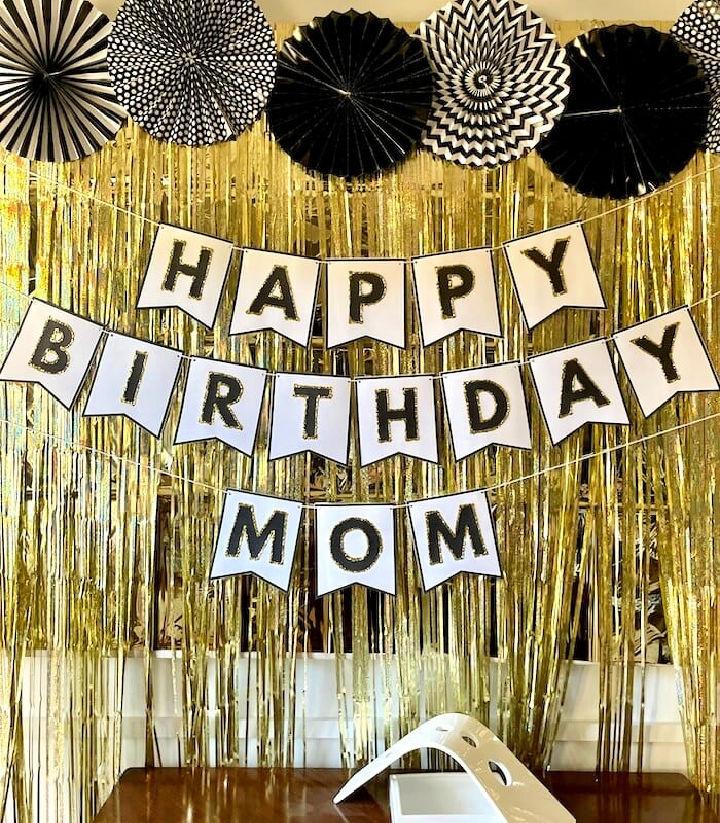
Planning a birthday celebration and want to add a touch of elegance? The Savvy Sparrow offers a free printable Happy Birthday banner template that’s perfect for making a chic black and gold themed decoration. Easy to make with just a few supplies like printer, card stock, scissors, hole punch, yarn or ribbon, and glitter, this DIY banner brings a personalized glam to any party setting.
Simply print the template, cut out the pennants, add glitter, and string them together for a stylish birthday message. Customize the color to fit your theme and enjoy a sophisticated, handcrafted addition to your birthday decor.
3. Easy DIY Happy Birthday Banner
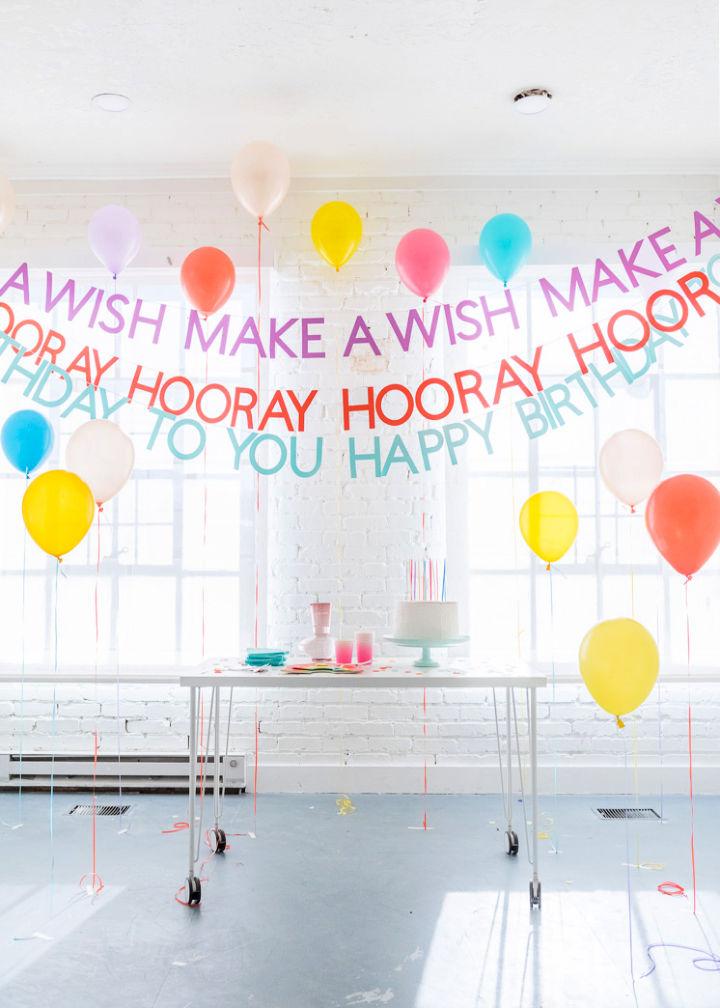
Make a festive atmosphere for any birthday celebration with a handmade touch using DIY Happy Birthday Banners. The House That Lars Built provides a simple and engaging guide to crafting personalized banners that will add a pop of color and joy to your party decor. With materials like card stock, natural twine, and a bit of glitter, you can design cheerful garlands that say “Happy Birthday To You,” “Make A Wish,” or “Hooray.”
Whether using a die-cut machine or scissors, these instructions make it easy to assemble your banners, ensuring they’re ready to brighten up any birthday bash. Get creative, have fun, and let your banners be the talk of the party!
4. Handmade Happy Birthday Banner
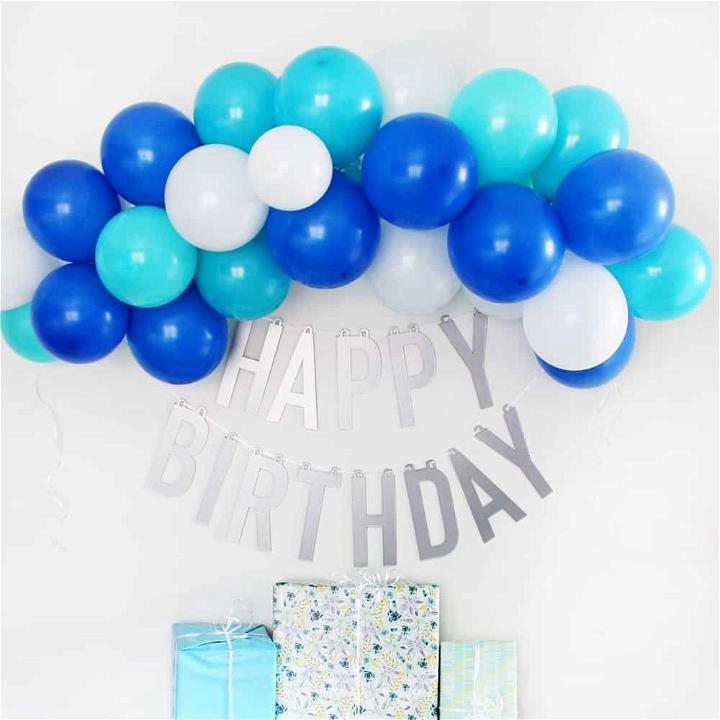
Make a festive atmosphere for every birthday celebration with your own DIY Happy Birthday Banner! Pretty Providence offers an easy-to-follow guide for crafting a reusable banner using a Cricut Maker and chipboard. Cover your chipboard with permanent vinyl for a sleek look, then cut out the letters with a knife blade.
With patience and a bit of time, you’ll have a personalized decoration that’s ready to enhance any birthday party. Keep your computer awake while cutting, and soon you’ll be stringing up your custom banner to add that special touch to your loved ones’ special day.
5. Make a Unicorn Birthday Banner
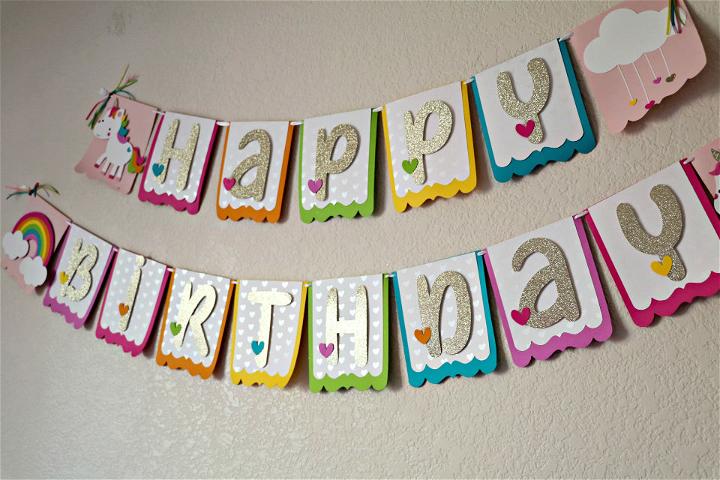
Planning a unicorn-themed birthday bash? The Denver Housewife offers a treasure trove of DIY Unicorn Birthday Party Decorations that will add magic to your celebration. Learn how to craft a personalized banner, enchanting cake topper, whimsical party favors, and playful masks with the help of your Silhouette Cameo.
With easy-to-follow instructions and customizable options to match your color theme, you’ll make a whimsical atmosphere that’s as unique as it is delightful. Bring your party to life with these charming handmade touches that are sure to impress your little guests and make the day unforgettable.
6. Homemade Felt Birthday Banner
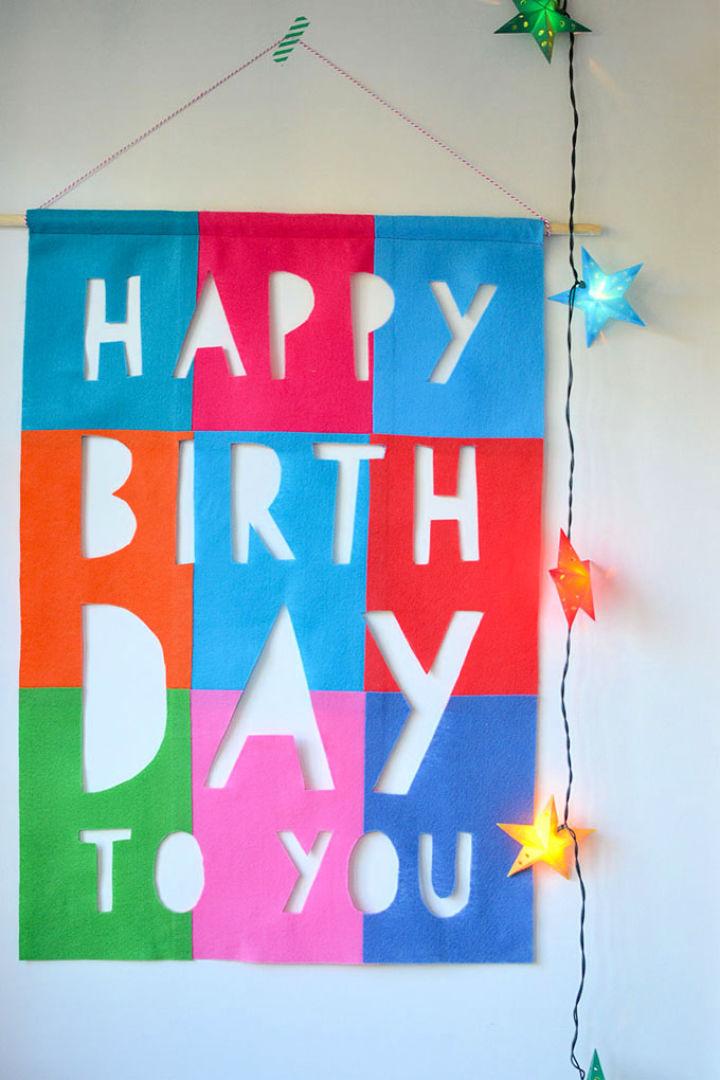
Make a charming and reusable birthday decoration with ARTBAR‘s DIY Felt Birthday Banner guide. This straightforward tutorial shows you how to craft a colorful, no-sew banner from felt, perfect for adding a personal touch to birthday celebrations.
Not only is this project simple and enjoyable, but the end result is a durable keepsake you can treasure and use for years to come. Dive into crafting with this engaging and practical decoration that promises to brighten up any birthday party.
7. DIY Birthday Banner With PSA Stamps
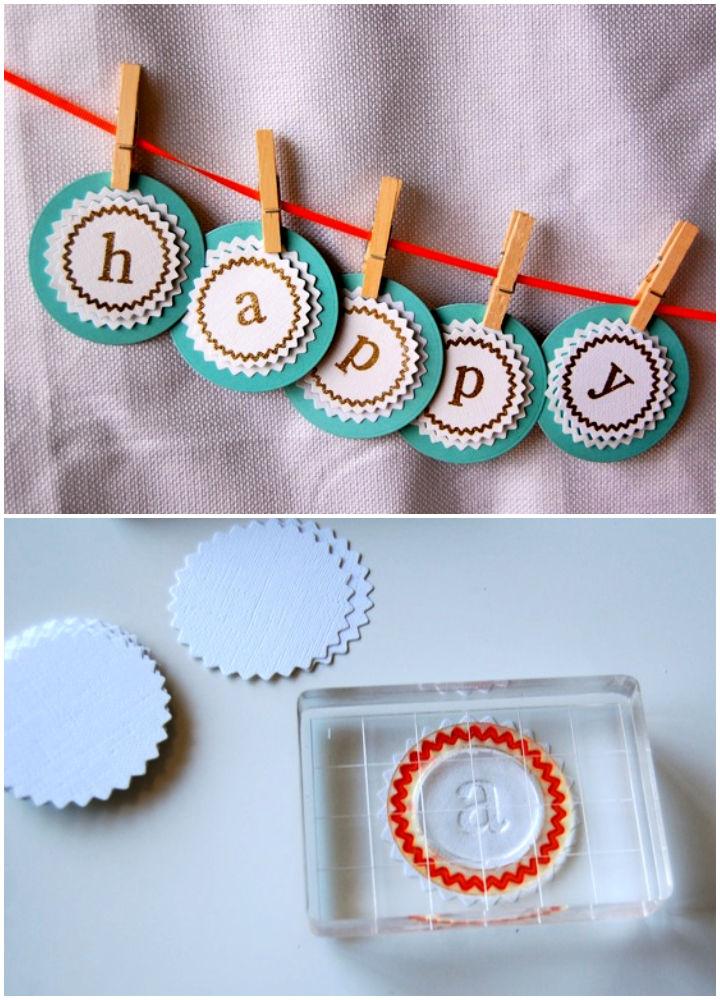
Craft a personalized birthday banner with this DIY guide from NoBiggie, where creativity meets celebration. Dive into a fun crafting session with PSA Stamp packs featuring the Vanilla font and the ric rac border from the Super Star set. Add a touch of elegance with Zing Gold Glitter embossing powder and give your banner a professional finish using a heat embossing tool.
The clear stamps ensure precise placement, while VersaMark Watermark ink pad creates a perfect watermark effect. Assemble your banner with ease, using ric rac circle cutting dies, an orange ribbon, and mini clothespins to display your creation. Whether gifting or decorating, this handmade birthday banner is sure to add a sparkle to any party.
8. Happy Birthday Pennant Banner Ideas
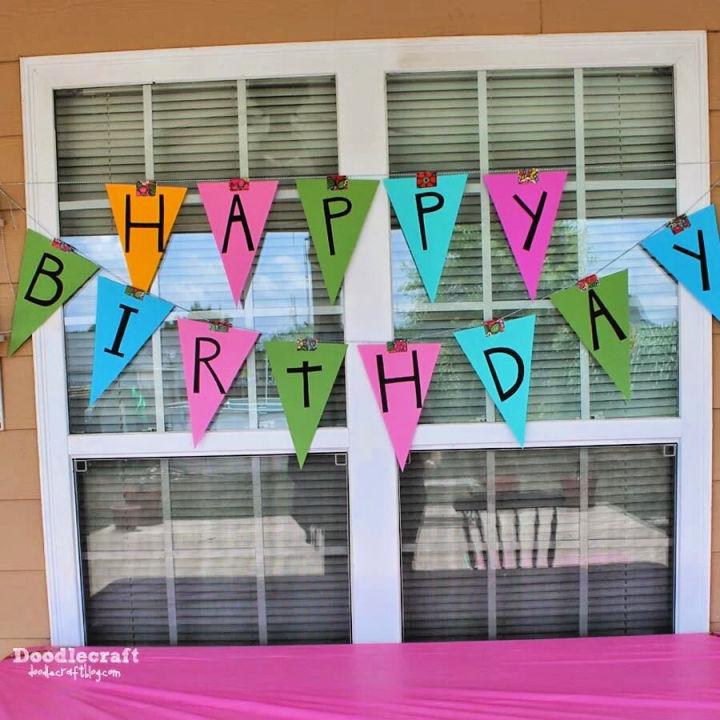
Making a Happy Birthday Pennant Banner is a breeze with Doodlecraft‘s simple guide! Ideal for birthdays or any festive gathering, you only need 12×12 scrapbook paper, a rotary cutter, ruler, and cutting mat. Start by transforming the square paper into a parallelogram and then into symmetrical pennants.
Customize with hand-cut or machine-cut letters and secure them onto twine with decorative Duck Tape. This method ensures a tangle-free and evenly spaced banner. Hang it up and add a handmade touch to your celebrations!
9. Make a Custom Birthday Banner
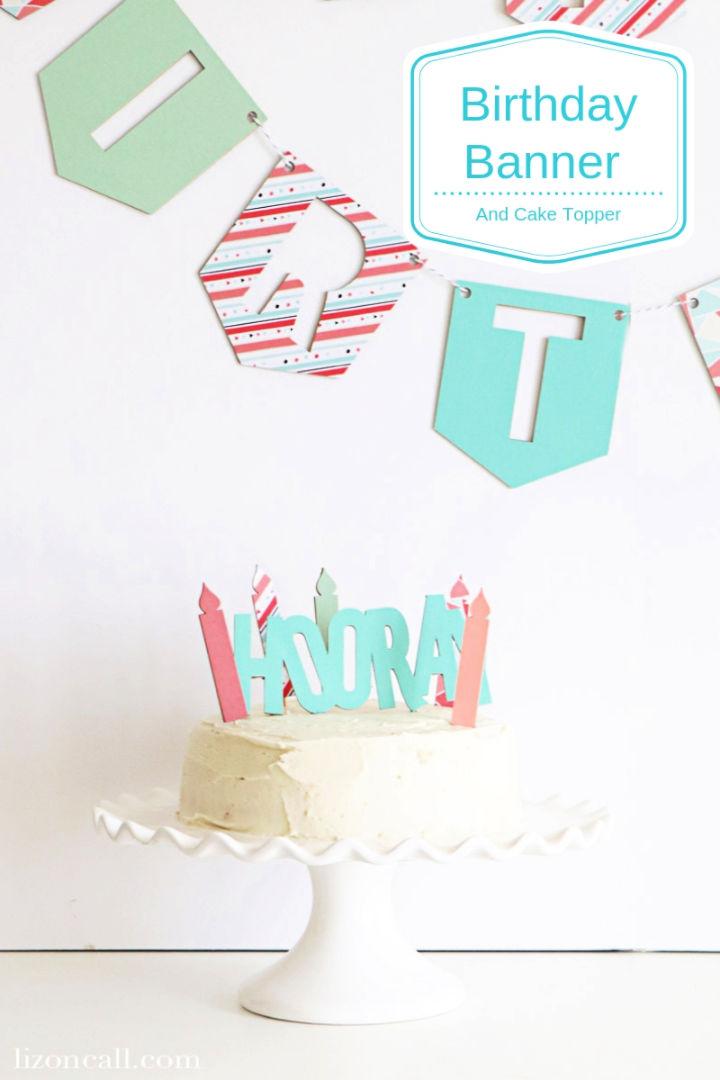
Making a custom DIY Birthday Banner is a breeze with your Cricut Maker, and Liz on Call‘s step-by-step guide makes the process even simpler. Discover how to cut chipboard for a durable banner that can be reused for future celebrations. Liz provides tips for a successful cut, such as avoiding overly thin designs and using a strong grip mat with masking tape for stability.
Once your chipboard is cut, you’ll learn how to give it a festive makeover with colorful cardstock and patterned paper. The guide also includes instructions for crafting a matching Hooray Cake Topper. Whether it’s for a loved one’s special day or your own, this DIY project adds a personalized touch to any birthday party.
10. Make Your Own Birthday Banner
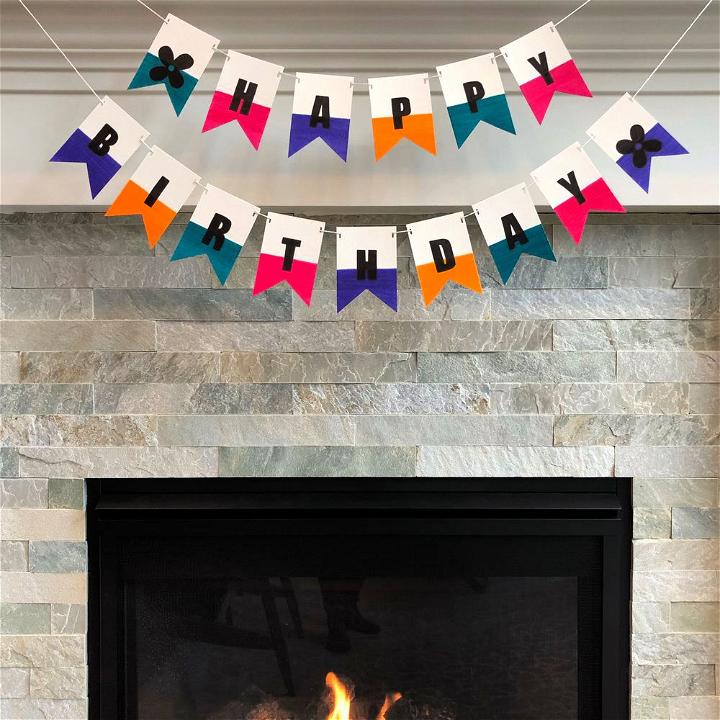
Make a charming birthday banner with ease using this step-by-step guide from Brown Paper Bunny Studio. Perfect for adding a personal touch to celebrations, this DIY project requires only a few simple supplies like Tombow Dual Brush Pens, scissors, cardstock pennants, string, a pencil, a MONO Drawing Pen, and a hole punch. Start by adding vibrant colors to your pennants, outline and fill in your celebratory message, and then string it all together for a festive decoration.
Crafting your own banner not only adds a unique flair to your party but also offers a fun and creative activity. So grab your supplies and let’s make your special day even more memorable!
11. How to Make Your Own Birthday Banner
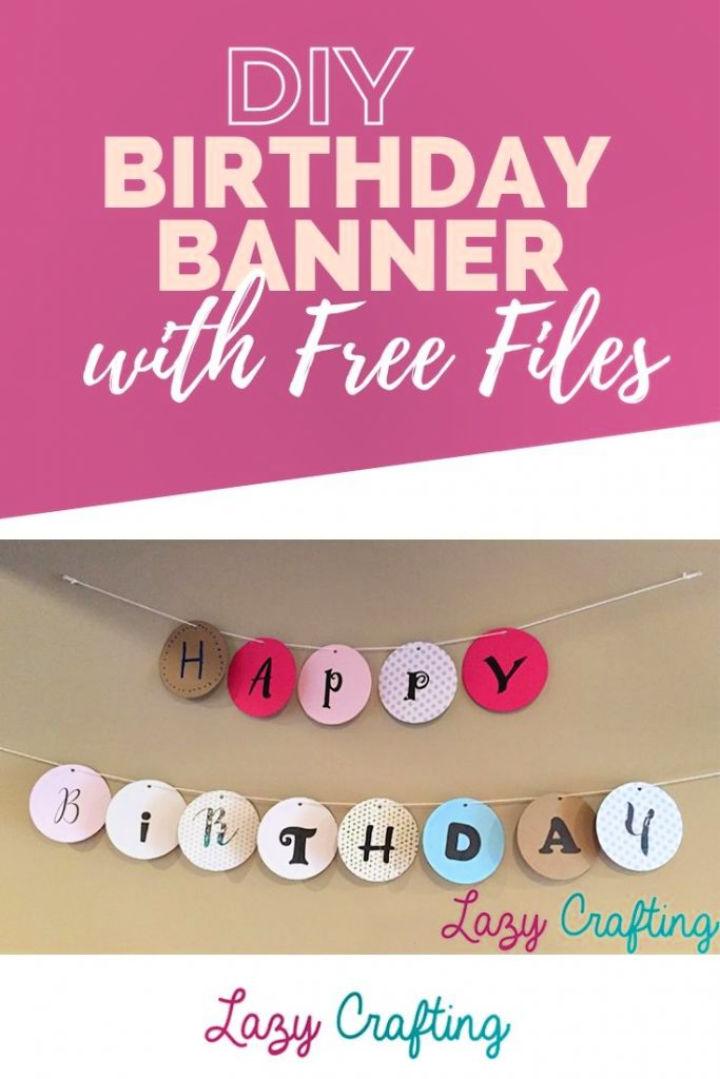
Planning a birthday celebration can be streamlined with a touch of creativity, and Lazy Crafting offers a DIY birthday banner to add a personalized flair to your party decor. Crafting a banner is straightforward and adaptable, allowing you to choose your style, from whimsical to elegant. Select a bold font from websites like Dafont or Font Squirrel, and opt for cardstock for durability and a quality feel.Enhance your creation with embellishments like glitter or sequins for extra sparkle.
To display your banner, simply punch holes and thread string or yarn, or use colorful clothespins for a fun twist. Lazy Crafting even provides a free download for the banner, with formats suitable for cutting machines and manual cutting. Embrace the joy of crafting without the pressure of perfection, and enjoy making your celebration special with this easy-to-make birthday banner.
12. Free Printable Birthday Banner
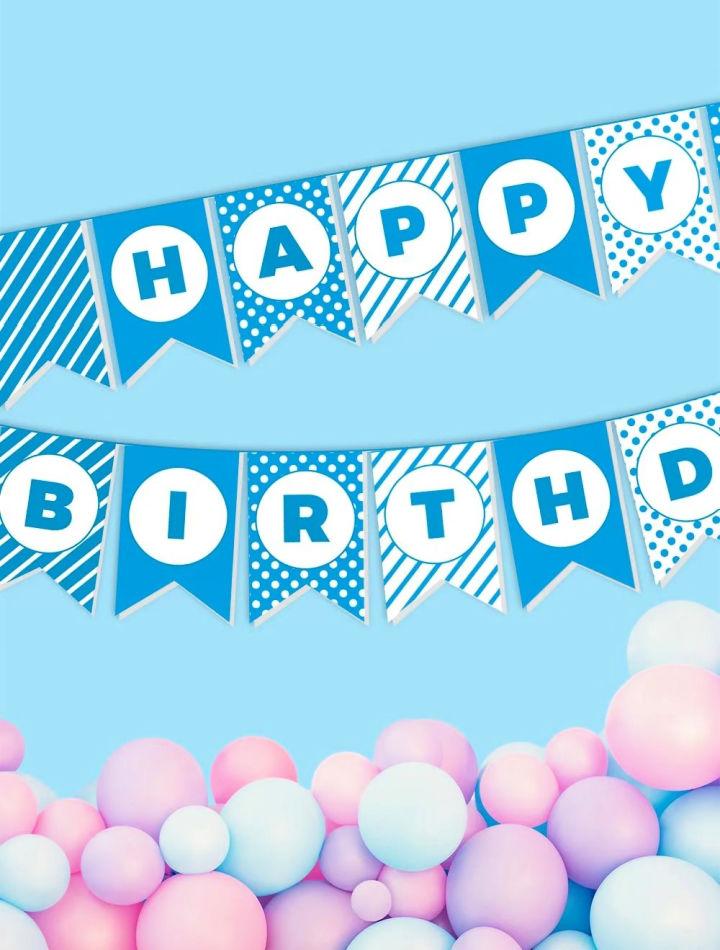
Add a pop of color and joy to any birthday celebration with the free aqua blue printable banner from A Visual Merriment. Ideal for party tables, backdrops, or as a cheerful surprise in a loved one’s workspace, this banner brings a special touch to the occasion. The download includes 18 versatile flags with polka dot and stripe patterns, plus blank designs for customization.
Easy to print and assemble, it’s a charming way to elevate your party decor. Access the printable along with other fantastic resources by signing up with an email address, and make someone’s birthday unforgettable.
13. Simple DIY Happy Birthday Banner
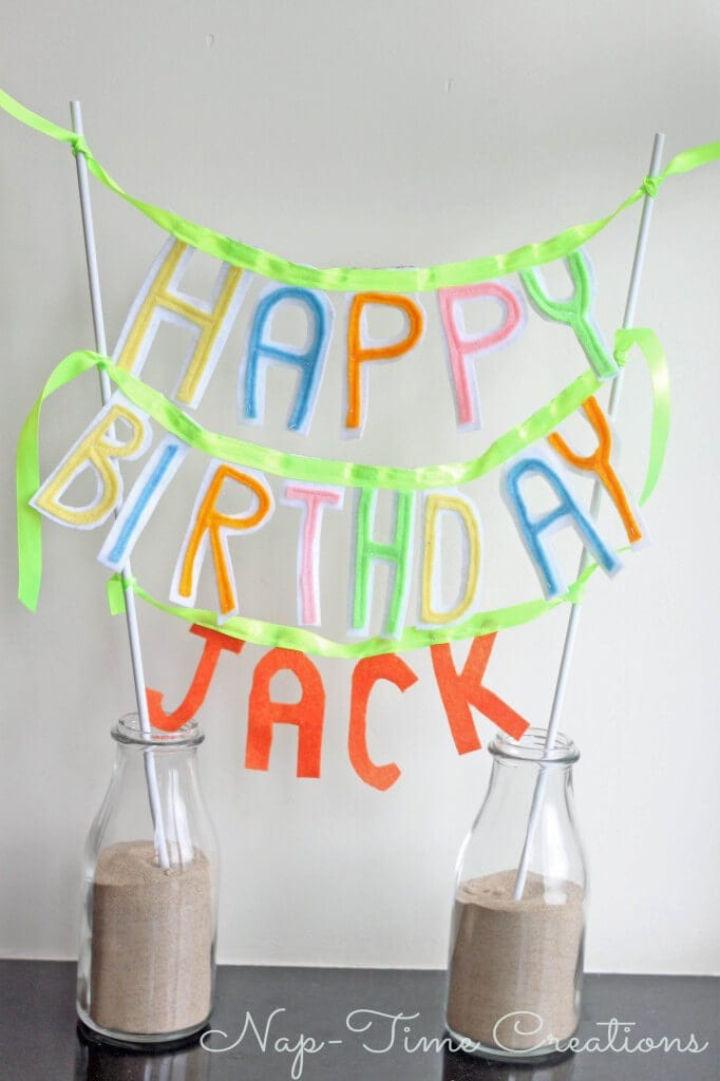
Make a charming DIY Happy Birthday Banner with ease using this simple tutorial from Life Sew Savory. Perfect for adding a personalized touch to birthday celebrations, this craft requires only basic materials like felt, ribbon, and sand-filled milk bottles for support. Cut out colorful felt letters and attach them to a ribbon for a festive table decoration.
You can even make individual name garlands for each family member. This banner is not only adorable but also conveniently compact for storage. With clear instructions, crafting this delightful decoration is enjoyable and straightforward, ensuring your birthday setup is both festive and heartfelt.
14. Making a Happy Birthday Banner Box
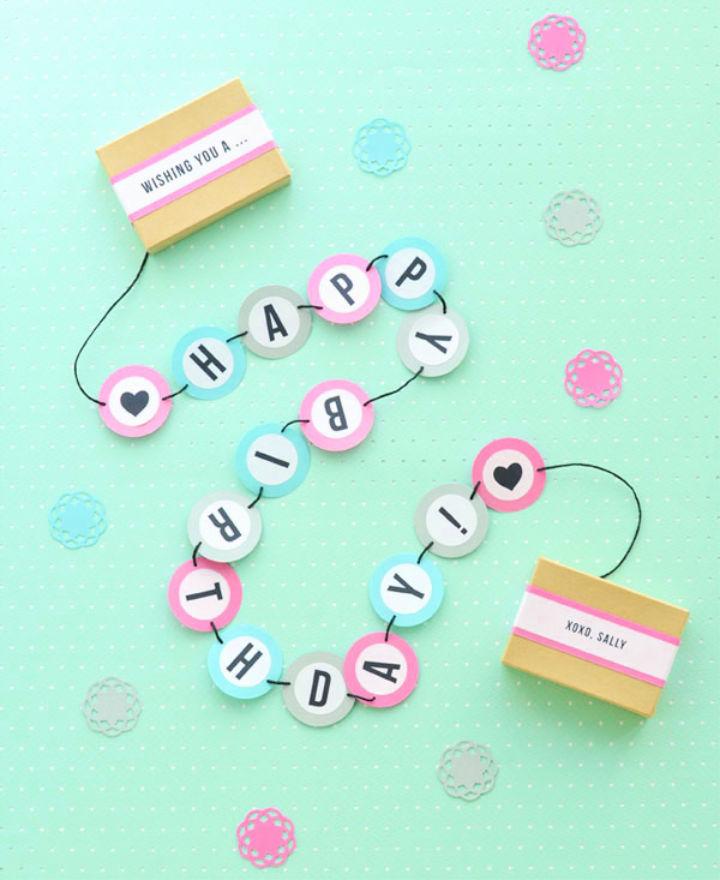
Making a Happy Birthday Banner Box is a heartfelt way to show someone you care on their special day. This DIY project transforms a simple kraft box into a memorable gift that doubles as a festive decoration. With easy-to-follow steps and common crafting materials like colored paper, sticker paper, and twine, you can assemble a charming banner that the birthday person can display.
The process involves printing, cutting, and stringing together vibrant letters to spell out a cheerful message. Ideal for crafters who enjoy adding a personal touch to their celebrations, this banner box not only serves as a unique alternative to traditional birthday cards but also as a keepsake that captures the joy of the occasion. Oh Happy Day
15. DIY Jungle Themed Birthday Banner
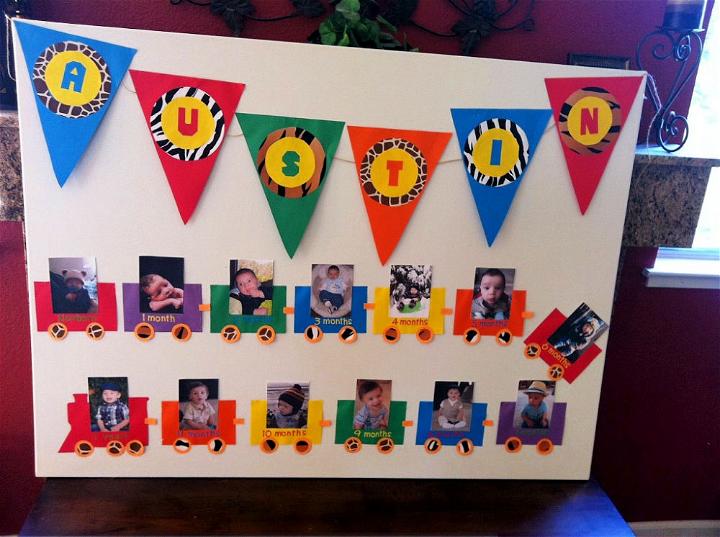
Planning a jungle-themed birthday bash? Hello Sensible has you covered with a DIY guide for crafting a festive birthday banner that adds a personalized touch to your celebration. Get creative with poster board, colored paper, and photos to assemble a vibrant decoration. Follow the step-by-step instructions to trace, cut, and glue your way to a fun and eye-catching banner.
This engaging and easy-to-understand tutorial ensures your party decor will roar with excitement, making it a memorable centerpiece for your little one’s special day. Keep it simple, have fun, and watch your jungle adventure come to life!
16. Balsa Wood Happy Birthday Banner
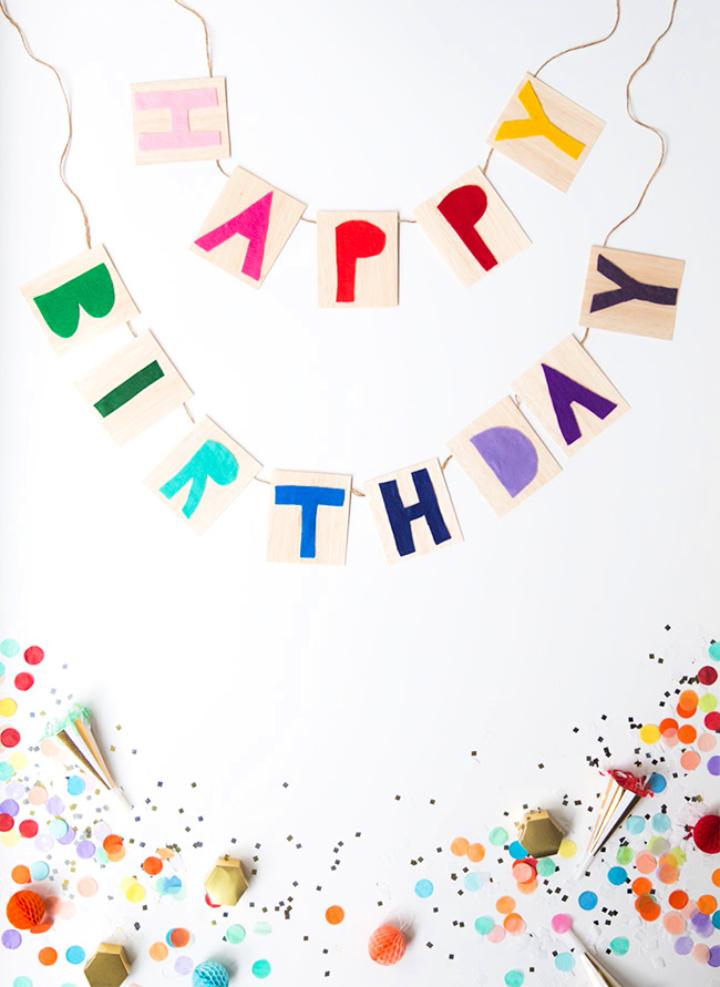
Making a personalized Happy Birthday banner adds a special touch to any celebration. Say Yes offers a simple DIY guide to crafting a balsa wood banner that’s sure to impress. Gather balsa wood strips, colorful felt, felt glue, string, and scissors to get started. Carefully select your felt colors for the letters to ensure a harmonious look.
Cut the balsa wood into rectangles, adhere the felt letters, and string them together for a festive decoration. This eco-friendly and stylish banner is perfect for those who enjoy updating traditional party decor with a modern twist.
17. Construction Paper Cartoon Character Banner
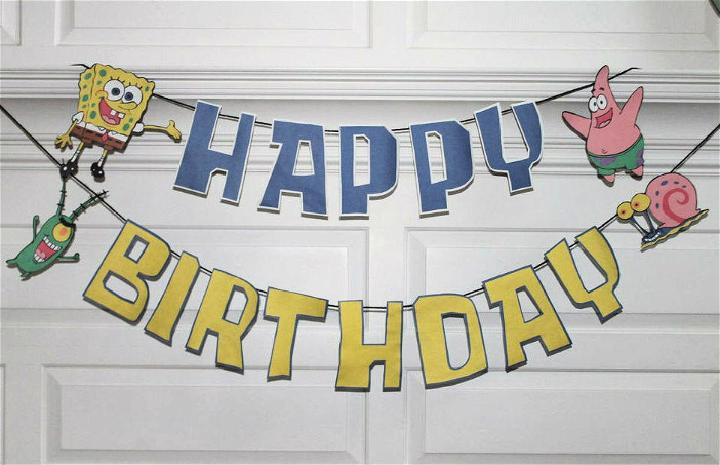
Make a vibrant and personalized Construction Paper Cartoon Character Banner with the help of Instructables‘ engaging guide. Perfect for parties or room decor, this project transforms simple construction paper into impressive, themed decorations. Learn to craft your favorite cartoon characters and design a custom banner using easy-to-find materials like paper, yarn, and glue.
With step-by-step instructions, you can accurately cut, layer, and assemble paper pieces for a stunning visual effect. Whether adorning your space or celebrating a special occasion, this DIY banner adds a unique, handcrafted touch that’s sure to impress.
18. Make a Felt Happy Birthday Banner
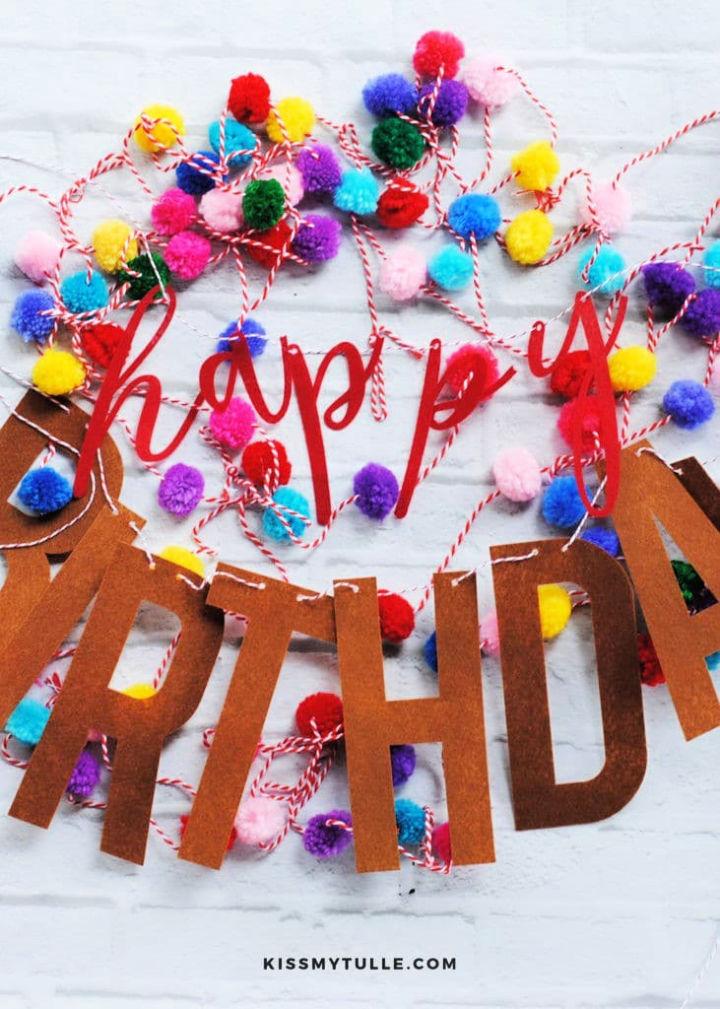
Make a personalized and reusable “Happy Birthday” banner with this DIY guide from Kiss My Tulle. With just felt, baker’s twine, and your Cricut Maker, you can craft a festive decoration to celebrate birthdays for years to come. Follow the simple steps to design and cut your banner pieces, then assemble them with ease.
Customize the colors and fonts to suit your style, adding a special touch to your party decor. This project is perfect for those who love to add a handmade element to their celebrations, offering both charm and cost-effectiveness. Get ready to impress your guests with this adorable and durable birthday banner.
19. Making a Birthday Banner Out of Felt and Leather
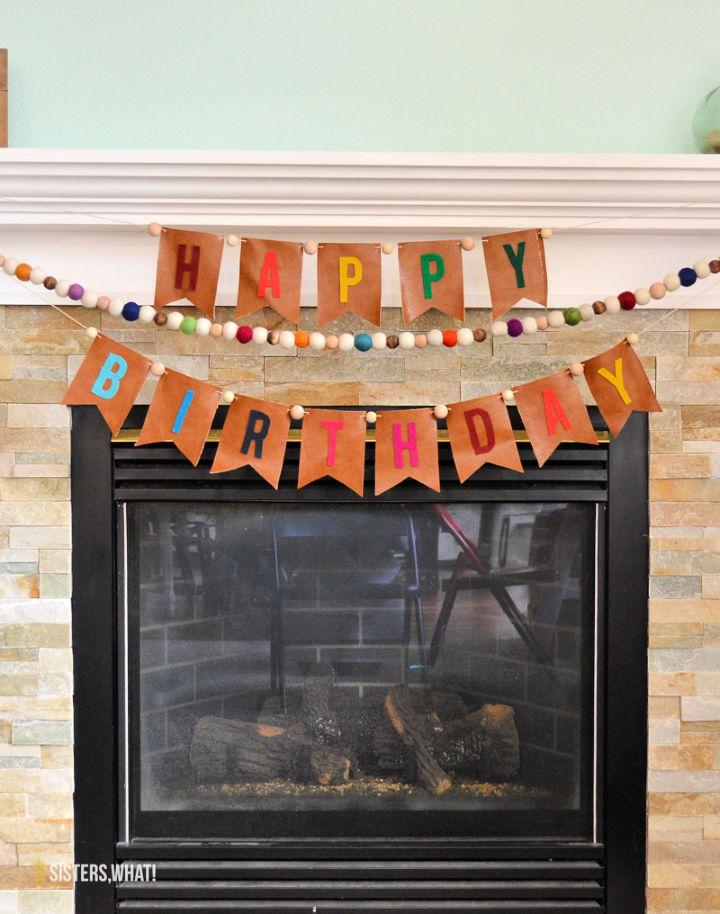
Craft a vibrant birthday banner using felt and leather with guidance from Sisters, What! This DIY project is a breeze and doesn’t require any sewing, making it perfect for crafters of all skill levels. With the option to use a cutting machine or scissors, you can personalize your banner with colorful felt letters and sturdy leather backing. Adhesive like E6000 secures the letters, while a leather punch creates holes for stringing the banner together.
Add a touch of whimsy with wooden beads, and you’re ready to celebrate in style. Simple, fun, and durable, this banner can be a cherished part of birthdays for years to come.
20. Best DIY Fabric Birthday Banner
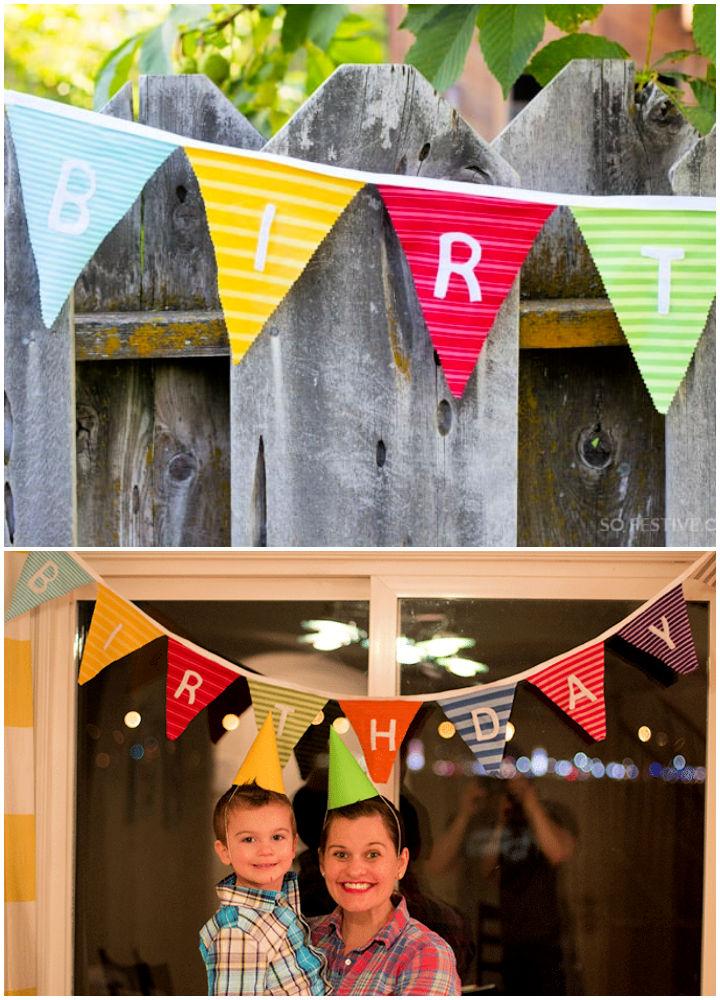
Make a vibrant fabric birthday banner with this straightforward tutorial from So Festive! Ideal for adding a personal touch to your celebrations, this guide is perfect for crafters looking to make a festive decoration that can be used year after year. Gather your colorful fabric scraps, pinking shears, a banner template, sharpie, bias tape, and a sewing machine, and follow the step-by-step instructions.
Cut out your fabric pieces and letters, sew them to the bias tape, and you’ll have a beautiful bunting ready to make birthdays extra special. With clear directions and a free pattern, crafting a lasting family tradition has never been easier or more enjoyable.
Conclusion:
In conclusion, crafting a DIY birthday banner is a wonderful way to infuse any celebration with a personal touch and flair. Our compilation of “20 DIY birthday banner ideas with free printable templates” provides ample inspiration for anyone looking to create a one-of-a-kind party decoration. From selecting the perfect design to match your theme, to piecing together vibrant materials for a festive look, these ideas will guide you through the process.
With a bit of creativity and our helpful tips, you’ll be ready to design a banner that not only captures the essence of the occasion but also delights your guests with its handmade charm. Celebrate your next birthday milestone with a banner that’s as unique as the person you’re honoring.
