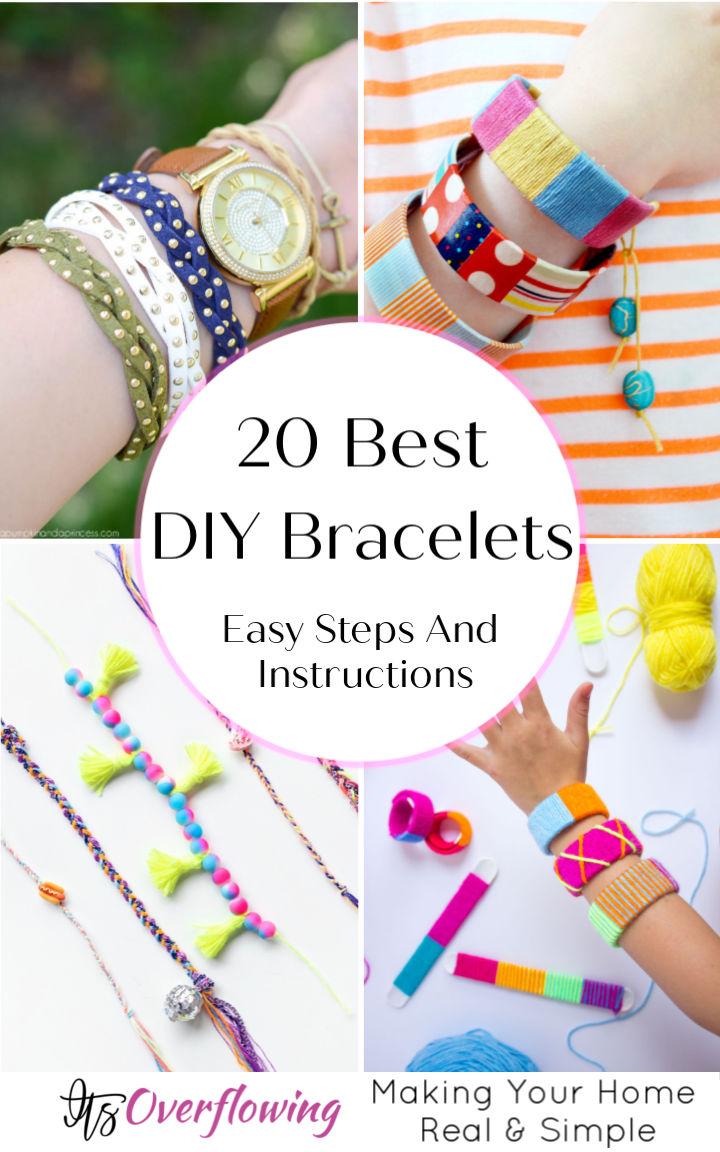
Bracelets are a beautiful way to make a fashion statement and showcase your unique style and personality. Dive into the world of DIY bracelet crafting with our collection of 20 cute bracelet ideas. With detailed, step-by-step instructions, you can make everything from braided to cuff to beaded bracelets. Perfect for crafting enthusiasts looking to personalize their accessories or to create gifts that come straight from the heart.
Crafting your own bracelets isn’t just a hobby; it’s a delightful expression of creativity. Our 20 cute DIY bracelet ideas provide easy-to-follow instructions for a variety of styles, ensuring your DIY bracelets look both professional and stylish. Each project promises a rewarding experience, as you transform simple materials into expensively looking pieces. Get ready to explore the popular DIY bracelet making ideas we’ve curated, perfect for adding a handmade touch to your wardrobe.
Continue to the next section to discover the joy of making DIY bracelets that are truly your own.
Why Make DIY Bracelets?
Making your own DIY bracelets can be an enriching and rewarding hobby for several reasons:
- Personalization: Crafting bracelets yourself allows you to infuse your personality into each piece. You can choose colors, patterns, and charms that represent your style or convey a message.
- Cost-Effective: DIY bracelets can save you money. Instead of purchasing expensive jewelry, you can make similar looks for a fraction of the price using affordable materials.
- Therapeutic Activity: The act of making can be a meditative and stress-relieving process. Focusing on patterns and designs can help calm the mind and provide a sense of satisfaction once completed.
- Gift with a Heart: Handmade bracelets make thoughtful and unique gifts. They show the recipient that you took the time and effort to make something just for them.
- Eco-Friendly: Upcycling materials like old t-shirts or unused strings can turn potential waste into stylish accessories, reducing your environmental impact.
- Skill Development: As you explore different bracelet-making techniques, you’ll improve your fine motor skills, learn new crafting methods, and grow your problem-solving abilities.
- Community and Sharing: Joining DIY crafting groups, either online or in-person, can lead to new friendships and an opportunity to share tips, designs, and inspiration.
Remember to keep your crafting sessions enjoyable and pressure-free. The goal is to have fun and express yourself, not to achieve perfection. Whether you’re crafting for yourself, for a friend, or to learn something new, DIY bracelet making is a versatile activity that offers a wide range of benefits.
How to Make Your Own DIY Bracelet
Making a DIY bracelet is a wonderful way to express your personal style, make a thoughtful gift, and even practice mindfulness through crafting. This guide will walk you through the simple steps to make your own unique bracelet, ensuring that the process is enjoyable and the result is something you can be proud of.
Choosing Your Bracelet Type
Before diving into the crafting process, decide on the type of bracelet you want to create. Here are a few popular options:
- Braided Bracelet: Ideal for beginners and those who enjoy knotting.
- Beaded Bracelet: Perfect for adding color and sparkle to your accessory.
- Cuff Bracelet: Best for a statement piece that’s both stylish and bold.
- Friendship Bracelet: A classic choice for personalized gifts with special meaning.
Materials You’ll Need
- Embroidery floss or cords
- Beads, charms, or stones (optional)
- Scissors
- Tape or a clipboard to secure your work
- Buttons or clasps for closures
- A ruler for measuring
Step-by-Step Bracelet Making
Step 1: Preparing Your Materials
Begin by gathering all your materials and cut the cords or embroidery floss to the desired length. Remember to add a few extra inches to allow for tying knots and closures.
Step 2: Secure Your Starting Point
Use tape or a clipboard to secure your cords. This will keep them in place as you work and help maintain even tension.
Step 3: Crafting Your Bracelet
Depending on the type of bracelet you’ve chosen, you will either be knotting, threading beads, braiding, or wrapping materials around a base like a bangle or craft stick.
- For a Braided Bracelet: Divide your cords into strands and braid them together, securing each end with a knot.
- For a Beaded Bracelet: Thread your chosen beads onto the cord using a pattern or randomly for a more eclectic look. Secure with a knot or clasp.
- For a Cuff Bracelet: You can wrap cords, beads, or fabric around a flexible base, securing the materials as you go.
Step 4: Adding the Closure
Once you’ve completed the body of the bracelet, it’s time to add a closure. This can be as simple as a button and loop or a more secure clasp.
Step 5: Finishing Touches
Trim any excess material from the ends, and if necessary, add a small drop of glue to knots for extra security. Give your bracelet a final check to ensure everything is secure.
Tips for Success
- Be Patient: Take your time and enjoy the process. Crafting is not a race!
- Stay Organized: Keep your materials tidy and sorted to make the process smoother.
- Experiment: Don’t be afraid to try new techniques or mix and match materials.
- Quality Matters: Use good quality materials to ensure your bracelet lasts longer.
Making your own DIY bracelet is a fun and rewarding activity. Not only do you end up with a unique piece of jewelry, but you also gain the satisfaction of having made it yourself. So, gather your materials, find a comfortable spot, and let your creativity flow!
FAQs About DIY Bracelets
Discover answers to frequently asked questions about DIY bracelets. Get all the information you need to create your own unique and stylish accessories.
What materials do I need to start making DIY bracelets?
Essential materials for DIY bracelets include:
- Embroidery floss or cords
- Beads, charms, or stones (if desired)
- Scissors
- Tape or a clipboard for securing your work
- Buttons or clasps for closures
- A ruler for measuring
How do I choose the right type of bracelet to make?
Consider the following popular bracelet types:
- Braided Bracelet: Good for beginners; involves knotting.
- Beaded Bracelet: Allows for color and pattern customization.
- Cuff Bracelet: Creates a bold statement piece.
- Friendship Bracelet: Ideal for personalized gifts.
Can I make a bracelet if I have no experience?
Absolutely! DIY bracelets are perfect for all skill levels. Start with simple patterns and as you become more comfortable, move on to more intricate designs.
How can I secure my bracelet-making work in place?
Use tape to secure your bracelet materials to a flat surface, or clip them to a clipboard. This helps maintain tension and keeps your work steady.
What is the best way to measure the length of my bracelet?
Use a ruler or measuring tape to measure your wrist and add a few extra inches to accommodate for knots and closures.
How do I add a closure to my DIY bracelet?
There are various closures you can use, such as:
- Buttons and loops
- Lobster clasps
- Tie-on knots
- Adjustable sliding knots
How do I ensure my DIY bracelet is durable?
To ensure durability:
- Tie secure knots
- Use quality materials
- Consider adding a small drop of jewelry glue to knots
Can I make eco-friendly bracelets?
Yes! Opt for upcycled materials like old T-shirts or strings to make eco-friendly accessories.
Where can I find inspiration for bracelet patterns?
Sources of inspiration include:
- Online crafting communities
- Social media platforms like Pinterest
- Crafting books and magazines
What are some good tips for beginners?
Helpful tips for beginners:
- Start simple: Choose easy patterns and gradually try more complex ones.
- Practice knotting: Get comfortable with basic knots used in bracelet making.
- Stay patient: Take your time to enjoy the process and learn from mistakes.
- Keep tools organized: This makes it easier to pick up where you left off.
Can I turn bracelet making into a social activity?
Certainly! Bracelet making is a great activity for social events, like birthday parties or crafting groups. It’s also a fun way to bond with friends and family while making something unique.
How can I gift a DIY bracelet?
When gifting, you might want to:
- Personalize the bracelet with the recipient’s favorite colors or charms.
- Include a handwritten note explaining the significance.
- Present it in a nice jewelry box or pouch for a special touch.
With these FAQs, you’re all set to start your journey into the colorful world of DIY bracelet making. Embrace the process and have fun creating!
Cute DIY Bracelet Ideas
Discover adorable DIY bracelet ideas that you’ll love making yourself. Get inspired and unleash your creativity with these charming bracelet projects.
1. DIY Netted Stone Friendship Bracelet
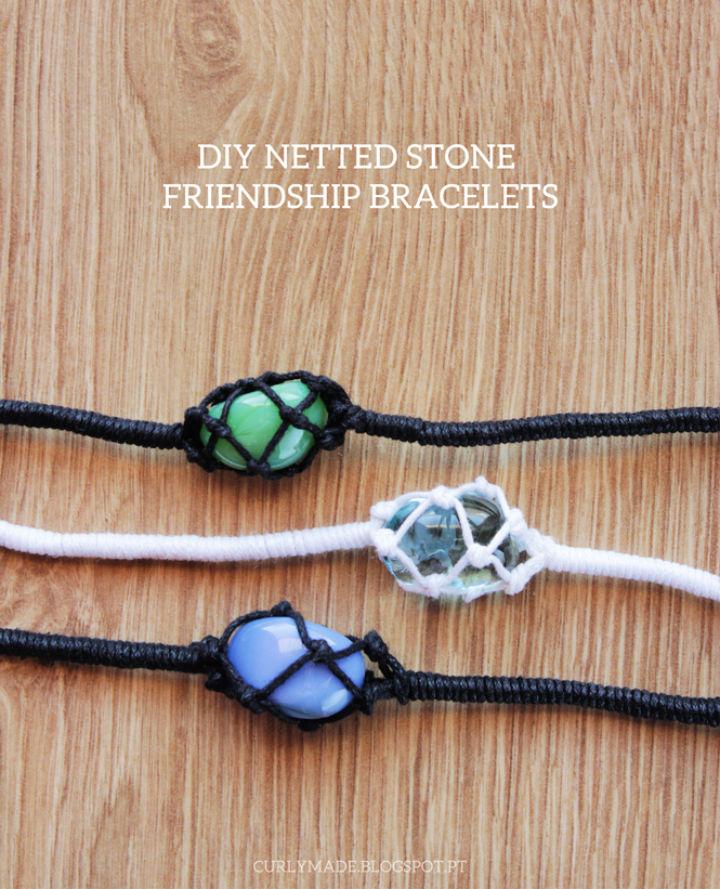
Make your own DIY Netted Stone Friendship Bracelets with Curly Made‘s easy-to-follow guide. Ideal for those who love crafting unique jewelry, this project transforms simple materials like waxed cotton cord, small stones, and a button into a charming accessory. Start by preparing your cords and stones, then follow the knotting technique to make a net that holds the stone securely.
With a clipboard to hold the cords in place, you’ll wrap and knot your way to a personalized bracelet. Finish off with a button closure, and enjoy your handmade creation. Perfect for warm-weather wear or as a heartfelt gift, these bracelets are sure to impress. Ready to begin? Grab your supplies and let’s start crafting!
2. Free Button Bracelet Pattern
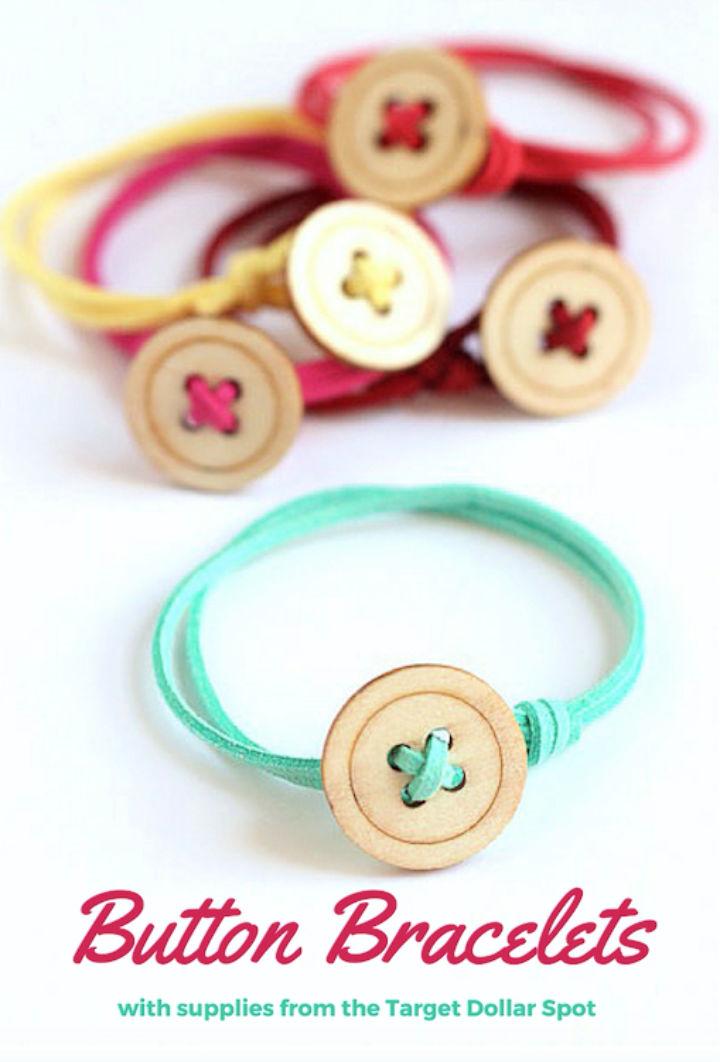
Looking to craft a unique accessory? All Things Target offers a DIY guide for making a charming button bracelet using simple materials like wood buttons and faux suede cording from the Target Dollar Spot. Easy to follow and perfect for adding a personal touch to your style, this tutorial takes you step by step through making a lightweight, comfortable bracelet that can be color-coordinated with any outfit. Grab your scissors and get ready for a fun crafting session that will leave you with a stylish handmade piece to wear or share.
3. Yarn Wrapped Slap Bracelet for Kids
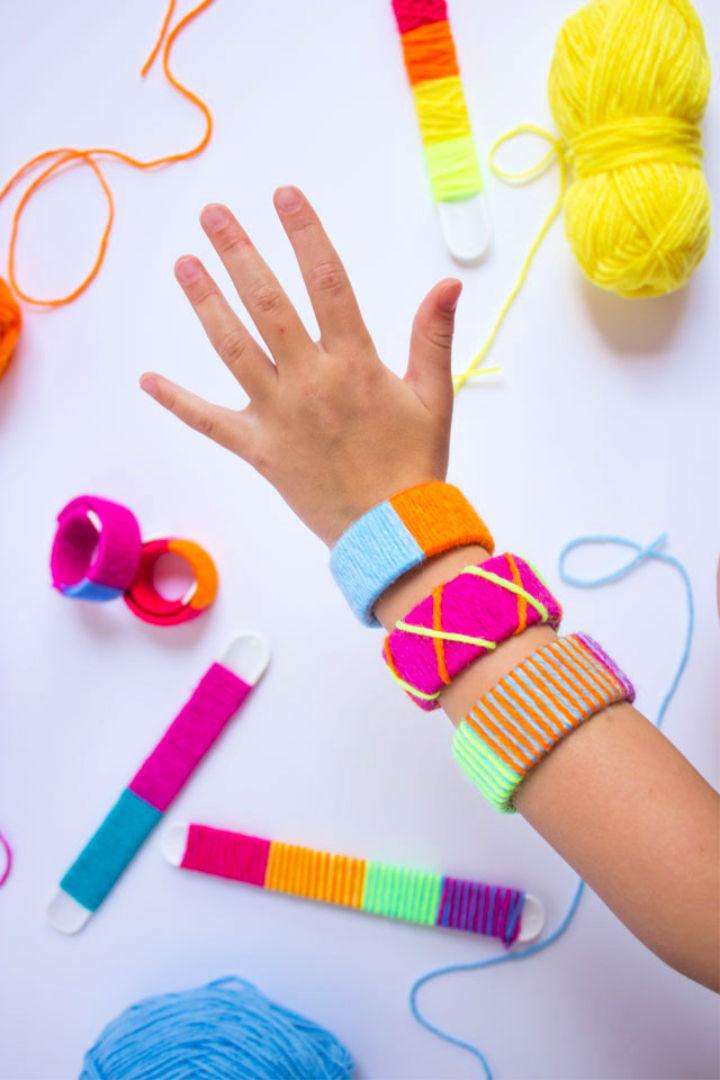
Revive the nostalgic fun of the 80s with DIY slap bracelets! Design Improvised brings you a delightful summer craft that’s perfect for kids—yarn-wrapped slap bracelets. This easy and engaging project involves wrapping colorful yarn around white silicone bracelets for a unique, personalized accessory. Grab some scissors, an array of yarn, and those plain slap bracelets to start this creative endeavor.
With clear instructions and a simple supply list available, you can transform a basic bracelet into a vibrant fashion statement. It’s an ideal activity for playdates, parties, or just a crafty afternoon at home. So gather your materials and let the wrapping begin!
4. Make a Washi Tape Wooden Bracelet
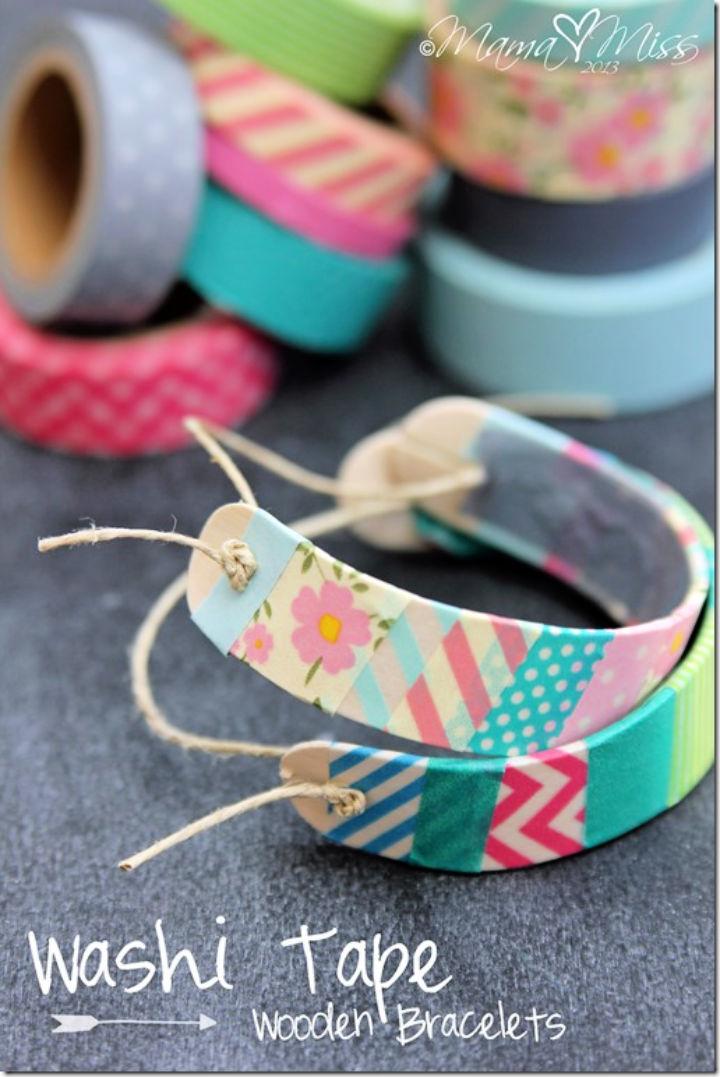
Making washi tape wooden bracelets is a fun and engaging DIY project that brings a splash of color to your wristwear. Mama Miss shares an innovative method to turn ordinary popsicle sticks into chic, handmade accessories. Start by soaking the sticks for two days until they’re flexible, then shape them into bracelets and let them dry. The real excitement comes with decorating—wrapping them with vibrant washi tape in patterns of your choice.
It’s a craft that requires patience but rewards you with unique jewelry perfect for mama-kiddo bonding. Just ensure you handle the materials with care to prevent breakage and follow the simple steps for a seamless finish. With these bracelets, you can add a personal touch to any outfit.
5. Homemade Crepe Paper Friendship Bracelet
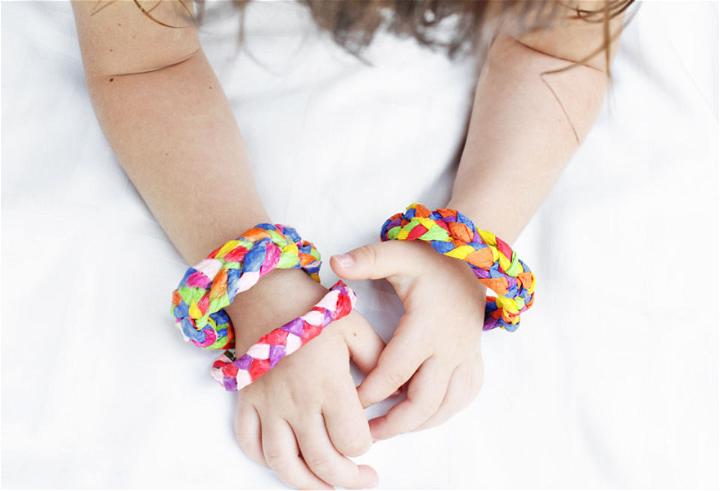
Transform leftover crepe paper streamers into charming, handcrafted bracelets with this easy-to-follow tutorial from Babble Dabble Do. Ideal for crafty kids aged 8 and up, this guide shows you how to braid colorful paper into unique accessories. You’ll need simple supplies like scissors, stapler, tape, and optional Mod Podge for durability.
Add a touch of creativity to your jewelry collection or make a special gift for friends. Just remember, paper bracelets aren’t waterproof, so keep them dry! With these step-by-step instructions, you’ll master the art of paper bracelet making in no time.
6. How to Make a Friendship Bracelet
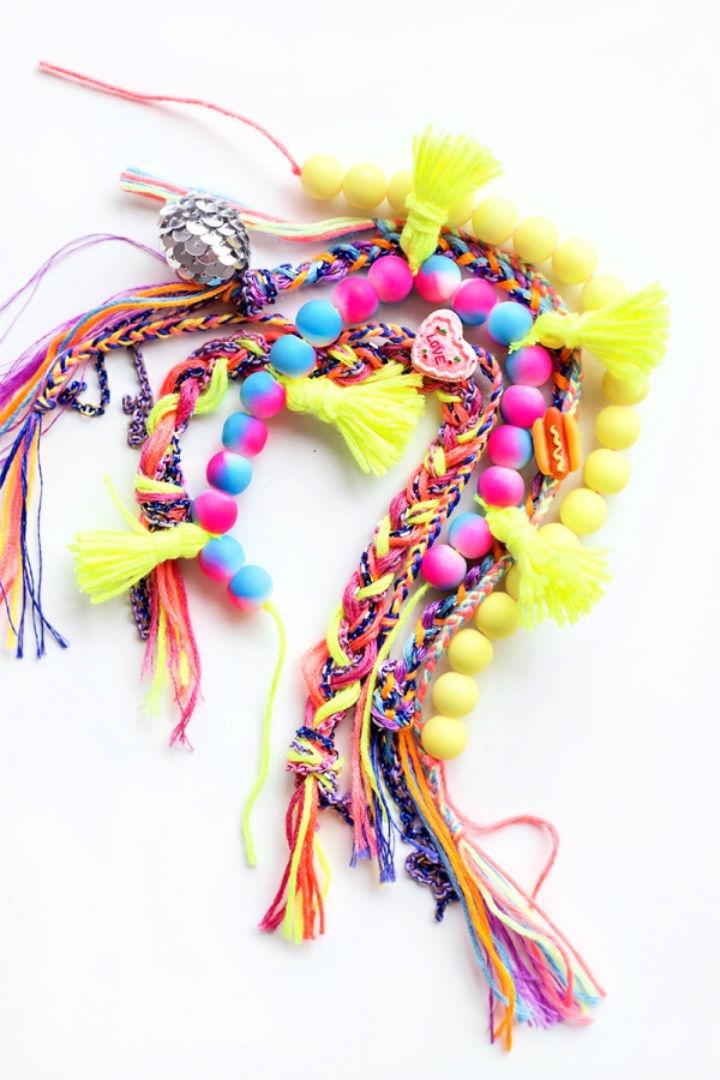
Ready to add a splash of color and creativity to your wristwear? Studio DIY‘s guide to crafting DIY friendship bracelets is here to help you make charming accessories that are perfect for sharing with friends or adding a personal touch to your own style. With easy-to-follow tutorials for braided, beaded tassel, and bangle bracelets, you can dive right into making these vibrant pieces.
Gather your embroidery thread, beads, and charms, and get ready to wrap, braid, and embellish your way to a fun and fashionable handmade treasure. Whether gifting or wearing, these bracelets are a bright way to celebrate friendships and memories.
7. DIY Duck Tape Bracelet for Kids
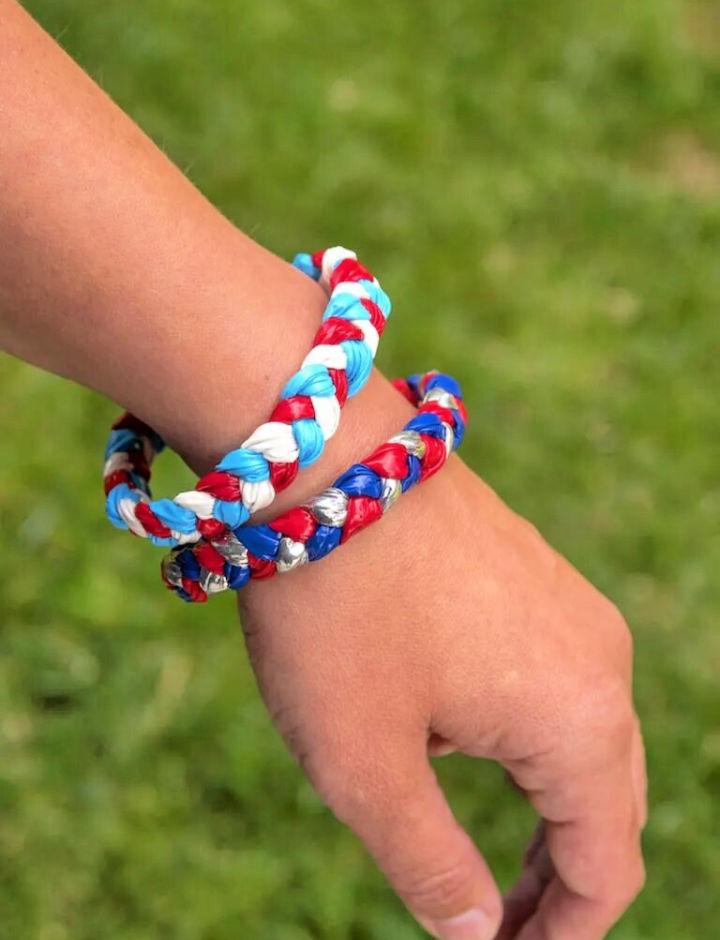
Ready to dive into a fun and easy crafting adventure with your kids? DIY Candy presents a fantastic project that transforms colorful Duck Tape into stylish, braided bracelets. Ideal for summer activities, these waterproof accessories can accompany your little ones through all their aquatic escapades.
With straightforward instructions and a simple supply list, this craft is perfect for an engaging family activity. Make a variety of designs by mixing and matching tape colors, and enjoy a craft that’s not only enjoyable to make but also cool to wear. Grab your Duck Tape, and let’s get crafting!
8. Handmade Studded Braid Bracelet
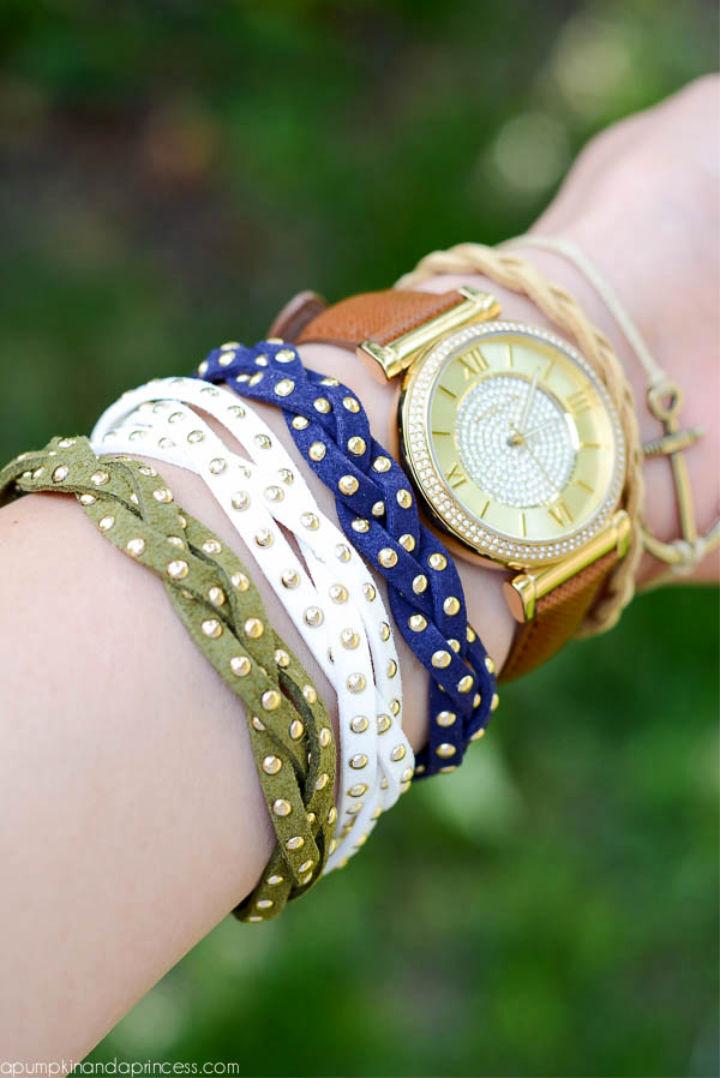
Discover how to craft stylish studded braid bracelets with this easy-to-follow guide from A Pumpkin And A Princess. Perfect for jazzing up your summer wardrobe, these handmade accessories blend simplicity with a touch of elegance. You’ll need studded cording, a crimp clasp, lobster clasp, jump ring, pliers, and jewelry glue.
Start by measuring and cutting the cord to fit your wrist, allowing an extra inch for a tight braid. Secure the strands with the crimp clasp, braid to your liking, then finish with another clasp and the lobster closure. Make a collection in your favorite colors for a personalized touch to any outfit.
9. Easy DIY Friendship Bracelet for Adults
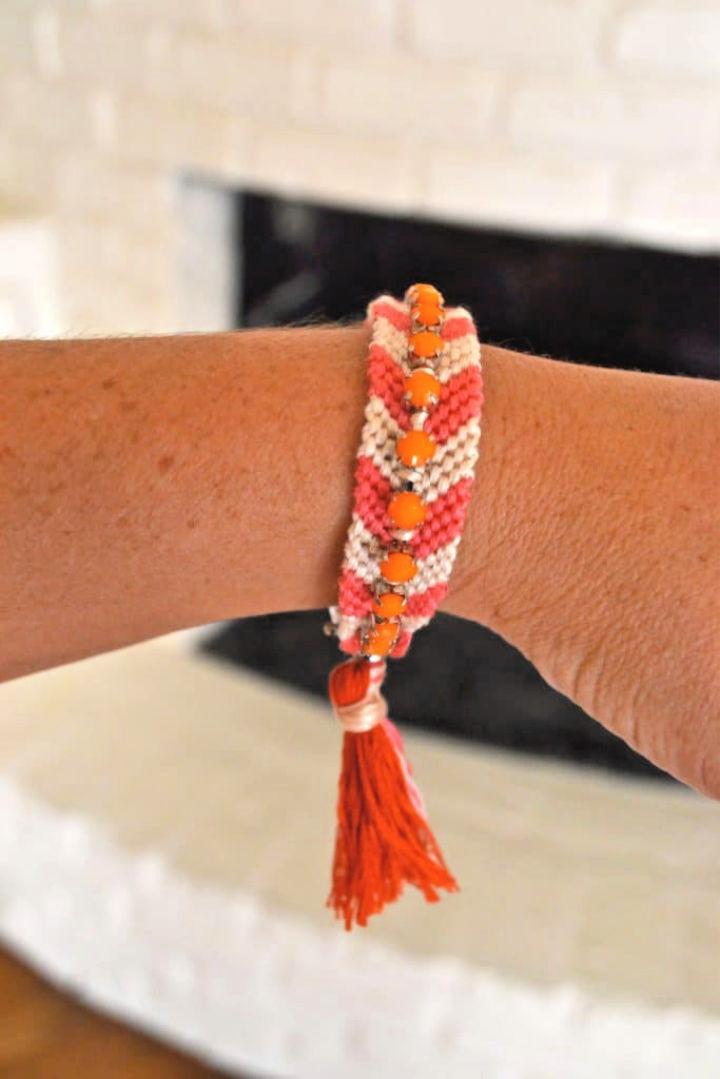
Discover how to craft stylish adult friendship bracelets with Good in the Simple‘s DIY tutorial. Embrace your creative side by selecting vibrant colors, integrating metallic threads, and personalizing with charms or rhinestone embellishments. This guide offers step-by-step instructions, ensuring an enjoyable and successful crafting experience.
Perfect for gifting or accessorizing, these bracelets add a touch of nostalgia and fashion to any outfit. With clear, engaging directions, you’ll find making these bracelets both fulfilling and fun.
10. Making a Friendship Bracelets With Name
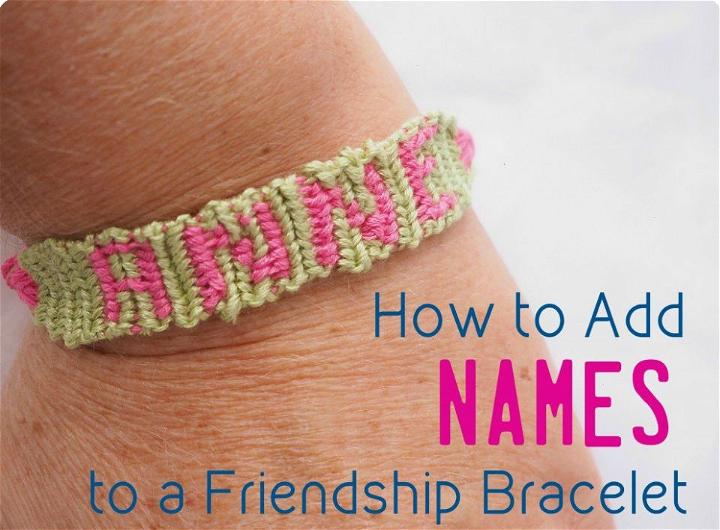
Making personalized friendship bracelets with names, letters, or numbers can be a fun and meaningful craft. FeltMagnet offers a detailed tutorial to guide you through the process of crafting these special accessories using embroidery floss. With clear instructions on making a homemade loom, learning essential knots, and incorporating custom designs, this guide is perfect for anyone looking to add a personal touch to their handmade gifts.
The step-by-step approach ensures that your bracelet will be both beautiful and durable, making it an ideal token of friendship. Keep your knots firm but gentle to prevent breakage, and remember to plan your design for a smooth crafting experience.
11. Make a Super Easy Friendship Bracelet
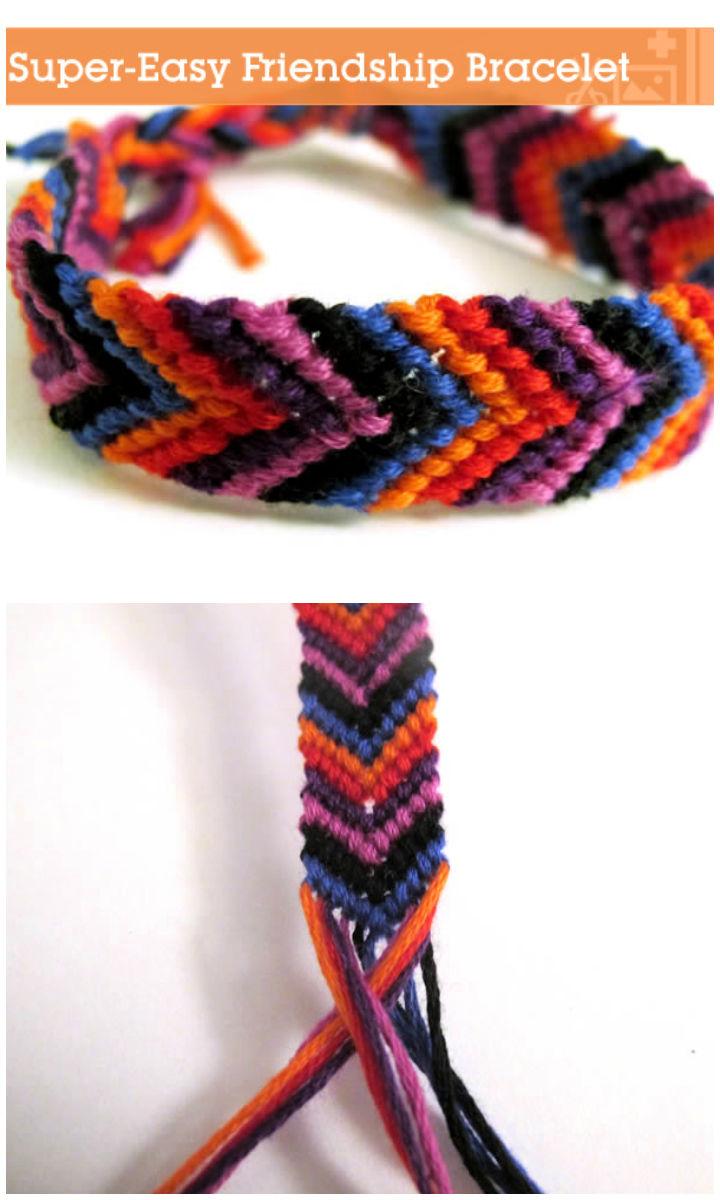
Ready to add a splash of color and charm to your wristwear collection? Envato Tuts presents an easy-to-follow guide on crafting a vibrant six-color friendship bracelet with a chic V pattern. Perfect for gifting or adding a personal touch to your style, this tutorial breaks down each step from selecting threads to the finishing knot.
Grab your embroidery floss, scissors, and get ready to make a handmade accessory that’s as fun to make as it is to wear. Engage with a timeless craft that not only brightens up your outfit but also strengthens the bonds of friendship. Crafts And DIYS
12. Make Your Own Stretch Bracelet
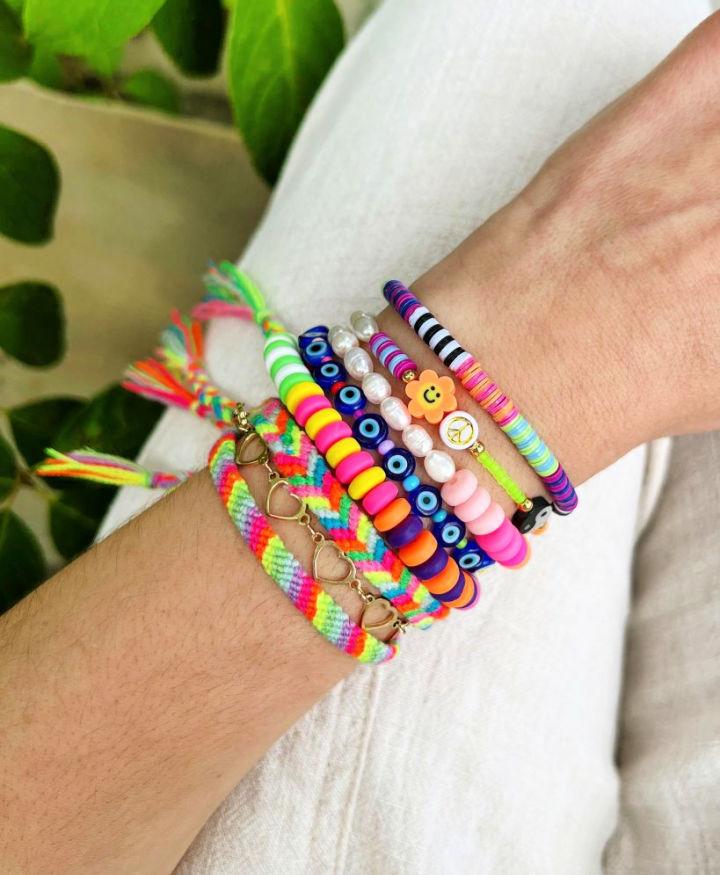
Crafting stretch bracelets that stand the test of time is easier than you might think. At the neon tea party, you’ll find invaluable tips for selecting the right materials, such as high-quality Stretch Magic elastic string, and mastering the art of knotting to ensure your creations are durable. Learn how to properly prep your string, add beads with or without a needle, and secure your work with a strong knot and a dab of G-S Hypo Cement.
Finish off your piece by neatly tucking away the knot for a professional look. With these straightforward instructions, your handmade jewelry will not only look fantastic but will also be resilient enough for everyday wear.
13. Recycled T Shirt Bracelet
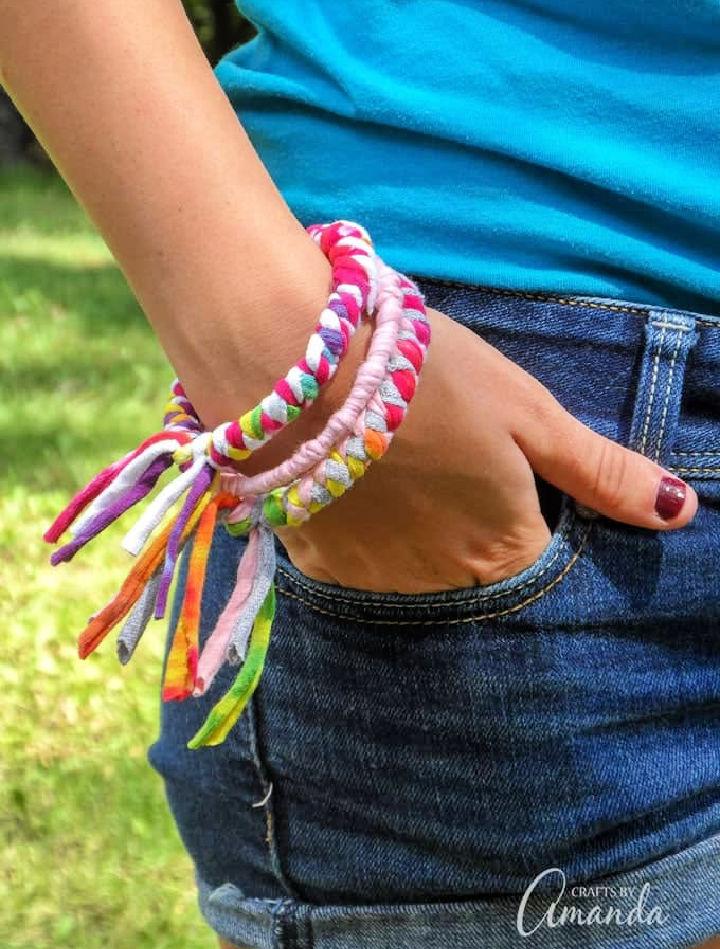
Transform old t-shirts into vibrant, eco-friendly bracelets with this simple craft from Crafts by Amanda. Ideal for teens and preteens, this project not only breathes new life into unused clothing but also serves as a lesson in recycling. To start, gather some bangle bracelets, a few t-shirts, scissors, and glue. Cut the t-shirt fabric into strips, braid or wrap them around the bangles, and secure them with a dab of glue.
This activity is perfect for group crafting sessions and makes for unique, personalized gifts. Make an array of colorful t-shirt bracelets that showcase your style while being kind to the planet.
14. 6 String 3 Color Friendship Bracelet Pattern
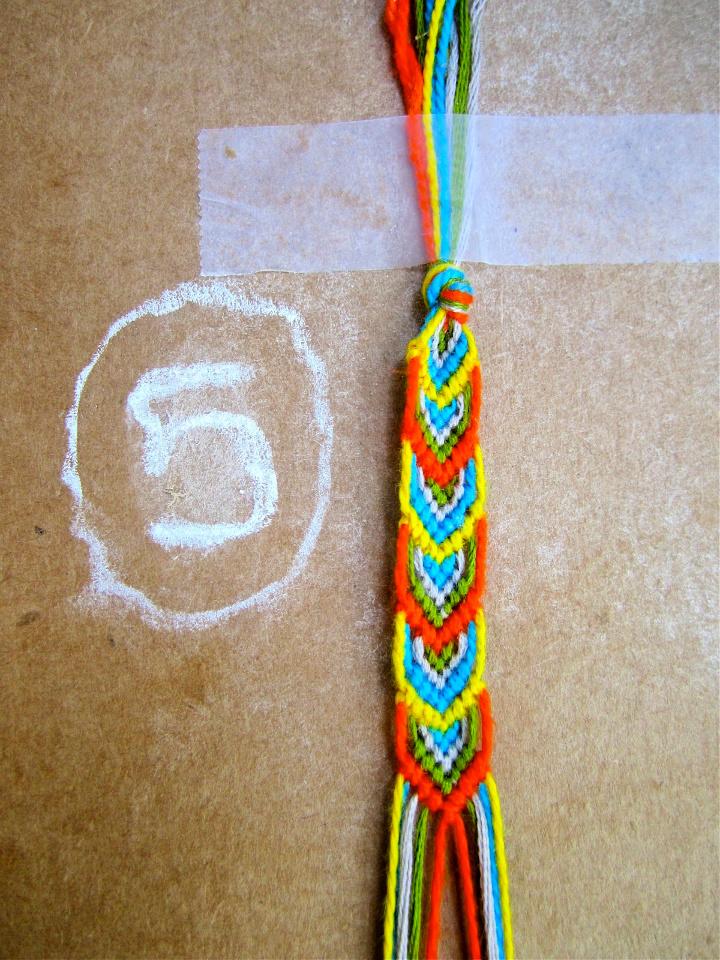
Crafting friendship bracelets is a joyous and creative pastime that brings color and fun to any summer camp experience. At Lovely Leaves, we offer a simple and engaging tutorial for campers and crafters of all ages. With just five colors of thread and a grasp of basic knotting techniques, you can make a charming leaf pattern bracelet.
Our step-by-step instructions are designed to be easy to follow, ensuring that even those who are new to bracelet making can enjoy the satisfaction of making something beautiful by hand. Start knotting today and watch as your skills grow with every twist and tie, leading to a handmade accessory you’ll be proud to wear or share. Good Things
15. Forward Knot and Chevron Bracelet
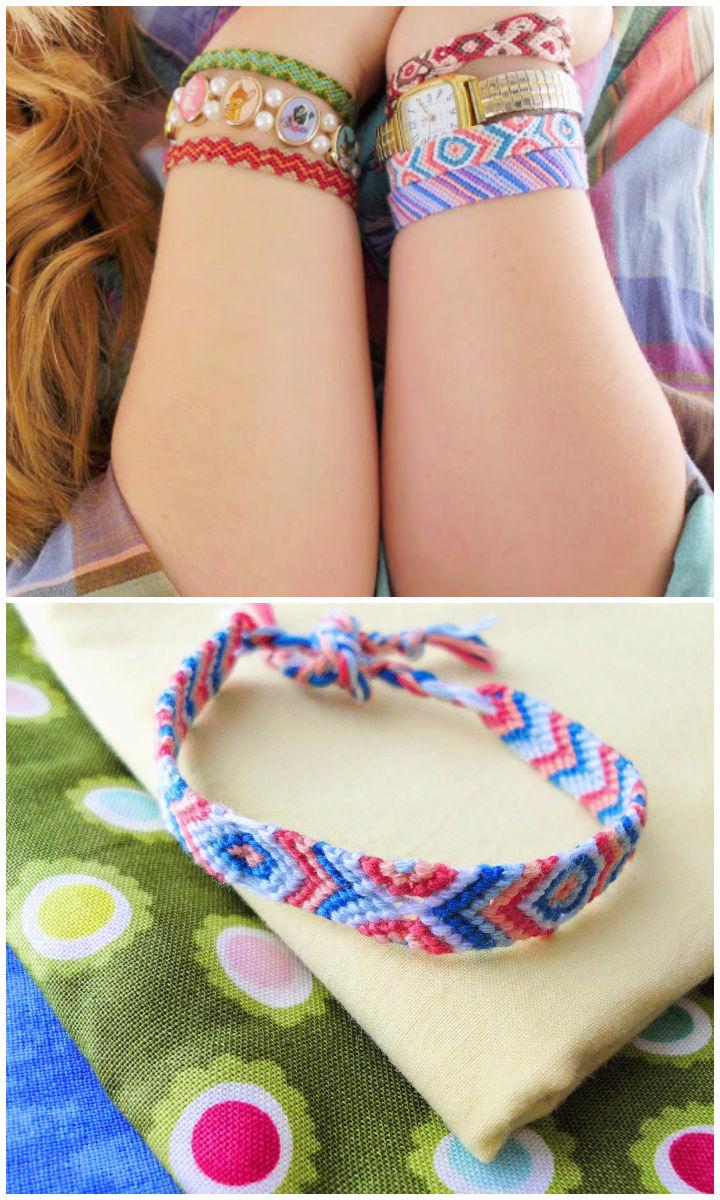
Discover how to craft a beautiful chevron friendship bracelet with our easy-to-follow guide on Forward Knot and Chevron Bracelet. In this tutorial, you’ll learn the simple steps to make forward knots and how to arrange them into a striking chevron pattern. Perfect for personalizing your style or gifting to a friend, this method can be spiced up by altering the bracelet’s direction for a unique twist.
Grab some embroidery thread in your favorite colors, and let’s get started on this fun and engaging DIY project. Remember, no experience is necessary, and the end result is sure to impress. Keep crafting and share your creations with us! Curious And Catcat
16. Giant Friendship Bracelet Pattern
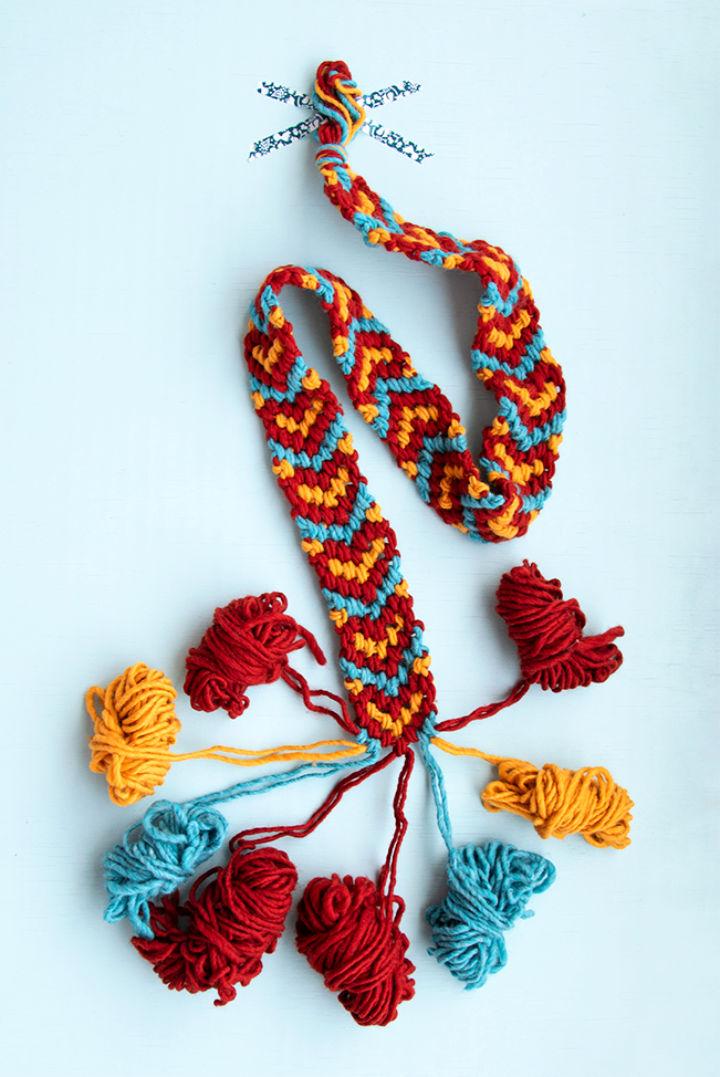
Planning a unique Friendsgiving celebration? Add a touch of handmade warmth to your table with a giant friendship Bracelet-inspired table runner. Crafted from 100% American wool, this runner is knotted in the style of macrame and features a charming heart design. It’s not only a festive centerpiece but also serves as a cozy macrame scarf or a thoughtful hostess gift.
Follow our step-by-step guide to make this eye-catching piece that’s sure to spark conversation and add a personal touch to your gathering. With a vintage flair and modern twist, your Friendsgiving table will be the talk of the season. Get creative and let your hands weave a story of friendship and gratitude with every knot on your runner. Hands Occupied
17. Macrame Spiral Bracelet for Couple
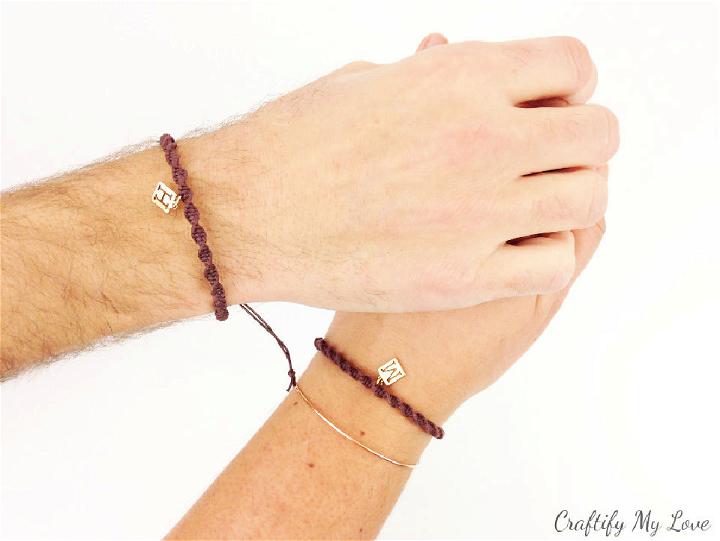
Making a macrame spiral bracelet is a charming and enjoyable DIY project perfect for crafting a meaningful gift or a special accessory for yourself and a friend. At Craftify My Love, you’ll find a comprehensive guide that walks you through the process with clear, step-by-step instructions. This tutorial is designed to be accessible, offering practical tips to ensure your bracelet-making experience is smooth and enjoyable.
The project requires simple materials like waxed cotton cord, scissors, and charms, which are easy to source. By mastering the half-knot technique, you’ll see your bracelet take shape into an elegant spiral design. With this guide, you can customize your bracelet’s length and finish it with an adjustable sliding knot clasp, adding a personalized touch to your handmade creation.
18. Simple DIY String Friendship Bracelet
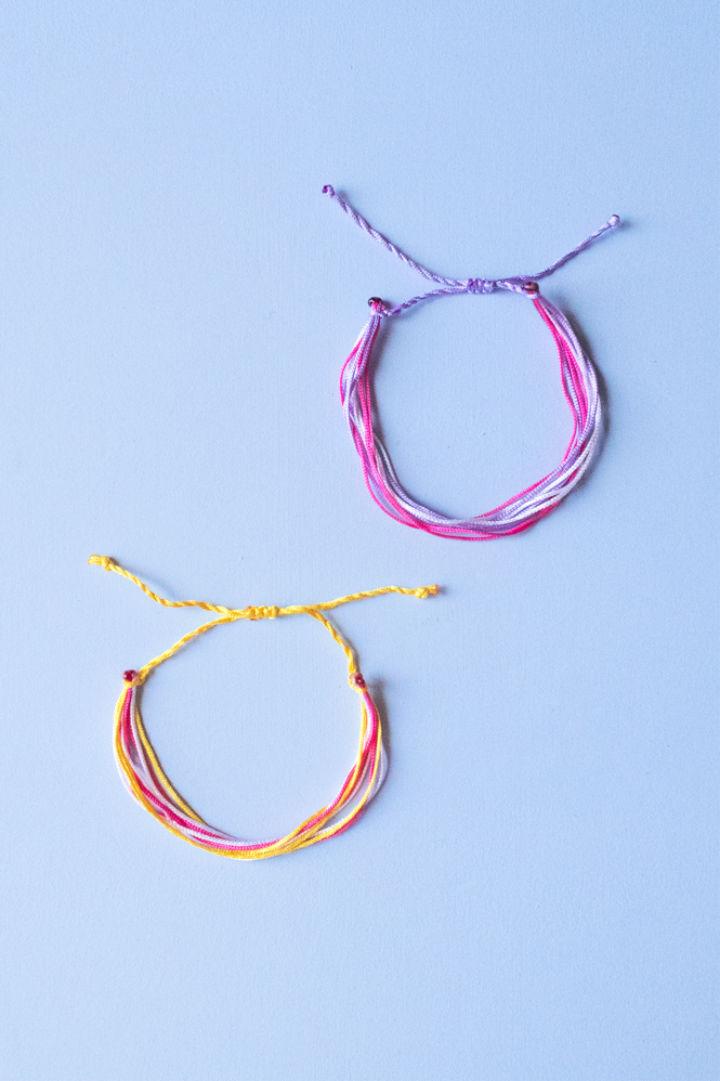
Ready to make your own Pura Vida inspired string friendship bracelets? With a simple supply list, mainly waxed polyester or nylon satin cord, you can start crafting these vibrant and trendy accessories. Our YouTube tutorial provides step-by-step guidance, ensuring an easy-to-follow process for making these beautiful bracelets.
Learn to master the square knot and discover tips for finishing your pieces with a polished look. Perfect for personal wear or as thoughtful gifts, these bracelets are a fun and creative way to express your style. Visit YouTube and search for “DIY Pura Vida Inspired String Friendship Bracelets” to begin your bracelet-making adventure today.
19. Ladder Stitch Friendship Bracelet Ideas
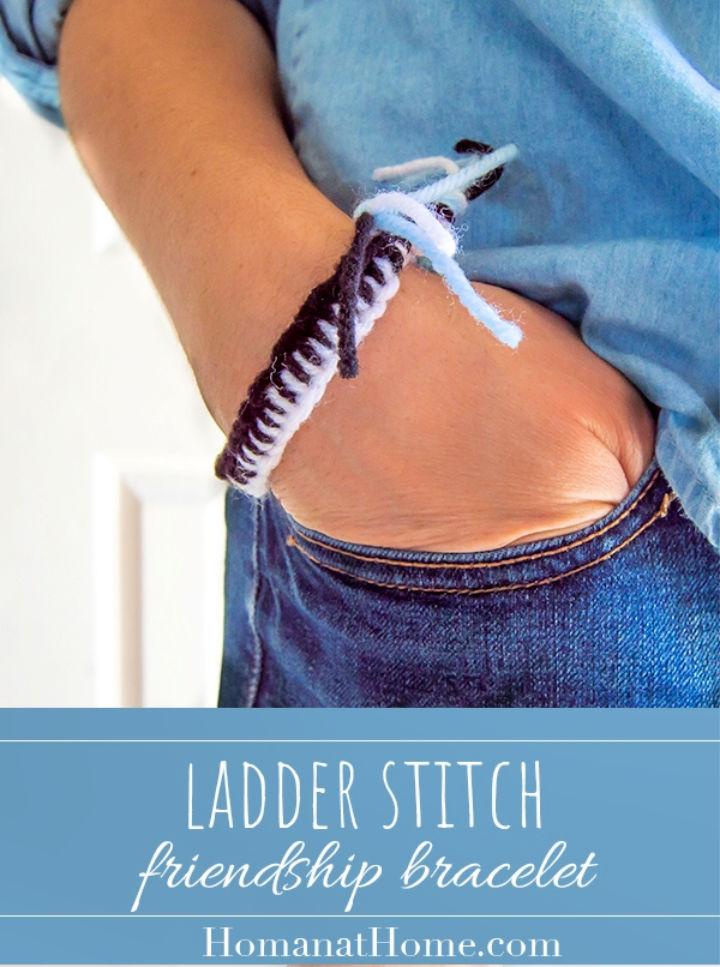
Discover how to craft a ladder stitch friendship bracelet with ease using Homan at Home‘s straightforward guide. Ideal for those who have struggled with traditional friendship bracelet techniques, this method requires only four threads and a few simple steps to make a beautiful two-toned pattern. The tutorial is designed to be accessible and engaging, ensuring a fun crafting experience.
With options to use various materials like yarn, t-shirt strips, embroidery floss, or paracord, you can personalize your bracelet to your liking. Perfect as a charming accessory or a heartfelt gift, this ladder stitch bracelet will add a handmade touch to any ensemble. Keep your tension steady and avoid pulling the knots too tight for the best results.
20. Letter Friendship Bracelet Pattern
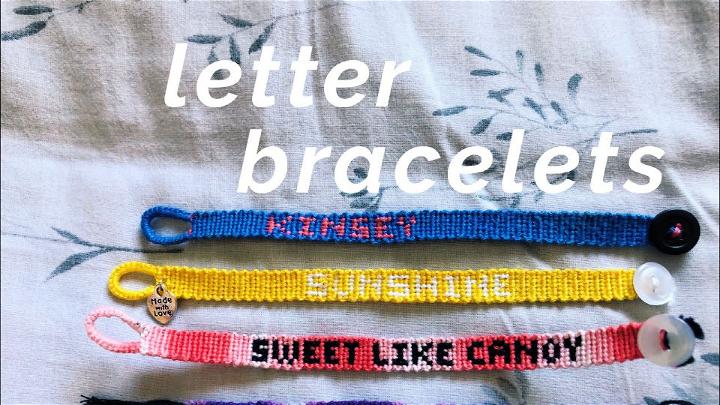
In this advanced name/letter friendship bracelet tutorial on YouTube, Kinsey B walks viewers through a detailed and engaging process of making personalized accessories. Ideal for those with some bracelet-making experience, the video provides step-by-step instructions for crafting alpha pattern bracelets.
Kinsey’s method involves using graph paper to plan out letters, making the design process clearer and more accessible. If you’ve been eager to add a personal touch to your friendship bracelets with names or initials, this tutorial offers the clarity and guidance needed to elevate your crafting skills. Watch the video, learn the techniques, and start making your own unique friendship bracelets today.
Conclusion:
In conclusion, our roundup of 20 cute DIY bracelet ideas is the perfect inspiration for anyone looking to add a personal touch to their jewelry collection or craft heartfelt gifts for loved ones. With step-by-step instructions, you can easily make beautiful braided, cuff, and beaded bracelets that reflect your unique style. So grab your materials and get ready to make DIY bracelets that are not only stylish but also infused with your creativity and passion. Happy DIY bracelet making!
