Discover the joy of candle making at home with our comprehensive 25 easy DIY candles for beginners guide. Learn to make DIY candles that not only enhance your living space but also fill it with delightful scents. Customizing your very own candles can be a fun, cost-effective, and eco-friendly endeavor that allows for personal expression through scent and color.
Making homemade candles yourself offers an opportunity to design unique, handcrafted pieces perfect for gifts or adding a warm ambiance to any room. Follow our step-by-step instructions to start this enjoyable and rewarding hobby. Continue reading for an easy and engaging tutorial on how to make candles, ensuring a seamless crafting experience that caters to your style and preferences.
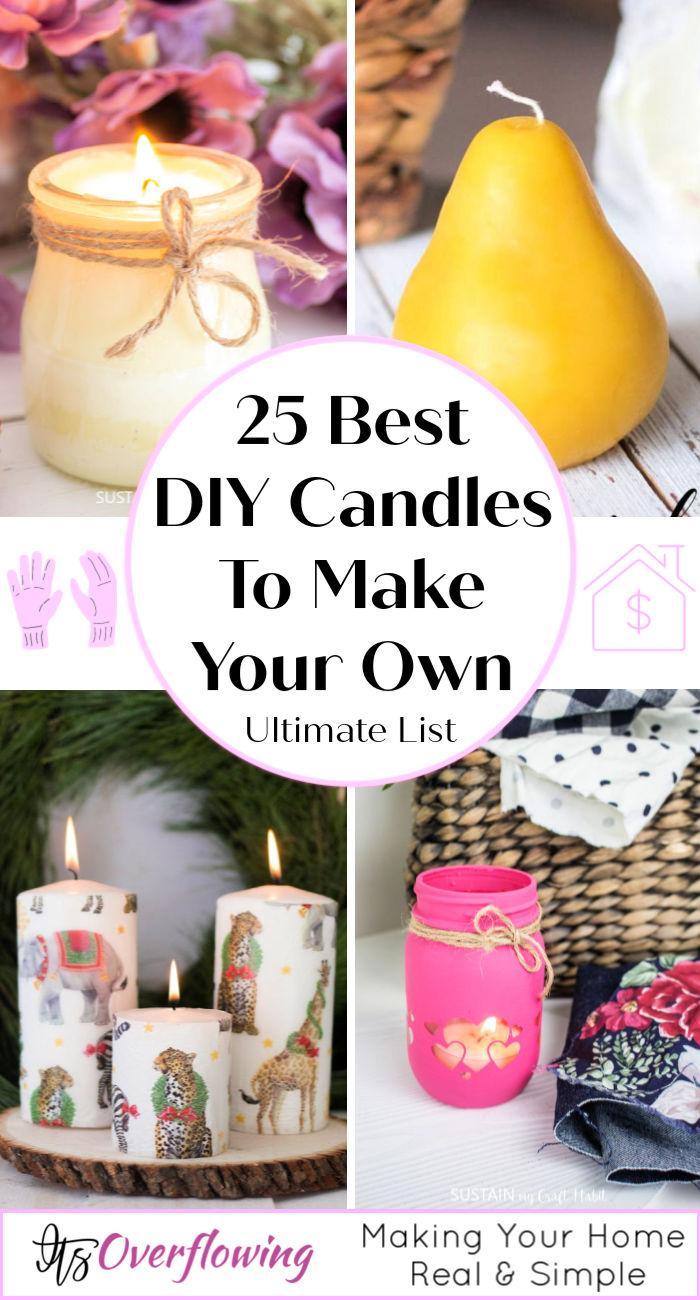
Why Make Your Own Candles?
Making your own candles can be a rewarding experience for a variety of reasons. Here’s a comprehensive look at why you should consider this creative endeavor:
- Personalization: You have complete control over the scent, color, shape, and size of your candles. Whether you prefer a subtle vanilla or a vibrant citrus, the customization options are endless.
- Cost-Effective: Homemade candles can be significantly cheaper than store-bought alternatives. By purchasing bulk materials, you can make multiple candles at a fraction of the price.
- Eco-Friendly: By choosing natural waxes and upcycling containers like jars and teacups, you’re making an environmentally friendly choice that reduces waste.
- Therapeutic Activity: The process of candle making can be a calming and therapeutic hobby, offering a break from the digital world and a chance to engage in a hands-on activity.
- Unique Gifts: Handcrafted candles make thoughtful and unique gifts that show your loved ones you care enough to make something just for them.
- Home Decor: Candles can enhance the ambiance of any room, providing a warm glow and a cozy atmosphere.
- Hobby Development: Candle making can start as a simple project and evolve into a passionate hobby or even a small business.
Remember, safety is paramount when making candles. Always follow proper procedures and never leave melting wax unattended. Now that you know the benefits, why not give candle making a try and light up your world in your own special way?
How to Choose the Right Materials for Candle Making
Discover the art of candle making and learn how to choose the perfect materials for your candles. Find out all you need to know in this helpful guide.
Selecting the Perfect Wax
Know Your Waxes: The first step in candle making is to choose the right wax. Each type of wax—soy, paraffin, beeswax, and blends—has different characteristics.
- Soy Wax: Ideal for beginners, burns cleanly and is eco-friendly.
- Paraffin Wax: Offers a strong scent throw and a smooth finish.
- Beeswax: Natural, burns slowly and has a subtle, honey-like fragrance.
- Blends: Combine the best qualities of different waxes.
Consider Your Candle Type: The candle you want to make may dictate your wax choice. For example, pillar candles need a harder wax, like paraffin or beeswax, while container candles can use softer waxes like soy.
Picking the Best Wick
Match Wick to Wax: The type of wick you choose should correspond with the wax you’re using. Wicks are available in different materials, such as cotton or wood, and sizes.
- Cotton Wicks: Good for most types of waxes and candles.
- Wood Wicks: Create a crackling sound, best with thicker, slower-burning waxes.
Size Matters: The size of your candle is also crucial. A larger candle will need a thicker wick to ensure an even burn.
Choosing Fragrances and Dyes
Fragrance Oils vs. Essential Oils:
- Fragrance Oils: Synthetic, offer a wide variety of scents and are usually stronger.
- Essential Oils: Natural, can be more subtle and have therapeutic properties.
Amount to Use: The general rule is to use about 1 ounce of fragrance per 1 pound of wax, but always check the manufacturer’s recommendations.
Color Your Candles: Dyes come in blocks, liquid, and powder forms. Pick one that blends well with your wax and gives the desired color intensity.
Understanding the Importance of Temperature
Melting Point: Each wax type has a specific melting point. You must heat the wax to the correct temperature for it to bind properly with the fragrance and dye.
Pouring Temperature: Pouring your wax at the right temperature is critical for avoiding issues like sinkholes or separation.
Equipment and Safety
Gather Your Tools: You’ll need a melting pot, thermometer, stirring utensil, and molds or containers. Use equipment that is specifically designed for candle making to ensure safety.
Safety First: Always monitor the wax’s temperature, and never leave it unattended on the heat source. Use protective gear like gloves and aprons to prevent burns.
By considering these factors, you can confidently choose the right materials for your candle making project. Remember, the best choices will lead to beautiful, long-lasting, and fragrant candles that you can be proud of.
How to Make Your Own DIY Candles at Home
Making your own candles is not only a fun and creative project but also a great way to add a cozy atmosphere to your home. You can personalize them with your favorite scents and colors, making them perfect for gifts or decoration. Here’s a step-by-step guide to help you get started on making your very own DIY candles.
Materials You’ll Need:
- Wax (soy, beeswax, or paraffin)
- Wicks
- Containers (Mason jars, teacups, or any heat-resistant container)
- Fragrance oils or essential oils (optional)
- Dye (if you want colored candles)
- A double boiler or a heatproof bowl and saucepan
- Thermometer
- Stirring utensil
- Scissors
Step 1: Prepare Your Containers
Before you begin, make sure your chosen containers are clean, dry, and heat-resistant. If you’re using jars or teacups, you might want to pre-warm them to prevent the wax from cooling too quickly, which can cause cracks.
Step 2: Attach the Wick
- Cut the wick to the appropriate length for your container. It should be a couple of inches taller than the container’s height.
- Use a little bit of wax or a wick sticker to secure the wick to the bottom of the container.
- To keep the wick centered, wrap the excess length around a pencil or skewer and rest it on top of the container.
Step 3: Melt the Wax
- Fill the bottom pot of your double boiler with water and place it on the stove to heat.
- Add the wax to the top portion of the double boiler or the heatproof bowl. Heat until the wax melts completely, stirring occasionally.
- If you’re using a thermometer, the ideal temperature for adding fragrance is around 185°F.
Step 4: Add Fragrance and Color
- Once the wax is melted, you can add dye if you want colored candles. Start with a little and add more to reach the desired shade.
- Add fragrance oils or essential oils to give your candle a pleasant aroma. The typical ratio is about 1 ounce of fragrance per pound of wax, but you can adjust this to your preference.
Step 5: Pour the Wax
- Carefully pour the melted wax into your prepared containers, leaving a small amount of space at the top.
- Let the wax cool slightly before moving to the next step. This will prevent the wick from moving out of place.
Step 6: Secure the Wick
- Ensure the wick is still centered and straight after pouring the wax.
- Use your pencil or skewer to adjust if necessary.
Step 7: Allow to Set
- Let your candles cool and set for several hours, or until completely solidified.
- Avoid moving the candles during this time to prevent spills and ensure an even shape.
Step 8: Trim the Wick
- Once the wax is set, trim the wick to about 1/4 inch above the surface of the candle.
- This is important for a clean burn and to prevent the flame from becoming too large.
Step 9: Enjoy Your Candle
- Light your new DIY candle and enjoy the warmth and fragrance it brings to your space!
- Remember to never leave lit candles unattended and keep them out of reach of children and pets.
By following these steps, you can make beautiful, personalized candles that enhance the ambiance of your home or make perfect gifts for any occasion. Happy candle making!
Frequently Asked Questions (FAQs) About DIY Candle Making
Get answers to commonly asked questions (FAQs) about DIY candle making. Learn all you need to know to start making your own beautiful homemade candles.
What type of wax is best for candle making?
Soy wax is a popular choice due to its clean burn and eco-friendly properties. Beeswax is also favored for its natural aroma and non-toxic burn. Paraffin wax is commonly used for its versatility in shaping and coloring. Your choice may depend on personal preference, the desired scent throw, or environmental considerations.
How can I ensure my homemade candles have a strong scent?
To achieve a strong scent, use high-quality fragrance oils or essential oils. The general rule is to add 1 ounce of fragrance per pound of wax. Also, ensure that you add the scent at the correct temperature; adding fragrance when the wax is around 185°F is recommended.
Can I use any container for my homemade candles?
Your containers must be heat-resistant to withstand the temperature of the molten wax. Common choices include Mason jars, teacups, or specialized candle containers. Always pre-warm containers to prevent the wax from cooling too quickly, which may cause cracks.
What safety precautions should I take when making candles?
- Never leave melting wax unattended on the stove.
- Use a thermometer to monitor wax temperature.
- Keep a fire extinguisher nearby in case of emergencies.
- Ensure your work area is clean and free from flammable materials.
- Trim the wick to 1/4 inch before burning to prevent a large flame.
How do I prevent my candle from tunneling?
To prevent tunneling, make sure the first burn lasts until the entire top layer of wax has melted to the edge of the container. This creates a “memory ring” and ensures even burning in future uses. Also, using the correct wick size for your candle is crucial.
Can I reuse old candle jars for new DIY candles?
Absolutely! Reusing old candle jars is an eco-friendly option. Ensure the jars are clean and free from any previous wax residue. Removing old wicks and giving the jar a thorough wash will prepare it for a new candle.
How long should I let my DIY candle cool before using it?
Allow your candle to cool and set for several hours, or until the wax has completely solidified. This is usually around 24 hours. Avoid moving the candles during this time to prevent spills and ensure an even shape.
Is it cheaper to make your own candles?
Making your own candles can be more cost-effective than purchasing store-bought ones, especially if you buy materials in bulk and reuse containers. Plus, you get the added benefit of customizing them to your liking.
Can I color my candles with crayons?
While it’s possible to use crayons for color, they may not be the best choice as they can clog the wick and affect the burn quality. It’s better to use candle dye which is specifically made for candle making and ensures a cleaner burn.
How can I clean up spilled wax?
To clean up spilled wax, let it harden first, then scrape it off the surface with a plastic putty knife or a credit card. For residue, place a paper towel over the wax and gently iron over it on a low setting to absorb the remaining wax.
Remember, patience and creativity are key in candle making. Don’t hesitate to experiment with scents, colors, and shapes to make candles that are uniquely yours. Happy crafting!
25 Easy DIY Candles for Beginners
Discover 25 simple candle making projects perfect for beginners. Get creative and start making your own beautiful DIY candles today!
1. How to Make Your Own Candles
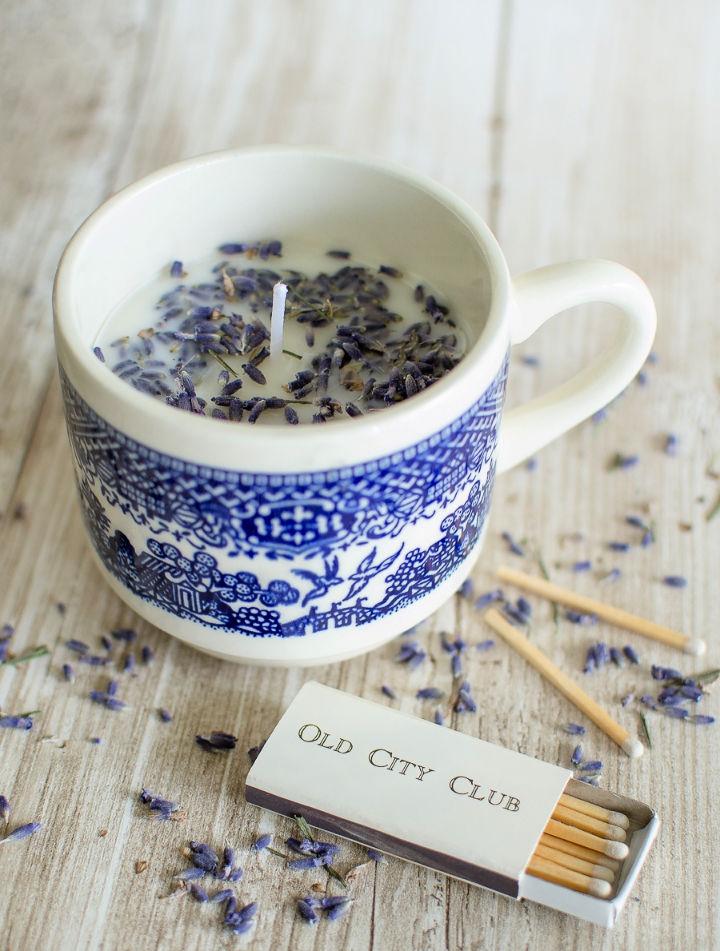
Discover how to craft your own candles with ease and creativity. Postcards from the Ridge offers an engaging tutorial that guides you through the process of makingacup candles using soy wax and a variety of containers. This DIY project is perfect for those who cherish vintage items, eco-friendly crafts, and the warm glow of homemade candles.
With detailed instructions on selecting containers, melting wax, setting wicks, and adding fragrance, you’ll be able to make beautiful, scented candles for your home or as thoughtful gifts. Plus, with tips on cleanup and candle safety, you’ll have all the knowledge you need to start this rewarding craft. Get ready to light up your space with the charm of candles made by you.
2. DIY Candle In A Eggshell
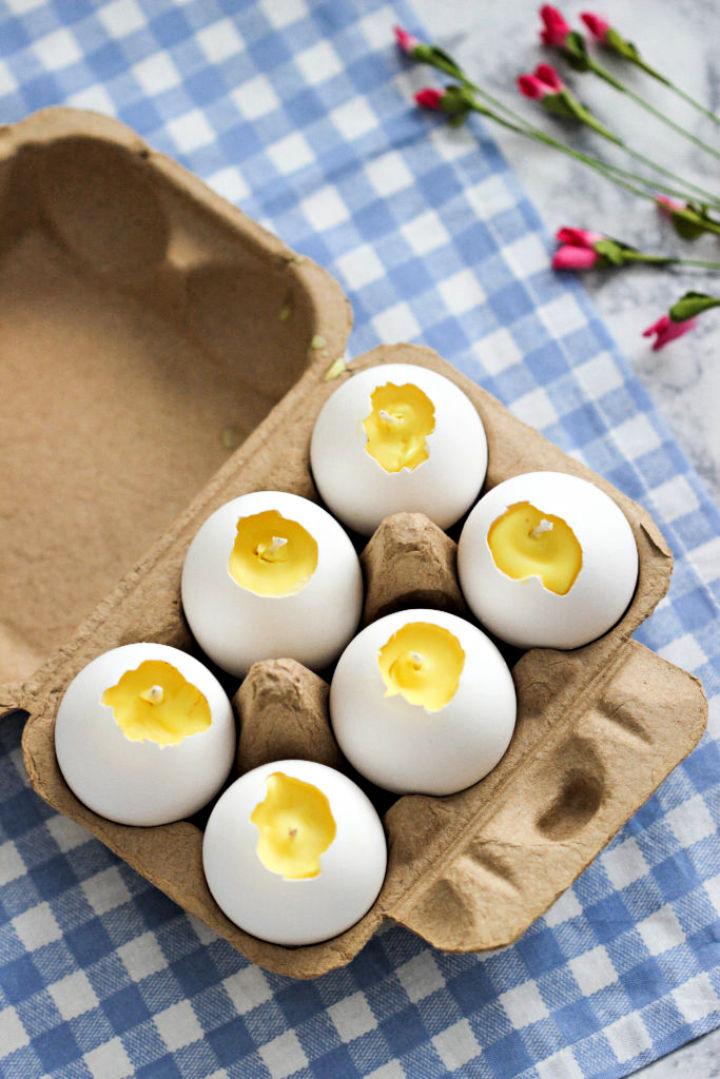
Ready to add a touch of handmade charm to your Easter decorations? Purely Katie offers a creative and enjoyable way to transform eggshells into pretty candles that can brighten up your home or serve as thoughtful gifts. This guide walks you through the process step by step, from preparing the eggshells to pouring the scented wax.
It’s an eco-friendly project that repurposes common kitchen leftovers, and you can customize the candles with a variety of essential oil blends for a personal touch. With clear instructions and helpful tips, making these eggshell candles is an engaging activity that yields beautiful results.
The holidays are just around the corner. This means that it’s the perfect time to do some cozy home decor. Candles are essential! You can take these a level up by making them in eggshells! A project perfect for showing off your creativity and an out-of-the-box mind! purelykatie
3. DIY Candy Striped Concrete Candles
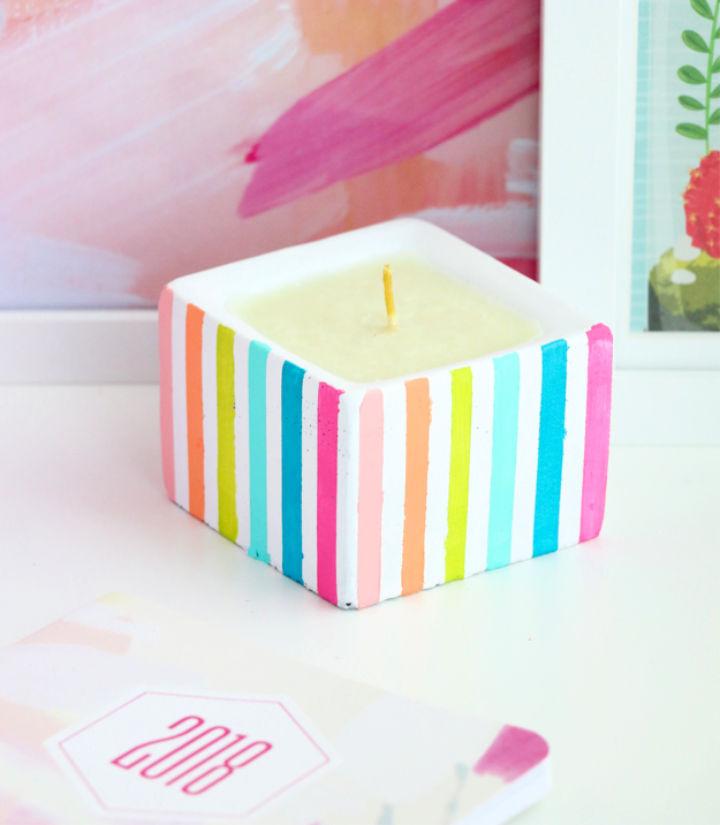
Ready to add a splash of color and creativity to your home decor? A Kailo Chic Life introduces a fun DIY project that transforms concrete planters into vibrant candy-striped concrete candles. With a few simple materials like acrylic craft paint, soy wax flakes, and a wick, you can craft a unique candle that doubles as a stylish piece of decor. Start by applying a coat of primer to your planter, then let your imagination run wild as you paint your chosen design.
Melt the wax, pour it in, and voilà – you have a bespoke candle to light up your space or to gift to someone special. If candles aren’t your thing, pop in a faux succulent for an equally charming alternative. Get ready to craft something special with an instructive, engaging guide that’s perfect for a relaxing crafting session.
4. Homemade Candles With Mason Jar
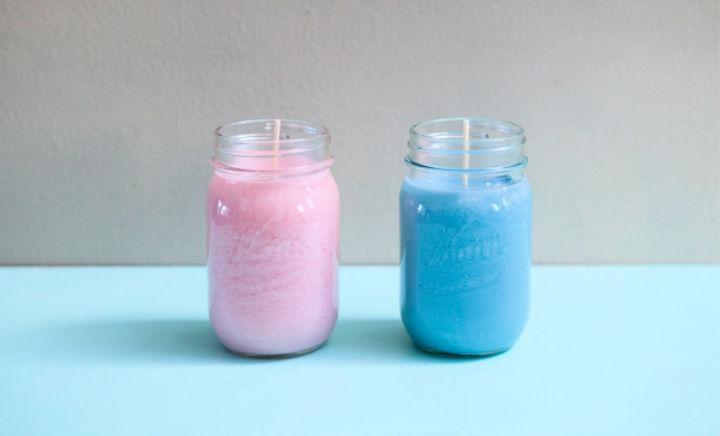
Ready to add a touch of warmth to your home with handmade charm? Our DIY mason jar candle guide on Something Turquoise walks you through making cozy, aromatic candles with ease. Gather your soy wax flakes, wicks, and favorite scents to begin this delightful crafting adventure. Learn how to secure your wick, melt and tint the wax, and pour it into sturdy mason jars for a rustic look.
Customize each candle with a personal touch by adding fabric or cardstock lids. Perfect for gifts or sprucing up your space, this tutorial makes candle-making accessible and fun. Get ready to light up your crafting skills with this engaging and helpful guide.
5. How to Make a Beeswax Candle
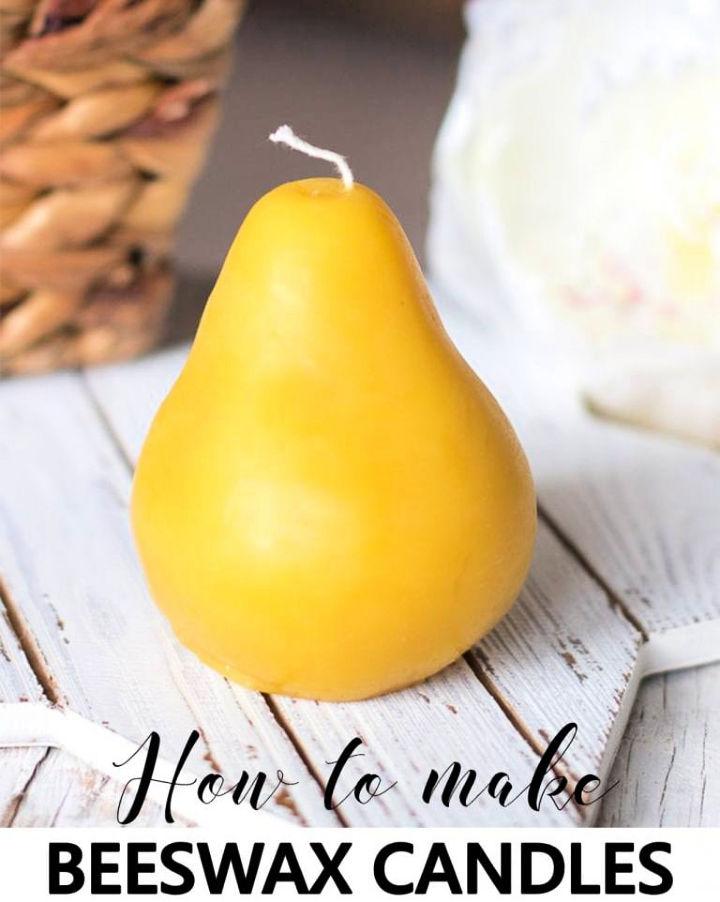
Dive into the art of candle-making with Sustain My Craft Habit‘s guide on crafting beeswax candles. This informative piece provides step-by-step instructions, ensuring a smooth and enjoyable experience for crafters. With a focus on making a pear-shaped beeswax candle, the guide offers practical tips, like using a double boiler for melting wax and selecting the right wick size.
Emphasizing safety and precision, it encourages crafters to protect their work surfaces and be cautious when handling hot wax. Whether looking to add a homemade touch to your decor or crafting unique gifts, this tutorial equips you with the skills to produce beautiful, naturally-scented beeswax candles.
6. Make a Lovely Candle In a Dough Bowl
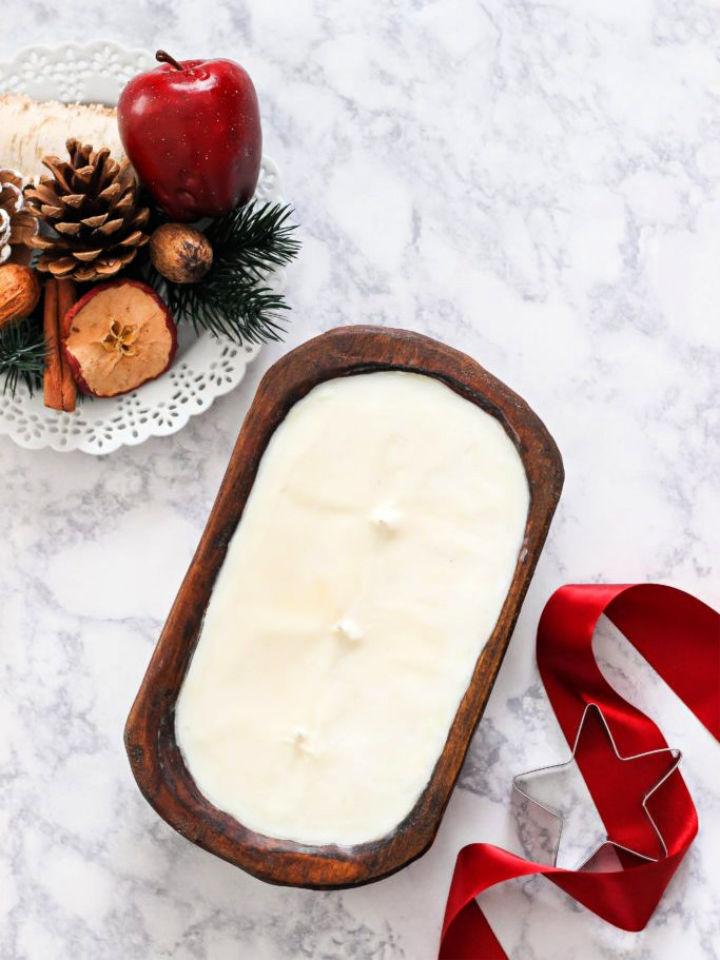
Making a candle in a dough bowl is a rewarding DIY project that brings a touch of warmth and personalization to your home or makes for a cherished handmade gift. Purely Katie‘s guide on crafting a soy candle in a vintage dough bowl is perfect for those who enjoy adding a personal flair to their space or gifting something unique.
This step-by-step tutorial outlines the necessary supplies, from wicks to natural soy wax, and walks you through the process of securing the wicks, melting and infusing wax with your chosen fragrance, and setting the candle to perfection. With helpful tips on candle care to ensure an even burn and prolonged life, you’ll find this project both enjoyable and practical. Remember to keep the wicks trimmed for the best burning experience.
7. Painted Mason Jar Candle Holders
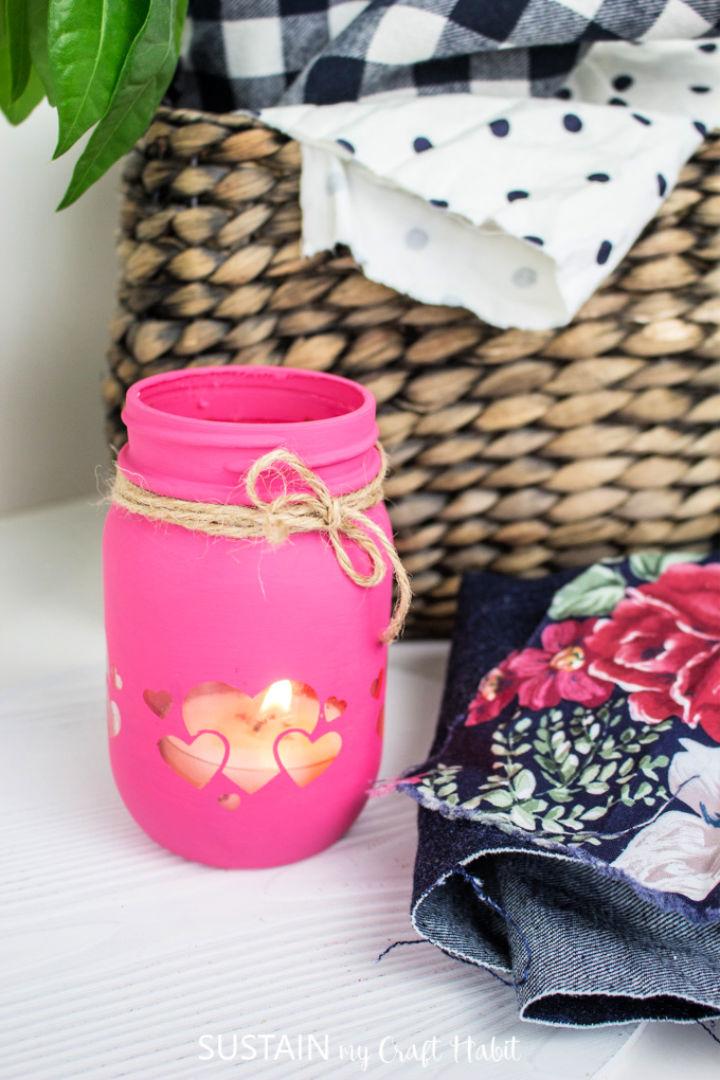
Make charming mason jar candle holders with a romantic twist using Cricut heart cut-outs, as detailed on Sustain My Craft Habit. These holders are perfect for adding a cozy ambiance to your space. The process involves applying vinyl heart silhouettes to the jars, painting them with lovely pink chalky paint, and then peeling off the vinyl to reveal a heart-shaped window.
This craft is a fun way to combine technology with traditional crafting techniques, resulting in a beautiful, handmade decoration. With clear instructions and a list of materials, you’ll enjoy making these unique candle holders that are sure to light up any room with a warm, inviting glow.
8. DIY Mason Jar Candle
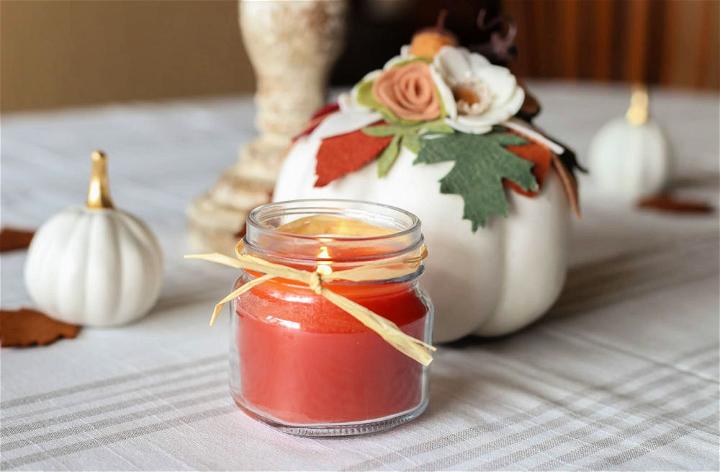
Making your own Mason Jar Candles is a rewarding and fun craft that’s perfect for adding a personal touch to your Thanksgiving table or any festive occasion. In this guide, we walk you through the steps to make these charming candles using simple materials like beeswax, soy wax, or paraffin.
You can customize them with crayons for color and essential oils for a natural fragrance. This activity is not only quick and easy but also allows you to experiment with various hues and scents. Gather your canning jars, wicks, and a few household tools, and let’s get started on this creative endeavor that’s sure to brighten any room. Treasure in an Earth Envessel
9. DIY Fall Candle With Simply Earth
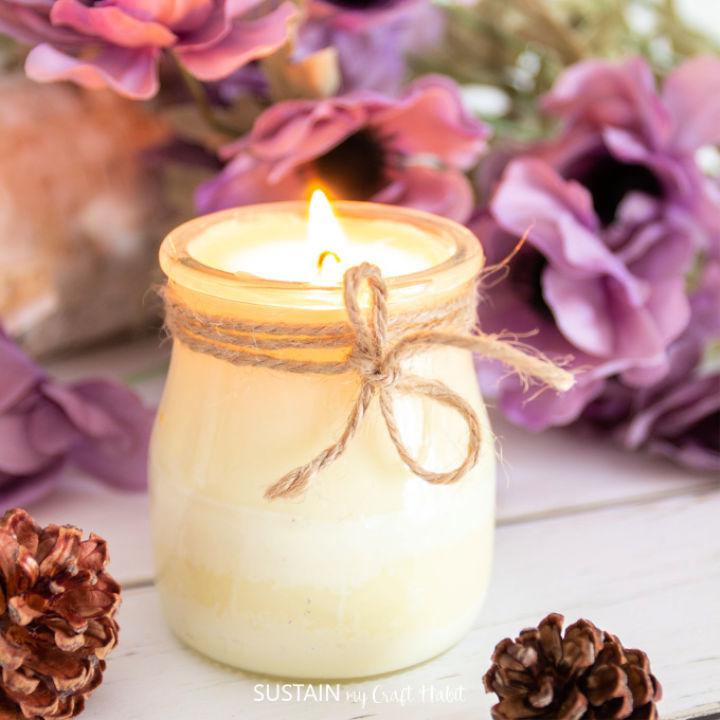
Make your own cozy ambiance with a homemade candle, infused with the warm scents of orange and cinnamon. Sustain My Craft Habit offers a straightforward guide on crafting DIY fall candles that can elevate your home’s atmosphere or serve as thoughtful gifts. With a few simple materials, including natural soy wax, beeswax, coconut oil, and essential oils, you can craft a delightful, aromatic candle.
The process is easy to follow: melt your ingredients, blend in the oils, set the wick, and pour. Once cooled, you’ll have a beautifully scented candle to enjoy on those crisp autumn evenings. Get started and fill your space with the inviting aromas of fall.
10. Easy 5-Minute Printed Candle Tutorial
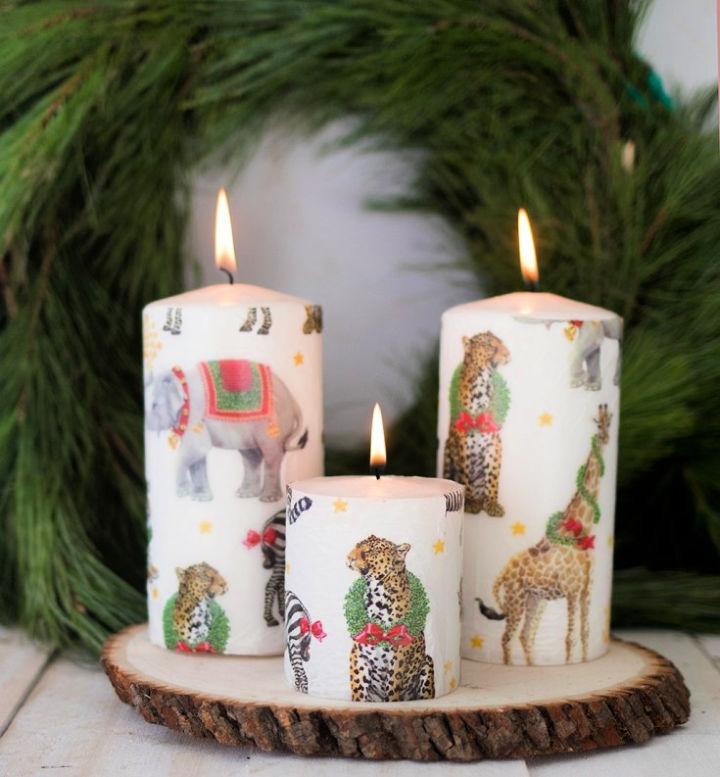
Make personalized holiday decor with ease using this quick and engaging 5-minute printed candle tutorial. Perfect for those pressed for time, this DIY project transforms ordinary pillar candles into stylish pieces with just a few supplies: tissue paper, a hairdryer, ruler, and scissors. Simply measure and cut the tissue paper, warm the candle’s surface to a tacky consistency, and gently press the paper onto the wax.
The result? A candle that appears professionally printed, ideal for adding a modern touch to your festive decorations. For more creative inspiration, explore additional Christmas DIY projects like yarn trees and wrapped ornaments. Enjoy crafting a warm, inviting atmosphere this holiday season! Gina Michele
11. Make Your Own Teacup Candle
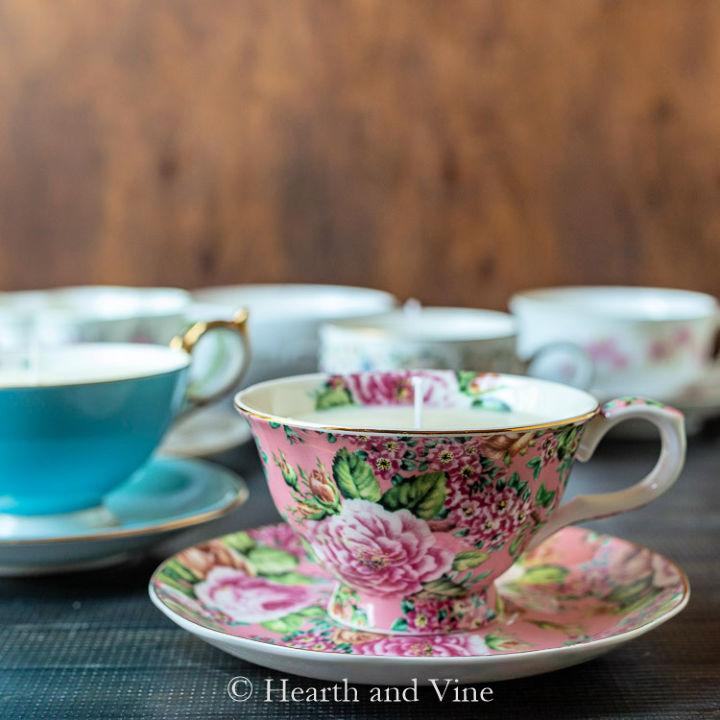
Looking to craft unique holiday gifts with a personal touch? Hearth and Vine provides an engaging guide on making DIY teacup candles that are perfect for gift-giving. This instructive piece takes you through the process of making scented candles using vintage teacups, soy wax, and fragrance oils.
It’s an affordable and straightforward craft that results in elegant and thoughtful presents. With clear steps and helpful tips, you’ll be able to produce beautiful candles that are sure to light up anyone’s holiday season. Get ready to impress your friends and family with handcrafted candles that carry the warmth of your heart.
12. How to Make a Wine Bottle Candle
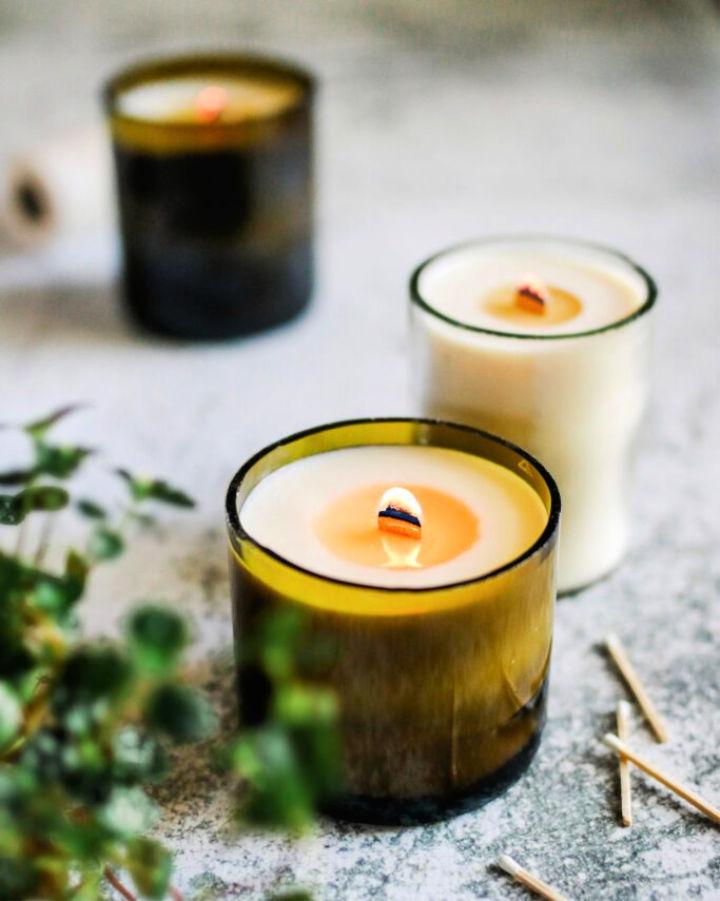
Transform old wine bottles into charming, handmade candles with this engaging DIY guide from Hello Nest. Our step-by-step instructions make it easy to make unique and eco-friendly gifts just in time for the holidays. With a list of simple supplies like soy wax, candle wicks, and essential oils, you’ll learn how to cut bottles safely and efficiently.
Master the art of alternating hot and cold water to achieve a clean break and smooth edges. Then, pour your scented wax into your new glass containers for a personal touch. Ready to light up your home with upcycled elegance? Let’s get crafting!
13. DIY Candle With Cinnamon Pumpkin
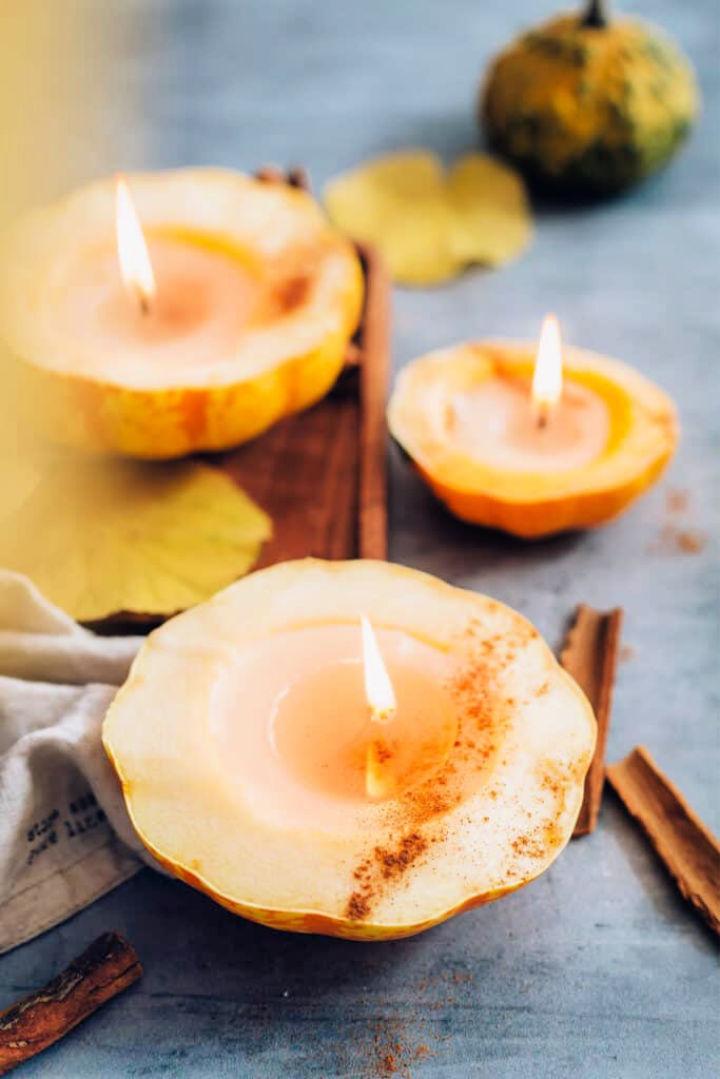
Get ready to infuse your home with the cozy aroma of autumn by making your own cinnamon pumpkin candles. Hello Glow provides a step-by-step guide that is perfect for crafters looking to add a touch of seasonal warmth to their space. With a few simple supplies like pie pumpkins, soy wax flakes, wicks, and cinnamon sticks, you can transform these adorable gourds into charming candles that make any room feel inviting. This DIY project is not only enjoyable but also allows you to personalize your candles with optional scents and colors. So, roll up your sleeves and prepare to make your living area smell like a crisp fall day.
14. Making a Gilded Seashell Candle
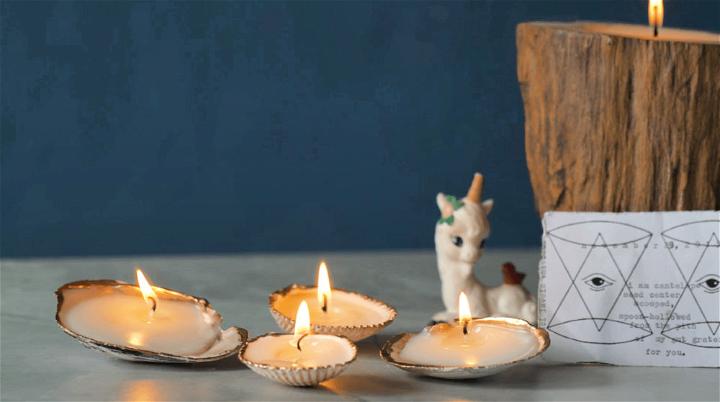
Craft stunning DIY Gilded Seashell Candles with a touch of elegance using this simple guide from Pop Shop America. Perfect for adding a nautical flair to your decor, these candles are enhanced with a shimmer of gold and can be scented with your favorite essential oils for a personalized touch. Gather large seashells, soy wax, cotton wicks, and liquid gilding to make these beautiful pieces.
With easy-to-follow steps, you’ll melt the wax, secure the wick, and add a luxurious golden edge to your seashells. These candles not only make charming gifts but also serve as a unique addition to any room. Get ready to elevate your crafting skills and infuse your space with the serene ambiance of gilded seashell candles.
15. Mini Concrete Pumpkin Votive
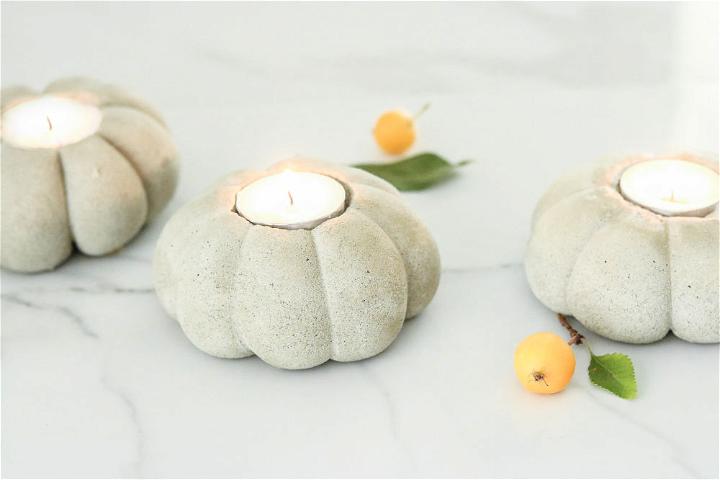
Crafting your own concrete pumpkin candles is a charming way to bring a touch of industrial fall decor to your home. Lily Ardor guides you through an engaging DIY project to make mini concrete pumpkin votives, perfect for indoor settings. With a straightforward process that takes about 30-35 minutes per pumpkin, including drying time, you can design these adorable decorations with ease.
You’ll need readily available supplies like concrete, pantyhose, and candles, and the cost is quite reasonable at around $16. This DIY offers practical tips to ensure your pumpkin candles turn out beautifully, such as achieving the right concrete consistency and carefully timing the removal of tights and rubber bands. Embrace your crafting spirit and add a unique, cozy ambiance to your space with these mini pumpkin candles.
16. DIY Sand Art Candle
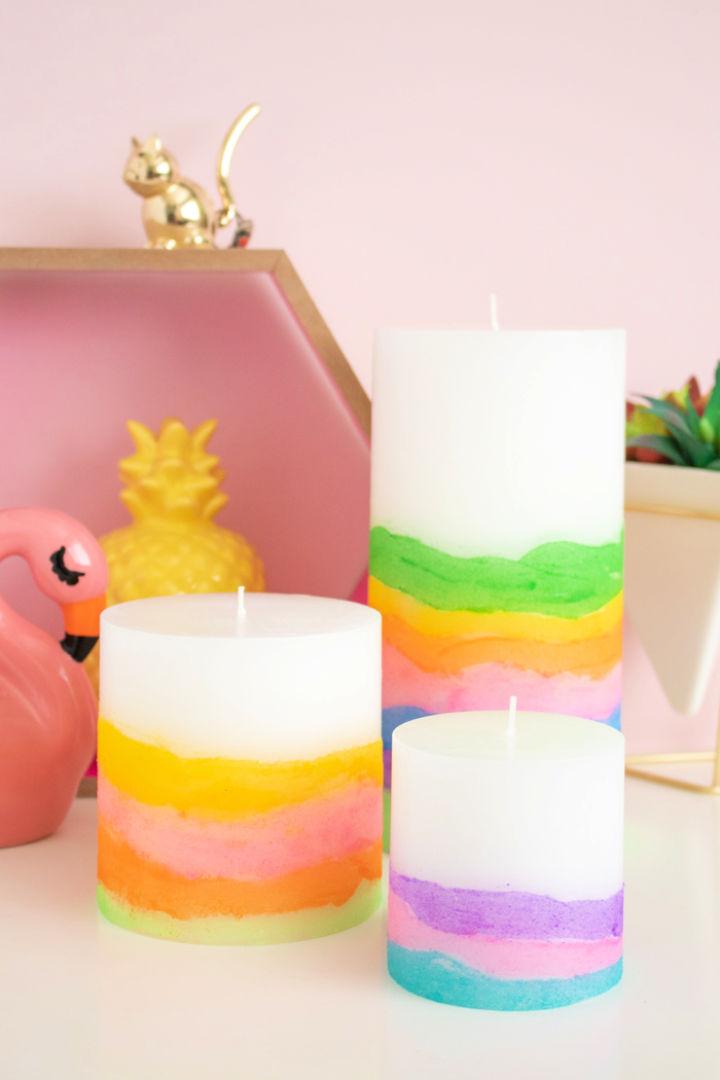
Revive the nostalgic charm of the 90s with a creative twist by making your own sand art candles! Club Crafted guides you through a simple, engaging process to transform plain white pillar candles into vibrant, textured decor. With a sand art kit, some Mod Podge, and a bit of imagination, you can easily craft unique candles that not only brighten up your space but also serve as thoughtful gifts.
Just apply colorful sand in layers for a custom look, seal it, and your sand art candles are ready to light up or embellish any room. Perfect for adding a splash of color and nostalgia to your home, these DIY candles merge fun crafting with practical beauty.
17. DIY Candle From Repurposed Candy Dishes
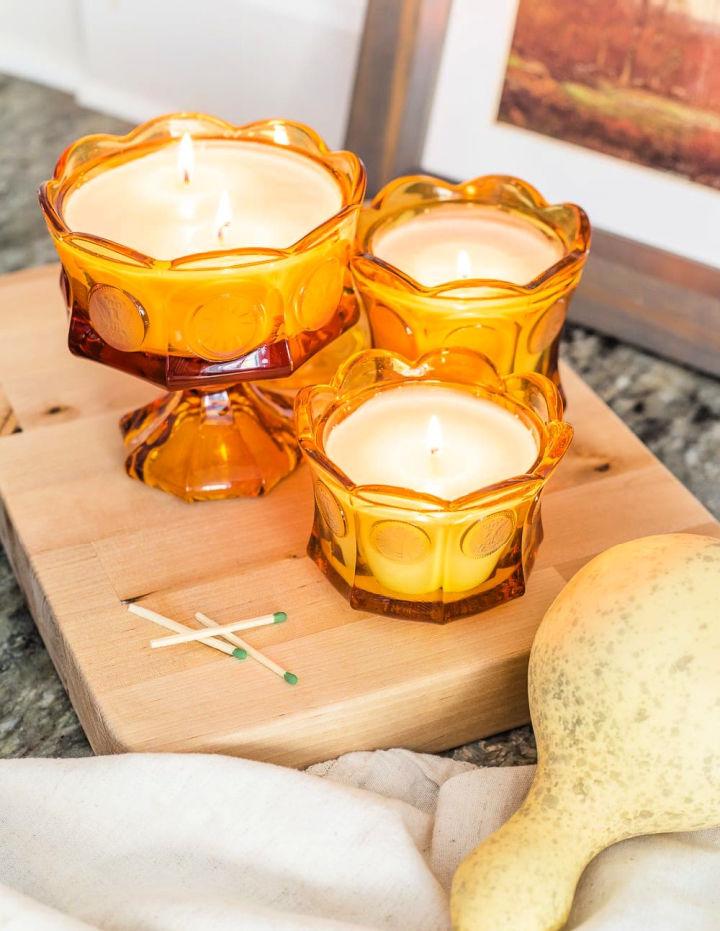
Ready to make unique, homemade candles with a touch of vintage charm? Bless’er House offers a straightforward guide to crafting soy wax candles using repurposed candy dishes, teacups, and more. This engaging tutorial is perfect for those eager to upcycle secondhand finds into cozy, fragrant home accents.
With clear instructions, you’ll learn to melt soy wax, secure wicks, and add your favorite scents. Whether you’re sprucing up your decor or seeking thoughtful gifts, this DIY candle-making guide is your go-to for a fun and fulfilling project.
18. Mason Jar Citronella Lavender Candle
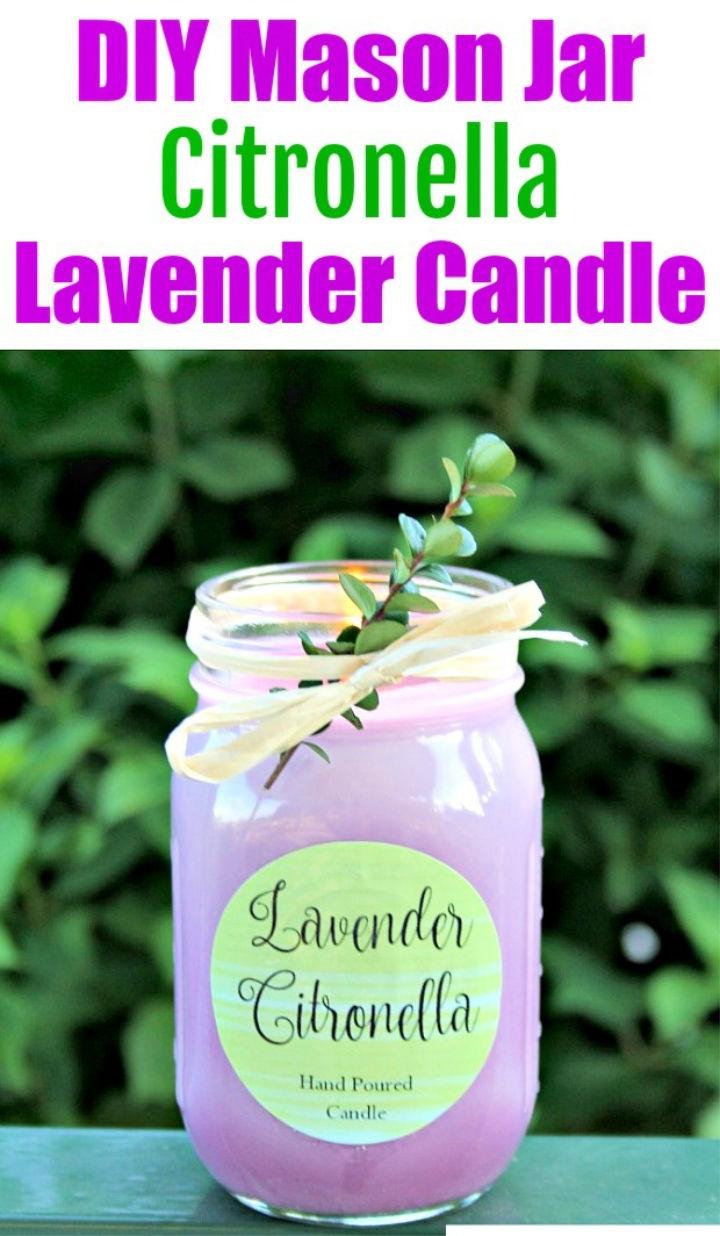
Enjoy the great outdoors without pesky bugs interrupting your relaxation with a DIY Mason Jar Citronella Lavender Candle. A Cultivated Nest Team shares a straightforward guide to making your own aromatic, bug-repelling candles using natural essential oils and soy or beeswax.
This homemade solution offers a safer, chemical-free alternative to store-bought candles and adds a touch of charm to your outdoor decor. Get ready to craft a pleasant, effective barrier against mosquitoes, and turn your focus back to the joys of summer evenings spent outside.
19. DIY Terracotta Citronella Candle
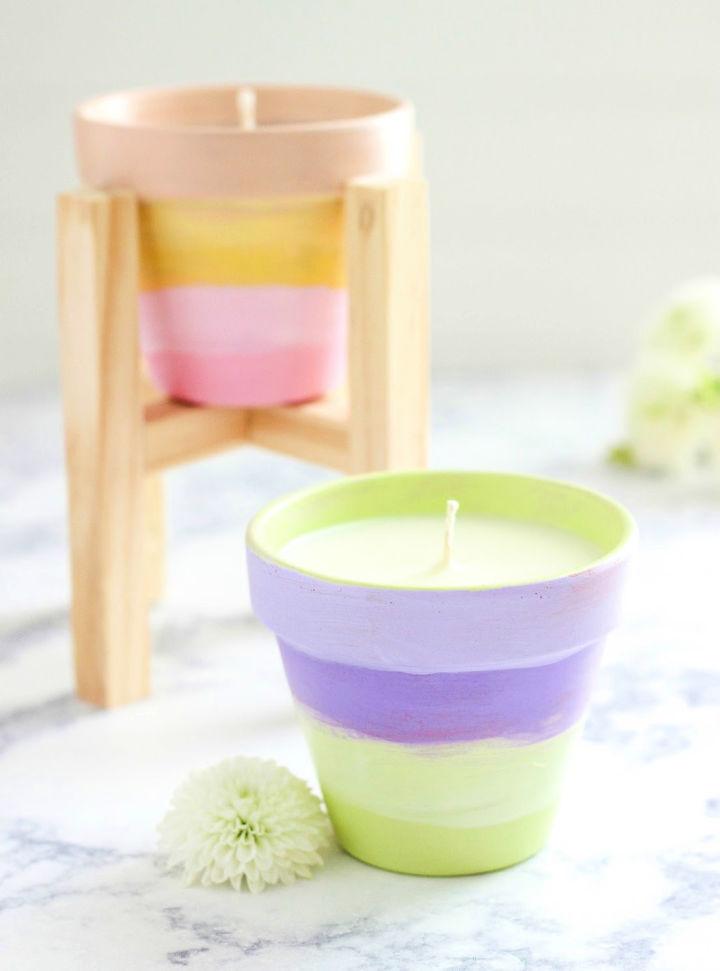
Make charming DIY Terracotta Citronella Candles with this easy-to-follow guide from Purely Katie. Perfect for adding ambiance to your summer gatherings while keeping bugs at bay, these homemade candles blend functionality with a trendy watercolor look. You’ll need small terracotta pots, outdoor-safe paint, soy wax flakes, citronella essential oil, and a few other basic supplies.
Begin by painting your pots in vibrant hues for a stunning ombre effect. Then, safely secure the wicks with hot glue, melt the wax, and mix in the citronella and other essential oils for a pleasant aroma. Pour the wax into the pots and let it set. In no time, you’ll have a set of lovely citronella candles ready to enhance your outdoor experience.
20. DIY Wine Bottle Citronella Candle
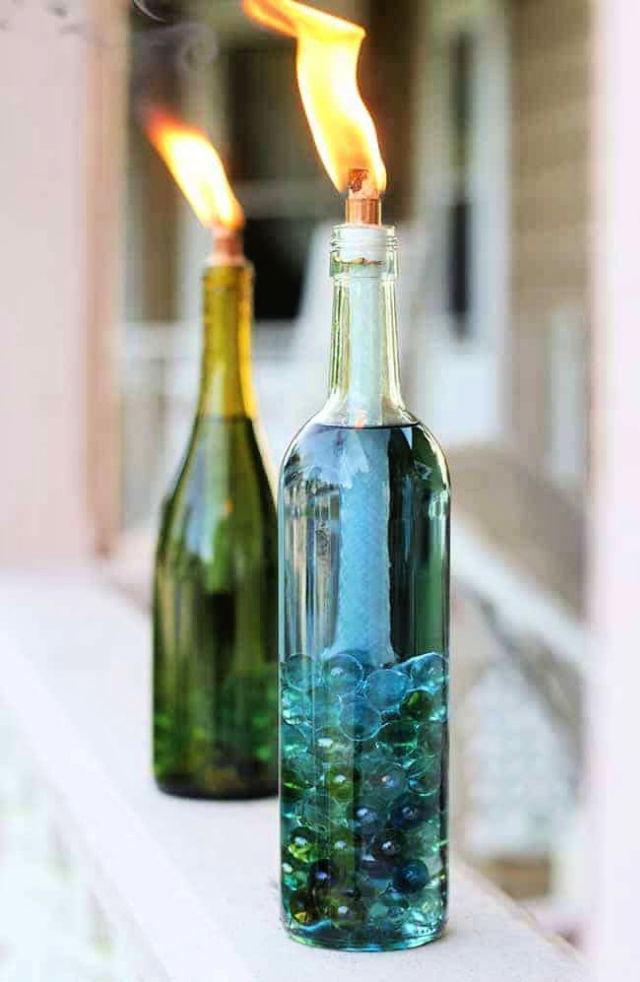
Transform your outdoor evenings with Hello Glow‘s DIY Wine Bottle Citronella Candles. This engaging and helpful guide provides step-by-step instructions to make your own mosquito-repelling candles using recycled wine bottles. Add a touch of elegance to your patio or garden while keeping those pesky insects at bay.
With simple supplies like glass bottles, copper couplings, and citronella torch fuel, you can craft beautiful, functional candles that enhance your summer nights. Perfect for those who enjoy a bit of DIY, these candles are easy to make, refillable, and offer a stylish alternative to traditional tiki torches. Get ready to enjoy serene, mosquito-free moments under the stars with this creative and practical project.
21. Halloween Wine Glass Candles
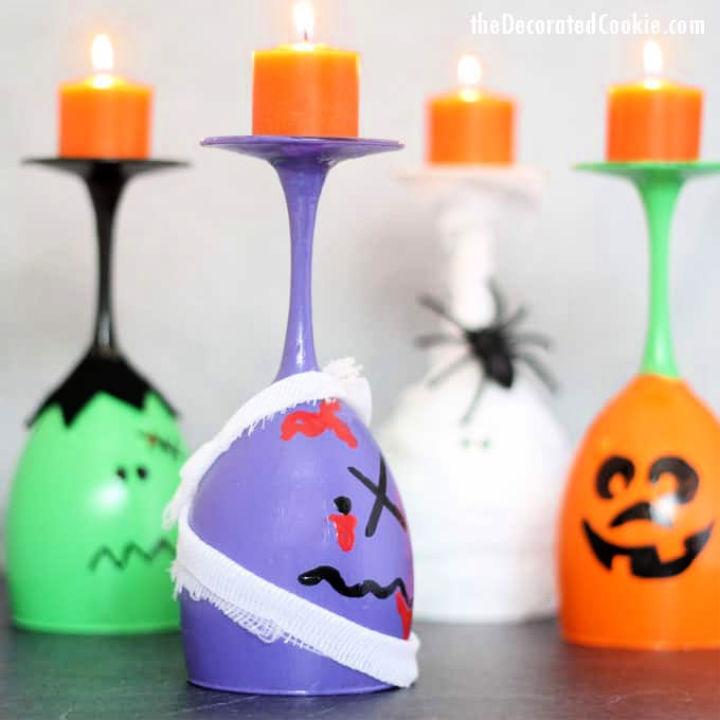
Get ready to add a touch of spooky charm to your Halloween decor with these DIY Halloween wine glass candles. The Decorated Cookie provides a creative and simple guide to transform ordinary wine glasses into festive decorations that will be the centerpiece of any Halloween party. Start by cleaning the glasses with rubbing alcohol, then paint them with vibrant acrylic enamel craft paint.
Designs range from classic Jack O’Lanterns to creepy mummies, each requiring just a few craft supplies like gauze, black felt, and a hot glue gun. Once painted and decorated, flip the glasses upside down, place an orange votive candle on top, and watch your creation come to life. This craft is not only fun to make but also serves as a fantastic conversation starter at your spooky gathering.
22. How to Make a Color-Blocked Candle Holder
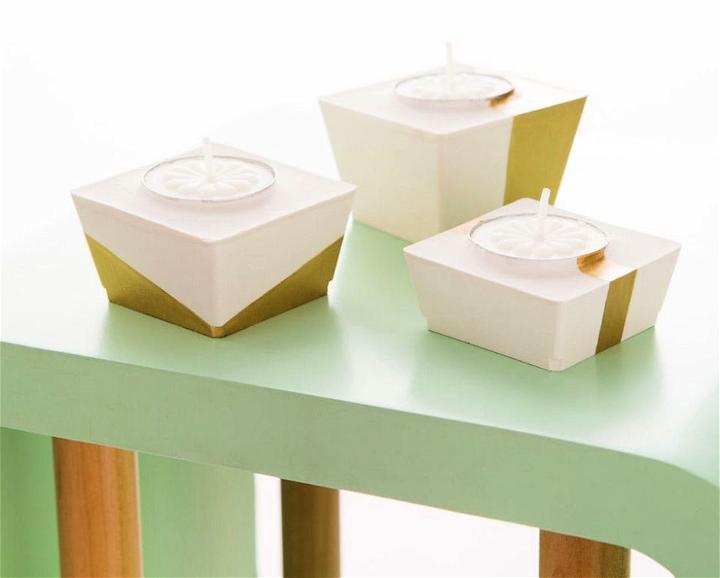
Transform your space with a touch of modern elegance by crafting your own color blocked candle holders, as guided by Lee Schellenberger on Brit + Co. This DIY project is a perfect blend of simplicity and style, suitable for crafters who enjoy working with their hands to make beautiful, functional decor.
With just a few materials like dry plaster, plastic molds, tea light candles, and acrylic paint, you can design custom candle holders that add a sophisticated flair to any room. The step-by-step instructions are clear and easy to follow, making it an enjoyable experience for anyone looking to add a personal touch to their home.
23. DIY Lavender Candle in Mason Jar
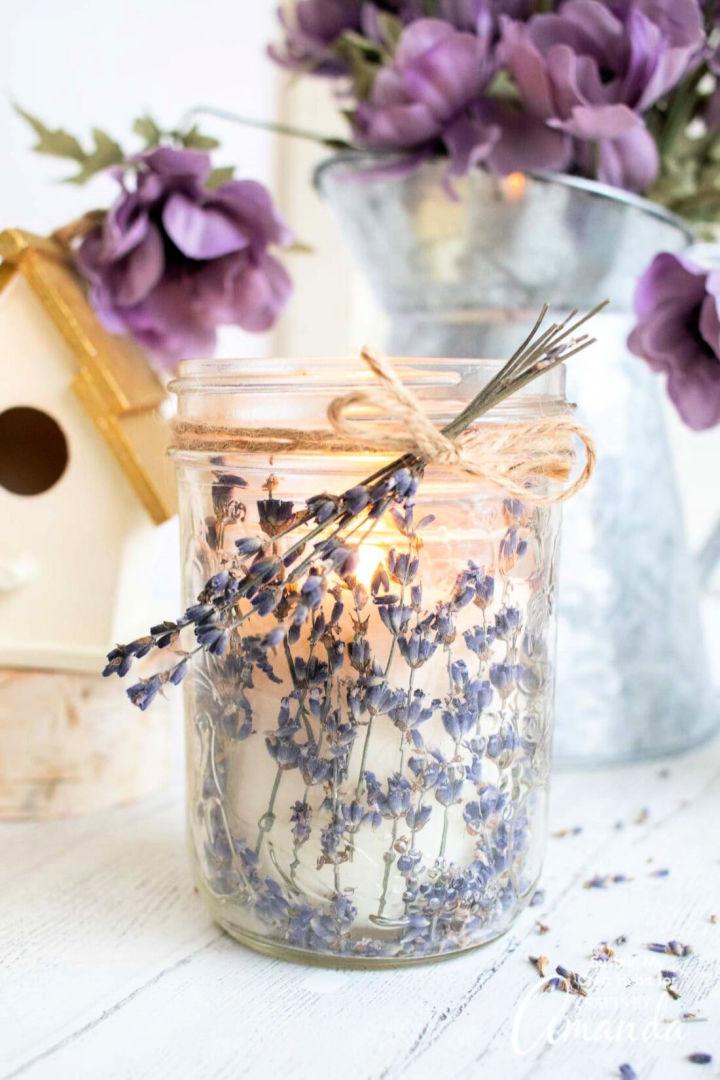
Making DIY Lavender Candles is a relaxing and enjoyable project that can add a touch of homemade charm to your home or serve as a heartfelt gift. Crafts by Amanda guides you through crafting these aromatic candles with clear, step-by-step instructions. You’ll need mason jars, dried lavender stems, wax, a wick, and essential oils. Melt the wax using a double boiler, secure the wick in place, and infuse the wax with lavender oil for a soothing scent.
Once poured and set, decorate with lavender stems for a beautiful finish. With a focus on safety, the tutorial advises against placing dried lavender inside the candle to prevent fire hazards. Enjoy crafting and the serene ambiance these lavender candles bring.
24. Make Your Own Citrus Candle
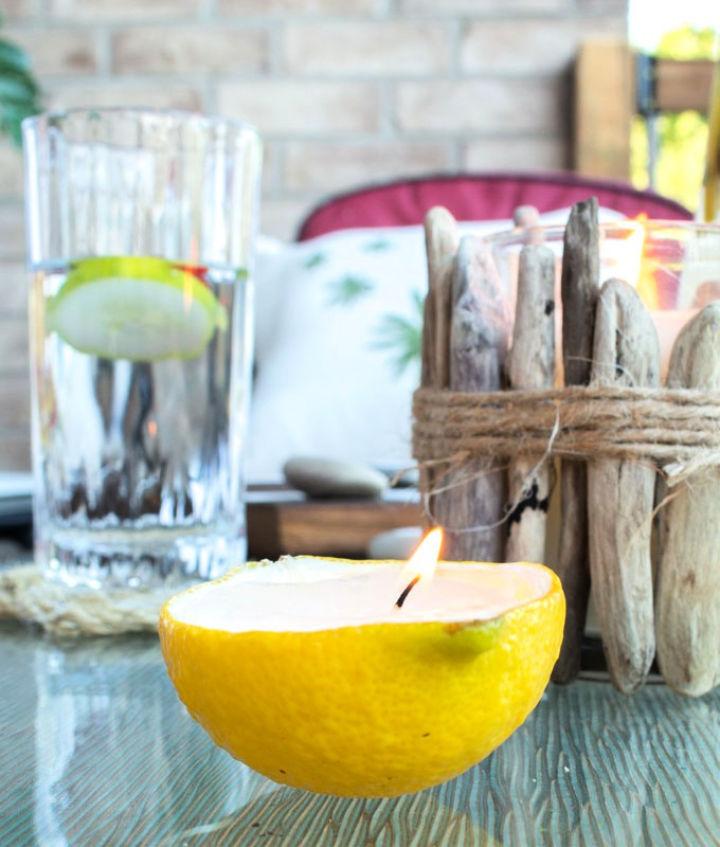
Transform your leftover citrus rinds into charming homemade candles with this creative DIY guide from Sustain My Craft Habit. Simple and delightful, this project requires just a few supplies: paraffin votive candles, a lemon, a lime, and common kitchen tools. Start by slicing the fruits and hollowing them out to form natural bowls. Melt the wax, position the wick, and pour to set your candle.
For an added touch, infuse the wax with essential oils like grapefruit or lemon for a refreshing aroma. Ideal for summer gatherings, these citrus candles will brighten your space with a slice of sunshine. Keep them cool between uses by storing them in the fridge. Enjoy crafting these eco-friendly decorations that are sure to spark conversations at your next outdoor event.
25. How to Make an Upcycled Candle
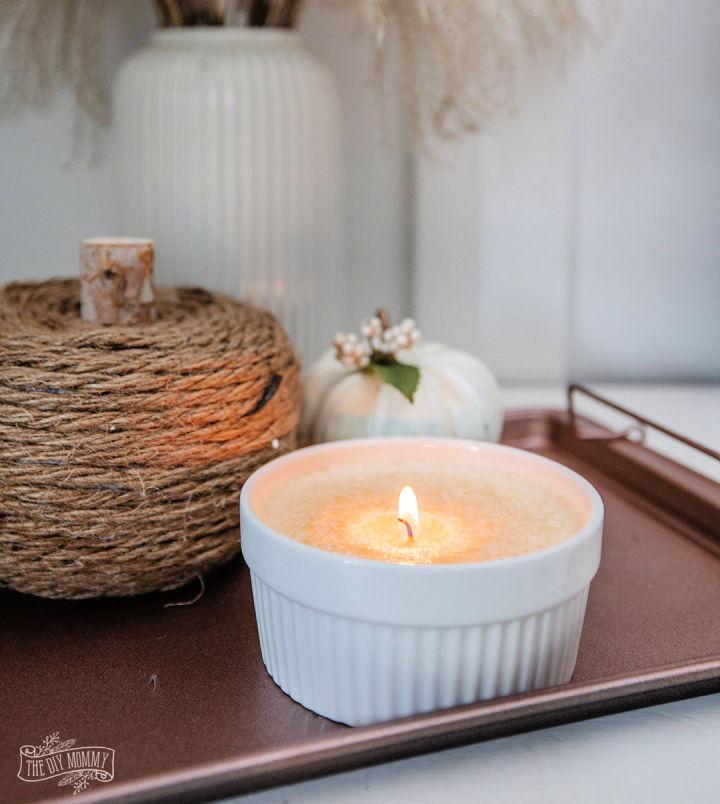
Transform an unused candle into a charming DIY upcycled candle using a simple dollar store ramekin. The DIY Mommy guides you through an eco-friendly craft that not only breathes new life into old items but also enhances your home decor. With clear, step-by-step instructions, this project is perfect for anyone looking to add a personal touch to their space or make a thoughtful, handmade gift. Gather your materials, and let’s get crafting with this engaging and practical tutorial that promises a delightful outcome.
Conclusion:
In conclusion, learning how to make candles with our easy DIY guide is an excellent way for crafters to personalize their living spaces with a handmade ambiance. By selecting the right materials, mastering the candle-making process, and experimenting with scents and colors, you can create beautiful, eco-friendly candles that serve as perfect gifts or home decor. With 25 easy DIY candles tailored for those starting out, there’s no better time to ignite your passion for this timeless craft. So grab your supplies, and let the joy of candle making illuminate your creative spirit!
