Chalk paint offers a unique opportunity for DIY enthusiasts to transform old dressers into beautiful pieces of furniture. It’s not just about the paint; it’s about bringing a new life to an old friend. Chalk paint dressers not only provide a fresh look but also add a personalized touch to your space. Learn how to chalk paint a dresser with 15 easy DIY chalk paint dresser ideas, including various colors and techniques that suit your taste. From choosing your paint to applying the final touches, every step is a chance to let your creativity shine.
Getting started with a chalk paint dresser makeover might seem daunting, but it’s easier. This guide will walk you through each step, from preparing your dresser to adding those finishing touches that make all the difference. Whether you want a modern look or prefer a distressed finish, there’s a technique for you. So, let’s dive into the world of DIY chalk paint dresser ideas and see what incredible transformations you can achieve with a little bit of paint and a lot of imagination.
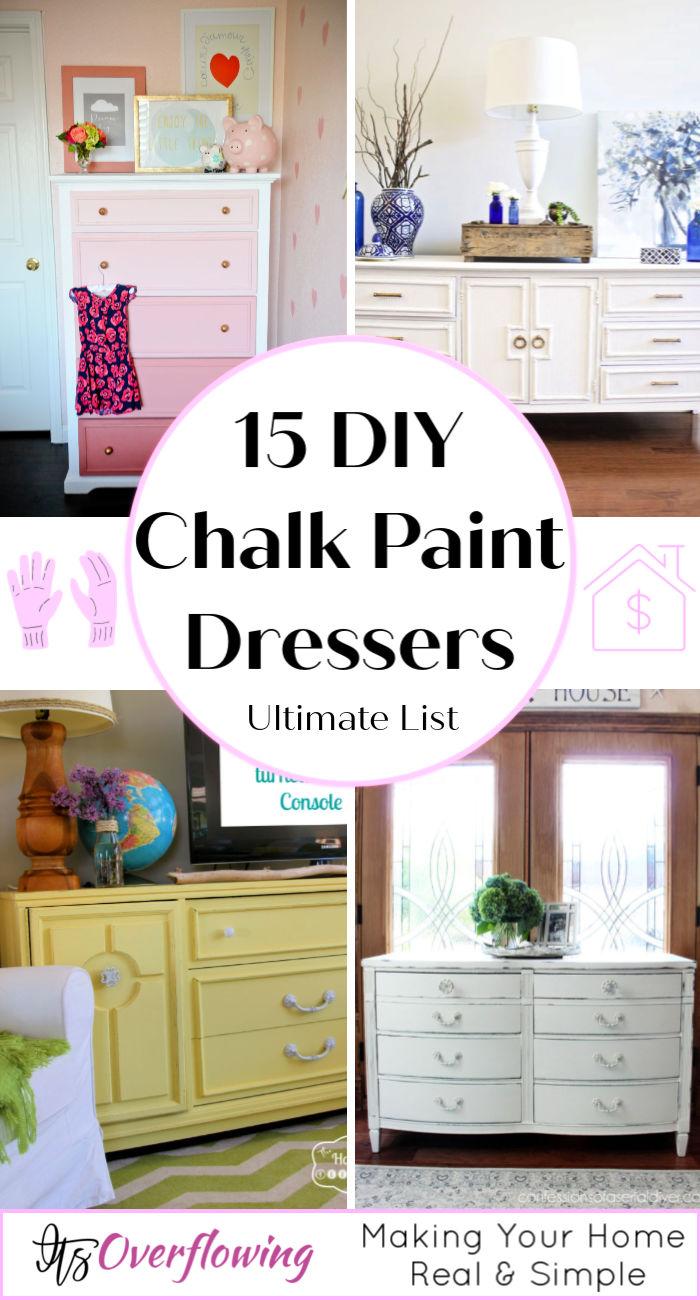
Why Choose Chalk Paint for Your Dresser Makeover
Chalk paint has become a go-to choice for DIY enthusiasts looking to breathe new life into their furniture, and with good reason. Here’s why you might consider it for your dresser makeover:
- Ease of Use: Chalk paint is renowned for its forgiving nature, especially for beginners. You don’t need to be a pro to get a smooth, even coat.
- No Prep Work: Skip the sanding and priming! Chalk paint adheres well to most surfaces, which means less prep time and more painting fun.
- Quick Drying Time: Compared to other paints, chalk paint dries faster, allowing you to complete your project in a shorter timeframe.
- Versatile Finishes: Whether you’re aiming for a sleek modern look, a distressed vintage vibe, or something in between, chalk paint is incredibly versatile and can be used to make a wide range of finishes.
- Custom Colors: Mix and match to make custom colors that fit your unique style and home décor.
- Eco-Friendly Options: With an increasing number of non-toxic and environmentally friendly chalk paints available, you can work on your project with the reassurance that you’re being kind to the planet.
So, whether you’re revamping a thrift store find or updating a piece you’ve had for years, chalk paint offers a practical and stylish solution for transforming your dresser.
How to Chalk Paint a Dresser: A Step-by-Step Guide
Transforming an old dresser with chalk paint is a fantastic way to give it a new lease of life. Chalk paint is loved for its ability to adhere to most surfaces without the need for sanding or priming, making it ideal for a quick and effective furniture makeover. Follow this simple, step-by-step guide to chalk paint your dresser, turning it from drab to fab with minimal effort.
Choosing Your Chalk Paint
- Select a Color: Decide on the color that best matches your decor. Chalk paint comes in a variety of shades, so you’re bound to find one that fits your style.
- DIY or Buy: You can either purchase chalk paint from a store or make your own using a simple recipe of calcium carbonate, water, and latex paint.
Preparing Your Dresser
- Clean Thoroughly: Ensure the dresser is clean and free from dust and grime. A well-cleaned surface helps the paint adhere better.
- Remove Hardware: Take off any knobs, handles, or pulls. It’s easier to paint a dresser without these in the way.
Painting Your Dresser
- Apply Primer (Optional): Though chalk paint typically doesn’t require a primer, applying one can ensure an even more durable finish.
- First Coat: Using a brush or roller, apply your first coat of chalk paint. Don’t worry about brush marks; chalk paint is forgiving and dries with a smooth finish.
- Let It Dry: Chalk paint dries relatively quickly, but it’s important to wait until it’s completely dry before adding another coat.
- Second Coat: If necessary, apply a second coat for full coverage, ensuring you cover any missed spots or uneven areas.
- Distressing (Optional): For a shabby chic look, use sandpaper to gently distress edges and details after the paint is fully dry.
Finishing Touches
- Wax or Sealant: Apply a wax or sealant to protect the paint and give it a beautiful finish. Clear wax will keep the color intact, while dark wax can be used to age the piece and highlight details.
- Replace Hardware: Consider updating the hardware to complement your new-look dresser. This can significantly impact the overall style of the piece.
Maintenance and Care
- Regular Dusting: Keep your chalk-painted dresser looking great with regular dusting using a soft cloth.
- Reapply Wax: Depending on usage, you may need to reapply wax every few months to maintain the protective finish.
Chalk painting a dresser is an easy, rewarding DIY project that can rejuvenate a tired piece of furniture. By following these straightforward steps, you’ll be able to make a beautiful, personalized piece that adds character and charm to your home.
FAQS: DIY Chalk Paint Dresser Ideas
Discover creative and budget-friendly dresser ideas using DIY chalk paint. Get inspired to transform your furniture with these FAQs.
What is Chalk Paint?
Chalk paint is a type of paint known for its matte, chalky appearance. It’s favored for furniture projects because it requires minimal prep work, adheres well to surfaces, and can be easily distressed for a vintage look.
Why Use Chalk Paint on a Dresser?
- No Prep Work: Chalk paint typically doesn’t require sanding or priming, making it easy to apply.
- Quick Drying Time: It dries faster than many other types of paint, allowing you to complete projects quickly.
- Versatile Finishes: You can achieve various looks, from sleek and modern to distressed and vintage.
- Customizable Colors: Mixing paints allows you to make custom colors to match your decor.
Can I Make My Own Chalk Paint?
Yes, you can make your own chalk paint using a simple recipe: mix calcium carbonate, water, and latex paint. This DIY approach is cost-efficient and allows for color customization.
How Do I Prepare My Dresser for Chalk Painting?
- Clean the dresser thoroughly to remove dust and grime.
- Remove any hardware like knobs or handles.
- Optionally, lightly sand the surface if it’s very glossy.
How to Apply Chalk Paint on a Dresser?
- First Coat: Apply a thin coat of chalk paint using a brush or roller. Don’t worry about brush marks; chalk paint levels out as it dries.
- Dry Time: Wait until the first coat is completely dry before applying another.
- Second Coat: If needed, apply a second coat for full coverage.
How Do I Achieve a Distressed Look?
After the paint has dried, use sandpaper to gently rub edges and corners where natural wear would occur. This process reveals the original surface, making a distressed vintage effect.
What Finish Should I Use on My Chalk-Painted Dresser?
Applying a wax or sealant is crucial for protecting the paint and achieving your desired sheen. Clear wax preserves the color, while dark wax can be used to antique the piece and highlight details.
How Do I Maintain My Chalk Painted Dresser?
- Dusting: Regularly dust the dresser with a soft cloth.
- Wax Application: Reapply wax every few months to maintain the protective finish and keep the dresser looking fresh.
Can I Chalk Paint a Dresser Without Removing the Old Paint?
Yes, one of the benefits of chalk paint is its ability to adhere to most surfaces without removing old paint. However, ensure the surface is clean and smooth before starting your project for the best results.
By following these guidelines, you can transform an old, dull dresser into a stunning piece of furniture that adds character and style to your home. Whether you’re new to DIY projects or an experienced crafter, chalk painting offers a rewarding way to rejuvenate furniture.
15 DIY Chalk Paint Dresser Ideas
Discover 15 creative DIY chalk paint dresser ideas to transform your furniture into a masterpiece. Quick, easy, and stylish projects for any skill level.
1. DIY Chalk Paint Thrift Store Dresser
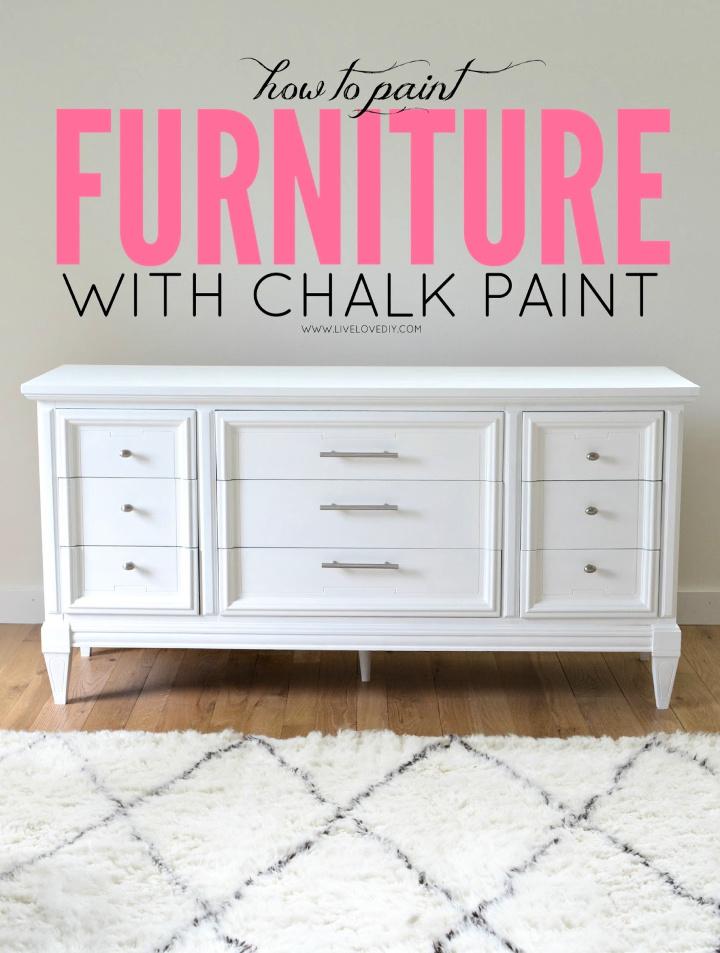
Struggling with a DIY furniture painting project? Learn how to transform your piece with chalk paint, a forgiving and versatile medium perfect for reviving old furniture. Our step-by-step guide walks you through the process, from stripping old finishes to applying the final touches, ensuring a smooth and durable result.
Discover tips on choosing the right color, avoiding common pitfalls, and selecting the perfect hardware to complement your refreshed item. Embrace the satisfaction of a successful DIY endeavor and give your furniture a new lease on life with the charm and character of chalk paint. Live Love Diy
2. How to Paint Dresser Using Chalk Paint
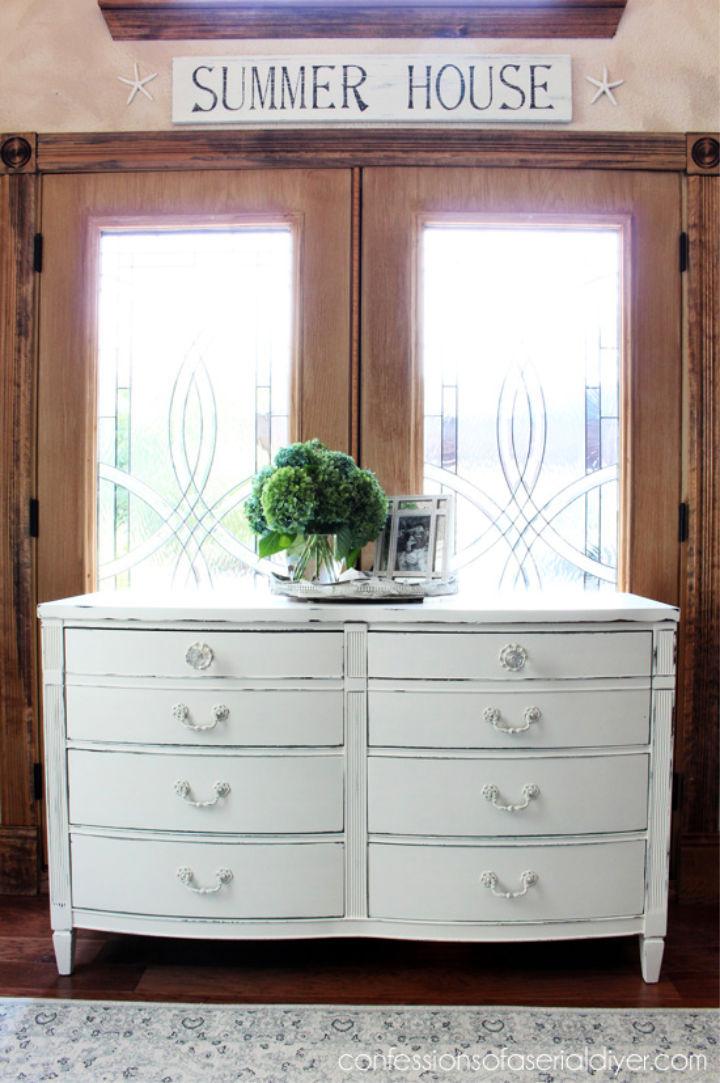
Transform your furniture with ease using chalk paint for a fresh, updated look. Confessions of a Serial Do-it-Yourselfer provides a comprehensive guide that walks you through the process step by step. Learn how to select the right paint, prep your piece, and apply the perfect finish. With tips on choosing quality brushes, cleaning, and even lining drawers, you’ll have all the know-how to give your furniture a professional touch. Get ready to make a charming and stylish piece that will elevate any room in your home.
3. Make a Chalk Paint Distressed Dresser
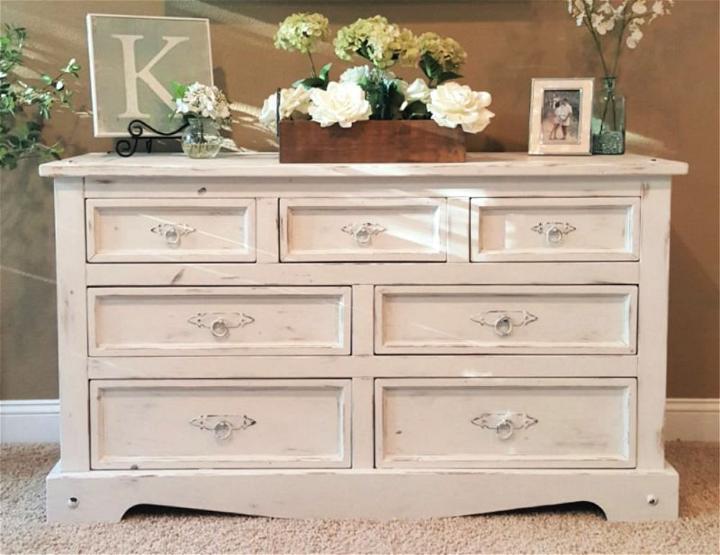
Transform tired furniture into trendy treasures with The Design Twins‘ comprehensive chalk painting tutorial. Ideal for DIY enthusiasts, this guide simplifies the chalk painting process, from preparation to the final waxing touches. It provides practical tips and a curated list of tools to ensure a smooth and enjoyable painting experience. Emphasizing the no-rules and creative freedom of chalk painting, the tutorial encourages personal expression and experimentation. Dive into the world of furniture makeovers with confidence thanks to this instructive and engaging resource.
4. Easy DIY Pink Chalk Paint Dresser
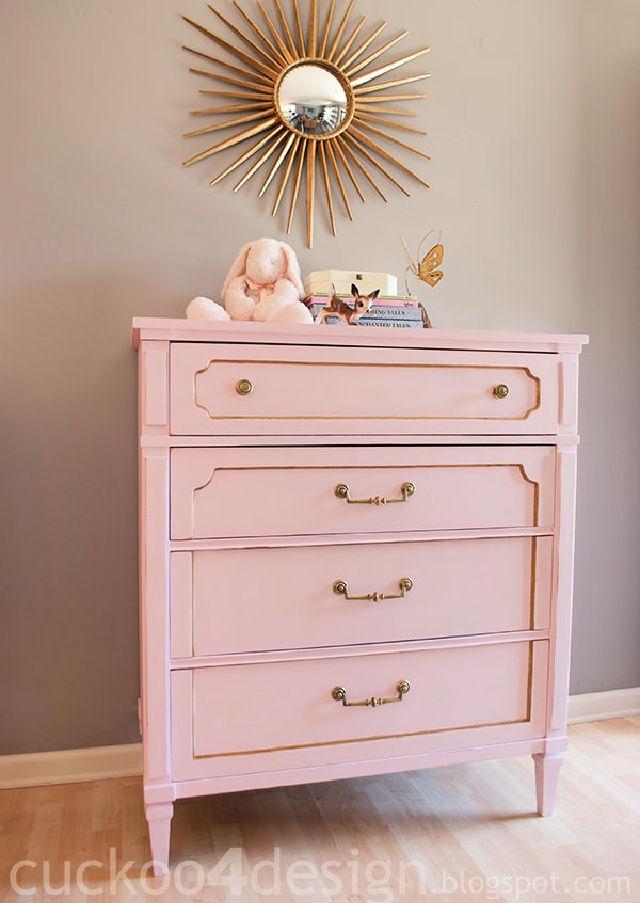
Transform your old dresser into a charming piece with a touch of vintage elegance using pink chalk paint. At Cuckoo4Design, Julia shares her personal experience with DIY chalk paint, offering a nontoxic option ideal for nurseries or young children’s rooms.
Learn how to select the perfect shade of pink, like the lovely ‘Hopeful’ by Behr, and get hands-on with a detailed, easy-to-follow recipe. Discover essential tips for prepping and painting your dresser, from cleaning and sanding to applying wax for a polished finish. With Julia’s guidance, you can make a unique and stylish pink chalk paint dresser that never goes out of fashion.
5. Chalk Paint Dresser Makeover Ideas
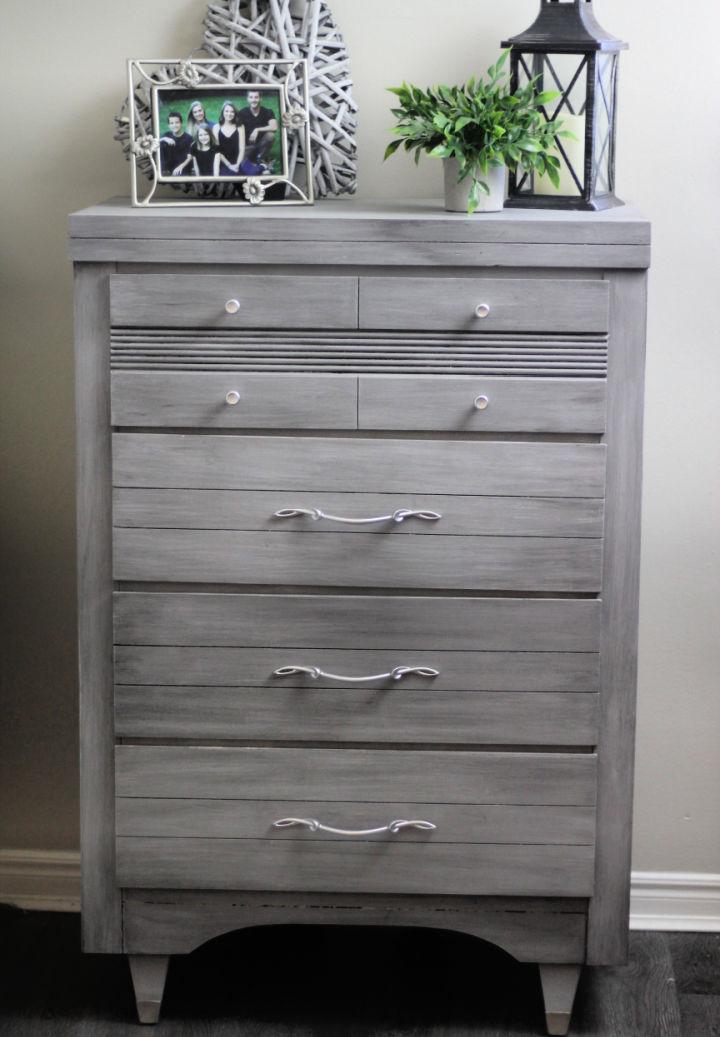
Transform your old dresser with a DIY chalk paint makeover, courtesy of Carrie at Nifty Thrifty DIYer. This budget-friendly project breathes new life into pre-loved furniture, making a stylish piece for any home. Learn how to mix your own chalk paint and apply techniques like whitewashing and waxing for added depth.
With clear instructions and helpful tips, you’ll achieve a professional-looking finish that will make your dresser the highlight of any room. Dive into this engaging and instructive guide to give your furniture a fresh, modern look.
6. How to Make a Chalk Paint Dresser
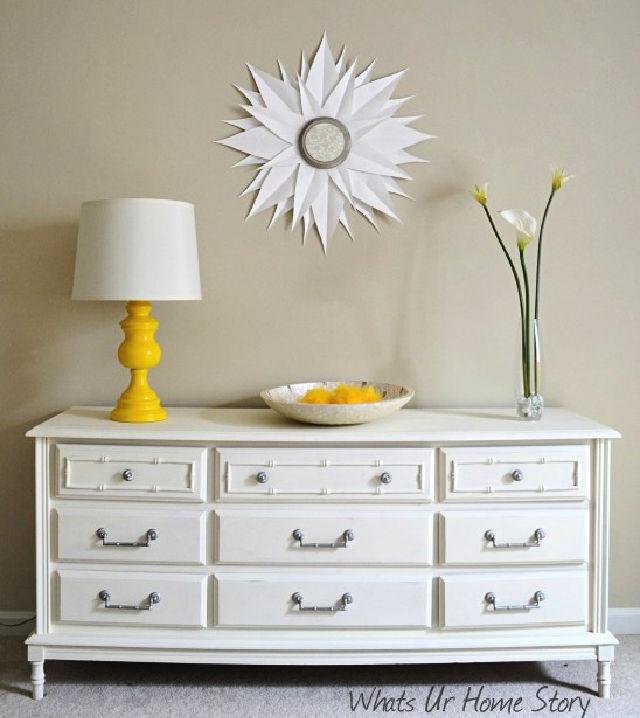
Transform your tired dresser into a stunning piece of bedroom decor with a chalk paint makeover! Whats Ur Home Story offers an easy-to-follow tutorial that breathes new life into old furniture. Discover how to prep and repair nicks and scratches, and learn the trick of numbering drawers for hassle-free reassembly.
The guide also provides tips on achieving a smooth paint application by adding water to chalk paint, ensuring a flawless finish. With helpful advice on choosing the right paint and updating hardware, you’ll be equipped to tackle your own dresser transformation project with confidence.
7. Making a Chalk Paint Dresser
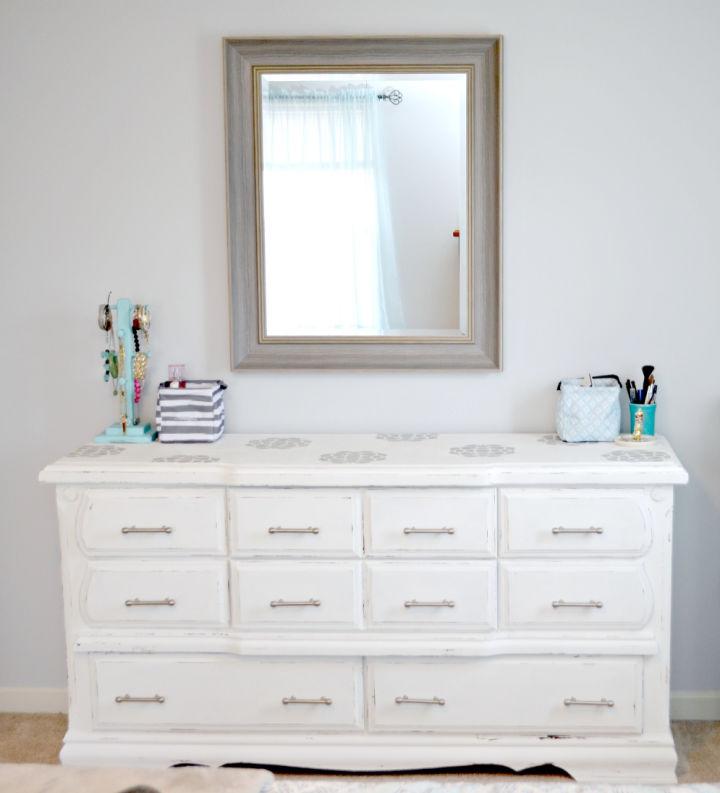
Transform your master bedroom with a DIY dresser makeover guided by Amy Latta Creations. In this comprehensive tutorial, Amy shares her journey of refreshing an outdated dresser using chalk paint for a modern and airy aesthetic. Ideal for anyone keen to revitalize their furniture, this step-by-step guide covers everything from selecting the right paint and tools to applying a beautiful stencil design.
Amy’s instructions are clear and engaging, making it easy to achieve a professional-looking finish. Discover how simple changes, such as updating the hardware and choosing the perfect mirror, can significantly enhance the overall look and feel of your room. Dive into Amy’s process and be inspired to make a brighter, more inviting space in your own home.
8. How to Paint Dresser With Chalk
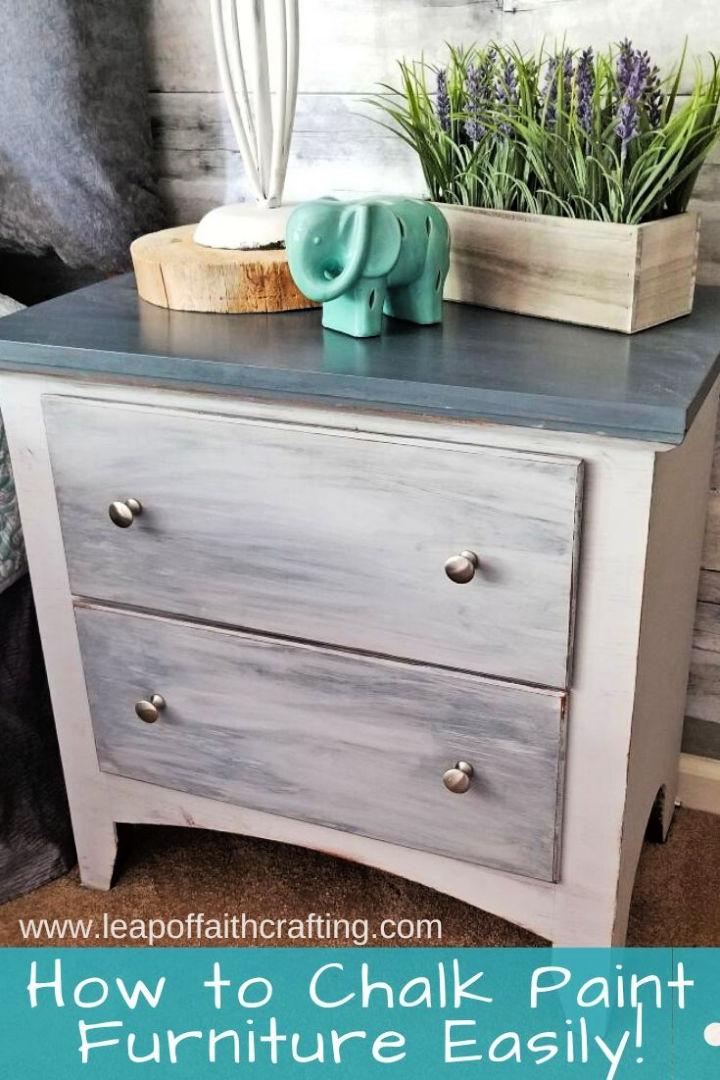
Revamp your bedroom with a dash of creativity using chalk paints! Leap of Faith Crafting‘s guide simplifies the process, showing you how to easily transform your furniture with grey chalk paint. No sanding is required, and with a few materials, you can achieve a fresh, distressed look.
Perfect for updating your space on a budget, this technique adds a rustic charm to your decor. Follow the straightforward instructions to paint dressers, nightstands, and more, giving them a new lease on life with a stylish grey hue. Get ready to give your bedroom a makeover that’s both quick and cost-effective.
9. Make Your Own Chalk Painted Dresser
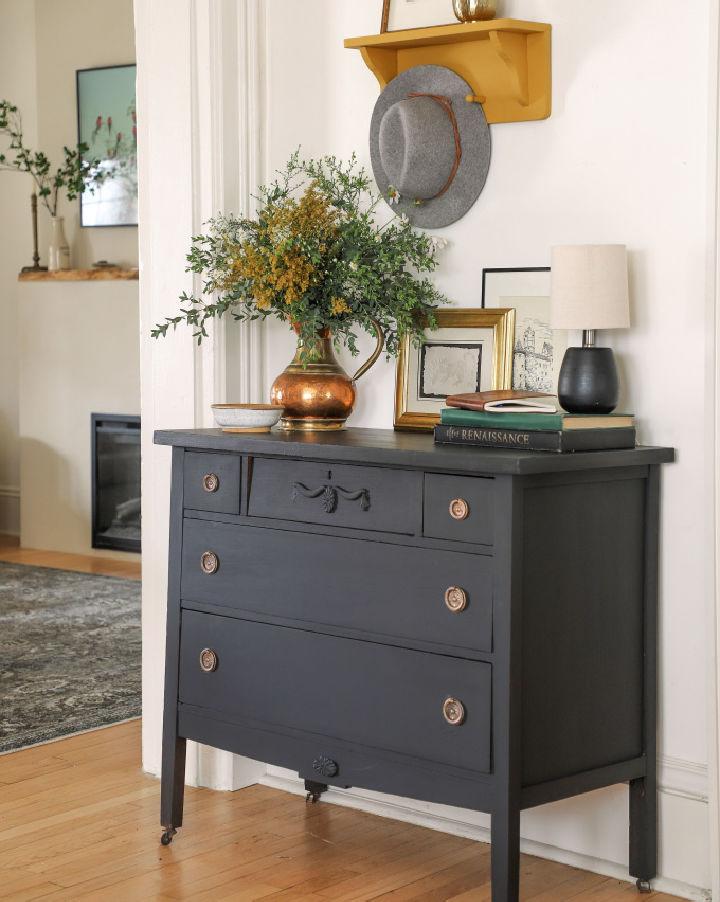
Transform your vintage dresser into a statement piece with the insightful guide on Milk Paint vs Chalk Paint from I SPY DIY. This informative post delves into the nuances between the two paint types, offering a practical comparison to help you choose the right finish for your furniture project. Milk Paint provides a more textured, semi-opaque look that can highlight the wood grain, while Chalk Paint offers a velvety, smooth, and fully opaque finish.
With tips on surface preparation and application techniques, the guide equips you with the knowledge to achieve a beautifully painted dresser without the need for sanding or priming on most surfaces. Enhance your DIY skills and give your furniture a personalized touch with the right paint choice.
10. Simple DIY Chalk Paint Dresser
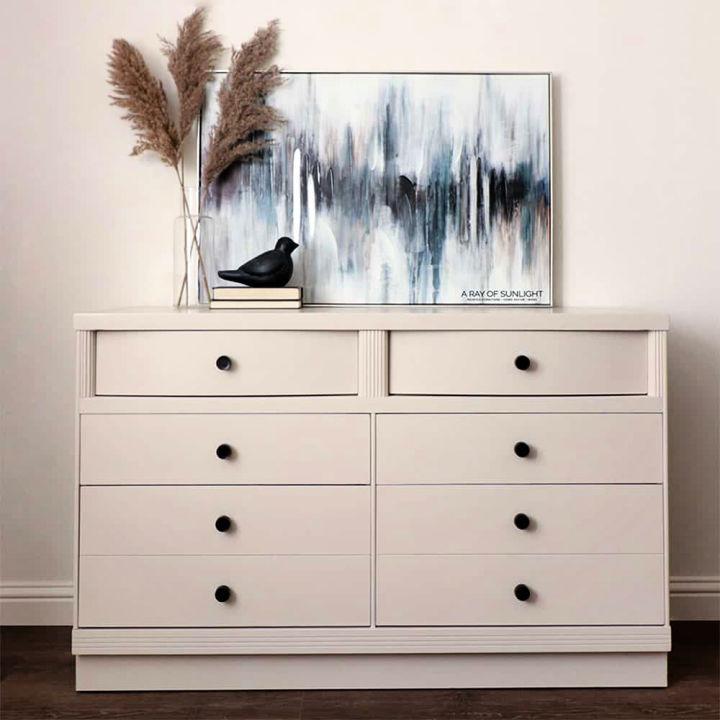
Revamp your dresser with a fresh coat of homemade chalk paint following the guide on A Ray of Sunlight. Discover how to turn a $50 marketplace find into a stunning piece of home decor. The tutorial walks you through each step, from prepping and priming to painting and sealing, ensuring a professional finish.
Learn how to tackle common issues like bleed-through and how to choose the perfect hardware to complement your transformed dresser. With clear instructions and helpful tips, you’ll be equipped to give any furniture item a beautiful, personalized makeover.
11. Homemade Chalk Painted Ombre Dresser
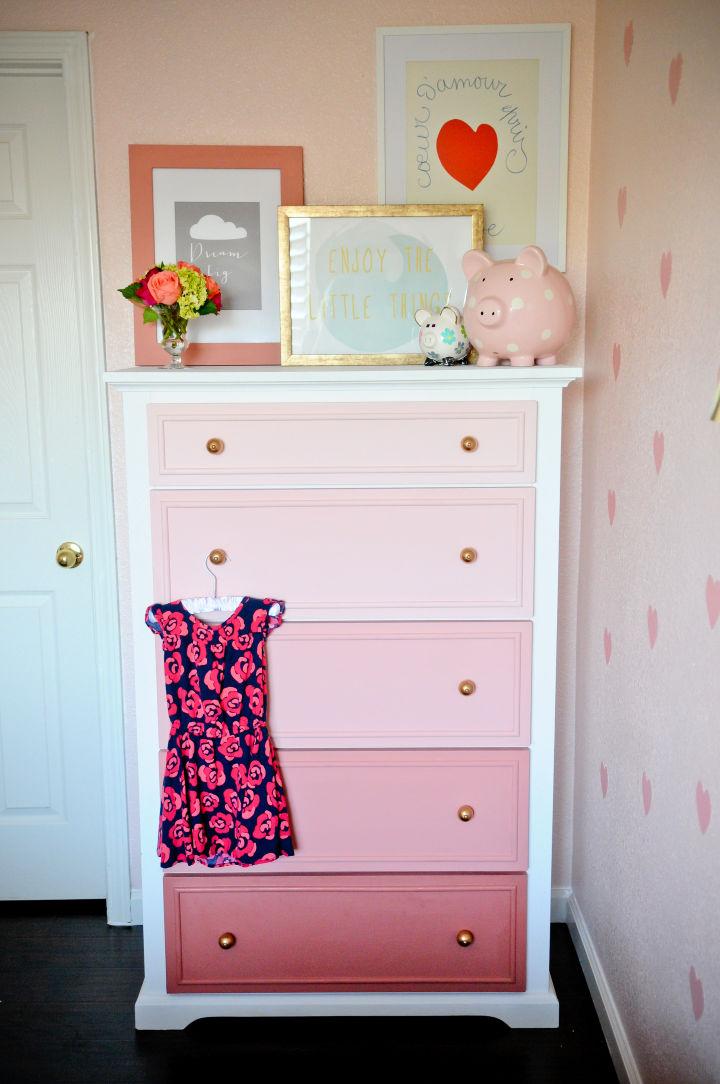
Transforming an old dresser into an ombre masterpiece is a creative and satisfying DIY project that anyone can undertake. At Project Nursery, we showcased a stunning example that garnered much attention. The process is straightforward: mix your chosen color with varying amounts of white paint to achieve the ombre effect across the drawers.
With no need for sanding or taping, just a brush and some chalk paint, you can breathe new life into a tired piece of furniture. This guide provides clear, easy-to-follow instructions to help you revamp your dresser with a fresh, personalized touch.
12. Modern DIY Chalk Paint Dresser
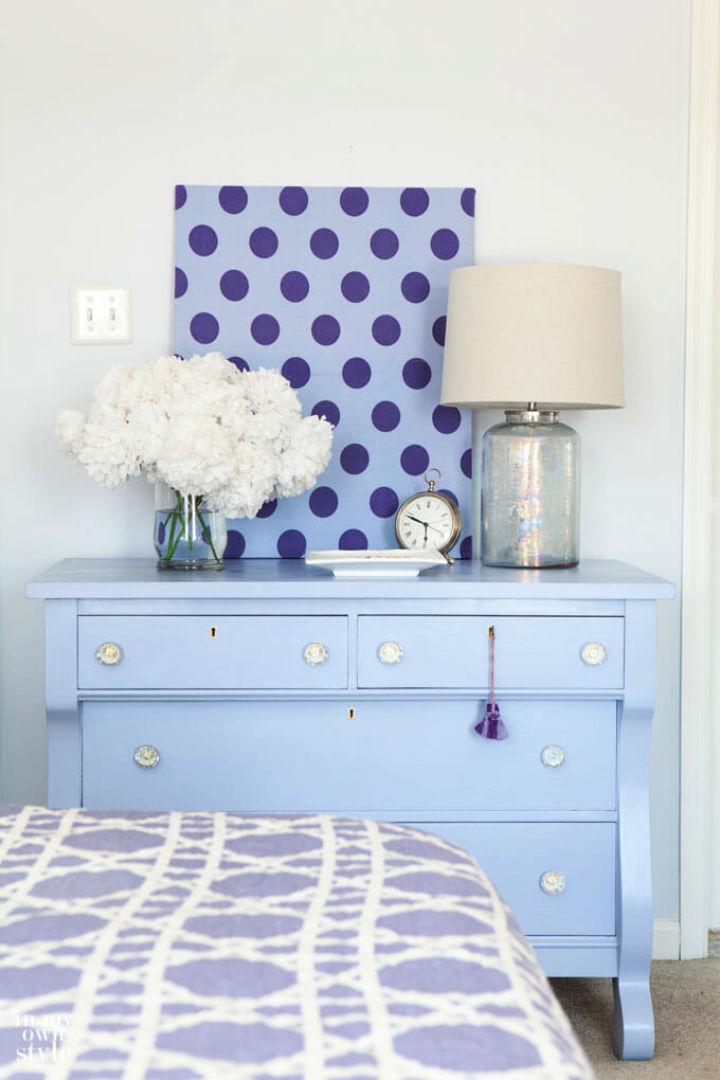
Transform your old dresser into a modern masterpiece with the step-by-step guide from In My Own Style. Discover how to apply chalk paint for a sleek, non-distressed finish that exudes contemporary charm. With expert tips on making your own chalk paint and sealing it for durability, you’ll learn to achieve a professional look that revitalizes any piece. From selecting the perfect hue to the final touches like lining drawers and painting keyholes, this tutorial ensures a chic update for your furniture. Dive into the details and give your dresser a new lease on life with a modern twist.
13. Ultimate DIY Chalk Paint Dresser
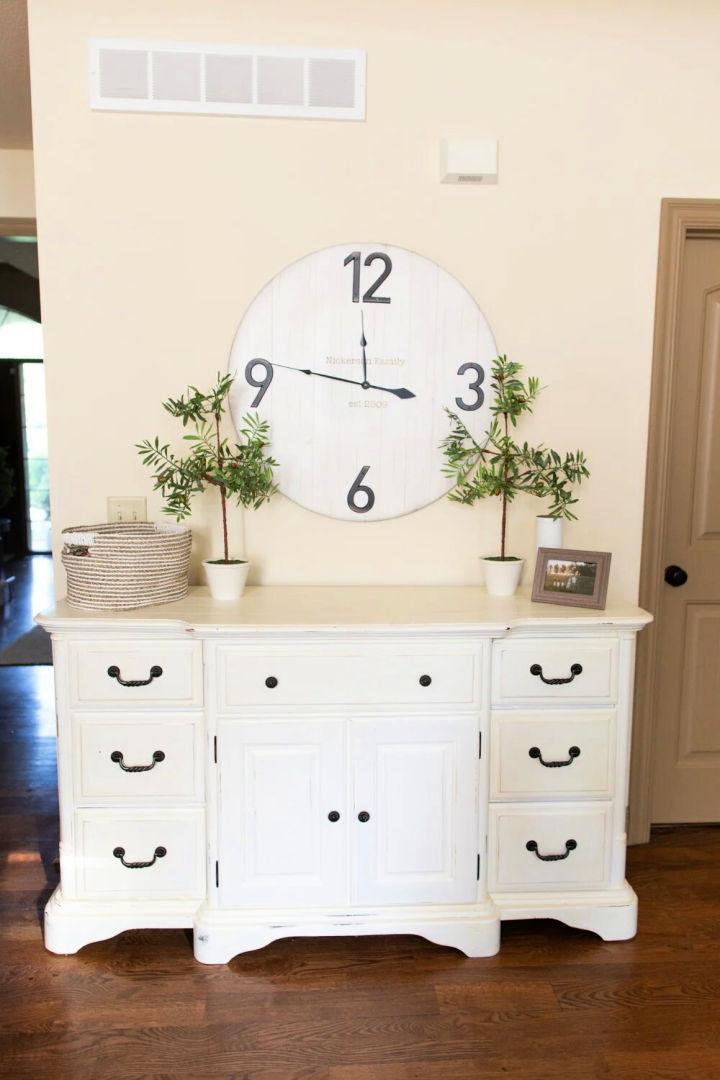
Transform your furniture with a homemade chalk paint recipe that’s simple, cost-effective, and yields professional results. Sengerson offers a step-by-step guide to making a chalk paint mixture using readily available ingredients like calcium carbonate and latex paint.
Ideal for achieving that coveted matte, vintage look on your furniture, this DIY chalk paint requires no sanding prep and dries quickly, making your project efficient and enjoyable. Plus, with tips on achieving the perfect consistency and selecting the right brushes, you’ll be equipped to tackle any furniture painting task with ease and confidence. Get ready to give your pieces a charming, chalky finish that will last for years.
14. How to Chalk Paint Dresser
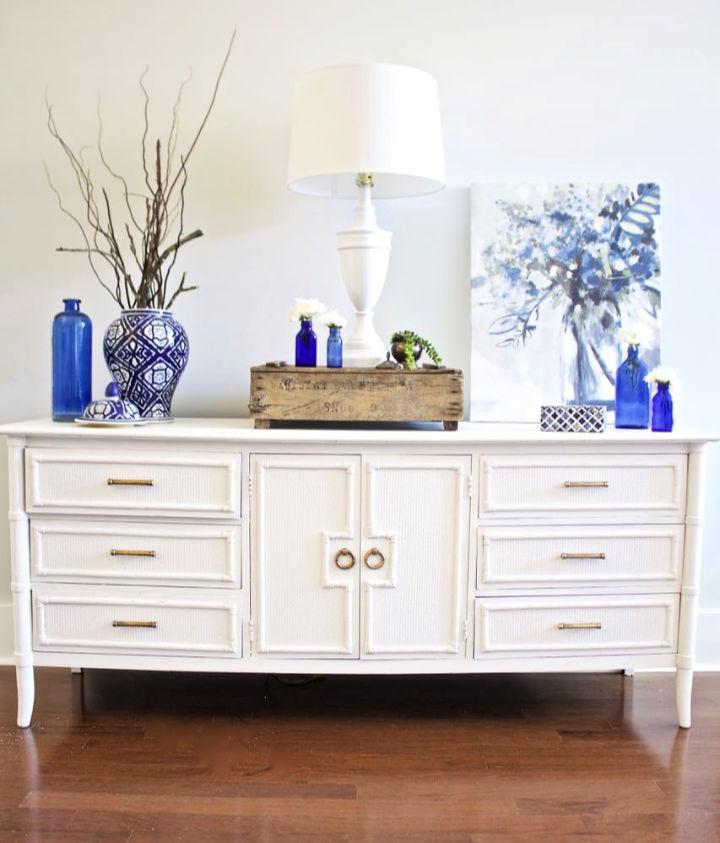
Transform your old furniture with the magic of chalk paint and give it a new lease on life. 2 Bees in a Pod offers an insightful guide on how to chalk paint furniture, with tips that ensure a smooth DIY project. Discover the secrets to selecting the right piece, choosing vibrant colors, and the best painting techniques to achieve a charming vintage look.
With step-by-step instructions, you’ll learn the importance of preparation, the art of distressing, and how to seal your masterpiece with wax. Whether sprucing up a side table or revamping a dresser, this guide empowers you to make stunning transformations in your own home.
15. Make Your Own Chalk Painted Dresser
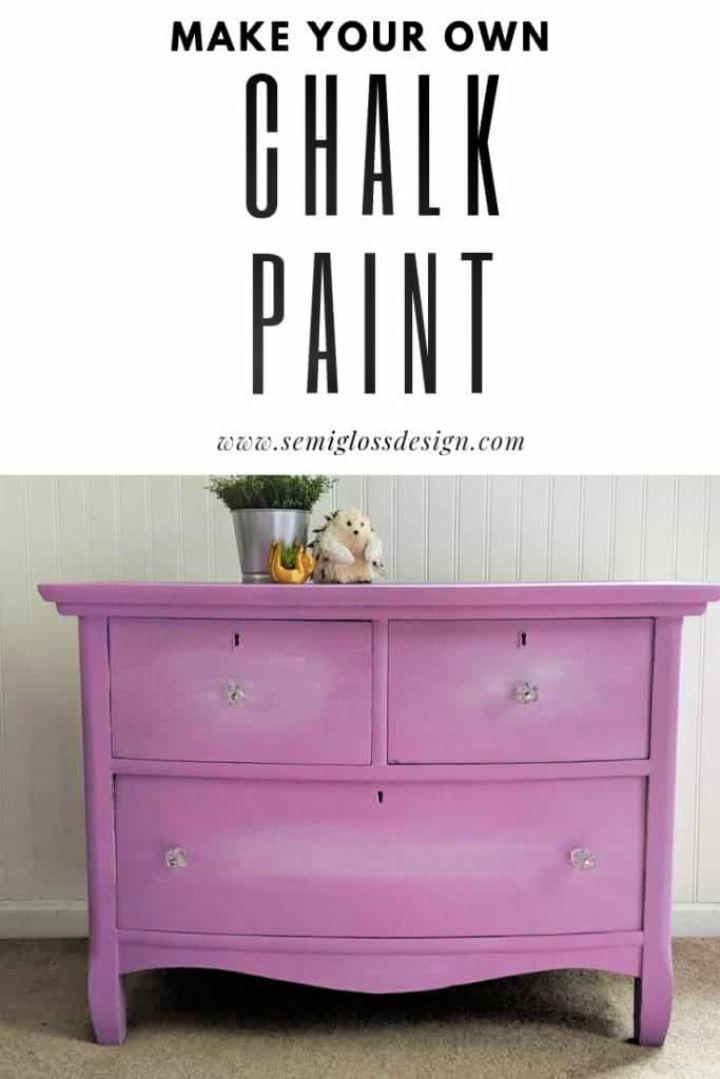
Transform your latex paint into custom DIY chalk paint with ease, following the simple recipe from Semigloss Design. DIY chalk paint offers an affordable and versatile option for your furniture projects, providing excellent coverage and a wide range of color possibilities to match your decor. All you need is latex paint, Plaster of Paris, water, and a few basic supplies.
Mix the ingredients as instructed, and you’re ready to give new life to any piece with a personalized touch. The process is straightforward and budget-friendly, making it perfect for sprucing up your home with a unique and charming aesthetic.
Conclusion:
In conclusion, transforming your dresser with DIY chalk paint ideas can bring a fresh and unique look to your space. From distressing techniques to ombre finishes, the possibilities are endless. By following the step-by-step guide and choosing the right chalk paint, you can achieve a beautiful and personalized dresser makeover that suits your style. Explore the world of chalk painting and unleash your creativity today!
Related DIY Projects:
- 15 Unique DIY Door Stopper Ideas To Make At Home
- 20 DIY Corner Shelf Ideas with Instructions and Free Plans
- 15 Best Wooden Candle Holders That You Can Easily DIY
Beginner Woodworking Plans
Looking for a woodworking project? Check out these 150 simple woodworking projects for beginners. Get FREE plans with clear step-by-step instructions and cut lists. You can do this!
