Making a DIY chicken waterer out of recycled materials is not only an eco-friendly choice but also a smart way to ensure your poultry has constant access to fresh water. This guide provides a step-by-step approach to making one, emphasizing the use of materials you likely already have. By opting for a homemade solution, you’re choosing sustainability and customization, tailoring the waterer to your flock’s specific needs.
This homemade chicken waterer guide will walk you through the process, from selecting the right container to setting up your completed waterer. With detailed instructions on installing waterer nipples and keeping your setup well-maintained, you’ll find that making your chicken waterer is straightforward and rewarding. Whether dealing with harsh winters or ensuring cleanliness, we’ve got you covered with practical tips and frequently asked questions.
Ready to get started on this fulfilling project that benefits both your chickens and the planet? Let’s dive into the next section to learn more about making your DIY chicken waterer.
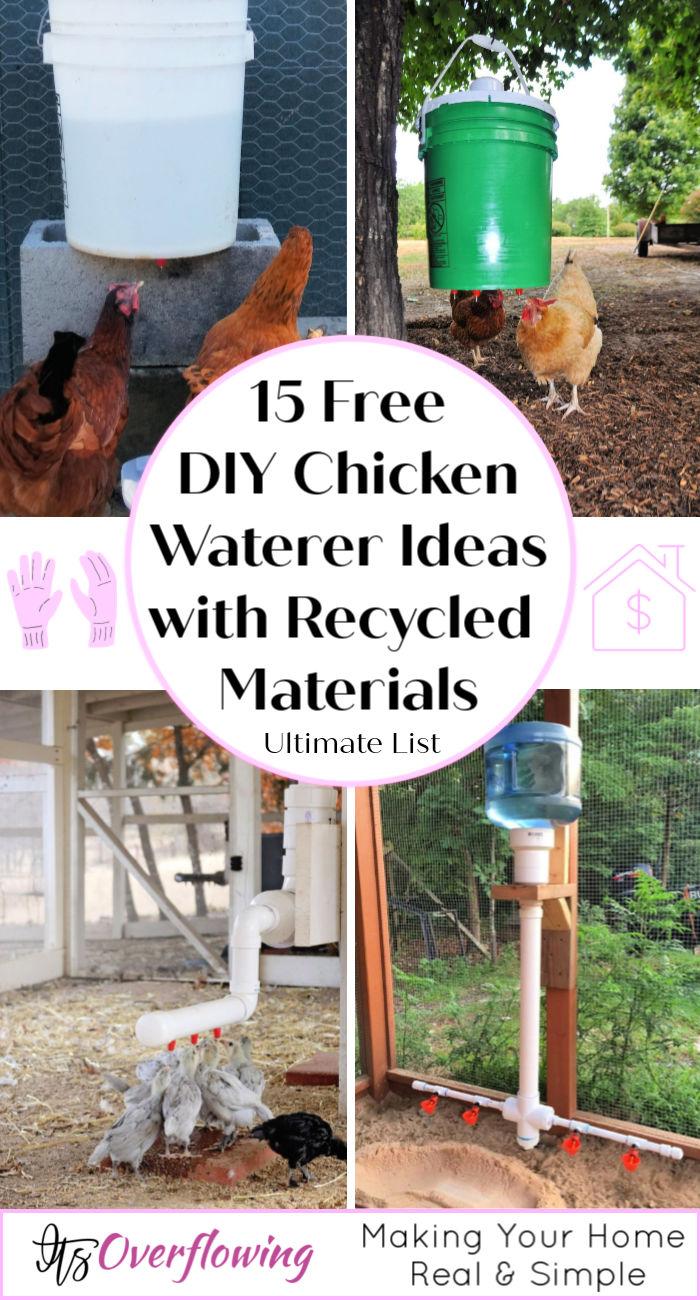
Why Make Your Own DIY Chicken Waterer?
Making a DIY chicken waterer can significantly improve your poultry management experience. Here’s why taking on such a project is beneficial:
- Cost-Effective: Building your own waterer saves you money, as commercial waterers can be expensive. You’ll often use recycled materials, which cuts down on costs.
- Customization: DIY allows you to tailor the waterer to your flock’s specific needs. You can adjust the size, capacity, and design based on the number of chickens and available space.
- Convenience: An automatic DIY waterer means less manual labor. It provides a consistent supply of water without the need for daily refills.
- Hygiene: Your homemade system can reduce the contamination of water by preventing chickens from roosting on the waterer. Clean water is essential for chicken health.
- Eco-Friendly: Repurposing materials for your waterer is an excellent way to recycle and minimize waste, making your poultry care routine more sustainable.
- Enjoyment: There’s a sense of accomplishment and enjoyment in making something with your own hands that serves a practical purpose in caring for your animals.
Incorporating a DIY chicken waterer into your coop isn’t just about practicality; it’s about taking an active, responsible, and creative role in the health and happiness of your chickens. With straightforward instructions and common household items, you can build an efficient watering system that keeps your chickens quenched and your mind at ease.
How to Make a DIY Chicken Waterer Out of Recycled Materials
Making a DIY chicken waterer out of recycled materials is not only a cost-effective way to ensure your chickens have a steady supply of clean water, but it’s also a great step towards a more sustainable living. Here’s a straightforward guide to help you make a simple yet efficient chicken waterer using items you might already have at home.
Choosing Your Container
First, you need to decide on the type of container you’ll use for your chicken waterer. Common household items that work well include:
- Plastic buckets or jugs
- Large soda or vinegar bottles
- Glass jars
Ensure that the container is clean and free from any hazardous substances that could harm your chickens.
Preparing the Container
For Plastic Buckets or Jugs:
- Clean the Container: Wash it thoroughly with soap and water to remove any residues.
- Mark the Placement for Nipples: About 2 inches from the bottom of the container, mark the spots where you want to install the waterer nipples. Spacing them evenly allows multiple chickens to drink at the same time.
- Drill Holes: Using a drill bit that matches the size of your poultry nipples, carefully drill holes at the marked spots.
For Glass Jars:
- Clean Thoroughly: Ensure the jar and bowl are clean to prevent any health issues for your chickens.
- Make a Watering Hole: For glass jars, the approach is a bit different. You’ll simply fill the jar with water, screw its lid tightly, and place it upside down in a shallow bowl. The water will gradually replace the air in the bowl as it’s consumed, providing a continuous water supply.
Installing Waterer Nipples
- Insert the Nipples: Screw the poultry nipples into the holes you’ve drilled in the plastic container. Ensure they are tight and secure to prevent leaks. For added security, you can apply some silicone around the edges.
- Test for Leaks: Before placing the waterer in your chicken coop, fill the container with water and check for any leaks around the nipples. Tighten as needed until there are no leaks.
Setting Up Your DIY Chicken Waterer
- Place in a Convenient Location: Position your new chicken waterer in a spot that’s easily accessible to your chickens but won’t get knocked over easily. Raising the waterer slightly off the ground can help keep the water clean.
- Monitor Water Levels: Especially in the beginning, keep an eye on the water levels to ensure your chickens are drinking and that the system is working correctly. Refill as necessary.
Maintenance Tips
- Regular Cleaning: Clean the waterer regularly to prevent algae growth and to ensure your chickens always have access to clean water.
- Winter Care: If you live in a cold climate, consider adding a small aquarium heater in the water container to prevent freezing during winter months, or opt for a heated base for glass jar setups.
Making a DIY chicken waterer from recycled materials is a straightforward project that not only saves money but also contributes to a more sustainable way of living. By following these simple steps, you can ensure your chickens have a constant supply of clean water, essential for their health and well-being.
How to Make a 5 Gallon Bucket Chicken Waterer
Making a DIY chicken waterer from a 5-gallon bucket is a cost-effective and efficient way to ensure your chickens have constant access to clean water. This guide is designed to be easy to follow, reliable, and focused on what’s best for you and your chickens.
Choosing Your Bucket
Start with a clean, food-grade 5-gallon bucket. It’s important to use a bucket that hasn’t stored harmful chemicals. Food-grade buckets are often available from restaurants or bakeries.
Materials You’ll Need
- A 5-gallon bucket with a lid
- Chicken waterer nipples (available online or at farm supply stores)
- Drill and drill bit (size as recommended for your chicken nipples)
- Optional: silicone sealant for extra leak protection
Step 1: Prepare the Bucket
Thoroughly clean the bucket and lid with soap and water to remove any residue. Let it dry completely.
Step 2: Mark and Drill Holes
Turn the bucket so the bottom is facing up. Decide how many chicken nipples you want to install. A good rule of thumb is one nipple for every 3 to 4 chickens. Mark the spots for your nipples, evenly spaced, about 2 inches from the edge of the bucket’s bottom.
Using the appropriate size drill bit for your chicken waterer nipples, carefully drill holes at the marks you’ve made.
Step 3: Install the Nipples
Screw the chicken waterer nipples into the holes you’ve drilled. If your nipples came with rubber gaskets, make sure they’re in place to prevent leaks. For extra leak prevention, you can apply a small bead of silicone sealant around the edge of each nipple. Let the silicone dry according to the product instructions if you use it.
Step 4: Fill and Seal the Bucket
Fill the bucket with water to test for leaks. If there are no leaks, secure the lid on top. This helps keep the water clean.
Step 5: Position the Waterer
Place your new chicken waterer in a spot that’s easy for your chickens to access but elevated off the ground to prevent dirt and debris from contaminating the water. You might use bricks or a small platform for this purpose.
Maintenance Tips
- Check and refill the bucket regularly.
- Clean the bucket and nipples with soap and water every few weeks to prevent algae and bacteria growth.
- In winter, consider adding a submersible bucket heater to prevent the water from freezing.
Making a 5-gallon bucket chicken waterer is a simple project that pays off by providing your chickens with a reliable and clean water source. With minimal maintenance, this DIY waterer can serve your flock for years, promoting their health and well-being.
FAQs About DIY Chicken Waterers
Get answers to all your DIY chicken waterer questions with our comprehensive FAQs. Discover tips and tricks for easy waterer setup.
What materials do I need to make a DIY chicken waterer?
To make a DIY chicken waterer, you will typically need:
- A container (e.g., plastic bucket, glass jar, or soda bottle)
- Chicken waterer nipples or poultry drinking cups
- A drill and appropriate drill bit for making holes
- Silicone sealant or thread tape (for securing nipples and preventing leaks)
- Optional: PVC pipes and fittings for more complex systems
Can I use recycled materials to build a chicken waterer?
Yes, using recycled materials is encouraged for DIY chicken waterers. Items such as plastic buckets, jugs, glass jars, and large soda or vinegar bottles can be repurposed into effective chicken waterers. Ensure the containers are clean and free from harmful substances.
How do I keep the water in my chicken waterer from freezing in the winter?
To prevent water from freezing in your DIY chicken waterer during winter, consider these options:
- Use a small aquarium heater inside the water container.
- Place the waterer on a heated base specifically designed for poultry waterers.
- Wrap the waterer in insulating material and use a heat lamp (safely distanced) to warm the area.
How often should I clean my DIY chicken waterer?
Clean your DIY chicken waterer at least once a week to prevent the buildup of algae and bacteria. During hot weather, you might need to clean it more frequently. Regular cleaning ensures your chickens have access to fresh and clean water.
Can I make an automatic chicken waterer using DIY methods?
Yes, many DIY chicken waterer projects are designed to be automatic, reducing the need for daily manual refilling. By installing chicken waterer nipples or poultry drinking cups on a container that is then filled with water, the system automatically provides water to chickens as they drink.
What is the best location to place my DIY chicken waterer?
Place your DIY chicken waterer in a spot that is easily accessible to your chickens but protected from contamination by bedding and waste. Elevating the waterer slightly off the ground can help keep the water clean. Ensure it is stable and won’t tip over easily.
How do I know if the chicken waterer nipples are installed correctly?
After installing the waterer nipples, fill the container with water and check for leaks. Chickens will quickly learn to use the nipples to drink, but you can gently tap the nipples to show them water comes out. If leaks occur, tighten the nipples or apply silicone sealant around the edges for a better seal.
15 Homemade DIY Chicken Waterer Ideas
Discover 15 homemade DIY chicken waterer ideas for your flock. Keep your chickens happy and hydrated with a simple, cost-effective watering system.
1. How to Make a PVC Chicken Waterer
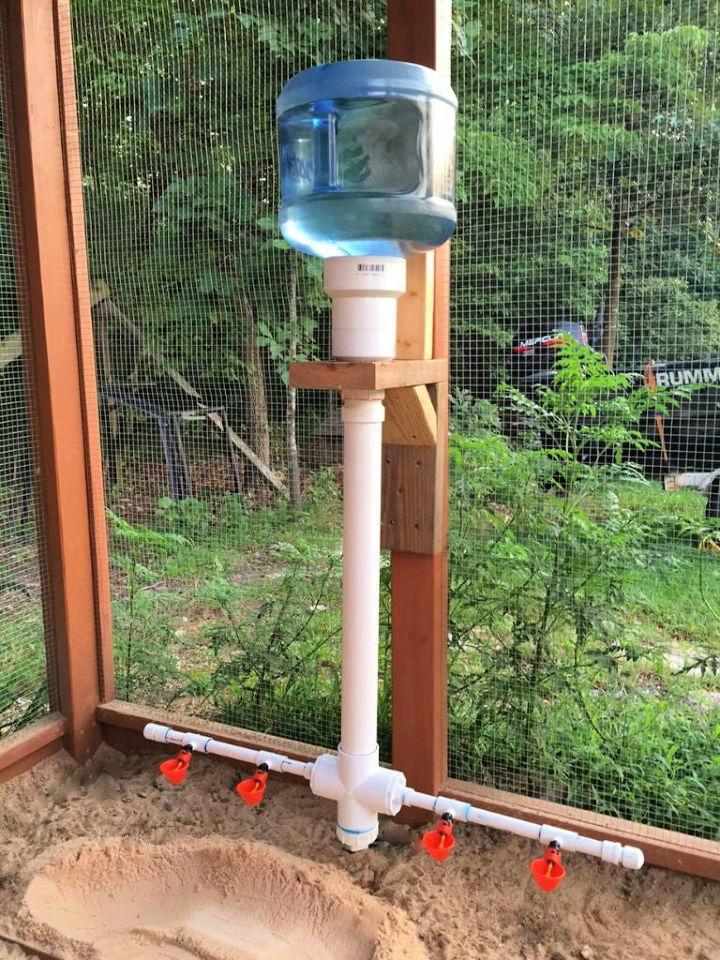
Looking to keep your chickens hydrated without the mess of toppled water containers? Instructables offers a smart DIY solution with their PVC Chicken Waterer guide. This step-by-step tutorial provides clear instructions on crafting a sturdy and easy-to-clean waterer using affordable PVC pipes and fittings.
With a total project cost of around $55, it’s an economical way to ensure your flock has constant access to clean water. Ideal for backyard chicken keepers, this guide helps you build a reliable watering system that’s both efficient and convenient.
2. DIY Chicken Waterer From Beverage Cooler
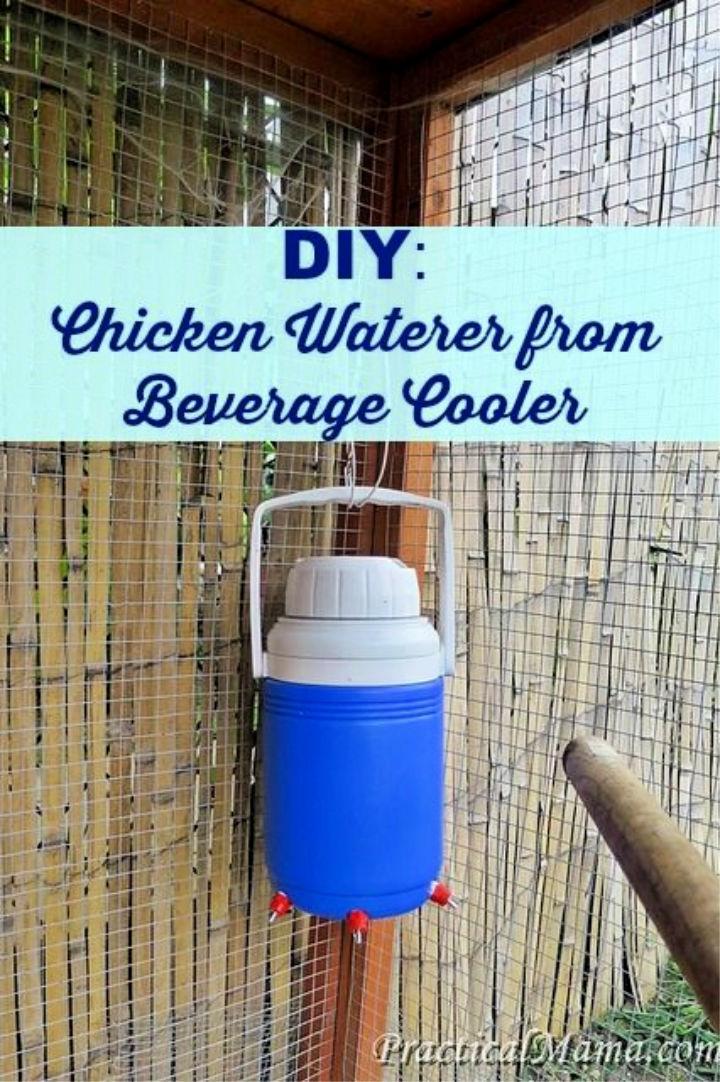
Craft a homemade chicken waterer with ease using a beverage cooler jug and poultry nipple drinkers. This DIY guide offers a step-by-step approach to making a practical hanging waterer that helps prevent diseases spread by wild birds. Ideal for small flocks, this waterer keeps water cool during summer and can be conveniently placed in the coop.
Learn to drill and install the nipples quickly, ensuring a leak-free setup without the need for silicone sealant. A perfect solution for chicken keepers, this waterer is a smart addition to your coop, promoting the health of your hens, especially with the increasing concerns of bird flu. Practical Mama
3. Homemade 5 Gallon Chicken Waterer
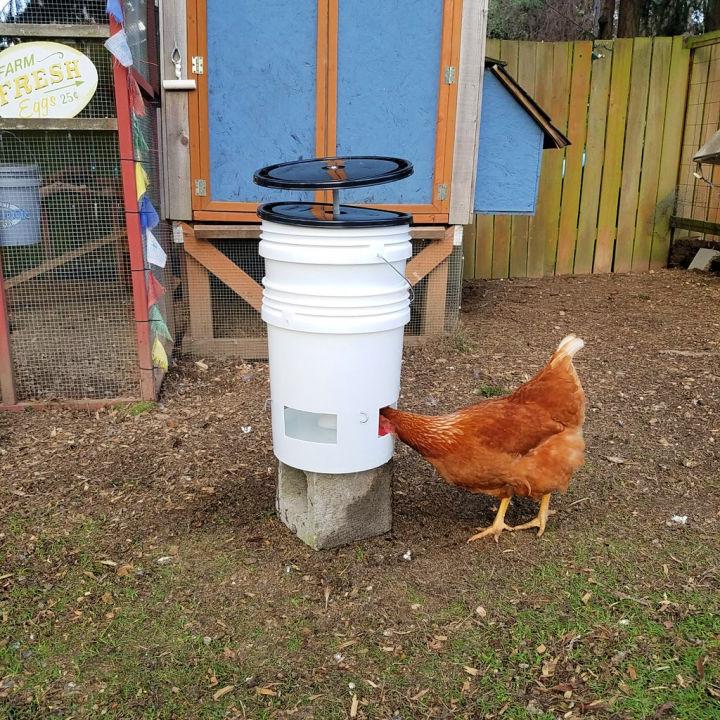
Maintaining a flock of chickens requires a clean and efficient watering system. Instructables offers a guide on constructing a 5-gallon chicken waterer that’s both easy to build and cost-effective. Perfect for poultry keepers, this DIY solution ensures your chickens have access to fresh water without the common problem of roosting and debris contamination.
The step-by-step instructions are designed to be clear and straightforward, helping you set up a reliable water source that contributes to the health and well-being of your chickens. Whether it’s for a backyard coop or a larger poultry operation, this clean water system is a practical addition to your poultry care routine.
4. PVC and Soda Bottle Chicken Waterer
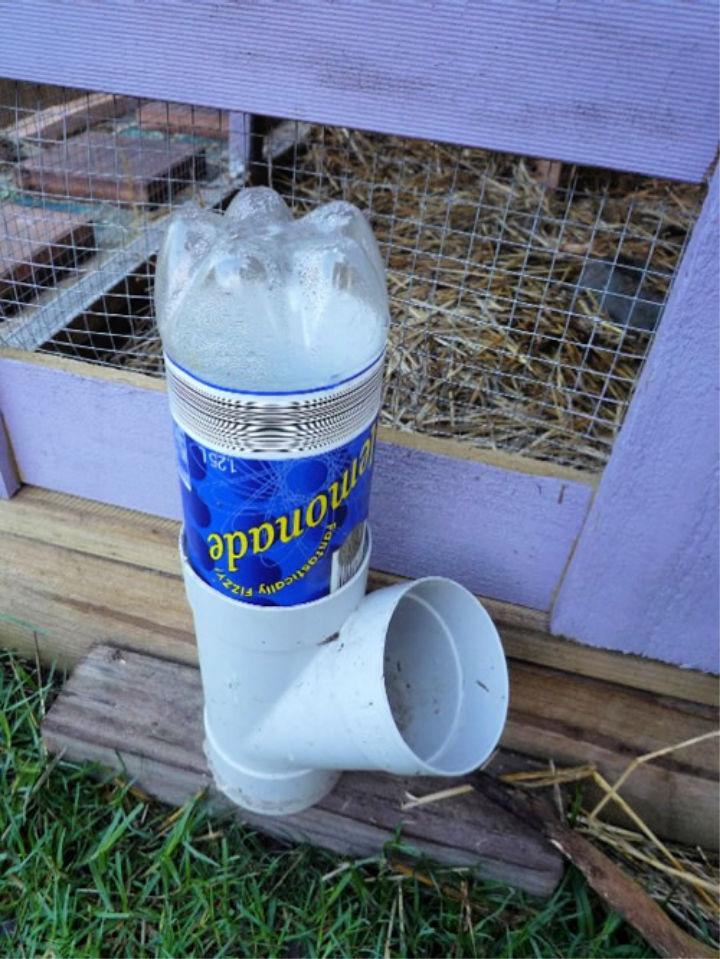
Looking to keep your chickens hydrated without frequent trips to the coop? Homestead Lifestyle presents an easy-to-assemble DIY PVC Soda Bottle Chicken Waterer that’s both budget-friendly and efficient. With a few simple materials like a PVC Y fitting, a PVC cap, a 1L plastic soda bottle, a nail, and a hammer, you can craft a convenient water source for your feathered friends.
Just fill the bottle, secure it in the fitting, and let gravity do the work. A perfect project for homesteaders, this clever device ensures your chickens have access to fresh water with minimal refills. Check out the detailed guide on Homestead Lifestyle for more smart homesteading tips.
5. DIY Glass Chicken and Poultry Waterer
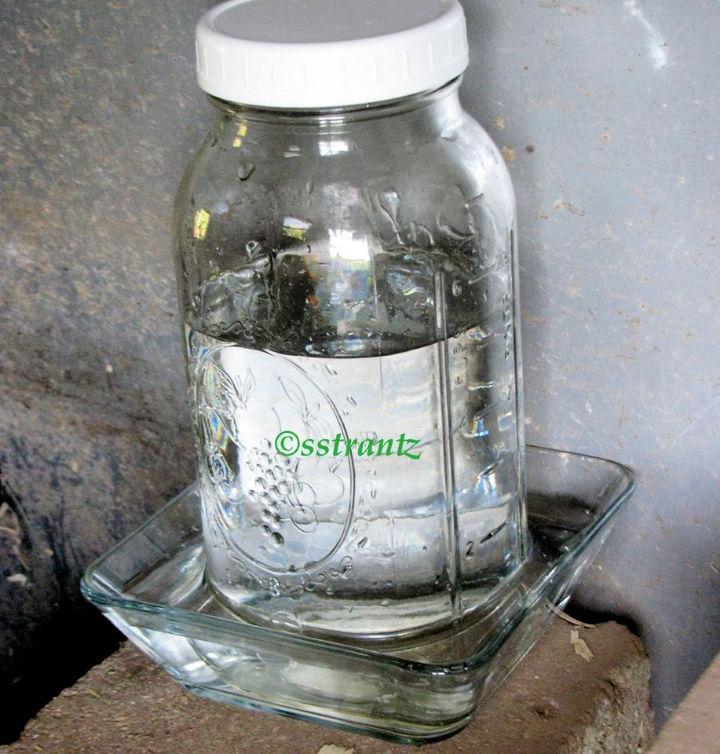
Discover how to make a DIY glass chicken and poultry waterer with our step-by-step guide. Ideal for those who prefer natural, organic, and holistic methods of chicken care, this easy-to-follow tutorial helps you craft a healthier watering option for your feathered friends. By avoiding plastic, you’re choosing a more sustainable and eco-friendly approach.
Our instructions ensure that your waterer is not only simple to fill, clean, and use but also designed to sit securely on a heating base during colder months. Upgrade your chicken coop with this glass waterer solution that keeps water clean and chickens happy. Natural Chicken Keeping
6. Make a Heated Chicken Waterer
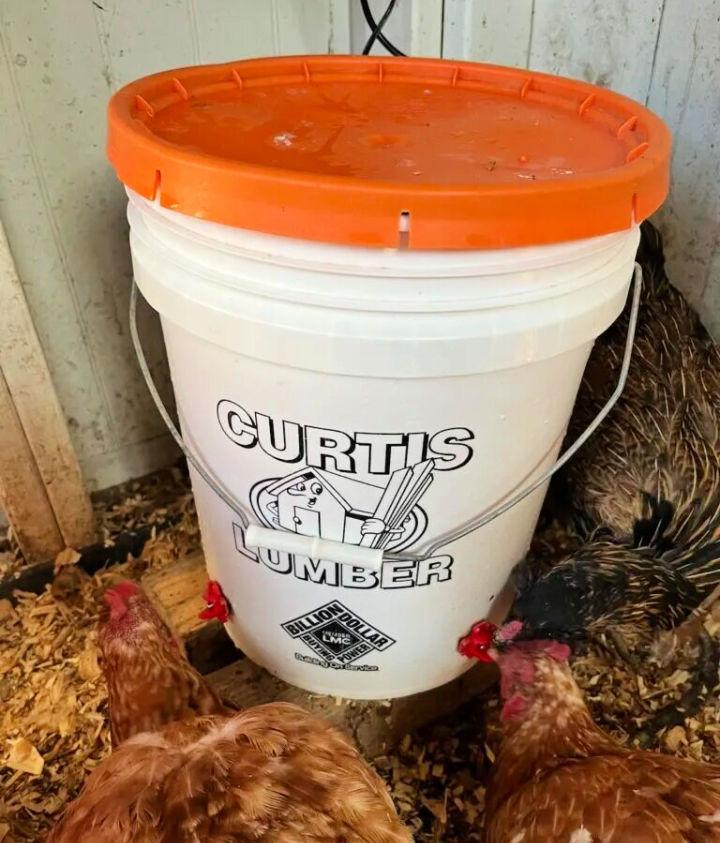
For those tending to chickens in the frigid winters of Upstate NY, a DIY heated chicken waterer from Tree Farm Design Co. can be a game-changer. Crafting this essential item requires an aquarium heater, bubbler, Thermo Cube, a sturdy 5-gallon bucket, and horizontal chicken watering nipples. The process is straightforward, focusing on keeping the water in motion and above-freezing temperatures.
Regular maintenance is simple, involving a thorough clean with hot water and apple cider vinegar at the season’s change. This system stands out for its efficiency, though extreme cold may require temporary indoor thawing. Keep your feathered friends hydrated and happy with this practical, low-maintenance solution.
7. Handmade Chicken Waterer Using 5 Gallon
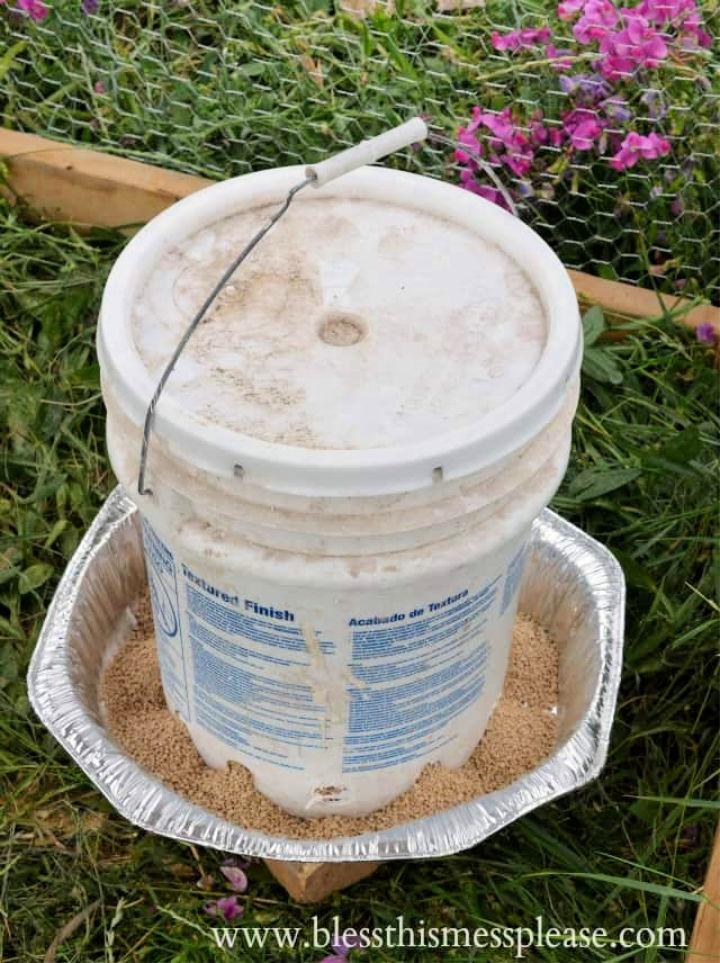
Ready to provide your backyard chickens with a steady supply of water and feed? Bless this Mess offers an easy-to-follow DIY tutorial on making a chicken waterer and feeder using inexpensive 5-gallon buckets. This simple project ensures your chickens stay hydrated and well-fed without breaking the bank. With just a few holes drilled and some basic supplies, you can set up a reliable feeding system that will serve your flock for years to come. Keep your feathered friends healthy and happy with this clever and cost-effective solution.
8. DIY 5 Gallon Chicken Waterer at Home
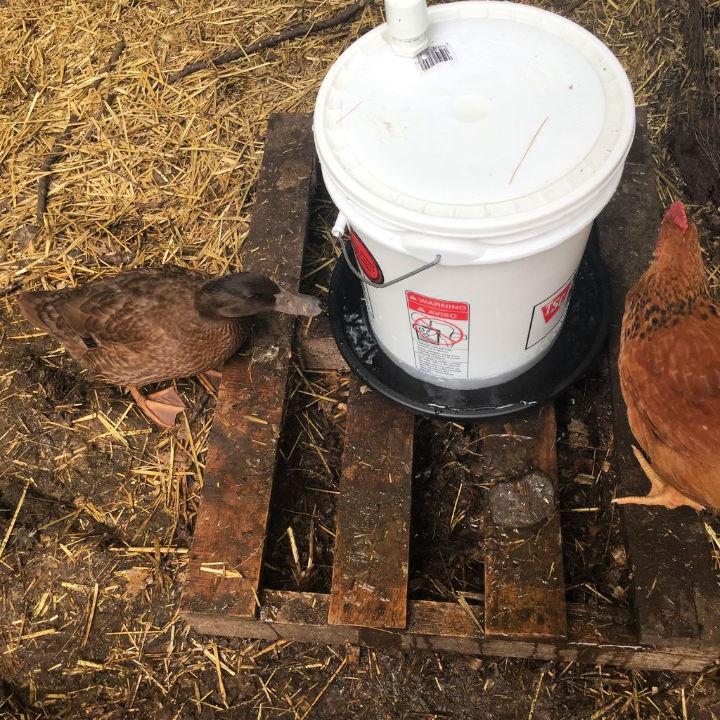
Making a DIY 5-gallon Chicken Waterer can be a practical project for poultry keepers aiming to ensure their flock has constant access to clean water. Instructables offers a step-by-step guide that simplifies the process of assembling a waterer using a few PVC couplings and common hardware store items.
With clear instructions and a parts list, anyone can build a durable and efficient watering system. This project is perfect for those who enjoy hands-on tasks and want to enhance their chicken-keeping setup with a homemade solution.
9. How to Make a Chicken Waterer
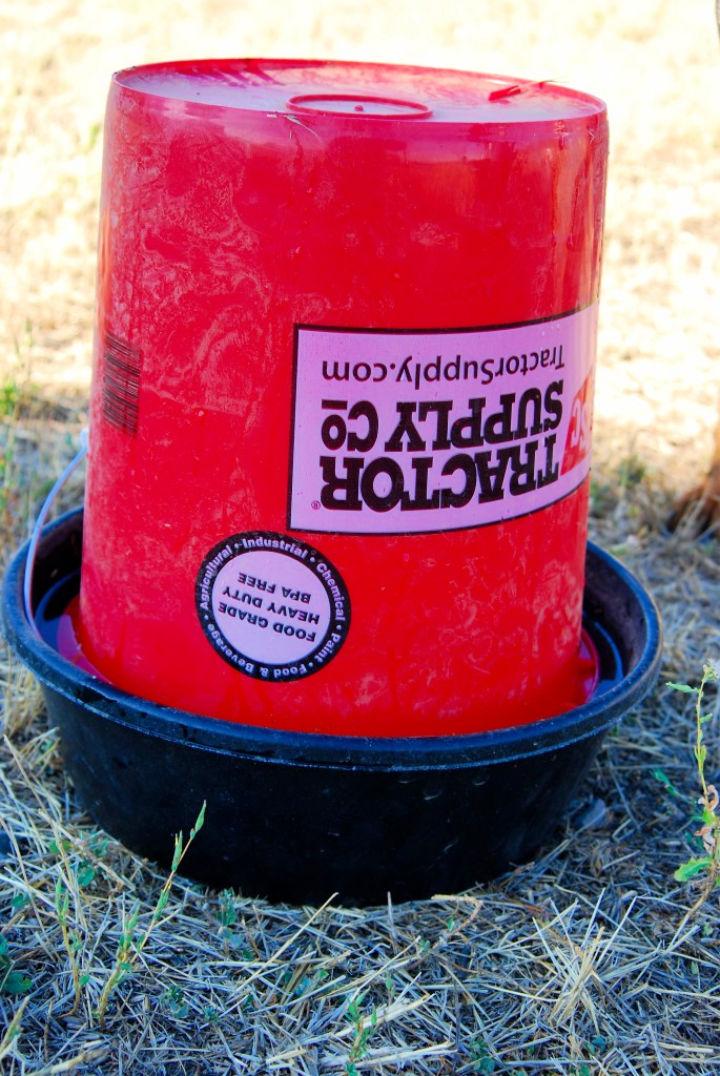
Keeping your chickens hydrated doesn’t have to be a chore or an expensive task. Longbourn Farm offers a DIY chicken waterer tutorial that’s both cost-effective and easy to create. This guide walks you through the simple steps of making a long-lasting chicken waterer using a few supplies like a 5-gallon bucket, lid, and feed pan.
With clear instructions and a drill, you can craft a reliable watering system for your feathered friends. The design ensures a consistent water supply, making it a practical addition to your chicken care routine. Keep your chickens quenched with this straightforward and helpful DIY project.
10. Automatic Chicken Watering System Ideas
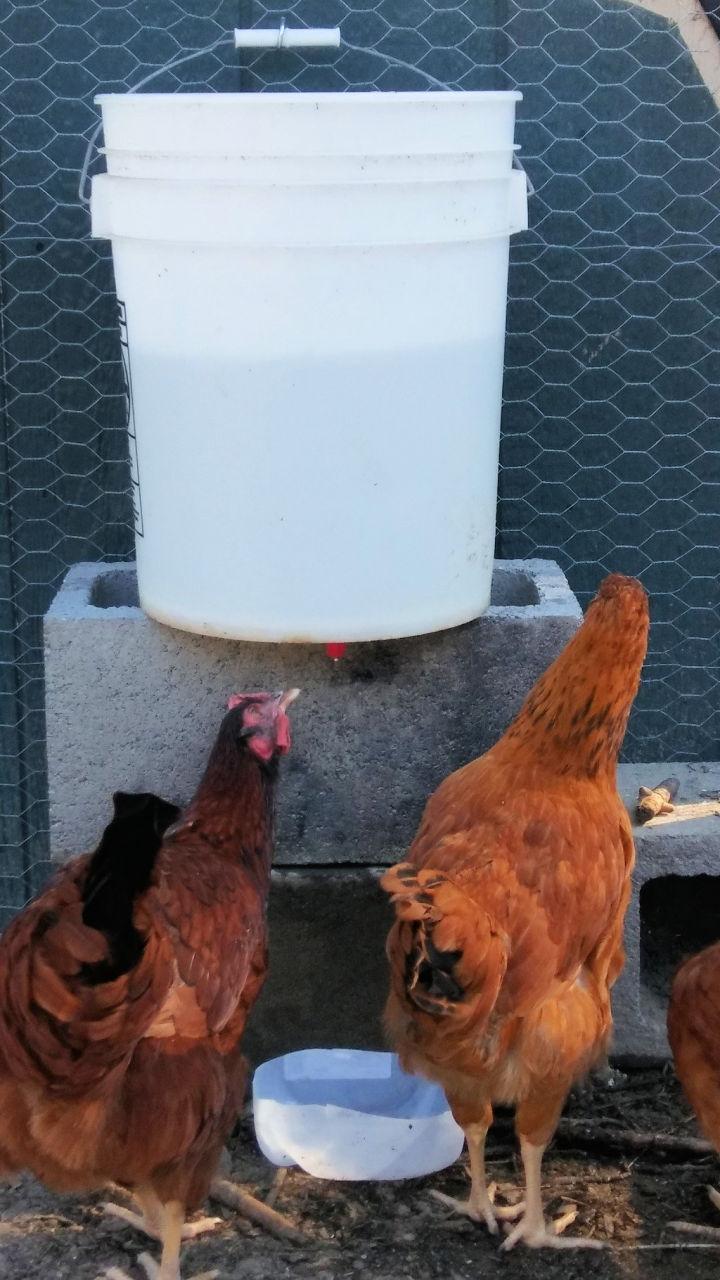
Looking to simplify your chicken care routine? PetHelpful offers a clever DIY guide for crafting an automatic chicken watering system. For under $10, you can build a five-gallon dispenser that provides your flock with a steady water supply. The instructions are clear, and the process is straightforward, involving common materials like nipple waterers and a bucket.
This cost-effective solution is perfect for poultry owners who wish to ensure their chickens stay hydrated without the daily hassle of manual water replenishment. It’s a practical project with immediate benefits for your feathered friends.
11. 5 Minutes Chicken Waterer With Nipples
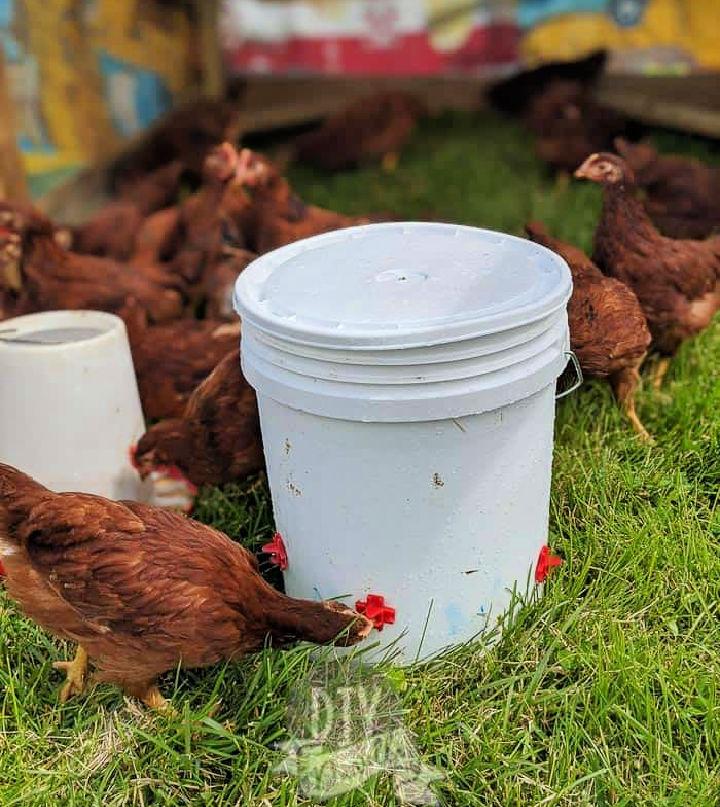
Making a DIY chicken waterer is a breeze with this simple 5-minute project, ideal for keeping your flock’s water supply clean and fresh. By using a 5-gallon bucket and a few chicken nipples, you can construct a durable waterer that prevents contamination from dirt and droppings. DIY Danielle® provides a step-by-step guide to help you assemble this efficient watering solution for your chicks or adult chickens. With a focus on practicality and ease, this DIY chicken waterer is perfect for ensuring your poultry has constant access to clean water, whether housed in a chicken tractor or free-ranging in a run.
12. DIY Vinegar Bottle Chicken Waterer
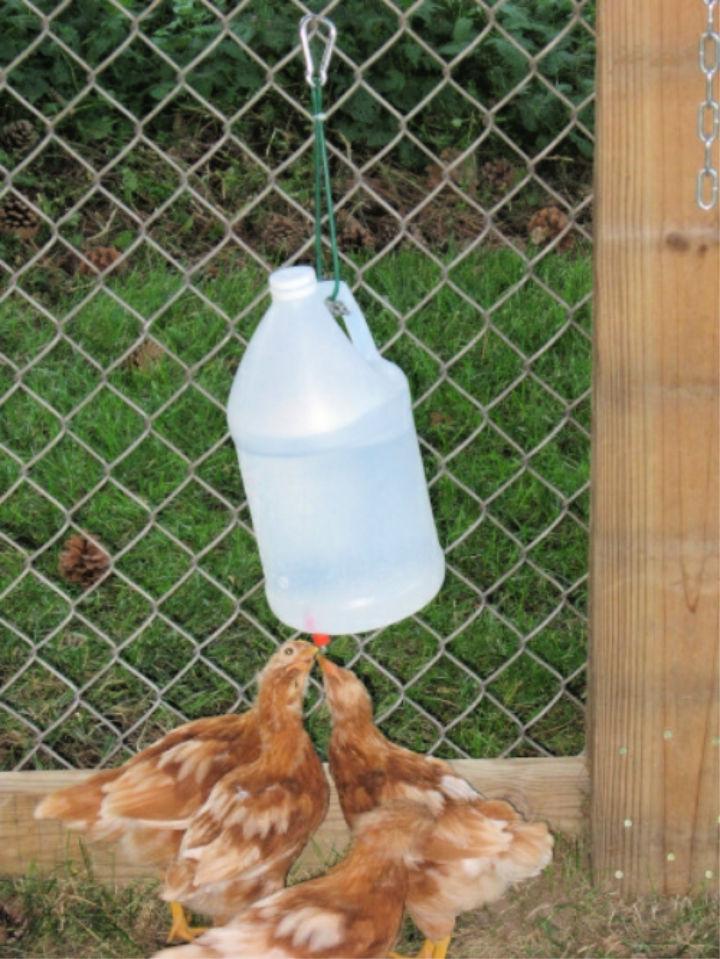
Looking to keep your chickens hydrated with a simple DIY solution? Homestead Lifestyle presents an easy-to-follow guide for making a vinegar-bottle chicken waterer. This project is quick, cost-effective, and offers a cleaner way to provide water to your feathered friends.
All you need is an empty gallon bottle, a nipple waterer, a nail, wire or rope, and silicone sealant. In just a few steps, you’ll have an ‘automatic’ water system ready for your coop. Keep your chickens’ water supply fresh and accessible with this handy homemade waterer.
13. Make Your Own PVC Chicken Waterer
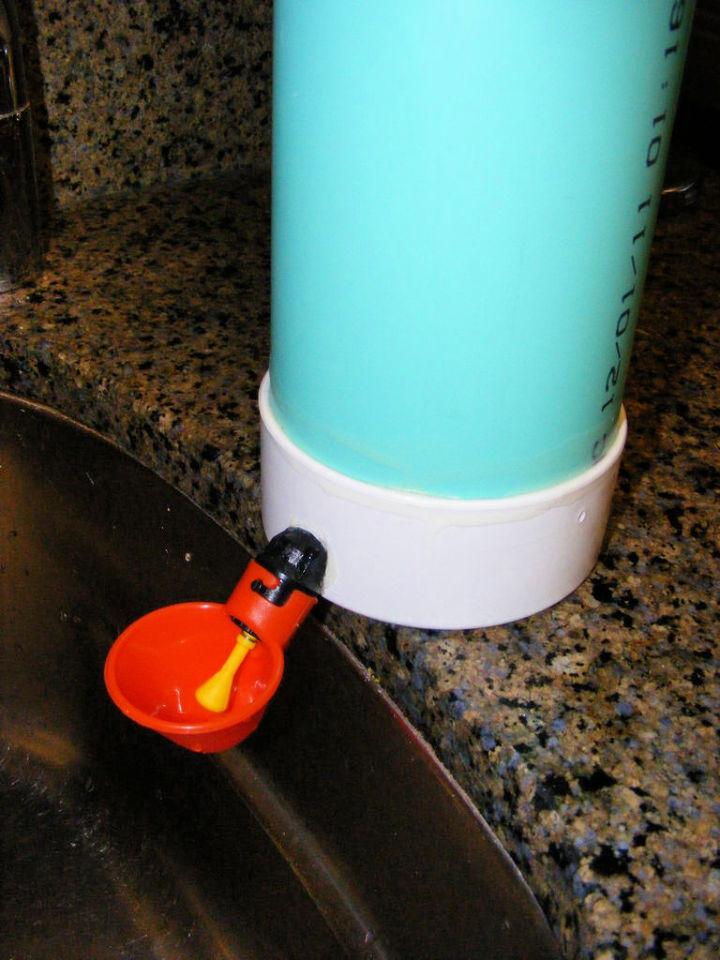
Looking to keep your chickens hydrated with a DIY solution? Instructables offers a detailed guide on making a PVC Chicken Waterer that’s both efficient and cost-effective. This step-by-step tutorial will assist you in assembling a durable waterer using PVC pipes and a chicken waterer cup.
Ideal for poultry enthusiasts, the instructions are clear, practical, and perfect for ensuring your feathered friends have a steady supply of clean water. Enhance your coop with this reliable watering system and enjoy the benefits of a well-hydrated flock.
14. DIY Nipple Valve Chicken Waterer
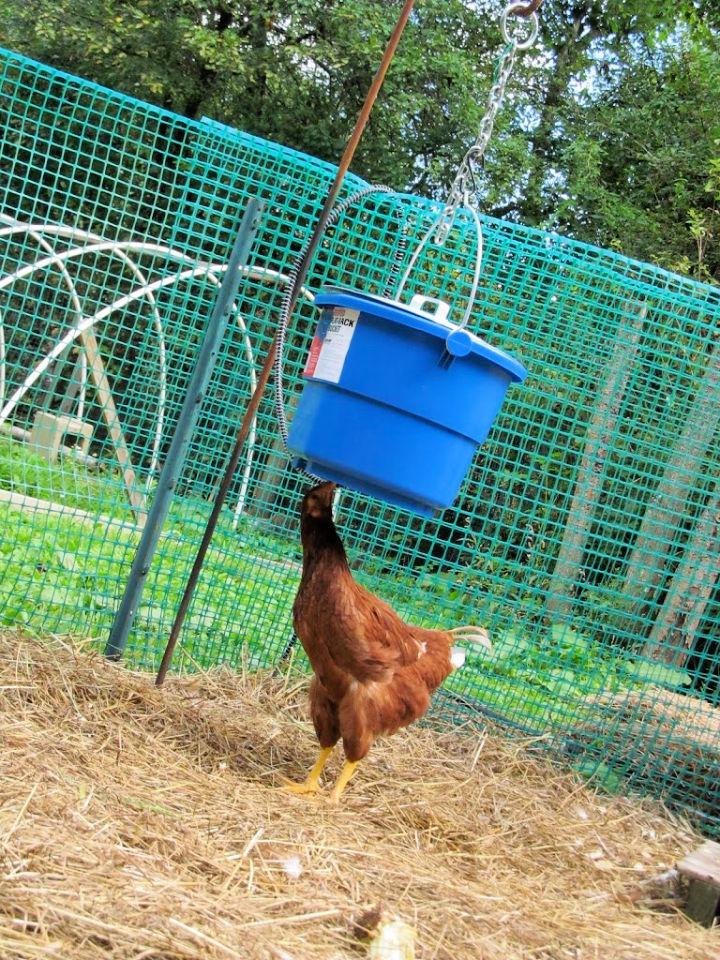
Looking to keep your chicken coop cleaner and your hens healthier? Henbogle shares a practical DIY guide for making a nipple valve chicken waterer. This innovative approach reduces mess, as it prevents chickens from perching on water containers and contaminating the water with droppings.
The guide walks you through converting a heated livestock bucket into an efficient watering system, complete with step-by-step instructions. With this setup, you’ll save time on maintenance and provide your feathered friends with clean water year-round. Perfect for those chilly months, this heated waterer is an excellent addition to any coop, ensuring your chickens stay hydrated without the hassle.
15. Easy DIY Chicken Waterer Using Cooler
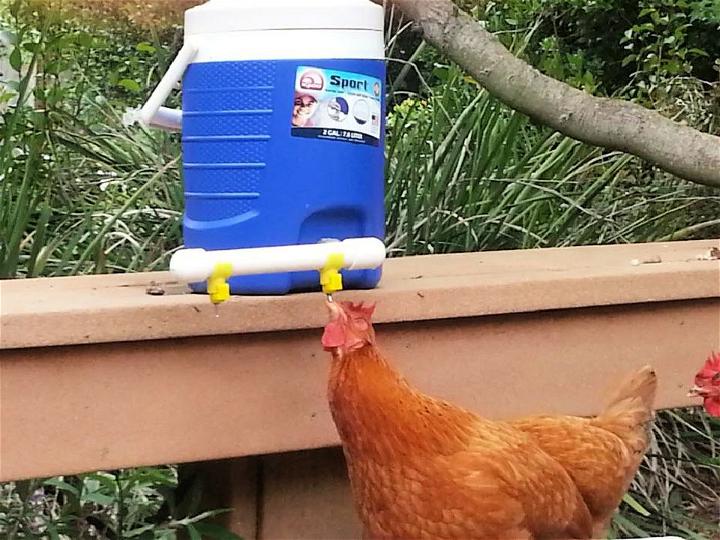
Instructables provides a comprehensive guide to making a chicken waterer from a cooler and electrical fittings. This DIY project is perfect for poultry keepers seeking a reliable watering solution. The tutorial is detailed and easy to follow, making it suitable for anyone interested in crafting a practical and efficient system for their feathered friends.
With step-by-step instructions and helpful tips, you can ensure your chickens always have access to clean water. Dive into this engaging guide to enhance your coop with a homemade waterer that’s both effective and budget-friendly.
16. Best DIY Chicken Water Feeder
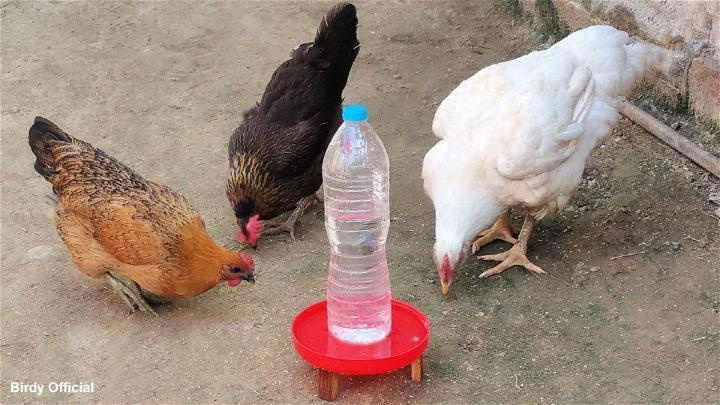
Looking to keep your chickens hydrated with a homemade solution? YouTube offers a creative and efficient DIY chicken waterer guide that teaches you how to craft a feeder or water tank using just a plastic bottle and a jar lid. Ideal for small flocks, this eco-friendly project is a fantastic way to recycle and ensure your poultry has access to clean water.
Simple to make and easy to use, this homemade chicken waterer is a cost-effective alternative to store-bought options. Follow the step-by-step instructions to make a practical and sustainable water source for your backyard chickens.
Conclusion:
In conclusion, crafting 15 DIY chicken waterer ideas out of recycled materials is a fantastic way to ensure your chickens stay hydrated with fresh water while being environmentally conscious. This guide has walked you through everything from choosing and preparing containers to installing waterer nipples and maintenance tips.
By making your chicken waterer, you contribute positively to sustainability and gain the satisfaction of a well-executed project. Whether it’s selecting the right recycled materials or troubleshooting common issues, remember, a healthy flock starts with access to clean water. Now that you’re equipped with the knowledge and inspiration, it’s time to start building a chicken waterer that’s perfect for your poultry’s needs.
Related DIY Projects to Try
Build yourself a DIY chicken house with the given free chicken coop plans that make a chicken coop in just about every size and shape.
Discover how to make your own DIY chicken nesting boxes with our easy step-by-step guide. Keep your hens happy and productive!
