Making a DIY dog cone can be a practical solution when your furry friend needs help avoiding injury spots or surgery sites. It’s an approach that not only saves you a trip to the store but also allows you to tailor the cone specifically to your dog’s needs and comfort. This guide offers various homemade dog cone ideas, ensuring you find one that suits your dog perfectly.
Understanding the reasons behind making a homemade dog cone is as important as the creation process itself. It enables you to choose the right materials and design for your pet’s comfort and safety. By following a step-by-step guide, you’ll learn how to measure your dog, craft the cone shape, and make sure it’s safe for your pet. Let’s dive into how you can protect your dog while ensuring they stay comfortable.
Why Make a DIY Dog Cone?
- Cost-Effective: Making your own dog cone can save you money. Purchasing a cone from the vet or pet store may be costly, especially if you need different sizes as your dog grows or heals.
- Comfort for Your Pet: DIY dog cones can be customized for a better fit, ensuring that your furry friend is comfortable. You can use softer materials that won’t irritate your dog’s neck or obstruct their peripheral vision.
- Easy to Adjust: Homemade cones can be easily adjusted in size and fit. If your dog is uncomfortable or if the cone is too loose/tight, you can quickly make the necessary changes without the need for a new purchase.
- Immediate Solution: Sometimes, an injury or surgical procedure might require immediate protection to prevent licking or biting. Making a cone at home can be a quick solution when you don’t have immediate access to a store-bought one.
- Personalized Touch: Making your own cone allows you to personalize it. You can choose colors or patterns that reflect your pet’s personality, making the healing process a bit more cheerful for them.
- Reusable and Eco-Friendly: DIY dog cones can be reused for future needs, reducing waste. Also, repurposing materials like towels, cardboard, or pool noodles contributes to environmental conservation.
By opting to make a homemade dog cone, you provide your pet with a tailored, comforting solution while also being mindful of your budget and the environment.
How to Make a DIY Dog Cone at Home
If your furry friend is recovering from surgery or a wound, preventing them from licking or biting the area is crucial for healing. Commercial dog cones can be expensive and uncomfortable for your pet. A DIY dog cone can be a cost-effective, comfortable, and quick solution. Let’s explore a simple and reliable way to make a homemade dog cone using materials you likely have at home.
Choosing the Right Material
First, consider the material you’ll use for your DIY dog cone. The material should be sturdy enough to resist your dog’s attempts to reach their wound, but also light and comfortable to avoid causing them any distress. Some popular options include:
- Stiff Cardboard: Easily available and customizable.
- Foam Sheets: Soft, flexible, and more comfortable for long-term wear.
- Plastic Sheets: Durable and easy to clean, but ensure the edges are smooth to prevent injury.
Step-by-Step Guide
Measure Your Dog
- Measure your dog’s neck to ensure the cone will fit comfortably.
- Determine the length the cone needs to extend beyond your dog’s nose to effectively prevent them from reaching their wounds.
Make the Cone Shape
For Cardboard or Plastic Sheets:
- Cut a large circle out of your chosen material. The diameter should be the distance from your dog’s neck to their nose, multiplied by two.
- Cut a straight line from the edge of the circle to the center.
- Form a cone shape by overlapping the cut edges and secure with tape.
For Foam Sheets:
- Similar to the cardboard method, but you may need to sew or use a strong adhesive suitable for foam to secure the overlapping edges.
Ensure Comfort and Safety
- Smooth Edges: If using plastic or cardboard, tape the edges with durable tape to prevent scratching or discomfort.
- Adjustable Closure: Attach Velcro strips to the ends of the cone so you can easily adjust the fit around your dog’s neck. Ensure it’s snug but not too tight.
Test and Monitor
- Initially, monitor your dog while they wear the DIY cone. Make sure they can breathe comfortably and drink water with ease.
- Adjust the fit as necessary, ensuring the cone remains effective without causing distress.
Making a DIY dog cone is a straightforward and budget-friendly solution to help your pet through their recovery. By customizing the fit and material, you can ensure your dog’s comfort and safety during this challenging time.
DIY Dog Cone FAQs
Making a DIY dog cone can be a lifesaver for your furry friend’s recovery period. We’ve gathered some of the most commonly asked questions to help you through the process of making a comfortable, effective, and safe dog cone at home.
Why Make a Dog Cone at Home?
Cost-Effective: Homemade dog cones are significantly cheaper than store-bought ones. Plus, you can utilize materials you already have.
Custom Fit: You can ensure the cone fits your dog perfectly, providing comfort and preventing them from reaching their injuries.
Immediate Solution: In urgent situations, a DIY cone can be made quickly, providing an instant solution.
What Materials Can I Use for a Homemade Dog Cone?
- Stiff Cardboard: Easily accessible and can be cut to any size.
- Foam Sheets: Offer a softer, more comfortable option.
- Plastic Sheets: Durable and easy to clean. Remember to smooth out any sharp edges to prevent injury.
How Do I Measure My Dog for a DIY Cone?
- Neck Circumference: Use a flexible tape measure to get the size of your dog’s neck.
- Length: Measure the distance from the base of the neck to the tip of the nose. The cone should extend slightly beyond this point to be effective.
How Can I Ensure the Homemade Dog Cone is Comfortable?
- Smooth Edges: If you’re using materials like plastic or cardboard, cover the edges with tape to prevent scratches.
- Proper Fit: Make sure the cone is snug but not too tight. You should be able to fit two fingers comfortably between the cone and your dog’s neck.
- Lightweight Materials: Opt for materials that won’t be too heavy around your dog’s neck, to make it easier for them to move around.
Can I Decorate My Dog’s DIY Cone?
Absolutely! Feel free to personalize the cone with non-toxic paints or stickers. Just ensure that any decorations don’t pose a choking hazard or irritate your dog’s skin.
How Do I Get My Dog Used to the Cone?
Patience and Positive Reinforcement: Introduce the cone slowly, offering treats and praise to make a positive association. Keep initial sessions short, gradually increasing the time your dog wears the cone.
Are DIY Dog Cones Safe for Overnight Use?
While DIY dog cones are generally safe, it’s important to ensure they are securely fastened and comfortable for overnight use. Check the cone regularly for any signs of distress or discomfort in your dog.
Can I Use a DIY Dog Cone for Cats?
Yes, but ensure it’s appropriately sized and comfortable for your cat. Cats may require a softer material like foam sheets for their comfort.
What If My Dog Absolutely Refuses to Wear the Cone?
If your dog is extremely distressed by the cone, consult your veterinarian for alternatives. They may recommend a special recovery suit or other types of protective gear that your dog might tolerate better.
Making a DIY dog cone can be a straightforward and rewarding project that ensures your pet’s safety and comfort during their recovery. Remember, each dog is unique, so what works for one might not work for another. Be prepared to try different materials or designs to find the perfect solution for your furry friend.
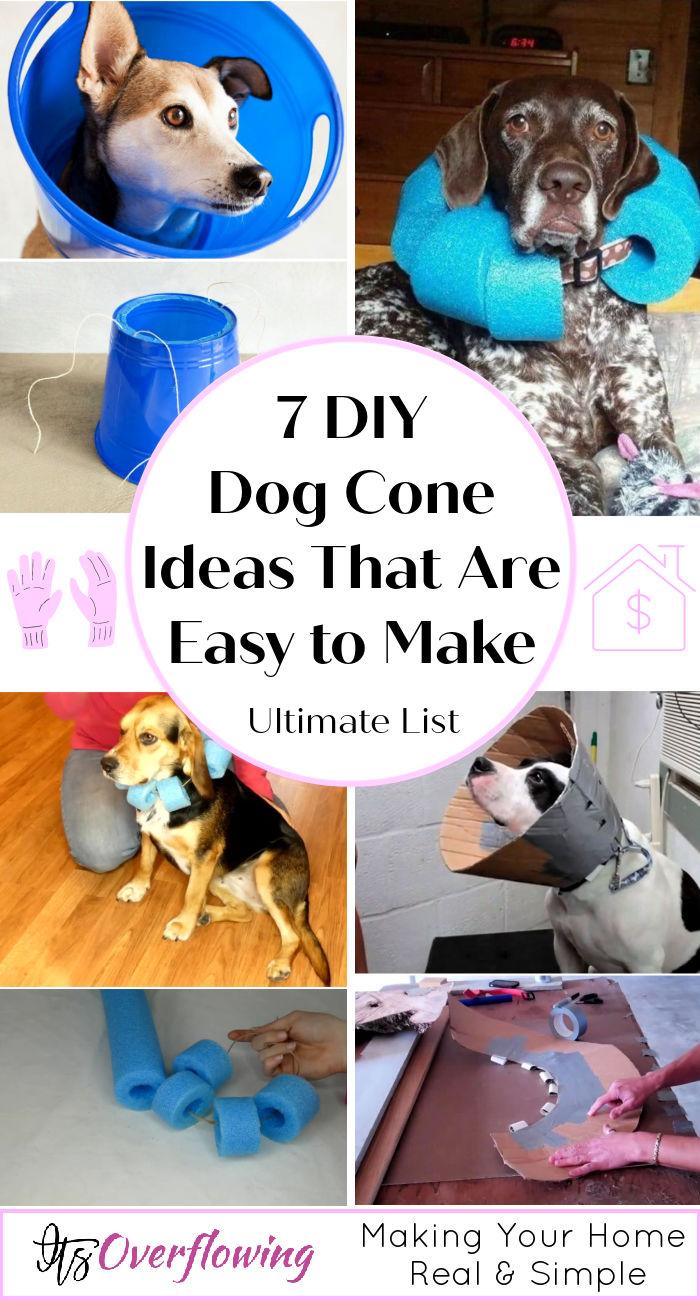
7 DIY Dog Cone Ideas
Looking for creative DIY dog cone ideas? Discover 7 unique ways to make your furry friend more comfortable and stylish. Start crafting today!
1. How to Make a Dog Cone
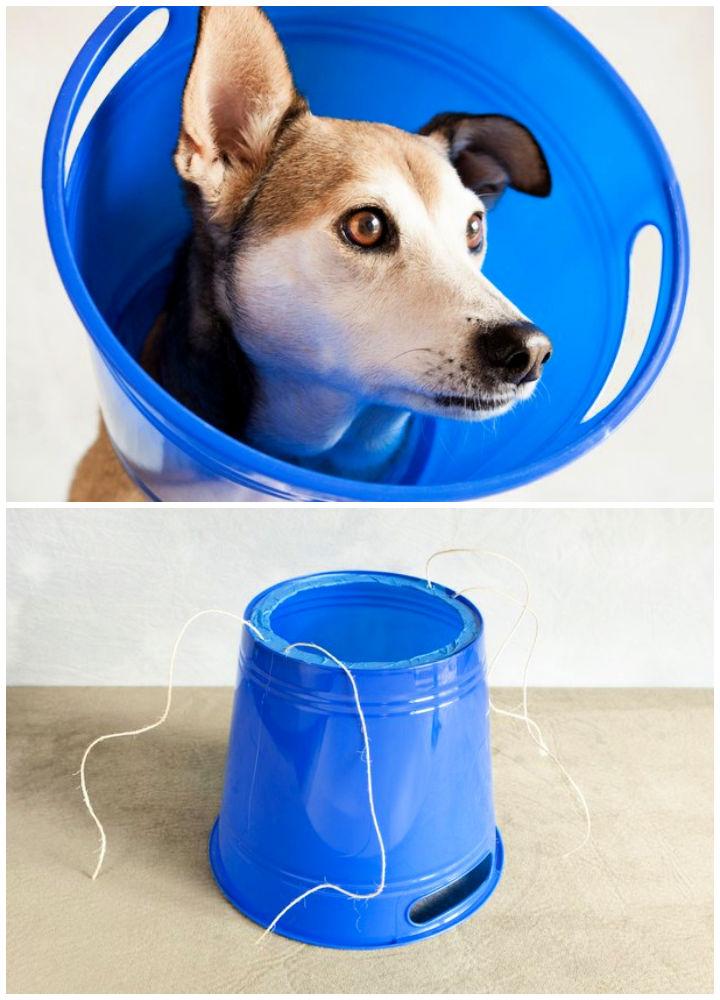
When your dog is healing from a wound or surgery, preventing them from licking or biting the area is crucial. A DIY dog head cone, commonly called an Elizabethan collar, can be a cost-effective solution. Cuteness.com offers a straightforward guide to making a comfortable, adjustable cone using common household items like a plastic flower pot or ice cream bucket. Ensure you measure your dog properly to allow for easy eating and drinking and always prioritize their comfort with smooth, taped edges. Crafting your own cone at home is a practical way to support your pet’s recovery while keeping them safe.
2. Homemade Dog Cone
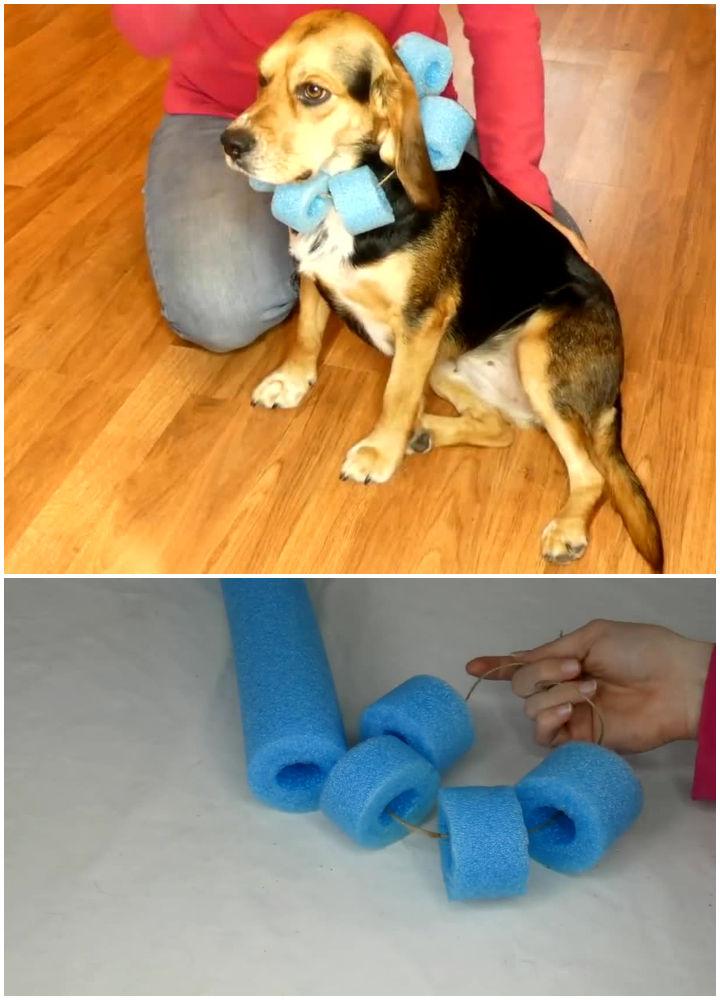
Craft a comfy and easy-to-make dog cone with this DIY guide! Say goodbye to the rigid plastic cones and hello to a homemade, flexible alternative that is perfect for your furry friend. All you need is a pool noodle and some twine. Measure the twine to fit your dog’s neck, adding a few extra inches for tying. Cut the pool noodles into small sections, similar to large beads, and thread them onto the twine.
This custom collar, reminiscent of childhood bead necklaces, is not only gentle but also effectively prevents your dog from bending its head excessively. It’s an affordable, quick solution to keep your pet comfortable while ensuring their safety. Discover the joy of crafting a unique, loving care accessory for your dog today!
3. DIY Comfy Dog Cone Collar
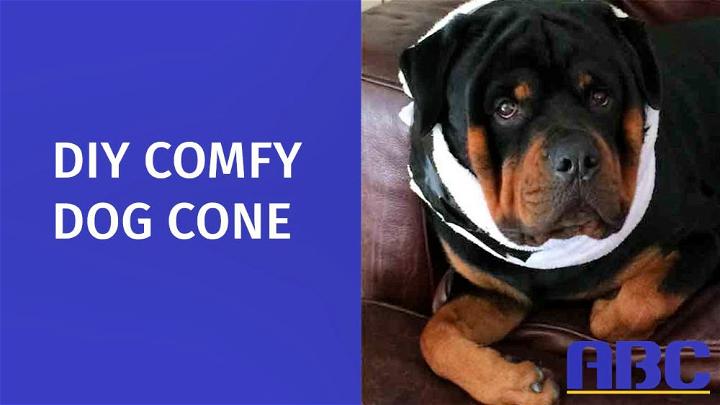
Make a comfortable homemade dog cone effortlessly using a towel and tape. It’s perfect for preventing your pup from licking wounds without the discomfort of traditional cones. Here’s how you can do it: Start with a full-sized towel and fold it lengthwise into thirds, making a soft barrier. To secure it, you’ll need three pieces of tape.
Position the towel above the dog’s shoulders but below the ears, adjusting for snugness while ensuring comfort. To distract your dog during this simple process, employ a helper with a plate of peanut butter. This DIY dog cone not only offers a gentle alternative but also saves on cost and is easily removable, making it a practical solution for pet owners seeking a kinder way to aid their furry friend’s healing.
4. Make Your Own Dog Cone
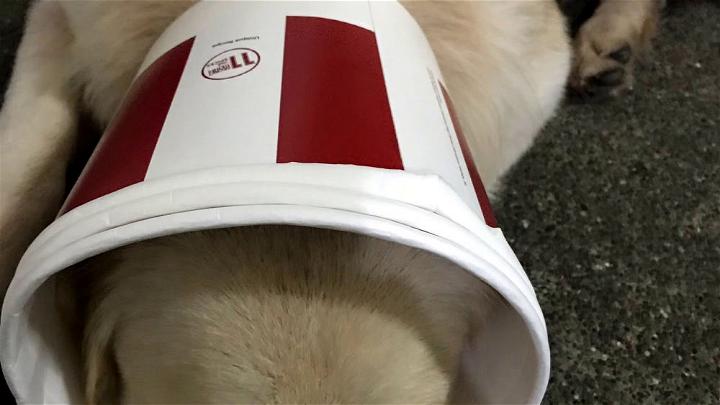
Making a homemade dog head cone using a KFC or Jollibee bucket is a resourceful way to protect your pet from scratching a wound or irritation. YouTube offers a video tutorial on how to DIY a comfortable and effective cone for your furry friend right at home.
With a clean, empty bucket and some tape, you can easily adjust the cone to fit your dog snugly and ensure their quick recovery. It’s a practical solution that also gives a new purpose to those fast-food buckets. Follow the step-by-step guide on YouTube to make this recycled dog head cone, ensuring your pet’s comfort and safety.
5. DIY Cardboard Dog Cone of Shame
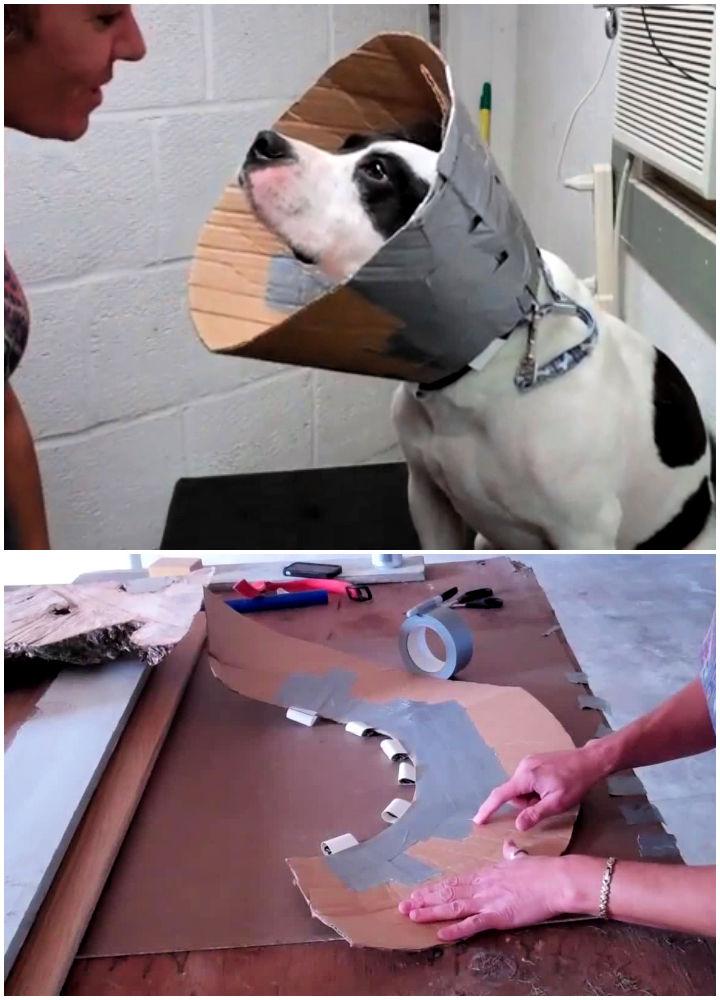
Looking to make a DIY E-Collar for your pet? YouTube offers a practical and instructive video that guides you through crafting a homemade Elizabethan collar with everyday materials. This simple yet effective solution involves folding a towel for neck support and adding cardboard for rigidity, providing a comfortable alternative to store-bought options.
The video is ideal for pet owners needing an immediate and cost-effective way to prevent their animals from scratching or licking wounds. Easy to follow and engaging, the tutorial on YouTube can help you ensure your pet’s speedy recovery without breaking the bank.
6. Making a Pool Noodle Dog Cone
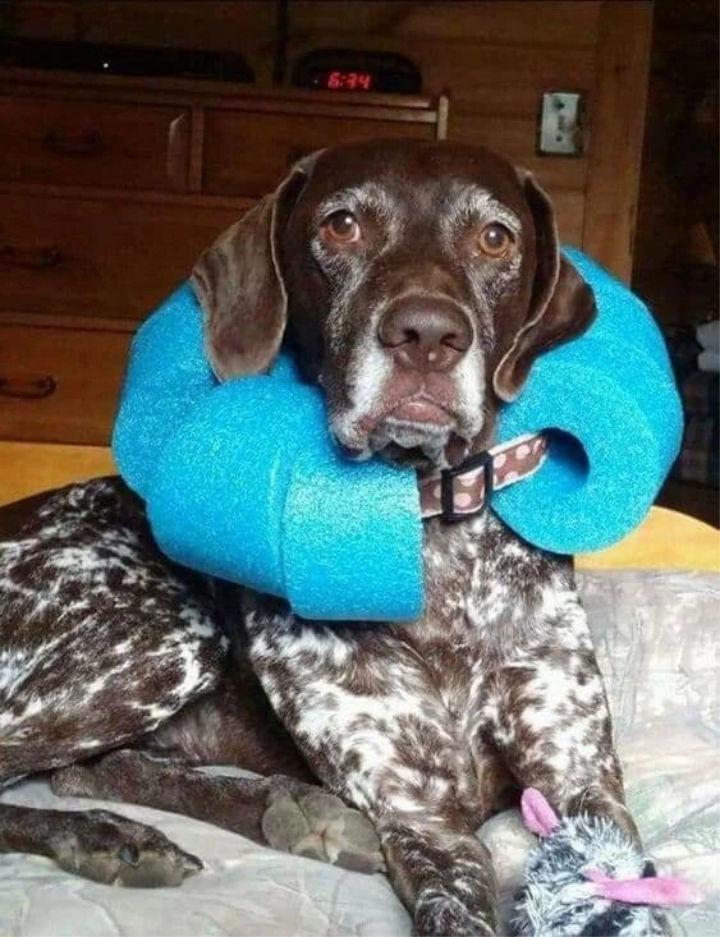
Discover a clever and compassionate solution for your pet’s comfort with our DIY collar made from a foam pool noodle. This innovative idea, perfect for pets ordered to wear a cone, allows for easy eating and drinking. You’ll need a foam pool noodle, parachute cord, and buckles (recycled from old gear).
Simply cut the pool noodle in half, thread the parachute cord through it, and attach the buckles. This comfortable alternative to the traditional cone has been successfully used for two weeks, ensuring your pet’s happiness and ease. Try this cost-effective, pet-friendly DIY project and provide your furry friend with the comfort they deserve!
7. DIY Pet Cone
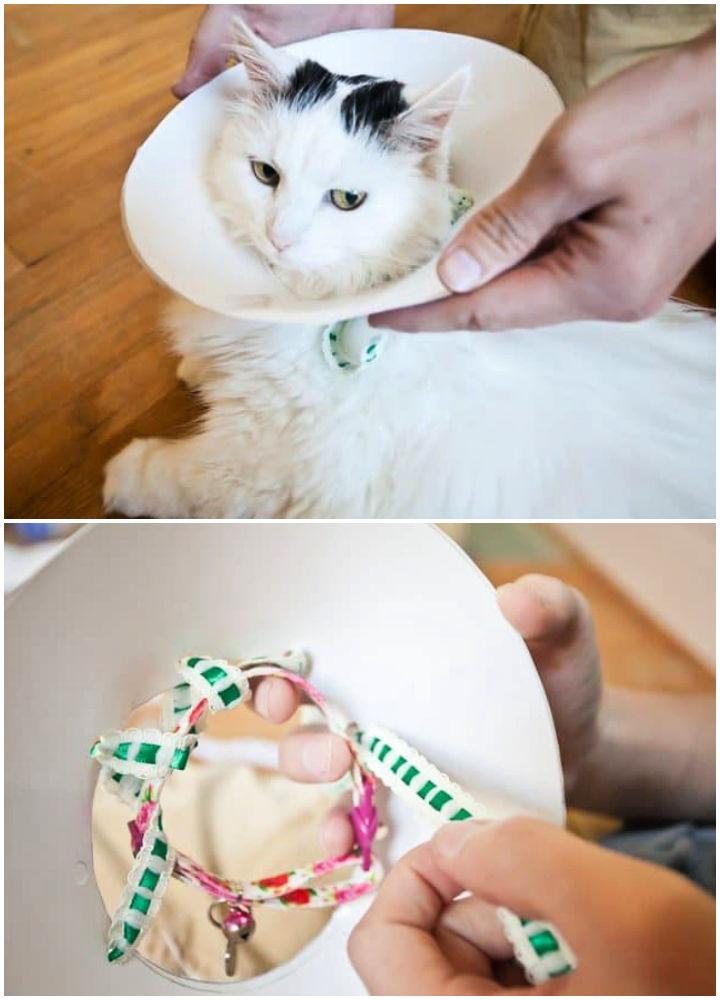
Making a soft Elizabethan collar for your cat can be a comfortable and cost-effective solution during their recovery from surgery or to prevent them from aggravating an irritation. On Cuteness.com, learn how to craft a homemade cat cone that ensures a snug yet gentle fit. With clear, step-by-step instructions, making a DIY cat cone from materials like foam sheets becomes an easy project. Ensuring proper measurements and secure attachment to your pet’s collar, this guide is designed to help pet owners provide care with a personal touch. Keep your feline friend safe and comfy with a custom-fitted Elizabethan collar.
Conclusion:
In conclusion, mastering how to make a DIY dog cone not only equips you with a valuable skill but also underscores the importance of caring for our furry friends during their times of need. This post has walked you through the essential steps and considerations for crafting a homemade dog cone, from selecting the right materials to ensuring the perfect fit for your dog’s comfort and safety.
With these strategies and 7 DIY dog cone ideas, you’re now well-prepared to make a protective accessory that will aid in your pet’s speedy recovery. Remember, a DIY dog cone is not just about protection; it’s a labor of love that reflects your dedication to your dog’s well-being.
DIY Dog Projects You Can Do At Home:
- 50 Free DIY Dog House Plans To Build a Dog House Cheaply
- 30 Easy DIY Dog Bed Plans
- 15 Free DIY Dog Ramp Plans With Detailed Instructions
- 8 Easy DIY Dog Pool Ideas
- 8 DIY Dog Run Ideas and Free Plans
- 15 Free Large Dog House Plans Your Dogs Will Love
- 9 Best DIY Dog Wheelchair Plans For Disabled Dogs
- 8 Best DIY Dog Door Plans
