Making a DIY dog door can be a rewarding project that not only enhances your pet’s independence but also simplifies your life. By following our 8 Free DIY Dog Door Plans, you can give your furry friend the freedom to explore the outdoors safely. Our guide is crafted to help you every step of the way, ensuring that your DIY project is both successful and satisfying. From selecting the perfect location to gathering the necessary materials and tools, we’ve got you covered with practical advice and tips.
Moving on to the installation process, our step-by-step guide is designed to make the construction of your DIY dog door as straightforward as possible. Whether it’s measuring your dog to ensure a perfect fit or securing the door to maximize home insulation, we’ve detailed all the crucial steps. Plus, with additional FAQs addressing common concerns, you’re well-equipped to create a functional and secure entryway for your pet. Get ready to empower your dog with the freedom they deserve, and let’s explore the next section for more insights on making this DIY dog door project a success.
Why DIY Dog Doors Are a Great Choice
Discover why DIY dog doors are the perfect choice for pet owners. Easy installation, cost-effective, and ultimate freedom for your furry friend.
- Save Money: Building a dog door yourself can be significantly cheaper than purchasing a pre-made one, especially if you use materials you already have at home.
- Customizable: You can tailor the door to the specific size and needs of your pet, ensuring a perfect fit.
- On Your Schedule: You can work on the project at your own pace and on your own time, without having to wait for delivery or installation.
- Easy Fixes: If something goes wrong, you’ll have the know-how to fix it since you made the door yourself.
- Safety Features: You can add extra locks or security barriers to ensure that your home stays safe while still being pet-friendly.
- Insulation: Customize the insulation level to your climate, reducing drafts and keeping your home comfortable.
- Skill Building: DIY projects can improve your carpentry and problem-solving skills, which can be applied to other areas of home improvement.
- Bonding Experience: Working on a project for your pet can strengthen your relationship with them as you build something tailored to their needs.
By taking the DIY route, you not only build a customized solution for your pet but also enjoy the satisfaction of completing a home project that benefits both you and your furry friend. Simple, practical, and fulfilling – DIY dog doors are a perfect weekend project for pet owners.
How to Install a DIY Dog Door: A Step-by-Step Guide
Making a dog door is an excellent way to give your pet the freedom to come and go as they please, ensuring they’re happy, healthy, and not cooped up indoors all day. Not only does this save you the hassle of playing doorman, but it also can significantly improve your dog’s mental stimulation and physical health. Let’s walk through the process of installing a DIY dog door in a way that’s easy to understand and execute.
Choosing the Right Location
Firstly, consider where you want to install the dog door. It needs to be easily accessible to your dog and lead to a safe, enclosed outdoor area. Common choices include back doors leading to fenced yards or side doors that open into secure side passages.
Measuring Your Dog
- Height: Measure your dog from the ground to the highest point of their shoulders. Add about 2 inches to ensure they can pass through comfortably without crouching.
- Width: Measure the widest part of your dog, usually the chest or hips, and add 2 inches for easy passage.
Gathering Materials and Tools
Before starting, make sure you have all the necessary materials and tools. You will need:
- A dog door kit suitable for your dog’s size
- A drill with appropriate bits
- A jigsaw or reciprocating saw for cutting the door
- Safety glasses and gloves
- A measuring tape and pencil
- A level to ensure the dog door is straight
- Caulk or weather stripping for sealing
Installation Steps
- Mark the Door: Use the measuring tape and pencil to mark the spot on your door based on the measurements you’ve taken. Most dog door kits come with a template to help you trace the exact size.
- Drill the Corners: Drill a hole in each corner of the traced rectangle to make it easier to start your cuts.
- Cut the Opening: Using the jigsaw, carefully cut along the lines you’ve drawn to build the opening for the dog door. It’s crucial to follow the lines closely for a snug fit.
- Attach the Frame: Once the opening is cut, fit the dog door frame into the space. Most dog doors come in two parts, one for the inside and one for the outside. Use the drill to attach these frames together through the door, following the manufacturer’s instructions.
- Seal the Edges: Apply caulk around the edges of the frame to seal any gaps. This will prevent drafts and ensure the door is weatherproof.
- Introduce Your Dog to the Door: Some dogs may be hesitant at first. You can encourage them by placing treats on the other side of the door or gently pushing the flap open to show them it’s safe.
Tips for Success
- Choose the Right Door: Make sure the dog door you purchase is suitable for your dog’s size and the local weather conditions. Heavier flaps or insulated doors are excellent for colder climates.
- Security: Consider dog doors with lockable panels for added security during the night or when you’re away from home.
- Training: Be patient and positive when teaching your dog how to use the door. Some may take to it immediately, while others need a little encouragement.
Installing a DIY dog door is a straightforward project that can significantly enhance your dog’s quality of life. By choosing the right location, measuring accurately, and following these simple installation steps, you can provide your pet with the freedom and independence they deserve.
DIY Dog Door FAQs
Get answers to all your DIY dog door FAQs here! Learn how to install, maintain, and troubleshoot your pet door with expert tips and advice.
What materials do I need for a DIY dog door?
To build a DIY dog door, you generally need:
- A measuring tape to measure your dog and the door space
- A saw (jigsaw or reciprocating saw) for cutting the door
- A drill with bits for starting your cuts
- A pencil for marking the cut area
- Safety glasses and gloves for protection
- A dog door kit suitable for your dog’s size
- Caulk or weather stripping to seal the door and prevent drafts
How do I choose the right size dog door?
Measure your dog’s height from the ground to the tallest point of their shoulders and add about 2 inches. For the width, measure the widest part of your dog, usually across the chest or hips, and again, add 2 inches. This ensures your dog can comfortably use the door without crouching or squeezing through.
Can I install a dog door in a rented property?
Always consult your landlord or property management before making modifications to your rental property. In many cases, they may allow it with the condition that the door is professionally installed and you agree to cover the costs of returning the area to its original condition when you move out.
Is it secure to have a dog door?
Modern DIY dog doors can be made secure with lockable panels or covers to prevent unauthorized entry. Consider adding extra locks or security measures if you’re concerned about safety. Additionally, positioning the dog door in a less visible and accessible part of your home can also increase security.
Will installing a dog door affect my home’s insulation?
Installing a dog door can impact your home’s insulation, but this can be mitigated. Choose a dog door with insulated flaps or add weather stripping around the door to minimize drafts. Some dog doors are specifically designed with energy efficiency in mind.
How can I train my dog to use the new dog door?
Patience is key. Start by propping the door open and encouraging your dog to walk through it with treats or toys. Gradually lower the flap as your dog becomes more comfortable. Some dogs take to it immediately, while others may need a few days to adjust.
Can I add a dog door to a sliding glass door?
Yes, there are specific pet door inserts designed for sliding glass doors. These inserts are easy to install and remove, making them a good option for renters or those looking for a less permanent solution.
How do I maintain my DIY dog door?
Regularly check the door for wear and tear, especially the flaps and the seal around the door. Replace any worn parts to ensure the door remains secure and weatherproof. Cleaning the door and the surrounding area will also help prevent dirt buildup that could hinder its operation.
By covering these frequently asked questions, you should now have a better understanding of how to approach making your own DIY dog door, ensuring a safe and convenient way for your furry friend to enjoy a little more freedom.
8 Free DIY Dog Door Plans
Discover the top 8 DIY dog door plans to build a convenient and secure entryway for your furry friend. Easy-to-follow instructions for every skill level.
1. DIY Dog Door
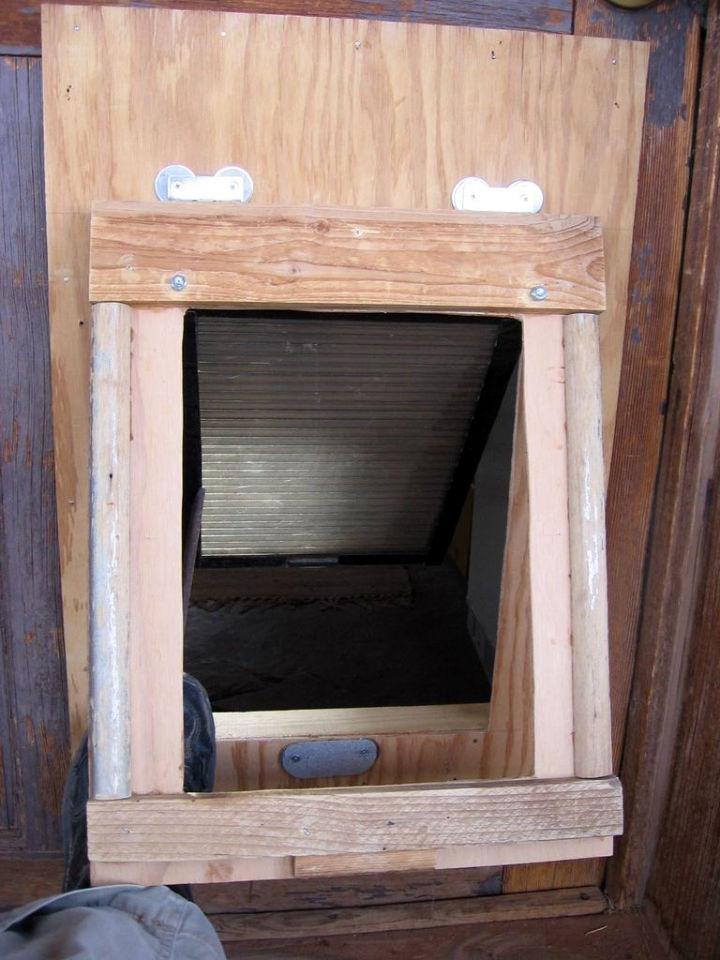
Installing a dog door can offer your furry friend the freedom to move in and out of your house as they please, even when you’re not home. Instructables provides an instructive guide to making a two-flap dog door, a design that improves security and insulation compared to standard options. This DIY solution involves crafting an overlapping outer flap and a smaller inner flap, both equipped with magnetic catches.
The process is detailed step-by-step, from measuring and cutting to mounting and weatherproofing, ensuring a snug and efficient entry point for your pet. The guide is helpful, engaging, and easy to follow, making it an ideal project for pet owners looking to enhance their dog’s independence safely and comfortably.
2. How to Make a Dog Door
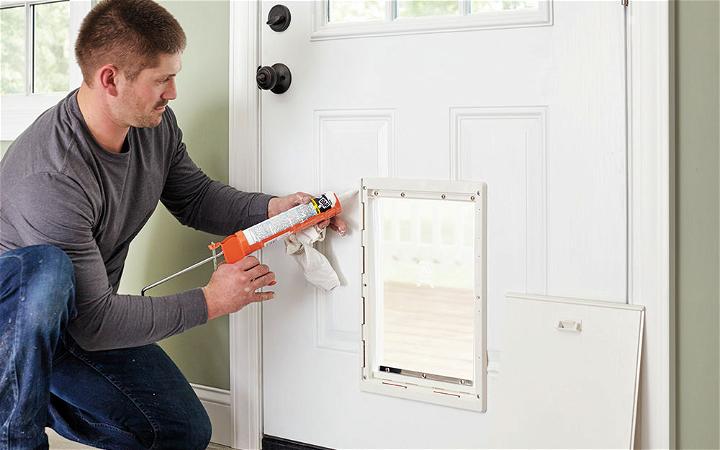
Installing a dog door in your home not only grants freedom to your furry companion but also adds convenience to your daily routine. To start, measure your pet to select a door size that accommodates their height and width, ensuring they can pass through comfortably. Choose a location that offers easy outdoor access and fits the door securely, leaving ample space for the frame.
Next, mark the placement, drill holes, and carefully cut out the opening. Fit the frames on both sides, insert screws to hold them in place, and apply caulk to seal the frame, protecting your home from the elements. For a comprehensive range of options, The Home Depot provides a variety of dog doors suitable for different breeds and house designs, along with installation assistance. Homedepot
3. Install a DIY Pet Door
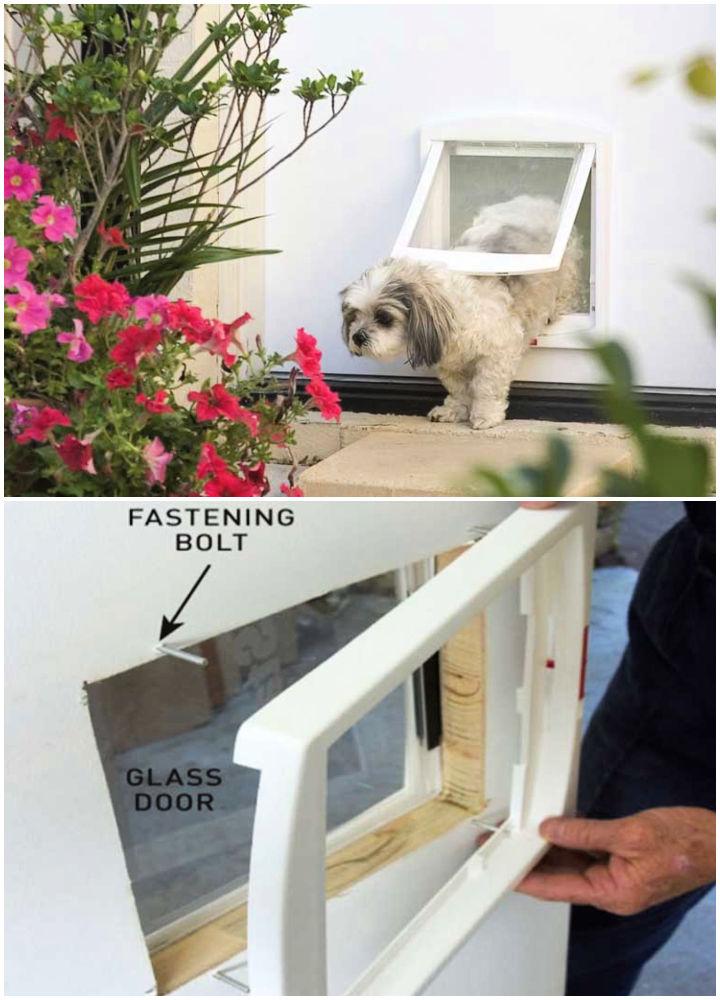
Installing a pet door is an excellent way to give your furry friends the independence they crave while maintaining your home’s security and convenience. Australian Handyman Magazine offers a comprehensive guide that simplifies the process. It begins with selecting the right door size and style to match your pet’s needs, ensuring their easy passage and your peace of mind. Detailed instructions, from marking the cutout baseline to securing the door, make this DIY project accessible for all pet owners. Follow these steps to build a seamless entry for your pet and enjoy the benefits of a pet-friendly home.
4. Homemade Dog Door
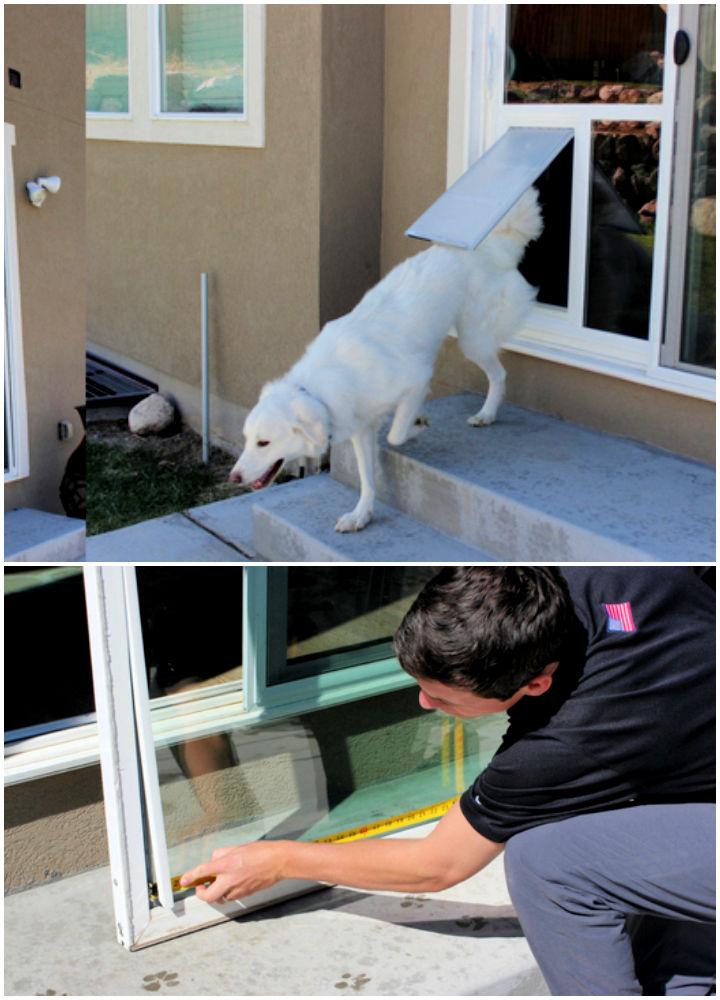
Installing a sliding glass pet door insert from Advanced Window Products can enhance the comfort of your furry companions and the convenience of your home life. Our step-by-step guide ensures a smooth DIY installation process with a comprehensive list of tools and meticulous instructions.
Perfect for pet owners who enjoy hands-on projects, this guide empowers you to build a pet-friendly environment without compromising the aesthetics or security of your sliding glass doors. If DIY isn’t your style, our team of professionals is ready to assist with installation. Trust Advanced Window Products for a seamless blend of quality, functionality, and service in your Utah home.
5. How to Make a Dog Gate
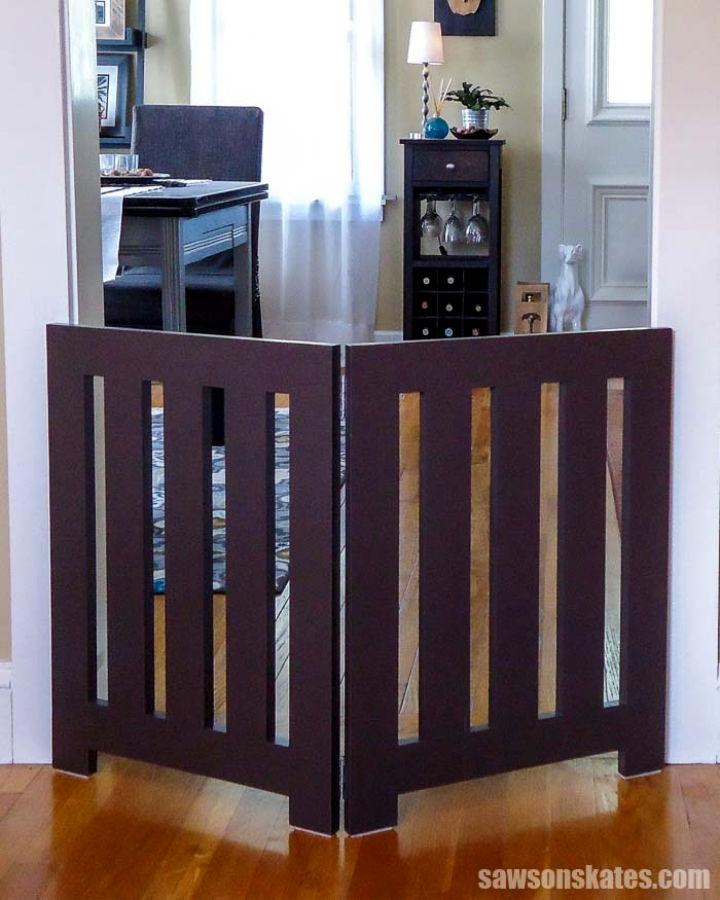
Secure your furry friend with a freestanding DIY dog gate, an ideal solution for homes needing pet barriers without wall damage. Saws on Skates provides a simple three-step guide to constructing a portable dog gate that’s customizable for various spaces. You’ll need basic tools like a miter saw, drill, and pocket hole jig, along with some wood, screws, and hinges.
Whether you choose to paint, stain, or leave the wood natural, this project promises a sturdy and attractive addition to your home. Perfect for containing pets in designated areas, this DIY gate blends functionality with ease of creation. Get started on crafting a safe space for your pup today with the free plan from Saws on Skates.
6. Heavy-Duty Doggie Door Ideas
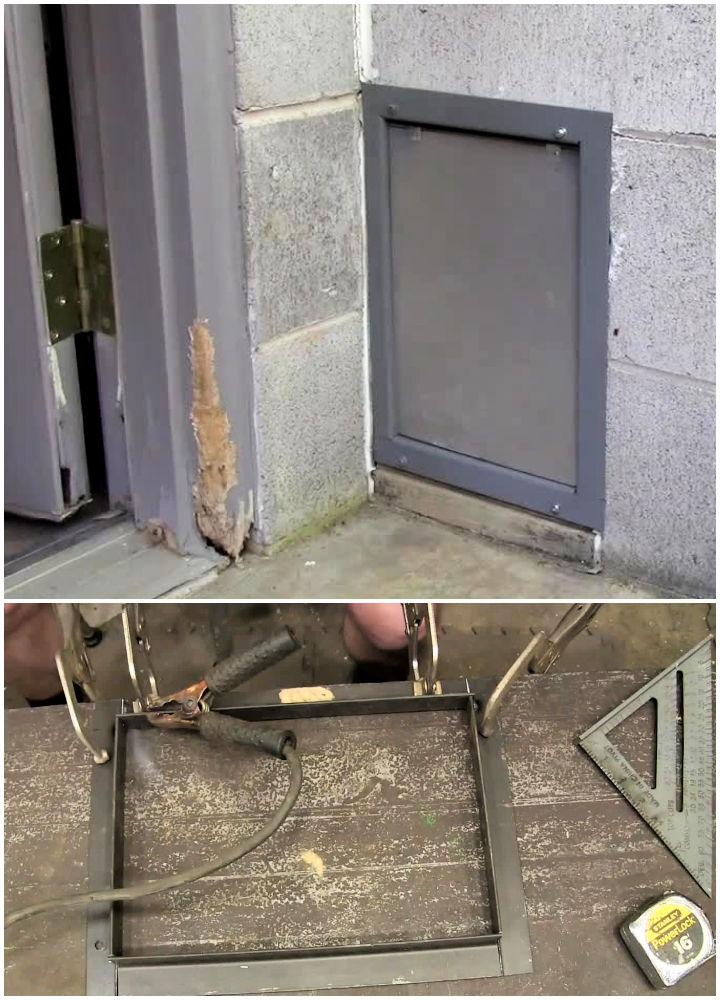
Craft a sturdy, long-lasting doggie door with this DIY tutorial! Ideal for pet owners, this project involves making a durable door through a concrete block wall, ensuring your furry friend’s easy access to the outdoors. Using steel, aluminum, and a few essential tools like a saw, drill, and wire for hinges, you’ll construct a resilient entryway that outperforms store-bought alternatives.
The guide includes clever use of neodymium magnets for secure closure and weather-stripping tips for extra insulation. This easy-to-follow process, requiring only basic DIY skills, guarantees a safe and convenient passage for your pet, enhancing both functionality and comfort in your home.
7. Mini Sliding Barn Style DIY Dog Door
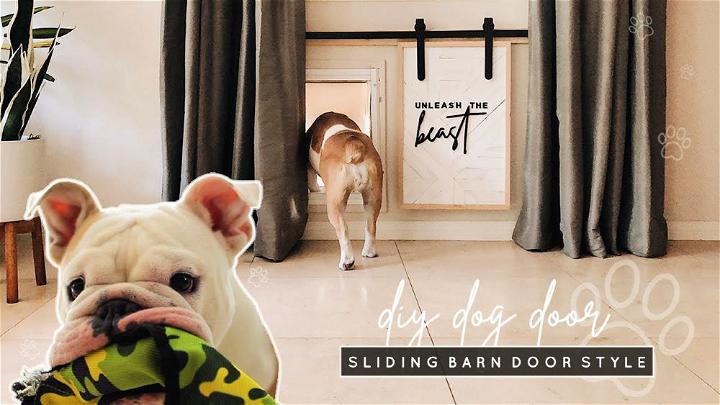
Elevate your pet’s access with a charming DIY Mini Sliding Barn Door Doggy Door, blending style and function seamlessly. This project, perfect for craft enthusiasts, transforms a simple dog door into an eye-catching feature. Using a Milwaukee Generation 2 18 gauge brad nailer and other basic carpentry tools, you’ll craft a plywood base adorned with creative wooden patterns.
This guide walks you through each step, from measuring and cutting wood to assembling and installing the miniature barn door. Not only does it add a rustic charm to your space, but it also offers a unique, pet-friendly solution. Dive into this engaging DIY project and give your furry friend a stylish entryway!
8. DIY Magnetic Dog Door Flap
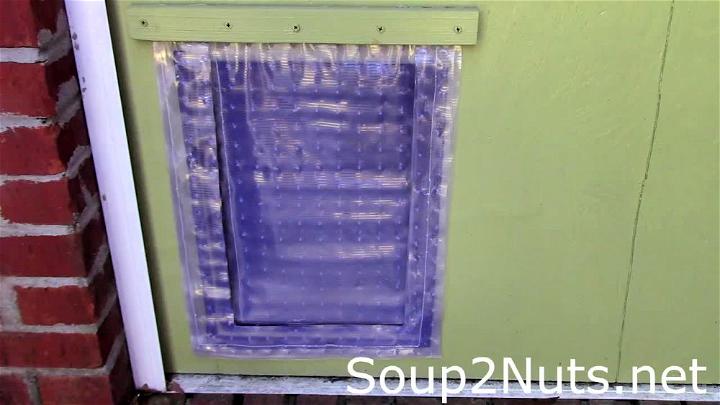
Elevate your pet’s freedom with this DIY Magnetic Dog Door Flap, a budget-friendly and innovative solution for pet owners. Using clear, durable plastic and magnets, this door flap ensures easy in-and-out access for your furry friend while maintaining home security. The process involves simple stitching, applying magnets, and crafting a sliding door for added safety.
This ingenious project, completed for under $15, transforms a basic plywood piece into a pet-friendly passage. It’s a creative and cost-effective way to grant your pet autonomy and enhance your home’s functionality. Perfect for those who love practical DIY projects that deliver big on convenience and pet comfort.
Conclusion:
In conclusion, mastering how to make a dog door through our 8 free DIY dog door plans offers pet owners a unique opportunity to enhance their pet’s freedom and comfort while ensuring the safety and insulation of their homes. From choosing the right location to gathering materials and mastering installation steps, these comprehensive guides are designed to help you successfully create a functional and aesthetically pleasing dog door. Additionally, the provided FAQs section aims to address common concerns and further assist you in this DIY project. By following these tips and embracing the DIY spirit, you’ll be well on your way to adding a practical and loving touch to your home for your furry friend.
