Organizing your drawers can feel like a monumental task, but it doesn’t have to be a journey you take alone. Our guide on making DIY drawer dividers is the companion you need. These dividers not only enhance the functionality of your storage spaces but also introduce an organized and stress-free environment into your home. Tailoring your spaces with custom storage solutions allows every item to have its rightful place, making your daily routine smoother and more enjoyable.
Creating these dividers yourself is not only a cost-effective strategy but also an opportunity for you to add a personal touch to your storage solutions. Utilize a variety of materials, from balsa wood to recycled cardboard, making it a sustainable choice that reduces waste. Whether it’s transforming a kitchen drawer or optimizing a dresser, these dividers are adaptable, easy to install, and customizable to your changing needs. Dive into our guide, ready to tackle any drawer with confidence and creativity. Let’s begin this organizing journey, where functionality meets style, and discover how to make your very own DIY drawer dividers.
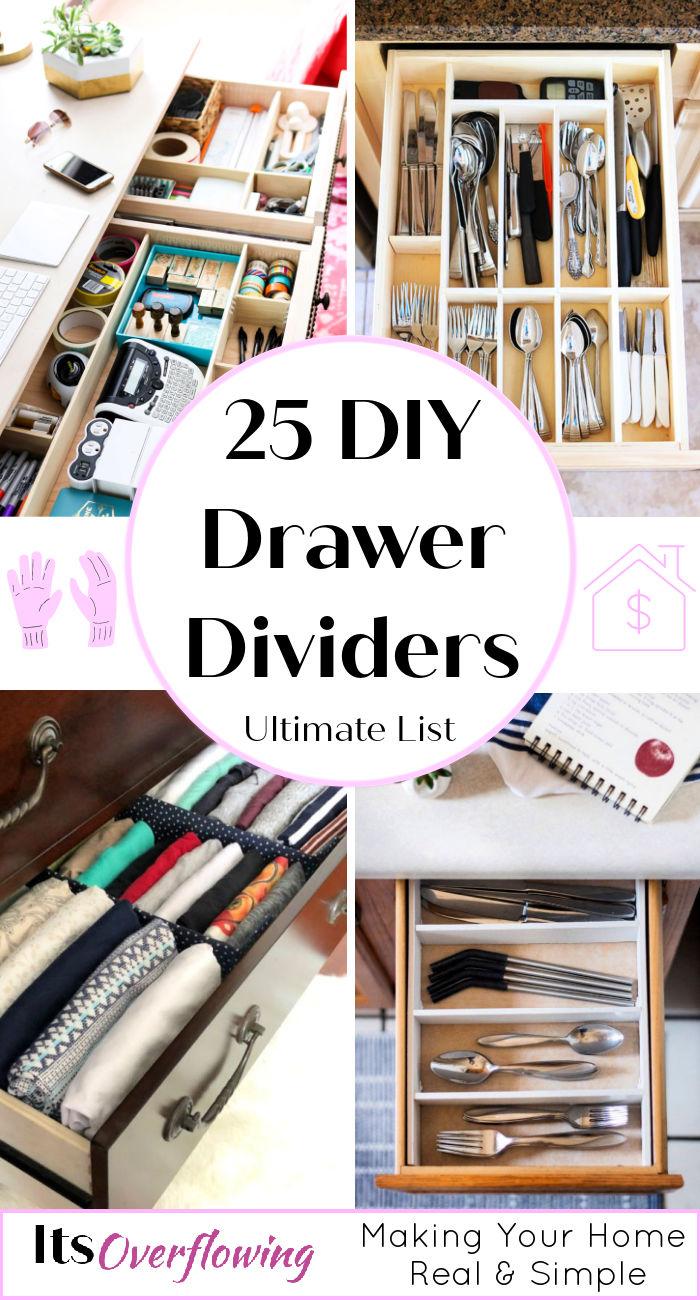
Why Choose DIY Drawer Dividers: A Guide to Organized Living
Organizing your home can be fulfilling yet challenging, particularly when dealing with cluttered drawers. Whether it’s a messy kitchen drawer, office desk, or dresser, the frustration of not finding what you need is real. That’s where DIY drawer dividers come in. Discover how DIY solutions can transform cluttered drawers into organized spaces.
- Custom Fit: One size does not fit all when it comes to organizing solutions. DIY drawer dividers allow you to customize each compartment to the exact dimensions of your drawers, ensuring every item has its place.
- Cost-Effective: Store-bought organizers can be expensive, especially when looking for high-quality, durable options. Making your own dividers is not only cheaper but allows you full control over the materials and design, ensuring you don’t have to compromise quality for price.
- Creative Use of Materials: The beauty of DIY projects lies in their versatility. From repurposed cardboard to leftover balsa wood, you can use a variety of materials that are readily available at home, making it a sustainable option that reduces waste.
- Enhanced Accessibility: By designing dividers that cater specifically to your storage needs, you significantly reduce the time spent rummaging through drawers. This ease of access not only saves time but also reduces stress, creating a more efficient and pleasant living environment.
- Personal Touch: DIY projects offer a unique opportunity to inject a bit of your personality into your storage solutions. Whether it’s choosing a specific fabric, paint color, or decorative element, your drawer dividers can become a reflection of your personal style.
- Adaptive and Flexible: As your storage needs change, so can your DIY dividers. Unlike fixed, store-bought organizers, you can easily adjust or remake your dividers to adapt to new items or different drawer dimensions, making them a versatile long-term solution.
- Improved Organization: Ultimately, the primary benefit of DIY drawer dividers is the improvement to your home organization. A well-organized drawer not only looks appealing but also functions more efficiently, making your daily routines smoother and more enjoyable.
DIY drawer dividers present a practical, cost-effective, and customizable solution to drawer organization.
How to Make DIY Drawer Dividers: A Step-By-Step Guide
Organizing your drawers can transform a cluttered space into an oasis of order, making it easy to find what you need, when you need it. DIY drawer dividers are a simple, cost-effective way to customize your storage and bring harmony to your home. Whether it’s for the kitchen, bathroom, office, or bedroom, follow this guide to make your own drawer dividers that fit your drawers and your lifestyle.
Materials You’ll Need
- Measuring tape
- Material for dividers (cardboard, balsa wood, or plywood)
- Cutter or saw (depending on material choice)
- Adhesive (glue, double-sided tape) or hardware (nails, screws) for assembly
- Decorative paper or fabric (optional)
- Finishing supplies (paint, varnish, duct tape) for customization
Step-by-Step Instructions
1. Measure Your Drawer
Start by measuring the length, width, and depth of your drawer. These dimensions are crucial for creating dividers that fit perfectly. Write down these measurements to refer back to during the planning and cutting stages.
2. Plan Your Dividers
Decide how you want to organize your drawer. Do you want long compartments for kitchen utensils, small sections for office supplies, or a mix for a vanity drawer? Sketch a simple plan, noting the dimensions of each compartment. This plan will be your guide during the construction phase.
3. Choose Your Material
Select the material for your dividers based on what you have available and your personal preference. Cardboard is great for an eco-friendly, cost-effective option. Balsa wood or plywood is sturdier and more durable but requires tools to cut.
4. Cut Your Dividers
Using your material of choice, cut pieces according to the dimensions you planned. For cardboard, a cutter or scissors will do. For wood, you’ll need a saw. Always wear protective gear when using sharp tools.
5. Assemble Your Dividers
After cutting the pieces, it’s time to put them together. For cardboard, interlocking notches or adhesive can work. For wood, glue, screws, or nails might be necessary. Ensure your dividers fit snugly in the drawer but can also be easily removed for cleaning or reorganization.
6. Customize Your Dividers
This step is optional but recommended for adding a personal touch. Cover cardboard dividers with decorative paper or fabric using glue. Paint or varnish wood dividers in colors that match your decor. Use duct tape for a quick, colorful finish.
7. Install Your Dividers
Once your dividers are assembled and customized, place them in your drawer. Arrange your items in the newly created compartments, taking advantage of your organized space.
Tips for Success
- Double-check measurements: It’s better to measure twice and cut once to avoid any mistakes.
- Consider adjustability: For changing needs, create dividers that can be moved or adjusted. Slotted designs or using removable adhesive can offer flexibility.
- Keep it light: Especially for deeper drawers, don’t overload sections, as this can cause dividers to shift or the drawer to become too heavy.
DIY drawer dividers are a straightforward, enjoyable project that can make a big difference in your daily life. By taking the time to measure accurately, plan your design, and customize your dividers, you’ll end up with a functional, beautiful result that enhances your home and simplifies your routines.
DIY Drawer Dividers FAQs
Get answers to frequently asked questions about DIY drawer dividers. Find out how to organize your drawers with these handy dividers.
What materials do I need to make DIY drawer dividers?
To create your own drawer dividers, you’ll typically need:
- Measuring tape
- Plywood or foam board
- Saw or utility knife
- Sandpaper (if using wood)
- Glue or adhesive strips
- Ruler or straight edge
How do I measure my drawer for dividers?
Measure the inside width, depth, and height of your drawer. Ensure you measure twice for accuracy. Use these measurements to cut your divider materials to the correct size.
Can I make adjustable drawer dividers?
Yes, you can make adjustable drawer dividers by:
- Using tension rods that can be expanded and placed inside the drawer without any need for cutting or gluing.
- Creating slots on the dividers to allow for customizable configurations.
How do I keep the dividers from sliding around?
Secure your dividers by:
- Applying adhesive strips or Velcro to the bottom of the dividers.
- Using non-slip pads or rubber drawer liners beneath the dividers.
What’s the best material for drawer dividers?
The best material depends on your needs:
- Plywood is sturdy and long-lasting.
- Foam board is lightweight and easy to cut.
- Acrylic can be a clear, stylish option.
- Cardboard is a cost-effective, temporary solution.
Can I make drawer dividers without tools?
Yes, for a tool-free option:
- Use thick cardboard or pre-cut foam board.
- Secure pieces together with adhesive tape or glue.
How do I cut straight lines for my dividers?
To cut straight lines:
- Mark your measurements clearly on the material.
- Use a ruler or straight edge as a guide while cutting.
- Go slowly and follow the edge closely with your cutting tool.
Are DIY drawer dividers durable?
The durability depends on the materials and construction. Plywood dividers are more durable than cardboard ones. Ensure all connections are secure for increased longevity.
How can I customize my drawer dividers?
Customize by:
- Painting or covering them with contact paper.
- Adding labels or decorative knobs.
- Adjusting the size and number of compartments to fit your items.
Can I remove the dividers easily if I change my mind?
Yes, if you use non-permanent fasteners like adhesive strips or Velcro, you can remove the dividers without damaging the drawer. Tension rods are also easily removable.
By addressing these common questions, you can embark on your DIY drawer divider project with confidence, creating a more organized and efficient space in your drawers.
25 Easy DIY Drawer Dividers
Discover 25 simple and creative DIY drawer dividers that will help you organize your space effortlessly.
1. Easy DIY Fabric Drawer Dividers
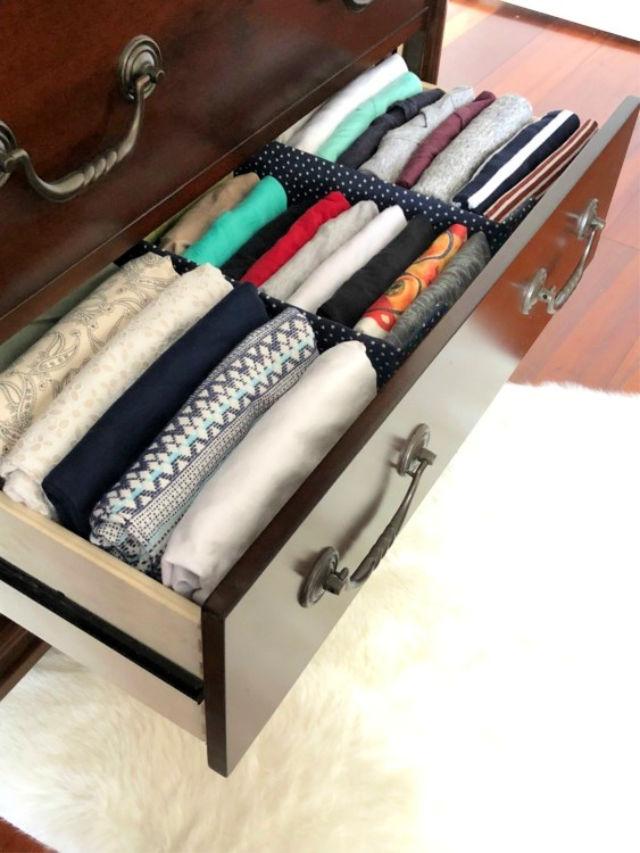
Organized-ish offers a creative and practical guide to making your own fabric drawer dividers. By utilizing recycled cardboard and leftover fabric, you can transform cluttered dresser drawers into well-organized spaces. The step-by-step instructions are easy to follow, ensuring a snug fit and a customized look for each drawer. This eco-friendly project not only helps in keeping your clothes neatly folded but also adds a personal touch to your storage. Get ready to tidy up your dresser with this cost-effective and stylish DIY solution. lelaburris
2. How to Make a Wooden Drawer Organizer
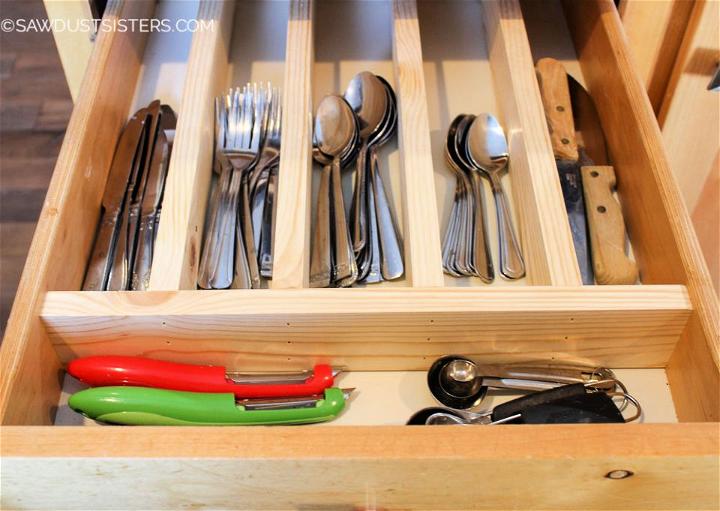
Transform your cluttered drawers into neatly organized spaces with a DIY drawer divider insert. Sawdust Sisters provides a step-by-step guide on crafting your own custom, removable wooden dividers. This project requires minimal materials such as a white wood board, wood glue, and a nail gun or hammer and nails.
You’ll be measuring, cutting, and assembling pieces to fit your drawer’s specific dimensions. Not only will this solution help you sort essential items efficiently, but it also offers the convenience of easy removal for cleaning. Get ready to streamline your storage with this practical and engaging woodworking project.
3. Simple Homemade Drawer Dividers
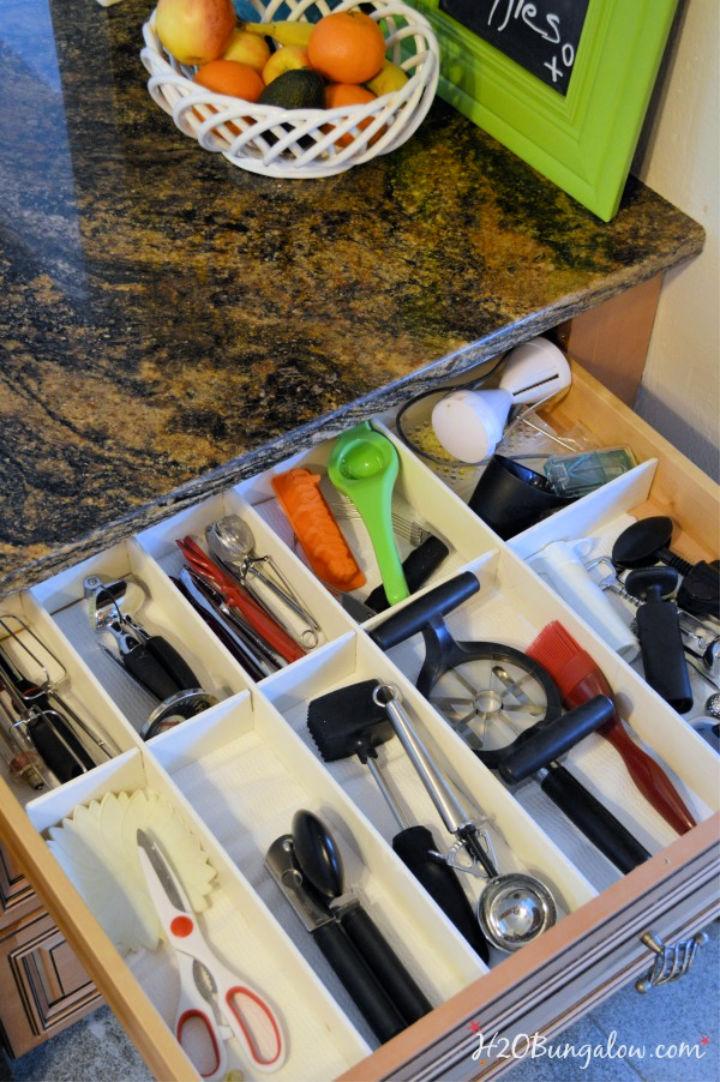
Struggling with cluttered kitchen drawers? h3OBungalow offers a straightforward guide to creating your own DIY wood drawer dividers, ensuring everything stays organized and accessible. With a simple design using 1/4 inch plywood, you can construct custom compartments that fit snugly without the need for nails or glue.
By following these steps, you can transform your messy drawers into a neatly arranged space, giving your longest utensils a perfect fit. Ideal for anyone seeking a practical and stylish solution to kitchen organization, these dividers are also easily adjustable, catering to future changes in your storage needs. Get ready to enjoy a tidier kitchen with these easy-to-make drawer dividers.
4. Cheap DIY Drawer Divider Organizer
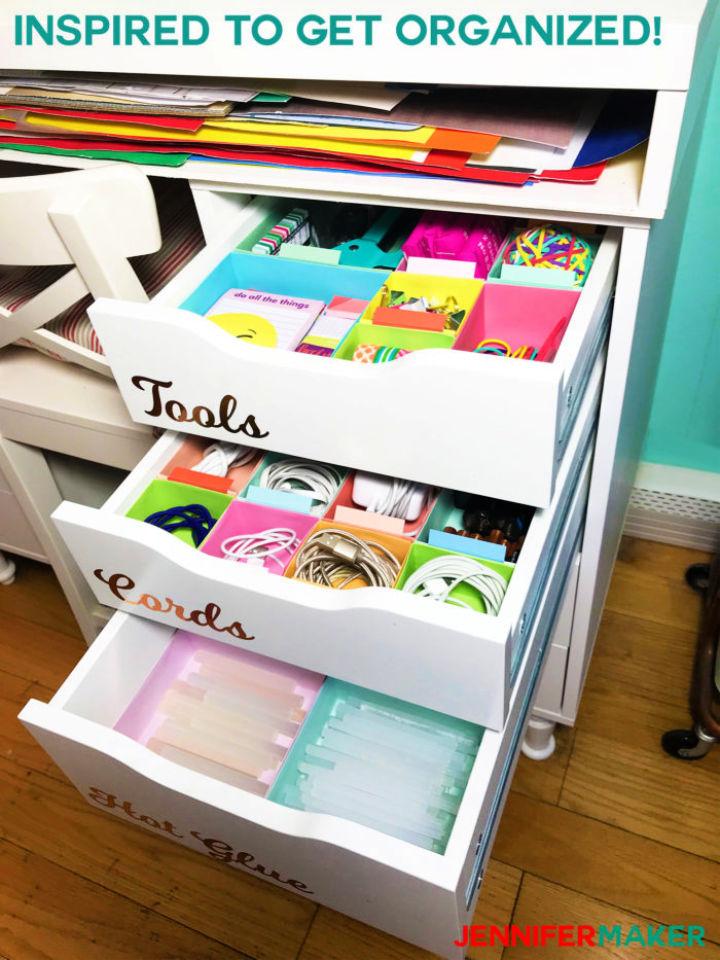
Struggling with cluttered drawers? JenuineMom.com offers a smart solution with DIY Drawer Dividers that you can craft yourself, perfect for tidying up any space. Jennifer provides a free pattern and an easy-to-follow tutorial to help you create customizable organizers for your IKEA drawers or any other type. With these dividers, you’ll not only organize efficiently but also enjoy the satisfaction of a neat and orderly drawer system. Say goodbye to mess and hello to an organized lifestyle with these handy drawer dividers.
5. Make Woden Drawer Dividers for a Clothing Dresser
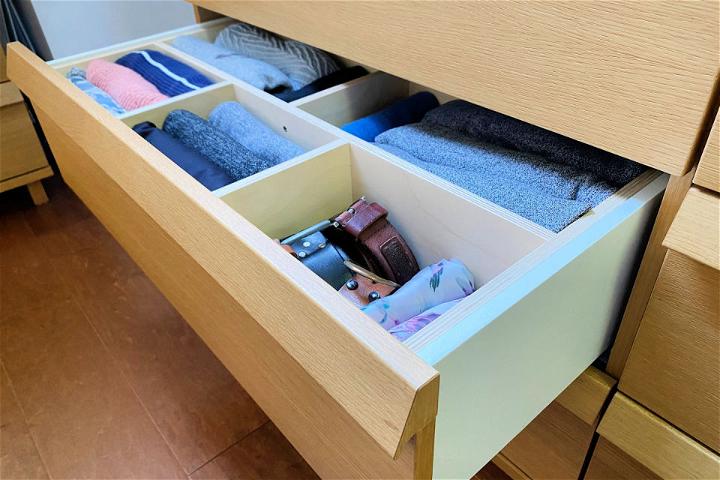
Transform your cluttered drawers into a model of organization with DIY drawer dividers that you can tailor to your storage needs. Family Handyman‘s comprehensive guide walks you through a simple process that turns chaotic drawers into neatly sectioned spaces. With a few tools, some plywood, and a bit of creativity, you can create custom dividers in just a few hours.
This project is not only cost-effective, ranging from $20 to $80, but also accessible for those looking to enhance their home organization. Follow the step-by-step instructions to measure, cut, and assemble your drawer dividers, ensuring all your items have a designated spot. A well-organized drawer can streamline your daily routine and bring a sense of calm to your living space.
6. How to Build Kitchen Drawer Dividers
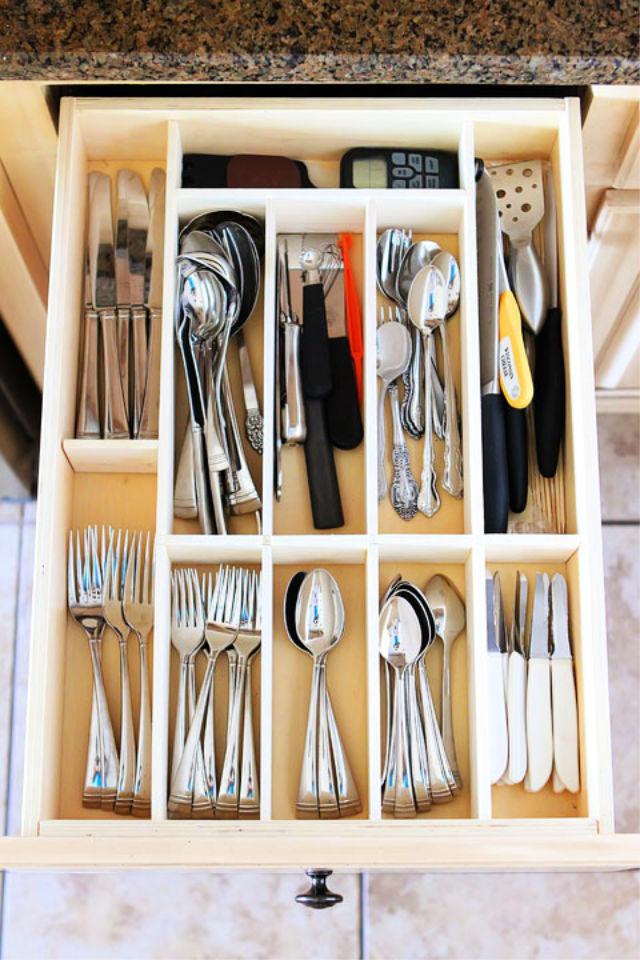
Transform your kitchen drawers from cluttered chaos into tidy havens with a custom drawer organizer, a DIY project that’s as rewarding as it is practical. Kevin & Amanda‘s guide walks you through crafting a bespoke kitchen drawer organizer with just a few supplies and simple tools.
No need for costly, pre-made options that never quite fit—this easy and inexpensive method will leave you with a perfectly tailored solution, enhancing the functionality and appearance of your kitchen storage. Embrace the satisfaction of a well-organized space where every utensil has its place, easily accessible and neatly arranged.
7. Beginner Friendly DIY Drawer Dividers
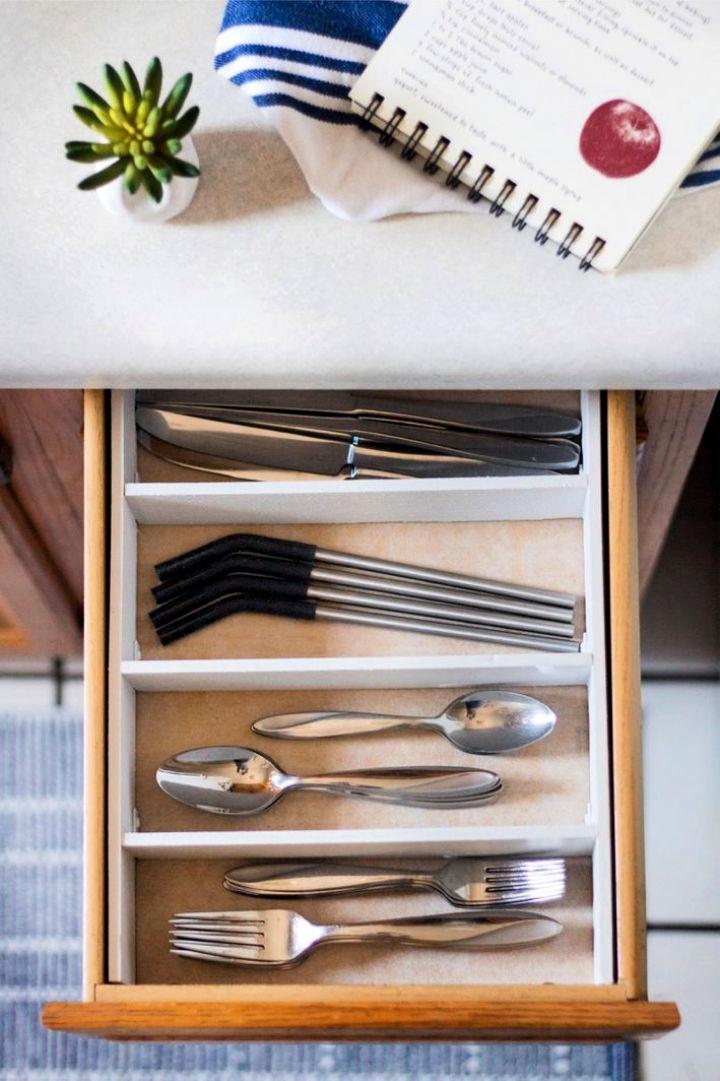
Transform your cluttered drawers into models of organization with a DIY approach to drawer dividers, as detailed on Curbly. M.E. Gray guides you through crafting custom solutions for both small and large storage needs. Learn how to measure, cut, and assemble poplar wood boards with simple tools like screws, corner braces, and wood glue. This engaging and helpful tutorial empowers you to create dividers that fit your drawers perfectly, making it easy to find what you need without the hassle. Say goodbye to chaotic storage spaces and hello to a neatly arranged home.
8. Building a Wooden Desk Drawer Organizer
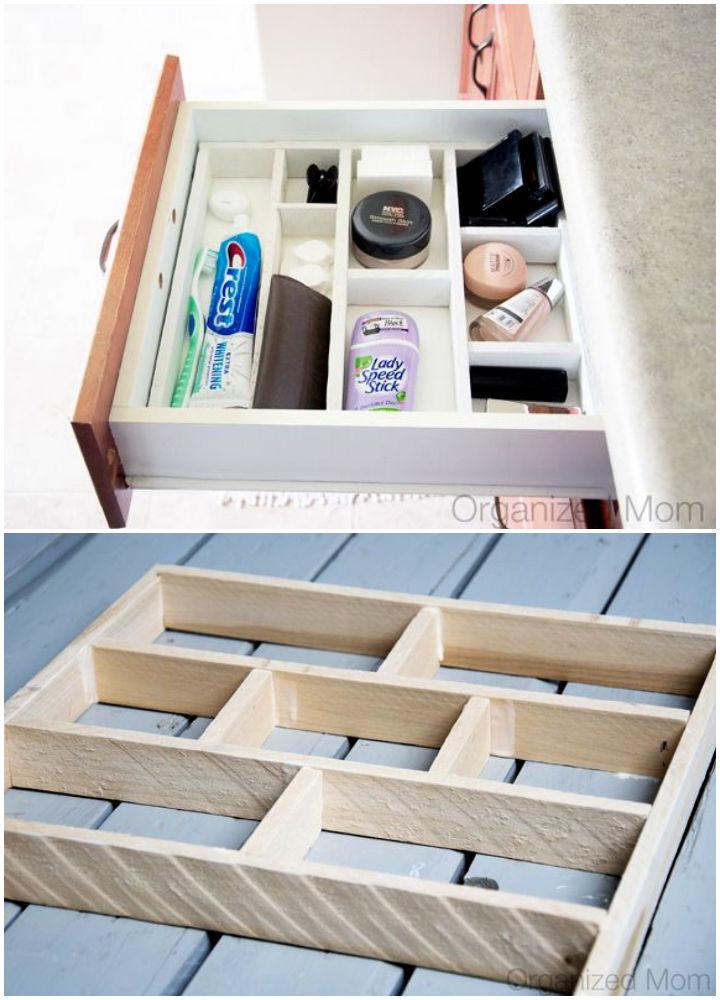
Transform your cluttered drawers into a haven of organization with the DIY drawer organizer guide from The Organized Mom. This affordable project is perfect for customizing your storage space without breaking the bank. Using simple materials like wood lathes and glue, you can craft dividers that fit snugly into your drawers, making the most of every inch.
With easy-to-follow instructions, you’ll paint and assemble your creation, resulting in a personalized insert that’s both removable and adaptable to your changing needs. Say goodbye to digging through chaos and hello to streamlined, efficient storage that makes daily routines a breeze.
9. Make Your Own Drawer Dividers
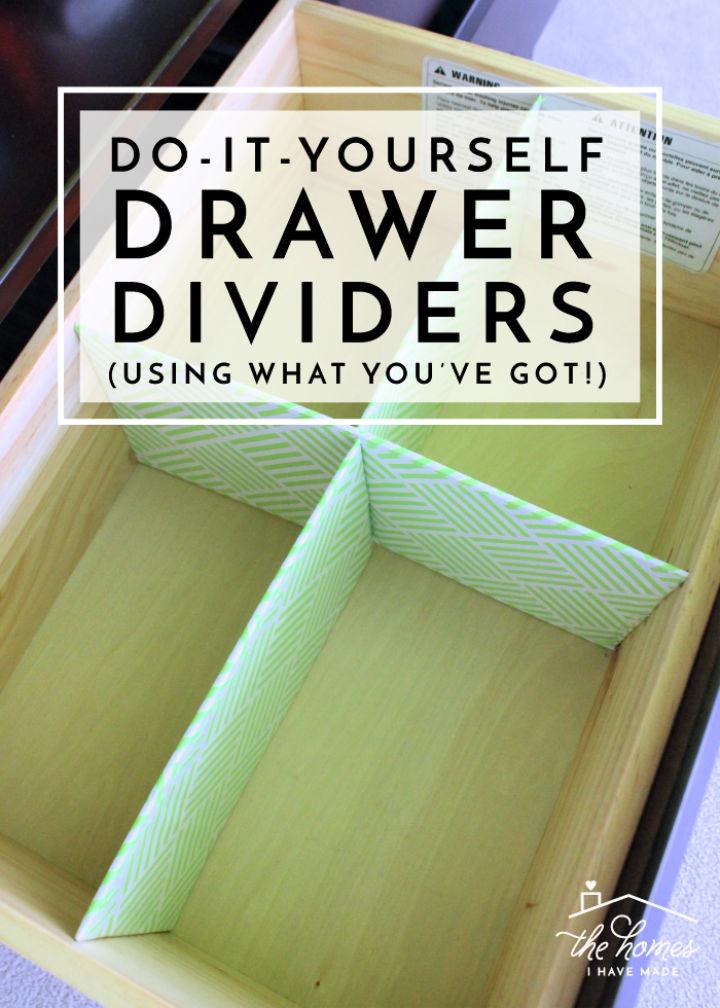
Transform your cluttered drawers into neatly organized spaces with easy DIY drawer dividers, courtesy of The Homes I Have Made. By using simple materials like cardboard or foam board, you can create custom compartments tailored to any drawer size, ensuring everything has its place.
This cost-effective solution not only helps you save money but also encourages recycling. Plus, with the option to line your drawers with chic paper and secure dividers with cable clips, the final look is as polished as it is practical. Dive into the tutorial and enjoy a more organized, efficient home today.
10. DIY Drawer Dividers for Kitchen Utensils
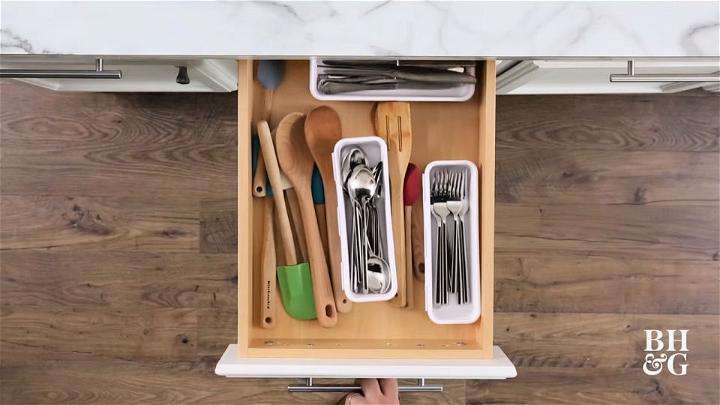
Transform your kitchen drawer chaos into a haven of organization with a simple DIY drawer divider project, as shown in the video by Better Homes and Gardens. With easy-to-follow instructions, you can create custom dividers to neatly store and sort all your kitchen utensils.
Not only is this an affordable solution, but it’s also a fun and rewarding weekend task that can bring order to your kitchen. Say goodbye to cluttered drawers and hello to efficiency! Make this smart upgrade and enjoy the satisfaction of a well-organized space that makes cooking and finding tools a breeze.
11. How to Make a Drawer Organizer – Step by Step
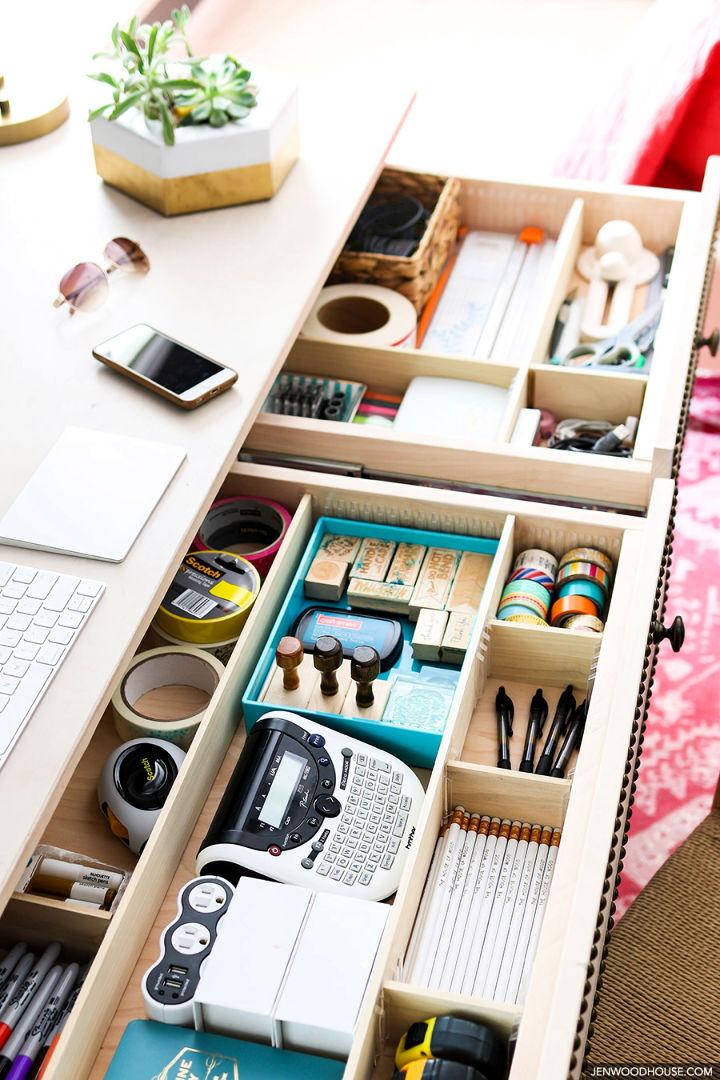
Transform your cluttered drawers into models of organization with Jen Woodhouse‘s easy DIY drawer divider tutorial on The House of Wood. Jen’s approachable guide empowers you to create custom drawer dividers that are simple to install, helping you keep your workspace tidy and your essentials at hand.
Her step-by-step instructions make the process clear and achievable, providing a practical solution to drawer disarray. Dive into the tutorial and start organizing your space with confidence and ease, crafting a more efficient and enjoyable work environment.
12. Handmade Cardboard Drawer Dividers
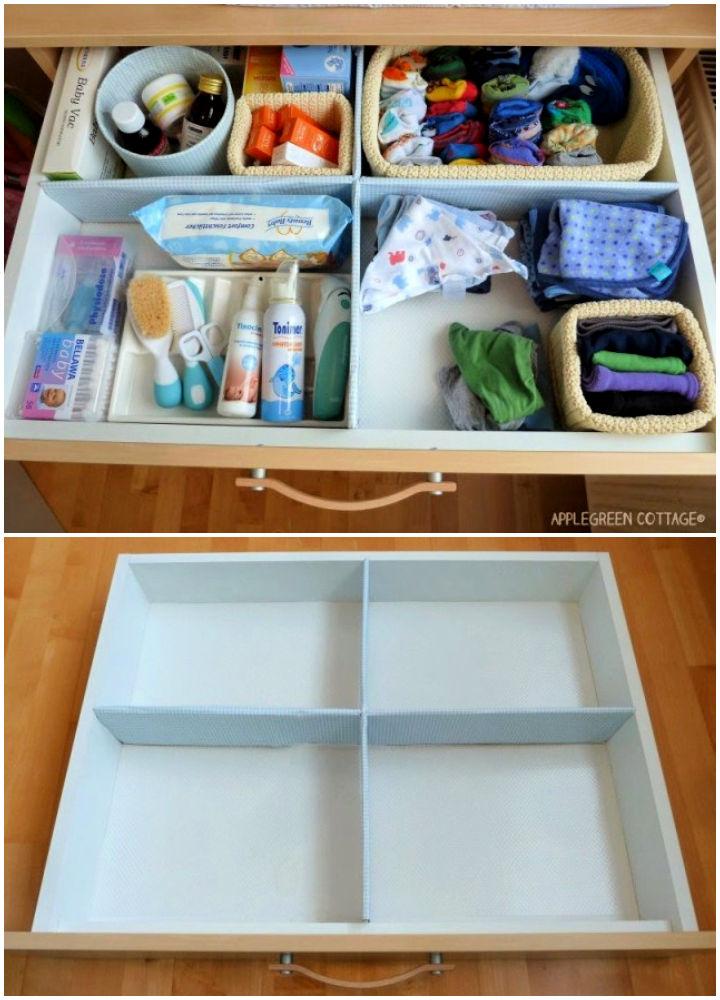
Organize your drawers quickly and efficiently with DIY cardboard drawer dividers from AppleGreen Cottage. Ideal for corralling kids’ clothes, small accessories, or even kitchen utensils, these dividers are a cost-effective way to enhance your storage space. With just a few supplies like sturdy Cardboard, a measuring tape, scissors, and optional wrapping paper for a decorative touch, you can create custom-fit solutions to keep everything tidy.
The instructive guide offers a simple step-by-step process, ensuring that even those with little to no crafting experience can achieve great results. Transform your cluttered drawers into models of organization with this practical and engaging DIY project.
13. Drawer Dividers to Organise Your Craft Supplies
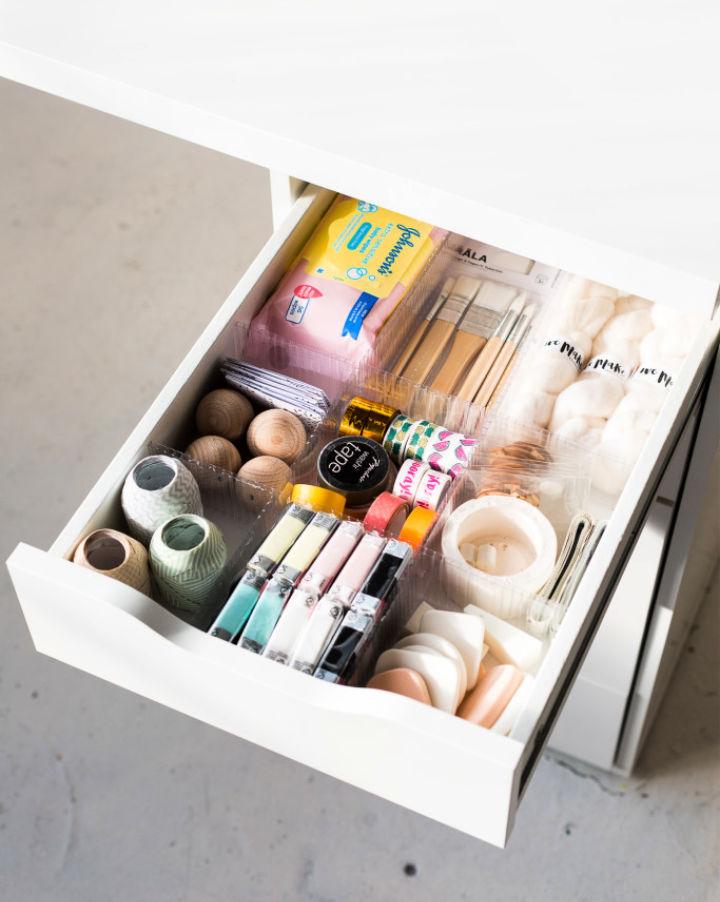
Organizing craft supplies can often feel overwhelming, but with DIY drawer dividers from Fall For DIY, you can easily tame the chaos. By using a corrugated plastic sheet and a few simple tools, you can create custom dividers that will keep your materials neatly sorted and within reach. This cost-effective solution allows you to tailor the size and number of compartments to your specific needs, whether for crafts, makeup, or kitchen utensils.
With an instructive and engaging guide, you’ll transform your drawers into well-organized spaces, ensuring that you spend less time searching for supplies and more time enjoying your creative projects. Get ready to cut the clutter and streamline your storage with this handy DIY project.
IKEA Desk Hack: Unleash your creativity with Easy IKEA Desk Hacks! Turn ordinary into extraordinary. Get inspired and redefine your workspace today!
14. DIY Adjustable Drawer Dividers
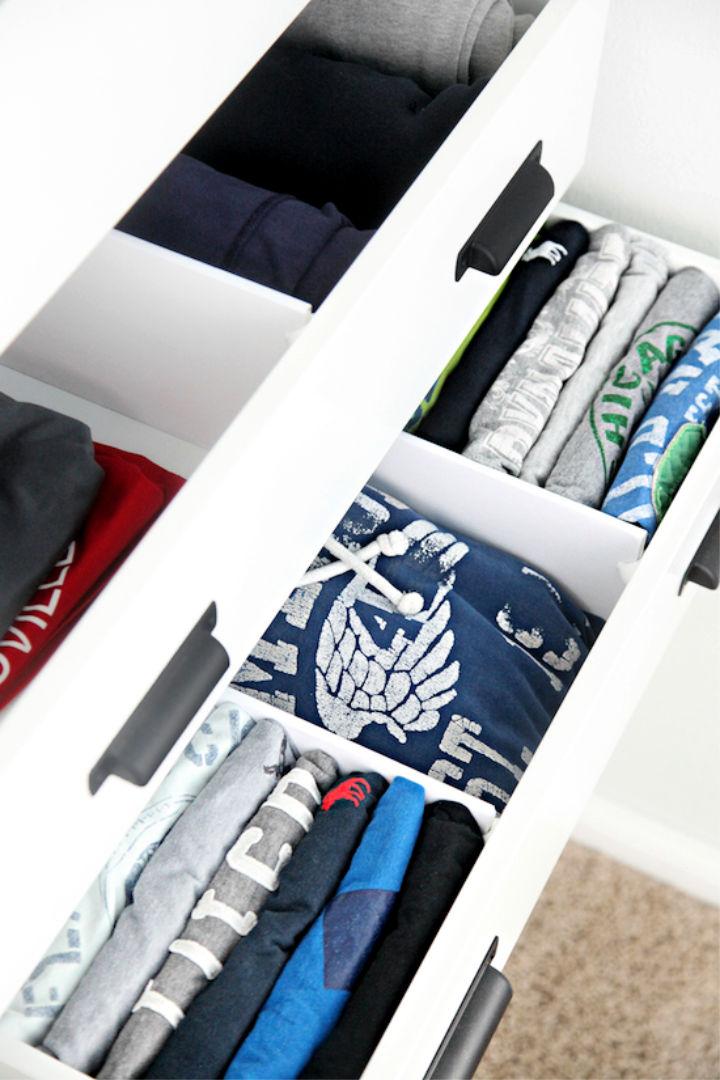
Make your own customizable drawer dividers with this straightforward DIY guide. Ideal for organizing those large, unruly closet drawers, this project is a game-changer for keeping clothes neatly categorized. No need for expensive, store-bought solutions that don’t fit your space—this method uses affordable materials like cord clips and craft wood, ensuring a perfect fit for your drawers.
With a simple measure, cut, and stick process, you can transform your storage in no time. Plus, the dividers are easily adjustable, so they can evolve with your needs. Get ready to organize your drawers like a pro with this easy-to-follow, cost-effective solution. I Heart Organizing
15. Build Drawer Dividers for Desk Organizing
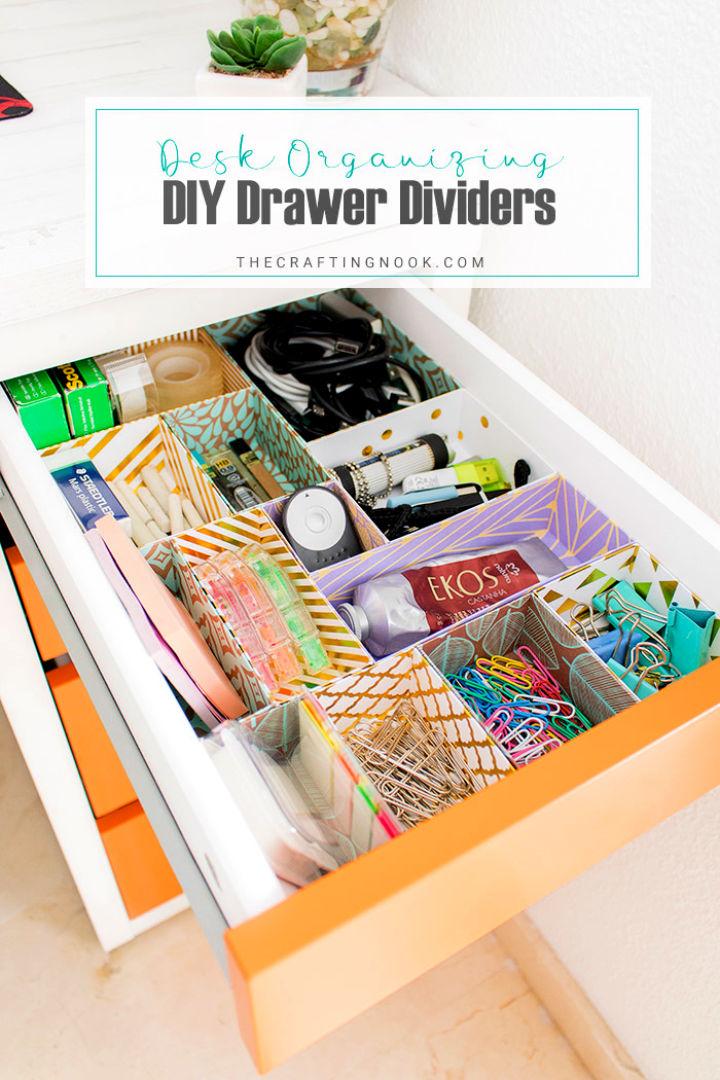
Organize your desk drawers efficiently with DIY drawer dividers crafted from cardstock. The Crafting Nook offers a straightforward guide to creating custom, functional compartments for your items, helping to maintain a tidy workspace. With just cardstock, glue, a cutter, ruler, and pencil, you can transform cluttered drawers into neatly organized spaces.
Measuring and planning are key steps, ensuring that each divider fits perfectly and optimizes your storage area. This cost-effective solution not only enhances accessibility but also personalizes your desk organization to fit your specific needs. Keep your essentials within easy reach and enjoy a streamlined desk that supports productivity and order.
16. Simple DIY Dresser Drawer Dividers
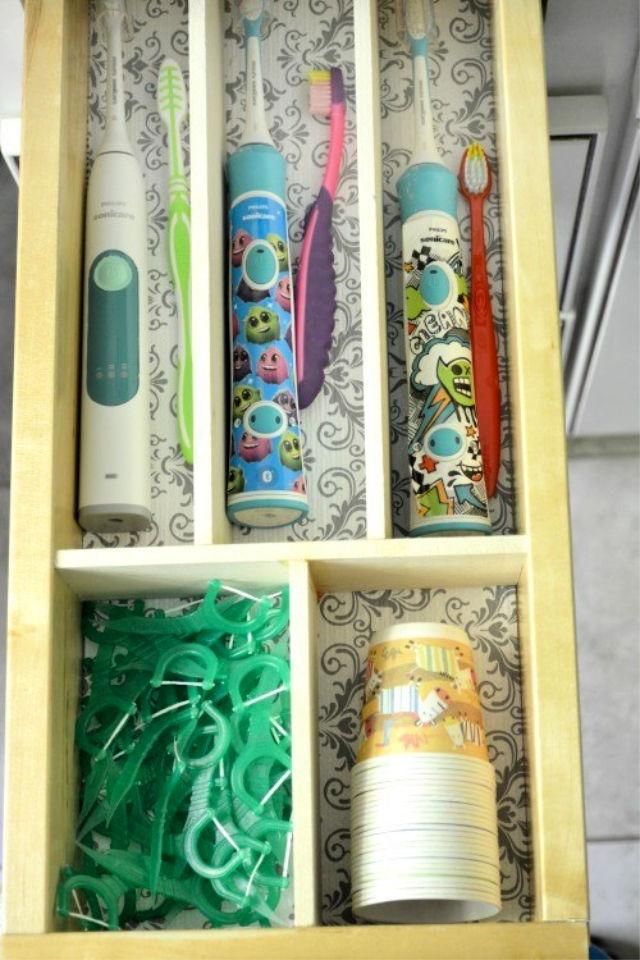
Transform your cluttered drawers into models of organization with DIY Drawer Dividers. Pretty Handy Girl‘s step-by-step guide helps you craft custom dividers tailored to your storage needs. With simple materials like poplar hobby boards, wood glue, and shelf paper, you can create compartments for your belongings, ensuring everything has its place. Perfect for any room, these dividers not only enhance efficiency but also save you time and money by utilizing what you already have. Dive into this project and enjoy the satisfaction of a neatly organized space.
17. How to Make Your Own Wooden Drawer Dividers
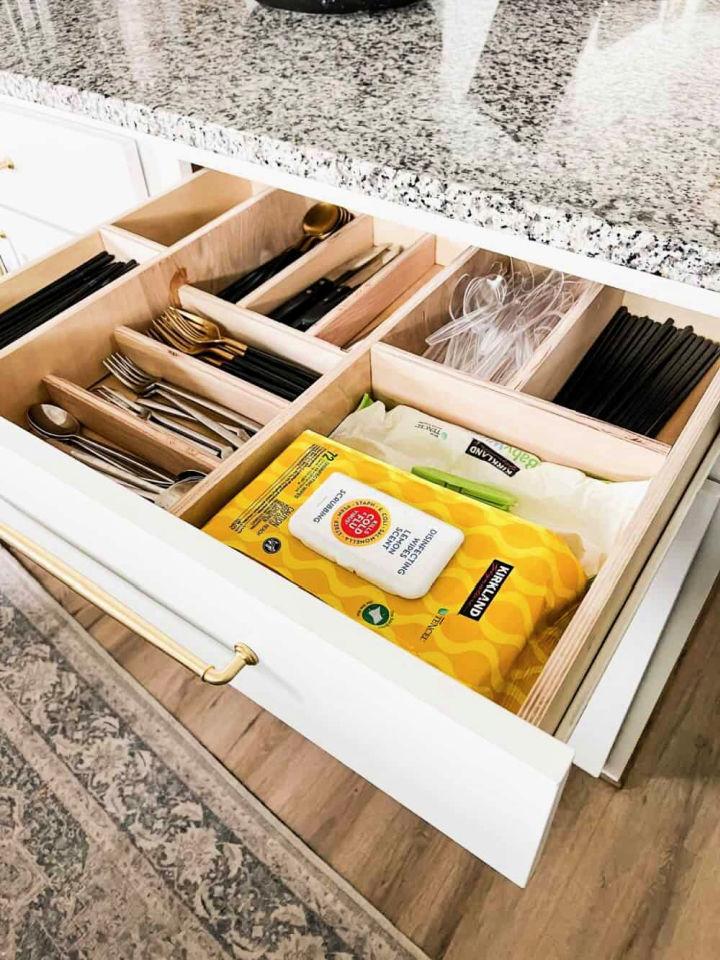
Transform your kitchen drawers from chaotic to neatly organized with a DIY wooden drawer organizer, as detailed on Love & Renovations. Amanda Hendrix guides you through creating a custom solution using only glue and plywood, ensuring a perfect fit for your utensils. With clear, step-by-step instructions and helpful tips, this project is a quick and satisfying way to bring order to your silverware drawer. Enjoy the ease of assembly and the thrill of opening a beautifully organized drawer every day. Get started on this simple yet effective organization project and make the most of your kitchen space.
18. Free Wooden Drawer Dividers Plan
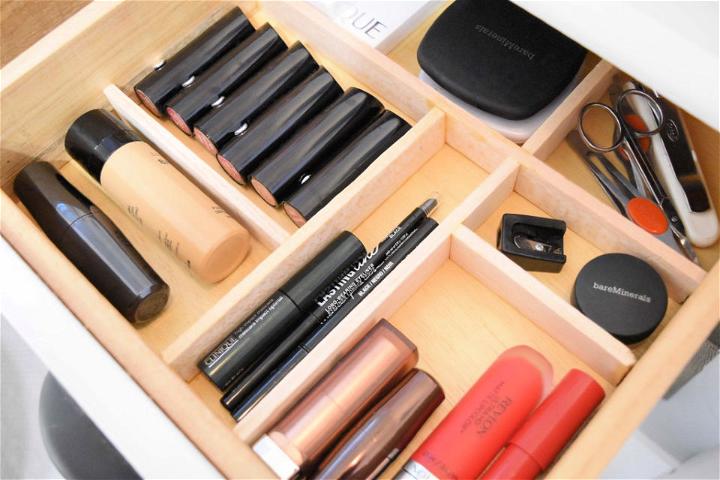
Transform your cluttered drawers into a model of organization with our easy DIY Wooden Drawer Dividers guide. No tools are necessary for this simple project! With balsa wood, a kitchen knife, and a bit of glue, you can custom-create compartments to neatly store all your essentials, from makeup to desk supplies.
These dividers are perfect for small, lightweight items and can be tailored to fit any drawer size. The process is straightforward, and the results are both functional and aesthetically pleasing, all at a minimal cost. Say goodbye to messy drawers and hello to a beautifully organized space. My Dear Irene
19. Inexpensive DIY Drawer Dividers Project
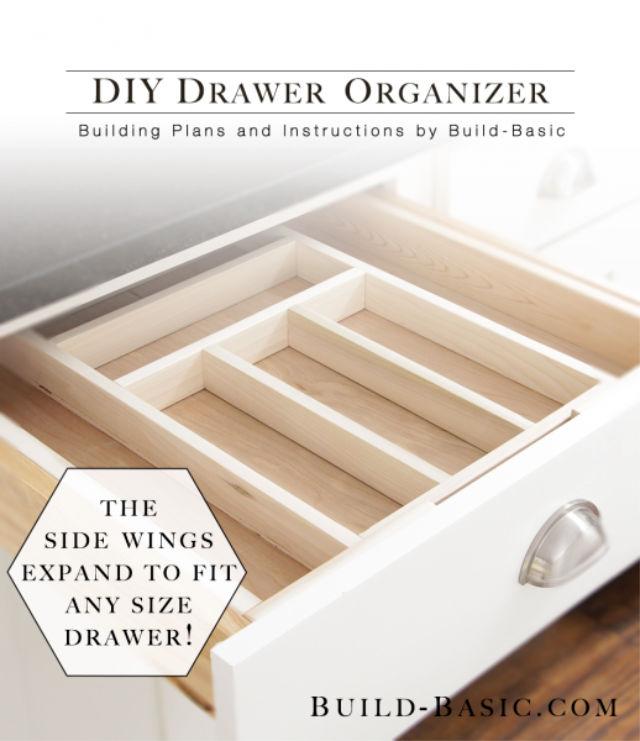
Struggling to find a silverware drawer organizer that fits perfectly? Build Basic offers an ingenious DIY solution that’s both adaptable and easy to construct. With this guide, you’ll create a drawer organizer with expandable “wings” that glide out to accommodate any drawer width. The project is moderately challenging, requiring precision to maintain square assembly, but the steps are clear and manageable.
Materials include plywood, wood cleats, and finish nails, and you’ll need tools like a miter saw and nail gun. Follow the step-by-step instructions to cut, assemble, and install your custom organizer. Get ready to enhance your kitchen storage with a personalized touch.
20. Custom Drawer Dividers With Free Plans
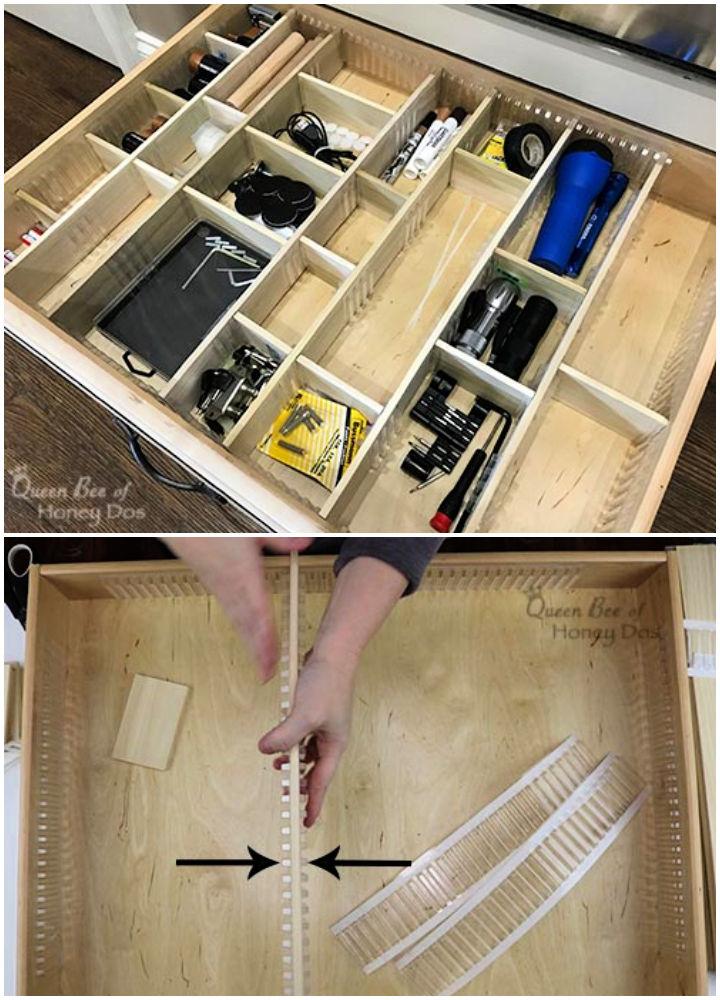
Transform your chaotic drawers into models of organization with easy DIY custom drawer dividers. Queen Bee of Honey Dos offers a simple solution with step-by-step instructions to create tailored spaces for all your essentials. No more rummaging for batteries or tools; with these dividers, everything has its place.
Perfect for anyone who loves a tidy home, this project is a breeze—just measure, cut, peel, and stick. It’s an organizational game-changer that allows flexibility for future changes. Keep your drawers neat and your mind at ease with this clever DIY hack.
21. How to Build Wood Drawer Dividers
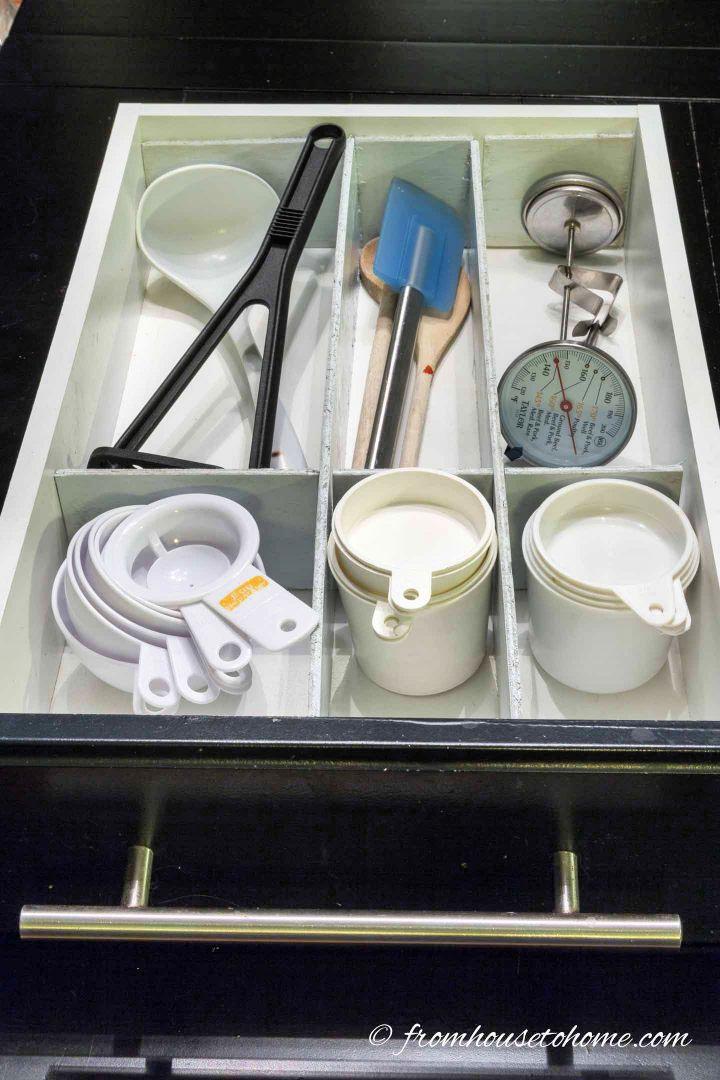
Transform your cluttered drawers into models of organization with custom wood DIY drawer dividers, as detailed by Wanda Simone on From House To Home. Perfect for kitchens, desks, or bathrooms, these homemade dividers offer a tailored fit and maximize space, unlike one-size-fits-all alternatives.
With a simple layout process and straightforward cutting instructions, anyone can create these dividers using plywood, a jig saw, and some paint. Follow Simone’s instructive guide to measure, cut, and assemble your drawer organizers, ensuring they’re removable for easy cleaning. Get ready to enjoy a more organized and efficient space in your home.
DIY Garden Tool Storage: Transform your garden clutter into a well-organized haven with our Easy DIY Garden Tool Storage guide. Step into efficiency today!
22. DIY Drawer Dividers for Bedroom Dresser
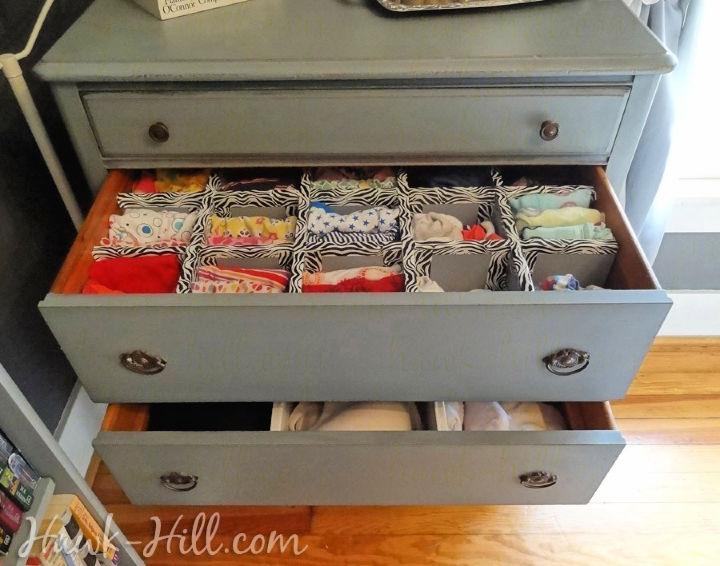
Transform your cluttered dresser into an oasis of organization with a DIY project from Hawk Hill. Discover how to create sturdy, custom drawer dividers using construction-grade foam core board. This guide provides a step-by-step process, including measuring, cutting, and assembling the dividers, ensuring a perfect fit for your space.
Add a personal touch with paint and duct tape finishes, resulting in a functional and stylish drawer organization system that stands the test of time. Perfect for spring cleaning or any time of year, this budget-friendly solution helps keep your bedroom dresser neat and your belongings easily accessible.
23. Making Drawer Dividers With Wood
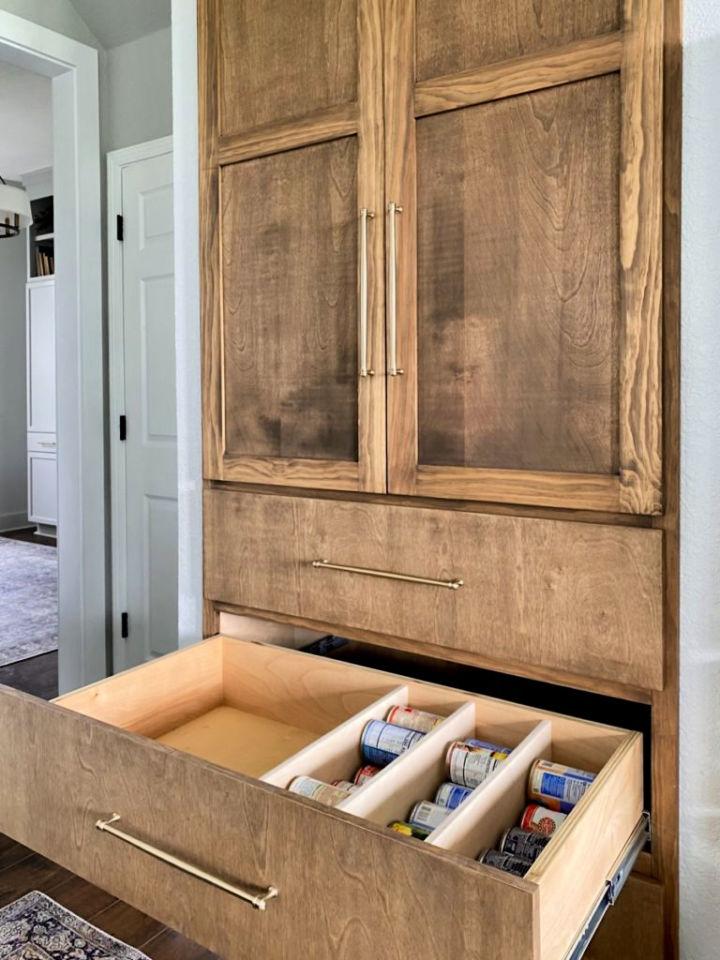
Organize your drawers effortlessly with Sawdust 2 Stitches‘ DIY Drawer Dividers guide. Transform cluttered spaces into neatly arranged sections, perfect for managing can storage or keeping snack packets in check. This step-by-step tutorial walks you through creating custom dividers using basic tools and materials like plywood and a Kreg Pocket Hole 720Pro.
With easy-to-follow instructions, including measuring, cutting, and installing, you’ll reclaim your drawer space in no time. Ideal for kitchen organization, this quick 15-minute project leverages scrap wood for an efficient and cost-effective solution. Get ready to enhance your home’s functionality and tidiness with these practical dividers.
24. Building Drawer Dividers With Written Instructions
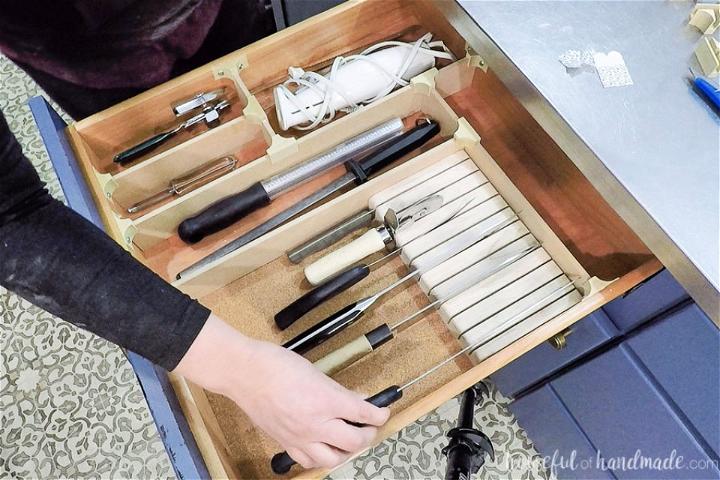
Make perfectly organized drawers with Houseful of Handmade‘s DIY drawer dividers. These easy-to-assemble dividers use wood clips to configure MDF strips to your liking, ensuring a tailored fit for any drawer. Ideal for kitchen utensils, the dividers can be glued for stability or left adjustable for future changes.
Additionally, learn how to craft a custom knife holder to integrate into your drawer system. This project enhances your home’s functionality and brings joy to your daily routine with neatly arranged spaces. With clear instructions and helpful tips, organizing has never been simpler or more satisfying.
25. DIY Custom Wooden Drawer Organizers
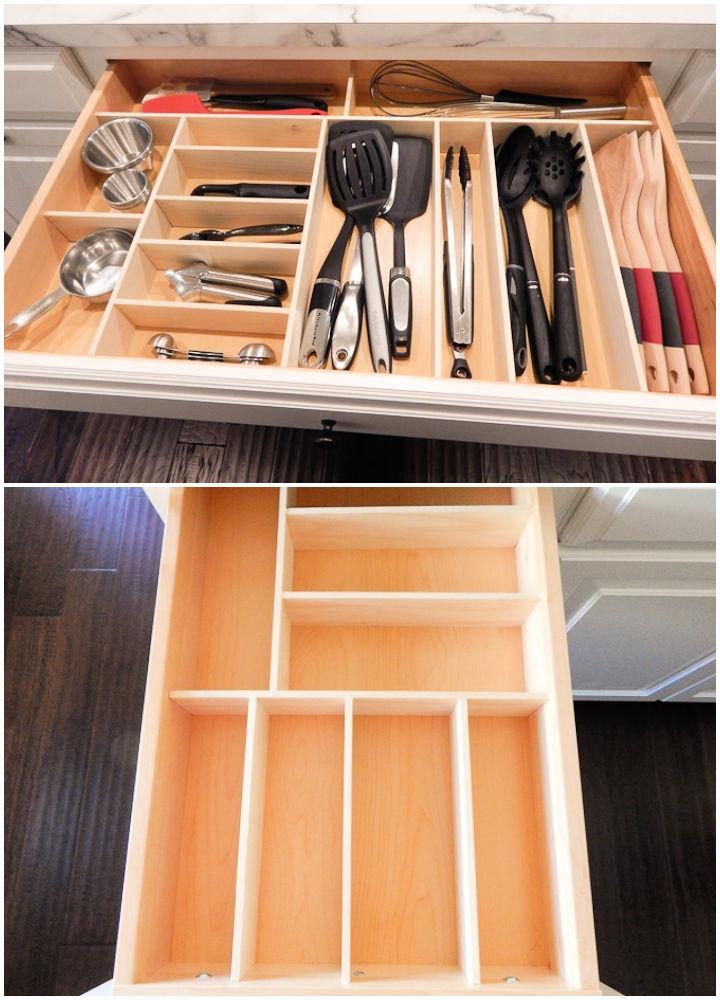
Struggling with cluttered kitchen drawers? Christene Holder Home offers an easy tutorial for crafting custom wooden drawer organizers that can transform your kitchen chaos into a neatly arranged masterpiece. With straightforward instructions on measuring, cutting, and assembling poplar boards, this guide empowers you to create organizers tailored to your utensils and cutlery.
Say goodbye to the frustration of ill-fitting store-bought inserts and hello to a budget-friendly, custom solution that enhances both the functionality and aesthetic of your kitchen space. Get ready to tackle your kitchen organization with confidence and a touch of DIY flair.
Conclusion:
In conclusion, making DIY drawer dividers is a transformative step toward achieving an organized and efficient home. With our guide, you’ve discovered how simple, cost-effective, and customizable solutions can bring order to your chaos, ultimately elevating your daily life. Whether optimizing a kitchen, office, or bedroom drawer, the ability to tailor storage with personal flair ensures a seamless blend of functionality and style. Get started on this rewarding project today and relish in the clarity and peace that come with a well-organized space. Let DIY drawer dividers guide you to a clutter-free existence where everything has its perfect place.
