Looking to organize your home gym with a custom touch? Our guide to 10 free DIY dumbbell rack plans offers a practical and rewarding project, perfect for anyone aiming to keep their workout space tidy and weights easily accessible. By building your own DIY weight rack, you not only get the satisfaction of a personalized creation but also the flexibility to tailor it to your specific needs and the dimensions of your space.
With 10 free DIY dumbbell rack plans, this guide ensures you have all the information at your fingertips, from selecting the right materials to the final finishing touches. Novices and seasoned DIYers alike will find the step-by-step instructions easy to follow, making the task of building a dumbbell rack less daunting and more engaging. Ready to give your home gym a functional upgrade while sharpening your DIY skills? Here’s how to get started on crafting a durable, customized DIY dumbbell rack that complements your fitness goals.
Why Build Your Own Dumbbell Rack?
Building your own dumbbell rack is not only a rewarding DIY project but also brings numerous practical benefits to your home gym. Here’s why you should consider building a custom rack:
- Space Efficiency: Tailor the size and design to perfectly fit your available space, eliminating the awkwardness of commercial racks that may not quite fit.
- Cost Savings: Purchasing a dumbbell rack can be expensive. DIY allows you to control the budget and often results in significant savings.
- Personalization: Customize the rack to accommodate the specific sizes and shapes of your weights, ensuring a snug and secure fit for each piece of equipment.
- Satisfaction: The sense of accomplishment from building something with your own hands can enhance the enjoyment of your workout space.
- Organization: A well-designed rack contributes to a tidy gym area, making workouts more efficient and reducing the risk of tripping over loose weights.
- Quality Control: Select your materials and ensure the construction meets your personal standards for durability and sturdiness.
- Creative Expression: Infuse your personality into the project with unique designs or finishes that commercial options don’t offer.
Remember, the key to a successful DIY dumbbell rack is planning, measuring twice, and cutting once. With the right tools and a little bit of patience, you’ll have a custom rack that’s both functional and a point of pride in your home gym.
How to Build Your Own Dumbbell Rack: A Step-by-Step Guide
Making your own dumbbell rack is a rewarding project that not only tidies up your workout space but also adds a personal touch to your home gym. This guide will walk you through the process, making it simple, enjoyable, and effective. Whether you’re a DIY novice or an experienced handyperson, these instructions will help you craft a durable and functional dumbbell rack.
Choosing Your Materials
The first step in building your dumbbell rack is selecting the right materials. Most DIY dumbbell racks can be made from wood, which is both sturdy and easy to work with. Here’s what you’ll generally need:
- Wooden planks or boards: Consider pine or oak for a balance of durability and cost.
- Screws: To assemble the rack securely.
- Wood glue: For added stability.
- Sandpaper: To smooth out any rough edges.
- Varnish or paint: Optional, for finishing touches.
Designing Your Rack
Before you start cutting and assembling, you need to design your rack. Consider the size and number of dumbbells you have. A simple three-tier rack is a good start for most home gyms. Make sure to measure your dumbbells to ensure the rack will accommodate them comfortably.
Cutting Your Wood
After finalizing your design:
- Mark your wood according to the measurements.
- Use a saw to cut the wood to size. Remember, it’s better to cut a piece slightly larger and then sand it down than to cut it too short.
Assembling the Rack
- Lay out your pieces to get a visual of how the rack will come together.
- Start with the base and sides: Use wood glue and screws to attach the sides of the rack to the base. Ensure everything is square as you work.
- Add the tiers: Attach the tiers from the bottom up, ensuring each one is level before securing it.
Finishing Touches
Once your rack is assembled:
- Sand down any rough or sharp edges to prevent injury.
- Apply a coat of varnish or paint, if desired, to protect the wood and give your rack a professional finish.
Safety Tips
- Always wear safety glasses when cutting wood or sanding.
- Work in a well-ventilated area, especially if you’re painting or applying varnish.
Building your own dumbbell rack is not only a practical addition to your home gym but also a project that can give you a sense of accomplishment. By following these steps, you’ll end up with a custom rack that suits your space and needs perfectly. Enjoy your cleaner, more organized workout area!
FAQs on DIY Dumbbell Rack Plans
Building your own dumbbell rack can be a rewarding project. Here, we address some common questions to help you get started and ensure a successful build.
What materials do I need for a DIY dumbbell rack?
The materials you need depend on the design you choose. Typically, you’ll require:
- Wooden planks or boards (pine or oak are good choices)
- Screws
- Wood glue
- Sandpaper
- Varnish or paint for finishing touches
Remember, the type and amount of material may vary based on the size and design of the rack you plan to build.
How do I design a dumbbell rack that fits my space?
Start by measuring the area where you intend to place the rack. Consider the number and size of dumbbells you need to store. A three-tier design is a good starting point for most home gyms. Ensure the rack dimensions accommodate your dumbbells comfortably.
Can I build a dumbbell rack if I’m new to DIY projects?
Yes, you can! Many dumbbell rack plans are designed with beginners in mind. Choose a project that matches your skill level and follow the instructions closely. Starting with a simpler design can help you gain confidence and experience.
What tools will I need to build my dumbbell rack?
The basic tools you might need include:
- A saw for cutting wood
- A drill for screwing pieces together
- Sandpaper or a sander for smoothing edges
- A measuring tape and pencil for accurate measurements
Some designs might require specific tools, so review your chosen plan before starting.
How do I ensure my dumbbell rack is sturdy and durable?
To ensure durability:
- Use high-quality wood and hardware.
- Apply wood glue along with screws for additional strength.
- Make sure all connections are tight and well-aligned.
- Apply a protective finish like varnish or paint to protect the wood.
Can I customize my dumbbell rack?
Absolutely! Feel free to adjust dimensions, add extra tiers, or incorporate storage for other gym equipment. Customization allows you to build a rack that perfectly suits your needs and space.
How do I maintain my DIY dumbbell rack?
To keep your rack in top condition:
- Regularly check and tighten any loose screws.
- Clean the rack with a damp cloth to remove dust and sweat.
- Reapply varnish or paint as needed to protect the wood.
Is it cheaper to build a dumbbell rack than to buy one?
In most cases, yes. Building your own rack allows you to control the cost by selecting materials that fit your budget. It can also be a more cost-effective solution, especially if you already have some of the required tools and materials.
Building a DIY dumbbell rack is not only a practical addition to your home gym but also a satisfying project that can be tailored to your exact needs. With a little planning and some elbow grease, you’ll soon have a custom storage solution that keeps your workout space organized and functional.
10 Free DIY Dumbbell Rack Plans
Discover 10 free DIY dumbbell rack plans to organize your home gym efficiently. Build your own dumbbell storage with these easy-to-follow guides.
1. Build a Dumbbell Rack in 3 Steps
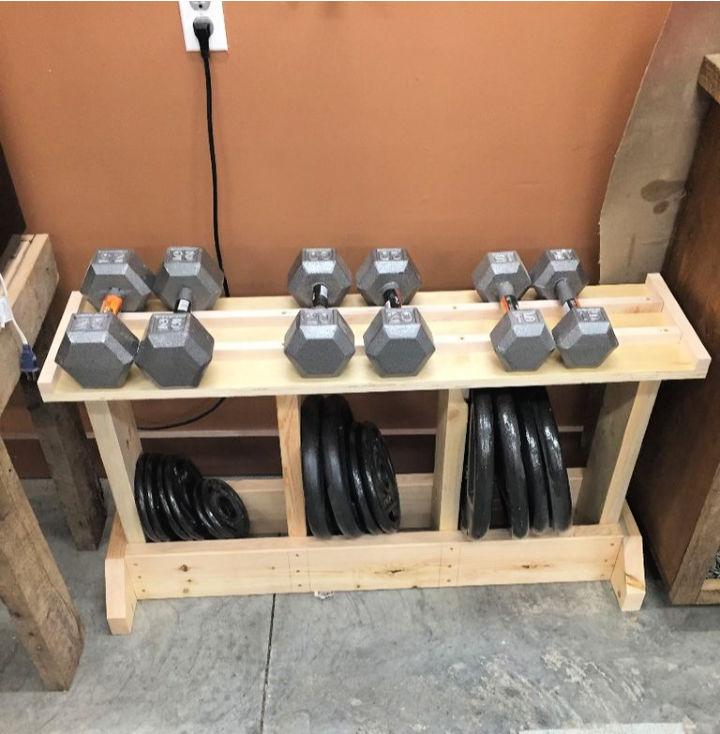
Struggling to keep your workout space tidy and your weights in order? Instructables offers a practical solution with their detailed guide on crafting a weight rack. This guide is perfect for fitness enthusiasts looking to build a customized weight storage system that fits their space and equipment.
Step-by-step instructions, accompanied by clear visuals, make it easy to follow along and construct a durable rack that not only organizes but also enhances the safety and functionality of your training area. Maximize your garage or home gym with this DIY project and enjoy a clutter-free, efficient workout environment.
2. DIY Dumbbell Rack – Free Plan
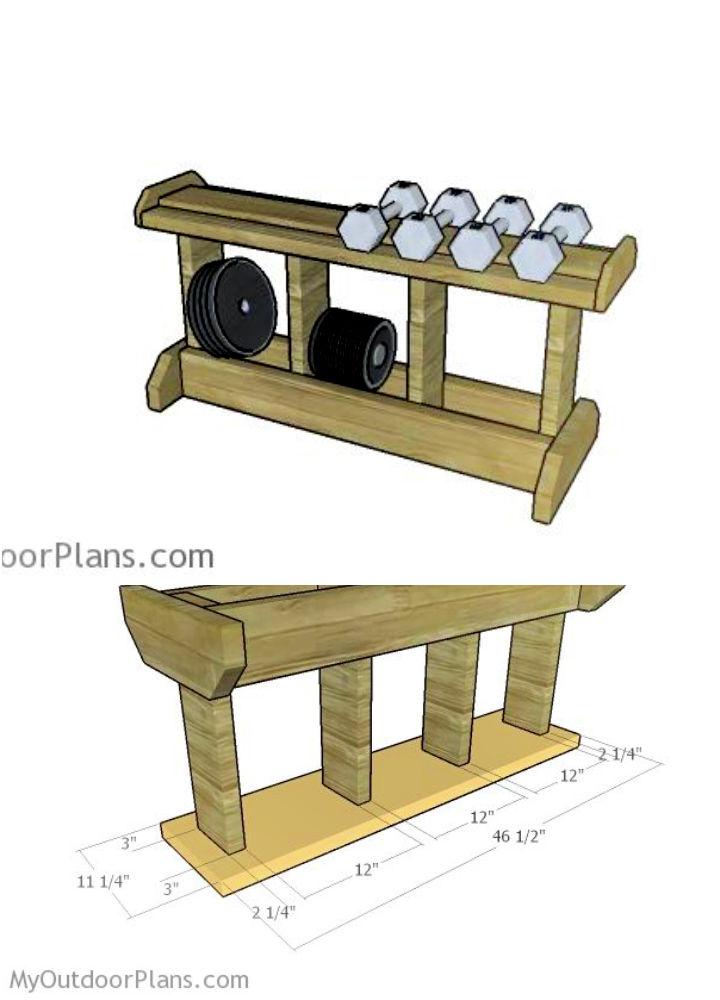
Ready to organize your gym space with a homemade touch? MyOutdoorPlans offers comprehensive and easy-to-follow weight rack plans that are perfect for streamlining your workout area. Crafted to maximize space efficiency, these plans are tailored for DIY enthusiasts eager to build a sturdy weight rack.
With clear material lists, detailed cut instructions, and helpful assembly steps, anyone can embark on this project with confidence. Sanding and finishing tips ensure a polished result, enhancing both the appearance and durability of your rack. Make your fitness routine more organized and enjoyable with this custom woodworking project. Visit MyOutdoorPlans for these weight rack plans and start building today.
3. Making a Weight and Barbell Storage Rack
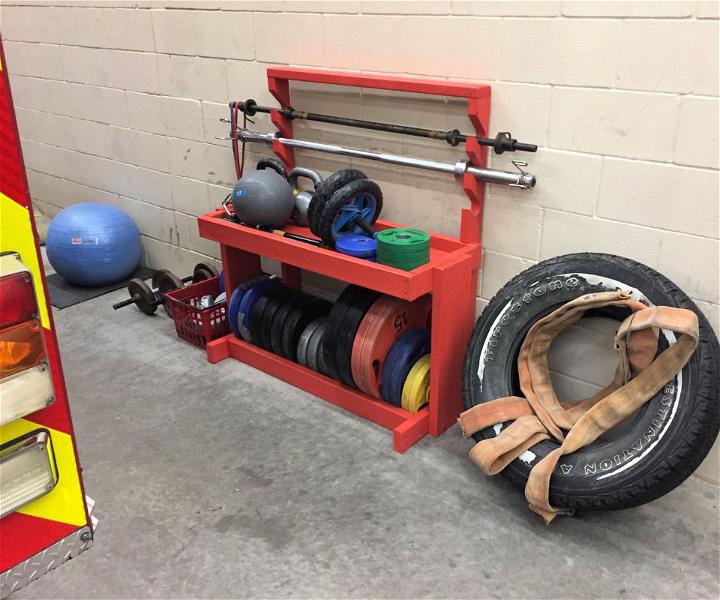
If you’re aiming to organize your gym space and keep your weights tidy, building a DIY Weight and Barbell Storage Rack is an excellent project to undertake. Presented by Instructables, this guide lays out a step-by-step process for constructing a robust storage solution that can support a substantial amount of weight.
The design is simple enough for those with basic DIY skills, yet the final product is both functional and durable. With this homemade rack, you can ensure that your workout area remains clutter-free, allowing you to focus on your fitness goals without the distraction of disorganized equipment. Instructables
4. DIY Dumbbell Rack / Table Desk
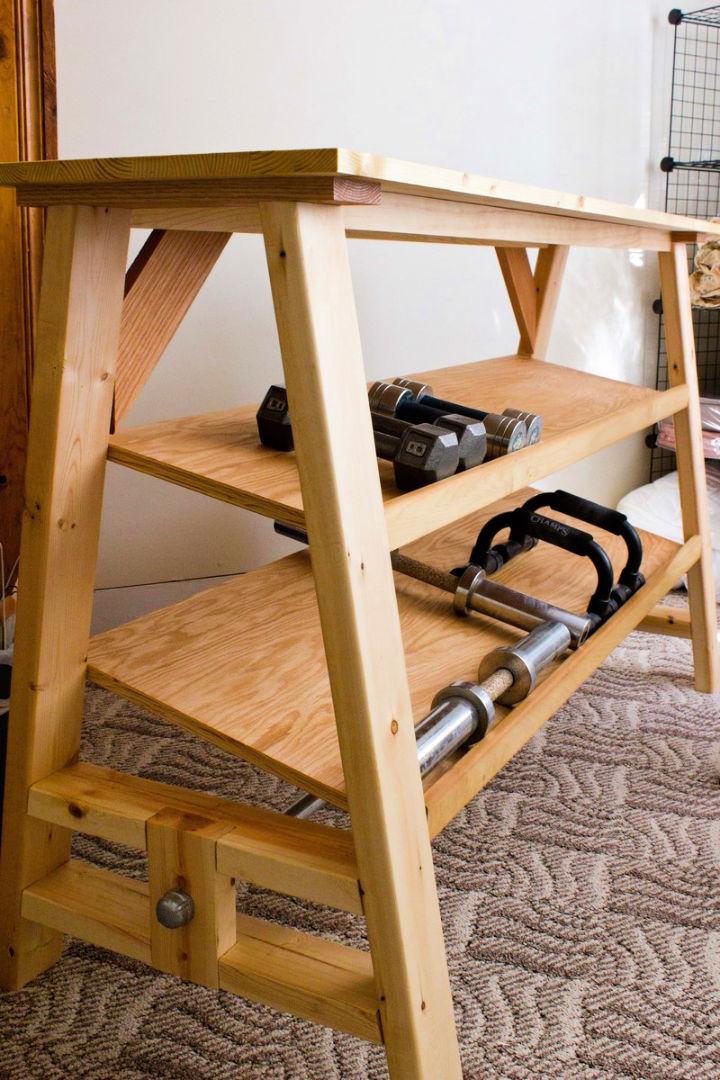
If you’re looking to add a sturdy and multifunctional piece to your home gym, the Dumbbell Table Desk by Ana White is an excellent project. It’s designed to function both as a weight rack and a resilient desk surface, ideal for fitness enthusiasts. With inspiration drawn from a trestle desk and borrowing the metal stretcher concept from a Pottery Barn dining table, this creation meets the demands of heavy-duty usage. It boasts a counter height build and is remarkably stable, with the option to forego the metal bar to save costs.
The construction process is straightforward, requiring a compound miter saw and possibly pocket holes to ensure strong joints. The finishing touch includes boiled linseed oil and furniture wax, providing durability without compromising the wood’s natural appeal. The project is a weekend endeavor, promising to blend practicality and durability into your workout space. For detailed instructions and the SketchUp model, Ana White’s guide is available to assist you in crafting this robust table.
5. How to Make Custom Garage Gym Weights Rack
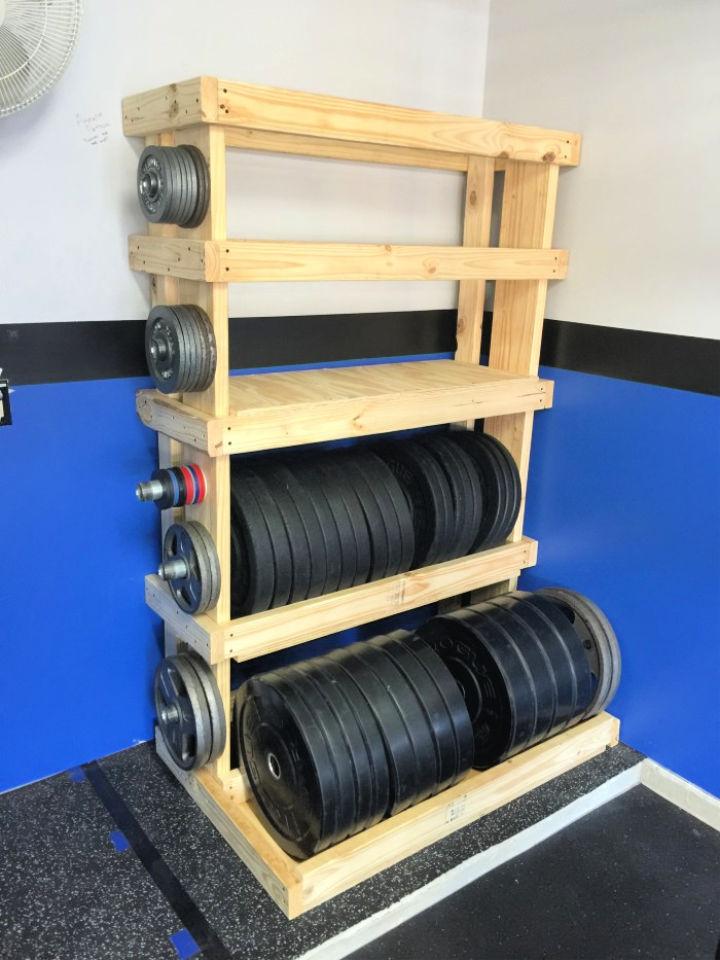
Transform your garage into a home gym with a custom-built weights rack, as demonstrated by the Munson Mischief team. They’ve mastered the art of space optimization by crafting a durable weight rack using 2x4s, 2x6s, plywood, and robust plumbing pipes for side weight holders. The process involves a simple yet effective use of wood glue and screws to ensure stability.
Ideal for fitness enthusiasts looking to enhance their workout space, this DIY project provides a functional and space-saving solution to organize your gym equipment. With clear instructions and engaging content, the guide helps you build a tailored storage unit that blends seamlessly into your garage gym, allowing for a clutter-free and efficient workout environment.
6. Dumbbell Weight Rack Storage from Wood
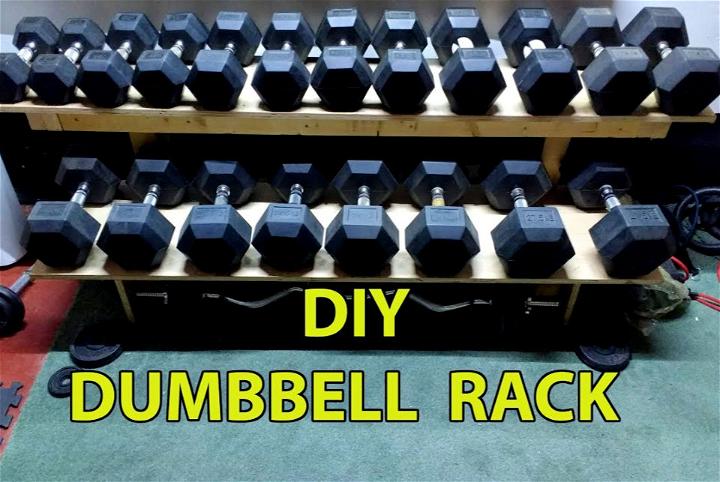
Are you interested in crafting a DIY dumbbell weight rack from wood? YouTube offers a practical guide to building your own storage solution for home gym equipment. By using leftover wood and offcuts, you can save money and build a custom rack tailored to your space and needs.
The video tutorial makes it easy to follow along, providing key moments and detailed instructions to ensure you can successfully complete the project. Not only is this a cost-effective alternative to expensive retail options, but it also allows for a personal touch in your workout area. Tune in to the video and get ready to enhance your home gym with a functional and stylish wood dumbbell rack.
7. DIY $20 Dumbbell Rack
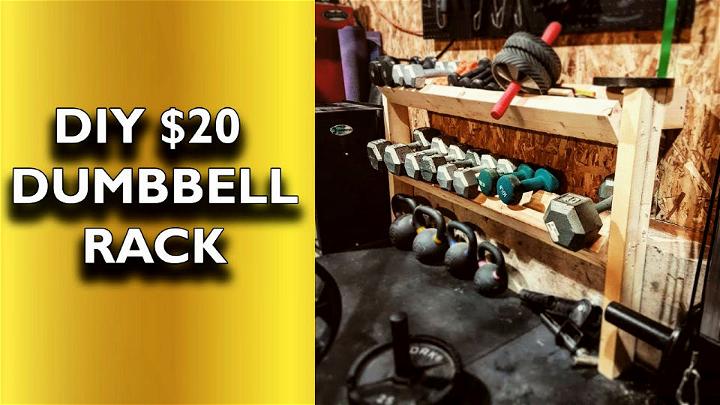
Looking to build a practical dumbbell rack for your home gym without breaking the bank? YouTube’s Barbell Sanctuary has you covered with a step-by-step tutorial that guides you through building a sturdy and space-efficient dumbbell rack for under $20. In this engaging and instructive video, you’ll learn how to use simple materials like 2x4s and screws to assemble a functional rack that can hold your weights neatly and safely.
The process is straightforward, making it accessible even if you’re not an avid DIYer. By following the easy-to-understand instructions, you’ll enhance your gym space, keep your equipment organized, and save money all at once. With a focus on practicality and affordability, this DIY guide is perfect for fitness enthusiasts looking to customize their workout area.
8. Homemade Wooden Weight Rack
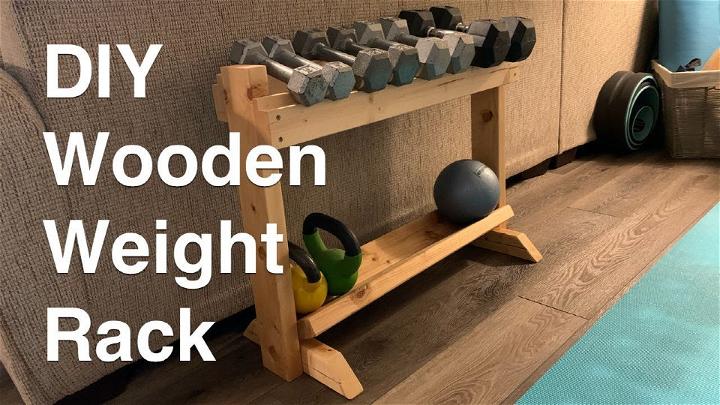
Building a DIY wooden weight rack is a practical and fulfilling project, especially if you enjoy woodworking and fitness. YouTube provides a tutorial where you’ll learn to construct a sturdy rack using repurposed 2x4s and 2x3s. The video guides you through each step, from cutting the wood to the final touches of adding a protective clear coat. It’s designed for home gym enthusiasts who appreciate handcrafted organization for their weights.
The process is straightforward, and the result is a custom, cost-effective solution for keeping weights neatly stored and easily accessible. Viewers are encouraged to tailor the design to fit their space and workout equipment. The video’s creator shares tips and tricks to ensure a smooth building experience, making it suitable for DIYers looking to enhance their workout area with a personalized touch.
9. DIY Dumbbell Rack from Scrap Wood
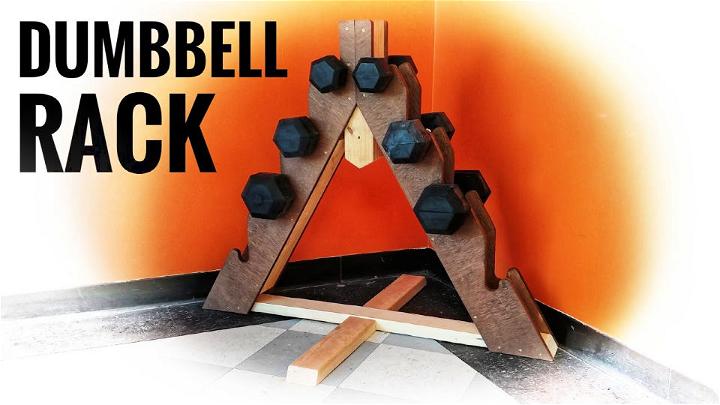
Need a practical solution to organize your dumbbells and enhance your gym space? YouTube’s Climber Dad channel offers a valuable tutorial on crafting a dumbbell rack using scrap wood. Perfect for fitness enthusiasts and DIYers alike, the video demonstrates a step-by-step process to a sturdy and functional weight rack. The guide is easy to follow, with an emphasis on using simple tools and available materials, making it a project accessible to anyone with basic woodworking skills.
It’s not only a cost-effective way to keep your weights off the floor but also a customizable addition to your home or commercial gym. Learn how to measure, cut, and assemble your very own dumbbell rack, adding a professional touch to your workout area. With Climber Dad, you’ll find practical advice and creative solutions for your climbing gym or home fitness setup.
10. Custom-Made Dumbbell Storage Rack
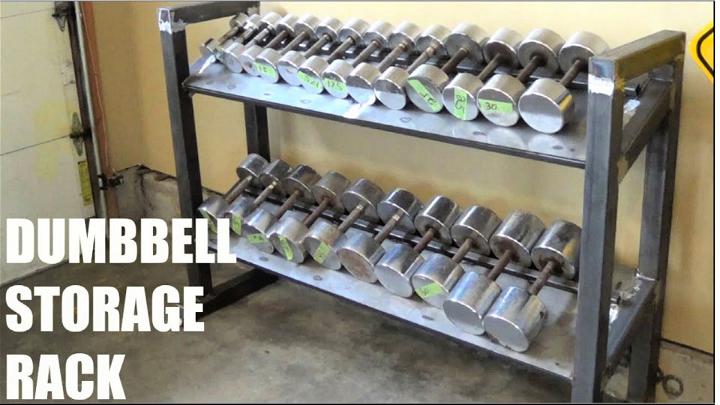
Build your custom dumbbell storage rack with ease by following Ryan Bahra’s detailed YouTube tutorial. Ideal for home gym enthusiasts and fitness aficionados, this guide demonstrates how to craft a sturdy and functional rack to keep your workout space tidy and organized.
Ryan shares valuable insights, from material selection to construction techniques, ensuring a durable and robust solution for your dumbbell storage needs. Tune into YouTube to watch Ryan’s instructional video and transform how you store your weights with a personalized touch. Keep your gym equipment in order, and enjoy a clutter-free workout environment.
Conclusion:
In conclusion, crafting your own dumbbell rack using our 10 free DIY dumbbell rack plans is not just a budget-friendly project but a personalized approach to organizing your fitness equipment. This guide offers everything you need to build a weight rack that suits your space and meets your requirements.
From selecting materials to putting on the finishing touches, each step is designed to make the process clear and manageable. Whether you’re enhancing your home gym or just starting out, these DIY dumbbell rack plans provide a rewarding way to achieve a more organized and functional workout area. So, why not take the first step towards a tidier, more efficient space today?
