Struggling to keep your woodworking shop clean and your lungs free from dust? Look no further than these 15 DIY Dust Collector Plans. Not only are they easy to make and cost-effective, but they also come in various structures to fit your specific needs. Most projects involve the Harbor Freight 2HP dust collector, using items like trash cans and barrels as giant collectors. These guides also offer the best advice on filters to prevent clogs. If building your own cyclone dust collector sounds like a plan, then you’re in the right place.
Our collection of DIY dust collector ideas is impressive, power-saving, and won’t cause you ear pain with loud noises. Whether you prefer a one-stage or two-stage cyclone dust collection, we’ve got you covered with step-by-step instructions, diagrams, and even video tutorials. From maximizing the use of plastic buckets to upgrading your current system, these plans ensure you won’t need to spend a fortune on dust collection. Dive into the next section to discover how to make a cleaner, healthier workspace with these smart DIY dust collector solutions.

Why Build Your Own DIY Dust Collector?
Discover the benefits of making your own DIY dust collector. Find out why this project is worth your time and effort for a cleaner and healthier workspace.
- Cost-Effective: Building a DIY dust collector can save you a significant amount of money. Commercial dust collectors come with hefty price tags, while homemade versions can be constructed with materials you may already have on hand or can purchase at a much lower cost.
- Customizable: Every workshop is different, and off-the-shelf dust collectors might not fit your specific needs. A DIY dust collector allows you to tailor the design to the size of your workspace, the tools you use, and the type of dust you generate.
- Enhanced Understanding: As you build your own dust collector, you’ll gain a deeper understanding of how the system works. This knowledge can be invaluable when it comes to maintenance or troubleshooting any issues that may arise.
- Fun and Fulfilling: The process of making something useful with your own hands adds a level of satisfaction to your woodworking. Completing a DIY dust collector project can be a rewarding experience and give you a sense of pride every time you use it.
- Environmentally Friendly: By controlling dust, you’re not only protecting your health but also contributing to a cleaner environment. A DIY dust collector can help reduce the amount of particulate matter released into the air, which is better for both you and the planet.
Remember, safety is paramount when dealing with power tools and dust collection systems. Always wear appropriate safety gear, and if you’re ever in doubt about a step in the building process, seek advice from experienced woodworkers or professionals.
How to Build a Simple DIY Dust Collector
Building a DIY dust collector for your workshop doesn’t need to be complicated or expensive. Follow this step-by-step guide to build a simple, effective, and affordable system to keep your workspace dust-free and your lungs healthy. This project is perfect for beginners and can be completed with minimal tools and materials.
Step 1: Gather Your Materials
- A shop vac or a similar vacuum system
- A bucket with a tight-fitting lid (5 gallons or larger)
- PVC pipes and elbows (2-inch diameter recommended)
- A couple of blast gates (optional, but useful for multiple tools)
- A cyclone dust separator (can be purchased or homemade)
- Hose clamps
- Screws and nuts
- Silicone caulk
Step 2: Assemble the Cyclone Separator
- If you have a pre-made cyclone separator, attach it to the lid of your bucket using screws and silicone caulk for an airtight seal.
- For a homemade cyclone, follow instructions specific to your design, ensuring it fits snugly onto your bucket’s lid.
Step 3: Connect the Shop Vac
- Attach one end of a PVC pipe to the outlet of the cyclone separator using a hose clamp.
- Connect the other end of the PVC pipe to your shop vac’s hose. Use an adapter if necessary to ensure a tight fit.
Step 4: Set Up the Dust Collection System
- Drill a hole in the side of the bucket, near the bottom, to fit the second PVC pipe. This will be the inlet for the dust and debris.
- Secure the PVC pipe with silicone caulk around the hole to ensure it’s airtight.
- Attach your tools to the inlet using additional PVC pipes or flexible hoses. Use blast gates to easily switch between tools.
Step 5: Test and Tweak
- Once everything is connected, turn on your shop vac and test the system with various tools. The dust should go through the cyclone separator into the bucket, not into the shop vac.
- Listen for any air leaks and check all connections. Seal any leaks with silicone caulk.
- Adjust the placement of the system as needed for convenience and efficiency.
Tips for Success
- Keep It Simple: Don’t overcomplicate the design. A straightforward system is easier to maintain and troubleshoot.
- Seal It Tight: Ensuring all connections are airtight is crucial for the system to work effectively. Double-check all seals and joints.
- Empty Regularly: Don’t let the bucket fill up completely. Regularly emptying it will prevent clogs and maintain suction power.
- Safety First: Always wear protective gear when working with tools and handling construction materials.
Building your own DIY dust collector is a practical and rewarding project that improves the cleanliness of your workshop and protects your health. With a bit of time and effort, you can make an efficient system that keeps your workspace dust-free without breaking the bank.
DIY Dust Collector Plans FAQs
Discover frequently asked questions about DIY dust collector plans. Get all the answers you need to build your own efficient dust collection system.
What is a DIY dust collector?
A DIY dust collector is a system you can build at home to improve air quality in your workspace by capturing dust, debris, and other airborne particles generated during woodworking or similar activities.
Why should I build my own dust collector?
Building your own dust collector can save money, allow customization to fit your specific needs, provide a deeper understanding of the system for easier maintenance, and offer a sense of satisfaction from making something useful yourself. It’s also more environmentally friendly by reducing airborne particles.
What materials do I need to build a dust collector?
Typical materials include a shop vac or similar vacuum system, buckets with tight-fitting lids, PVC pipes and elbows, blast gates (optional), a cyclone dust separator, hose clamps, screws, nuts, and silicone caulk.
Can I build a dust collector if I’m not very experienced in DIY projects?
Yes, many DIY dust collector projects are designed with beginners in mind, featuring step-by-step instructions that require minimal tools and materials.
How do I connect my dust collector to multiple tools?
You can use blast gates to connect and switch between tools easily. These are installed along the ductwork or hose lines and can be opened or closed to direct airflow from different machines to the dust collector.
What is the benefit of a cyclone dust separator?
A cyclone dust separator enhances the efficiency of your dust collection system by separating larger particles from finer dust before it reaches the filter. This reduces filter clogging and extends the lifespan of your dust collector.
How often should I empty the dust collector?
It depends on usage, but it’s important not to let the collection bin fill up completely. Regularly checking and emptying the bin will prevent clogs and maintain suction power.
Is it necessary to wear protective gear while building a dust collector?
Yes, always wear appropriate safety gear, including eye protection and a dust mask, when working with power tools and handling construction materials to prevent injuries and inhalation of dust.
Can I vent my dust collector system outside?
Venting your dust collector outside can eliminate the need for a filter for the finest particles, but it’s important to consider the environmental impact and local regulations before doing so. Make sure it does not adversely affect your neighbors or the environment.
How can I ensure my dust collector system is efficient?
Keep the system design simple for easy maintenance, ensure all connections are airtight for effective dust collection, and regularly check and clean the system to prevent any decrease in performance.
By building your own dust collector, you take a significant step towards a cleaner, healthier, and more enjoyable woodworking experience.
How to Choose the Right DIY Dust Collector Plan
Choosing the right DIY dust collector plan for your workshop can significantly improve your work environment, making it cleaner and healthier. However, with so many options available, it can be daunting to decide which plan is best suited to your needs. Here are some guidelines to help you make an informed decision.
Understand Your Workshop’s Requirements
Evaluate Your Space: The size of your workshop and the layout will greatly influence your choice. If you’re working in a compact space, a wall-mounted dust collector could save valuable floor space.
Consider the Tools You Use: Different woodworking tools generate varying amounts of dust. For instance, planers and table saws produce more dust than hand tools. Choose a plan that can handle the volume and type of dust your tools generate.
Assess Your DIY Skills: While some plans require basic DIY skills, others might be more complex and require experience with tools and machinery. Be realistic about your abilities to ensure a successful project.
Key Features to Look For
Efficiency: The plan should effectively remove dust from your workspace. Look for designs that incorporate a cyclone separator, as they are more efficient in separating dust from the air before it reaches the filter.
Ease of Maintenance: Opt for a design that allows easy access to empty the dust bin and clean or replace filters. This will make maintenance tasks less cumbersome.
Noise Level: Consider the noise generated by the dust collector. If you spend long hours in your workshop, a quieter system will make the environment more pleasant.
Budget: DIY plans can range from very affordable to more expensive, depending on the materials and components required. Set a budget beforehand and choose a plan that offers a good balance between cost and performance.
Making the Final Decision
Read Reviews and Watch Tutorials: Before settling on a plan, look for reviews or watch tutorial videos to get a better understanding of the construction process and the system’s effectiveness.
Consult with Fellow Woodworkers: If possible, talk to other woodworkers who have built their own dust collectors. They can offer valuable insights and tips based on their experiences.
Future-Proofing: Consider whether the dust collector can be easily upgraded or expanded. As your workshop grows, you might need a more powerful system or one that can handle multiple machines simultaneously.
Choosing the right DIY dust collector plan requires a thoughtful assessment of your workshop’s specific needs, your DIY skills, and your budget. By focusing on efficiency, ease of maintenance, and the ability to adapt to future needs, you can select a plan that will significantly improve the cleanliness and healthiness of your workspace.
15 Cheap DIY Dust Collector Plans
Save money and keep your workspace clean with our 15 Cheap DIY Dust Collector Plans. Perfect for the savvy DIYer looking to cut costs!
1. DIY Wall Mount Dust Collector
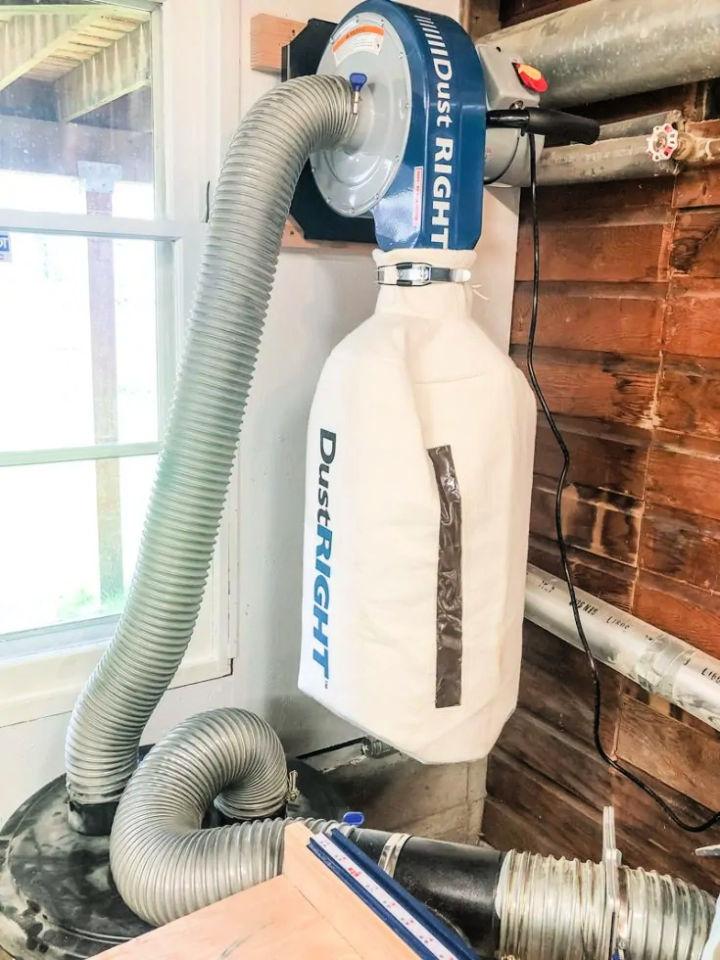
Vineta Jackson at The Handyman’s Daughter shares insightful reasons for switching to a wall mount dust collector in her compact workshop. If you’re grappling with limited space, her solution offers a practical alternative to bulky floor units. A wall-mounted system not only frees up valuable floor area but also maintains strong suction capability for effective dust management.
Jackson’s setup includes a space-saving trash can separator and an upgraded 5-micron filter to keep the air and surfaces cleaner. For woodworkers seeking a tidier workspace without compromising on dust collection power, this thoughtful switch to a wall-mounted unit could be the answer to a clutter-free shop environment.
2. Build a See-Through Cyclone Dust Separator
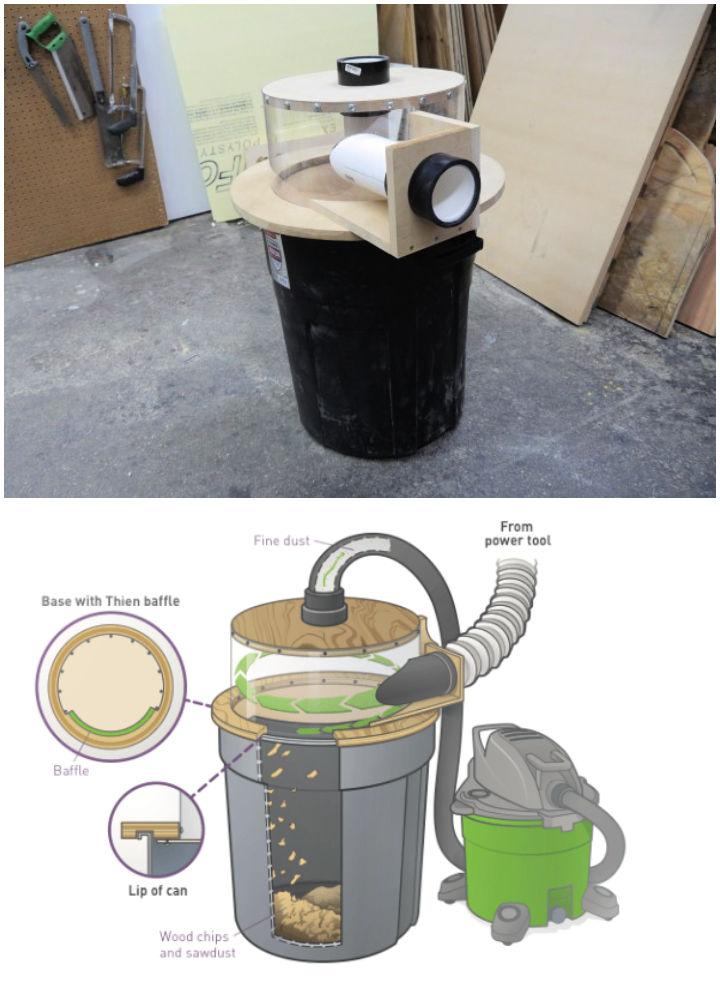
Elevate your workshop’s efficiency with a see-through cyclone dust separator for your shop vac, as explained by Raymond Mowder on Make Zine for Makers. This innovative DIY upgrade, involving a 20-gallon garbage can, streamlines your cleaning process by swiftly sucking up debris. The guide is clear, informative, and full of handy tips to ensure a smooth setup. Perfect for woodworkers and hobbyists, this dust separator project enhances your workspace while keeping it cleaner and safer. Get your tools ready and make a dust-free environment in your shop today!
3. DIY Cyclone Dust Collector System
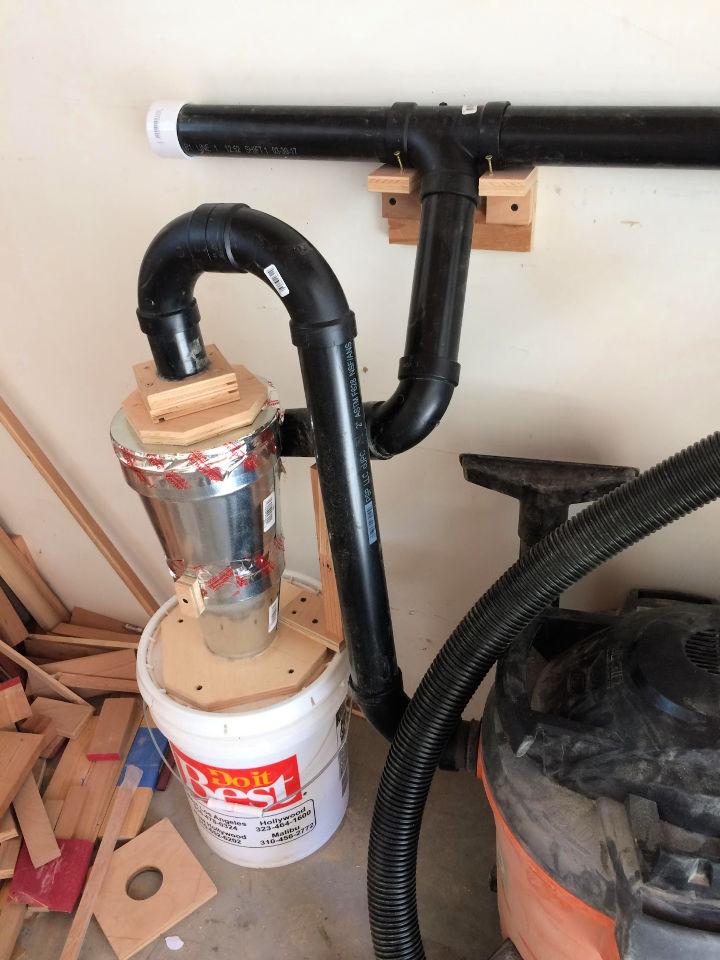
For woodworking enthusiasts aiming to enhance their workshop’s cleanliness and efficiency, a DIY cyclone dust collector system presents an innovative solution. The Imgur Gallery PSKP8 showcases a home-built setup that effectively reduces airborne particles, keeping the workspace tidy. The creator ingeniously adapts a shop vac to construct a system that rivals commercial offerings, achieving a remarkable 90% reduction in dust.
This system is easily connected to various woodworking tools, ensuring a cleaner environment for your projects. The step-by-step visual guide offers inspiration and practical insights for constructing your own cyclone dust collector, with clear imagery and helpful commentary. Perfect for DIYers seeking to make a healthier and more enjoyable workshop experience.
4. Cyclone Chip Separator for a Dust Collector
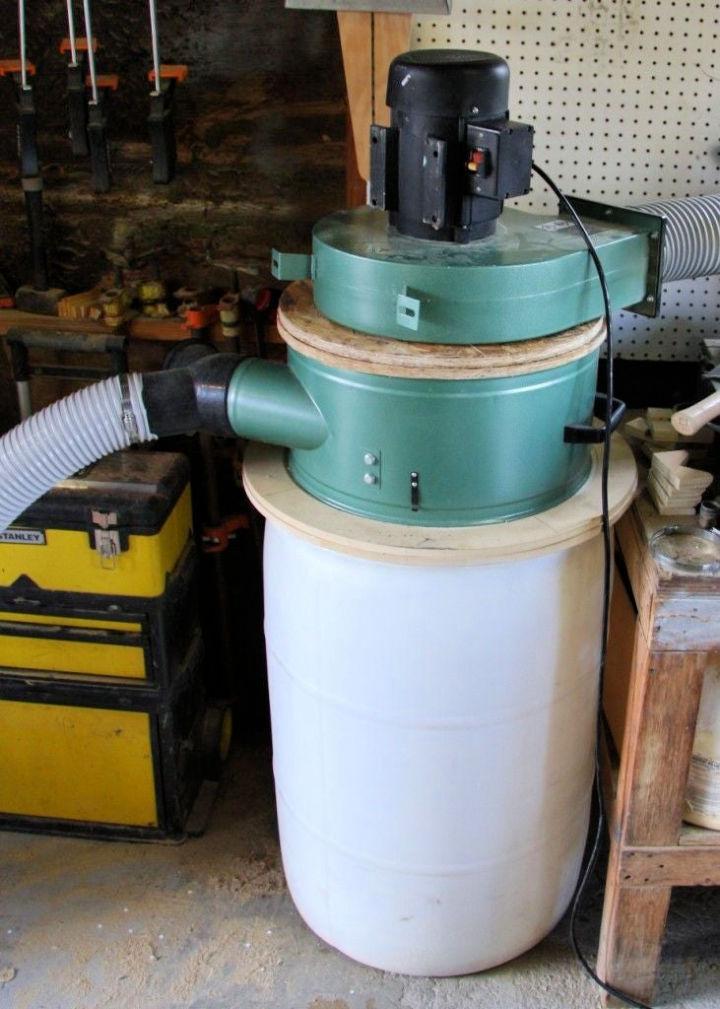
For woodworking enthusiasts keen on maintaining a clean, healthy workshop, a homemade cyclone chip separator for your dust collector can be a game-changer. Instructables provides an instructive guide to building your own, ensuring your lungs are safeguarded from harmful dust while preserving the efficiency of your dust collector. This DIY project involves repurposing readily available materials and tools to make a baffle system that effectively traps debris before it clogs your filter.
The step-by-step process is easy to follow and tailored to fit within a modest budget, making it accessible for all levels of woodworkers. By venting your system outdoors, this setup can also eliminate the need for costly aftermarket filters. Whether you’re upgrading your shop or setting up a new workspace, this solution is designed to help you achieve a cleaner, more efficient environment for your woodworking pursuits.
5. Homemade New Cyclone Dust Collector – Woodworking Essentials
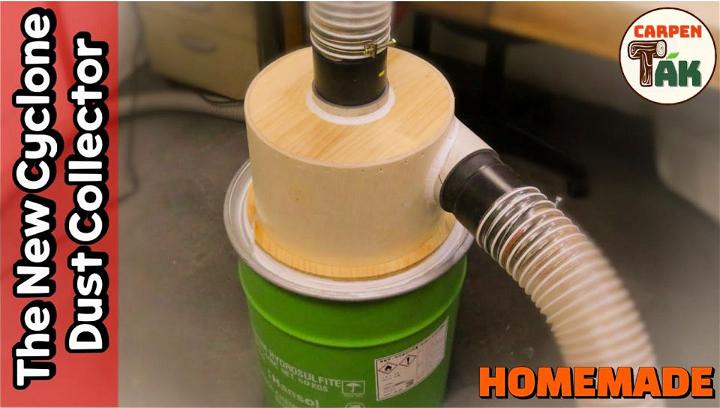
Elevate your woodworking workshop with a DIY Cyclone Dust Collector, a must-have for a cleaner, more efficient space. This homemade essential is surprisingly simple to build and highly effective, especially for small-scale workshops. Gather basic materials like pipes, hoses, and a collection bin to embark on this cost-effective project.
Follow our detailed guide to assemble your dust collector, ensuring a dust-free environment for your woodworking endeavors. Not only does it significantly improve air quality, but it also enhances the longevity of your tools. Crafted with precision, this Cyclone Dust Collector stands as a testament to your commitment to quality and cleanliness in your creative workspace. youtube
6. Homemade Small Dust Collector
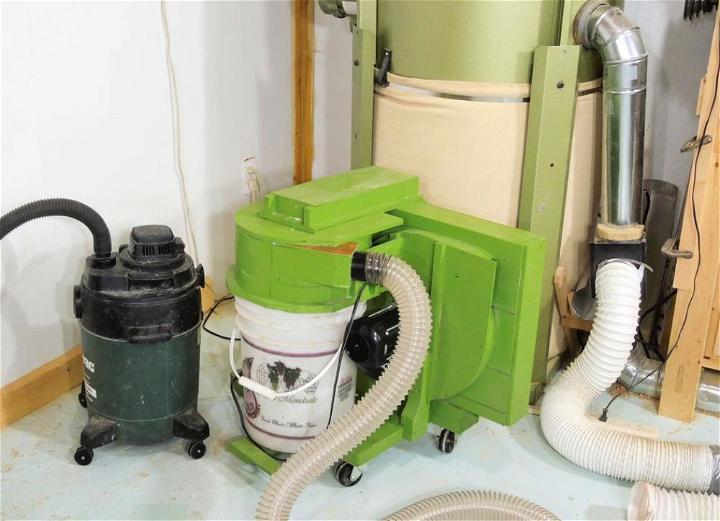
Explore the process of building a small dust collector with this comprehensive guide. Discover practical tips on crafting a quieter and less power-hungry alternative to shop vacs, all while delving into the intricacies of blower and cyclone design. From selecting the right motor to fine-tuning impeller blades, you’ll gain valuable insights into the experimental journey of making an effective dust collection system.
Perfect for DIY enthusiasts, this engaging walkthrough ensures that you’re equipped with the knowledge to tackle dust collection in your own workspace. Dive into this instructive and helpful resource for a step-by-step understanding of dust collector construction. Wood Gears
Explore these “150 Simple Woodworking Projects for Beginners” to craft anything for your home.
7. Homemade Dust Collector System
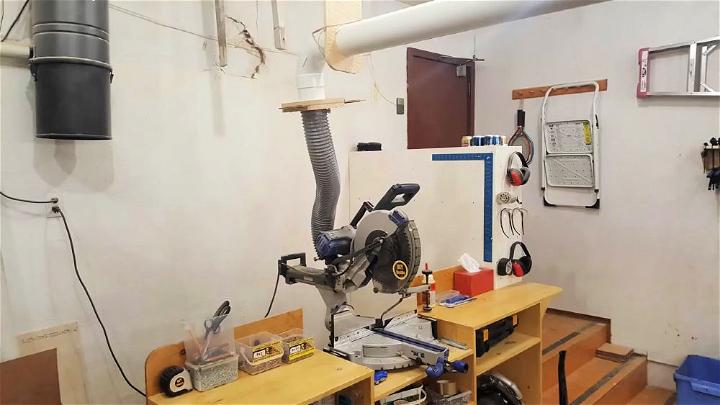
Transform your workshop into a clean, dust-free environment with the DIY Builds Dust Collector System. Perfect for woodworkers keen to enhance their space, this ingenious system efficiently captures dust from various tools, including routers, band saws, sanders, and saws. With an easy-to-follow guide, you can modify a standard dust collector into a cyclone separator using readily available materials like PVC pipes and 55-gallon barrels.
The setup also includes a smart relay and switch mechanism that automatically activates the dust collector when a blast gate is opened. Detailed instructions cover everything from installing exhaust louvers to making custom brackets, ensuring a tidy and safe workspace. Embrace a cleaner crafting experience at DIY Builds with this practical dust management solution.
8. DIY 2 Stage Harbor Freight Dust Collector
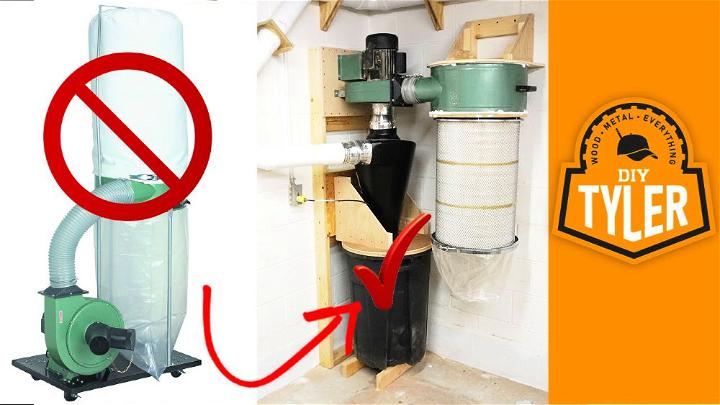
Looking to upgrade your workshop’s dust management? DIYTyler’s video on YouTube showcases a transformative project turning a Harbor Freight Dust Collector into a high-efficiency, two-stage system with an Oneida Super Dust Deputy Cyclone. Ideal for woodworking hobbyists or professionals keen on maintaining a clean shop environment, this detailed tutorial demonstrates how to increase airflow and reduce maintenance frequency.
By integrating a cartridge filter and reconfiguring the setup, DIYTyler presents a compact, sturdy solution for effective dust collection. His instructive guidance is perfect for those aiming to enhance their dust collection without breaking the bank, and the clear, engaging walkthrough makes the project accessible and manageable. For more insights and project ideas, follow the link to the video and see the transformation in action.
9. Cheapest DIY Dust Collection System
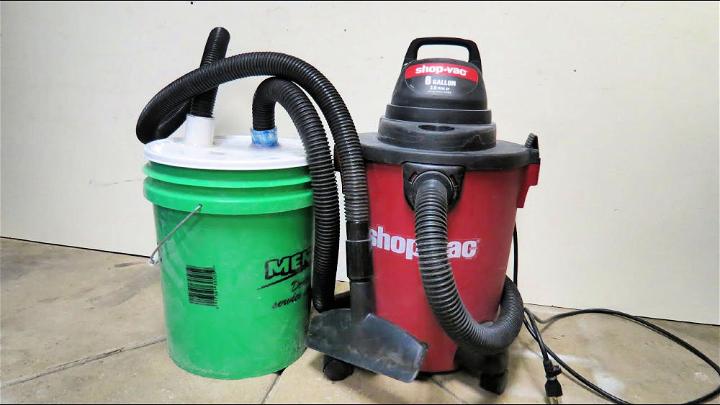
Looking for an inexpensive solution to keep your workspace clean from dust and debris? YouTube has a fantastic video titled “Cheapest DIY Dust Collection System,” where Martin Minkov demonstrates how to make a highly affordable and simple dust collection system using just a bucket and some piping.
With a minimal spend of $5, this DIY project is not only budget-friendly but also an easy-to-follow guide that helps maintain a clean and efficient work area. Perfect for DIY enthusiasts and woodworkers, the video offers clear instructions that can be adapted for various tools and workshops. Tune into YouTube and discover how to enhance your dust management without breaking the bank.
10. How to Make a Cyclone Dust Collector
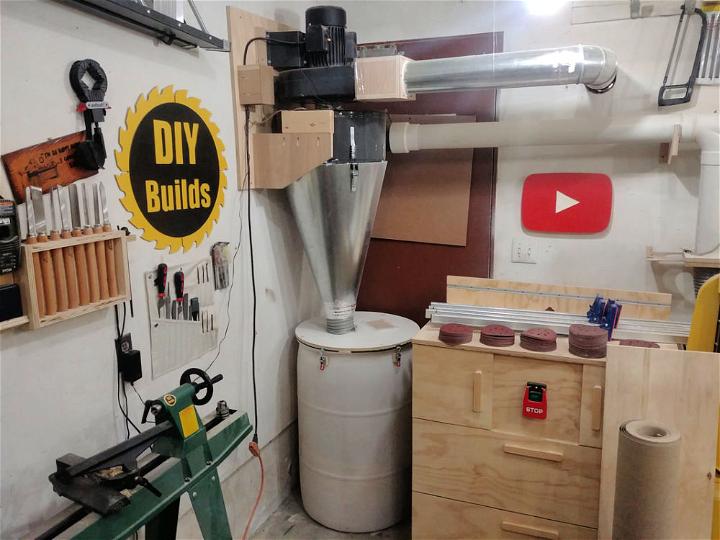
Transform your Harbor Freight 2HP dust collector into an efficient 2-stage cyclone separator with the DIY Builds guide. For a budget-friendly upgrade, utilize a pre-cut piece of 24-gauge sheet metal and a $20 55-gallon barrel. The step-by-step instructions lead you through the process of drilling, riveting, and sealing to make a seamless connection between the cyclone and the collector.
With simple tools like a bandsaw, router, and caulk, you can enhance the performance of your dust collection system. DIY Builds ensures that you can execute this project with ease, keeping your workspace clean and dust-free. The inclusion of pictures and thorough descriptions makes the setup straightforward and ideal for improving your workshop’s dust management. Visit DIY Builds for detailed plans and further guidance on constructing your own cyclone dust collector.
11. Simple DIY Cyclone Dust Collector
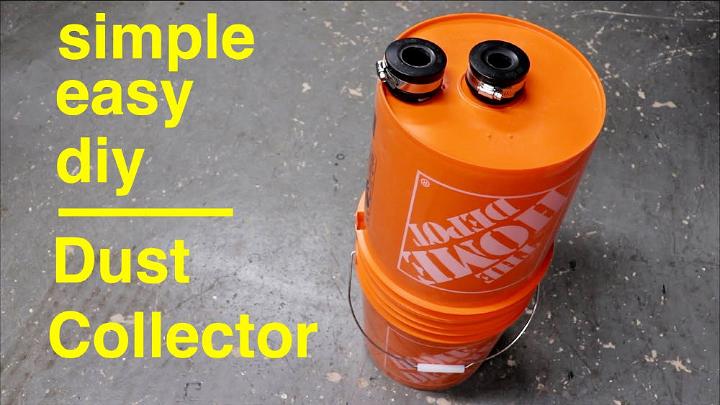
Looking to enhance your woodworking space with a dust management solution that’s easy to build? YouTube offers an instructive guide on crafting a Simple Cyclone Dust Collector, perfect for keeping your workshop clean and sawdust-free. The video showcases a step-by-step process using readily available materials and common tools, ensuring a seamless DIY experience.
Learn how to connect two buckets, fit pipes, and make a secure seal, all without complex equipment. Ideal for hobbyists and seasoned woodworkers alike, this video provides clear, engaging, and helpful instructions to improve your dust collection system efficiently. Watch, learn, and apply these tips to maintain a tidier, healthier workspace.
12. Harbor Freight Dust Collector Design
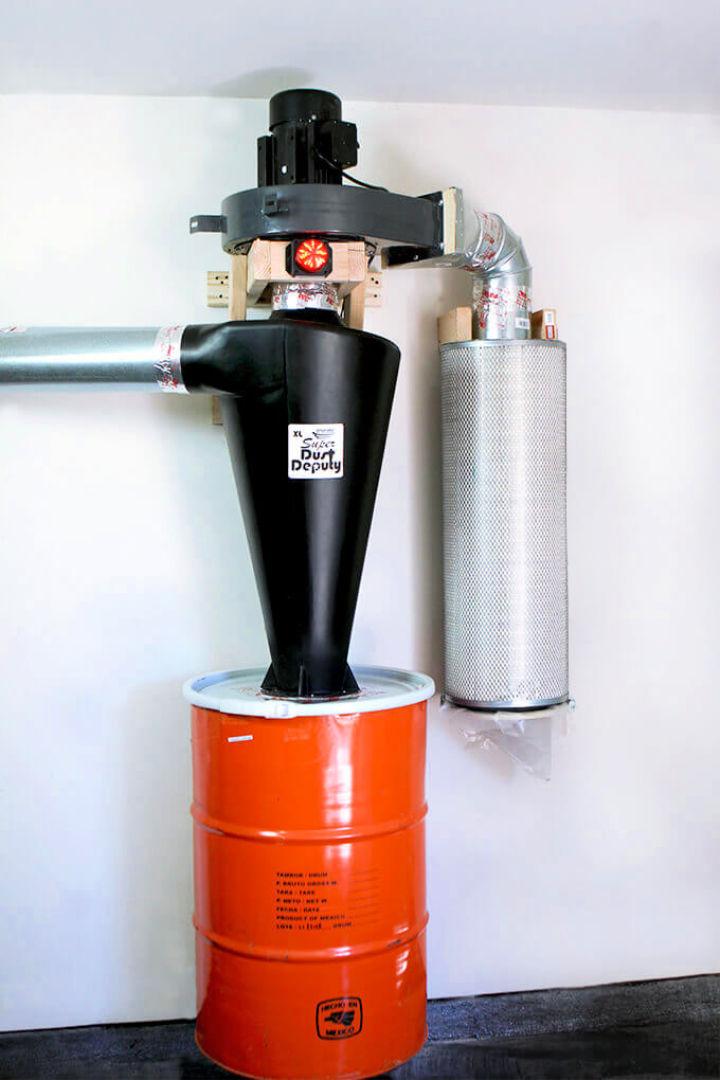
Enhance your woodworking shop with a dust collector upgrade guided by Gray House Studio‘s insightful tutorial. Brent showcases his transformation of a Harbor Freight Dust Collector into a powerhouse 1500 CMF unit with the Super Dust Deputy XL from Oneida Air Systems. The walkthrough is loaded with practical tips, from modifying the impeller for increased airflow to ensuring fine particles are captured effectively.
For DIY enthusiasts eager to maintain a clean, efficient workspace, this step-by-step guide offers the knowledge you need to make a multi-tool servicing system and keep your projects dust-free. With clear instructions and engaging content, you’ll find this upgrade not only improves your shop’s cleanliness but also your woodworking experience.
13. Cyclone Dust Collector from Two Buckets
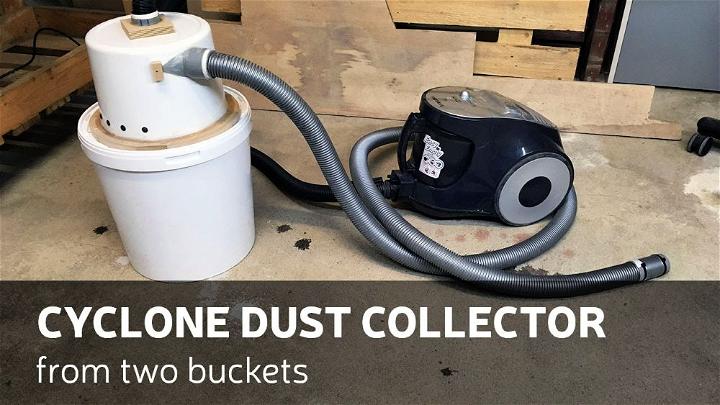
Looking to enhance your workshop’s dust management? YouTube’s Well Done Tips offers a practical and efficient solution with their DIY Cyclone Dust Collector tutorial. By using two common buckets, viewers can construct a cyclone dust separator, an essential tool for any woodworking space. The step-by-step video ensures clarity and ease of understanding, making it accessible for DIY enthusiasts eager to keep their work area clean and sawdust-free.
By following this guide, you’ll not only extend the life of your vacuum cleaner but also improve its performance without frequent clogs and maintenance interruptions. Dive into this instructive video to make a homemade cyclone dust collector and elevate your dust control system.
14. Handmade Dust Collector
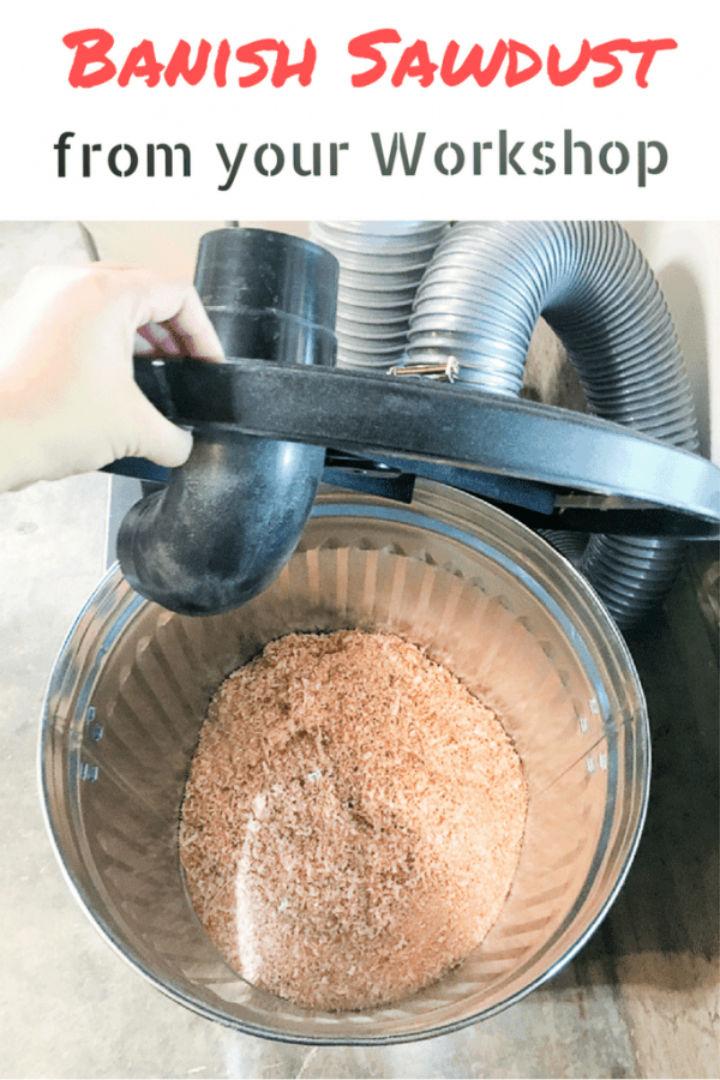
Upgrading your workshop’s dust management system? The Handyman’s Daughter, Vineta Jackson, outlines a practical approach to constructing a 2-stage dust collector. Ideal for maintaining a clean and healthy work environment, this system expertly separates larger debris from fine dust, ensuring your filter and lungs stay clear of harmful particles.
By adding a cyclone separator to your setup, you can quickly dispose of sawdust and keep your workspace in top condition. The guide provides a step-by-step tutorial, complete with a materials list and helpful tips on connecting the system to various tools. Boost your workshop’s efficiency and breathe easier with this essential dust collector upgrade.
15. DIY Tyler Dust Collector
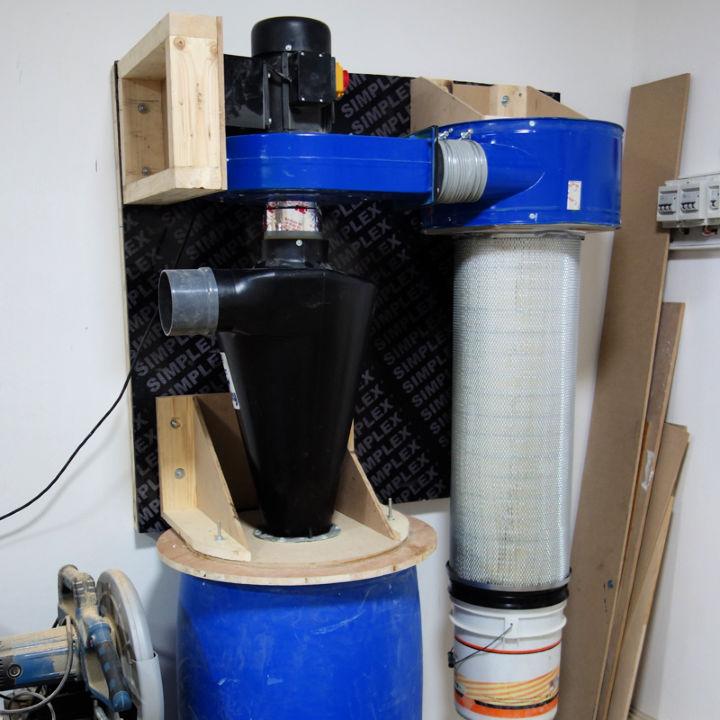
Elevate your dust collection system’s efficiency with a DIY manometer, an ingenious real-time filter monitor. This accessible project, ideal for any filter type, requires basic materials like a PVC cap, pan head bolt, nylon hose barb, flexible tubing, and common tools. The construction process involves precise drilling and securing components with silicone caulk, ensuring a robust setup.
Once assembled, this manometer tracks filter performance, signaling when cleaning is necessary, thus prolonging your filter’s life and safeguarding your health. The tutorial guides you through each step, from crafting to calibration, making it a practical and cost-effective solution for any dust collection system.
Conclusion:
In conclusion, making an efficient yet affordable dust collection system is entirely possible with these “15 cheap DIY dust collector plans.” By carefully selecting the right plan for your workspace and skill level, you can significantly improve your working environment by reducing dust and debris. These plans are designed to cater to the needs of DIY enthusiasts who are eager to enhance their workshops without breaking the bank. So grab your tools, and let’s get started on building a cleaner, more organized workspace today. Ensuring you have a dust-free environment will not only safeguard your health but also increase the efficiency and longevity of your tools.
