Are you tired of traditional nightstands that take up too much floor space? Dive into our guide on 25 easy DIY floating nightstand plans and ideas to transform your bedroom. Discover a variety of designs that are not only space-saving but also add a touch of elegance to your decor. From mini shelf styles to wall-mounted cabinets, these easy-to-follow projects will inspire you to build functional and stylish nightstands.
Building a DIY floating nightstand can significantly enhance your bedroom’s aesthetics and functionality without breaking the bank. Our collection offers customizable options that allow you to tailor your nightstand to your exact needs. Whether it’s adding extra storage or incorporating minimalist designs, our guide has something for everyone. Get ready to explore creative and practical solutions to revamp your bedroom space.

Why Choose DIY Floating Nightstands:
Discover the benefits of DIY floating nightstands and elevate your bedroom decor with style and functionality.
- Space-Saving Design: DIY floating nightstands are ideal for small bedrooms or tight spaces. They attach directly to the wall, which frees up floor space, making your room look and feel bigger.
- Cost-Effective: Building your own nightstand is typically more affordable than purchasing pre-made furniture. You can also repurpose materials you already have, which can further reduce costs.
- Customizable: When you DIY, you have the freedom to tailor the nightstand to your specific needs and preferences. From size and color to the number of shelves or drawers, you can make it your own.
- Minimalist Aesthetic: The clean lines and “floating” aspect of these nightstands lend a modern and minimalist charm to your bedroom, aligning with contemporary interior design trends.
- Enhanced Organization: These nightstands often feature creative storage solutions, such as hidden drawers or built-in chargers, helping you keep your bedside area tidy and functional.
- Personal Satisfaction: There’s a sense of pride and accomplishment that comes with building something with your own hands. Plus, it’s a fun and engaging activity you can do solo or with family and friends.
- Adaptability: Floating nightstands can be installed at any height, making them perfect for beds of all sizes. They’re also great for children’s rooms, as they can be adjusted as they grow.
Remember, the key to a successful DIY project is patience and attention to detail. Take your time to enjoy the process, and you’ll end up with a piece of furniture that’s not only practical but also a reflection of your personal style.
How to Make a DIY Floating Nightstand
Making a DIY floating nightstand is a fantastic way to add style and functionality to your bedroom without taking up precious floor space. Whether you’re a beginner or a seasoned DIY enthusiast, this guide will walk you through the process of making your own floating nightstand, ensuring it’s both a practical and aesthetic addition to your room.
Choosing Your Style and Materials
Before you start, decide on the style and materials you want to use for your floating nightstand. Do you prefer a minimalist design, or are you aiming for something with more storage, like a drawer or shelves? Your choice will dictate the materials and tools you’ll need. Common materials include wood (plywood, MDF, or solid wood), screws, brackets, and paint or stain for finishing.
Tools You’ll Need
- Measuring tape
- Drill
- Saw (hand saw, circular saw, or jigsaw, depending on your design)
- Sandpaper or an electric sander
- Level
- Paintbrush or roller (if painting or staining)
Step-by-Step Guide
1. Design and Measurements: First, sketch your design, including dimensions. Measure the space where your nightstand will go to ensure it fits perfectly. Keep in mind the height of your bed and the items you plan to place on the nightstand.
2. Cutting Your Materials: Based on your measurements, cut your wood to size. If you’re not comfortable doing this yourself, most hardware stores will cut the wood for you.
3. Assembling the Nightstand: If your design is simple, you might just be attaching a single shelf to the wall. For more complex designs, assemble the pieces using screws or wood glue. Ensure all edges are smooth by sanding.
4. Finishing Touches: Apply paint or stain to your nightstand, depending on your preference. Let it dry completely.
5. Mounting to the Wall: The key to a floating nightstand is securing it firmly to the wall. Use a stud finder to locate the studs in your wall. If you can’t mount directly into studs, use appropriate wall anchors. Mark your drilling points with the level to ensure your nightstand hangs straight. Drill pilot holes, then screw the brackets or the nightstand itself into the wall.
6. Decorating Your Nightstand: Once mounted, add your lamp, books, or any other essentials. Enjoy the convenience and style of your new floating nightstand!
Tips for Success
- Always wear protective gear when using power tools.
- Double-check your measurements before cutting or drilling.
- Consider adding a small lip to the edge of your nightstand to prevent items from slipping off.
- If you’re unsure about the weight capacity, opt for heavy-duty brackets to ensure stability.
Making a DIY floating nightstand is not only a practical project but also an opportunity to customize your bedroom space to suit your needs and style. With a little time and creativity, you can have a functional, stylish nightstand that enhances your room’s look and feels without crowding your floor space.
Creating: A Guide to Common Questions
When it comes to creating, whether it’s art, content, projects, or solutions, there are often many questions that come up along the way. This section aims to address some of the most common and frequently asked questions to help guide your creative process.
What is the best way to start a creative project?
- Define your goal: Understand what you aim to achieve with your project.
- Gather inspiration: Look at similar works or brainstorm ideas that could influence your project.
- Plan your approach: Break down the project into smaller, manageable tasks.
- Gather necessary materials or resources: Ensure you have everything you need before starting.
How can I overcome creative block?
- Take a break: Sometimes stepping away can provide a new perspective.
- Seek inspiration: Explore other works, nature, or different environments for new ideas.
- Experiment: Try different approaches without focusing on the outcome.
- Collaborate: Getting input from others can spark new directions.
What tools or resources are essential for creating?
- Digital tools: Software or apps specific to your project (e.g., Adobe Creative Suite for designers, Scrivener for writers).
- Traditional materials: Depending on the project, this could range from paints and brushes to musical instruments.
- Educational resources: Books, online courses, or tutorials that can provide guidance and improve your skills.
How do I know when my project is finished?
- It meets your initial goals: The project fulfills the objectives you set out at the beginning.
- Feedback: Sometimes external input can indicate whether further adjustments are needed.
- Personal satisfaction: You feel content with the state of the project, and it reflects your vision.
How can I protect my creative work?
- Copyright your work: This is automatic in many places but formalizing it can offer additional protection.
- Watermark digital work: If sharing online, this can deter unauthorized use.
- Understand your rights: Research and be aware of your rights as a creator, including copyright laws and fair use.
How to stay motivated during a lengthy project?
- Set milestones: Breaking the project into stages can make progress feel more achievable.
- Celebrate small wins: Acknowledge and reward yourself for completing tasks.
- Stay organized: Keep a schedule or to-do list to maintain focus.
- Seek support: Sharing your progress with friends, family, or a mentor can provide encouragement.
Making something new can be a challenging yet rewarding journey. By addressing these common questions, the hope is to make the process a little easier and more enjoyable.
How to Choose the Right DIY Floating Nightstand Plan for Your Bedroom
Choosing the perfect DIY floating nightstand plan can uplift your bedroom’s aesthetics and functionality. With numerous styles and designs available, it’s crucial to select one that matches your needs and skill level. Let’s explore how to make an informed decision.
Understand Your Space and Needs
Assess Your Bedroom Space: Before diving into plans, evaluate the space beside your bed. A floating nightstand should complement the area without overcrowding it. Measure the available wall space to ensure your chosen design fits perfectly.
Identify Your Storage Needs: Consider what you plan to store or display on your nightstand. If you just need a spot for a book and a lamp, a minimalist shelf-style nightstand might suffice. However, if you require more storage, look for plans that include drawers or multiple shelves.
Match Your Bedroom Decor
Consider Your Decor Style: Your floating nightstand should enhance your bedroom’s current aesthetic. Whether you have a modern, rustic, or minimalist decor, there’s a DIY plan that matches. Pay attention to the materials and finishes suggested in the plan to ensure they complement your room.
Color Coordination: If you’re planning to paint or stain your nightstand, choose colors that harmonize with your bedroom palette. A well-coordinated nightstand can become a seamless part of your overall decor.
Evaluate Your DIY Skills
Assess Your Skill Level: Be realistic about your carpentry and DIY skills. Some floating nightstand plans require more advanced techniques, such as drawer installations or working with specific tools. Beginners should opt for simpler designs to ensure a smooth project experience.
Tool Availability: Check the tools listed in the plan. Ensure you have access to them or can easily borrow or purchase them. It’s also worth considering plans that require minimal tools to reduce additional costs.
Consider the Time and Cost
Time Investment: Consider how much time you’re willing to dedicate to this project. Some plans can be completed in a weekend, while others might require more extensive work. Choose a plan that fits your schedule.
Budgeting: Calculate the cost of materials and any tools you might need to buy. If you’re on a tight budget, look for plans that utilize repurposed materials or require fewer supplies.
Choosing the right DIY floating nightstand plan involves a balance of aesthetics, functionality, skill level, and budget. By carefully considering your needs and capabilities, you can select a plan that not only adds charm to your bedroom but also provides practical value.
25 Easy DIY Floating Nightstand / Side Table Plans
Discover 25 easy DIY plans for building your own floating nightstand or side table, perfect for adding style and functionality to any bedroom.
1. DIY Minimalist Floating Nightstand
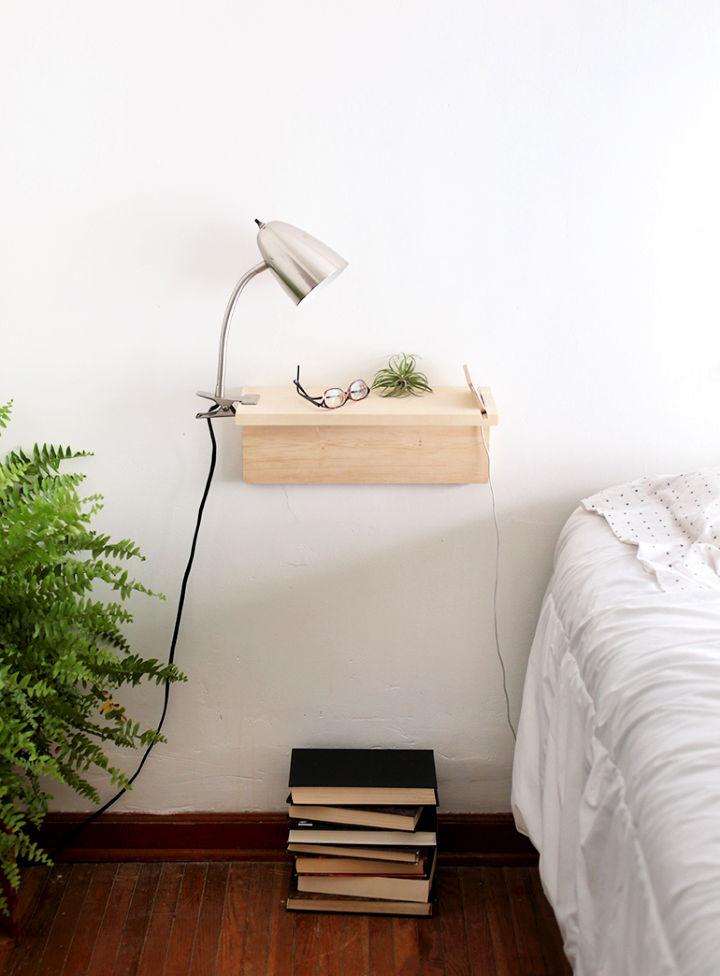
Revamp your bedroom with a stylish and practical DIY Floating Nightstand, courtesy of The Merrythought. Manda shares a step-by-step guide to building a minimalist nightstand that not only enhances the aesthetics of your space but also optimizes functionality. Ideal for those with limited floor area, this floating nightstand provides just enough room for essentials without cluttering your bedroom.
With clear instructions on materials, measurements, and assembly, you’ll have everything you need to craft a custom piece that’s perfect for your phone and accessories. Embrace this creative project and transform your nighttime space with a personalized touch.
2. How to Make a Floating Side Table
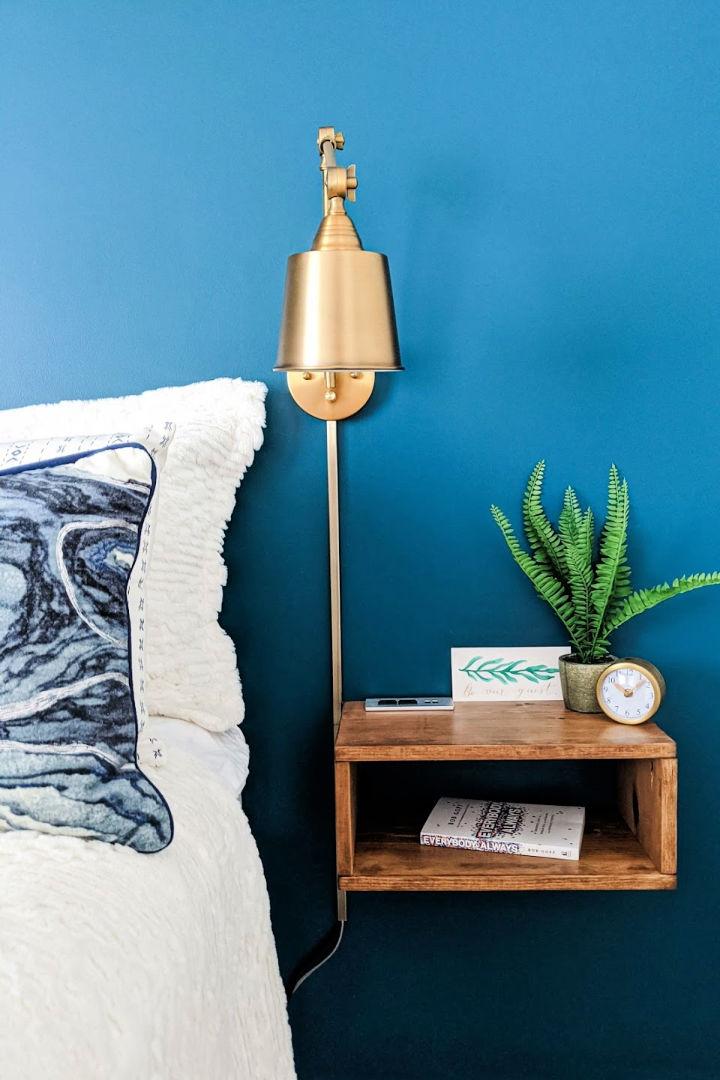
Ready to add a touch of modern simplicity to your bedroom with DIY floating nightstands? Pine and Poplar‘s guide offers a quick and engaging way to build stylish, space-saving bedside storage. With clear instructions, you’ll learn to incorporate a charger and USB port for added convenience.
The tutorial ensures a smooth process, from selecting the right tools and materials to assembly and installation. By following these steps, you can transform your space with functional and attractive nightstands in under an hour. Perfect for keeping essentials at arm’s reach and maintaining a clutter-free look, these nightstands are an excellent project for those eager to enhance their home with a personal touch.
3. Homemade Floating Storage Nightstand
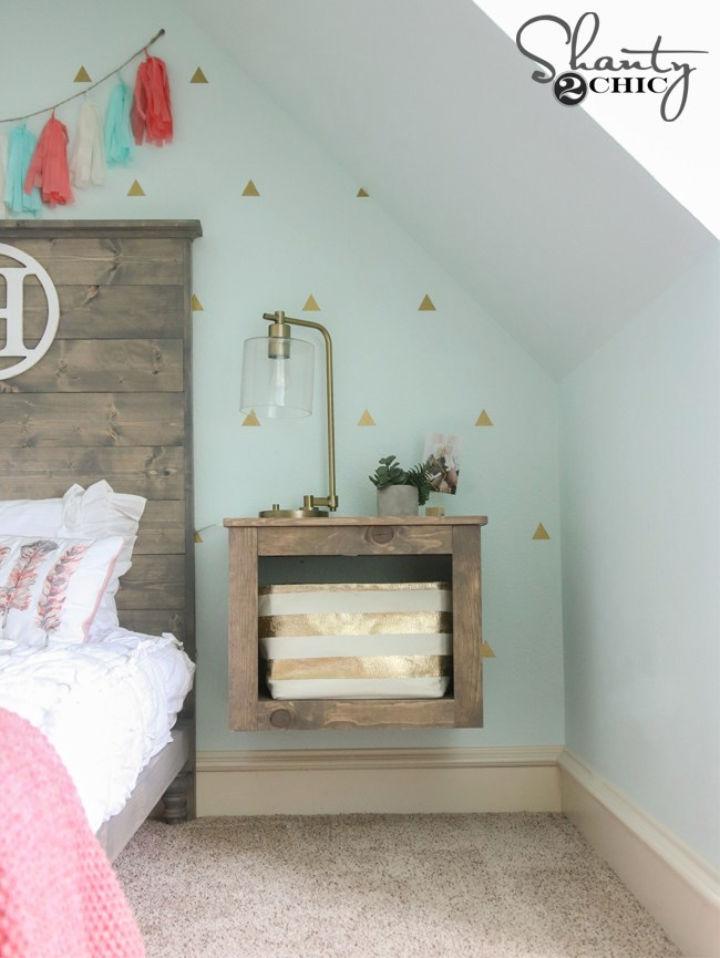
Discover how to build a chic and practical DIY Floating Storage Nightstand with Shanty 2 Chic‘s free woodworking plans and tutorials. Perfect for adding a modern touch to your bedroom, this project involves crafting a nightstand with a sleek floating design and convenient storage options.
The guide offers step-by-step instructions, from constructing the plywood box to installing the cleat for wall mounting. Enhance your space with this stylish and functional piece, complete with room for decorative baskets and a sturdy top for your bedside essentials. With clear, engaging, and helpful directions, you’ll have a new furniture piece that not only serves its purpose but also adds character to your room.
4. DIY Floating Stand for Master Bedroom
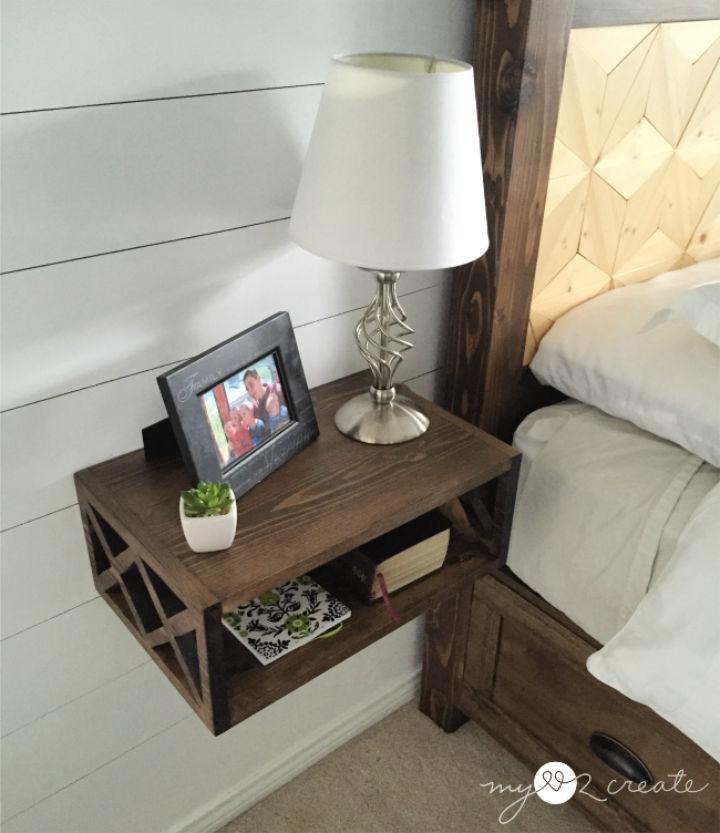
Find how to build a stylish DIY Floating Night Stand with a charming double X pattern using just a single 1x8x8 foot common board. MyLove2Make offers a step-by-step picture tutorial, perfect for anyone looking to add a functional yet space-saving piece to their bedroom decor.
By following this guide, you’ll learn to make a nightstand that not only enhances your room’s aesthetic but also allows for easy access to storage without the hassle of moving furniture around. With a cost-effective approach and clear instructions, you can craft a sturdy and appealing floating nightstand that complements any bedroom setup.
5. Build a Floating Nightstand With Brackets
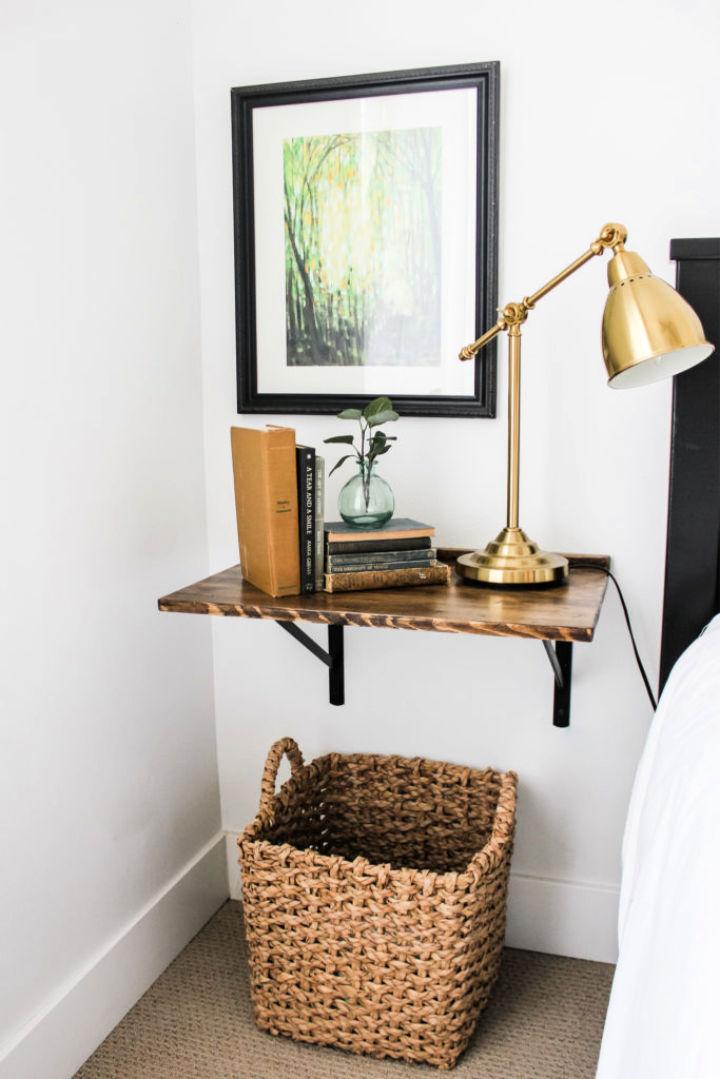
Design a charming industrial farmhouse-style nightstand with this simple tutorial from Loralee Ah Mu. Ideal for DIY enthusiasts, this project can be completed in under an hour and requires minimal tools. You’ll need lumber, heavy-duty shelf brackets, wood glue, screws, and a few other supplies. The process involves attaching a back ledge to the nightstand top, sanding, conditioning, and staining the wood, then securing the piece with brackets to your wall.
Perfect for adding a personalized touch to your bedroom, follow these steps to build a functional and stylish nightstand that showcases a mix of wood and metal aesthetics. Visit Loralee Ah Mu’s page for the full guide and add a handmade piece to your home decor.
6. Simple Handmade Floating Nightstand
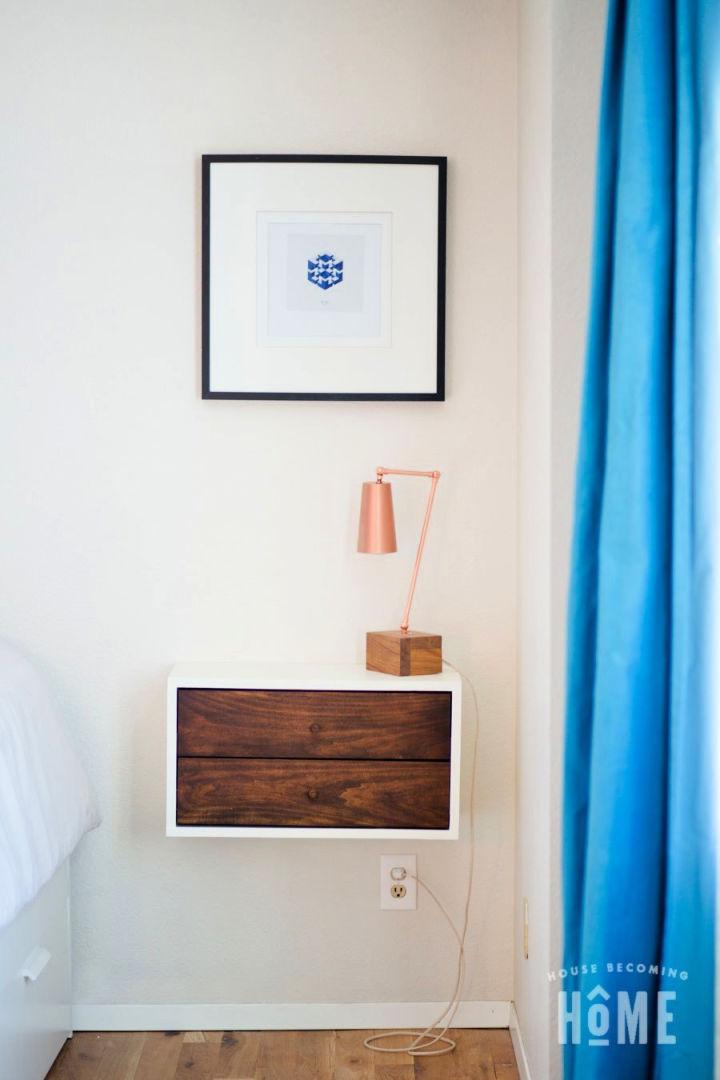
If you’re keen on adding a sleek, modern touch to your bedroom with a DIY project, House Becoming Home offers a fantastic guide to building a simple floating nightstand. Ideal for those starting their woodworking journey or anyone seeking a quick and rewarding build, this nightstand not only elevates your room’s aesthetic but also provides convenient, hidden storage.
The tutorial is thoughtfully laid out with a list of materials, including lumber and hardware, and the necessary tools to bring this nightstand to life. With easy-to-follow instructions and free printable plans, you’ll be well on your way to building functional, stylish furniture for your home.
7. Making a Floating Stand With Shelves
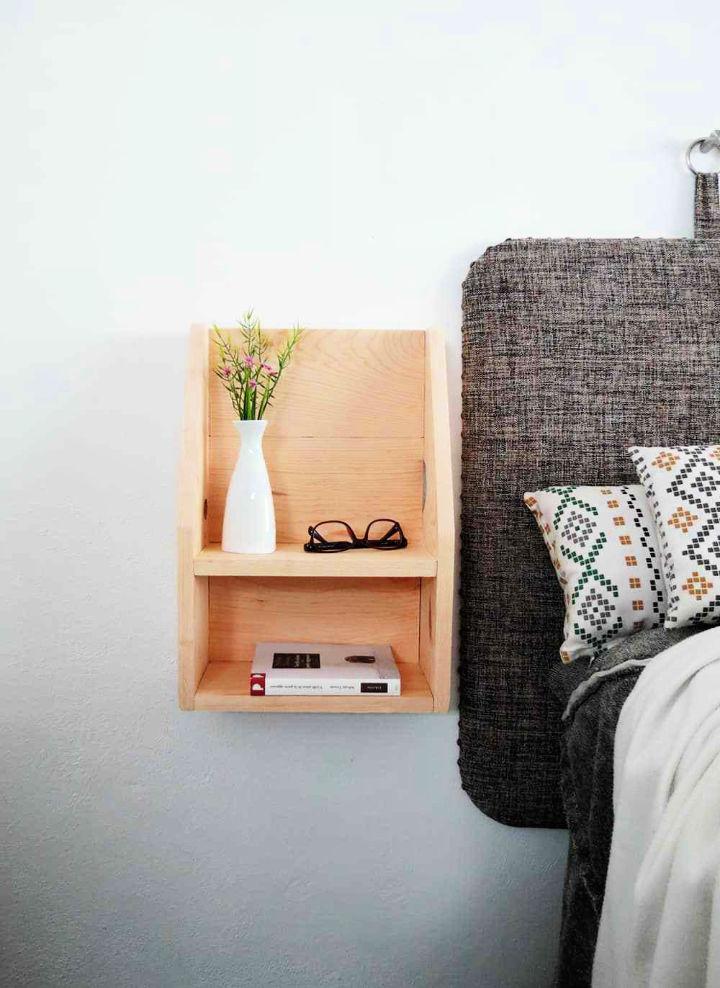
Making a floating nightstand is a clever way to add functionality and style to your bedroom without compromising space. If you’re looking to build one, Ohoh deco offers a step-by-step guide that’s simple to follow. Ideal for those who enjoy a touch of DIY, this project requires minimal materials and can be completed with ease.
A floating nightstand not only provides a convenient spot for your bedtime reads but also enhances the aesthetics of your room. Dive into the tutorial at Ohoh deco and craft a practical piece that seamlessly blends with your bedroom decor.
8. Affordable DIY Floating Nightstand
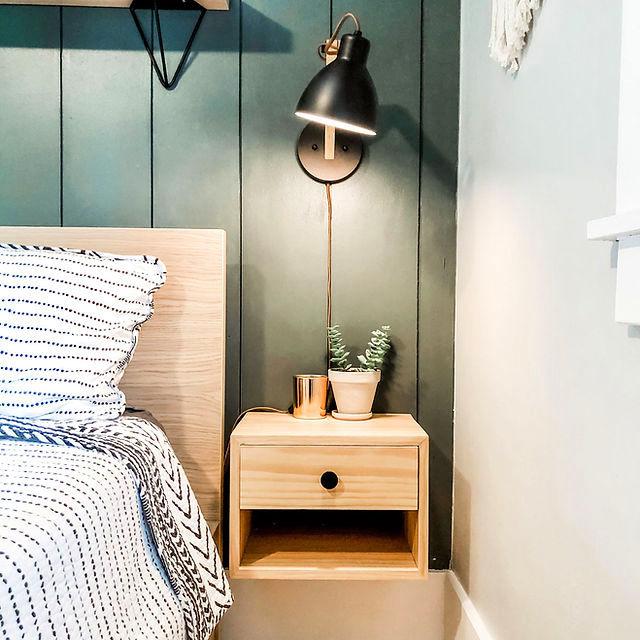
Elevate your bedroom’s aesthetic with DIY Modern Floating Nightstands that seamlessly blend with IKEA MALM beds, as detailed by Hygge & Spruce. With a practical design that allows for easy access to bed drawers, these nightstands are a stylish and budget-friendly addition. For around $94, you can craft a pair, saving substantially compared to store-bought options.
The guide provides a step-by-step process, from constructing the box frame to installing the drawer slides, ensuring you can confidently build functional, floating storage. Simple tools and materials like pine boards, drawer slides, and polyurethane are used. Engage in this creative project to customize your space with a minimalist touch.
9. How to Build a Floating Nightstand
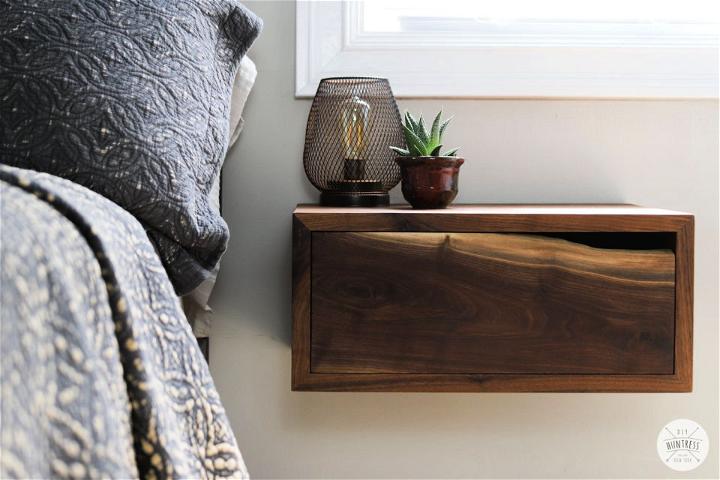
Make a cozy and functional space in your bedroom with DIY Huntress‘s guide to crafting your own floating nightstands, complete with unique live edge drawers. Perfect for those who value underbed storage access, these stylish nightstands not only save floor space but also add a touch of natural charm to your decor. Sam, the skillful woodworker behind DIY Huntress, provides a detailed, step-by-step tutorial that simplifies the building process.
From selecting the right tools and materials to the final touches of installing a convenient French cleat hanging system, this guide is designed to help you successfully complete your project. Elevate your bedroom’s aesthetic and enjoy the practical benefits of these handmade nightstands.
10. Building a Wooden Floating Nightstand
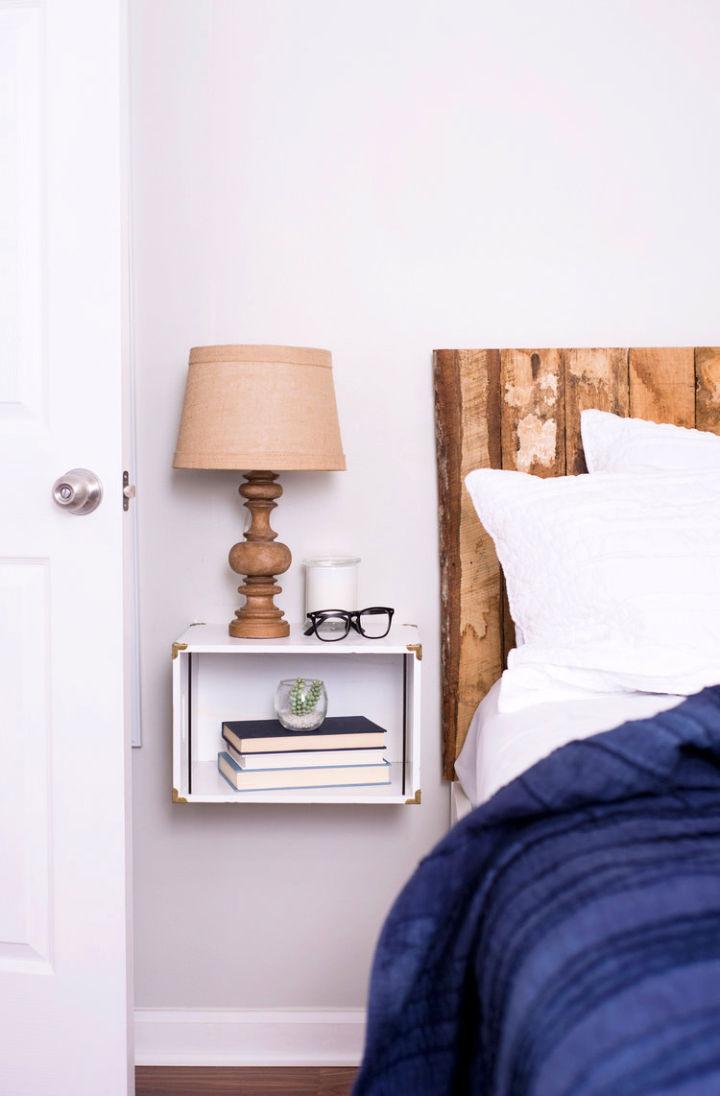
Maximizing space in a tiny living environment can be challenging, but Elah Tree Creative offers a clever solution with their floating bedside tables. Ideal for compact bedrooms, these innovative tables combine functionality and style. By using wood file organizers or storage cabinets, you can build a minimalist and practical bedside space without sacrificing precious floor area.
Easy to install and customizable with a simple coat of paint, these floating tables are perfect for keeping your essentials within reach while maintaining a clutter-free zone. Embrace the efficiency of tiny living with these smart furniture choices that help you make the most out of your small living quarters.
11. Easiest Way to Make a Floating Night Stand
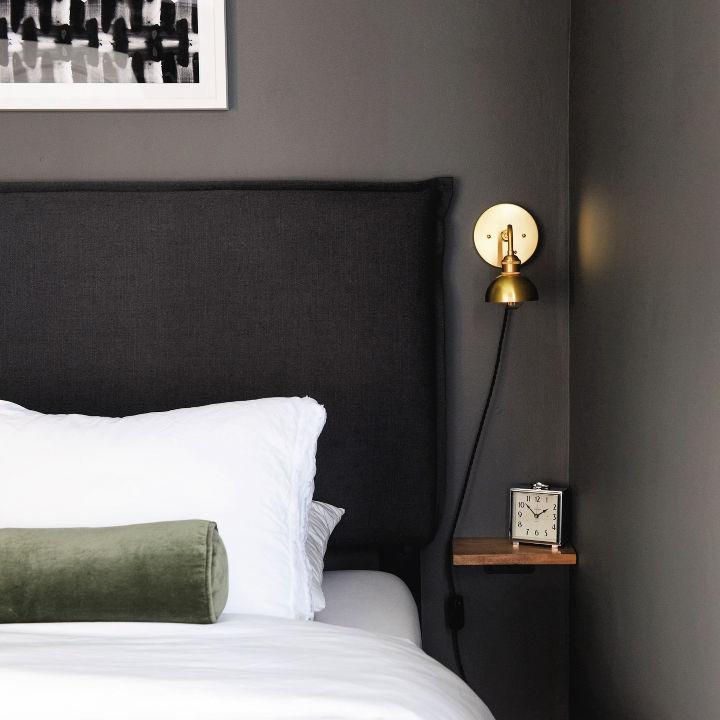
Transform your bedroom’s functionality with ease using the DIY ‘Floating’ Night Stands guide from Yellow Brick Home. Scott shares a clever and cost-effective way to add bedside convenience to tight spaces. With simple tools like a miter saw, drill, and some paint, you can build stylish, space-saving shelves that seem to levitate against your wall. This step-by-step tutorial is perfect for those looking to enhance their room without the bulk of traditional furniture. Engage in this rewarding project and enjoy the sleek, minimalist aesthetic it brings to your home.
12. DIY Wall Mounted Nightstand Under $30
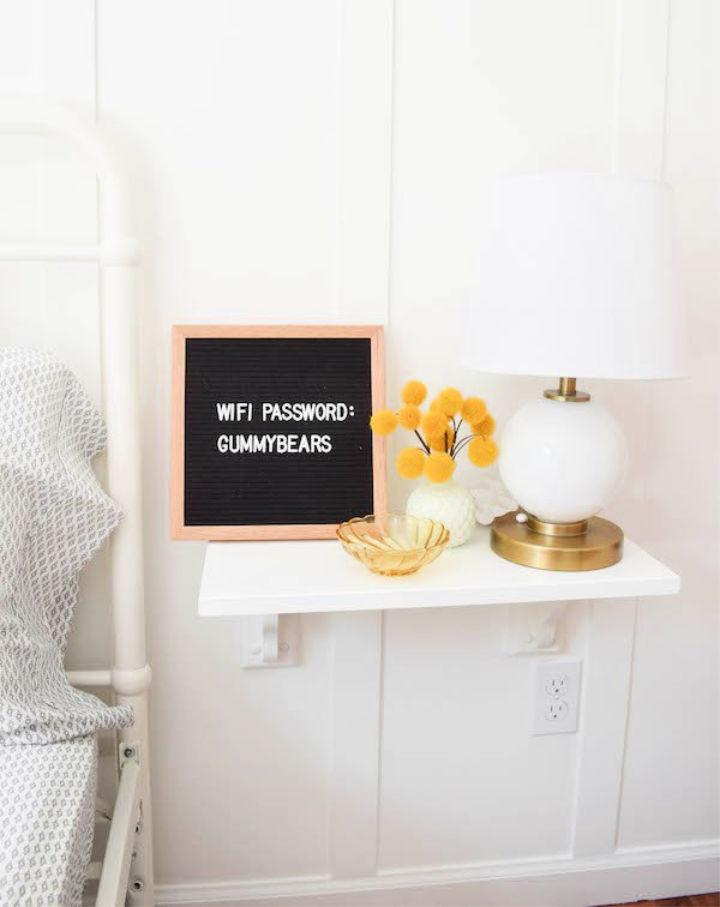
Transform your nursery or guest room with a space-saving and stylish wall-mounted nightstand, as showcased in Rachel Schultz‘s blog. Discover how to use simple hardware store corbels and a piece of poplar wood to build an elegant, floating nightstand that complements your room’s aesthetics without cluttering the space.
Follow the easy steps to sand, paint, and mount your custom nightstand, adding a personalized touch to your interior decor. This budget-friendly project not only enhances the room’s flow but also serves as a charming platform to display decorative items, merging functionality with flair.
13. How to Make a Floating Side Table – Step by Step
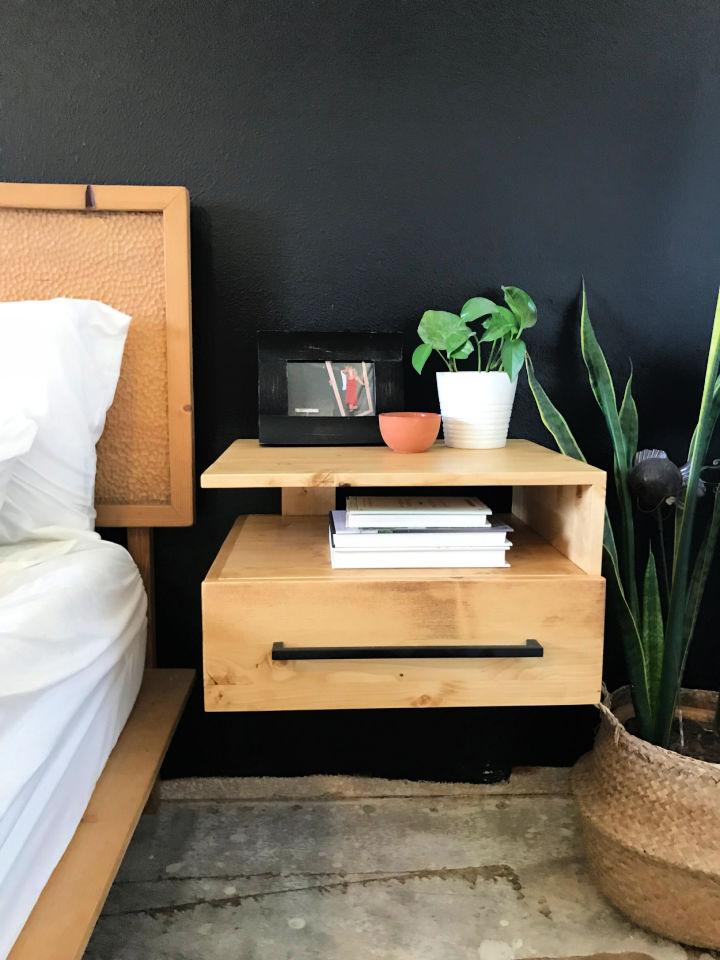
If you’re eager to craft sleek, modern floating nightstands that elevate your bedroom’s style while offering practical storage solutions, The Awesome Orange has just the project for you. Dive into the DIY guide crafted by Sadie Mae John, which meticulously outlines the process of building floating nightstands using Kreg’s new 720 Pro pocket hole jig.
With clear, step-by-step instructions, you’ll learn how to build these chic pieces with an open shelf design and a hidden drawer, perfect for stashing away clutter. The guide is designed to be accessible, providing a detailed materials list and helpful tips to ensure your build is both enjoyable and successful. Enhance your bedroom and your DIY skills with this engaging and instructive project.
14. DIY Minimal Hanging Night Stand
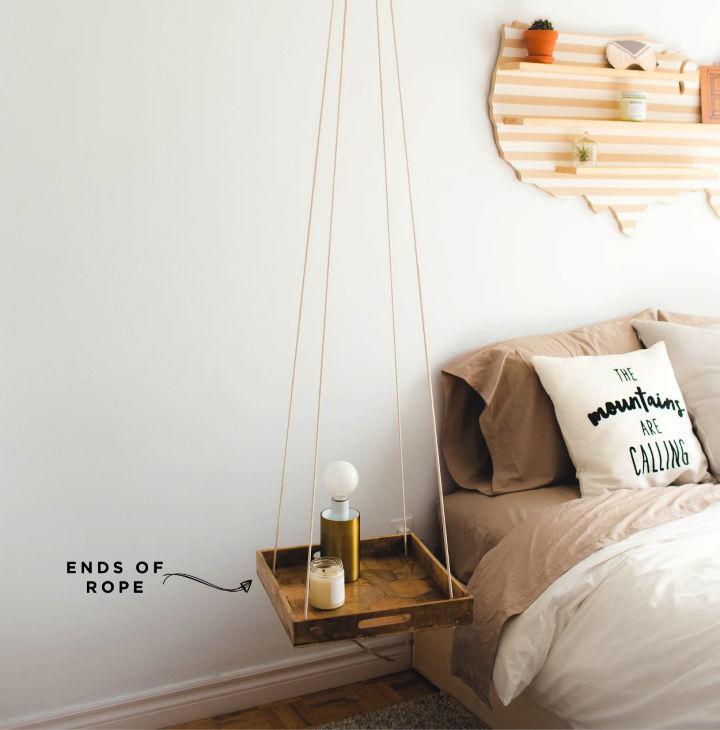
Transform your bedroom space with a touch of modern simplicity by building a DIY minimal hanging nightstand, as detailed by The Sorry Girls. This project is surprisingly straightforward and budget-friendly, costing only $10-$15. You’ll need a C-hook, poly-cotton blend rope, a wooden tray, and some basic tools like a drill and wood drill bit.
Start by drilling four holes into each corner of your chosen tray, thread the rope through, and secure with knots. Then, paint a screw hook to match your ceiling and install it into a stud. Hang your new nightstand, making adjustments to ensure it’s level. The result is a sleek, floating piece that adds functionality and style to your room. Enjoy crafting your own unique nightstand and infuse your personal flair into your living space.
15. Make Your Own Floating Side Table
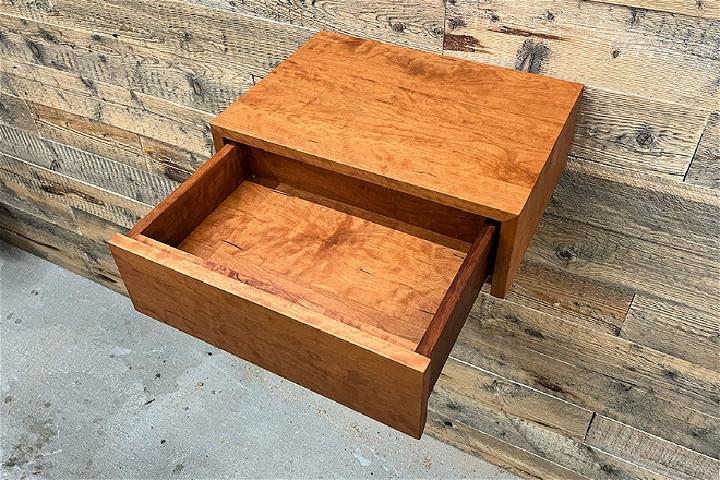
Upgrade your bedroom with the Modern Floating Nightstand from Kreg Tool, a sleek and practical addition that provides essential storage without overwhelming your space. With clear instructions for cutting, assembling, and installing, this DIY project is ideal for anyone aiming to enhance their home with a custom touch.
The design features a sturdy cherry wood construction and includes a smooth-gliding drawer with an understated front, ensuring a cohesive look that complements any decor. Follow the step-by-step guide to build a nightstand that not only looks great but also serves as a convenient bedside organizer.
16. Building a Wooden Floating Nightstand With Drawer
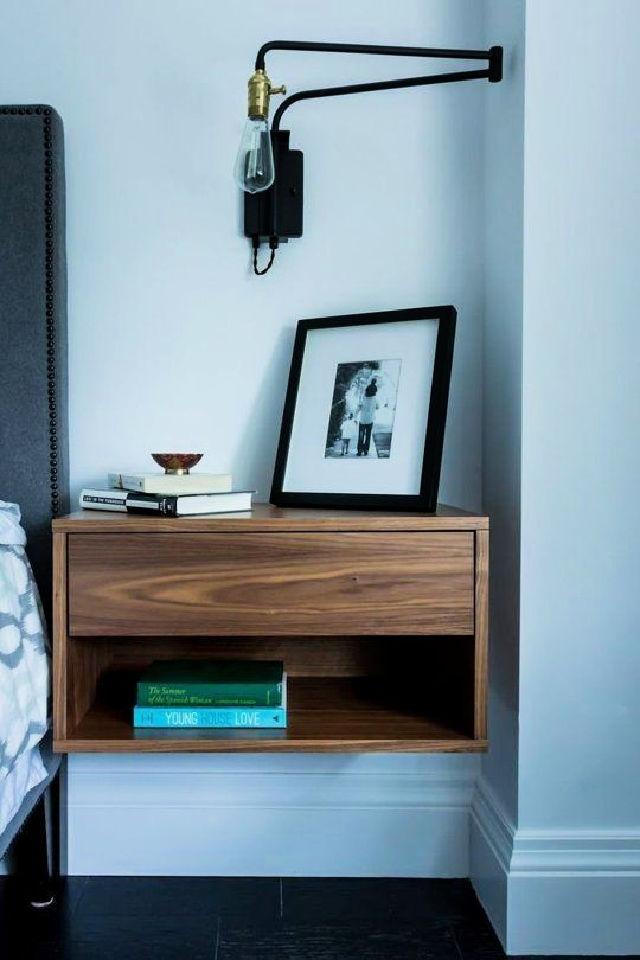
Welcome to day nine of our nightstand series! Today’s feature is a sleek floating nightstand with a drawer, perfect for adding a touch of modern style to your bedroom. Floating nightstands not only provide a clean, minimalist look but also help to de-clutter your space. This DIY project is straightforward and can be tackled with basic tools and materials. The plan includes a handy shopping list and a cut list to ensure precision.
With a combination of a shelf and a drawer, you’ll have ample storage for all your bedside essentials. Follow the step-by-step instructions to build this functional and stylish piece. Once assembled, you can personalize it with your choice of paint or stain. Add a chic drawer pull, or simply use the drawer front’s lip as a pull for a more streamlined appearance. Get ready to enhance your bedroom with this charming floating nightstand! More Like Home
17. Easy DIY Floating String Side Stand

Ready for a weekend DIY project? Monsterscircus presents an easy-to-follow guide on building a stylish and budget-friendly floating string table using a wooden cutting board. With a few simple materials like steel wire, ferrules, and a drill, you can craft a unique piece of furniture that adds a contemporary touch to your space.
If you prefer a chic finish, the tutorial also covers how to adorn your cutting board with a leather surface. Ideal for those who enjoy hands-on projects, this string table will not only be a conversation starter but also a testament to your crafting skills. Get ready to elevate your home decor with this innovative floating table design.
18. Best Homemade X Floating Stand
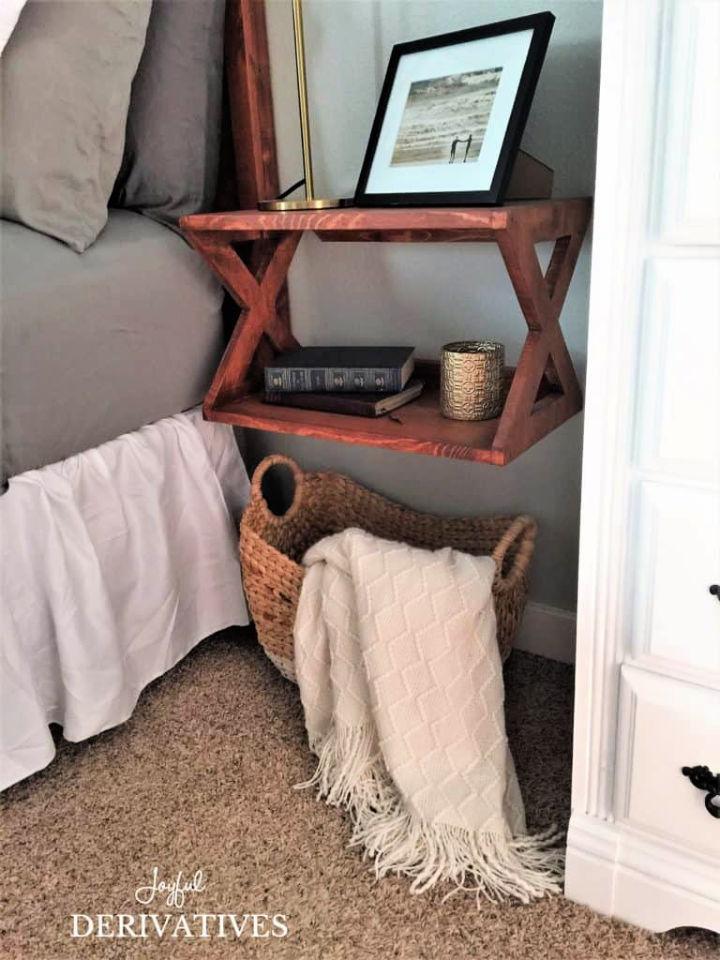
Transform your bedroom with a DIY floating nightstand that exudes farmhouse charm. Joyful Derivatives offers an accessible guide to building a stylish and functional “X” floating nightstand using basic lumber. This project not only enhances the aesthetic appeal of your space but also maximizes floor area, making it ideal for compact rooms.
The instructions are easy to follow, with a detailed materials list and step-by-step directions that ensure a smooth crafting experience. Add a personal touch by selecting a stain or paint that complements your decor. Once complete, the nightstand mounts securely to the wall, providing a sturdy and attractive addition to your bedroom furnishings. Embrace this DIY opportunity to elevate your home’s interior with a handmade piece that boasts both beauty and practicality.
19. How to Make a Modern Floating Nightstand
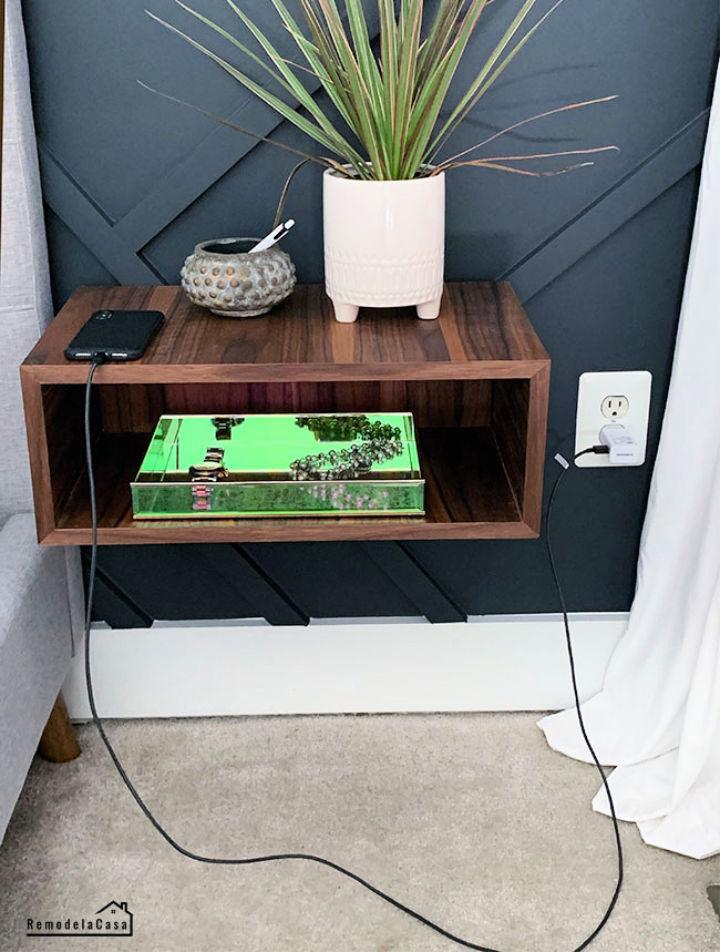
Elevate your bedroom decor with a sleek, modern touch by crafting your own wall-mounted nightstands featuring a built-in wireless charger. Cristina Garay’s guide on Remodelando la Casa simplifies the process, ensuring you can build functional and stylish bedside furniture.
With a detailed cut list and step-by-step instructions, this DIY project is accessible to those eager to enhance their space. Materials like plywood, wood glue, and a wireless charger transform into a chic storage solution that eliminates clutter and keeps your devices charged. Incorporate these nightstands into your room for a minimalist look that marries form and function.
20. Build Your Own Floating Nightstand

Struggling with limited space in your bedroom? Our guide on crafting a DIY floating nightstand is here to help you maximize your area with style and functionality. Ideal for those who need a convenient spot for essentials like a phone or a book, this project is quick, easy, and adaptable to your room’s decor.
With clear instructions and practical tips, you can build a custom floating nightstand using basic tools like wood, L-brackets, and a screwdriver. By following our step-by-step process, you’ll ensure a level and sturdy installation, adding a personal touch to your space without the bulk of traditional furniture. Get ready to transform your bedside with this space-saving solution that’s both practical and chic. Housetipster
21. Cool DIY Floating Bedside Tables
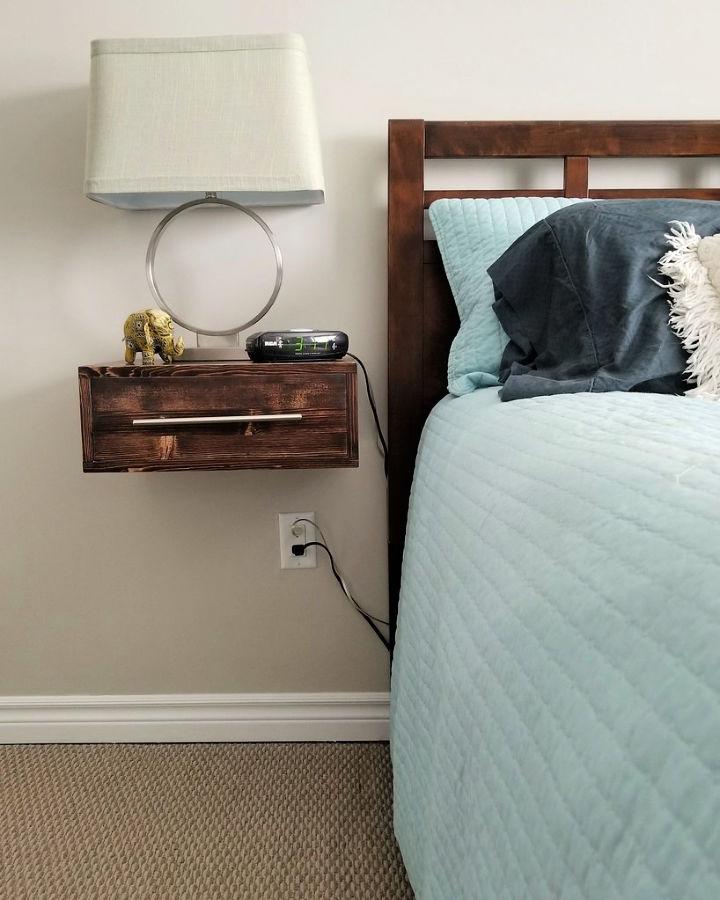
Discover how to maximize your bedroom space with a DIY project that not only adds style but also practicality to your sleeping quarters. Our blog guides you through the process of crafting floating bedside tables, providing a sleek solution to declutter your floor area.
With detailed instructions on building and mounting these chic, space-saving tables, you’ll be able to build a functional and attractive element in your bedroom. The design complements various decor styles and the inclusion of convenient drawers offers additional storage. Follow our steps to transform your bedroom with this innovative and streamlined approach to bedside furniture. Turtles And Tails
22. How to Build a Rustic Floating Nightstand
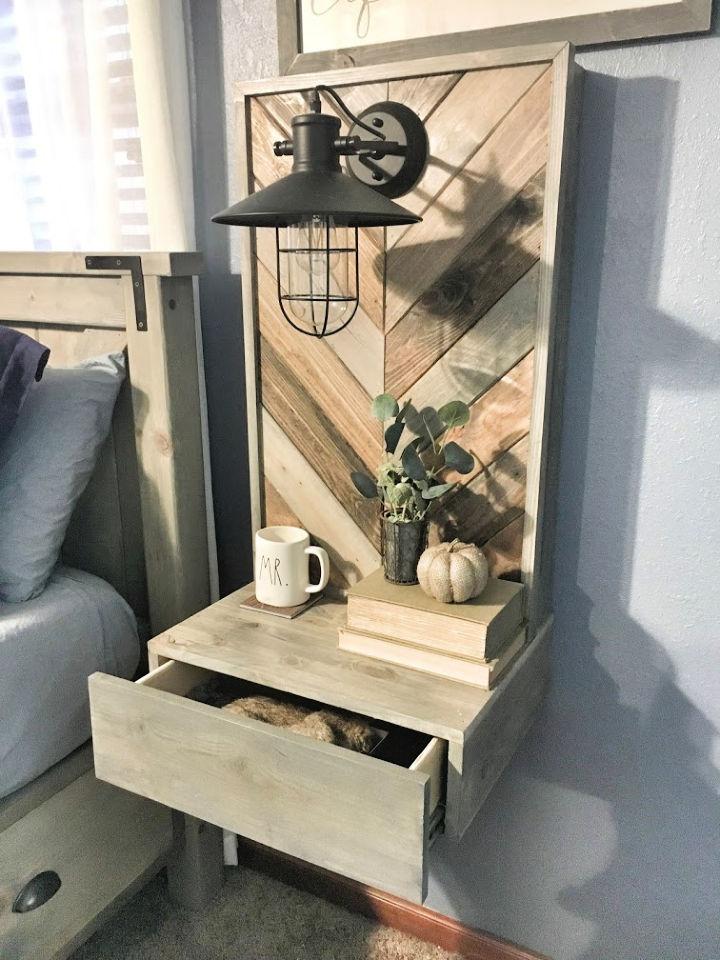
Transform your bedroom with a DIY touch by crafting your own rustic floating nightstands with the help of Ashley Diann Designs. These stylish and functional pieces offer under-bed storage access and serve as a charming statement in any room. The detailed plans provided guide you through the process, including a comprehensive supply list and step-by-step instructions, ensuring a smooth building experience.
Perfect for a weekend project, these nightstands can be made using primarily scrap wood and common tools. Embrace the satisfaction of building a personalized space while adding practicality and elegance to your home with these unique floating nightstands.
23. Amazing DIY Wooden Floating Nightstand
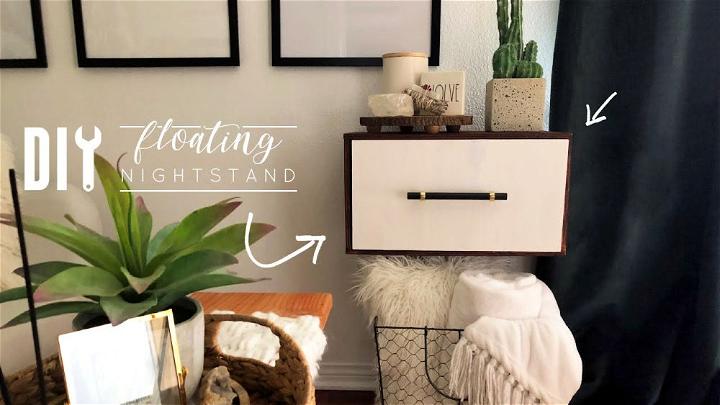
Elevate your space with a custom DIY Floating Nightstand, a stylish and practical solution for managing electrical cords. This project involves basic tools like a nail gun, sandpaper, tape, and wood glue, along with cut wood pieces for a seamless fit in your space. Construct a box-shaped frame and attach a back piece, ensuring perfect alignment.
For added functionality, incorporate a DIY cord rack using a pot pan holder, cleverly concealed with a faux drawer front. This design allows for easy access and ventilation. You can personalize it further by staining or painting to match your decor. Ideal for tech-savvy decorators, this floating nightstand not only adds elegance but also keeps cables organized and out of sight.
24. Handmade Floating Nightstand Under $10
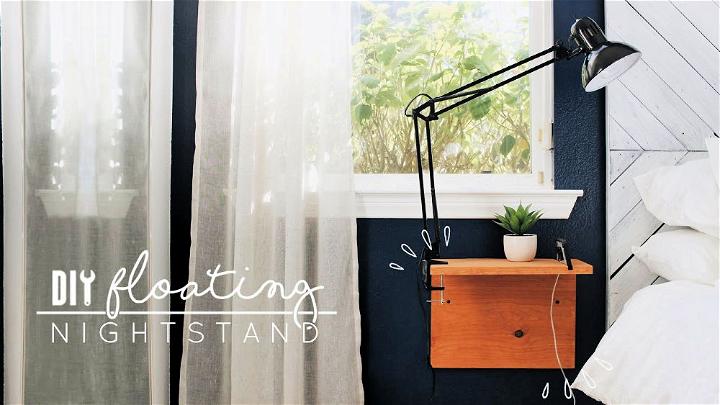
Make a chic and functional floating nightstand using just an $8 pine board from your local store! Perfect for any bedroom space, this DIY project allows you to customize the size to fit your needs. With a 16-inch width and 10-inch depth, this nightstand is ideal for tight spaces.
The guide includes steps for cutting the wood, building a convenient charging groove for your phone or tablet, and drilling a hole for easy cable management. Finish with your favorite stain and a protective spray for a sleek look. This cost-effective and simple-to-make nightstand is not only a space-saver but also adds a modern touch to any room. Perfect for DIY enthusiasts seeking a practical yet stylish addition to their home.
25. How to Make a Floating Nightstand
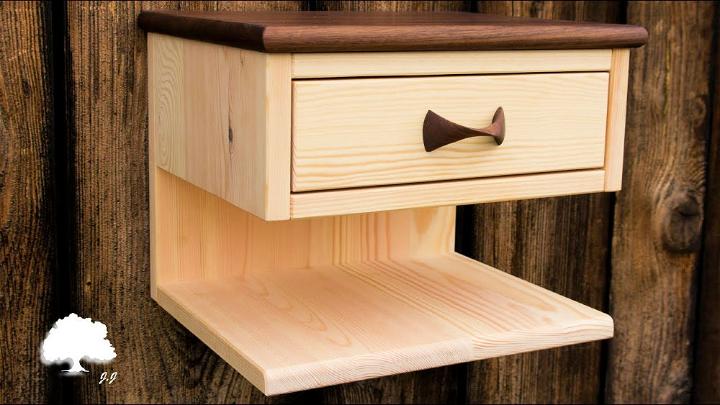
If you’re captivated by the blend of functionality and style in home furnishings, the Floating Nightstand Bedside Table by finewoodworking by J.J. is an inspiring creation. Expertly crafted using American Nut and European Pine, this sleek nightstand is a testament to fine craftsmanship and modern design. The video on YouTube guides viewers through the construction process, offering a glimpse into the meticulous work that goes into making such a piece.
Plans are available for purchase on the finewoodworking by J.J. Etsy store, allowing DIY enthusiasts to rebuild this elegant addition to any bedroom. With its clean lines and floating design, it not only saves space but also adds a touch of sophistication to your living space. Discover how to enhance your room’s ambiance with this stylish and practical nightstand.
Conclusion:
In conclusion, our exploration of 25 easy DIY floating nightstand plans provides a comprehensive guide for anyone eager to add a touch of personal flair to their bedroom or living space. These plans not only cater to functional needs but also offer an opportunity to enhance your home’s aesthetic appeal with a unique, space-saving solution. With clear instructions and a variety of styles to choose from, tackling your next DIY project has never been more accessible. So why wait? Start crafting that perfect floating nightstand or side table today, and transform your living space into a reflection of your personal style and craftsmanship.
