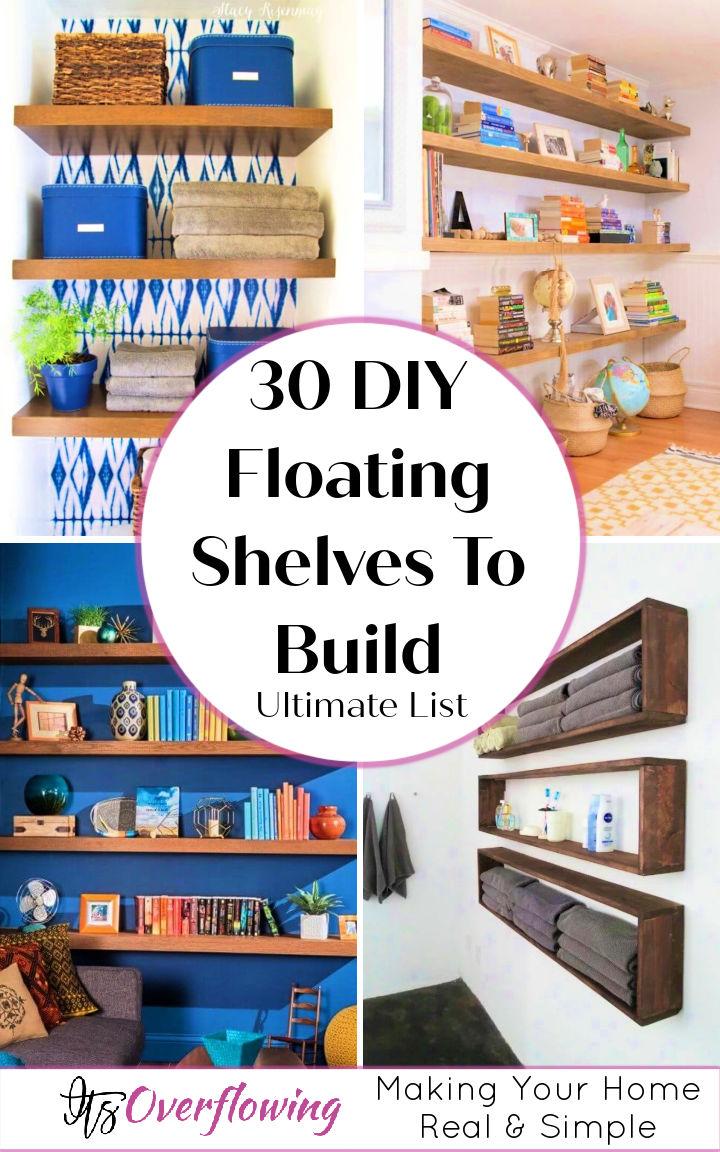
DIY floating shelves offer a stylish and practical solution to your storage and display needs. By building your own DIY floating shelves, you gain the flexibility to customize size, style, and finish to perfectly match your home’s decor. This 30 DIY floating shelf ideas guide is designed to walk you through the process from understanding the basics to installing your finished product, ensuring you have all the information to bring your project to life.
Embarking on DIY projects can be rewarding, giving you a sense of accomplishment while allowing you to tailor your creations to your exact requirements. Whether it’s finding the perfect spot in your living room for a bookshelf or adding extra storage in your kitchen, floating shelves serve multiple purposes. As we delve into the details of making your own DIY floating shelves, we invite you to explore the beauty and functionality they can add to your space.
Why Build Your Own DIY Floating Shelves
Building your own DIY floating shelves comes with a host of benefits that cater to your specific needs and preferences. Here are several compelling reasons why you should consider this project:
- Customization: Tailor the dimensions, style, and finish to perfectly fit your space and match your decor, ensuring a seamless integration with your home’s aesthetic.
- Cost-Effectiveness: By choosing to DIY, you save money compared to purchasing pre-made units. You have the freedom to select materials within your budget without compromising on quality.
- Space-Saving Design: Floating shelves offer storage without the bulkiness of traditional shelving, keeping your floors clear and making an open, airy feel in any room.
- Functionality: They provide an organized, accessible place to display books, plants, or collectibles, enhancing the usability of your living space.
- Satisfaction: There’s a unique sense of accomplishment that comes with building something with your own hands. Completing a DIY shelf project gives you a tangible result that you can take pride in every day.
- Adaptability: DIY shelves can be adjusted to accommodate uneven walls or fit into awkward spaces where standard shelves wouldn’t work.
Embracing the DIY approach not only yields practical and aesthetic advantages but also allows for a personalized touch that truly makes your space your own. With straightforward instructions and a little creativity, you can elevate the look and functionality of your home efficiently and affordably.
How to Build Your Own DIY Floating Shelves
Making DIY floating shelves is a fantastic way to add both style and storage to your home. With the right tools and a bit of patience, you can craft shelves that are both beautiful and functional. Here’s a simple guide to help you through the process, ensuring you get the best results with minimum hassle.
Understanding the Basics
Before we dive into the step-by-step process, let’s understand why floating shelves are such a great addition to your home:
- Space-Saving: They take up less space than traditional shelves since they don’t require external brackets.
- Customizable: You can tailor them to fit any room, wall, or niche.
- Stylish: Their minimalistic look complements almost any decor style.
- Cost-Effective: Building them yourself can be significantly cheaper than buying pre-made ones.
Step-by-Step Guide to Building Floating Shelves
Step 1: Gather Your Materials and Tools
First, you’ll need the following materials and tools:
- Wooden boards (the size and type depending on your preference)
- Heavy-duty shelf brackets (invisible or floating shelf brackets)
- Screws and wall plugs
- Drill and drill bits
- Level
- Saw (if cutting the boards to size)
- Sandpaper
- Paint or wood stain (optional)
Step 2: Cut Your Boards to Size
If your wooden boards aren’t the right size, cut them to your desired dimensions. Make sure the cuts are straight and even for a polished look. Sand down the edges to smooth out any roughness.
Step 3: Prepare the Wall
Identify where you want to place your shelves and use a level to mark the exact spots. It’s crucial to find and mark the studs in your wall, as securing the brackets directly into studs will provide the most support for your shelves. If studs aren’t available, use appropriate wall anchors that can support the weight of the shelves and the items you plan to place on them.
Step 4: Install the Brackets
Following the manufacturer’s instructions, attach the brackets to the wall. Ensure they are perfectly level and spaced appropriately for the length of your shelf. This step is crucial for the overall stability and appearance of your floating shelves.
Step 5: Attach the Shelf
Place the wooden board onto the brackets and secure it in place. If your brackets come with screws or a method of securing the shelf to the bracket, ensure this is done tightly so the shelf doesn’t shift.
Step 6: Finishing Touches
If you haven’t already, now is the time to add a coat of paint or stain to your shelves. This can be done before installing the shelves if you prefer. Allow any paint or stain to dry completely before placing items on the shelves.
Tips for Success
- Measure Twice, Drill Once: Always double-check your measurements and level before drilling into your walls.
- Less is More: Don’t overload your shelves. Keeping items minimalistic on the shelves not only looks better but also ensures they remain secure.
- Be Patient: Take your time with each step to ensure the best results.
Building your own DIY floating shelves can be a rewarding project that adds value and beauty to your home. With the right preparation and care, you can build something you’ll be proud of and that serves a practical purpose. Happy building!
FAQs about DIY Floating Shelves
Discover how to build beautiful DIY floating shelves with our comprehensive FAQ section. Get answers to all your questions today!
What are DIY Floating Shelves?
DIY Floating Shelves are custom shelves you build and install yourself with no visible brackets, making a sleek, clean look. They are a space-saving solution that adds both function and style to any room.
Why Should I Consider Making DIY Floating Shelves?
- Customization: Tailor them to your exact size, style, and color preferences.
- Cost-Effective: Typically cheaper than buying pre-made shelves.
- Space Efficiency: They take up less room, providing storage without bulk.
- Personal Satisfaction: There’s a sense of pride in making something functional and beautiful for your home.
What Materials Do I Need for DIY Floating Shelves?
- Wooden boards (size depends on your project)
- Heavy-duty shelf brackets (floating shelf brackets recommended)
- Screws and wall plugs
- Tools: Drill, saw (if cutting wood to size), level, sandpaper
- Optional: Paint or wood stain
How Do I Install DIY Floating Shelves?
- Plan and Measure: Decide on the placement and size of your shelves.
- Cut Wood to Size: If necessary, cut your wooden boards to your desired dimensions.
- Prepare the Wall: Locate studs and mark where your brackets will go.
- Install Brackets: Secure the brackets into the wall, ensuring they are level.
- Attach the Shelf: Place the shelf on the brackets and secure it, if applicable.
- Finishing Touches: Sand, paint, or stain your shelves as desired.
Can I Build Floating Shelves Without Studs?
Yes, but you’ll need to use wall anchors designed for the weight of the shelf and the items you plan to display. Always prioritize safety and stability by choosing the appropriate hardware.
How Much Weight Can DIY Floating Shelves Hold?
It varies based on the materials used and how the shelf is installed. Shelves mounted into studs with heavy-duty brackets can typically hold more weight. Always consult the bracket manufacturer’s guidelines.
Are Floating Shelves Difficult to Make?
Not necessarily. With the right tools and a basic understanding of DIY projects, many people find making floating shelves a manageable and rewarding task. However, more complex designs or materials might require advanced DIY skills.
Can Floating Shelves be Removed Easily?
Yes, but the ease of removal will depend on how they were installed. Shelves installed with screws into studs or anchors can be removed by unscrewing them. However, repairing and repainting the wall may be necessary afterward.
How Do I Ensure My Floating Shelves Are Level?
Using a level during installation is crucial. Place the level on top of the shelf as you secure it, adjusting as needed to ensure it’s perfectly horizontal.
Can I Make Floating Shelves From Reclaimed Wood or Other Materials?
Absolutely! Reclaimed wood, old doors, or even metal pipes can be used to build unique and stylish floating shelves. The key is ensuring the material can safely support the weight you plan to place on it.
By building your own DIY floating shelves, you not only add a functional storage solution to your home but also have the opportunity to inject your personal style and creativity into your living space.
30 Clever DIY Floating Shelves
Discover 30 clever DIY floating shelves ideas to enhance your home decor and maximize storage space. Get inspired and start crafting today!
1. How to Build Wooden Floating Shelves
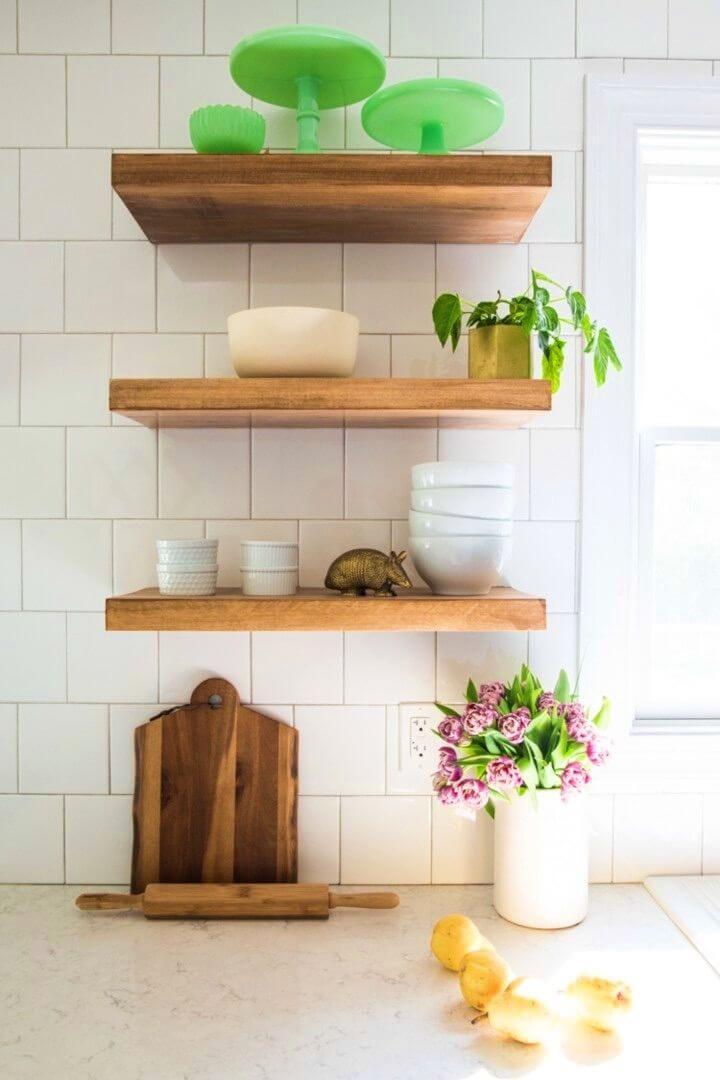
Construct your own stunning, wooden floating shelves with guidance from Live Free Creative Co. In this DIY tutorial, Miranda shares her insights on crafting practical and beautiful open shelving for your kitchen, enhancing both aesthetics and functionality.
From selecting the right lumber and brackets to the final touches of styling, every step is clearly detailed. This project may require a bit more DIY prowess and access to tools, but the result is custom shelving that’s both cost-effective and tailored to your space. Get ready to elevate your home with these charming, self-made additions that are sure to impress.
2. DIY Customizable Floating Shelves
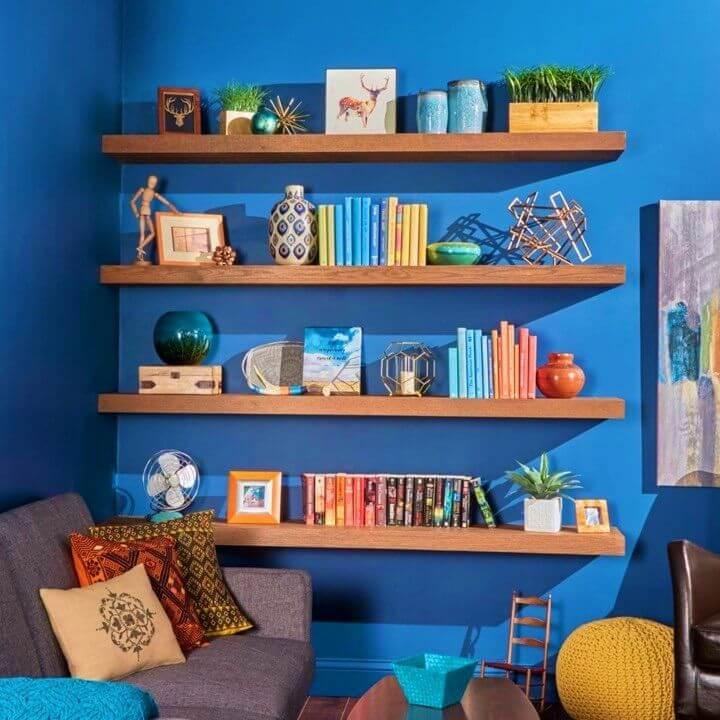
Looking to add a personal touch to your home decor? Building your own floating shelves is a rewarding DIY project that allows you to customize the size, thickness, and finish to perfectly match your space. With the guidance from Family Handyman, you can build sturdy, bespoke shelves that not only enhance the aesthetics of your room but also provide a strong, functional storage solution. Get ready to impress with your handiwork and enjoy shelves that can support approximately 50 lbs each. This step-by-step guide ensures a smooth process, from sourcing materials to the final installation.
3. Simple Homemade Floating Shelves
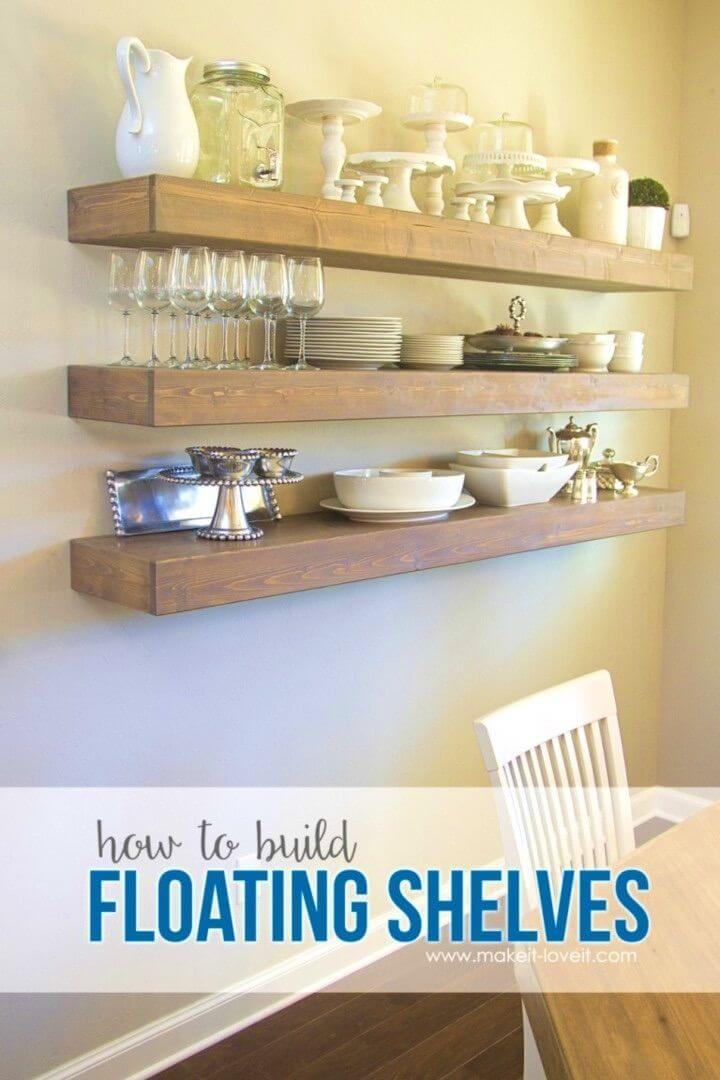
Looking to enhance your home with practical yet stylish storage? Make It & Love It offers a comprehensive guide on building simple floating shelves that can transform any room. Ashley Johnston walks you through the process, from selecting materials to the final touches of staining your new shelves.
With clear instructions and helpful tips, you’ll be able to build sturdy and beautiful floating shelves without visible supports. Perfect for kitchens, bedrooms, or entryways, these shelves are a fantastic DIY project for adding a touch of farmhouse charm to your living space.
4. Making a Functional Floating Shelf
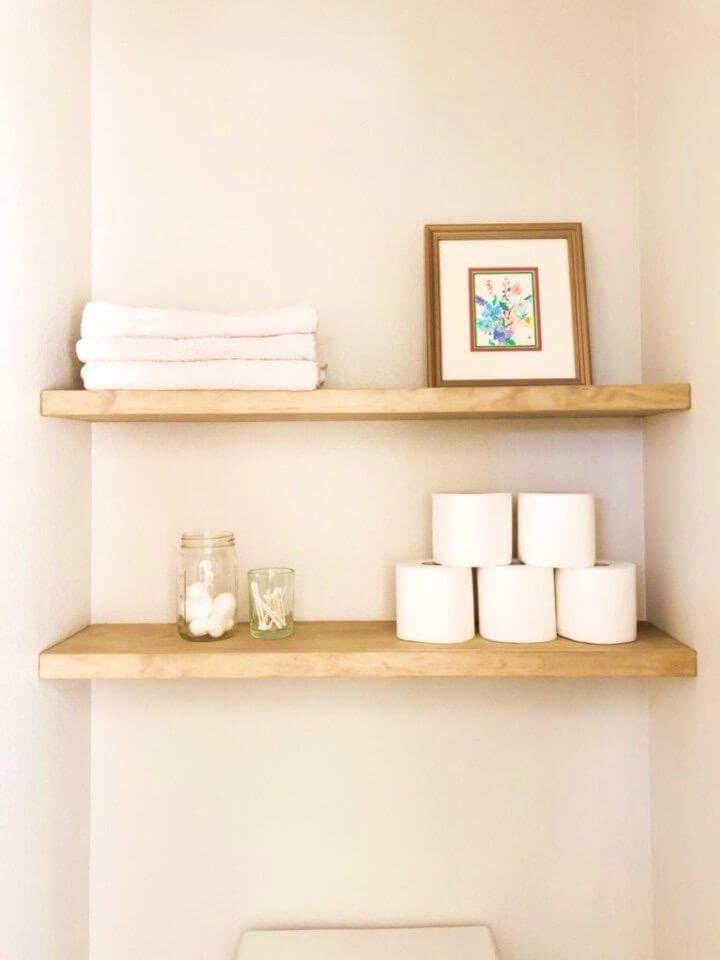
Learn how to build sleek, 1.5-inch thick floating shelves with this easy-to-follow tutorial from Angela Rose Home. Ideal for adding a modern touch to any room, these thin shelves provide a minimalist aesthetic without the bulkiness of traditional designs.
Gather your pine boards, plywood, and tools to start this DIY project, ensuring your shelves fit precisely where you want them. With step-by-step instructions, including tips on using a Kreg Jig for pocket holes and securing your shelves for a sturdy finish, you’ll be ready to enhance your space with functional, stylish floating shelves.
5. How to Make Heavy-Duty Floating Shelves
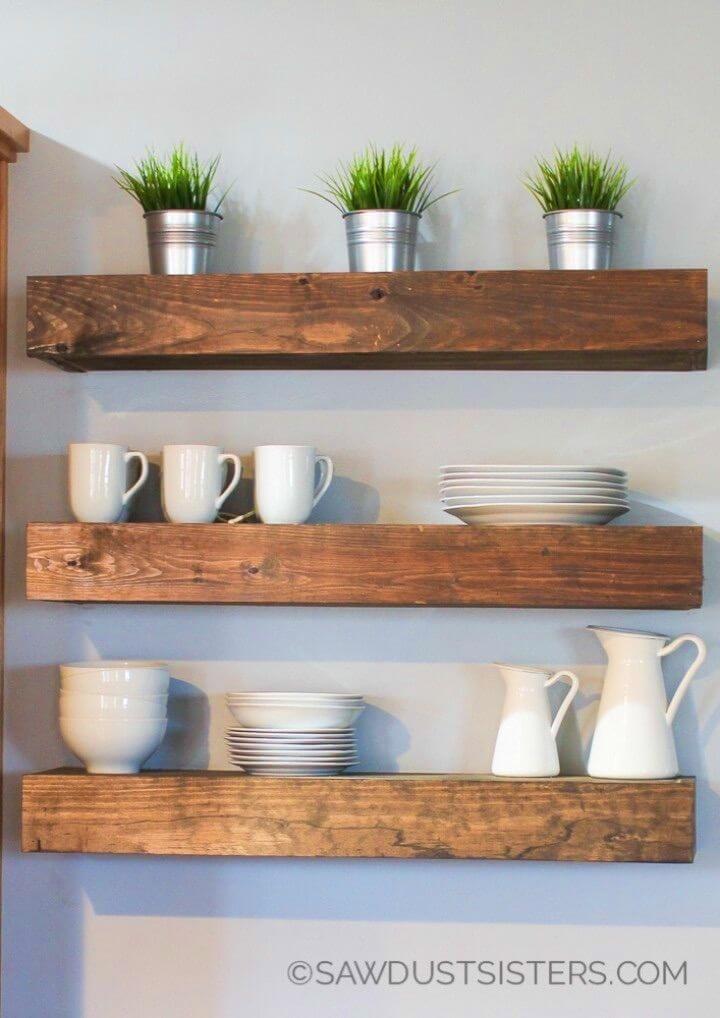
Transform any room with custom DIY floating shelves using Sawdust Sisters‘ free plans! These sturdy, budget-friendly shelves are an ideal project for those who enjoy crafting and organizing. With a detailed step-by-step tutorial and a complete materials list, you’ll be guided through the process of making functional and stylish storage.
Whether it’s for displaying memorabilia in a bedroom or spices in the kitchen, these shelves add a personal touch to your space. Paint them before mounting for a seamless look, and enjoy the satisfaction of building something both beautiful and practical for your home. Get ready to elevate your decor with these easy-to-make floating shelves.
6. Handmade Floating Shelves for Bathroom Storage
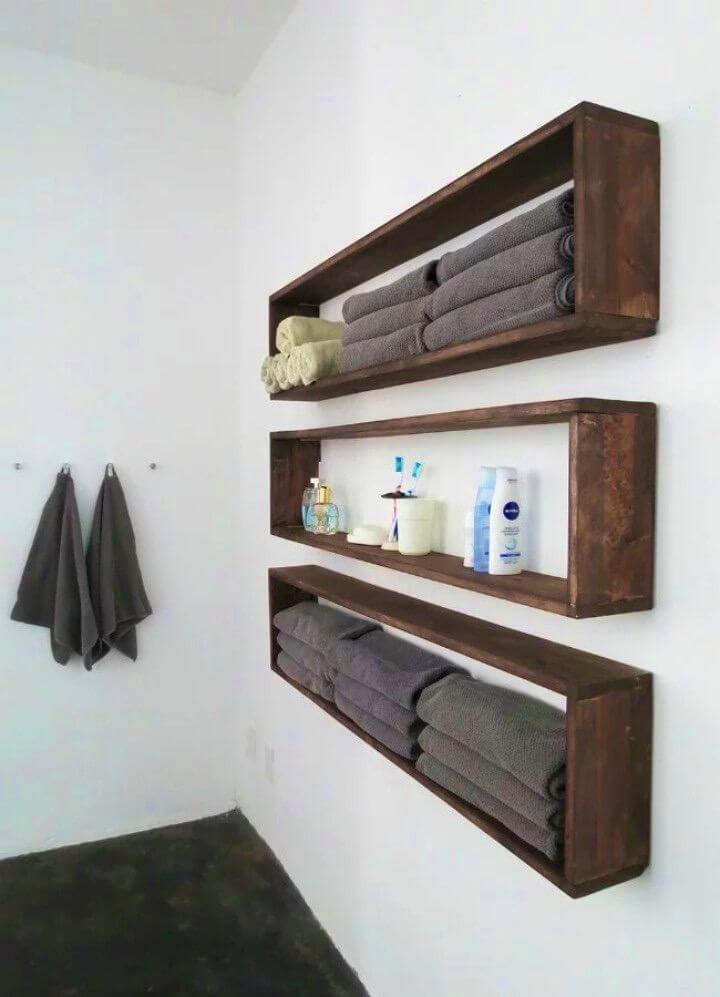
Maximize your bathroom storage space with a DIY project from Bob Vila that’s as practical as it is stylish. Learn how to build easy box shelves that can double or even triple your toiletry storage. These wall-mounted wooden shelves are not only a simple way to keep essentials at hand but also add a touch of charm to your bathroom. The instructions are straightforward, making it an achievable weekend task. Transform an empty wall into a useful storage area with this engaging and helpful guide.
7. Modern and Rustic DIY Floating Shelves
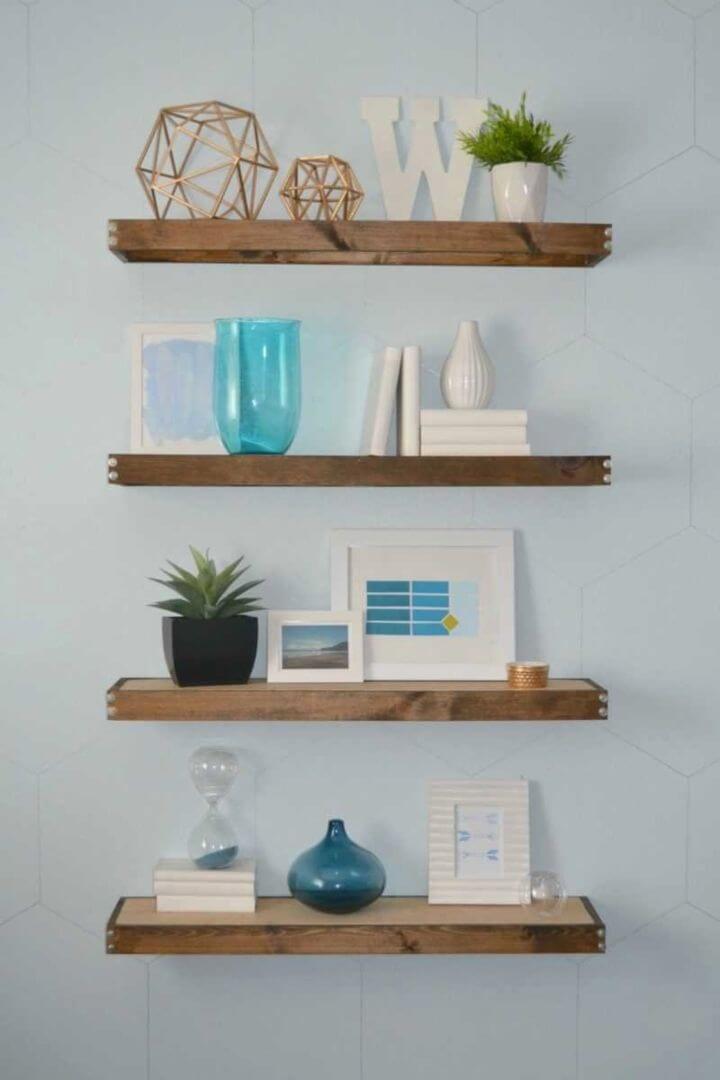
Installing floating shelves can elevate your home decor, and Hey There, Home offers an instructive guide to help you do it with ease. Corey Willis walks you through a four-step process, ensuring you can confidently secure your shelves for a functional and stylish addition to any room. First, determine the ideal placement of your shelves to build visual harmony.
Next, mark the positions on your wall, considering the spacing and alignment. When attaching the shelves, ensure they are level and securely fastened into wall studs. Finally, place the tops on each shelf and enjoy decorating them to match your unique style. With these tips, you’ll have your floating shelves up in no time, enhancing the modern feel of your living space.
8. Build Your Own Wood Floating Shelves
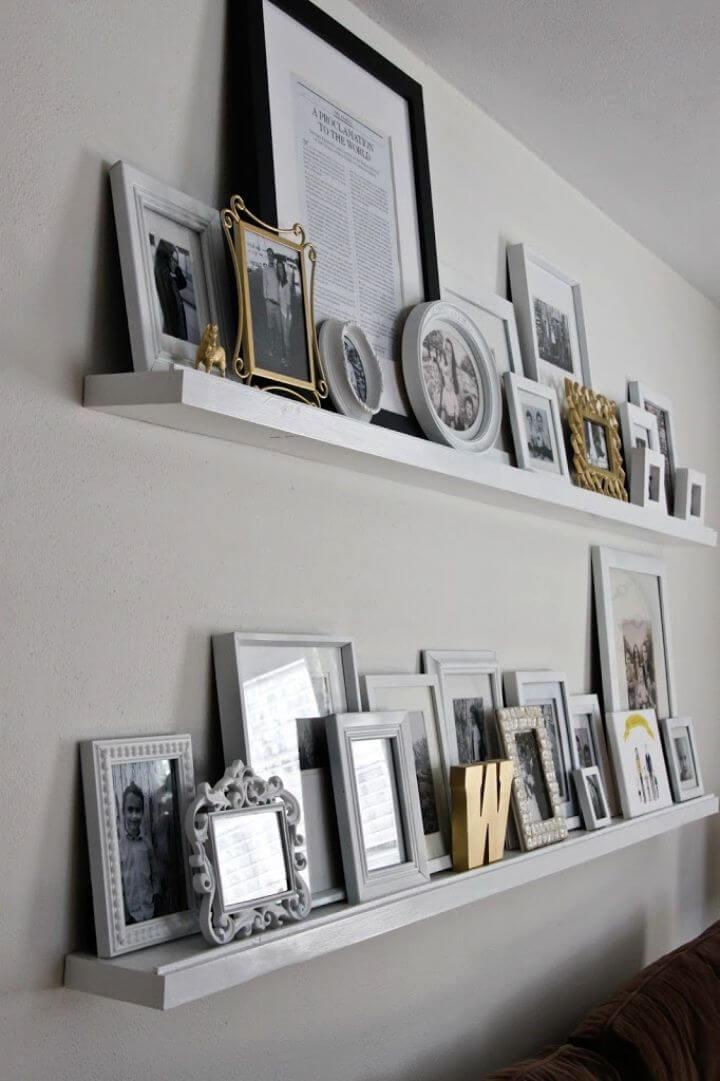
Transform old doors into chic floating shelves with this DIY guide from Colors and Craft. Follow our step-by-step instructions to cut, hollow, and mount your repurposed door into a stylish storage solution. Sand and paint your creation for a polished look, and add a custom stopper to keep your items secure. Ideal for a gallery wall effect, these shelves allow you to easily switch out photo frames and decor. Get ready to elevate your home’s ambiance with a personal touch.
9. How to Build Floating Shelves for Bathroom
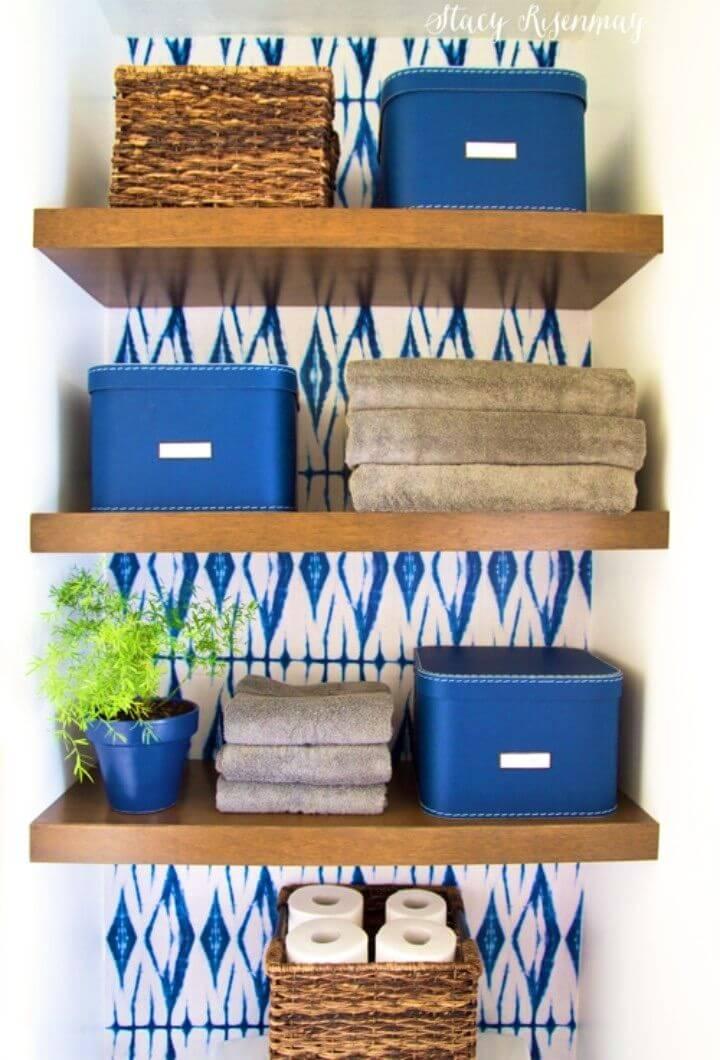
Looking to add a personal touch to your bathroom with some DIY flair? Stacy Risenmay shares a fantastic guide on making stylish floating bathroom shelves, perfect for sprucing up the space above your toilet. With a clear step-by-step process, Stacy takes you through selecting materials, staining, assembling, and adding the finishing touches to your custom shelves.
Her use of Minwax products ensures a professional finish, complementing any bathroom decor. Head over to Stacy Risenmay’s site for this engaging and helpful tutorial that will elevate your bathroom’s look while providing practical storage solutions. Not Just A Housewife
10. Making a Ladder Floating Shelf – Free Plans
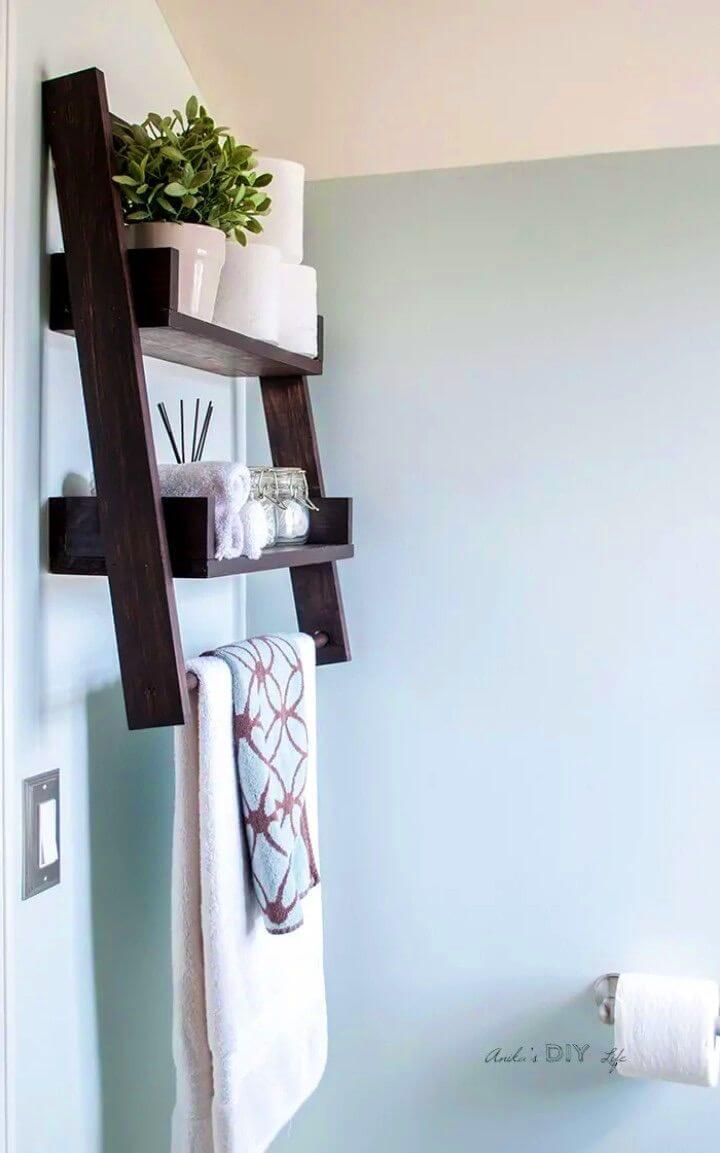
Looking to add a touch of creativity and practicality to your home? Anika’s DIY Life offers a fantastic guide for crafting a DIY floating ladder shelf. This project is perfect for anyone eager to build a stylish Storage Solution that doubles as a decorative piece. The instructions are clear, engaging, and designed to help you build a functional shelf with a built-in towel bar – perfect for bathrooms or any space needing extra storage.
With a video tutorial and step-by-step written guidance, you’ll have all the support you need to make this versatile shelf. The process involves simple cutting, sanding, drilling, and assembly, making it a great project even for those new to DIY. Get ready to enhance your living space with this unique ladder shelf!
11. Inexpensive DIY Floating Shelves for Storage
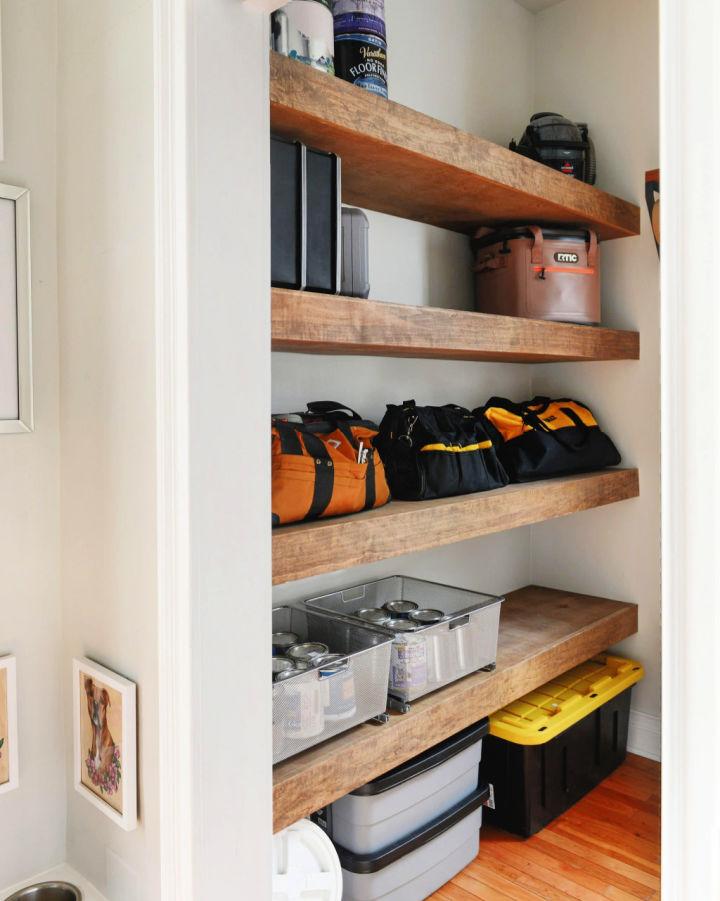
Transform any space with efficient storage by mastering the craft of DIY floating shelves, courtesy of Yellow Brick Home‘s step-by-step guide. Dive into the process of building sturdy, wall-to-wall wooden shelves, perfect for organizing your workshop or any cluttered area.
The tutorial provides a comprehensive shopping list, highlights essential tools, and walks you through each phase, from locating studs to the satisfying final touch of staining your handiwork. With clear instructions and helpful images, you’ll be on your way to making functional, beautiful shelves that enhance your space and make organization a breeze.
12. Build Giant Wooden Pegboard Shelves
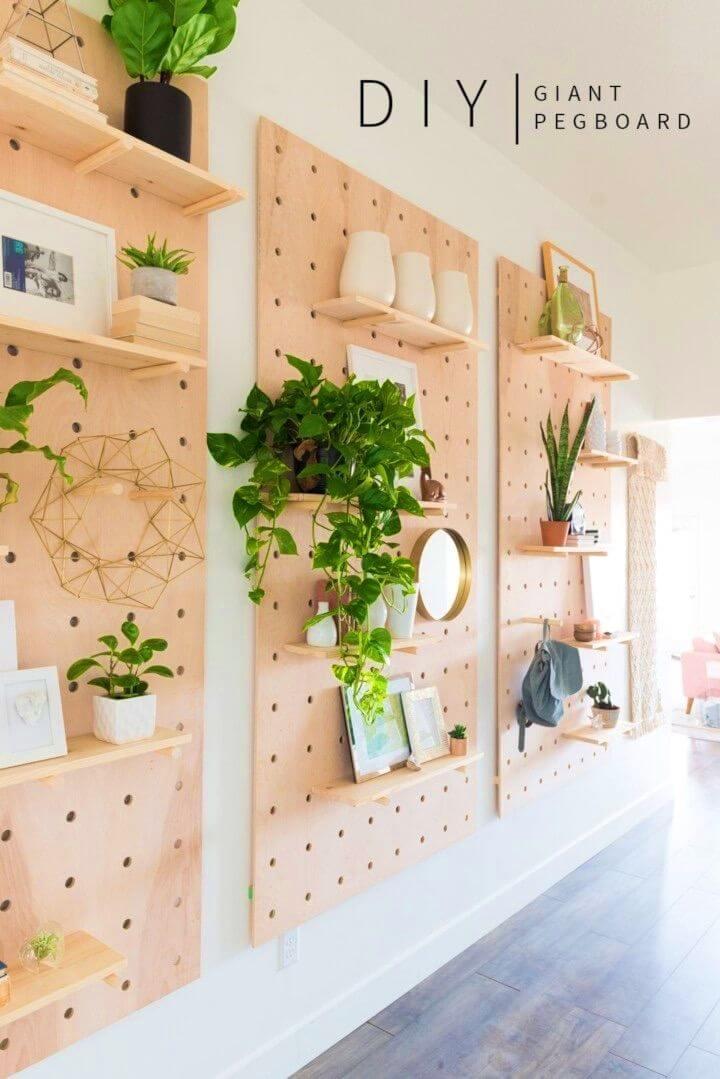
Transform your living space with a stunning DIY Giant Wooden Peg Board! Vintage Revivals provides an easy-to-follow guide for making a versatile wall treatment that can be tailored to your decor preferences. Ideal for expansive walls, this pegboard acts as a functional piece of art, offering opportunities to display shelves, hang artwork, or store accessories.
With detailed instructions on selecting materials, drilling precise holes, and mounting the pegboard securely, you’ll be equipped to craft a statement piece that elevates the aesthetic of any room. Engage in this rewarding project and enjoy the flexibility of interchangeable wooden pegs to refresh your home’s look whenever inspiration strikes.
13. Easy to Make a Rope Floating Shelf
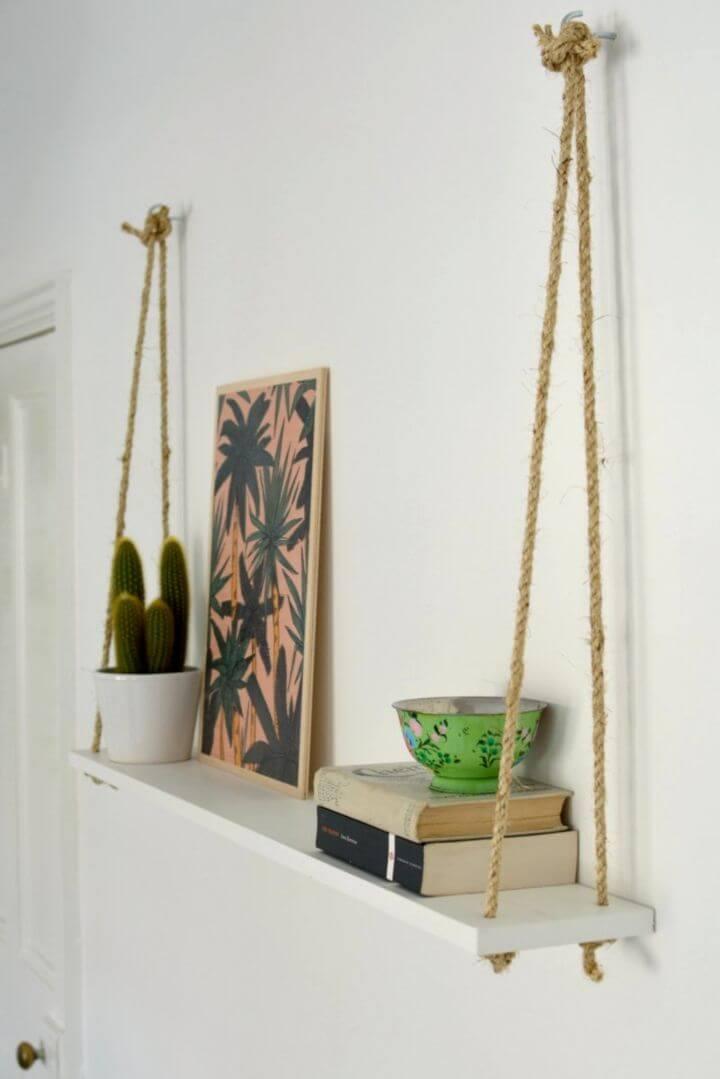
Make a charming and functional rope shelf with ease by following this straightforward DIY guide from Burkatron. Ideal for adding a rustic touch to your home decor, this project is both budget-friendly and satisfying to complete. You’ll need a wooden plank cut to your desired size, some sturdy rope, a drill, and a couple of large hook screws. Begin by drilling holes slightly larger than your rope at each end of the wood.
You can personalize the shelf by painting or staining the wood. After securing the hooks into your wall, cut the rope into four equal lengths, thread through the holes, and secure with strong knots underneath. Hang the shelf by tying the rope ends in knots over the hooks. Adjust the height and level by manipulating the knots. With materials costing around £15, you can even craft an additional shelf for another space. Ready to add a personalized touch to your home? Give this rope shelf project a try!
14. DIY Copper Pipe Floating Shelves
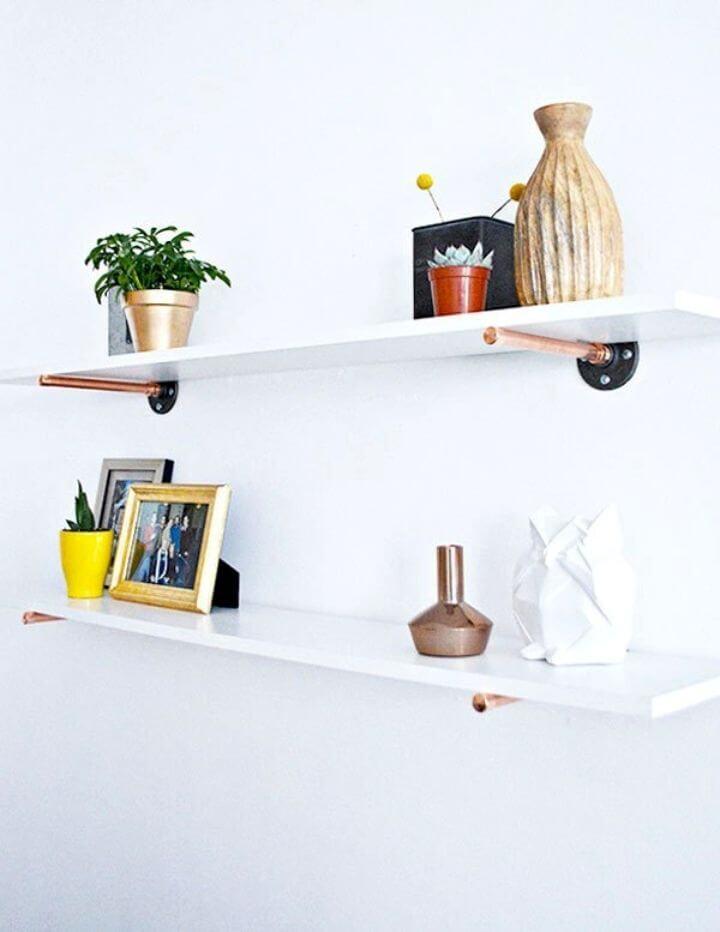
Transform your living space with a touch of industrial chic using copper pipe shelves, as showcased on A Joyful Riot. These shelves are not only stylish but also lightweight, making them perfect for walls without studs. The process is straightforward: cut the copper pipe to your shelf’s width, secure flanges with a drill, attach male adapters, and place the pipes to support your chosen shelves. With the option to cap the pipes for a polished look, you can quickly build a unique storage solution that enhances your home decor. Follow these steps to elevate your interiors with functional elegance.
15. Building Floating Shelves With Belt Straps
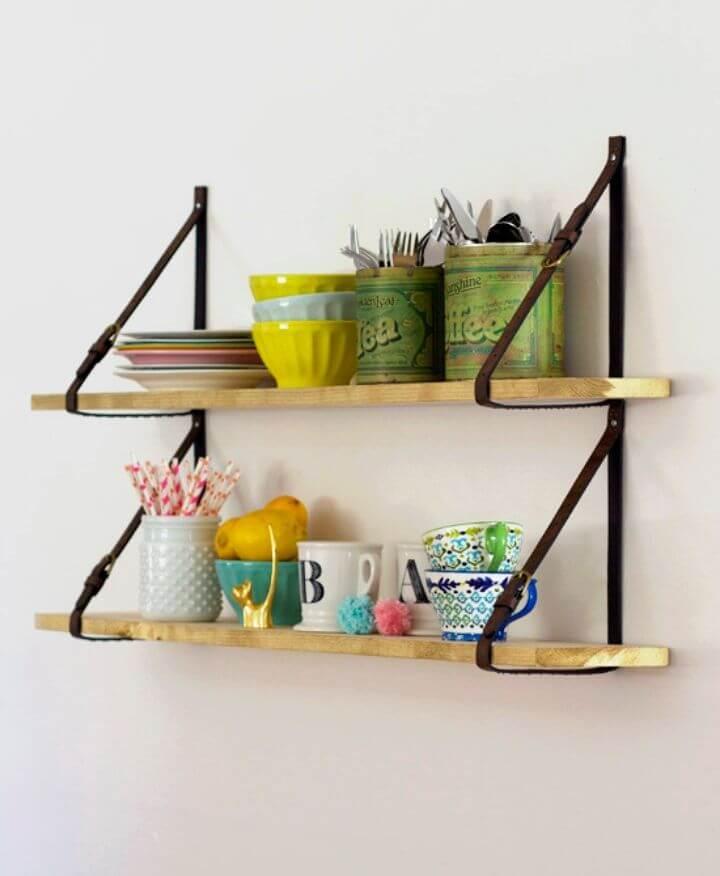
Transform your dining room with a touch of creativity by crafting your own DIY shelves with belt straps, as shown on At Home In Love. This project is not only budget-friendly but also infuses your space with a unique character that outshines store-bought alternatives. With a simple set of materials, including boards, paint, belts or leather straps, and a few tools, you can build a stylish storage solution.
The process involves painting the edges of the boards, cutting and securing the straps, and installing the shelves with precision. The result is a set of secure, stationary shelves that add a personalized flair to your home. If you have questions or need clarification, the original tutorial offers a step-by-step guide to ensure your shelving success.
16. How to Make a Circle Wood Floating Shelf
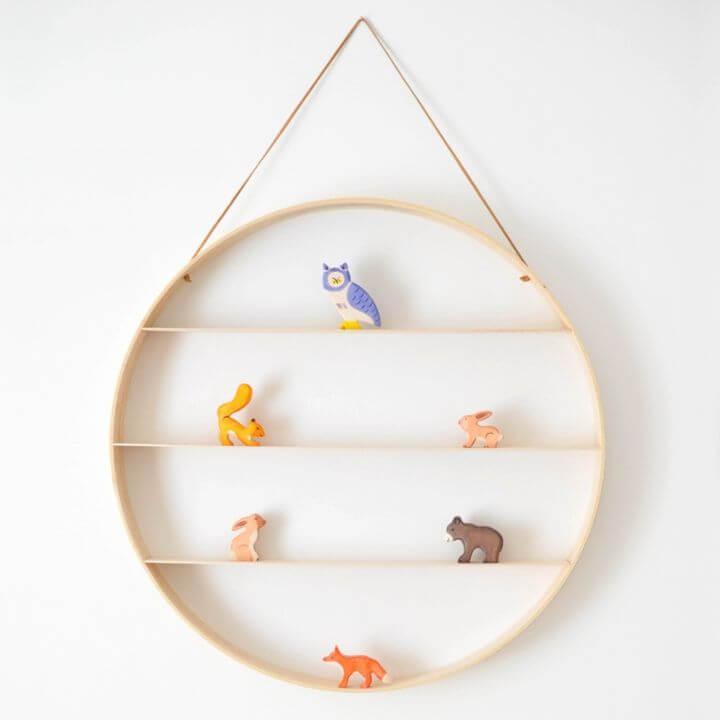
Crafting a circular wood shelf can add a touch of modern minimalism to any room without costing a fortune. Discover how to transform quilting hoops into chic wall decor with this DIY guide. You’ll learn to select hoops with similar wood tones, securely bond them with wood glue, and sand them down for a smooth finish.
By cutting basswood sheets for shelves and attaching them with craft glue, you’ll build a sturdy and stylish display. The addition of a leather lace for hanging provides a warm, natural contrast to the wood. Perfect for nurseries or any living space, this project offers an affordable way to elevate your home decor. Visit our website for the full tutorial and transform your space today. New Blooming
17. Easy DIY Floating Shelf With Brackets
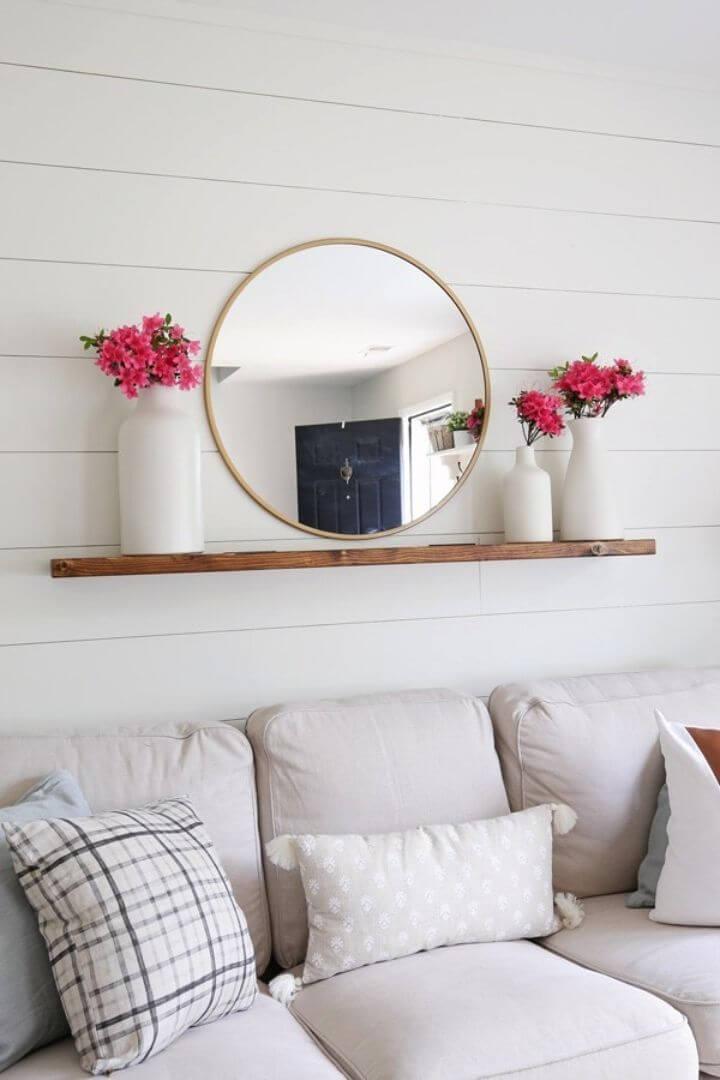
Learn how to build a beautiful and sturdy floating shelf with hidden brackets, courtesy of Angela Marie Made. This DIY project is perfect for those who want to add a touch of modern rustic charm to their living space. Using a single piece of wood and a set of heavy-duty steel brackets, you can craft a shelf that’s not only aesthetically pleasing but also capable of supporting heavier items.
The guide provides detailed steps for cutting, sanding, staining, and mounting your shelf, ensuring a seamless and flush fit against the wall. Perfect for displaying decor, this easy-to-follow tutorial will help you enhance any room with a functional and stylish floating shelf.
18. Make Your Own Wooden Floating Shelves
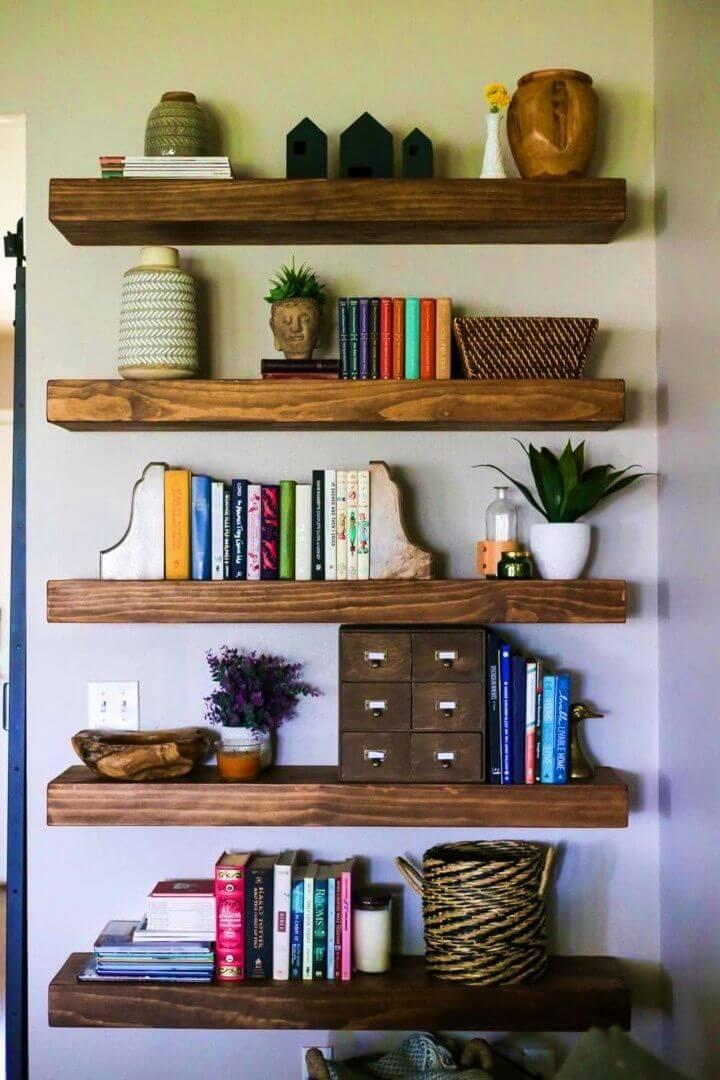
Looking to add a custom touch to your living space with DIY floating shelves? Love & Renovations offers a comprehensive tutorial that simplifies the process, making it accessible and manageable. With clear instructions and a list of tools and materials, you can transform a blank wall into a stylish and functional display area.
The guide covers everything from planning and cutting to assembly and installation, ensuring a sturdy and attractive result. Embrace the opportunity to enhance your home with these handmade shelves that not only elevate your decor but also provide additional storage. Get ready to tackle this project with confidence and build a feature in your home that’s both practical and visually appealing.
19. DIY Floating Shelves for Uneven Walls
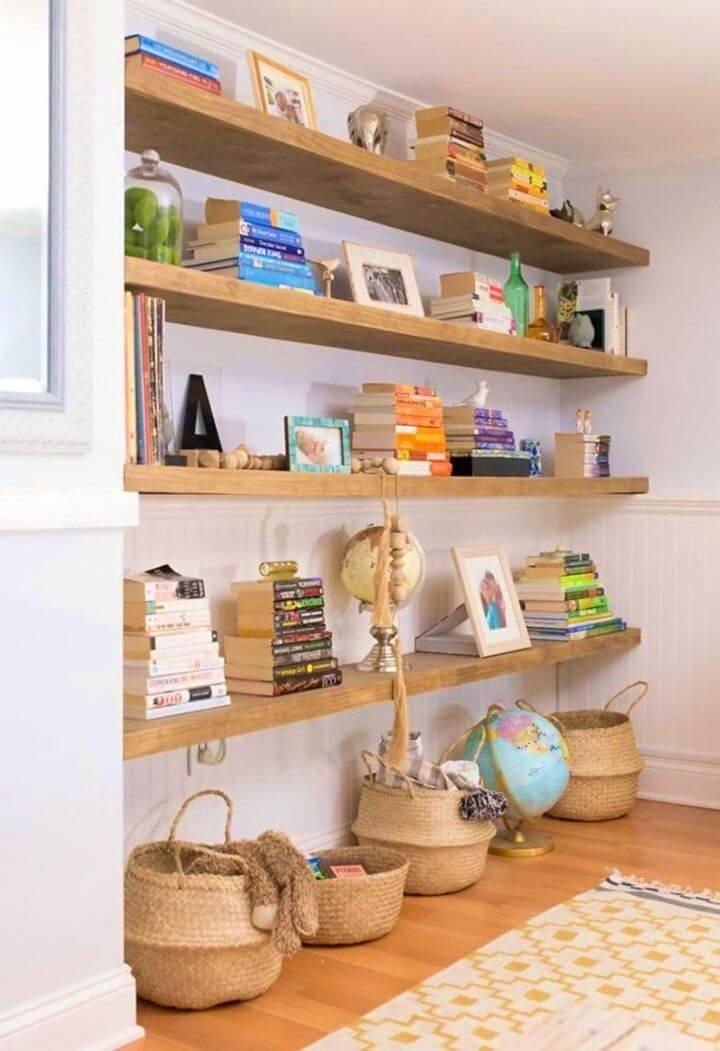
Struggling with uneven walls and dreaming of sleek, custom storage? Shrimp Salad Circus offers a detailed guide on crafting DIY floating shelves that blend seamlessly into your space, regardless of wall irregularities. With clear, step-by-step instructions, you’ll learn to measure, cut, and assemble sturdy wood frames and finish them with your choice of paint or stain. This hands-on project elevates home organization and adds a personalized touch to your decor. Grab a partner, roll up your sleeves, and transform your walls with functional elegance.
20. Reclaimed Wood Rustic Floating Shelves
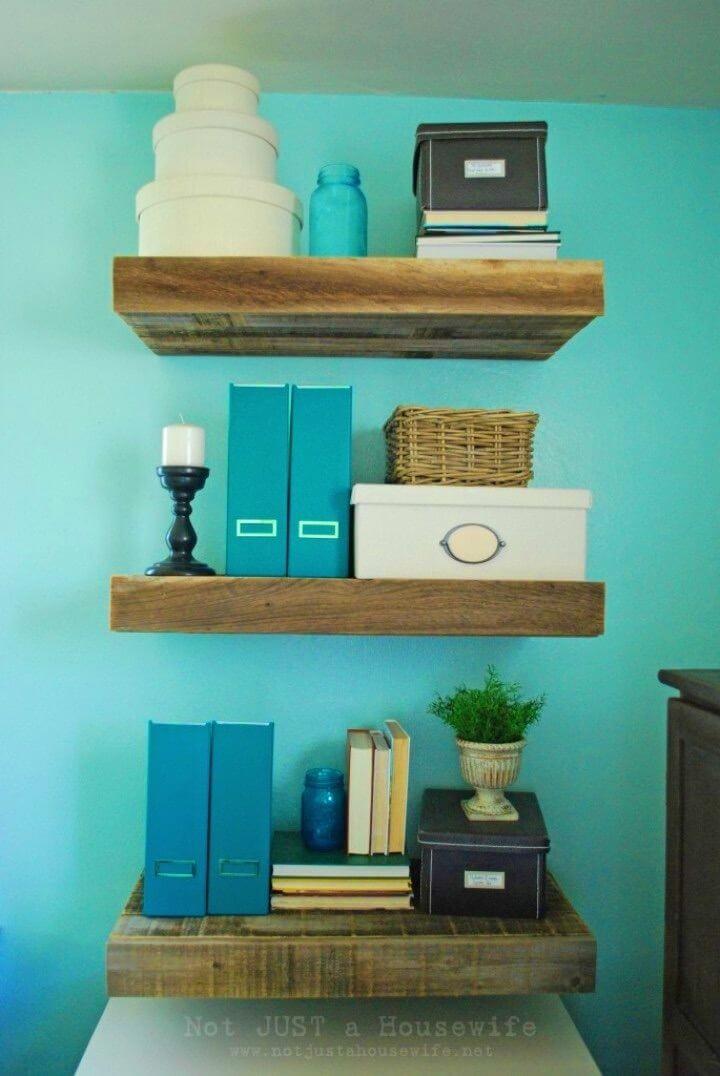
Transform your office space with a touch of rustic charm using reclaimed wood floating shelves, as detailed in Stacy Risenmay’s comprehensive tutorial. Maximize your room’s vertical potential and build a unique, open feel with these DIY shelves that double as clever storage drawers. With a clear, step-by-step guide, Stacy walks you through the process, from selecting and cutting the reclaimed wood to constructing the shelves and securing them to your wall.
Ideal for storing papers and adding character to your workspace, these shelves are not only practical but also add a stylish aesthetic. Discover how to bring this creative and budget-friendly project to life in your own home by visiting Stacy Risenmay’s site for all the helpful tips and tricks. Not Just a Housewife
21. How to Build a Cheap Floating Shelf
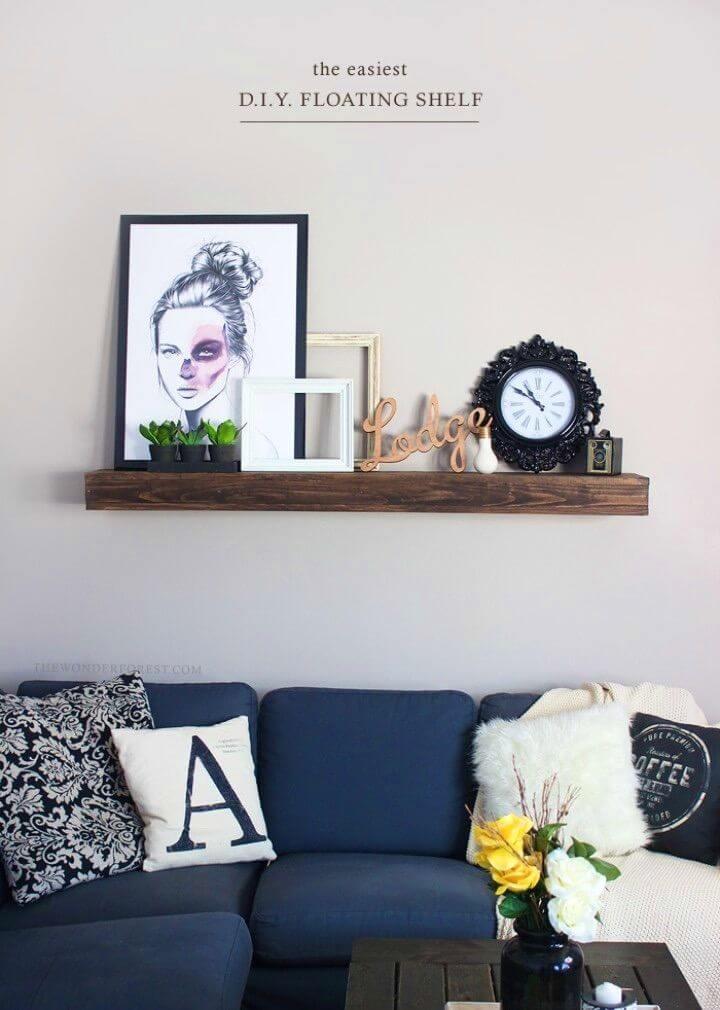
Transform your living space with a touch of DIY flair by crafting a chic floating shelf, perfect for sprucing up any wall above your sofa or in a cozy nook. Wonder Forest‘s guide offers a straightforward approach to making this stylish storage solution. With simple materials like 1×3 and 1×10 wood planks and basic tools, you’ll assemble a sturdy and attractive shelf.
Stain it to your liking and follow the easy steps to secure it onto your wall, achieving that coveted floating effect. Ideal for displaying books, plants, or cherished knick-knacks, this project is not only cost-effective, with a budget under $20, but also a fulfilling weekend endeavor that enhances your home’s aesthetics and functionality.
22. DIY Floating Shelves for Your Bathroom
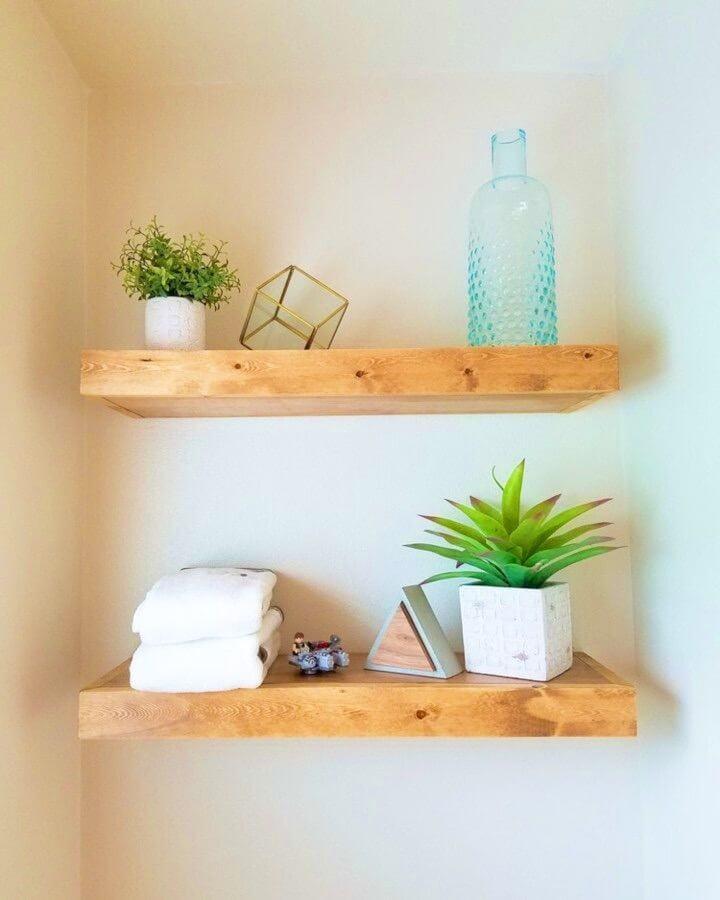
Transform your main bathroom with a touch of DIY elegance using OSO DIY‘s simple floating shelf guide. Ideal for compact spaces, these shelves offer additional storage while maintaining a sleek look. Crafted from affordable scrap pine wood, the project involves making sturdy support brackets and smooth shelf faces, followed by sanding, staining, and sealing for a polished finish.
nstallation is straightforward with wall anchors or direct stud drilling, and the final step is securing the shelf to the mount for a snug fit. This practical and stylish solution is perfect for displaying decor or keeping essentials within reach. Visit OSO DIY for the full tutorial and enhance your bathroom’s functionality and aesthetics.
23. How to Make Rustic Floating Shelves
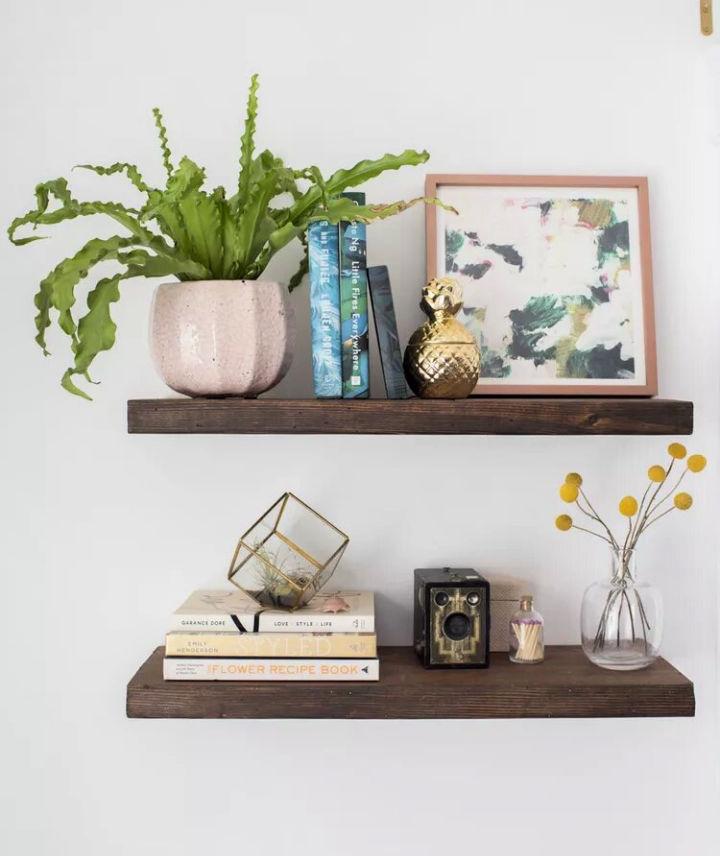
Looking to enhance your home with a touch of elegance and functionality? Real Simple‘s guide on building DIY floating shelves offers a practical and stylish solution. Master the creation of custom shelving with this step-by-step tutorial, perfect for displaying your cherished books, plants, and keepsakes.
From cutting the wood to the final touches of staining or painting, you’ll find all the necessary tips to ensure your shelves not only look great but are sturdy and well-crafted. Dive into this woodworking project and transform your living space with shelves that truly reflect your personal style.
24. Creative Wood Floating Shelves for Corner
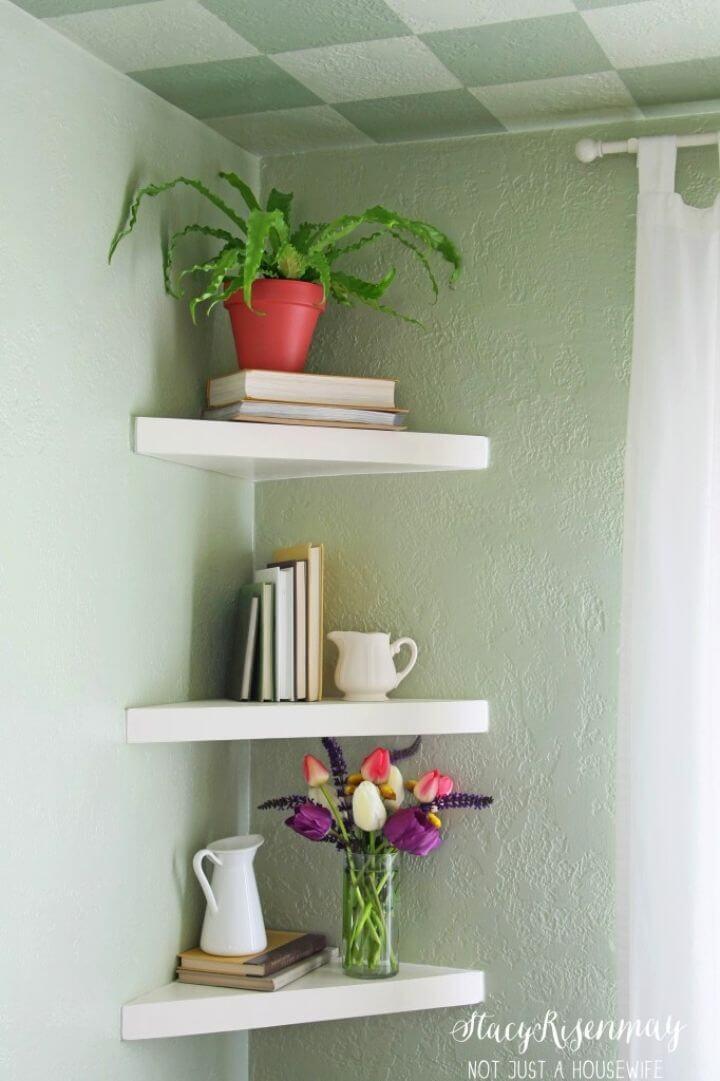
Transform a cozy corner in your dining area into a functional and stylish space with Stacy Risenmay’s guide on making floating corner shelves. With clear, step-by-step instructions, Stacy’s tutorial makes it easy for DIY enthusiasts to build and install these shelves using minimal tools and materials. Ideal for small spaces, these shelves add a touch of elegance without overwhelming the room.
The use of plywood ensures a lightweight yet sturdy design, and the mitered edges offer a polished finish. Learn to construct the shelves, build a secure brace, and achieve a seamless look with caulking for a professional result. Stacy Risenmay’s blog is your go-to resource for enhancing your home’s storage and decor with practical and chic solutions. Not Just a Housewife
25. Adorable DIY Wood Floating Shelves
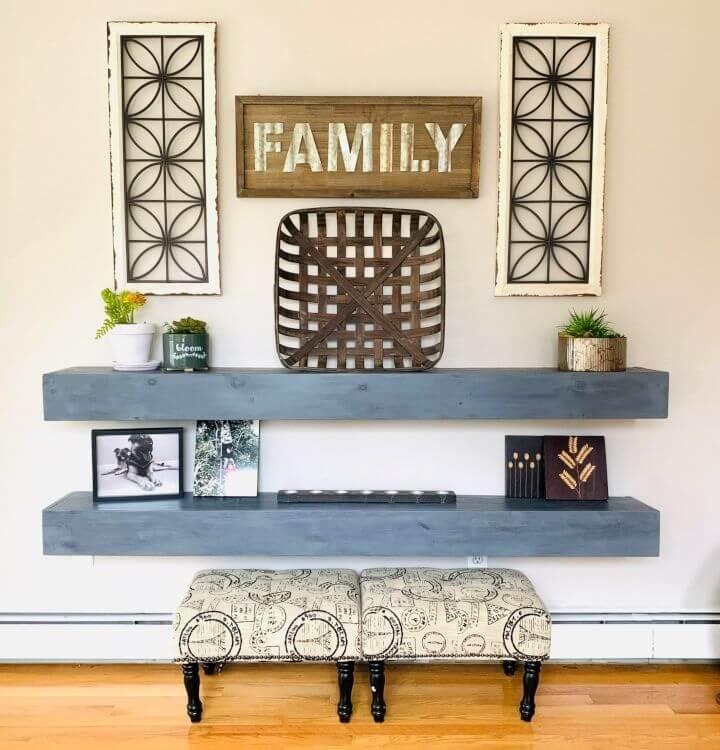
Transform your home with a touch of elegance and functionality by making your very own DIY floating shelves. Our guide offers a straightforward approach to crafting these stylish Storage Solutions. With a list of supplies, detailed instructions, and tips for installation, you’ll be well-equipped to add a personal touch to any room.
Learn how to measure, cut, and assemble your shelves, then finish them with your choice of stain or paint for a custom look. Perfect for any space needing an upgrade, these floating shelves not only enhance your decor but also provide practical storage. Start your project today and enjoy the satisfaction of a beautifully organized and decorated home. Rocky Canyon Rustic
26. Anthro-Inspired Copper Floating Shelves
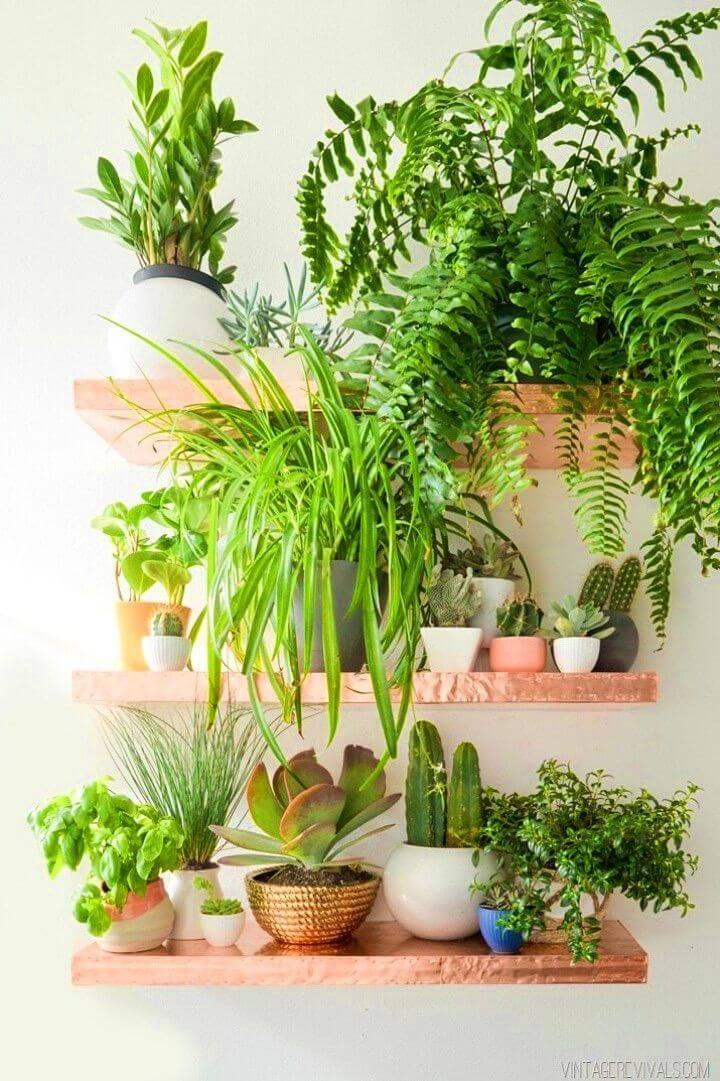
Transform your entryway with a touch of elegance using this DIY guide to build stunning copper shelves inspired by Anthropologie’s chic design. Vintage Revivals‘ Mandi shares a detailed and accessible tutorial on how to construct these eye-catching shelves, adding both functionality and style to your space.
With helpful tips on handling copper sheeting and building sturdy supports, this project is perfect for enhancing your home decor. The step-by-step instructions ensure that even those new to DIY can achieve beautiful results, making your shelving dreams a reality. Add your favorite planters to these homemade copper shelves and elevate your interior design game.
Unique Gallery Wall Ideas: Discover a world of creativity with these unique gallery wall ideas! Transform your space into an art haven.
27. Simple Floating Shelves With Leather Straps
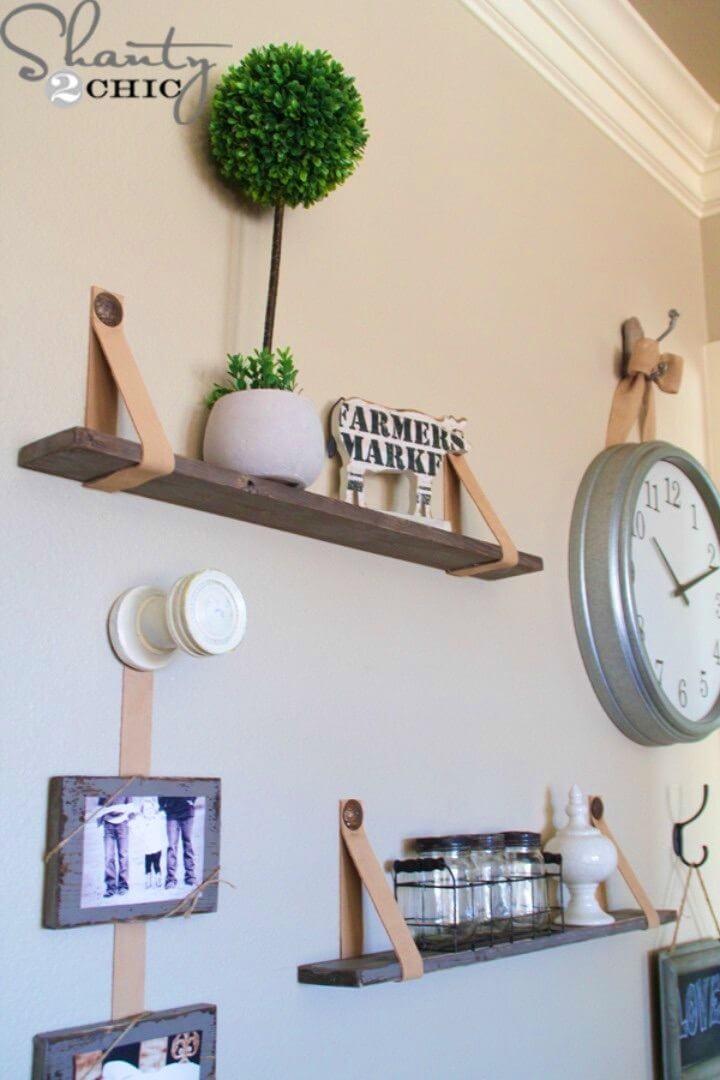
Transform a blank wall into a stylish storage space with DIY $5 Shelves with Leather Straps! Shanty 2 Chic offers a step-by-step tutorial to build chic, space-saving shelves perfect for narrow areas. The process is simple: stain and paint your cut boards, distress them for a rustic look, and use affordable materials like “L” brackets and leather straps for mounting.
This project is not only budget-friendly but also adds a touch of elegance to your decor. Ideal for those who enjoy weekend crafting, these shelves are a quick way to enhance any room. Get ready to add a personal touch to your home with this practical and attractive shelving solution.
28. How to Build Floating Bookshelves
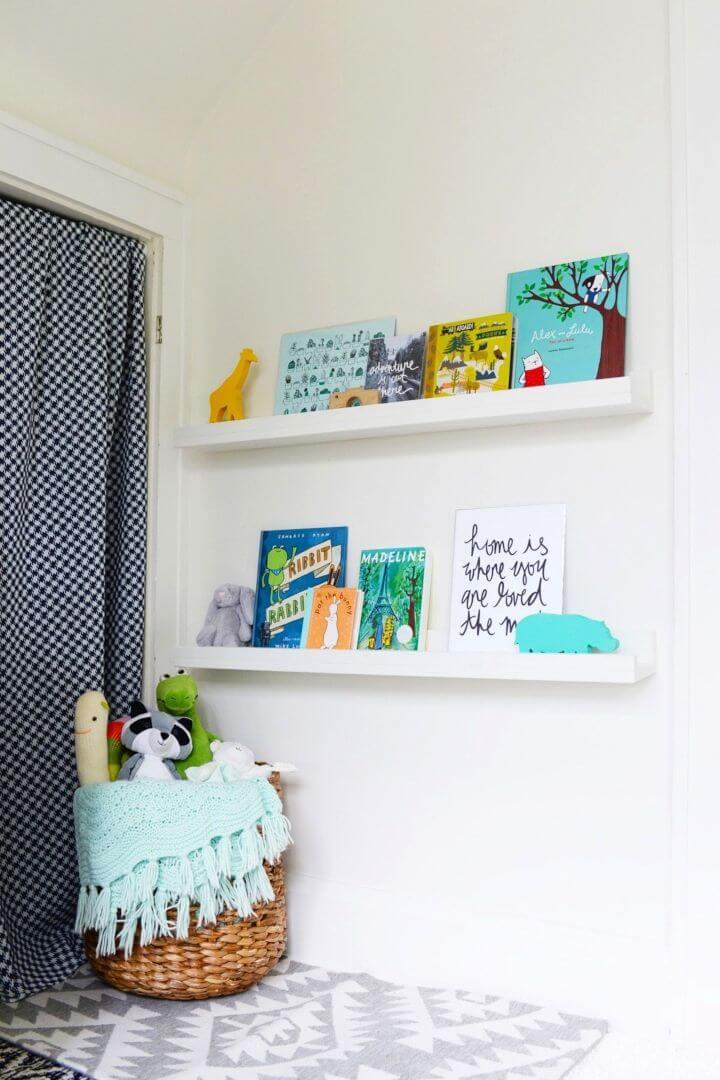
Transform any room in your home with a touch of elegance and functionality by making your own DIY floating bookshelf. Homedit offers a comprehensive guide that simplifies the process, making it accessible even for those new to DIY projects. Learn how to measure, cut, and assemble your shelves with ease, and find out the best ways to secure them for maximum strength. Once installed, these floating shelves serve as a stylish platform for books, decorations, and more, enhancing your space without visible brackets. Follow this instructive and engaging tutorial to add a seamless and practical design element to your living space.
Decorative shelving is a great way to make a unique display with convenient storage for your home. This DIY shelves guide will teach you how to build your own DIY shelf.
29. Beginner’s Guide to Building Floating Shelves
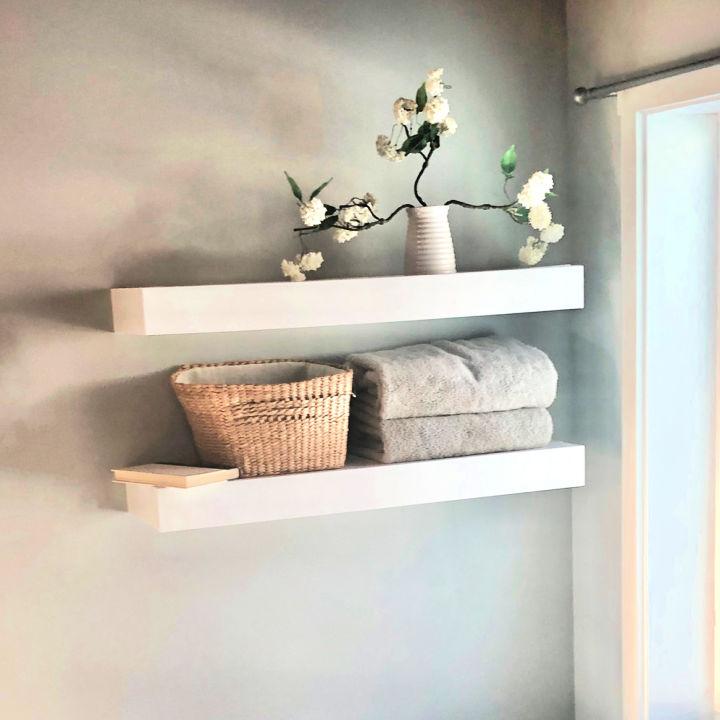
If you’re aiming to add a touch of style and functionality to your space, consider crafting easy-to-build floating shelves. Ana-White.com offers a straightforward guide to making these versatile shelves that suit any room, from kitchens to bathrooms. With no special tools required, you can customize the dimensions to fit your needs perfectly.
The process is simple: build, paint or stain in your workspace, and then mount on your wall for a sleek finish. Tested for strength and sturdiness, these floating shelves not only look great but are also durable. Follow the step-by-step instructions and watch the accompanying video tutorial for useful tips to ensure your shelves are both beautiful and strong.
30. DIY Wooden Floating Shelves for the Kitchen
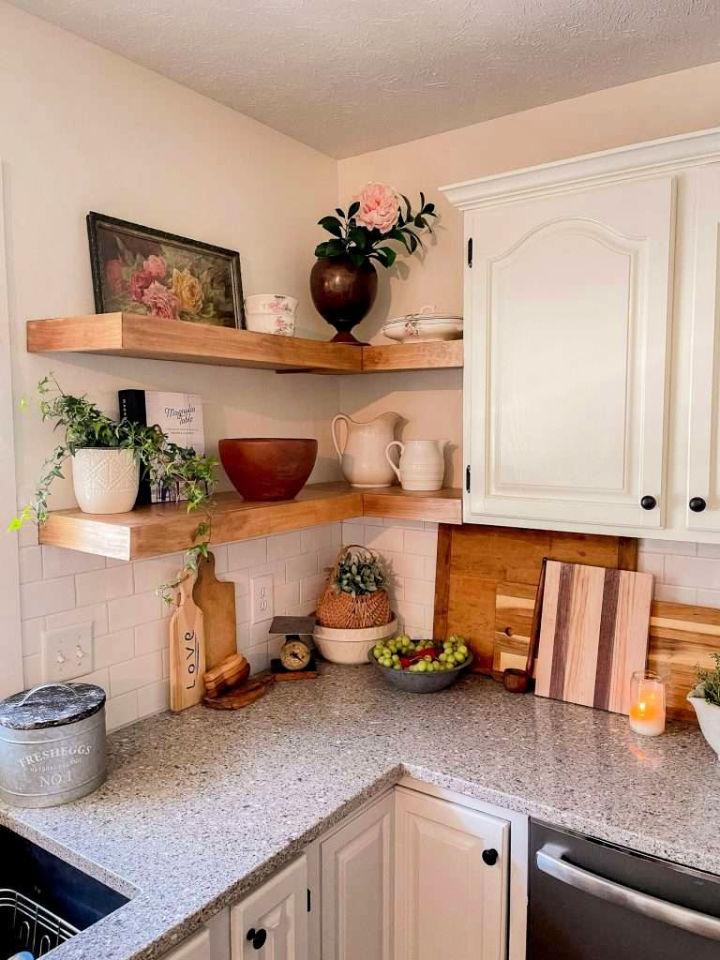
Transform your kitchen space with DIY floating shelves, a stylish and functional addition to any home decor. Grace In My Space offers a clear and engaging tutorial that guides you through making your own single shelf or corner floating shelves. With a focus on simplicity and affordability, the step-by-step instructions are easy to follow, making it a perfect project for DIY enthusiasts.
From selecting the right wood to the final touches of staining or painting, this guide covers all the essentials. Plus, it provides smart tips on installation to ensure your shelves are secure and level. Get ready to enhance your kitchen’s aesthetics and storage capacity with this practical DIY project.
Conclusion:
In conclusion, this guide on DIY floating shelves offers everything you need to embark on creating functional, stylish storage in any room of your house. From understanding the basics to following a detailed step-by-step guide, these 30 DIY floating shelf ideas are designed to inspire and assist you in adding a personal touch to your space. Whether it’s choosing the right materials or mastering the installation process, we’ve covered the essential insights to ensure your floating shelves are not just beautiful but also sturdy and practical. So, grab your tools, let your creativity flow, and give your walls a makeover with these ingenious DIY floating shelf ideas.
