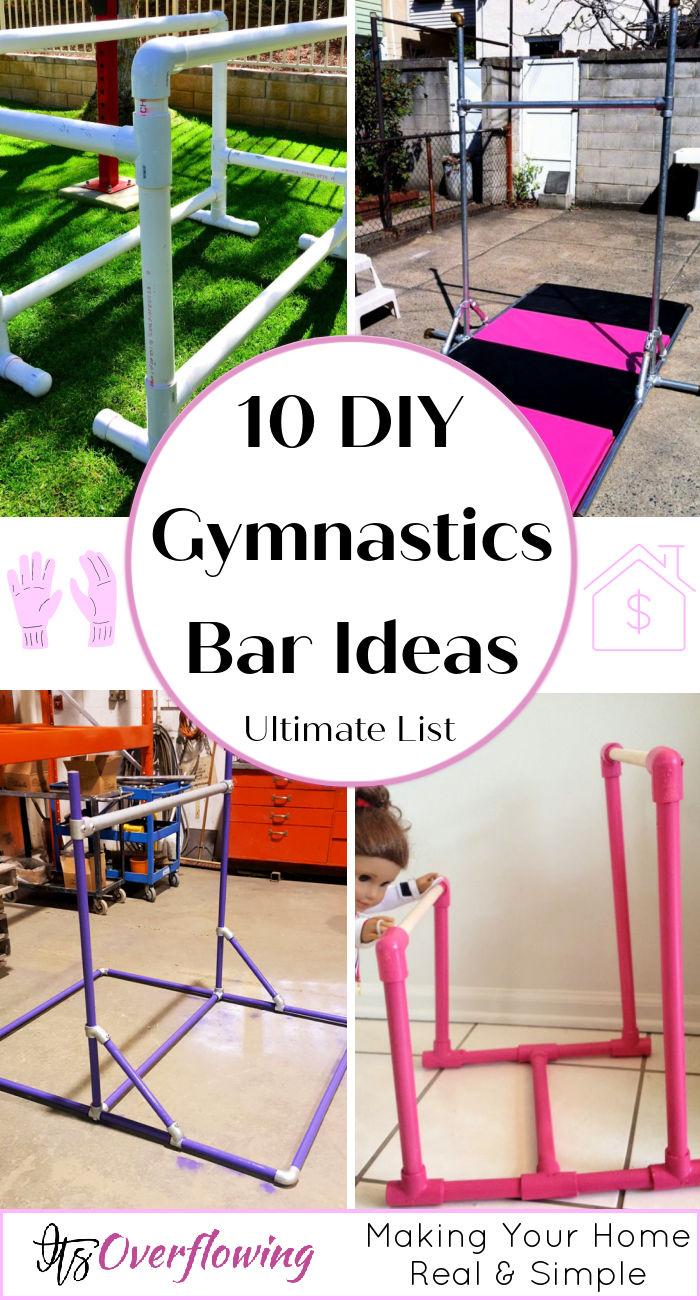
Looking to make a fun and functional gymnastics bar for your home? Our guide on 10 free DIY gymnastics bar plans is your perfect starting point. These plans are designed to make the process accessible for everyone, laying out everything you need – from materials to step-by-step instructions. Not only do these plans offer a great way to build a custom gymnastics bar, but they also provide an opportunity to engage in a rewarding project.
Building your own DIY gymnastics bar at home opens up endless possibilities for customization and adjustment. Whether it’s modifying the height for growing users or ensuring the structure fits perfectly in your available space, the power is in your hands. Plus, building it yourself is not just about the final product; it’s about the pride of creation and the joy it brings. Ready to start this exciting project? Read on to discover how to make your very own DIY gymnastics bar.
Why Build a DIY Gymnastics Bar?
Building a DIY gymnastics bar at home is not just about saving money; it’s about building a personalized and effective training environment. Here’s why taking on such a project is a great idea:
- Cost-Effective: Purchasing a professional gymnastics bar can be expensive. DIY solutions offer a more affordable way to have a functional piece of equipment at home, utilizing materials that are often less costly than ready-made options.
- Customizable: One of the greatest advantages of building your own gymnastics bar is the ability to tailor it to your specific needs. Whether it’s adjusting the height, width, or even the grip, you have full control over the customization, ensuring it perfectly suits the user’s requirements.
- Skill Development: For budding gymnasts, having easy access to a gymnastics bar at home allows for extra practice time, leading to quicker skill development. It provides an opportunity to work on strength, flexibility, and techniques outside of formal training sessions.
- Family Project: Building a gymnastics bar can be a fun and engaging project for the whole family. It encourages teamwork and offers a sense of accomplishment once the bar is completed and ready to use.
- Space-Saving: Many DIY gymnastics bar designs consider the limitation of space in modern homes. By building your own, you can ensure that it fits perfectly in the available area, making efficient use of the space.
Constructing a DIY gymnastics bar presents a practical and rewarding opportunity to enhance your or your child’s gymnastic practice, while also being a cost-effective and customizable project that the whole family can enjoy.
How to Build a DIY Gymnastics Bar at Home
Building your own gymnastics bar at home is a rewarding project that can save you money and provide endless hours of fun and exercise for gymnasts of all levels. This guide will walk you through the process in an easy-to-understand manner, focusing on safety, reliability, and usability. Whether for practice or play, follow these steps to build a sturdy gymnastics bar.
Materials and Tools You’ll Need
- Two 8-foot 4×4 wooden posts (for the uprights)
- One 5-foot 1.5-inch diameter metal pipe (for the bar)
- Four 3-foot 2×4 wooden boards (for the base)
- Wood screws (3-inch)
- Drill and drill bits
- Saw
- Sandpaper
- Measuring tape
- Level
- Wood sealant or paint (optional for outdoor use)
Step 1: Preparing the Base
- Cut the 2x4s: Using the saw, cut the 2×4 wooden boards to make the base. You’ll need four 3-foot pieces.
- Assemble the Base: Arrange two 2x4s in a parallel layout about 4 feet apart. These will serve as the foundation. Connect them using the remaining two 2x4s at each end, building a rectangle. Secure the structure with wood screws.
Step 2: Attaching the Uprights
- Prepare the Uprights: Take the 4×4 posts and drill holes 3 feet from one end. These holes should be the same diameter as your metal bar.
- Attach to the Base: Position the 4×4 posts upright at the narrow ends of your base. Ensure they are perfectly vertical using the level. Once aligned, secure them to the base with wood screws.
Step 3: Installing the Gymnastics Bar
- Sand the Metal Pipe: To prevent any injuries from sharp edges, sand both ends of the metal pipe.
- Insert the Bar: Slide the metal pipe through the holes in the 4×4 posts. If the fit is too tight, slightly enlarge the holes with the drill. The bar should be snug but not overly tight.
Step 4: Finishing Touches
- Secure the Bar: Once the bar is in place, you might want to add screws through the sides of the 4x4s to firmly hold the bar. This step is optional but recommended for added safety.
- Sand and Seal: Sand any rough edges on the wood to prevent splinters. If your gymnastics bar will be outdoors, apply a wood sealant or paint to protect it from the elements.
Safety and Usage Tips
- Regular Checks: Periodically check the gymnastics bar for any loose screws or signs of wear and tear.
- Proper Installation: Make sure the bar is installed on a level surface to prevent any wobbling.
- Supervision: Especially with younger gymnasts, supervision is crucial to prevent any accidents.
- Use Appropriate Mats: For added safety, place gymnastics mats or soft padding around the bar.
Building a DIY gymnastics bar is not only cost-effective but also allows you to customize the bar to your specific needs. By following these steps, you can ensure a safe and enjoyable gymnastics experience right at home.
DIY Gymnastics Bar FAQs
Building your own gymnastics bar can be an exciting project. Here are some frequently asked questions to help guide you through the process.
What materials do I need to build a DIY gymnastics bar?
To build a basic DIY gymnastics bar, you will typically need:
- Two 8-foot 4×4 wooden posts (uprights)
- One 5-foot 1.5-inch diameter metal pipe (bar)
- Four 3-foot 2×4 wooden boards (base)
- Wood screws (3-inch)
- Tools like a drill, saw, sandpaper, and measuring tape
How do I ensure the gymnastics bar is stable?
To ensure stability:
- Use sturdy materials like thick wooden posts and a metal pipe for the bar.
- Make sure the base is wide enough to prevent tipping.
- Secure all connections tightly with screws.
- Consider adding extra support braces if needed.
Can I adjust the height of the DIY gymnastics bar?
Yes, you can design your gymnastics bar to be adjustable by:
- Building multiple sets of holes in the uprights at different heights.
- Using clamps or movable brackets to secure the bar at the desired height.
Is it safe to build and use a DIY gymnastics bar?
Yes, it can be safe if you:
- Use strong and durable materials.
- Ensure all parts are securely attached.
- Regularly inspect the bar for any signs of wear or damage.
- Always supervise younger users and use gymnastics mats for added safety.
Can this project be done as a family activity?
Absolutely! Building a DIY gymnastics bar can be a fun and rewarding family project. It allows for teamwork and can be a great way to spend quality time together. Just that tasks are assigned according to each family member’s age and ability for safety.
How do I protect my DIY gymnastics bar from outdoor elements?
To protect your gymnastics bar if it’s outdoors:
- Apply a wood sealant or paint to all wooden parts to prevent rot and water damage.
- Consider using galvanized or stainless steel for the metal bar to prevent rust.
- Regularly check and reapply protective coatings as needed.
Can I use PVC pipes instead of a metal bar?
Yes, PVC pipes can be used for lighter applications, especially for young children. However, keep in mind:
- PVC pipes may not hold up well under heavy use or with older gymnasts.
- For added strength, consider using a metal pipe inside the PVC or choosing a thicker, high-grade PVC.
Building a DIY gymnastics bar can be a fulfilling project that provides endless fun and exercise opportunities. Just remember to prioritize safety, use quality materials, and don’t hesitate to adjust designs to better fit your needs.
10 Free DIY Gymnastics Bar Plans
Discover the best 10 free DIY gymnastics bar plans to build your own at home. Get started on building your own gymnastics equipment today!
1. How to Build a Gymnastics Bar
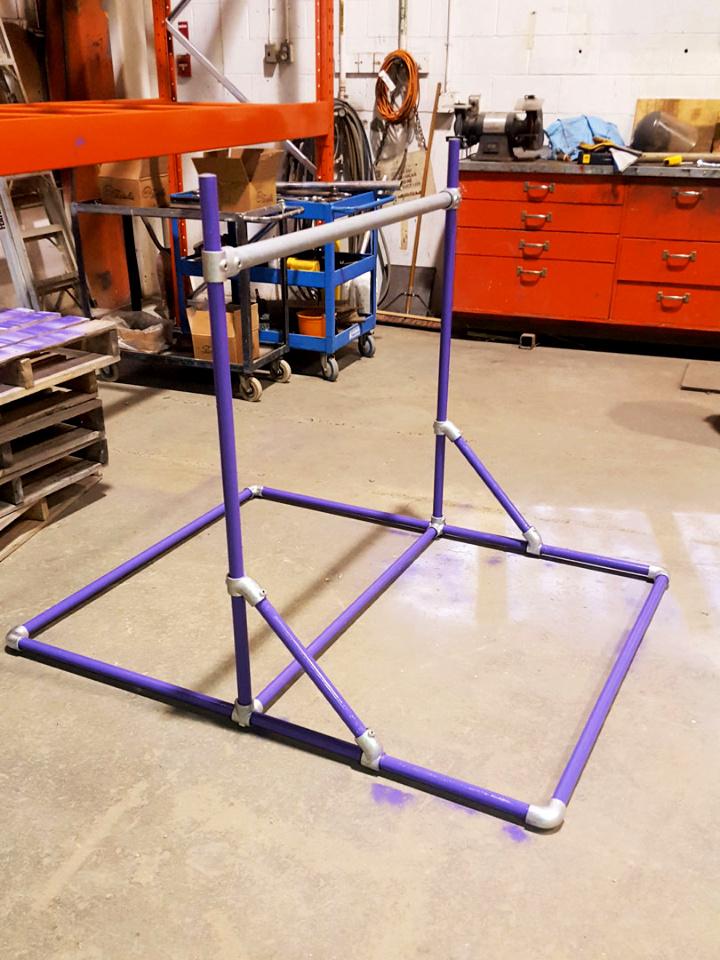
Building a gymnastics bar at home can be a rewarding DIY project, and with this instructive guide, you’ll have all the information you need to make a sturdy and adjustable piece of equipment. Brian’s step-by-step plans, utilizing Kee Klamp fittings and pipe, offer a clear and simple process that can be completed in about an hour, plus additional time for painting if desired.
This guide is helpful for those who want to craft a gymnastics bar that can grow with their athlete, providing a customizable height feature. The detailed diagrams and easy-to-understand instructions make assembly a breeze, even for those new to DIY projects. If questions arise or you need assistance, expert help is just an email away. Dive into this project and build a functional gymnastics bar for practice and fun at home. Simplified Building
2. DIY Backyard Jungle Gym Bars
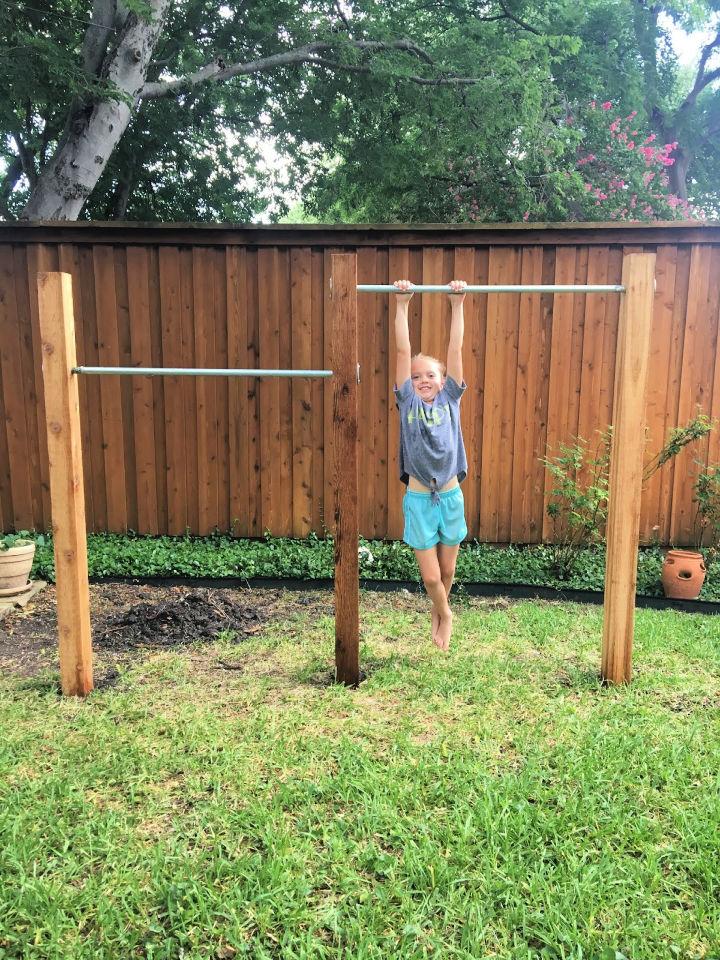
Looking to add some fun to your backyard without the hassle of concrete? House Homemade offers a DIY guide on how to make sturdy jungle gym bars using simple materials like cedar posts, galvanized pipes, and drainage rocks. Perfect for gymnastics enthusiasts or anyone wanting to encourage active play, this project promises durability and aesthetic appeal.
Follow these step-by-step instructions to craft a custom play area that your family will enjoy for years to come. Get ready to dig, drill, and assemble your way to a personalized backyard feature that’s both functional and visually pleasing.
3. Making a American Girl Gymnastics Bar
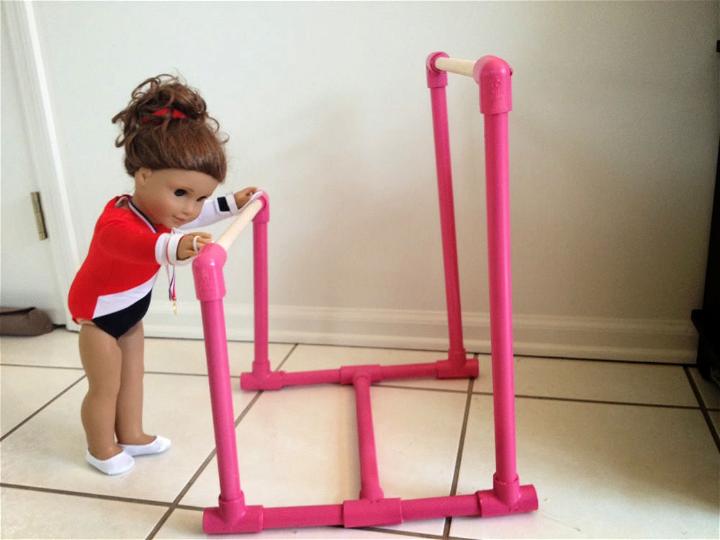
Building a DIY American Girl Gymnastics Bar is a fantastic way to delight your child without breaking the bank. Two It Yourself offers a clear and engaging tutorial that guides you through constructing a sturdy and affordable gymnastics set for your child’s doll. The step-by-step instructions make the process simple, using easily obtainable materials from your local Home Depot.
From cutting PVC pipes to assembling the bars, this project is manageable and rewarding, ensuring your little one finds joy on Christmas morning. Plus, with a cost-effective approach, you’ll save enough to consider real gymnastics classes for your budding athlete. Visit Two It Yourself for this practical and fun DIY guide, perfect for parents eager to craft a memorable gift.
4. Doll Gymnastics Practice Bar Tutorial
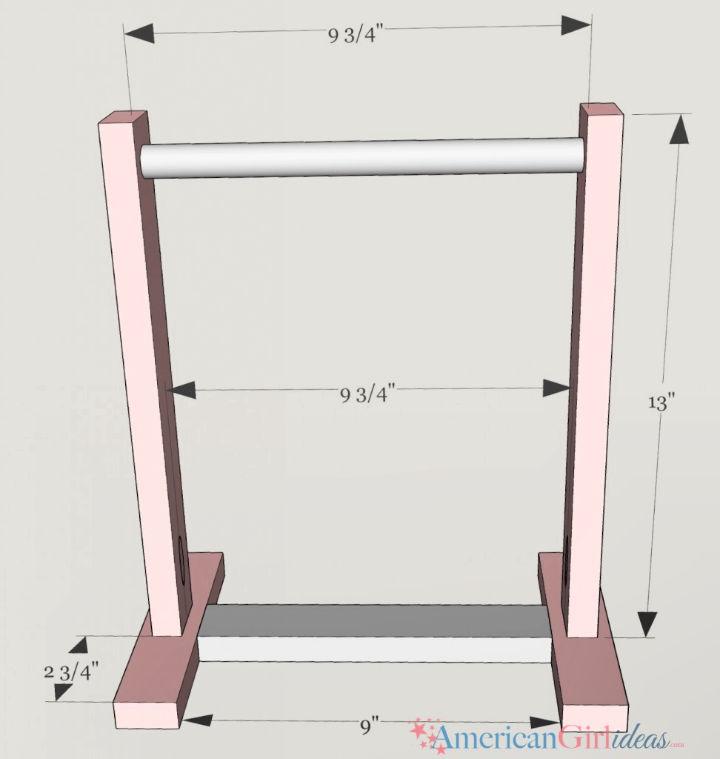
Making a gymnastics practice bar for an American Girl doll is a fantastic project that combines crafting fun with imaginative play. American Girl Ideas provides a clear, step-by-step guide to making a durable and cute practice bar that’s perfect for any doll enthusiast. With a simple shopping list, including basic wood pieces and tools, this DIY activity is accessible and affordable.
The instructions are easy to follow, ensuring a rewarding experience as you build and customize a miniature gymnastics setup. Once complete, your American Girl doll will be ready to practice her routines on a bar that’s been crafted with love and creativity.
5. Homemade Pull Up Bar
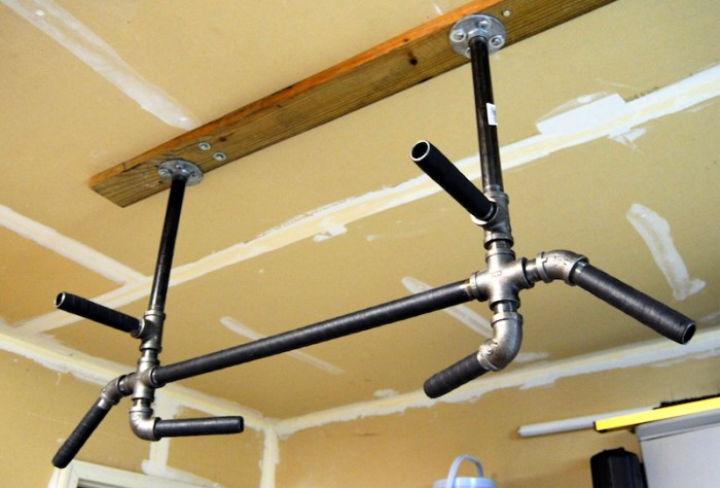
Building a pull-up bar at home is a rewarding project that can enhance your fitness routine. Make a Pull Up Bar offers detailed, easy-to-follow instructions for DIY enthusiasts eager to build a sturdy, customized pull-up bar. Whether opting for an over-the-door or ceiling-mounted design, this guide provides a shopping list, construction steps, and practical tips.
By following these guidelines, you can construct a durable pull-up bar tailored to your space and workout needs, all while keeping costs down. Dive into this engaging project and boost your upper body strength with your very own homemade gym equipment.
6. DIY Chin-up Bar Without a Doorway
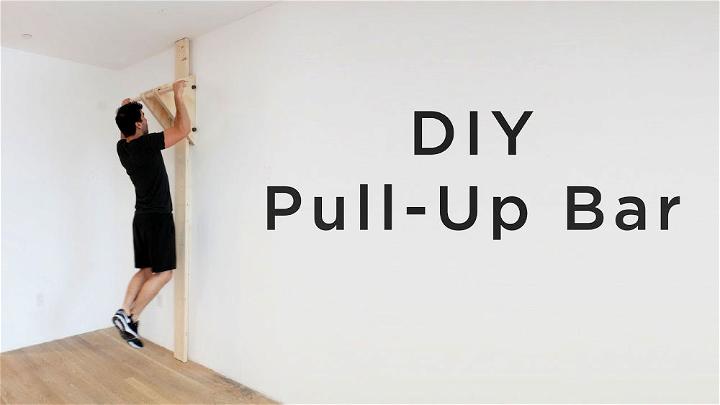
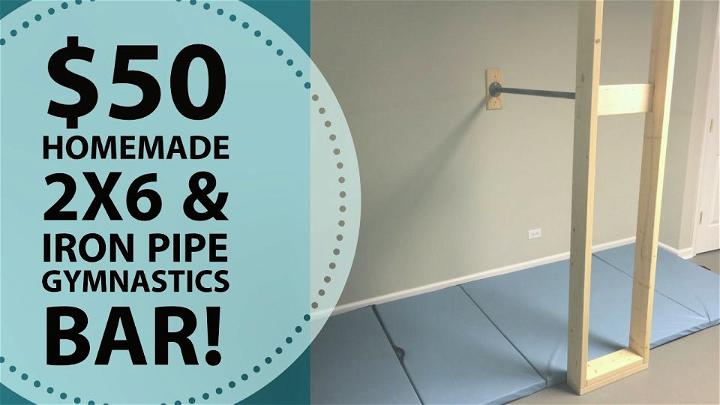
Elevate your home fitness routine with a robust DIY Pull Up/Chin Up Bar, perfect for those lacking a doorway bar. This detailed guide demonstrates how to craft a durable bar using a 10-foot long 2×6, scrap 2x4s, 3/4 inch plywood, wood glue, and a mix of long screws. The method involves meticulous measurements for a sturdy wall-mount, ensuring safety and efficiency.
For the chin-up bar, choose between a wooden dowel or a 3/4 inch iron pipe, depending on your preference for strength and aesthetics. This setup not only provides a challenging workout but also adds minimal visual impact to your living space. It’s an ideal project for fitness enthusiasts seeking a reliable, space-saving exercise solution in their home.
7. Make a Gymnastics Bar at Home in 5 Steps
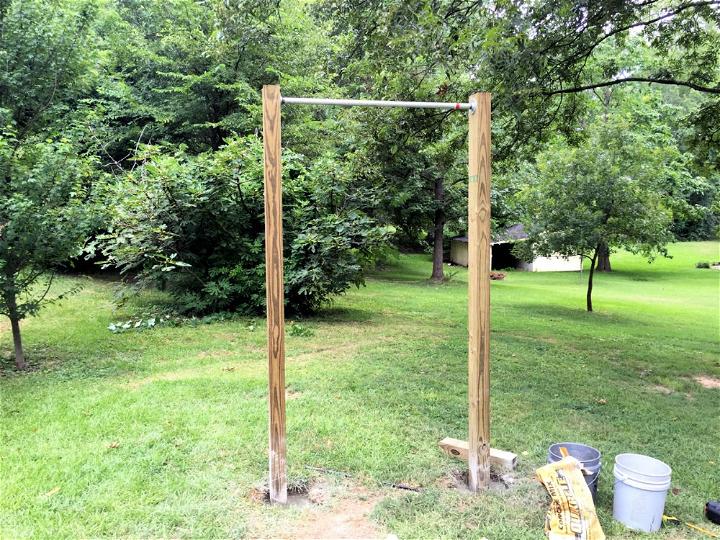
Building a DIY pull-up bar at home can be a rewarding project, enhancing your backyard or garage gym. Our comprehensive guide walks you through building a sturdy and reliable pull-up station in just five simple steps. With a list of materials and tools, plus detailed instructions, you’ll be equipped to construct a fitness feature that’s both cost-effective and customizable.
Perfect for those ready to take on a hands-on task, our step-by-step tutorial ensures an engaging and successful build, leaving you with a professional-grade pull-up bar ready for rigorous workouts. Get ready to elevate your exercise routine with your very own homemade pull-up bar. FitnessHQ
8. How to Make a Pull-up Bar and Play Gym
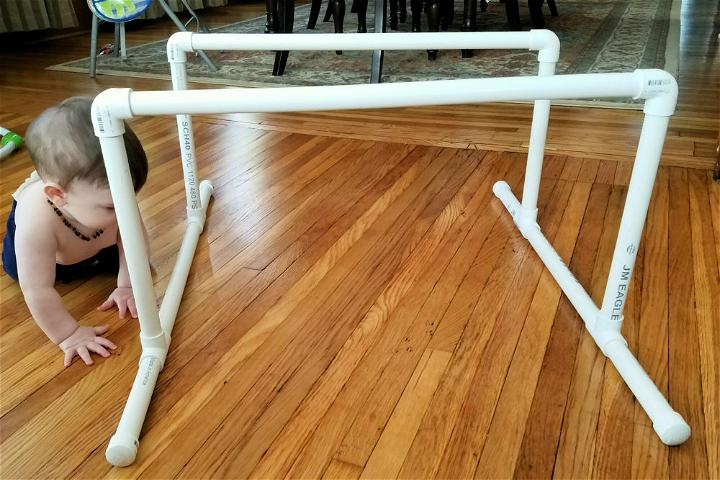
Building a DIY pull-up bar and play gym is a fantastic project for parents looking to support their little one’s physical development. Buffalo’s Okayest Mom offers a practical guide on how to build a sturdy and safe pull-up bar using simple materials like PVC piping, end caps, T and elbow joints, along with a filler like sand or pebbles for stability. For added safety, especially when repurposing the structure as a play gym for smaller children, consider padding the base with pool noodles.
Not only is this project cost-effective, but it also provides a custom solution tailored to your child’s height, ensuring hours of fun and growth. Remember to seal your connections with glue to prevent any leaks and wrap the hand bars with duct tape for a secure grip. With these tips, you’ll make a durable play area that encourages your child to explore and strengthen their muscles safely.
9. DIY Gymnastics Strap Bar
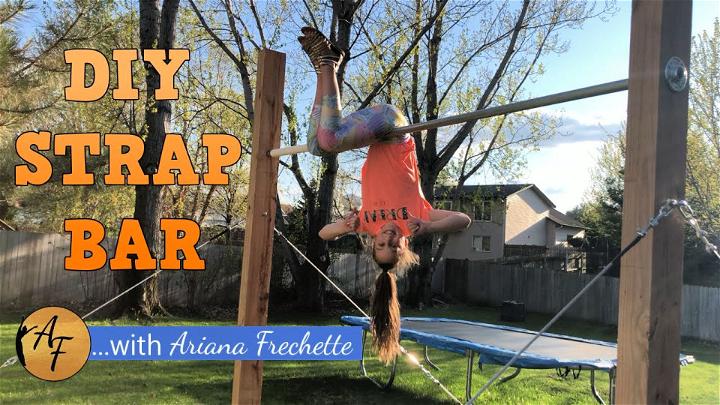
Craft your own sturdy, space-efficient gymnastics bar with this comprehensive guide! This tutorial takes you through an improved design process, fixing issues like unstable bases and unsealed surfaces from previous attempts. You’ll learn to align and secure the bar using innovative techniques like laser lines for precision and construction adhesive for stability. The guide covers everything from selecting the right screws to building a seamless fit with dado cuts and rounded edges.
With detailed instructions on assembling, sanding, and applying a protective polyurethane coat, this DIY project is perfect for enhancing your gymnastics setup at home. Transform your space with a gymnastics bar that’s both functional and aesthetically pleasing, all while enjoying the satisfaction of building it yourself.
10. Making PVC High Parallel Bars
If you’re eager to make a gymnastics bar at home, YouTube offers a comprehensive guide that’s just a click away. Tundra, Tools, and Tech’s video on constructing a homemade gymnastics bar is ideal for those interested in DIY projects. This instructional video walks viewers through each step, ensuring clarity and ease of understanding. It covers the selection of tools, materials needed, and detailed processes for assembling a sturdy and functional gymnastics bar.
Perfect for anyone keen to add a personal touch to their home gym equipment, this resource is both engaging and informative. By watching this video, you’ll gain the knowledge needed to build a safe and durable piece of gymnastics equipment for practice or fun. Visit YouTube and search for “How to Build a Homemade Gymnastics Bar” to start your project today.
Conclusion:
In wrapping up this guide on 10 free DIY gymnastics bar plans, we hope you feel inspired and equipped with the information needed to embark on this exciting project. Building a DIY gymnastics bar not only adds value to your home gym but also sparks joy and a sense of accomplishment.
Remember, whether it’s ensuring stability or adjusting the height, these plans are designed to cater to a variety of needs and spaces. Don’t hesitate to get started on crafting a DIY gymnastics bar that promises endless fun and physical activity. Happy building!
