Building a kitchen island can transform your cooking space, adding both functionality and style. Our guide on how to build a kitchen island offers 25 free DIY kitchen island plans suited for various skill levels and kitchen sizes. These DIY kitchen island plans are designed to help you craft a piece that not only enhances your kitchen’s aesthetics but also boosts its utility. With clear instructions and practical tips, you’ll find it easier to embark on this project, regardless of your woodworking experience.
As you move to the next section, get ready to explore a wide range of DIY kitchen island plans. Each diy kitchen island plan is tailored to meet different needs, from adding storage space to making more prep areas. Our goal is to help you build a kitchen island that not only looks great but also serves your specific requirements. Let’s dive into the details and start building your dream kitchen island today.
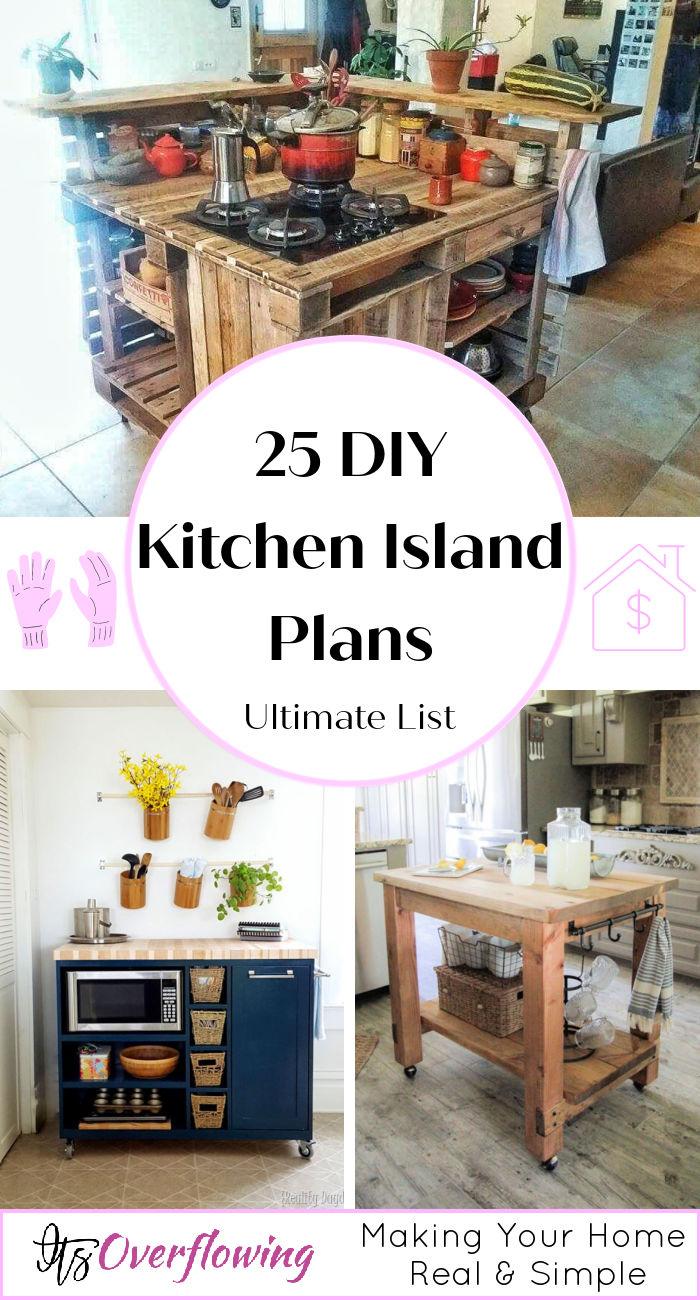
Why Build a DIY Kitchen Island?
- Maximizes Space: Tailor your island to fit your kitchen perfectly, utilizing every square inch for storage or seating.
- Custom Storage Solutions: Include drawers, shelves, or even a pull-out trash bin to suit your specific needs.
- Additional Workspace: An island provides extra countertop area for food preparation, serving, and dining.
- Design Freedom: Choose materials and colors that match your kitchen’s décor and your personal taste.
- Cost-Effective: Save money by using repurposed materials or upcycling old furniture.
- Increases Home Value: A well-built, attractive kitchen island can boost your home’s marketability and worth.
- Skill Development: Improve your woodworking or upcycling skills with a hands-on learning experience.
- Sense of Achievement: There’s nothing like the pride of having built a functional piece of your home with your own hands.
By considering these factors, you can build a kitchen island that not only enhances your home but also brings a sense of personal achievement and joy. Keep it simple, have fun, and enjoy the process as much as the final product.
How to Build a Kitchen Island
Building a kitchen island can be a great way to increase counter space, add additional storage, and create a focal point in your kitchen. Whether you’re a beginner or have some DIY experience, this guide will help you get started on creating your own kitchen island.
Planning Your Kitchen Island
Size and Location
First, consider the size and location of your kitchen island. It should have enough room around it for easy movement, typically 36 to 48 inches of walkway space. Also, think about what functions you want your island to serve. Will it include a sink, cooktop, or just be used for additional counter space and storage?
Design and Materials
Choose a design that complements your current kitchen layout and style. Consider the materials you’d like to use, such as wood for the frame and countertop options like granite, butcher block, or stainless steel. Remember, the materials should not only match your aesthetic but also be practical for your cooking and maintenance habits.
Draw a Detailed Plan
Before you start building, it’s crucial to have a detailed plan. This plan should include the dimensions of the island, the placement of any appliances or sinks, and the materials you’ll need. If you’re not comfortable drafting plans, consider hiring a professional to help.
Building Your Kitchen Island
Learn how to build your own kitchen island with our step-by-step guide. Build a functional and stylish addition to your kitchen space.
Gather Materials and Tools
Based on your plan, gather all the necessary materials and tools before starting. Common tools for building a kitchen island include a saw, drill, screws, brackets, measuring tape, and level.
Build the Frame
Start by building the frame for your kitchen island. This is typically done using 2x4s or larger pieces of wood, depending on the size and weight of your countertop. Make sure the frame is sturdy and level.
Add Shelving and Cabinets
Once the frame is built, you can add shelving or cabinets for storage. This might involve custom-building these elements or modifying pre-made cabinets to fit your island.
Install the Countertop
After the frame and storage are in place, install the countertop. If you’re using a heavy material like stone, you may need assistance to lift and secure the countertop properly.
Add Finishing Touches
Finally, add any finishing touches. This could include painting or staining the frame, installing hardware on cabinets, or adding bar stools for seating. Make sure to also install any electrical outlets or plumbing needed for appliances.
Building a kitchen island requires careful planning, the right materials, and some DIY skills, but it can significantly enhance the functionality and look of your kitchen. By following these steps, you can build a custom kitchen island that fits your needs and style. Remember, safety comes first, so take your time and consult professionals if you’re unsure about any part of the project.
FAQs on Building a Kitchen Island
Discover the answers to common questions about building a kitchen island. Gain insights and tips for creating your dream culinary space.
How much does it typically cost to build a kitchen island?
The cost varies greatly depending on the size, materials, and whether you’re doing it yourself or hiring a professional. A DIY kitchen island project can start at a few hundred dollars for basic materials. However, if you’re looking at high-end materials or plan to include appliances, it could go up to several thousand dollars.
Can I build a kitchen island if I have a small kitchen?
Yes, even small kitchens can benefit from a kitchen island. The key is to scale the project to fit your space. Consider a narrow or small island that provides additional counter space and storage without overwhelming the room. Mobile or portable islands are also great options for small kitchens.
What tools will I need to build a DIY kitchen island?
A basic toolkit for building a kitchen island includes:
- Measuring tape
- Saw (hand saw, circular saw, or miter saw depending on your comfort level and needs)
- Drill and drill bits
- Screws and nails
- Hammer
- Level
- Sandpaper or a sander for finishing
How do I choose the right materials for my kitchen island?
Think about both the functionality and the aesthetic you want to achieve. For the frame, hardwood or high-quality plywood is durable and can be painted or stained. For the countertop, consider your cooking habits: butcher block is great for chopping, while stone or laminate are durable and easy to clean.
Do I need to anchor my kitchen island to the floor?
It depends on the design and function of your island. Freestanding or mobile islands don’t need to be anchored and offer flexibility in your kitchen layout. However, if your island will house a sink, appliances, or serve as a primary work surface, anchoring it can provide stability and safety.
How can I customize my DIY kitchen island?
There are countless ways to customize your island, such as:
- Adding a drop leaf or extendable countertop for extra dining or workspace.
- Installing hooks or racks on the sides for utensils or towels.
- Including unique drawer pulls or cabinet knobs that match your kitchen’s decor.
- Choosing a countertop material or color that stands out or complements your existing counters.
- Incorporating open shelving for displaying cookbooks or decorative items.
Is it possible to include plumbing or electrical work in my DIY kitchen island?
Yes, but these tasks generally require a higher level of skill and knowledge about building codes and safety standards. For electrical outlets or plumbing, you may want to consult with or hire a professional to ensure the work is done safely and correctly.
By considering these common questions and answers, you’re ready with the knowledge to start planning and building the kitchen island that best fits your space, needs, and style. Remember, careful planning and attention to detail will help make your DIY kitchen island project a success.
25 Free DIY Kitchen Island Plans
Discover 25 free DIY kitchen island plans to build your dream kitchen space. Get inspired and start building your own kitchen island today!
1. How to Make a Rolling Kitchen Island
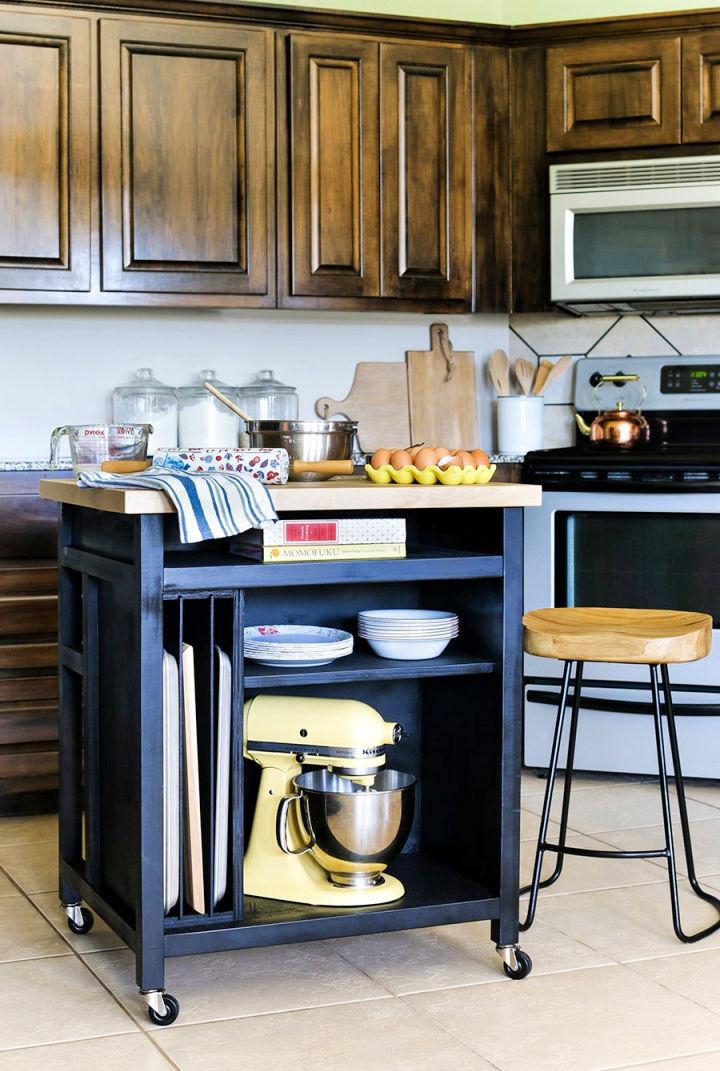
Transform your kitchen with a functional DIY Rolling Kitchen Island, crafted by Jen from The House of Wood. This versatile piece offers extra workspace and smart storage solutions, featuring a bottom shelf for large appliances, adjustable dividers for baking sheets, and a cozy spot for a helper to sit and assist with meal prep.
Complete with a towel bar and an integrated power outlet, this island on wheels is the perfect addition for those needing flexibility in their kitchen. Get ready to roll up your sleeves build a custom island with Jen’s easy-to-follow plans and expert tips, ensuring your culinary space is both organized and welcoming. Jen Wood House
2. Easy DIY Kitchen Island from Desk
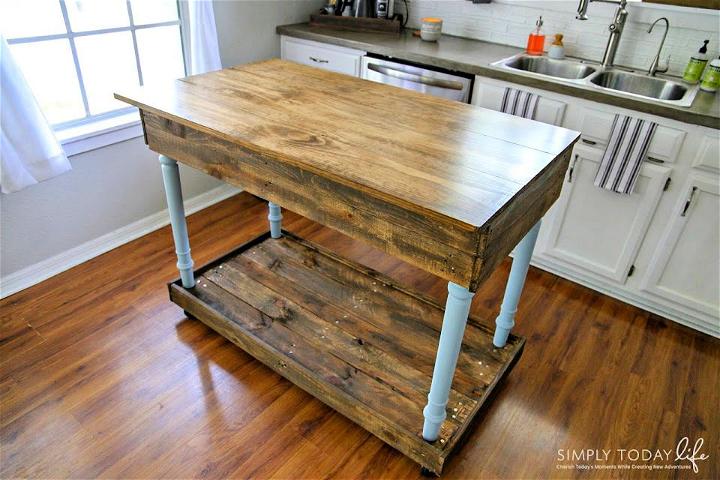
Transform your kitchen with a touch of farmhouse charm by making a DIY Kitchen Island from an old desk, as showcased on Simply Today Life. This engaging project is perfect for those who love to upcycle and add functional beauty to their home on a budget.
With a detailed guide, you’ll learn how to repurpose a desk and pallet wood into a stylish and practical kitchen centerpiece. Paint, stain, and some basic tools are all you need to bring this island to life, complete with a food-safe countertop for meal preps. Roll up your sleeves and get ready to enhance your kitchen space with this clever DIY transformation.
3. Beautiful Handmade Kitchen Island Trim and Lights
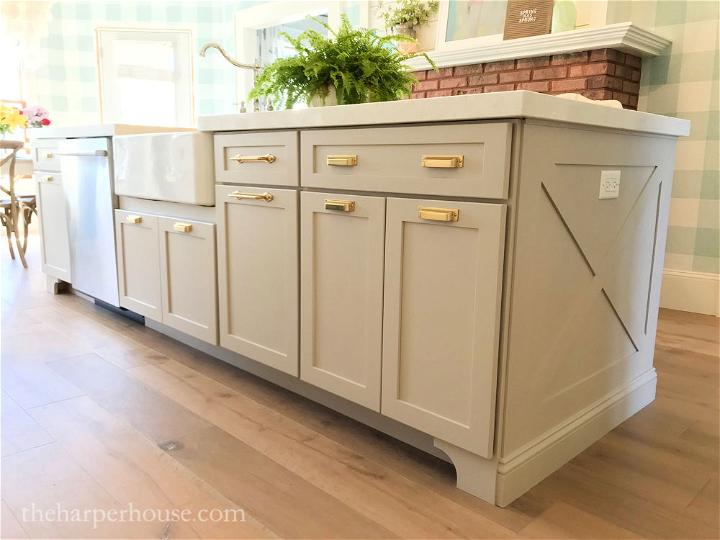
Transform your kitchen with a custom island trim and lighting, as detailed by Christy Harper at The Harper House. Learn how to build a stylish and substantial look without breaking the bank, using DIY skills to craft beautiful end panels and add elegance with well-chosen pendant lights.
Harper shares a step-by-step guide on extending island depth with maple plywood and poplar boards, making an X-style design that’s both chic and budget-friendly. With practical tips on finishing touches, like baseboards and paint, and a personal touch with unique light fixtures, you’ll be equipped to enhance your kitchen’s charm and functionality. Get inspired to tackle your kitchen remodel with confidence and creativity!
4. Make a Pallet Wood Kitchen Island
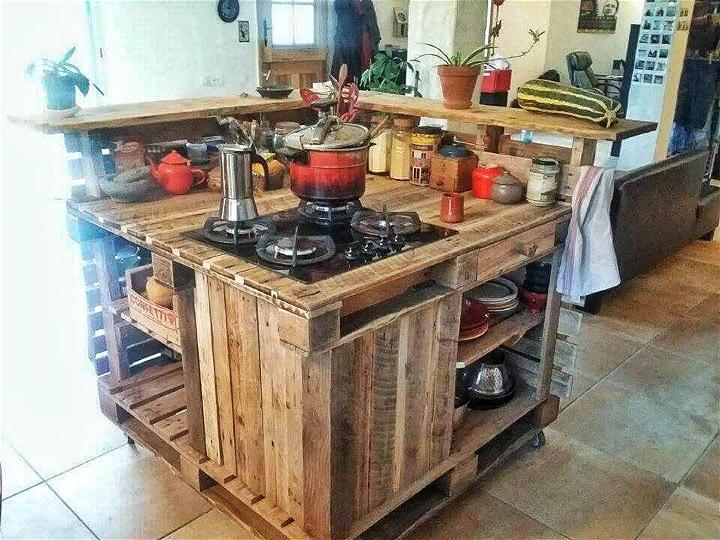
Transform your kitchen space with a DIY Pallet Kitchen Island, a creative and sustainable project featured on DIY Crafts. This kitchen island is not only a practical addition for food preparation but also offers ample storage with built-in spice racks, cubbies, and drawers. Constructed from 100% free Pallets, it’s a budget-friendly option for those who enjoy upcycling. The island includes a stove corner, towel rack, and a counter-top for serving or decoration.
Its mobile design, equipped with wheels, allows you to move it wherever you need, making it perfect for both indoor and outdoor cooking experiences. Follow simple steps to assemble the base, add sectional walls, and customize with additional shelves or hinged doors. Finish with paint or a wood stain for a personalized touch. Create a functional and rustic kitchen piece with this pallet island, a testament to ingenuity and resourcefulness.
5. DIY Kitchen Island With Trash Storage
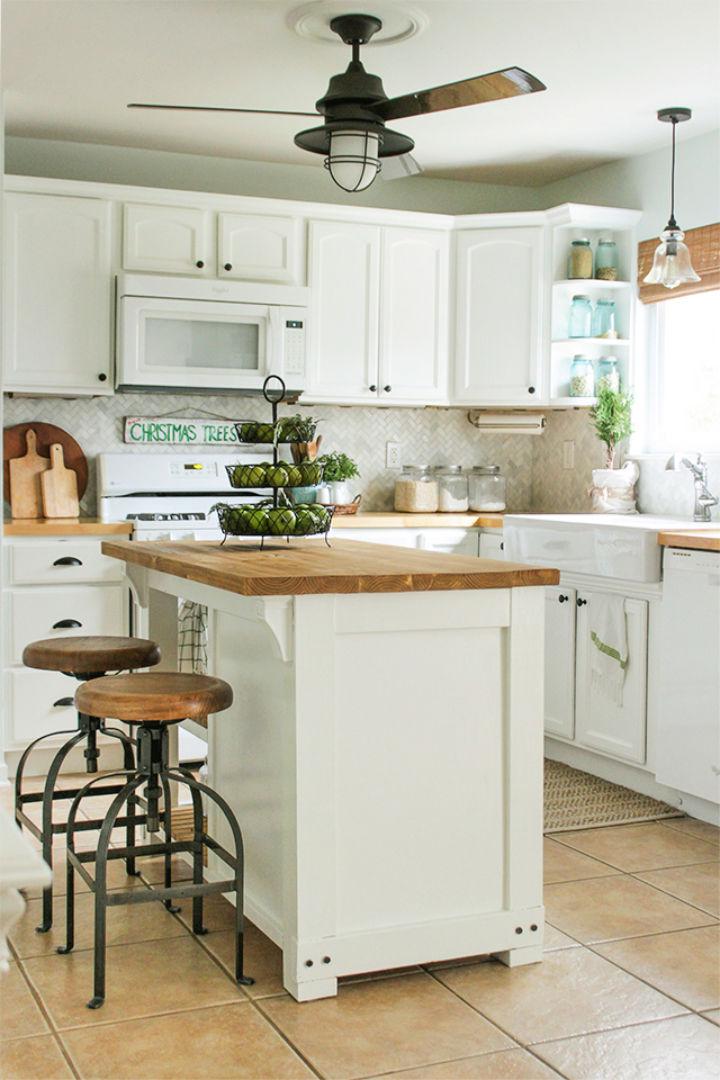
Transform your kitchen’s functionality and style with a DIY Kitchen Island featuring convenient trash storage, crafted by Rachel from Shades of Blue Interiors. Ideal for making extra counter space and keeping waste out of sight, this island also offers additional shelving for your baking essentials.
With free downloadable plans, you can build a 4’x 2 1/2′ island that not only enhances your kitchen’s appeal but also increases its social and practical utility. The design incorporates sleek black hardware for a timeless look and a smooth finish for easy cleaning. For an in-depth guide and inspiration, visit Shades of Blue Interiors and start your kitchen upgrade today.
6. How to Build a Kitchen Island at Home
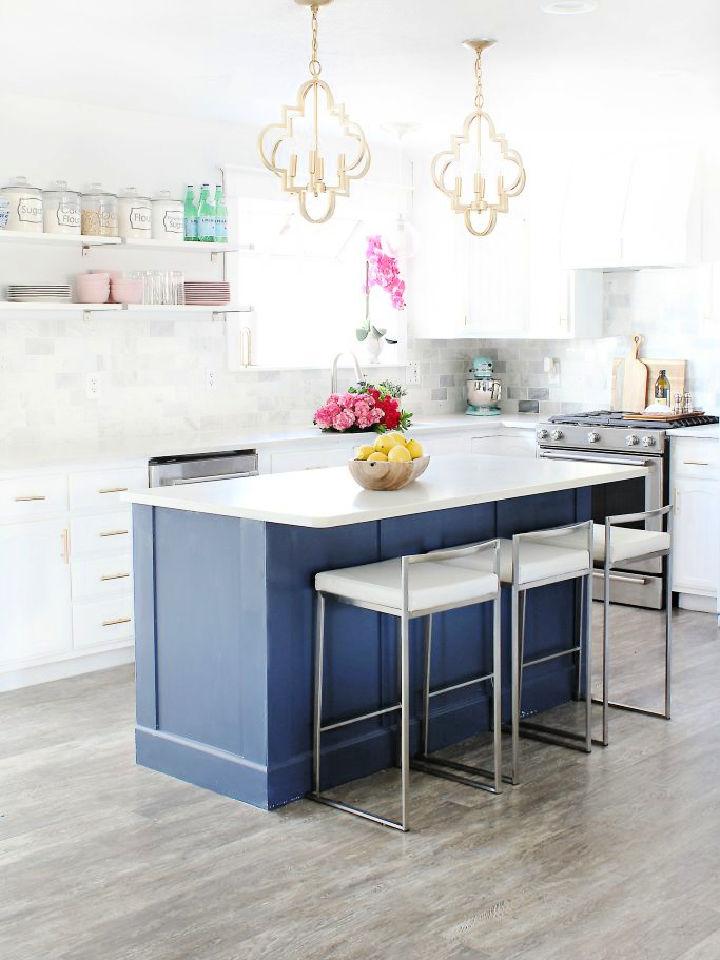
Discover how to craft your own kitchen island with this engaging and easy-to-understand guide. Perfect for DIY enthusiasts, our step-by-step tutorial takes you through the process of building a custom island using stock cabinets from your local home improvement store.
Learn how to measure, secure, and finish your island with a professional touch, all while keeping costs down. With clear instructions and practical tips, you’ll transform your kitchen into a more functional and stylish space. Dive into this DIY project and add a personal touch to your home today, with a little help from our expert advice. Classy Clutter
7. DIY Wooden Kitchen Island Out of Base Cabinets
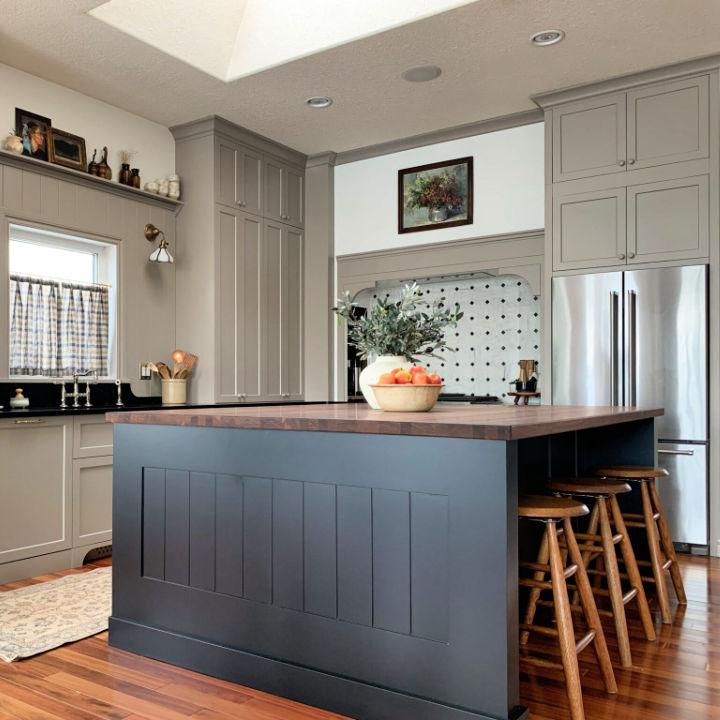
Transform your kitchen space with a custom island using stock cabinets like those from Ikea, as showcased by Erin Zubot Design. Building a kitchen island from base cabinets is simpler than it seems, and it can significantly increase your kitchen’s functionality and storage. When planning, consider the island’s size to ensure it fits comfortably within your kitchen, leaving ample walking space. Choose the appropriate depth to accommodate seating, and decide on the length based on your design needs and countertop material constraints.
Think about the island’s purpose—whether it will house appliances, a sink, or simply provide extra counter space. Opt for drawer storage for ease of access and design with symmetry in mind for an aesthetically pleasing result. Remember to build a sturdy base, finish the sides tastefully, and neatly cover the base with toe kicks for a polished look. With careful planning and attention to detail, you can build a beautiful and practical kitchen island that enhances your culinary space.
8. Free Kitchen Island Woodworking Plans
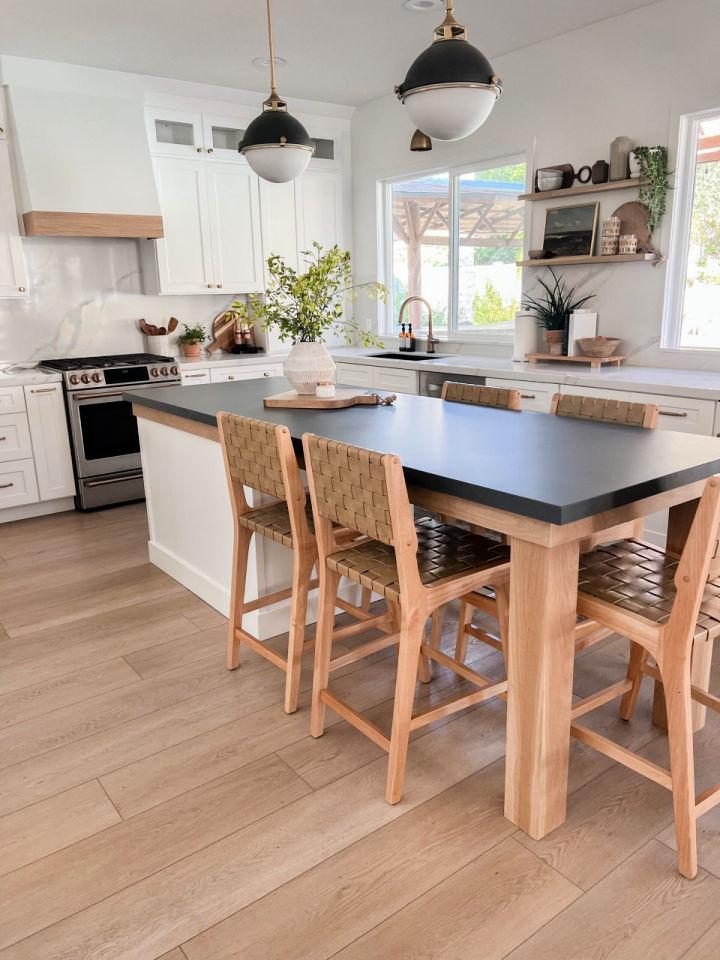
Transform your kitchen with a custom DIY island following Domestic Blonde‘s comprehensive tutorial. Kelly guides you through making a functional and stylish kitchen centerpiece with seating for five. From initial design and tool selection to assembly and finishing touches, this step-by-step guide empowers you to build an island that meets your specific needs while saving on remodeling costs. With clear instructions and practical tips, even those new to DIY projects can achieve a professional-looking result. Start crafting your kitchen’s focal point today with Domestic Blonde’s expert advice.
9. Build a Wood Kitchen Island Tutorial
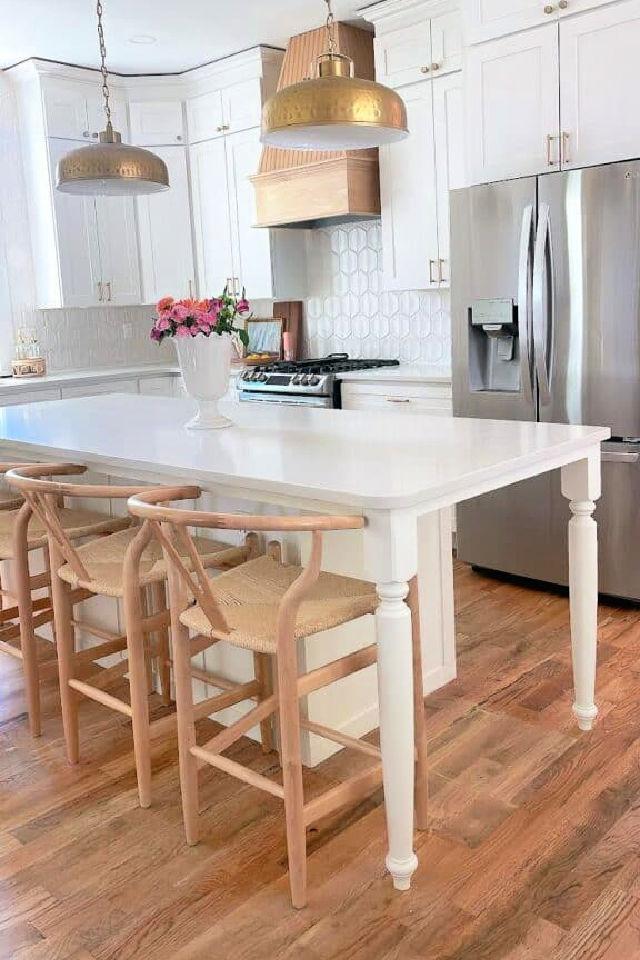
Transform your kitchen with a DIY island that adds functionality and style to your space. Arinsolangeathome provides a step-by-step guide to making a custom kitchen centerpiece using stock cabinets or existing furniture. With practical tips on framing, trim work, and painting, this tutorial caters to DIY enthusiasts eager to enhance their kitchen’s look and utility. Emphasizing ease and customization, the guide ensures a smooth project journey, yielding a kitchen island tailored to your home’s unique needs. Get ready to elevate your kitchen with this engaging and helpful DIY island tutorial.
DIY Coffee Table Plans: Unleash your inner artisan with these Free DIY Coffee Table Plans. Simple, fun, and affordable. Transform your living space today!
10. How to Make a Reclaimed Wood Rustic Island
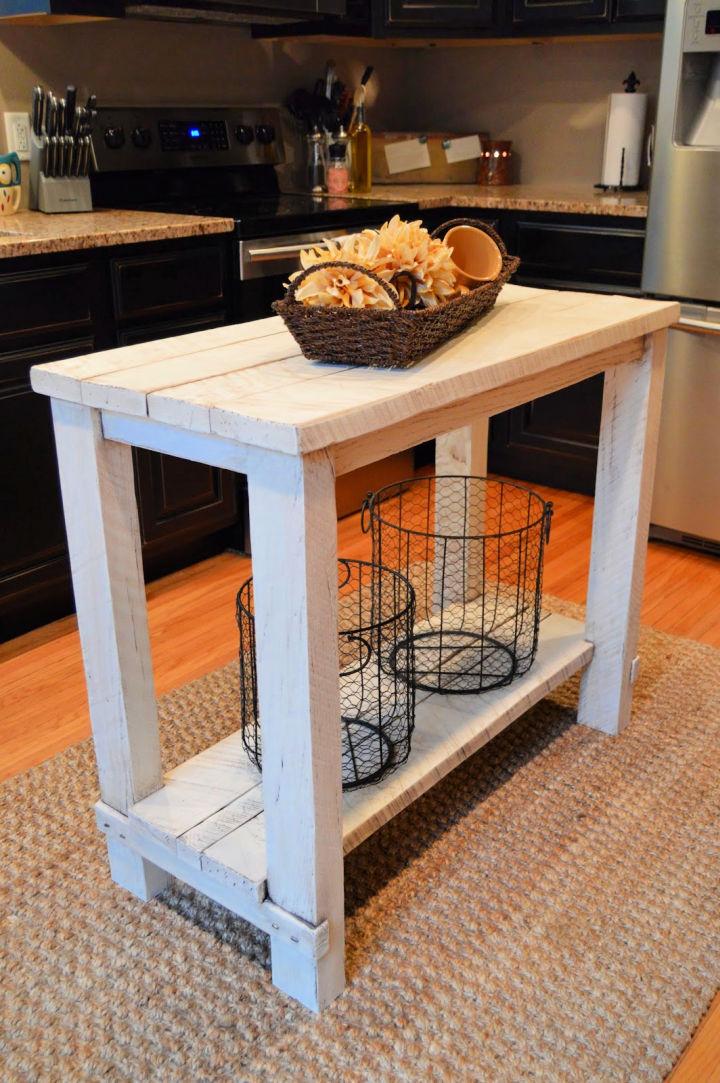
Discover how to craft a rustic reclaimed wood island that adds a touch of vintage charm to your home. Perfect for those who appreciate a DIY challenge and enjoy working with their hands, this guide provides step-by-step instructions to build a unique kitchen island or table using reclaimed wood.
By maintaining the wood’s naturally distressed look while ensuring a smooth finish, you’ll achieve a balance of rough-hewn beauty and practicality. With customization options for size, this project can be tailored to fit any space, making it a versatile addition to your home décor. Learn the techniques of distressing, glazing, and finishing to bring out the wood’s character, and transform your space with a functional, stylish piece that’s sure to be a conversation starter. Kruses Work Shop
11. Building a Kitchen Island With Step by Step Instructions
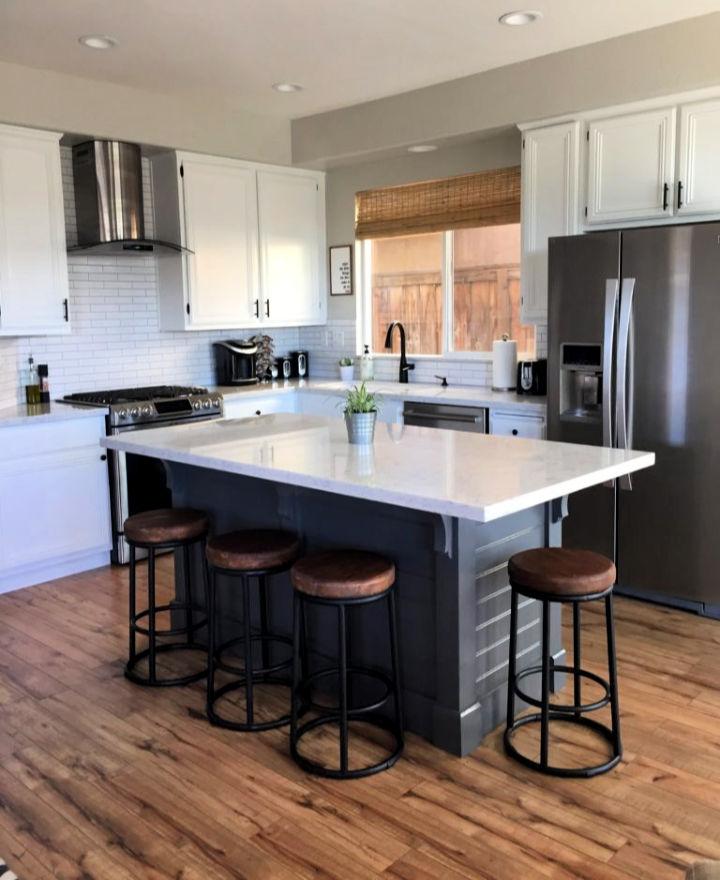
Making a DIY kitchen island is a savvy way to enhance your kitchen without breaking the bank. On Domestic Blonde, Kelly shares an in-depth tutorial on how to craft a stylish and functional island using affordable materials and a touch of creativity. Learn how to select the right base cabinets, merge them into a solid unit, and add personalized touches with paint and hardware. Whether updating your space or adding extra storage and seating, this guide provides the know-how to tackle the project with confidence, making it an engaging and helpful read for those eager to transform their kitchen on a budget.
12. Turn a Bookshelf Into Kitchen Island
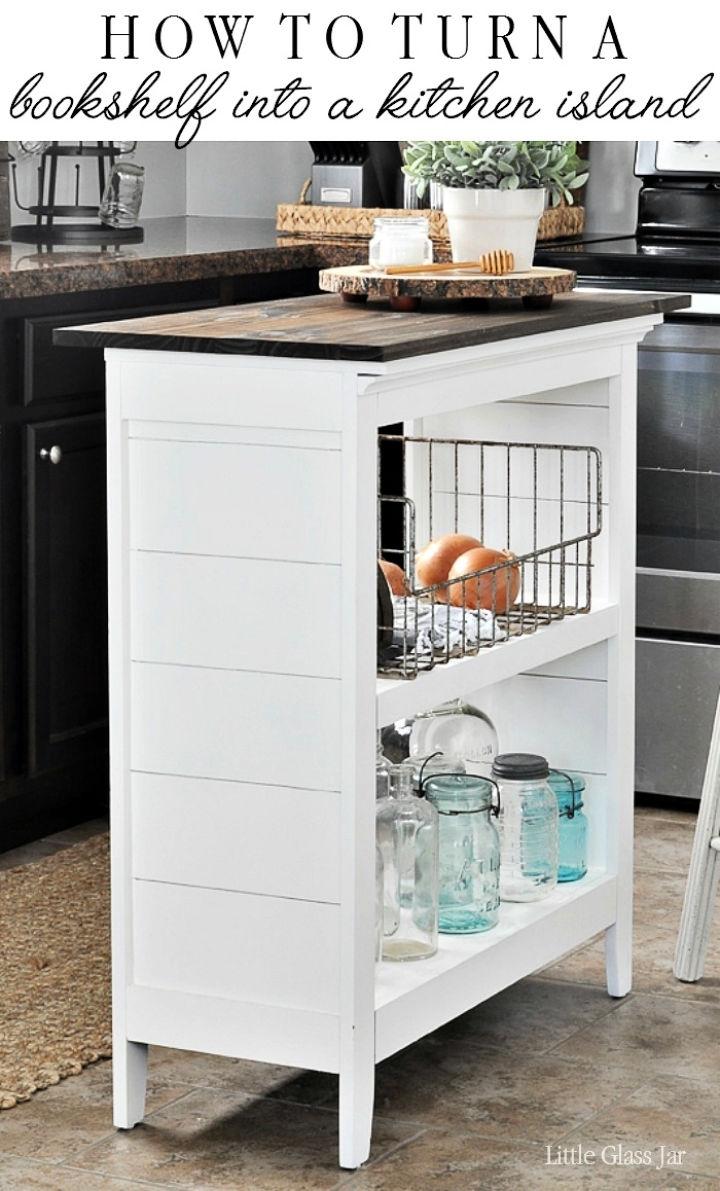
Transform your old bookshelf into a functional and stylish kitchen island with guidance from Little Glass Jar‘s detailed DIY tutorial. Learn how to repurpose a sturdy Bookshelf into a kitchen centerpiece that not only adds extra workspace but also enhances storage possibilities. With a list of necessary supplies and step-by-step instructions, this engaging guide makes it easy to customize an island that suits your taste and kitchen’s needs.
From priming and painting to making a shiplap look and attaching a wooden top, you’ll find helpful tips to ensure a smooth project process. Ideal for small kitchens, this cost-effective solution breathes new life into unused furniture, proving that a little creativity goes a long way in home decor.
13. Free Wooden Farmhouse Kitchen Island Plan
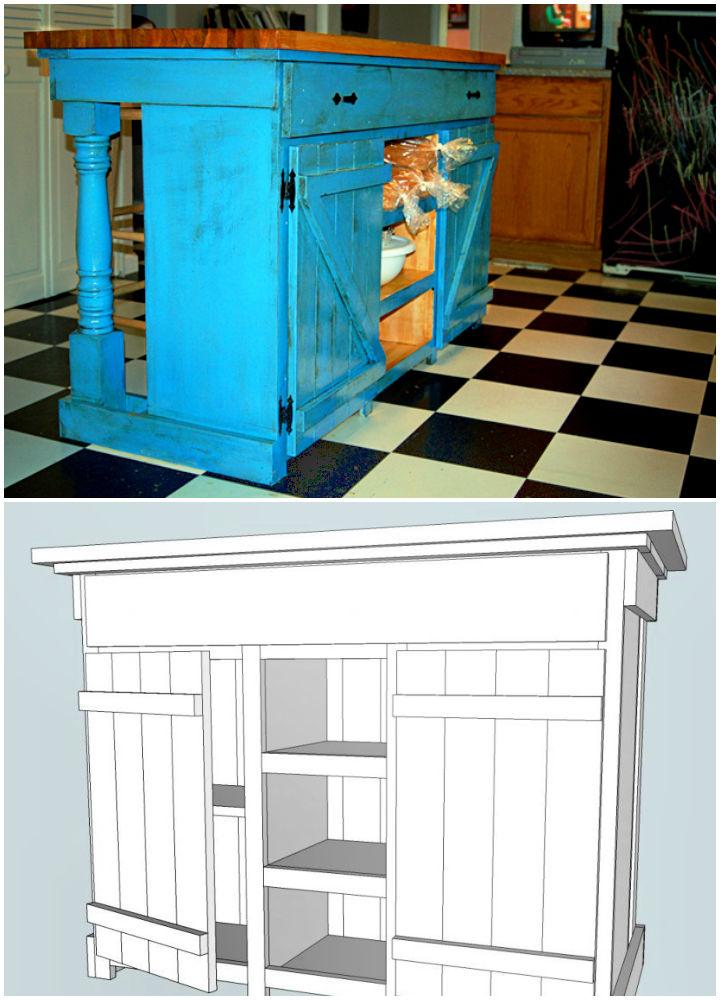
Transform your kitchen with our Farmhouse Kitchen Island & Bar Plans, an advanced-level project perfect for those who need extra storage and dislike chairs cluttering the kitchen space. Detailed plans provide dimensions and a comprehensive shopping list, ensuring you have all materials at hand before you start. The cut list is precise; however, remember to double-check your measurements as board widths can vary.
Step-by-step instructions guide you through building a robust frame, adding rustic back slats, and assembling the various components for a functional and stylish kitchen island. With a bar, large cupboards, shelves, and a drawer, there’s ample room for silpats, rolling pins, and other kitchen essentials.
For the finish, the guide recommends putty to fill holes, sanding for smoothness, and a coat of paint followed by polyurethane for durability. Customize the color to match your decor, and if you fancy a distressed look, consider sanding edges before applying a stain or glaze. This project requires attention to detail and a bit of woodworking prowess, but the outcome is a beautiful and practical addition to any kitchen. Ana White
14. Budget-Friendly DIY Kitchen Island
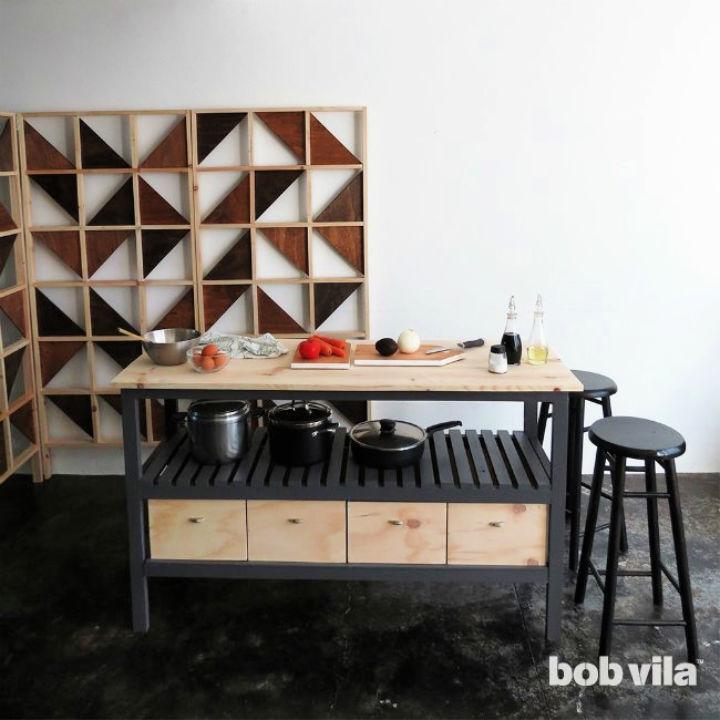
Transform your kitchen into a functional and stylish space with a custom-built island, courtesy of Bob Vila‘s comprehensive guide. This step-by-step tutorial walks you through making a practical kitchen centerpiece, perfect for storage, prep, and more. Tailor the dimensions to suit your space and needs, and follow the clear instructions to construct a sturdy and attractive kitchen island that will enhance your culinary endeavors. With helpful tips on materials, cutting, assembly, and finishing touches, you’ll have everything you need to bring this project to life in your own home.
15. Simple and Easy Homemade Kitchen Island
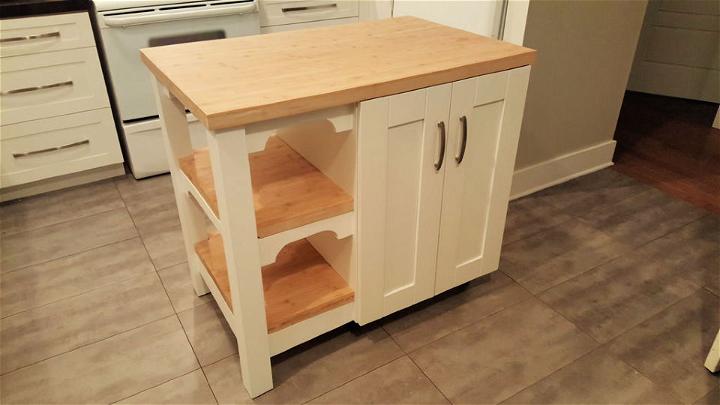
Transform your kitchen space with a custom island that combines style and function. Instructables guides you through making an affordable yet unique kitchen centerpiece. This project is perfect for those wanting to enhance their kitchen without crafting every component from scratch. By starting with a pre-made cabinet, you’ll save time and still achieve a personalized look.
Our step-by-step instructions ensure a smooth process, making it easier to assemble and customize your kitchen island to suit your home’s decor and your culinary needs. Embrace the satisfaction of DIY while elevating your kitchen’s appeal with a one-of-a-kind island that’s both practical and chic.
16. Custom Rolling Kitchen Island on Wheels
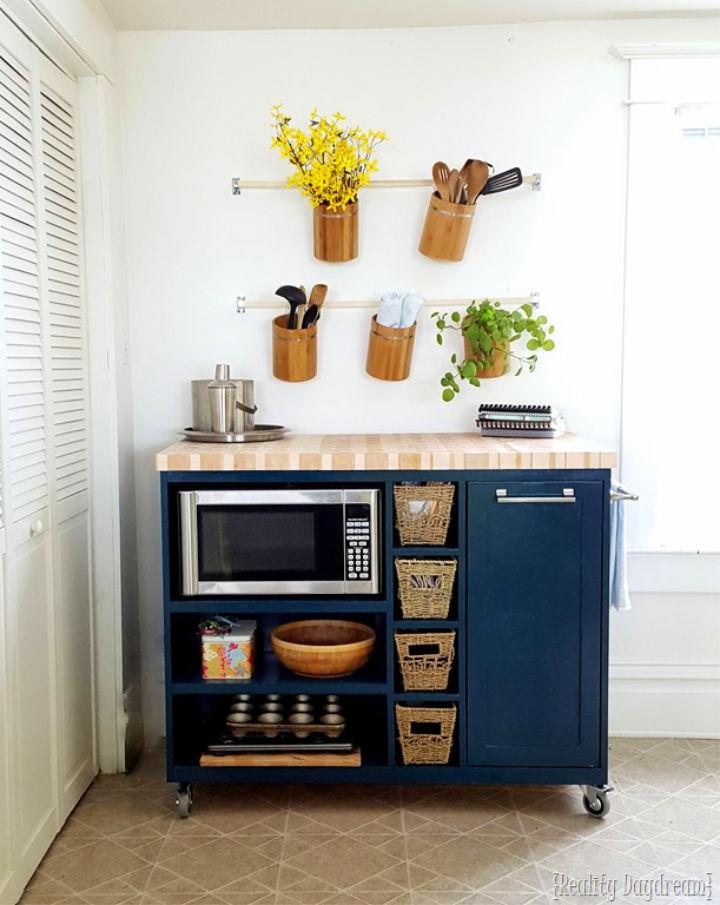
Transform your kitchen with a custom DIY rolling island by following the detailed guide on Reality Daydream. Bethany Sy offers a comprehensive plan, complete with step-by-step instructions and images, to help you build a functional and stylish addition to your culinary space.
With practical tips on woodworking, assembly, and finishing touches, this resource empowers you to build a beautiful kitchen centerpiece that meets your specific needs. Perfect for adding extra storage and worktop space, this DIY project is a smart way to enhance your kitchen’s efficiency and aesthetics.
17. How to Make a Wood Kitchen Island – Free Plans
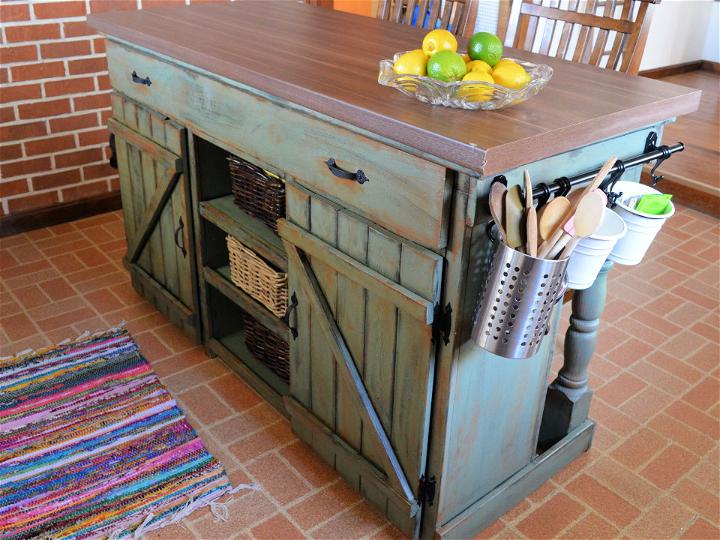
Transform your kitchen with a custom-built farmhouse island, courtesy of Ana White‘s inspiring DIY project. Perfect for intermediate-level crafters, this kitchen centerpiece was created with affordable materials, including whiteboard lumber and a laminate countertop.
Add a touch of rustic charm with a green paint finish, complemented by black and chestnut dry-brushed distressing. This weekend endeavor not only enhances your space but also offers the satisfaction of handcrafting a functional piece of furniture. Embrace this engaging and instructive guide to elevate your home with a personalized kitchen island that’s sure to impress.
18. Cheap DIY Wooden Kitchen Island
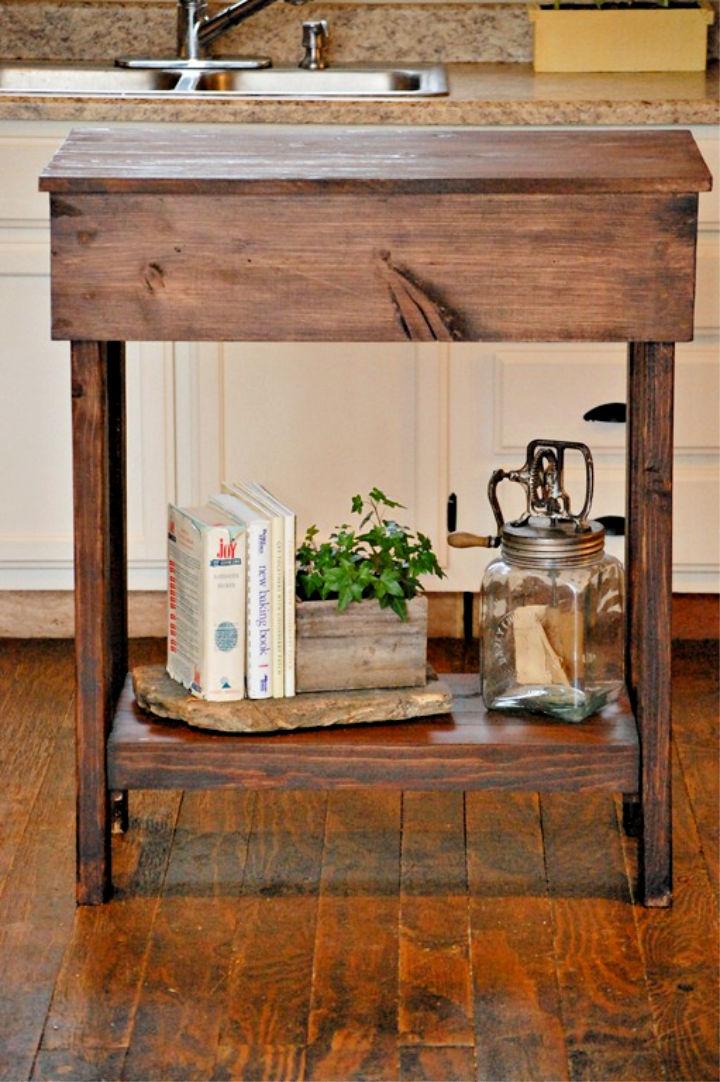
Transform your kitchen space with a custom-built island following the guide on Our Vintage Home blog. This DIY project is perfect for enhancing functionality and adding a touch of personal style to your kitchen, regardless of its size. With a comprehensive tutorial and a materials list costing around $31, you can build a solid wood island tailored to your needs.
The process involves cutting boards, assembling the structure, and adding finishing touches with wood putty, sandpaper, and paint or stain. Ideal for adding extra prep space and storage, this kitchen island project is accessible, affordable, and rewarding to complete. For any queries on the build, reach out for support and get ready to enhance your kitchen with this practical addition. Cedar Tree Farmhouse
19. Build Your Own Wooden Kitchen Island
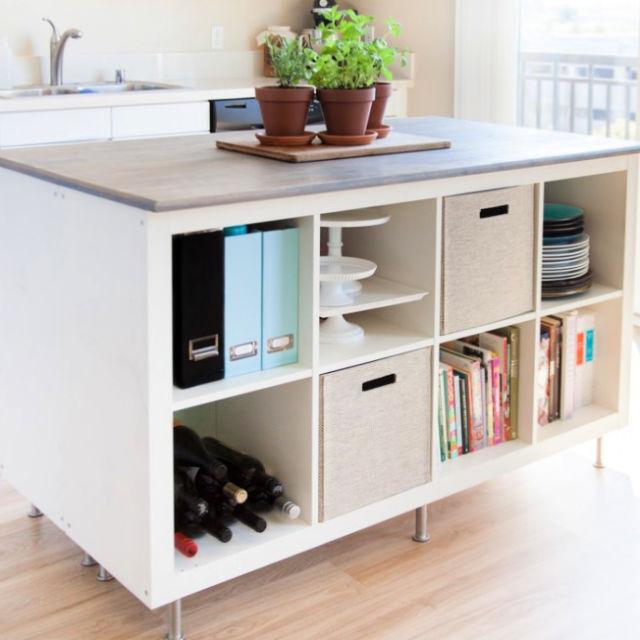
Transform your kitchen with a DIY kitchen island that maximizes storage and workspace! Kreating Homes shares a clever upcycling project where old Ikea Expedit bookcases become a functional centerpiece for any loft or large kitchen. This island isn’t just a quick fix; it’s a durable solution that adds character and practicality to your cooking space.
With easy-to-follow steps, you can build an island that houses everything from cookbooks to water bottles, hidden neatly in stylish fabric storage bins. Perfect for food photographers or home chefs needing extra organization, this DIY island is a testament to savvy space utilization and creative reuse. Dive into the full guide to enhance your kitchen’s functionality and aesthetics.
20. Make a Rustic Kitchen Table Island
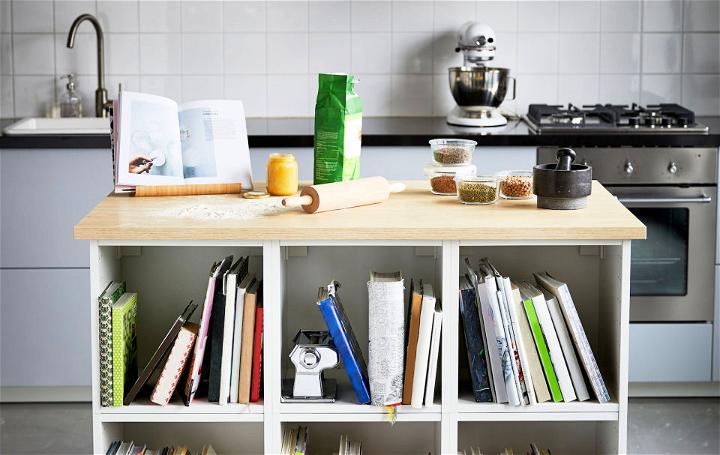
Making a DIY kitchen island with ample storage is a rewarding project that can enhance both the functionality and aesthetic of your kitchen. Our step-by-step guide offers clear instructions to build a robust island, perfect for avid bakers and culinary aficionados. Start by constructing a sturdy wooden frame and then assemble METOD cabinets for generous space to stow away baking tools and cookbooks.
Finish with a sleek countertop for a spacious work area. Remember, customizing products may affect guarantees and return policies, but it’s a great way to personalize your space. Dive into this DIY endeavor and make your kitchen more inviting and efficient. Ikea
21. Affordable DIY Kitchen Rolling Island
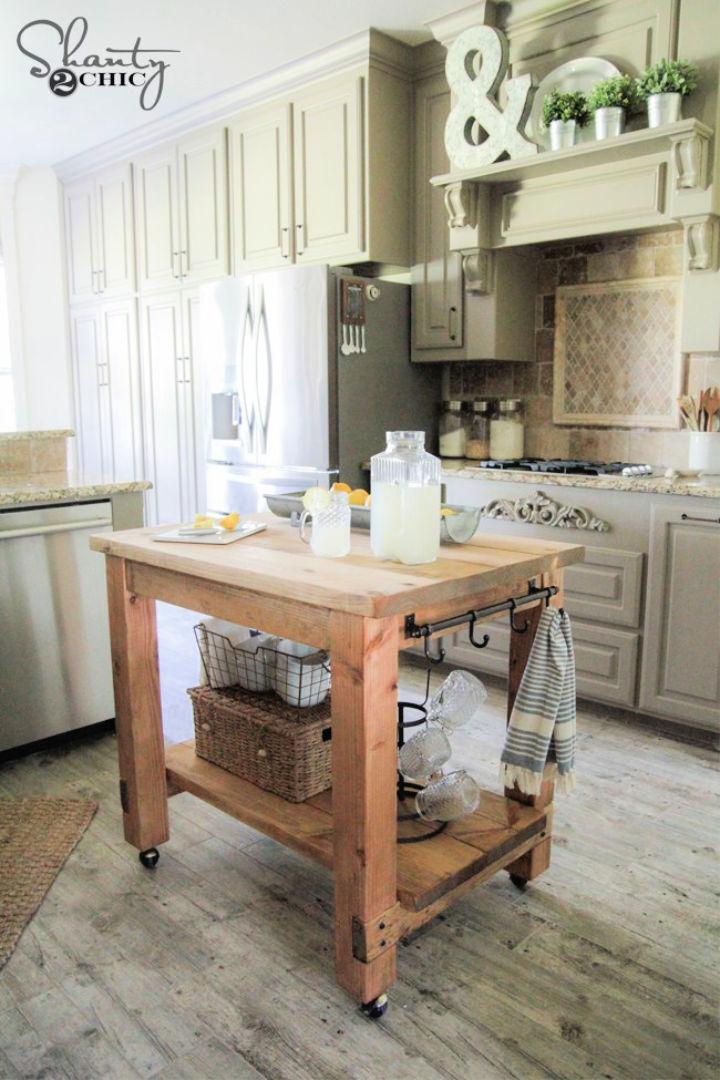
Transform your kitchen with a DIY island inspired by Pottery Barn, courtesy of Shanty 2 Chic. This engaging project is not only cost-effective, with the entire build coming in at around $85, but it also offers a versatile solution for homes where space is at a premium. The island can be moved easily thanks to its caster wheels—ideal for rolling away when not in use.
With an instructive guide, including tips on using a Kreg Jig for pocket holes and achieving a rustic finish with wood stain and strategic sanding, this project is accessible for those keen on crafting their own furniture. Dive into the full set of free plans available through Shanty 2 Chic’s collaboration with Ana White and add a personal touch to your kitchen space.
22. How to Build a Kitchen Island With Printable Blueprints

Transform your kitchen with a DIY Kitchen Island from Cherished Bliss. This step-by-step guide provides all the necessary instructions, supply lists, and helpful tips to build a functional and stylish centerpiece for your kitchen space. Ideal for adding extra storage and enhancing workflow, this project is perfect for those who enjoy hands-on home improvements.
With clear, engaging, and easy-to-follow directions, you’ll be able to construct a custom kitchen island that not only meets your needs but also complements your home’s aesthetic. Dive into this project and upgrade your kitchen’s appeal and functionality.
23. Pottery Barn Inspired Kitchen Island
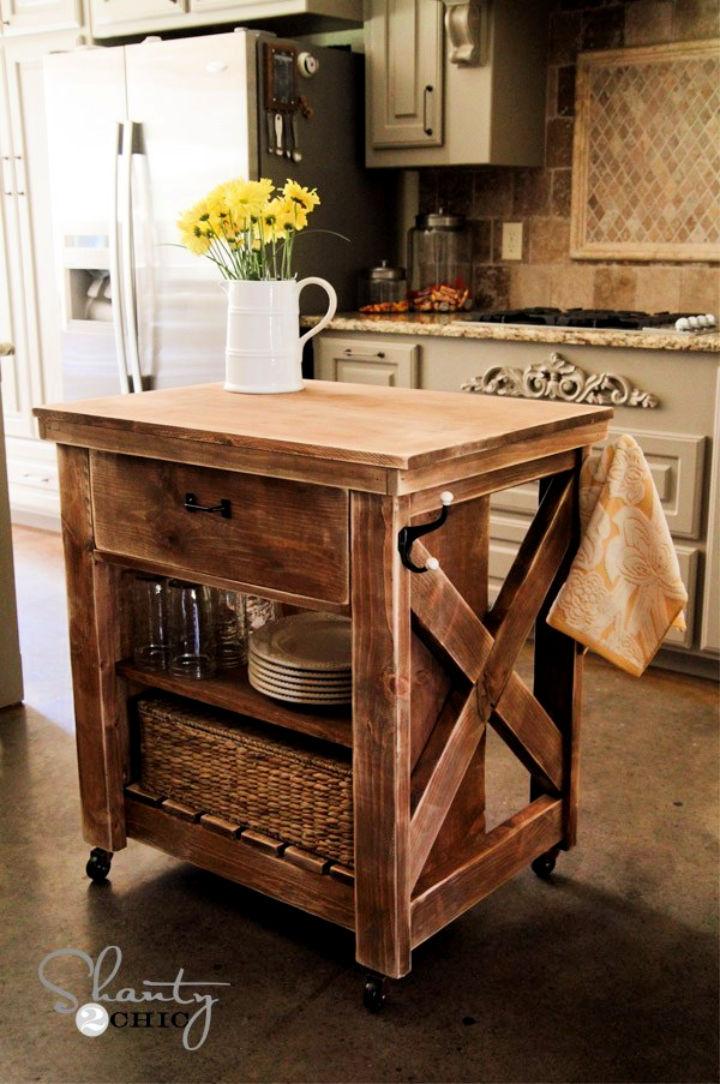
Ready to enhance your kitchen with a custom island that adds functionality and style? Shanty 2 Chic presents an easy-to-follow DIY Kitchen Island tutorial complete with free plans. Dive into this project, even if you’re new to woodworking, and discover how straightforward cuts and a little effort can transform your space.
The guide offers step-by-step instructions, from selecting the right lumber to the final touches of staining and hardware installation. Equipped with clear images and detailed measurements, you’ll find assembling your new kitchen centerpiece both achievable and rewarding. Start crafting your kitchen upgrade today and enjoy the satisfaction of a personalized touch in your home.
24. Awesome DIY Kitchen Island Makeover
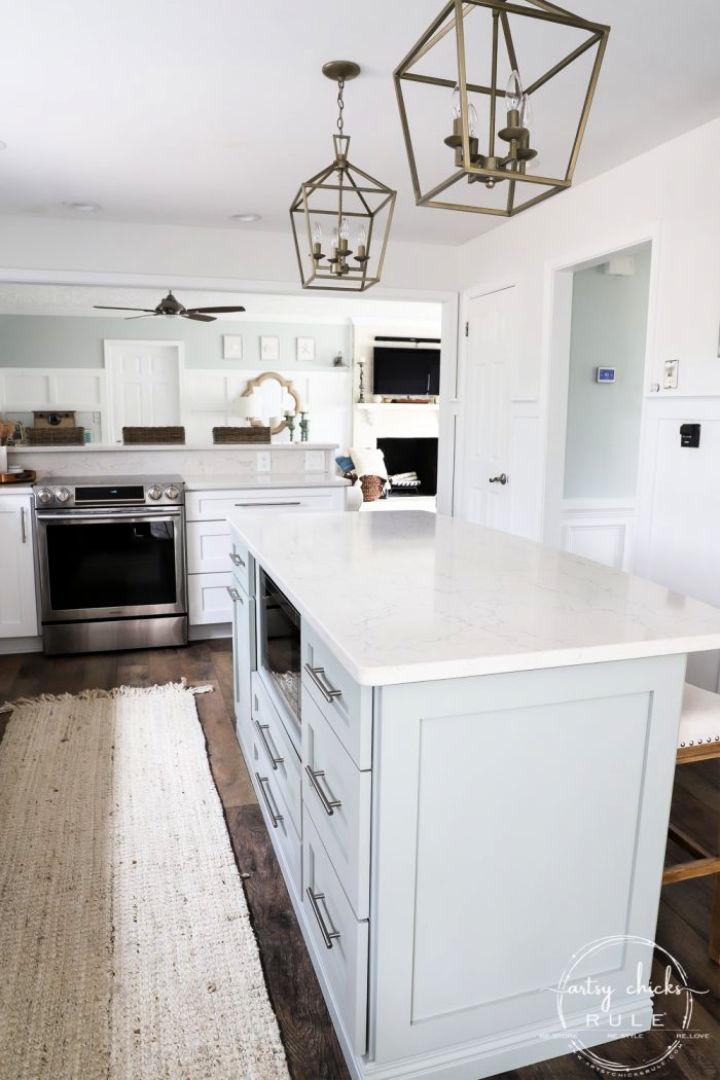
Transform your kitchen with a DIY island using big box store cabinets, as detailed on Artsy Chicks Rule®. Nancy walks you through her own kitchen island’s evolution, offering inspiration and practical advice for making a custom look without breaking the bank.
With step-by-step guidance on selecting cabinets, adding stylish panels, and choosing the perfect paint color, you’ll be equipped to craft a centerpiece that elevates your kitchen’s functionality and aesthetic. Dive into this engaging and helpful resource to make your kitchen island project a reality.
25. How to Make a Furniture-Style Kitchen Island
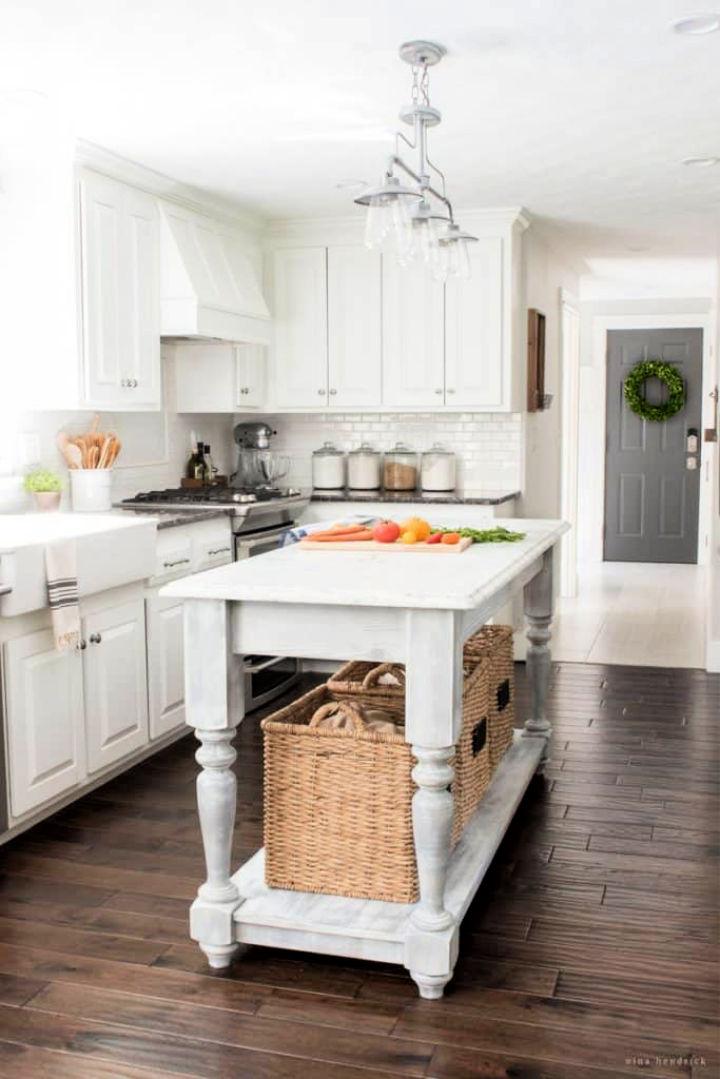
Transform your kitchen with a custom-built DIY island using Nina Hendrick Home‘s comprehensive tutorial and step-by-step plans. Ideal for adding a touch of elegance and practicality to your space, this guide is perfect for those who enjoy hands-on projects.
With clear instructions and helpful tips, you can build a Furniture-Style centerpiece that enhances your kitchen’s functionality and style. Embrace the satisfaction of crafting a beautiful kitchen island that is sure to impress and serve as a focal point in your home.
Conclusion:
In conclusion, crafting your very own kitchen island has never been more achievable thanks to this comprehensive guide on How to Build a Kitchen Island (25 DIY Kitchen Island Plans). With a variety of styles and functions detailed in these plans, you can enhance your kitchen’s aesthetics and functionality. Remember, a well-executed DIY kitchen island can not only serve as a central hub for meals and gatherings but also significantly boost your home’s value. So, grab your tools and let your creativity and expertise shine as you transform your kitchen into a space that truly reflects your personal style and needs. Happy building!
