Storing necklaces without a tangle in sight can be a challenge. Our 26 easy DIY necklace holder ideas provide a clever solution to display and organize your collection. These DIY necklace holder ideas use materials like wood scraps and upcycled frames, allowing you to display your jewelry with style and ease. Each DIY necklace holder is an opportunity to express creativity and achieve a clutter-free space.
Making a DIY necklace organizer is a delightful way to protect and arrange your treasures. From rustic charm to modern chic, our guide offers a range of designs suited to any decor. As you dive into these clever storage solutions, you’ll find that assembling a personalized accessory display is both rewarding and functional. Get ready to transform your tangled jewels into an orderly, eye-catching display.
Now, step into our world of DIY necklace holders and discover how easy it is to craft a space-saving jewelry organizer for your cherished necklaces.

Why Make a DIY Necklace Holder?
Making a DIY necklace holder can significantly enhance your daily routine and home organization. Here’s why you should consider crafting one:
- Minimize Tangles: Necklaces can easily become entwined and knotted when tossed in a drawer. A holder keeps each piece separate and accessible.
- Display Your Collection: Rather than hiding your jewelry away, a DIY holder can turn your necklaces into a decorative feature in your room.
- Cost-Effective: Instead of purchasing expensive organizers, using materials you already have can save money and achieve the same result.
- Customization: Tailor your holder to fit your space and style preferences, ensuring it complements your home decor perfectly.
- Reduce Clutter: By having a dedicated space for your necklaces, you can declutter surfaces like dressers and countertops.
- Easy Access: Getting ready is smoother when you can quickly see and select the necklace you want to wear.
- Repurpose Materials: It’s an eco-friendly solution that reuses materials that might otherwise be discarded.
- Personal Satisfaction: There’s a sense of pride and accomplishment that comes from making something useful with your own hands.
- Perfect Gift Idea: A handcrafted necklace holder is a thoughtful and personalized gift for friends and family.
In short, DIY necklace holders are practical, cost-efficient, and customizable. They simplify your life while adding charm to your space. By making one, you’re taking a step toward better organization, saving money, and expressing your creativity.
How to Make Your Own DIY Necklace Holder
Making a DIY necklace holder is a great way to keep your jewelry organized, untangled, and easily accessible. Below, you’ll find a helpful guide to making your own necklace holder at home with a few simple tools and materials. Let’s get crafty and make something both functional and stylish!
Choose Your Base Material
Materials You Will Need:
- Wood (such as a small wooden plank or an old picture frame)
- Paint or wood stain (optional for aesthetics)
- Hooks (cup hooks are commonly used)
- Sandpaper (if working with wood)
- Drill or screwdriver (to secure hooks)
Steps:
- Select Your Wood: Choose a wooden plank or an old picture frame as the base for your necklace holder. Make sure it is smooth and free from splinters.
- Sand It Down: Use sandpaper to smooth out any rough edges or surfaces.
- Customize Your Design: Paint or stain the wood in a color that complements your decor. This step is optional but adds a personal touch.
Installing Hooks
Steps:
- Measure and Mark: Before, measure the wood and mark where you want to place the hooks. Ensure they are spaced out evenly.
- Drill Holes: Carefully drill small pilot holes at each mark. This will make it easier to screw in the hooks.
- Attach Hooks: Screw the hooks into the pilot holes by hand or use a screwdriver for a secure fit.
Mounting Your DIY Necklace Holder
Options for Mounting:
- Wall mounting with nails or picture hangers
- Adhesive strips for a damage-free option
- Standing on a dresser with a supportive base
Steps:
- Choose Your Mounting Method: Decide whether you want to mount the holder on the wall or have it stand on a surface.
- Prepare for Hanging: If wall-mounted, attach picture hangers to the back of the wood or use adhesive strips if you prefer a damage-free option.
- Secure It in Place: Mount it on the wall, ensuring it’s level, or set it on your dresser with a sturdy base.
Final Touches
- Organize Your Jewelry: Hang your necklaces on the hooks, sorting them by length, style, or frequency of use.
- Add Decorative Elements: Consider attaching small decorative items to the frame or adding a fabric backing for added flair.
Tips for Success
- Be Mindful of Weight: Ensure the hooks and mounting method you choose can support the weight of your jewelry.
- Protect Your Walls: If you’re renting or concerned about wall damage, use adhesive strips or a standing holder.
- Regular Maintenance: Periodically tighten the hooks and check the mounting stability to keep your jewelry safe.
By following these steps, you can make a necklace holder that is not only practical but also enhances the decor of your space. Plus, the satisfaction of DIY-ing something so useful is a reward in itself. Enjoy your clutter-free and stylish jewelry organization!
Frequently Asked Questions (FAQs) About DIY Necklace Holders
What materials do I need to make a DIY necklace holder?
To make your own necklace holder, you generally need:
- A base material like a wooden plank or an old picture frame
- Paint or wood stain (optional for aesthetic purposes)
- Hooks, such as cup hooks
- Sandpaper (if you’re working with wood)
- A drill or screwdriver to attach the hooks
How can I make sure my DIY necklace holder is sturdy?
To ensure sturdiness:
- Choose a solid wood base that can support the weight of your jewelry.
- Space your hooks evenly and secure them properly with pilot holes.
- If wall-mounted, use appropriate hanging hardware or damage-free adhesive strips based on the weight of the holder.
Can I make a necklace holder without damaging my walls?
Yes, you can use:
- Adhesive strips designed to hold weight without leaving marks
- A freestanding holder that rests on a dresser or shelf
What’s the easiest type of DIY necklace holder to make?
The easiest DIY holder involves:
- Using an existing picture frame and simply adding hooks to it
- Repurposing a rake or driftwood by attaching it to the wall and using it as a hanger
How do I prevent my necklaces from tangling on the holder?
To prevent tangling:
- Space hooks far enough apart so necklaces hang freely
- Group necklaces by length, ensuring shorter ones are not overshadowed by longer pieces
Can I make a necklace holder that doubles as room decor?
Absolutely! Consider these creative ideas:
- Paint or decorate the base to match your room’s theme
- Use a unique material like driftwood or an antique rake for a rustic look
- Arrange your necklaces by color for a visually appealing display
Is it possible to make a travel-friendly necklace holder?
Yes, for a travel-friendly version:
- Make a roll-up organizer using fabric with sewn-in compartments or loops
- Use a small corkboard that can fit into your luggage
How do I maintain my DIY necklace holder?
To maintain your holder:
- Occasionally tighten any loose hooks
- If wall-mounted, check the stability of the mount
- Clean the base material as needed to keep it looking fresh
Remember, making a DIY necklace holder is not just about organization; it’s a chance to express your creativity and add a personalized touch to your space. With these helpful tips, you’re ready to start your project and enjoy a more organized and stylish way to store your jewelry.
26 DIY Necklace Holder Ideas for An Organized Display
Discover 26 creative DIY necklace holder ideas to keep your jewelry collection organized and beautifully displayed.
1. Making a Necklace Holder Out of Picture Frame
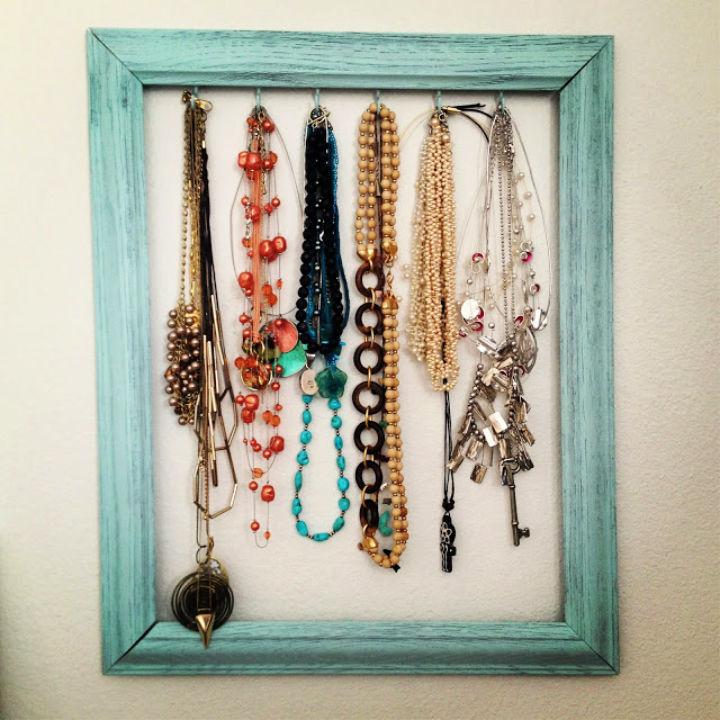
Make a stylish and functional necklace holder with this easy DIY project. Transform an old frame into a chic jewelry organizer using simple materials like paint, hooks, and a few tools. Follow our step-by-step guide to measure, mark, and install hooks, then give your frame a fresh coat of paint to match your decor.
Once dry, hang your necklaces to keep them tangle-free and add a touch of personality to your space. Perfect for anyone looking to tidy up their accessories with a personalized touch, this necklace holder is not only practical but also serves as a unique piece of wall art. Mountains And Mode
2. DIY Rake Necklace Hanger
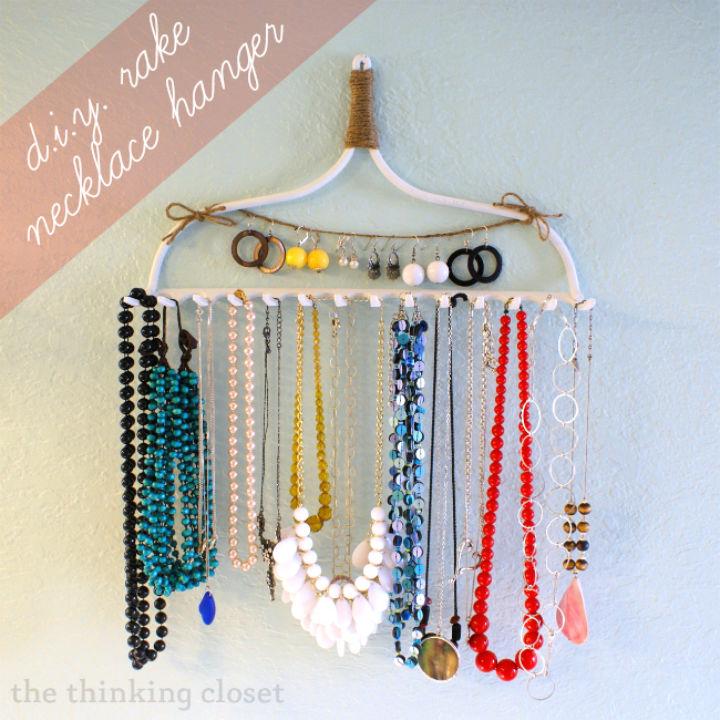
Transform your cluttered necklace collection into an organized display with a DIY Rake Necklace Hanger. Lauren from The Thinking Closet guides you through the creative process, turning a simple garden rake into a stylish and functional jewelry organizer.
With a step-by-step tutorial, this project is perfect for anyone seeking to add a touch of rustic charm to their space while keeping necklaces tangle-free and accessible. Grab a rake, some paint, and a few tools, and get ready to craft a unique hanger that not only saves your jewelry from the dreaded no-man’s-land behind the vanity but also serves as an eye-catching piece in your home.
3. How to Make a Necklace Holder
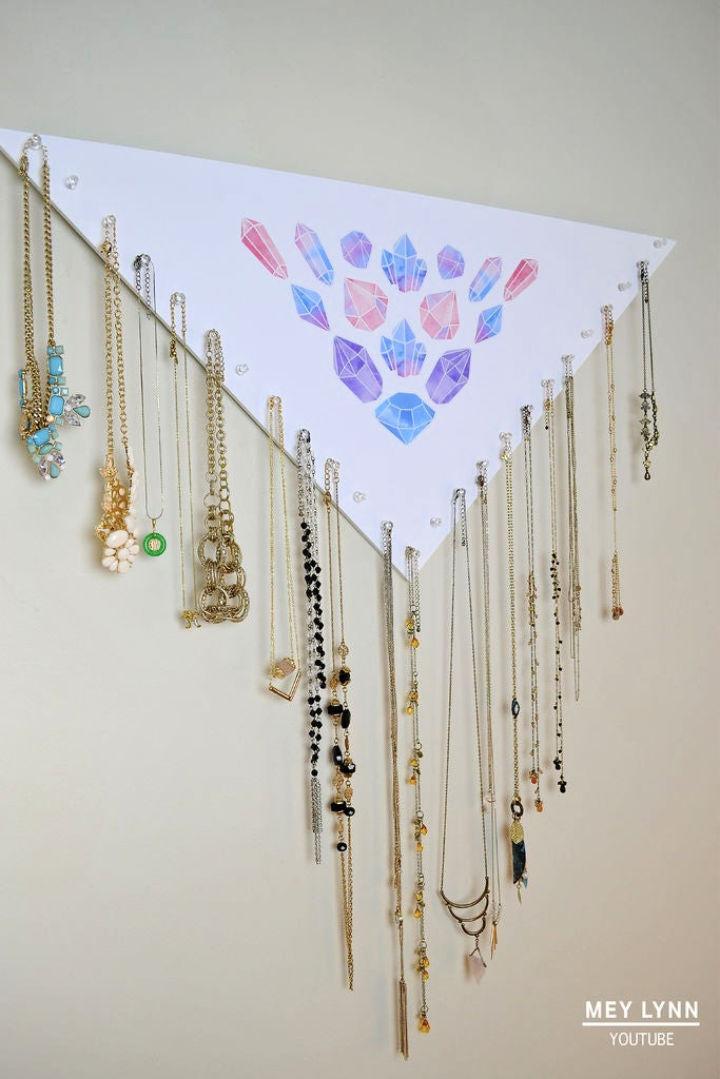
Make your own stylish and functional necklace holder with this DIY guide from Instructables. If you’re tired of tangled jewelry and cluttered spaces, this project is perfect for you. Utilize common household items and simple techniques to craft a personalized and chic organizer for your necklaces.
The process requires minimal effort and is budget-friendly, making it an ideal solution for keeping your accessories neatly displayed and easily accessible. Follow these easy steps and add a touch of creativity to your room’s decor while efficiently organizing your jewelry collection.
4. Necklace Holder to Organize Your Jewelry
Looking to organize your jewelry with a touch of personal style? A to Zen Life offers a fantastic solution with their DIY necklace holder guide. This project is not only easy to execute but also affordable, transforming a simple piece of wood into a chic and functional piece of wall art.
With clear step-by-step instructions, you can measure, drill, and assemble a necklace holder that not only tidies up your space but also showcases your necklaces beautifully. Ideal for those who enjoy crafting and customization, this guide helps you make a bespoke organizer that doubles as decor, ensuring your necklaces are
5. DIY Necklace Holder at Home
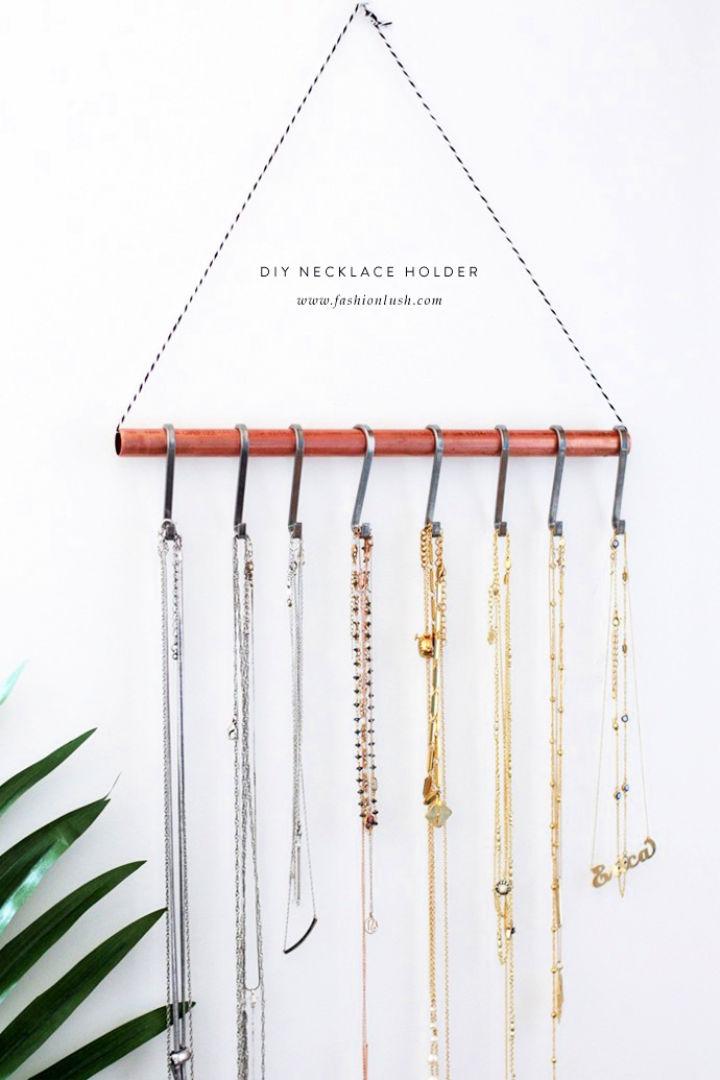
Struggling with tangled necklaces and cluttered jewelry? Simplify your life with a DIY necklace holder that’s both stylish and practical. Fashionlush offers an easy-to-follow guide on making a minimalistic necklace organizer using just a few materials like a copper pipe, bakers twine, and S hooks.
Not only is this project budget-friendly, but it also saves space, keeping your jewelry neatly displayed and within reach. Perfect for anyone keen on decluttering their space, this chic solution will transform how you store your favorite accessories. Give your necklaces a new home with this clever and functional DIY holder.
6. Making a Necklace Holder for Under $10
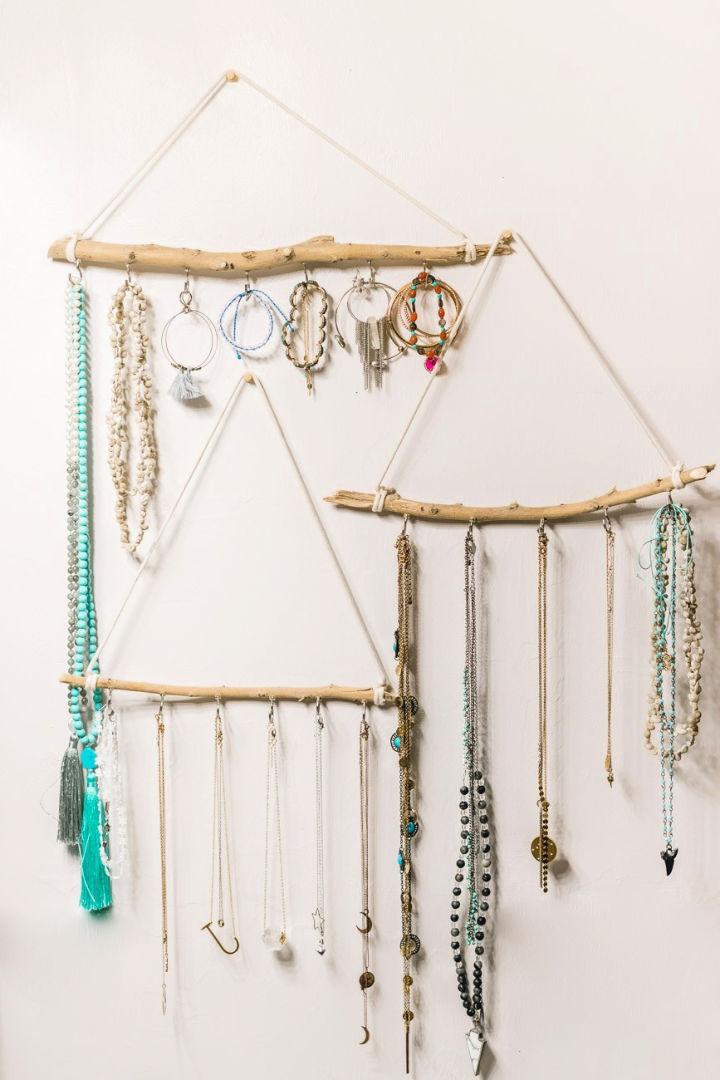
Make your own stylish DIY jewelry holder with materials that cost less than $10, following a simple guide from Sweet Teal. Perfect for keeping your accessories neatly organized, this project involves smoothing down sticks, screwing in hooks, and attaching macrame cord for hanging. The process is straightforward, and the result is a unique and functional piece of home decor.
Organize your jewelry by type, color, or any system that helps you find what you need quickly. Not only is this an economical craft, but it also adds a personalized touch to your space. Keep your jewelry in order and add a chic touch to your room with this easy-to-make jewelry holder.
7. DIY Wall Mounted Jewelry Organizer
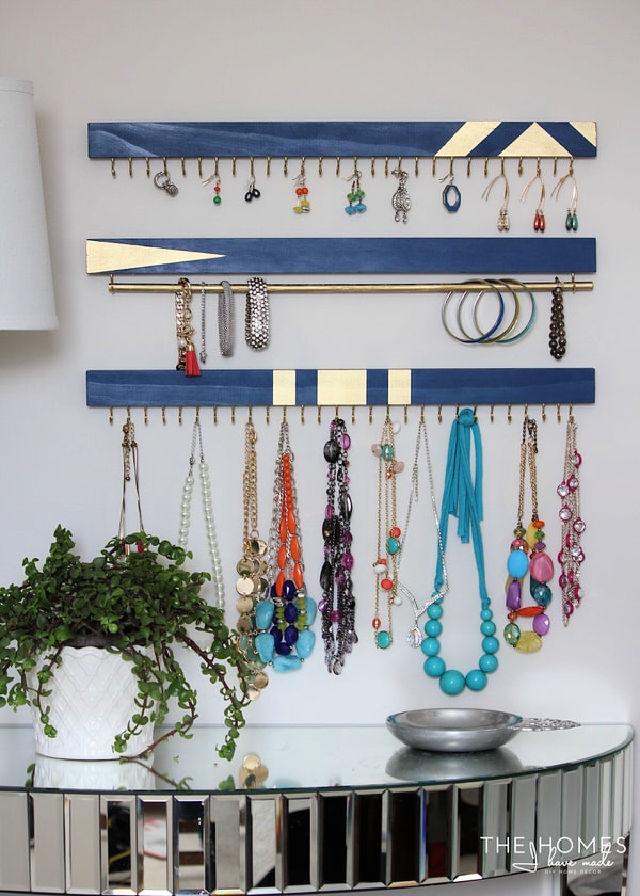
Develop an organized and visually appealing space for your jewelry with a simple DIY Jewelry Organizer. The Homes I Have Made provides a step-by-step guide to crafting a wall-mounted storage solution using common materials like 1×2 wood boards, cup hooks, and a wooden dowel. Customize it to fit your collection, ensuring your accessories stay tangle-free and easy to access.
This project is not only budget-friendly but also renter-friendly, thanks to damage-free hanging options. Get ready to transform your jewelry storage into a functional piece of art that enhances your room’s decor and makes selecting the perfect piece to wear a breeze.
8. Make Your Own Jewelry Holder
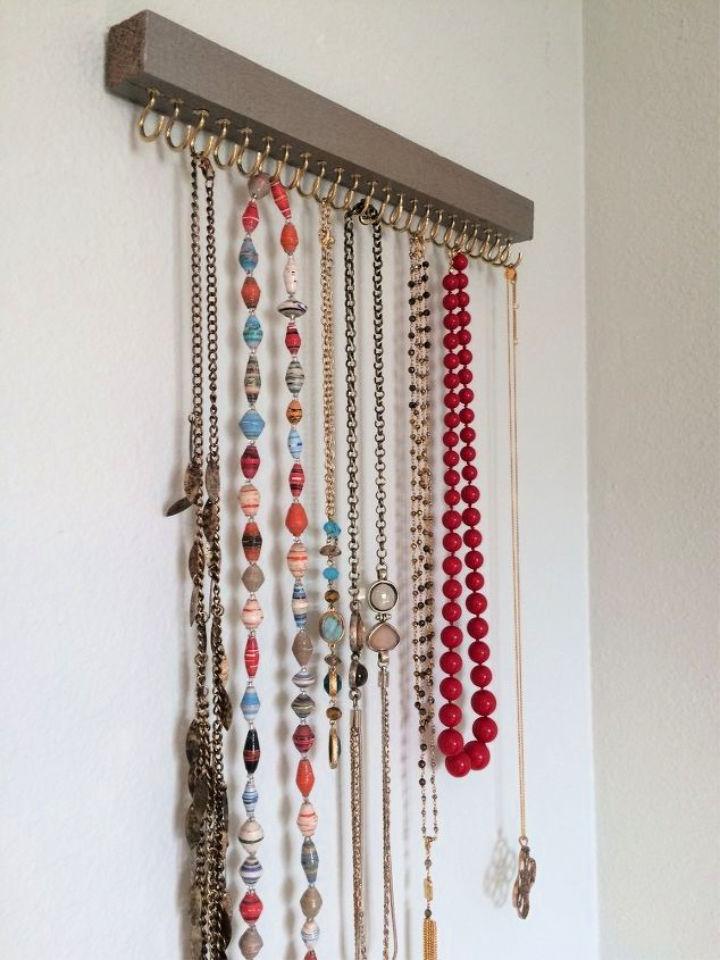
Looking to organize your jewelry and add a touch of style to your bedroom? Hometalk.com presents an easy and budget-friendly DIY Jewelry Holder project that will keep your precious items neatly displayed and away from curious little hands. With a simple wooden block, some hooks, and a bit of spray paint, you can make a functional and decorative piece for under $5.
This craft not only helps declutter your space but also brings a pop of color to your room, making it easier to select accessories when you’re getting ready. Follow the clear, step-by-step instructions to make your very own jewelry holder and enjoy a tidier, more vibrant bedroom setup.
9. Jewelry Organizer for Tangle-Free Necklaces
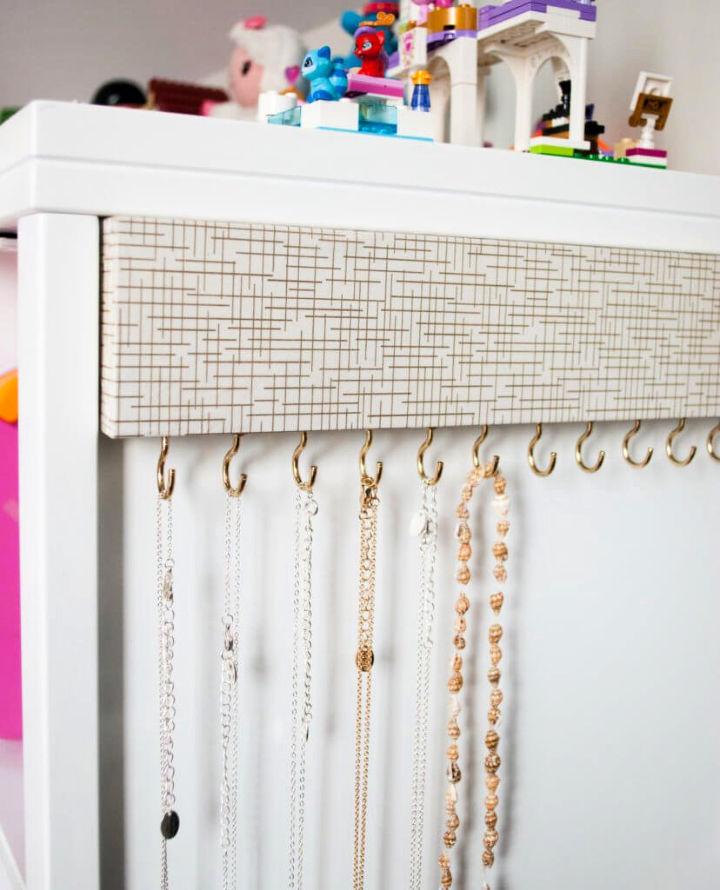
Organize your necklaces tangle-free with this easy DIY jewelry holder from Merriment Design. In a few simple steps, you can make an attractive and functional organizer using basic supplies like a piece of wood, cup hooks, and decorative paper. Perfect for those who want a custom solution without the clutter or cost, this project is not only budget-friendly but also adds a personalized touch to your space. Follow our instructive guide to craft your own chic necklace display, ensuring your jewelry is neatly showcased and ready to wear.
10. Upcycled Wood Jewelry Organizer
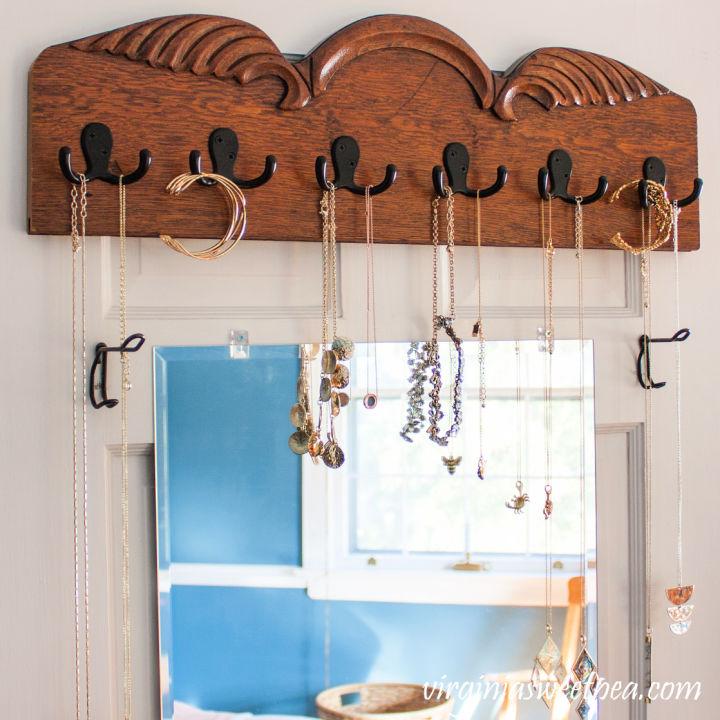
Transform your cluttered jewelry collection into an organized display with Sweet Pea‘s DIY Upcycled Wood Jewelry Organizer. This engaging project breathes new life into old wood, turning it into a stylish and functional piece that keeps your accessories in sight and within reach.
Perfect for small spaces, the organizer can be easily mounted on a wall or closet door, ensuring your favorite necklaces and bracelets are always ready to complement your outfit. With clear, step-by-step instructions and helpful tips on using tools like a center rule and router, crafting this jewelry organizer is both rewarding and practical. Keep your dresser clutter-free and your jewelry well-arranged with this chic, upcycled solution.
11. DIY Wooden Jewelry Holder
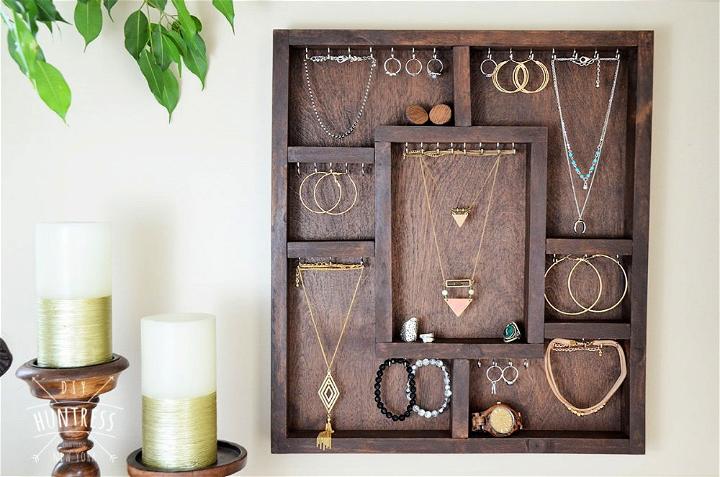
Make a custom DIY Wooden Jewelry Holder with guidance from DIY Huntress, Sam. This engaging project is perfect for gifting on Mother’s Day, birthdays, or other special occasions. The tutorial offers step-by-step instructions on cutting, assembling, and finishing a bohemian-inspired jewelry holder using simple tools and materials like wood, hooks, and stain.
With a focus on hands-on crafting, you can sign up for a free Do-It-Herself workshop at Home Depot to hone your skills. Embrace this creative endeavor and add a personal touch to your home decor, or make someone’s day with a thoughtful, handmade present.
12. Easy DIY Necklace Holder
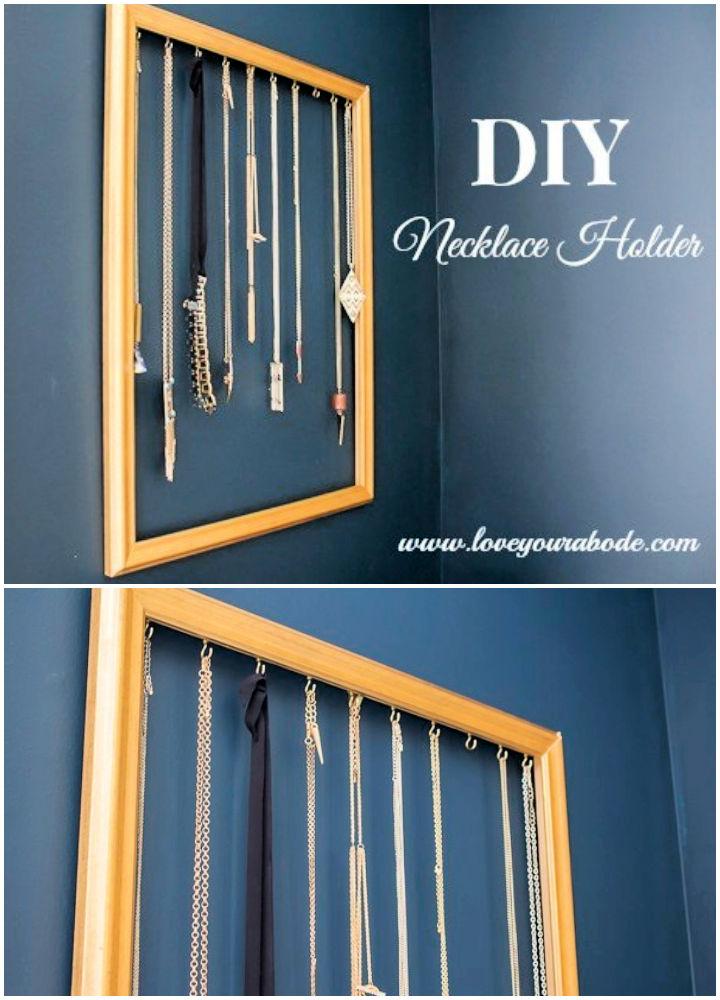
Build a charming and functional necklace holder with this simple DIY guide from I’m an Organizing Junkie. Organize your cherished jewelry pieces and keep them free from tangles by crafting your own stylish piece using a thrifted wooden frame, cup hooks, and a few basic tools.
Perfect for adding a touch of elegance to your bedroom decor, this necklace holder is an affordable solution that’s also great for gifting. Follow the step-by-step instructions and enjoy a clutter-free space that showcases your favorite necklaces beautifully. With this easy project, your accessories will always be within reach and displayed in an orderly fashion.
13. DIY Necklace Holder Stand With Copper Pipes
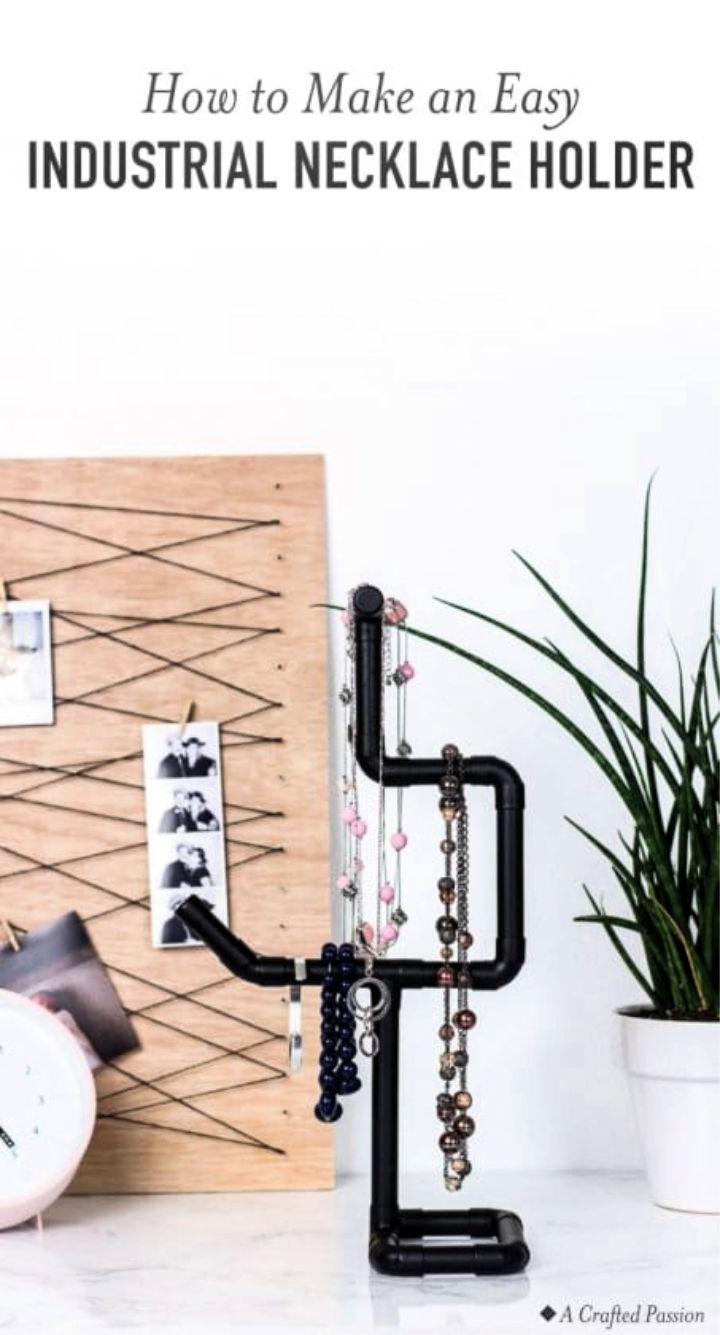
Build an industrial-style necklace holder with this DIY guide from A Crafted Passion. This project transforms copper pipes into a sleek, modern jewelry stand that’s perfect for displaying on your dresser. In just a few simple steps, you can cut, assemble, and paint your way to a chic organization solution. With clear instructions and a list of materials, crafting this piece is straightforward, ensuring a rewarding experience as you build a functional piece of decor. Keep your necklaces untangled and accessible while adding an industrial touch to your space.
14. Old Canvas to Jewelry Hanger
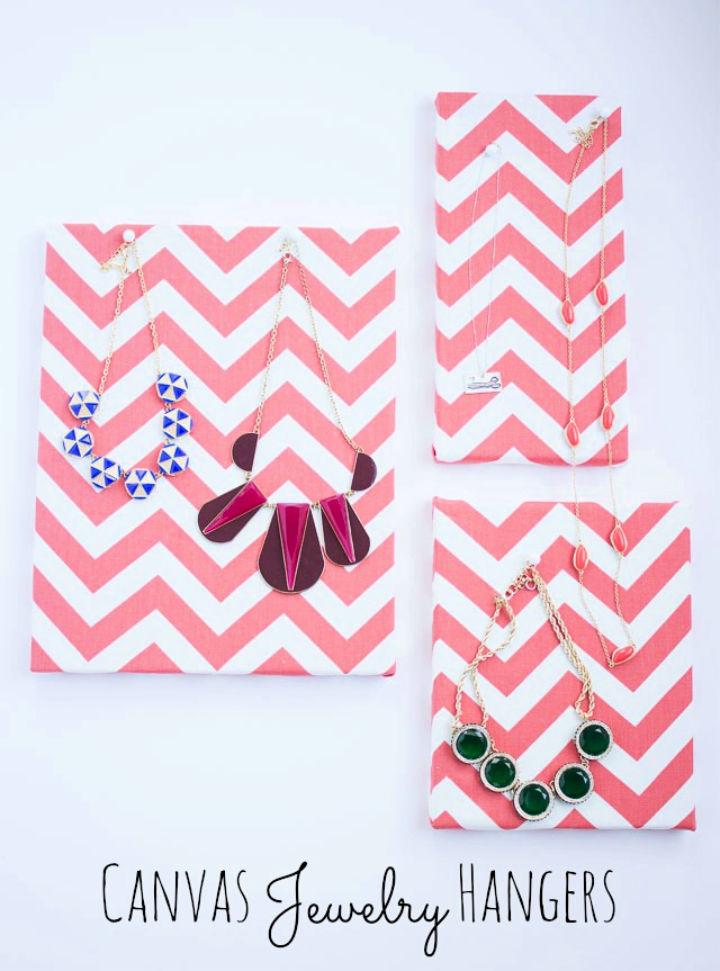
Transform your old canvases into chic necklace hangers with this creative DIY project from Design Improvised. Haeley Giambalvo guides you through the easy steps of repurposing canvases with stylish fabric to organize and display your jewelry. You’ll need small canvases, attractive fabric, a staple gun, scissors, and push pins.
Start by cutting the fabric to size, staple it securely to the canvas frame, and then use push pins to hang your necklaces. This practical and decorative solution not only helps declutter your space but also adds a personal touch to your decor. Simple, quick, and cost-effective, this craft is ideal for sprucing up your closet and keeping your favorite accessories within reach.
15. Homemade Necklace Holder
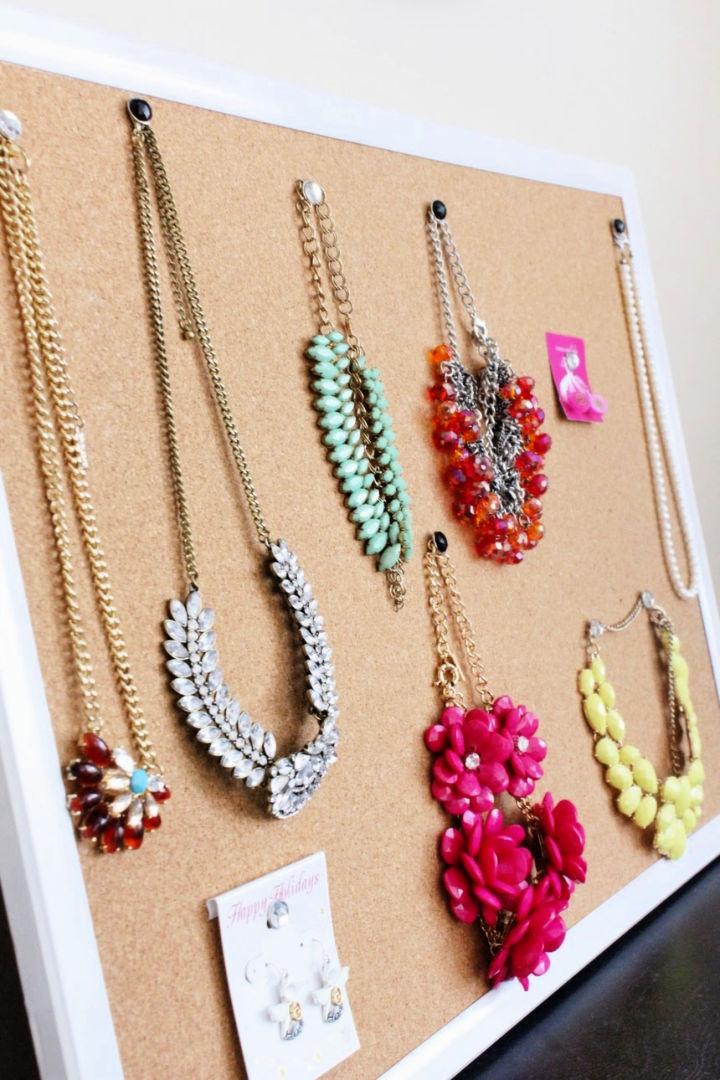
Discover a clever and straightforward way to keep your jewelry organized and out of reach from curious little hands with The Happy Flammily‘s DIY Jewelry Holder guide. Tackling this project is a breeze—even for those who aren’t typically crafty—with a few simple materials and a dash of creativity. The guide takes you through each step, from securing supplies at a bargain with savvy coupon use to the final touches of arranging your jewelry on the freshly painted holder. Keep your precious accessories safe and add a touch of personalized decor to your space with this practical and stylish solution.
16. DIY Window Frame Necklace Display
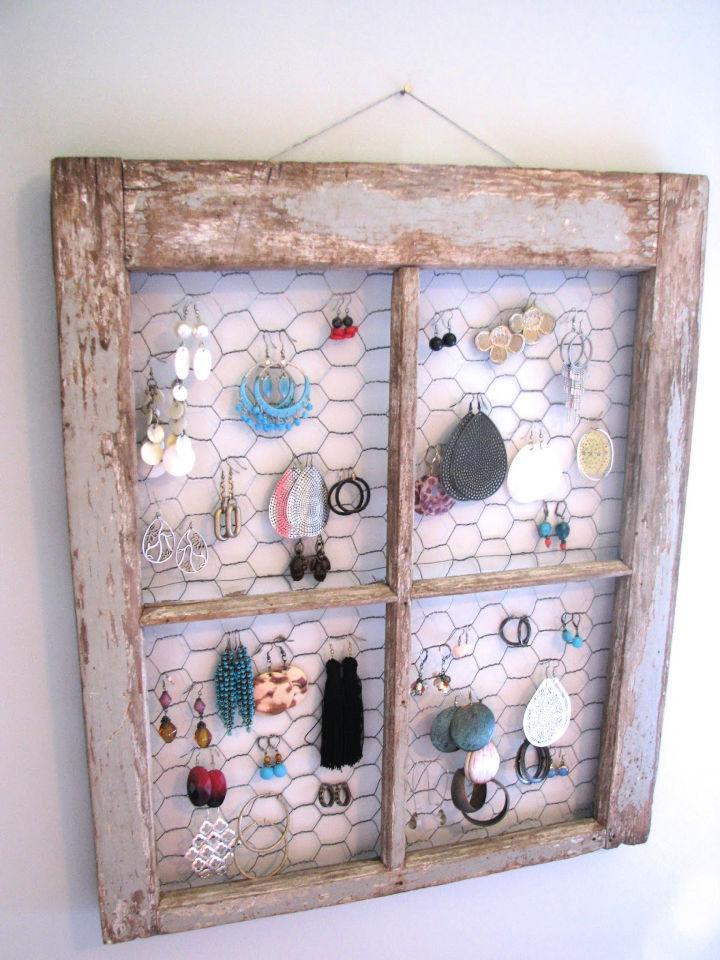
Revamp an old window frame into a charming DIY jewelry holder with Life Love Larson‘s creative guide. Transforming a once-forgotten piece into a daily essential, this project breathes new life into your space. Attach chicken wire to the frame for an easy earring display, and use paper clips for necklaces. It’s a simple, yet effective way to organize and showcase your favorite accessories.
Not only will your jewelry be neatly displayed, but you’ll also enjoy a piece of decor that tells a story with its weathered and distressed charm. Follow this engaging, step-by-step tutorial to make a practical and visually appealing jewelry organizer that celebrates the past while serving the present.
17. DIY Wooden Necklace Organizer
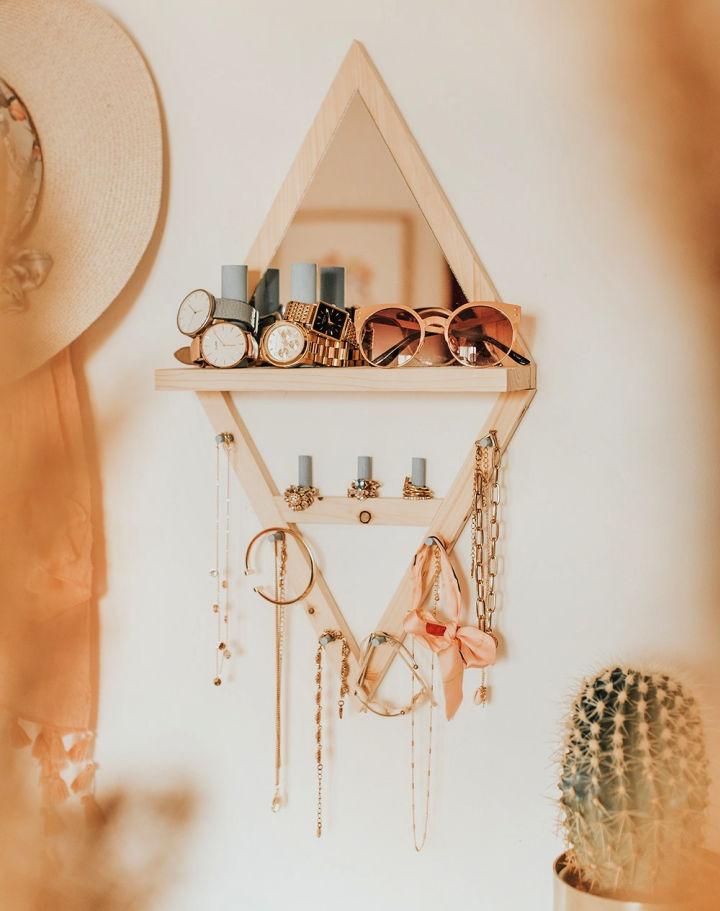
Make your own urban-outfitter-inspired wood jewelry organizer with a shelf using this step-by-step guide from Enthralling Gumption. This DIY project not only helps declutter and display your accessories neatly but also adds a stylish touch to your space.
With a detailed list of materials and clear instructions, you’ll transform pinewood and dowels into a functional piece of decor. Sand, drill, and assemble with ease, whether you’re enhancing your woodwork skills or diving into a new hobby. Paint your dowels for a pop of color and enjoy the satisfaction of crafting a custom organizer that’s both practical and chic.
18. Handmade Jewelry Holder
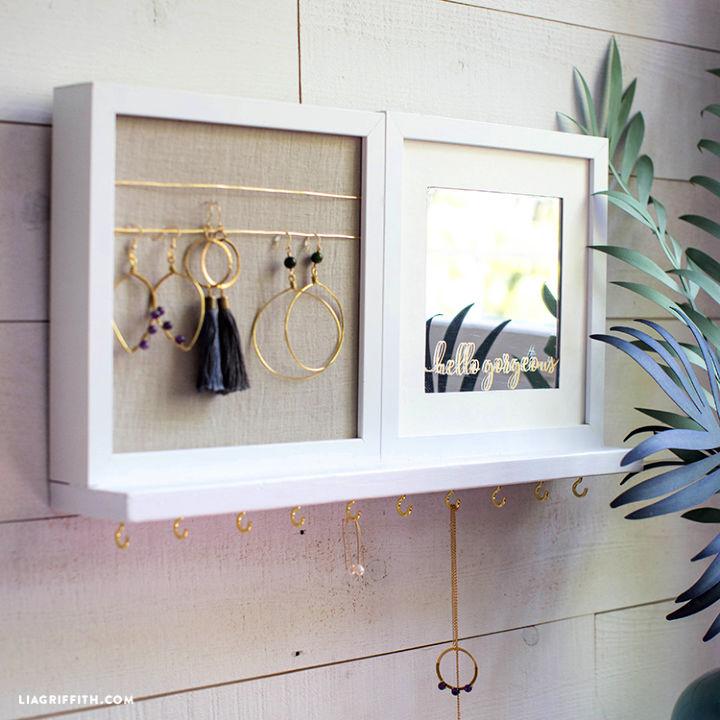
If you’re keen on organizing your jewelry in a chic and functional way, Lia Griffith offers an easy-to-follow DIY jewelry holder project. This creative endeavor allows you to craft a personalized space for your earrings, necklaces, and bracelets, ensuring they stay untangled and ready to accessorize your outfits. The project involves simple tools and materials like picture frames, wood, a mirror, and a few others you might already have at home.
With clear steps that guide you through the process, you’ll paint, cut, glue, and assemble a jewelry holder complete with a mini mirror for those last-minute checks. Not only does this DIY project result in a practical item for your home, but it also gives you the satisfaction of making something beautiful and unique for your personal use. Dive into the Lia Griffith membership for access to this and thousands of other high-quality craft projects to enhance your crafting journey.
19. DIY Jewelry Holder for Heavy Necklaces
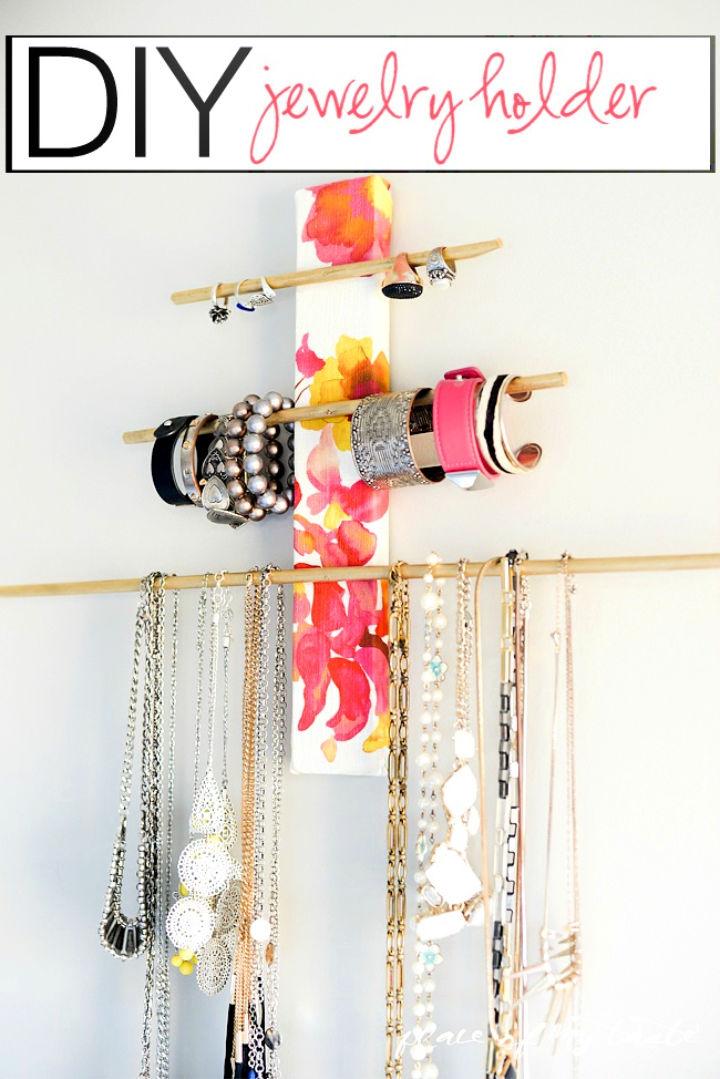
Make your own chic DIY jewelry holder with this engaging tutorial from Place Of My Taste. Ideal for organizing your collection of necklaces, bracelets, and rings, this project is not only functional but also adds a contemporary touch to your decor. With a simple list of materials like wood panels, fabric, metallic gold spray paint, wood rods, nails, and a sawtooth hanger, you can craft a stylish addition to your bedroom wall. This guide is helpful, easy to follow, and perfect for anyone wanting to bring a personalized flair to their space. Happy crafting and organizing!
20. Picture Frame Necklace Holder
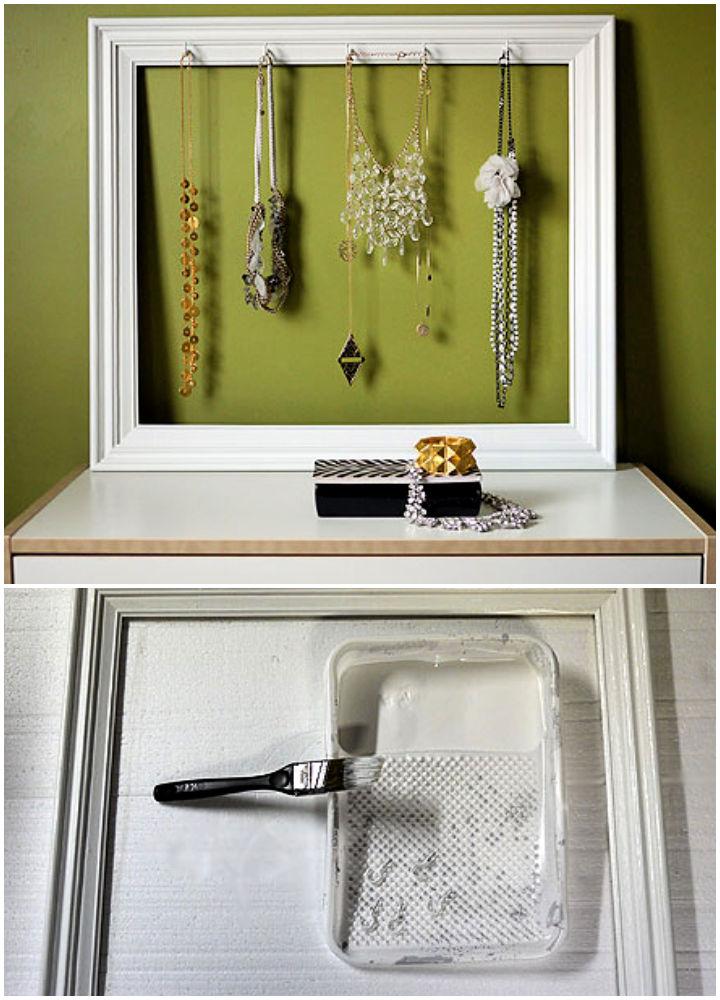
Transform an old picture frame into a chic necklace holder with this easy DIY guide from The Budget Babe. All you need is a wooden frame, some hooks, and a bit of paint to make a stylish storage solution that complements your room’s decor. Apply a fresh coat of paint to the frame, attach the hooks, and your new jewelry organizer is ready to use. Hang it on the wall or place it on your dresser to keep your necklaces tangle-free and displayed beautifully. Share your own jewelry storage ideas in the comments and inspire others with your creativity.
21. DIY Necklace Holder from Wood Scraps
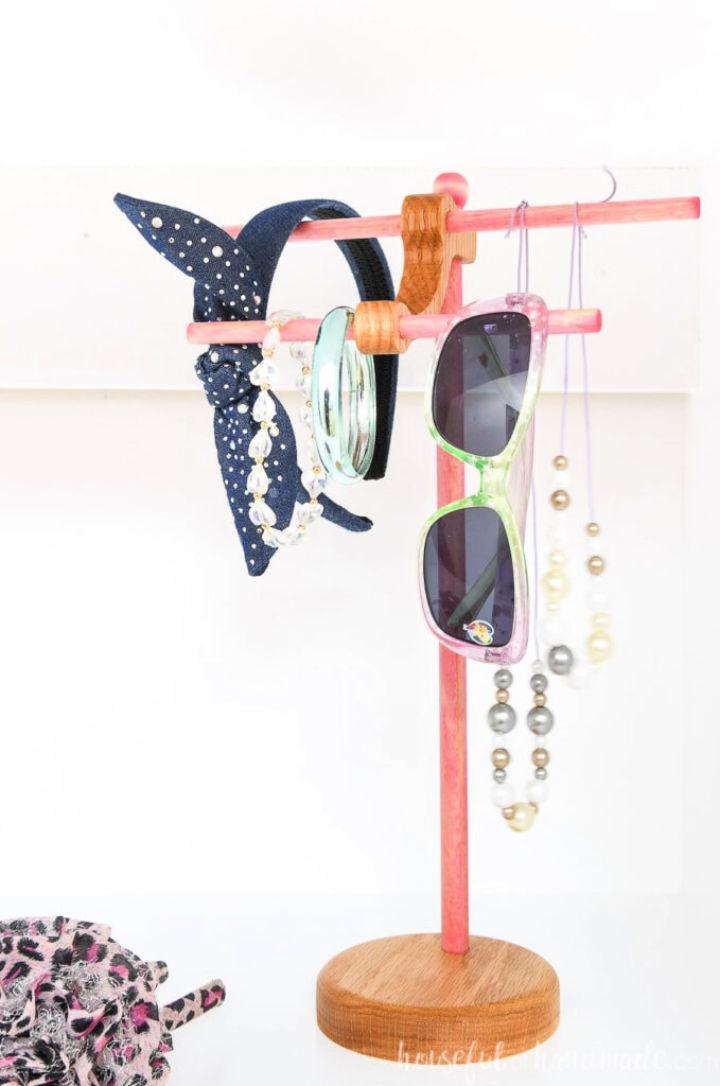
Make a stylish and practical DIY necklace holder with ease, following the step-by-step guide from Houseful of Handmade. Ideal for keeping jewelry organized and beautifully displayed, this project is perfect for utilizing those leftover wood scraps. Choose between a charming wood dowel design or an elevated brass rod version to suit your personal taste and decor.
With simple tools and materials, you can craft a custom piece that not only serves as a functional organizer but also adds a touch of elegance to your space. Get ready to transform your favorite necklaces and bracelets into a stunning arrangement with this delightful DIY project.
22. How to Build a Necklace Organizer
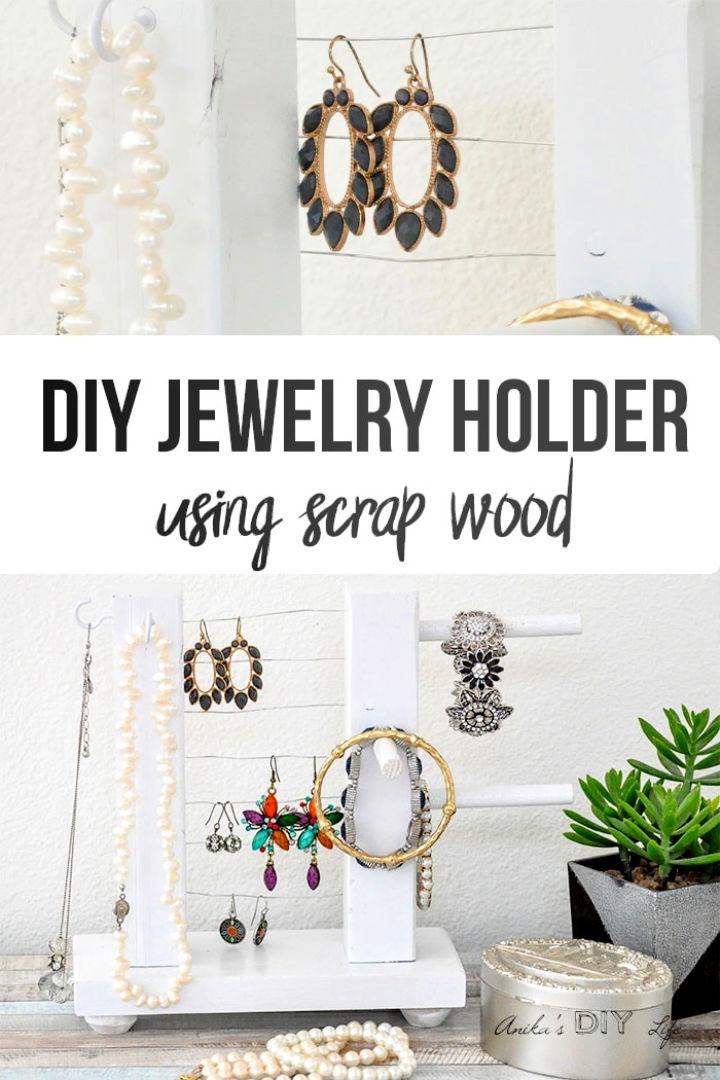
If crafting a DIY jewelry holder from scrap wood piques your interest, Anika’s DIY Life offers an easy-to-follow guide to making a charming organizer for your precious accessories. Step-by-step instructions and a helpful video make this project accessible to DIY enthusiasts eager to tackle a functional and stylish addition to their vanity or gift to a loved one.
The tutorial covers everything from selecting materials to the final assembly, ensuring a smooth crafting experience. With simple tools and a dash of creativity, you can transform ordinary wood into a practical and attractive jewelry display. Keep your bracelets, earrings, and necklaces organized and within easy reach with this homemade solution.
23. Cute DIY Jewelry Holder
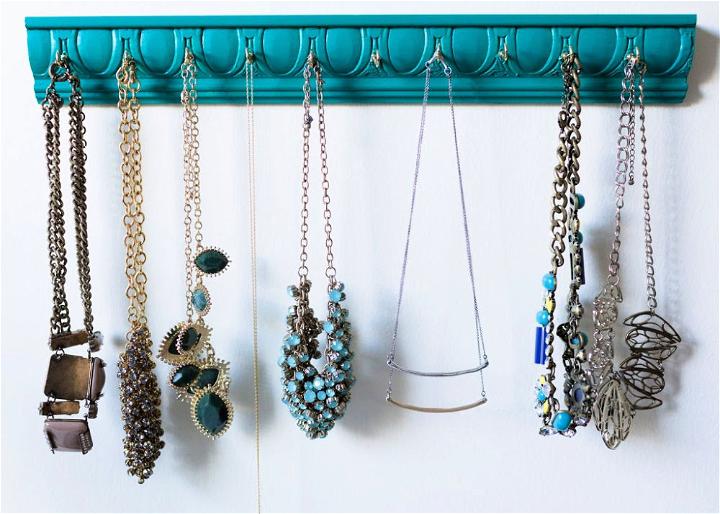
Organizing your jewelry doesn’t have to be a hassle or lead to tangled accessories. The Pioneer Woman offers a charming DIY jewelry holder guide that’s not only functional but also adds a touch of elegance to your decor. With a few materials like decorative molding, paint, and hooks, you can make a personalized space to neatly display your treasures. This project is perfect for anyone looking to bring order to their collection while indulging in a simple and rewarding craft. Clear, step-by-step instructions make it easy to follow along and ensure your pieces are beautifully showcased and ready to wear.
24. Wood Mountains Necklace Holder
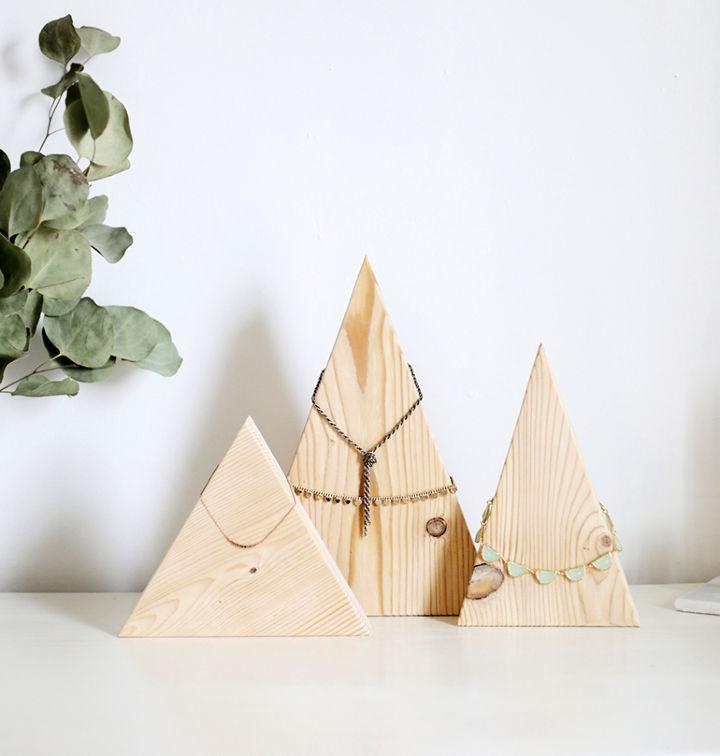
Tired of tangled necklaces cluttering your space? The Merrythought presents a creative solution with their DIY Mountain Necklace Display tutorial. This engaging guide provides step-by-step instructions on how to craft a charming and functional jewelry organizer from a simple wooden board.
With a list of materials and clear directions, you’ll easily make a beautiful display that not only organizes your necklaces but also enhances your decor. Keep your treasured accessories knot-free and easily accessible while adding a touch of rustic elegance to your room. Perfect for crafters who enjoy personalized home projects.
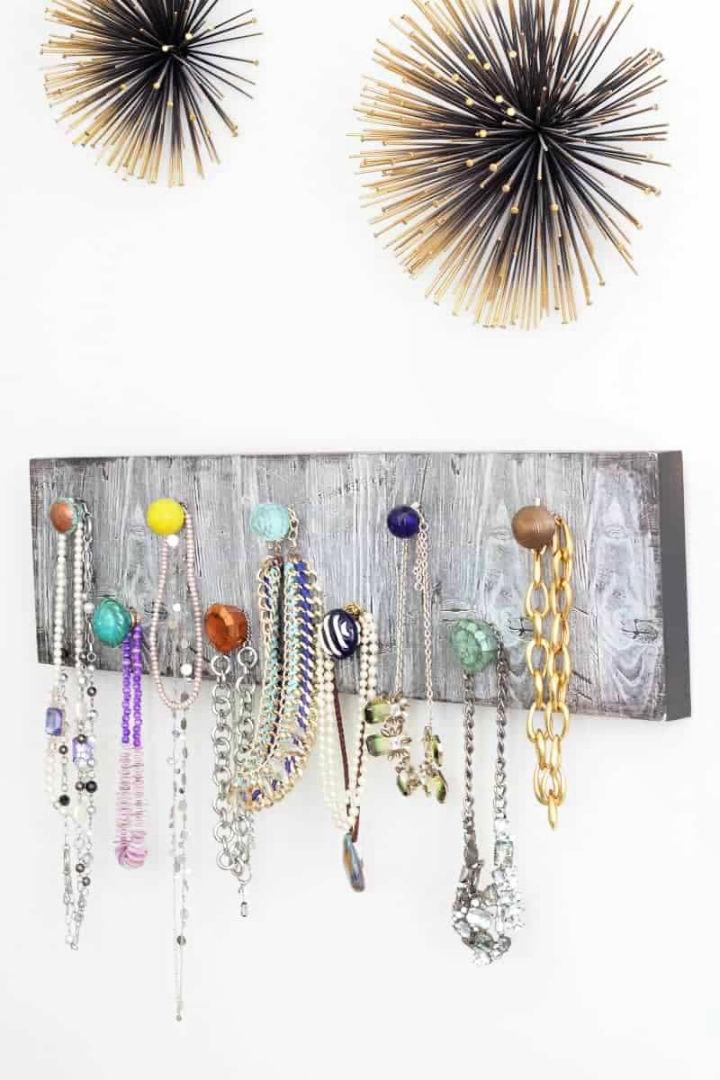
25. DIY Necklace Holder for Ages
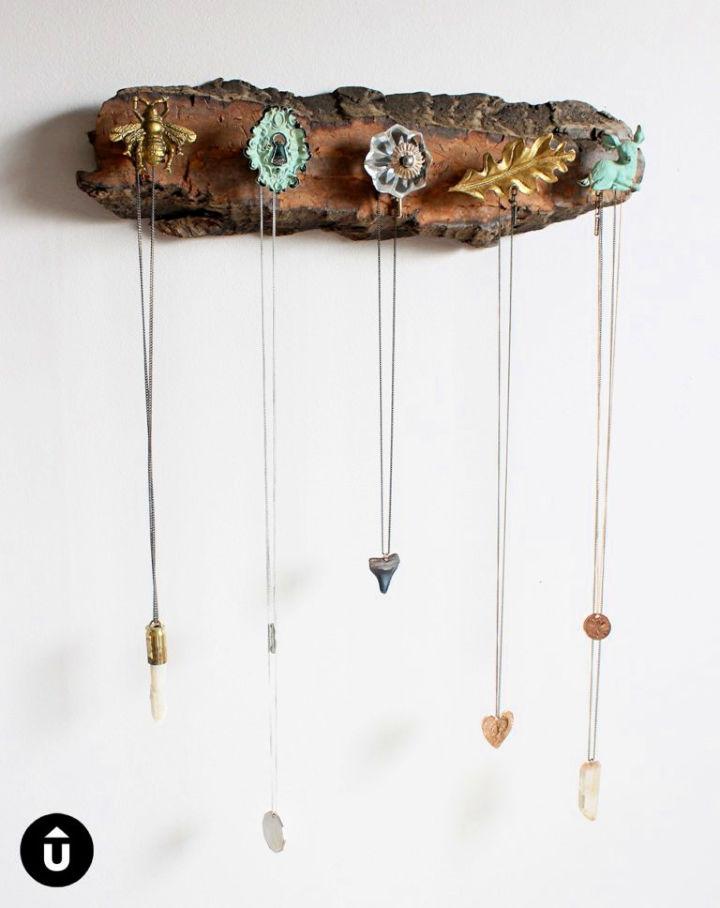
Make your own DIY necklace holder with Upcycle That‘s simple guide, turning a piece of driftwood and some stylish knobs into a chic jewelry display. Perfect for organizing your necklaces and preventing tangles, this project is ideal for crafting novices and DIY enthusiasts alike.
You’ll need reclaimed wood, a handful of knobs, a drill, a measuring tape, and a sawtooth picture hanger. Start by spacing out your knobs on the wood, drill the holes, then attach the knobs and a picture hanger on the back. Hang it up, drape your necklaces, and enjoy a functional piece of decor that showcases your favorite pieces.
26. Ana White Jewelry Holder Plan
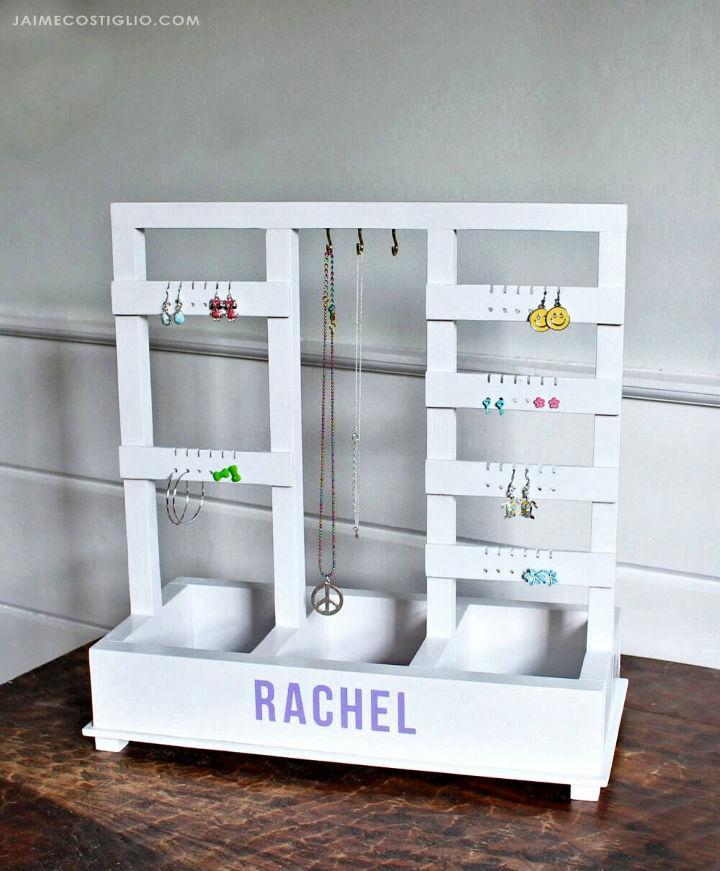
Discover how to make a chic and functional jewelry holder with Ana White‘s free DIY tutorial. This intermediate-level project is an excellent way to craft a personalized gift while saving money and reducing the environmental impact of shipping and packaging. The holder is designed to hang earrings and necklaces conveniently, plus it features a tray for rings and other accessories.
Made from simple materials like wood scraps and plywood, you’ll be able to construct a beautiful piece that keeps jewelry organized and accessible. Follow the step-by-step instructions and add a touch of handmade charm to your dresser, or gift it to someone special. Visit Ana White for the full build tutorial, and add this stylish organizer to your crafting list.
Woodworking Projects: Discover the best woodworking projects that are not only enjoyable to build but also highly profitable.
Conclusion:
In conclusion, if you’re seeking a creative and practical solution to organize your jewelry collection, our compilation of 26 easy DIY necklace holder ideas offers an inspiring array of possibilities. Each design empowers you to craft a clutter-free and personalized space that showcases your necklaces with ease and style. Enthusiasts of home organization and DIY projects will find these ideas both engaging and rewarding. Put your own spin on these DIY necklace holder ideas and transform the way you store and display your beloved accessories.
