Transform your wardrobe with unique flair using DIY patches that showcase your style and creativity. Our guide provides 20 easy DIY iron on patches to make custom patches, from intricate embroidery skills to simple no-sew techniques. Learn to adorn clothes, jeans, and hats in ways that are not only cost-effective but also amplify your personal expression.
Discover how to make DIY iron on patches with ease, breathing new life into your favorite accessories and clothing. Our step-by-step instructions and visual tutorials make it simple to tap into your artistic talents, whether through sewing, drawing, or painting. Let’s get ready to add a personal touch to your garments and inspire your next fashion statement.
Continue reading for an inspiring collection of iron on patch ideas that will take your patch-making skills to the next level.

Why Make Your Own DIY Patches?
Discover the benefits of making your own DIY patches and unleash your creativity with unique, personalized designs. Upgrade your style and showcase your individuality with homemade patches.
- Personalization: DIY patches allow you to express your individuality and style. By making a patch yourself, you can choose the exact colors, designs, and shapes that resonate with your personal taste or represent your interests.
- Cost-Effective: Crafting your own patches can be significantly less expensive than purchasing pre-made ones. Utilizing materials you may already have at home, or investing in a few simple supplies, can save you money while still achieving a professional look.
- Skill Development: Embarking on a patch-making project can help you develop new skills or hone existing ones. Whether it’s embroidery, sewing, or using a Cricut machine, each patch becomes a practice piece that contributes to your crafting abilities.
- Unique Gifts: Handmade patches make for thoughtful and unique gifts. When you make a patch specifically for someone, it shows care and consideration, as the patch is tailored to their personality and preferences.
- Repair and Upcycle: Patches aren’t just decorative; they can also serve a practical purpose. Use them to cover up holes or worn areas on clothing, giving your favorite items a fresh look and extending their life.
- Fun Activity: Making patches can be a fun and engaging activity, whether done solo or with friends and family. It’s a great way to spend time, share experiences, and even learn from each other.
Remember, making DIY patches is not only about the final product but also the joy and satisfaction found in the process of making something by hand. Keep it simple, enjoy the journey, and wear your patches with pride!
How to Make Your Own DIY Patches
Making your own DIY patches is a fun way to add a personal touch to your clothing and accessories. Whether you’re looking to express your style, cover up a tear, or just add something unique to your wardrobe, making patches is an easy and rewarding craft. Let’s dive into the steps to make your own patches in a way that’s simple and enjoyable.
Choosing Your Design and Materials
Materials You’ll Need:
- Embroidery floss or thread
- Fabric (felt, twill, or canvas)
- Scissors
- Embroidery hoop (optional)
- Needle
- Interfacing or Heat N Bond (for no-sew options)
- Iron (for Heat N Bond patches)
- Printer and transfer paper (for photo patches)
Design Selection:
- Decide on a Design: Choose something that resonates with you. could be a symbol, a favorite character, or an abstract design.
- Gather Inspiration: Look at existing patches or search online for ideas.
- Sketch or Print: Draw your design by hand or print it out if you’re using a photo or a digital design.
Making an Embroidered Patch
- Trace Your Design: Place your fabric in the embroidery hoop and your design onto it.
2.Embroider the Design:** Using your chosen embroidery stitches, fill in the design. Common stitches include the satin stitch and the split stitch. - Cut and Finish: Once embroidered, cut out the design, leaving a small border.
- Prepare for Attachment: Layer the back with interfacing or felt and secure with stitches or iron-on adhesive.
No-Sew Options
- Design on Transfer Paper: Print your design onto transfer paper for an easy no-sew patch.
- Iron-On: Cut out the design and iron it onto your fabric following the transfer paper.
- Adhesive Back: Alternatively, use Heat N Bond to adhere your patch without.
Attaching Your Patch
- Sew-On: If you’re with a needle and thread, sew your patch onto your garment for traditional look.
- Iron-On: For no-sew patches, position your patch, then press with a hot iron to bond it to the fabric.
- Glue: Fabric glue is another no-sew option. Apply glue to the back of the patch and press firmly onto the fabric.
Tips for Success
- Take Your Time: Embroidery and patch making can be detailed work. Don’t rush it.
- Practice Makes Perfect: Your first may not be perfect, but you’ll improve with each one you make.
- Care Instructions: If you’ve used glue or iron-on materials, be mindful of washing instructions to ensure your patch stays in place.
With these steps, you should feel confident in starting your own DIY patch project. Remember to have fun with it, and wear your custom patches with pride!
Frequently Asked Questions About DIY Patches
Curious about DIY patches? Get answers to all your questions in this FAQ guide.
What materials do I need to make DIY patches?
To make your own DIY patches, you generally need the following materials:
- Fabric (such as felt, twill, or canvas)
- Embroidery floss or thread
- Scissors
- Embroidery hoop (optional but helpful)
- Needle
- Interfacing or Heat N Bond for no-sew options
- Iron for applying Heat N Bond patches
- Printer and transfer paper for photo patches
Can I make a DIY patch without sewing?
Yes, you can! No-sew options include:
- Using transfer paper to print your design and then ironing it onto the fabric
- Using Heat N Bond adhesive to attach your patch
- Employing fabric glue to secure your patch onto the desired surface
How do I attach a DIY patch to clothing?
There are several methods to attach a DIY patch to clothing:
- Sewing: Use a needle and thread to sew the patch for a traditional look.
- Iron-On: For no-sew patches, place the patch on the fabric and press it with a hot iron to bond.
- Glue: Fabric glue is a quick no-sew option; just apply glue to the back of the patch and press it onto the fabric.
What are some common designs for DIY patches?
Popular DIY patch designs include:
- Symbols or logos representing personal interests
- Favorite characters or icons from pop culture
- Abstract or geometric shapes
- Initials or names for personalization
- Nature elements like flowers or animals
How do I care for my DIY patch-adorned clothing?
For longevity, consider the following care instructions:
- If you used glue or iron-on materials, wash the item on a gentle cycle and avoid high heat.
- For sewn patches, wash normally but check the stitching occasionally to ensure it remains intact.
Can I make a patch with a photo?
Yes, to make a patch with a photo:
- Print your photo onto transfer paper using an inkjet printer.
- Iron the transfer paper onto a piece of fabric.
- Cut out the design and either sew or iron it onto your garment.
Is making DIY patches cost-effective compared to buying them?
Yes, making DIY patches can be more cost-effective than buying pre-made patches, especially if you use materials you already have at home or purchase minimal supplies.
How do I make a patch for a baseball hat?
To make a patch for a baseball hat:
- Use printable heat transfer vinyl and an inkjet printer to make your design.
- Cut the design out and apply it to canvas material with Heat N Bond.
- Iron the patch onto the hat.
What kind of fabric is best for DIY patches?
Durable fabrics like felt, twill, or canvas are best for DIY patches because they hold up well to wear and tear and provide a stable foundation for your design.
Can DIY patches be used to repair clothing?
Absolutely! Patches are great for covering up holes or worn areas on clothing, giving your items a refreshed look while also extending their life.
Remember, making DIY patches is not only a practical solution for repairing and personalizing clothing but also a fun and creative activity. Enjoy the crafting process and take pride in wearing your unique creations!
20 Easy DIY Iron on Patches
Discover 20 simple and fun DIY iron on patches that you can easily make yourself. Add some flair and personality to your clothing with these creative and customizable patches. Get ready to show off your unique style!
1. How to Make an Embroidered Patch
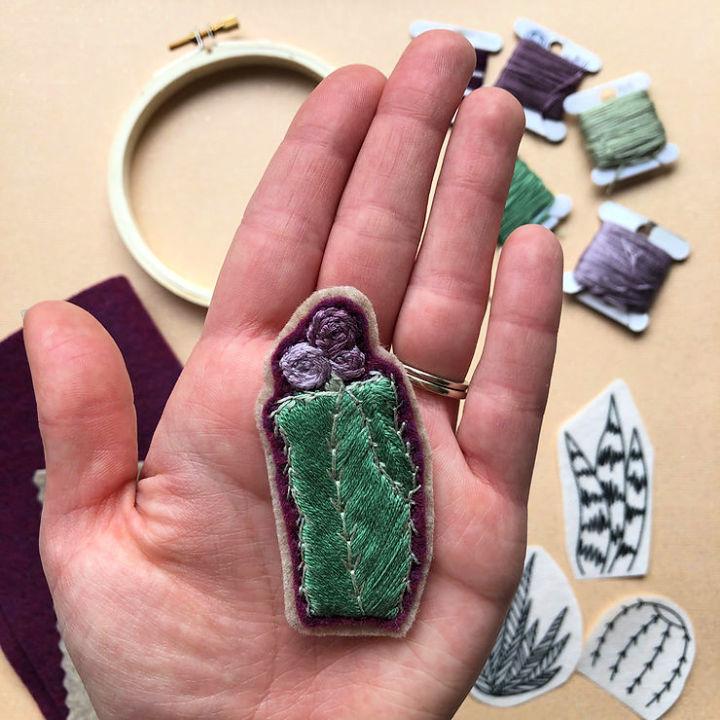
Embroidery enthusiasts, get ready to add a personal touch to your wardrobe or accessories with a handcrafted patch! MCreativeJ offers a clear, step-by-step guide to making your own embroidered patch from the comfort of your home. You’ll need some felt, an embroidery hoop, and a few other basic supplies to get started.
This tutorial will walk you through each stage, from setting up your hoop to executing the perfect satin stitch, all the way to finishing off your patch with a professional look. Perfect for personalizing bags, jackets, or hats, your hand-embroidered patch will be a unique expression of your creativity. Get stitching and show off your handiwork with pride!
2. Turn Your Embroidery Art Into a Patch
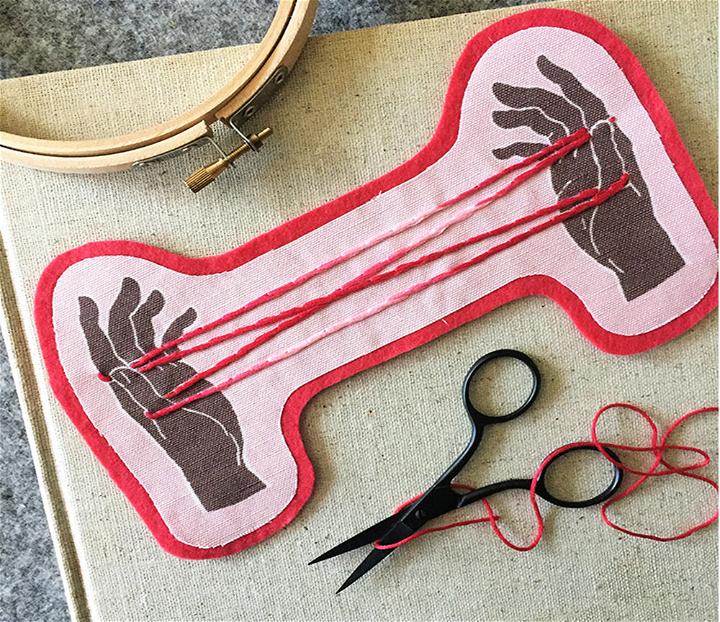
Embroidery artist Robert Mahar shares a delightful DIY project on the Spoonflower Blog that allows crafters to turn their hand-embroidered art into stylish patches. These patches are perfect for adding a personal touch to jackets, backpacks, or fabric book covers. Robert’s tutorial takes you through the process step by step, ensuring a fun and successful crafting experience.
From selecting the right materials like Linen Cotton Canvas and embroidery floss to mastering the stitch and adhering the patch, his guide is packed with helpful tips. With the option to choose various patterns and colorways, crafters can make unique patches that reflect their style. Dive into this creative endeavor and enhance your fabric accessories with a handcrafted flair.
3. Making a Patch for a Baseball Hat

Add a touch of personal flair to your wardrobe with a DIY patch baseball hat! The Pretty Life Girls offer a straightforward tutorial to make your own unique patches using printable heat transfer vinyl. With a few simple supplies like an inkjet printer, Silhouette CAMEO, canvas material, and Heat N Bond, you can transform a plain hat into a statement piece.
Perfect for sprucing up jackets, bags, and more, this DIY guide helps you craft a custom accessory that showcases your style. Get ready to craft a hat that’s as individual as you are, with an easy-to-follow process that yields impressive results.
4. DIY Hand-Stitched Embroidery into a Patch

Transform your hand-stitched embroidery into a wearable patch with ease, following the guide by Madeline Bachelder on Brit + Co. Begin by tracing a circle around your embroidery to define the patch’s border. Then, apply Heat’n Bond to the reverse side, iron it on, and trim the edges. Attach the patch to a muslin or canvas backing, securing it with an iron. Complete the piece with a whip stitch around the perimeter, trimming any excess thread.
For a durable finish, apply a drop of Fray Check. Finally, adhere another Heat’n Bond piece to the back of your patch, remove the backing, and iron it onto your chosen fabric. In just a few simple steps, your custom patch is ready to flaunt on any garment or accessory.
5. Quick and Easy DIY Patches
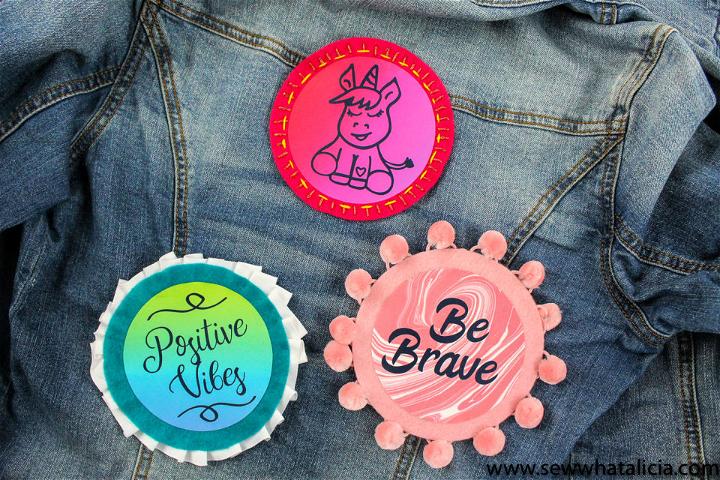
Sew What, Alicia? offers a fantastic tutorial on making quick and easy DIY patches that will inspire crafters to get imaginative. With clear, step-by-step instructions, you can make your own patches using a variety of materials like HTV (Iron On), felt, and even add decorative trims. No sewing skills? No problem! The guide includes methods for making patches without stitching, such as using Heat N Bond Ultra and an EasyPress or iron.
For those who prefer the traditional touch, there are tips for hand-sewing patches with different embroidery stitches. Perfect for personalizing garments or accessories, these DIY patches are an enjoyable project for all craft enthusiasts looking to add a unique flair to their items.
6. DIY Embroidered Patches
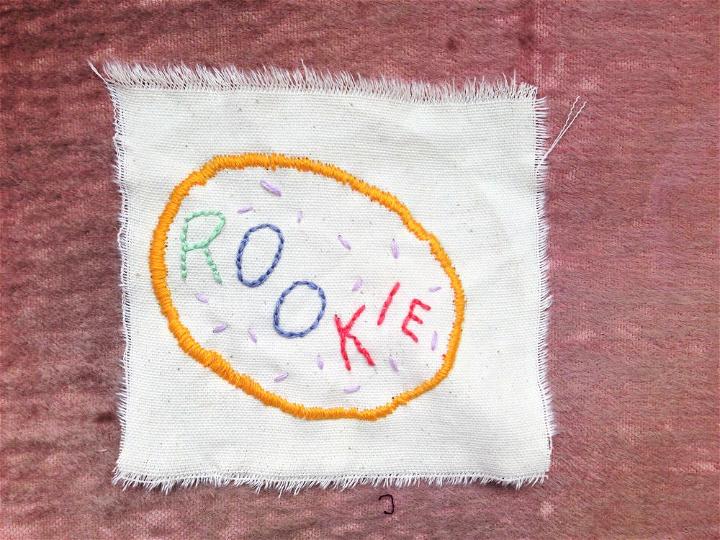
Embroidered patches add a personal touch to any garment, and learning to make them is a rewarding DIY project. Allyssa Yohana at Rookie guides you through the process with clear, step-by-step instructions. You’ll need simple materials like scissors, canvas, an embroidery hoop, a pen, embroidery floss, and a needle. Start by sketching your design onto the canvas, then secure it in the hoop.
With stitches like the split stitch and satin stitch, you’ll bring your design to life. Patience is key as you work your way around the design, but the result is a unique patch that’s all your own. Once you’ve finished stitching, trim the canvas to size, and your custom patch is ready to wear. This hands-on activity not only hones your crafting skills but also gives you a unique way to express your style.
7. DIY Embroidered Patches for Jacket
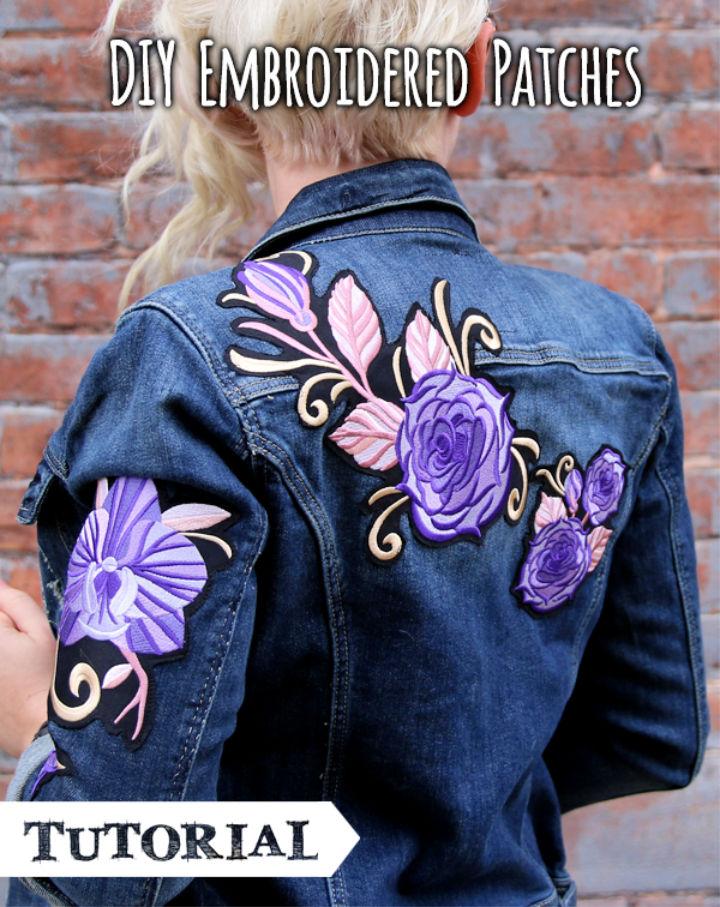
Ready to add a personal touch to your wardrobe with DIY embroidered patches? Our step-by-step guide simplifies the process, helping you transform any embroidery design into a stylish iron-on patch. Gather medium weight cutaway stabilizer, sturdy fabric like twill or canvas, fusible web, and a few other supplies to begin. Start by stitching your design onto the fabric, then adhere it to the fusible web.
Carefully trim, remove the backing, and iron the patch onto your chosen item, using fabric tack glue for extra hold. For lasting attachment, stitch around the edges of the patch. Whether jazzing up shoes or giving a jacket a new lease on life, our tutorial equips you with the know-how to infuse your items with your unique flair. Urban Threads
8. Make Photo Tie Patche for Father’s Day

Make a touching and personalized gift for your dad with this easy DIY Photo Tie Patch tutorial from Something Turquoise. Perfect for Father’s Day or as a sentimental token on your wedding day, this no-sew project transforms a simple tie into a keepsake in just 30 minutes. You’ll need a tie, iron-on transfer paper, a piece of white fabric, an iron or EasyPress, and fabric glue.
Follow the straightforward steps to print your chosen photo using a Canon PIXMA TS9521C printer, iron it onto the fabric, and adhere it to the tie. Finish by placing your crafted tie in a gift box adorned with a heartfelt printable label, making it a gift your dad is sure to cherish.
9. Handmade Embroidery Patche
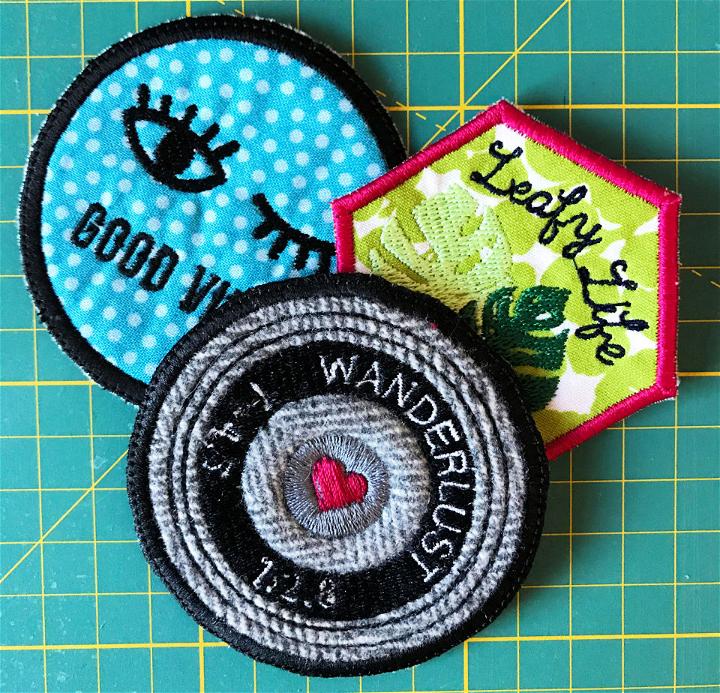
Embarking on the craft of embroidery can initially seem intimidating, but EverSewn simplifies the process with a straightforward guide on making DIY embroidery patches. This engaging tutorial provides step-by-step instructions, from selecting your materials to the final touches of making your patch iron-on ready.
With helpful tips like using a wet Q-tip to dissolve stabilizer edges, even those new to embroidery will find making a patch manageable and enjoyable. Ideal for adding a dash of personality to any fabric, this tutorial makes it easy to infuse your style into small, handcrafted projects.
10. DIY Embroidered Merit Patch

Add a personal touch to your wardrobe or accessories with a DIY embroidered merit patch! WeAllSew guides you through a simple technique to make custom badges that can showcase your embroidery skills. You’ll need a few materials like cotton-linen blend canvas, quilting cotton for backing, embroidery thread, and a few tools such as scissors and an embroidery hoop.
Follow the step-by-step instructions to prepare your fabric, set up the design, and stitch out your patch. After embroidering, you’ll learn how to make your patch fusible for easy application onto any fabric surface. With this helpful tutorial, you can craft unique patches to elevate your style or give as personalized gifts.
11. Custom DIY Patch With Felt
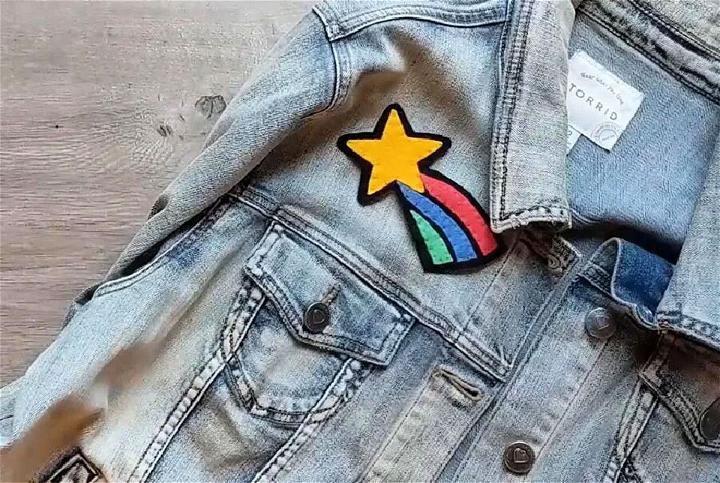
Crafting your own custom patches with felt is a fun and simple project, ideal for adding a personalized touch to costumes or awards. Hawk Hill offers an instructive guide that caters to all skill levels, detailing a method that involves cutting, layering, and stitching or gluing felt pieces.
With clear steps and helpful tips, such as using a charcoal fabric pen for marking designs and choosing sturdy felt for the base, you’ll be able to make unique patches in no time. Stitching can be adjusted for durability, and the guide even covers basic embroidery for adding text. Finish by attaching your patch to clothing or bags, making it a versatile addition to your DIY repertoire.
12. Fabric Patch Step by Step Tutorial
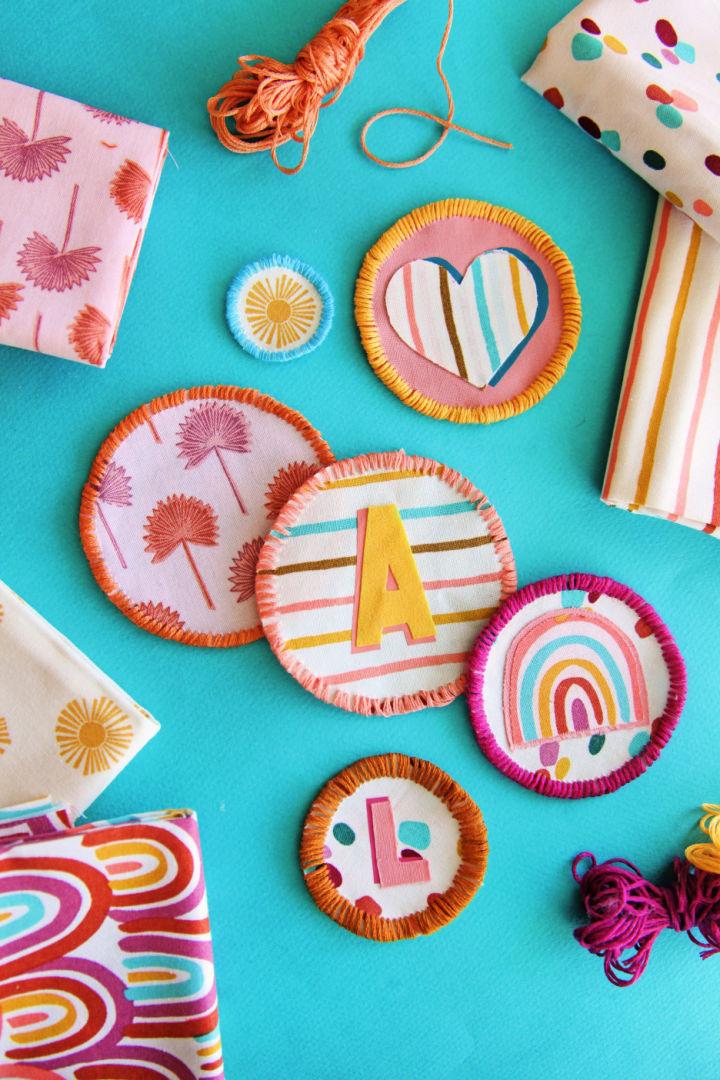
Make unique DIY fabric patches with this simple step-by-step tutorial from The Pretty Life Girls. Perfect for adding a touch of personality to backpacks, jackets, or lunchboxes, these custom patches require only basic supplies like fabric, Heat N Bond, embroidery floss, an iron, scissors, and a needle.
Cut your fabric, bond it, add embellishments, and stitch for a personalized finish. Iron your patch onto any surface to instantly upgrade your gear. Dive into crafting with this engaging, easy-to-follow guide and give your belongings a stylish twist!
13. No Sew DIY Heart Elbow Patch
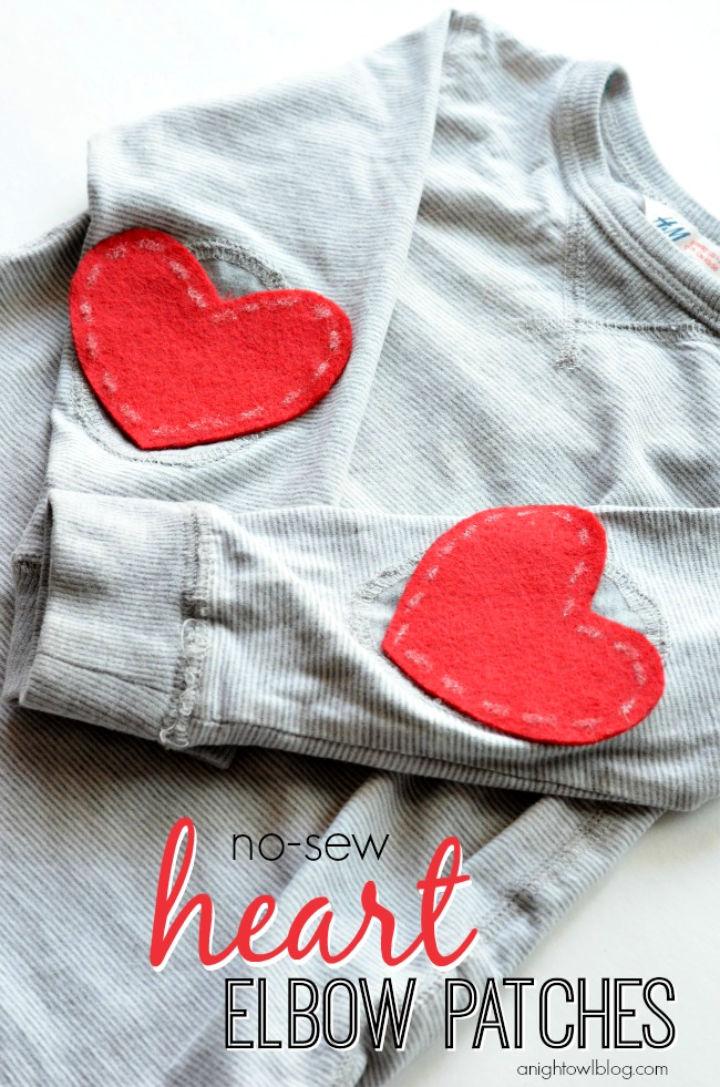
Add a touch of whimsy to your child’s Valentine’s Day outfit with no-sew Heart Elbow Patches, a simple and charming DIY project featured on A Night Owl Blog. With just a few supplies like felt, Elmer’s Craft Bond Fabric & Paper Glue, and Elmer’s Painters Paint Markers, you can make adorable patches that are both stylish and heartfelt.
Perfect for a cozy sweater or a casual shirt, these patches are easy to make and require no sewing skills. Simply draw, cut, and glue for an instant upgrade to any garment. Follow the step-by-step guide and let your creativity shine through a personalized touch that’s sure to be a hit on this special day.
14. Make Your Own Knee Patch
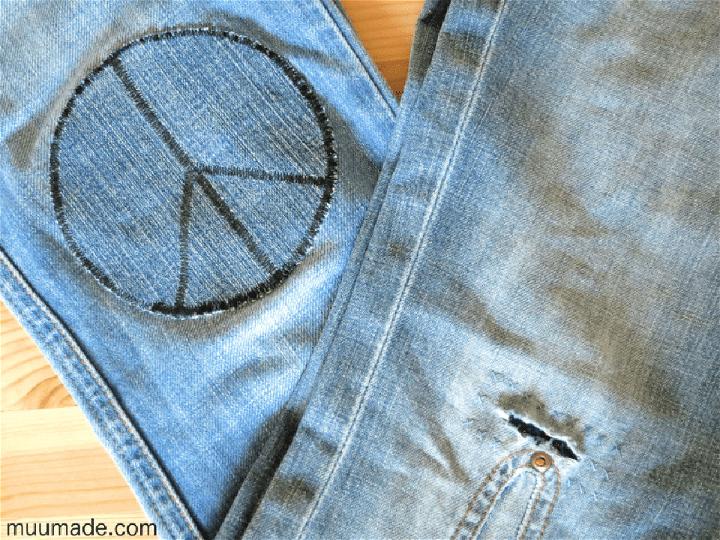
Revive your favorite jeans with a touch of personal flair using a DIY knee patch from Muumade. Discover how easy it is to breathe new life into worn denim by making a unique patch, using a free peace symbol pattern or any shape of your choice. With simple materials like old jeans and fusible web, plus a bit of sewing, you can transform rips into stylish features.
Secure your patch with a hot iron and reinforce it with hand stitches for durability. Get ready to step out in your refreshed jeans, now boasting a cool, customized look. Happy crafting!
15. Homemade Embroidered Patch
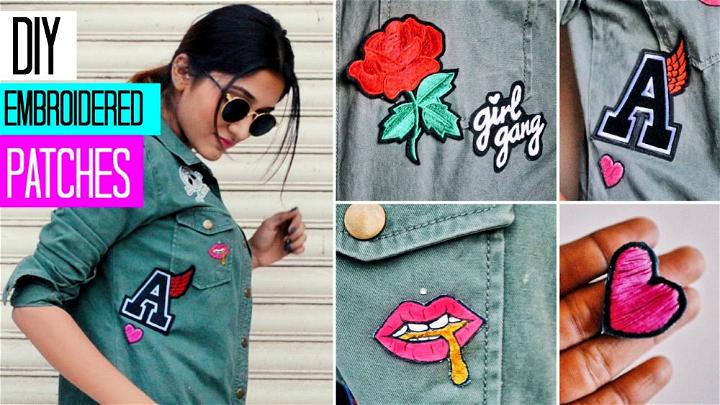
If you’re keen to personalize your wardrobe with unique flair, making custom embroidered patches is a fantastic way to start. YouTube offers an informative video, “DIY: Custom Embroidered Patches || 3 techniques,” which guides viewers through three different methods to craft their own patches. From painting to satin stitching, the tutorial is packed with step-by-step instructions that are clear, engaging, and suitable for anyone looking to enhance their DIY skills.
With these techniques, you can transform everyday items into pieces that showcase your style and creativity. Get your materials ready and dive into the world of DIY embroidery to give your garments a bespoke touch.
16. How to Sew a Patch Like a Pro
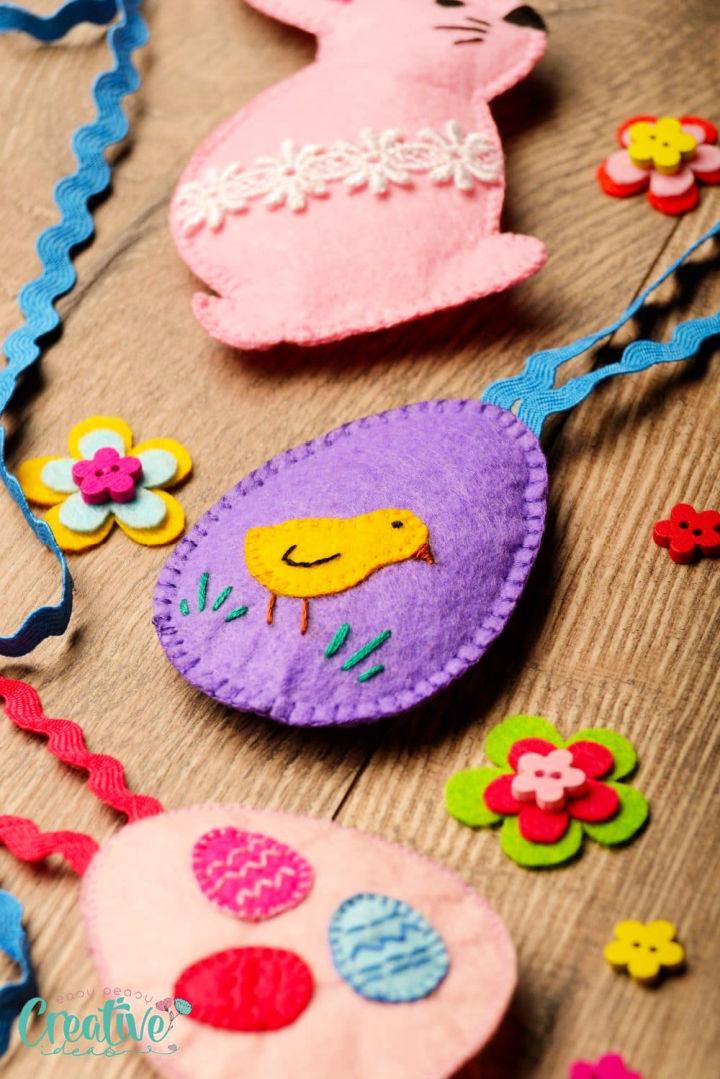
Patching sewing is a skill that can breathe new life into your favorite garments, transforming wear and tear into a style statement. Easy Peasy Creative Ideas guides you through the process, offering practical tips for selecting the right materials and executing stitches that not only mend but also enhance your clothes.
With clear, step-by-step instructions, this resource empowers you to tackle holes and rips with confidence, ensuring your patched-up pieces look seamless and stylish. Whether sprucing up denim with personality-packed patches or reinforcing a beloved sweater, you’ll find the know-how you need to keep your wardrobe both durable and chic.
17. DIY Patch With Free Motion Couching
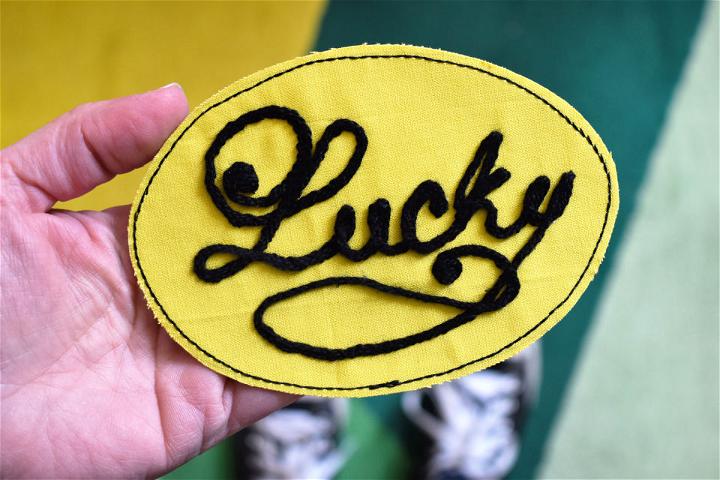
Crafting personalized patches with free-motion couching is a creative way to add flair to your garments or accessories. With WeAllSew‘s guide, you can master the technique of using the Free-motion couching foot #43 to design retro-style chain stitched patches. The tutorial is ideal for those with some free-motion stitching experience, guiding you through the process with helpful tips and material suggestions.
From preparing your base fabric to adding the final touches with an iron-on backing, this instructive piece makes it easy and engaging to make unique patches that showcase your style. Get ready to elevate your crafting game and personalize your items with eye-catching patches.
18. Make a Patch Using Things You Already Have
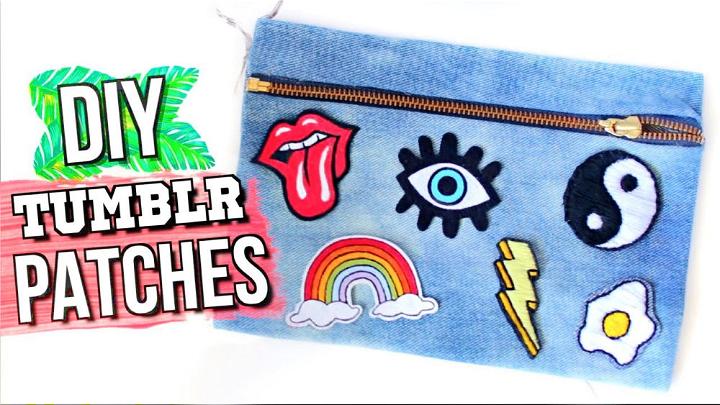
Ready to add a personal touch to your wardrobe with custom patches? JENerationDIY’s YouTube tutorial guides you through making your own unique patches using materials you likely already have at home. From traditional embroidery to a no-sew method, this video is packed with creative ideas and step-by-step instructions.
Perfect for customizing jackets, backpacks, or any fabric item, this DIY project is fun, budget-friendly, and lets you express your style. So grab some denim, fabric paint, and get ready to craft patches that are uniquely you! Check out JENerationDIY for this handy and engaging tutorial.
19. How to Hand Make a Patch
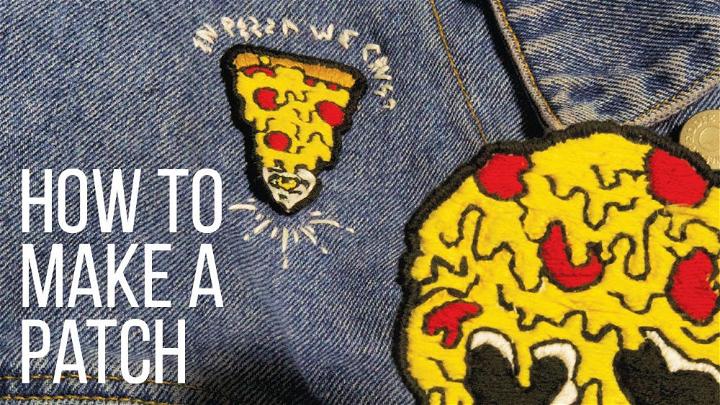
Looking to craft your own hand-stitched patch? YouTube’s Shmoxd tutorial offers a step-by-step guide on making a personalized patch with basic embroidery materials. The video demonstrates tracing your design, securing the fabric in an embroidery hoop, and executing neat stitches to bring your image to life.
You’ll also learn how to finish your patch with an iron-on adhesive and a neat border to prevent fraying. Ideal for DIY enthusiasts, this video provides a clear, engaging, and helpful walkthrough that’s easy to follow. So grab your embroidery backing, fabric, floss, and hoop, and start stitching your unique patch today!
20. How to Make Patches at Home

Ready to add a personal touch to your wardrobe with unique patches? ThreadBanger’s DIY tutorial on YouTube is your go-to resource for making custom patches at home. In this engaging guide, you’ll learn two distinct methods: hand-drawn canvas patches for a quick, artistic fix and embroidered jean patches for a more traditional look. All you need is some basic materials like canvas, heat and bond fabric sheets, embroidery needles, thread, and a pair of scissors.
Whether you’re sprucing up an old jacket or personalizing a backpack, these steps will help you craft patches that showcase your style. Remember, precision with scissors and a steady hand with the needle are your best friends in this crafty endeavor. Watch the video, follow along, and transform your items into statement pieces with your own handmade patches.
Conclusion:
In conclusion, making DIY iron on patches offers an creative way to personalize your wardrobe with unique designs that reflect your style. With the 20 easy DIY patch ideas presented, you have a treasure trove of inspiration to choose from. By following these simple guidelines, anyone can create distinctive patches that transform ordinary clothing into statement pieces. So, grab your materials, and let’s make your fashion pieces overflow with DIY Iron on Patches!
