Making your own DIY picture frame can be a rewarding project, allowing you to add a personal touch to your home decor. Not only do these frames serve as a protective display for your cherished memories, but they also reflect your style and creativity. This guide will take you through various 50 easy DIY picture frame ideas, from simple designs to more innovative ones, ensuring there’s a project suitable for every skill level and taste.
If you’ve ever wondered how to make a picture frame that stands out, you’re in the right place. We will explore materials, step-by-step instructions, and key tips for success, making it easier for anyone to dive into these projects. By the end of this guide, you’ll be equipped with the knowledge and inspiration needed to start making your own unique picture frames. Stay tuned for insightful DIY tips and easy-to-follow guides that will help make your picture frames come to life.
Why DIY Picture Frames?
Making your own DIY picture frames offers a wealth of benefits that store-bought options simply can’t match. Here are some compelling reasons to consider making your own:
- Personalization: DIY frames allow you to tailor the size, color, and style to perfectly match your decor and the artwork they’re meant to showcase.
- Cost-Effective: Making frames yourself can be significantly cheaper than purchasing pre-made ones, especially if you’re looking for large or custom sizes.
- Eco-Friendly: By upcycling materials or using sustainable resources, you’re making an environmentally friendly choice.
- Skill Development: Crafting your own frames is a great way to improve your woodworking, painting, or decorating skills.
- Gift-Giving: A handmade frame is a thoughtful and personalized gift that can be treasured for years to come.
- Satisfaction: There’s a unique sense of accomplishment and satisfaction that comes from making something beautiful with your own hands.
- Therapeutic Activity: The process of DIY can be a relaxing and therapeutic hobby that allows you to unwind and express your creativity.
By choosing to DIY, you’re embarking on a rewarding project that benefits both your walls and your well-being. So grab your tools, unleash your creativity, and enjoy the process of making something truly one-of-a-kind!
How to Make a DIY Modern Wood and Magnet Photo Frame
Making your own photo frames is a rewarding DIY project that allows you to display your cherished memories in a personalized way. This guide will help you make a modern wood and magnet photo frame, which not only looks sleek and contemporary but also makes swapping photos effortless. Let’s get started on this simple yet striking project.
Materials Needed
- Two wooden strips (length depends on your photo size)
- Sandpaper (fine grit)
- Small, strong magnets
- Wood glue or epoxy
- Twine (for hanging, optional)
- Your favorite photo
Steps to Make Your Frame
Prepare the Wooden Strips
- Measure and Cut: Begin by measuring your photo and cutting the wooden strips to match its width. If you’re not comfortable cutting the wood yourself, most hardware stores can cut them for you.
- Sand the Edges: Using fine-grit sandpaper, smooth the edges and surfaces of your wooden strips. This not only prepares them for the magnets but also ensures a sleek finish.
Attach the Magnets
- Position the Magnets: Lay your wooden strips side by side and mark where you’ll place the magnets. Ensure they align perfectly when the strips are put together.
- Glue the Magnets: Apply a small amount of wood glue or epoxy to the magnets and place them on your marks. Be sure the magnets are positioned so they attract rather than repel each other when the frame is assembled. Allow the glue to dry as per the instructions on the glue package.
Assemble the Frame
- Lay Your Photo: Once the glue is dry, lay your photo on one of the wooden strips, ensuring it’s centered.
- Secure with the Other Strip: Place the second wooden strip on top, aligning the magnets. The magnetic force will hold your photo in place between the wood strips.
Finishing Touches
- Add Hanging Hardware: If you’d like to hang your frame, attach twine to the back of the top wooden strip using a staple gun or small nails. Alternatively, you can simply place the frame on a shelf.
- Enjoy Your Work: Place your photo in the frame, and admire your handiwork. The best part about this frame is how easily you can swap photos whenever you want a change.
Tips for Success
- Choose Strong Magnets: Ensure the magnets are strong enough to hold your photo securely. Neodymium magnets are a good choice for their strength.
- Protect the Surface: Consider adding a layer of felt or rubber to the back of the wooden strips to prevent scratches on your wall or furniture.
- Personalize: Feel free to paint or stain the wooden strips before attaching the magnets for a more personalized touch.
Making a DIY modern wood and magnet photo frame is not only a fun project but also adds a custom, stylish element to your home decor. Whether you make it for yourself or as a gift, it’s a wonderful way to showcase your favorite moments.
DIY Picture Frame FAQs
Making DIY picture frames can be a fun and rewarding project. Here are some commonly asked questions to help guide you through your crafting journey.
What materials do I need to make a DIY picture frame?
To start, you will need:
- Wooden strips or molding for the frame itself.
- Sandpaper to smooth the wood.
- Wood glue or epoxy for bonding.
- Small, strong magnets if you’re making a magnetic frame.
- Twine or hanging hardware for mounting.
- Paint or stain for finishing touches.
How can I ensure my DIY picture frame fits my photo perfectly?
- Measure your photo carefully.
- Add extra length to each side for the frame’s width.
- Use a miter box and saw for precise cuts.
- Dry-fit the pieces before gluing to check the fit.
What are some creative ideas for decorating DIY picture frames?
Consider these decoration ideas:
- Painting or staining the wood.
- Adding decorative trim like pom-poms or macrame.
- Decoupage with paper or fabric.
- Wood burning for a rustic look.
- Using magnets for interchangeable photos.
How can I make my DIY picture frame stand out?
To make your frame unique:
- Personalize with initials or dates using paint or wood-burning techniques.
- Mix materials, combining wood with metal or fabric.
- Experiment with shapes, not just sticking to rectangles or squares.
- Play with textures, incorporating elements like burlap or leather.
Can DIY picture frames be eco-friendly?
Yes, by:
- Upcycling materials like old frames or reclaimed wood.
- Choosing sustainable resources such as bamboo or recycled metals.
- Using non-toxic finishes like natural oils or beeswax.
What are some tips for beginners?
For those new to DIY framing:
- Start with a simple design to build confidence.
- Practice cutting and joining on scrap wood first.
- Take your time measuring and cutting for accuracy.
- Don’t be afraid to ask for help at your local hardware store.
How can I hang my DIY picture frame securely?
To hang your frame safely:
- Use wall anchors for heavy frames.
- Ensure the hanger is attached firmly to the frame.
- For lighter frames, consider adhesive strips that won’t damage walls.
- Always use a level to hang frames straight.
Making your own picture frames not only adds a personal touch to your decor but also allows for customization and creativity. With these FAQs, you’re well on your way to crafting beautiful, unique frames for your home.
50 Easy DIY Picture Frame Ideas
Discover 50 easy DIY picture frame ideas to showcase your memories creatively and affordably. Get inspired and start framing today!
1. DIY Large Picture Frames for Less than $20 Each
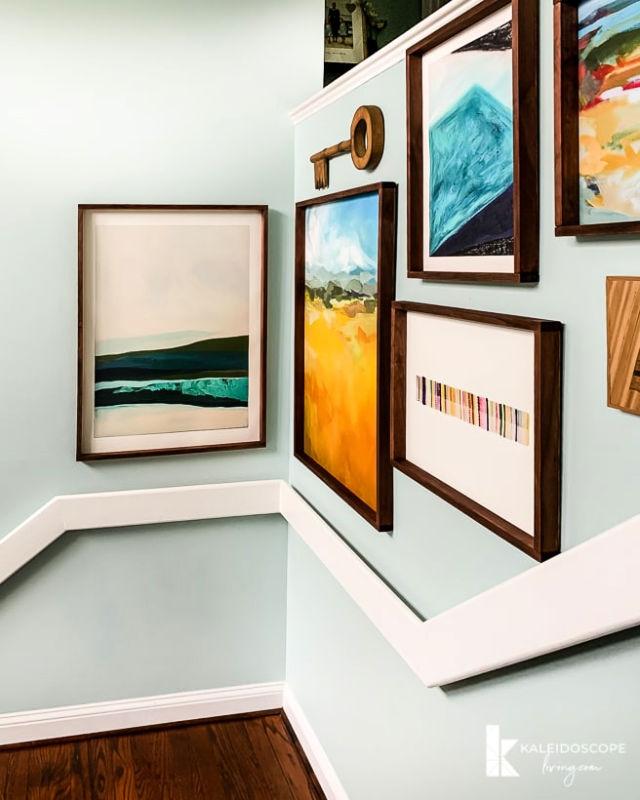
Build stunning, large-scale picture frames on a budget with this DIY guide! For under $20 each, you can showcase your favorite art or memories in a custom frame that looks expensive but won’t break the bank. Start by sourcing inexpensive materials like molding from your local hardware store or reclaimed wood for a rustic touch. Use a simple miter box and saw to cut your frame pieces to size.
Join them with wood glue and finishing nails for a sturdy build. Don’t forget to sand and paint or stain your frame for a professional finish. With these steps, you’ll craft beautiful frames that are both cost-effective and personalized, perfectly capturing your style while enhancing your home’s decor. Designer Trapped
2. Homemade Mason Jar Picture Frame Vase
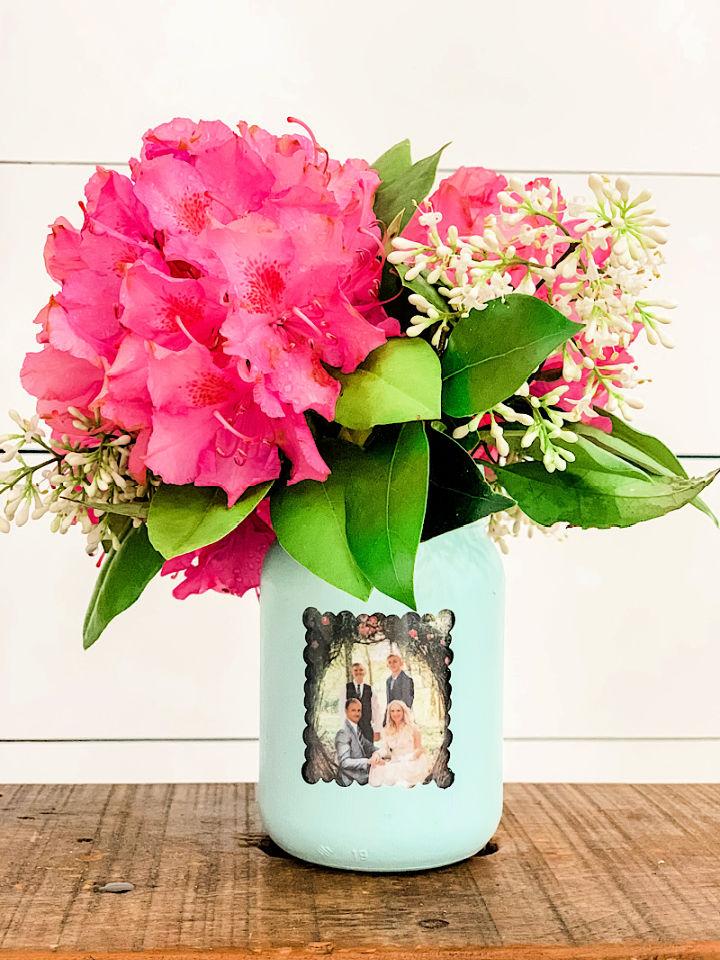
Transform a mason jar into a charming picture frame vase with this creative DIY project from Home Stories A to Z. Ideal for a personalized Mother’s Day gift or a sprightly spring decoration; this craft is simple enough for kids to help with under adult supervision. Gather a mason jar, paint, and a few basic supplies to start.
The step-by-step guide ensures an enjoyable crafting experience, leading to a unique vase that can hold fresh flowers or serve as a decorative candle holder. Seal it with clear spray paint for durability, and fill it with treats or a homemade scrub for an extra special touch. Crafting a mason jar picture frame vase is a thoughtful and fun way to add a personal flair to your home or give a heartfelt gift.
3. Making Large Custom Picture Frames
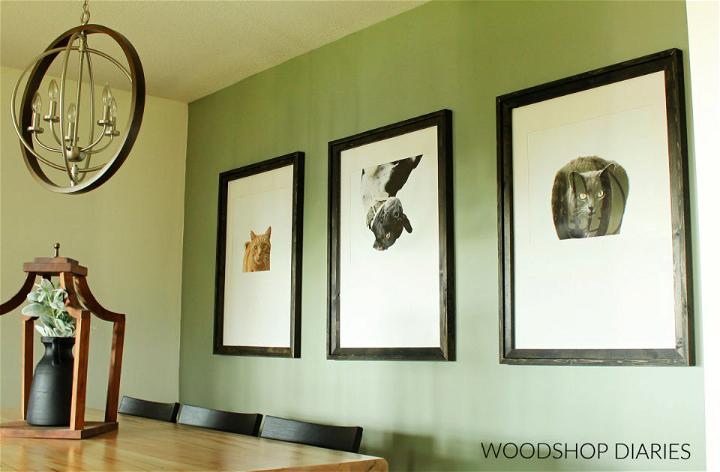
Make stunning, personalized décor with easy-to-make large custom DIY picture frames. These frames not only add a touch of individuality to your home but are also a cost-effective way to display your favorite memories or art. Begin by measuring your picture and deciding on the width of your frame.
Purchase moldings from your local hardware store, and cut them at 45-degree angles for a professional look. Assemble with wood glue and nails, and finish with a paint or stain of your choice. Remember to add hanging hardware! This project is perfect for anyone looking to elevate their space with a unique, handcrafted touch. Woodshop Diaries
4. Handmade Picture Frames With a Miter Box
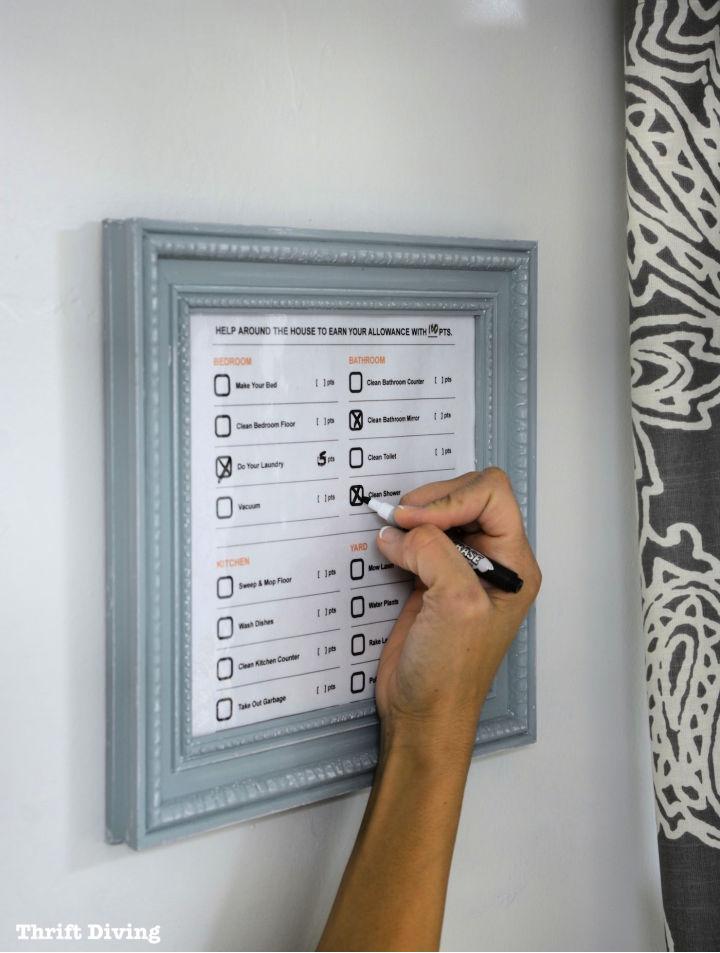
Making your own picture frames using a miter box is an enjoyable and cost-effective way to add a personal touch to your home decor. By cutting your frame pieces at perfect 45-degree angles, the miter box ensures a professional-looking finish. Start by measuring your artwork and cutting the frame material to size, remembering to account for the width of the frame when calculating the length of each side.
Sand the edges for a smooth surface before joining them with wood glue and securing them with nails for added stability. Finish your frame with a stain or paint of your choice, then simply add your artwork, secure it with frame points, and enjoy the satisfaction of a job well done! Thrift Diving
5. DIY Modern Wood + Magnet Photo Frame
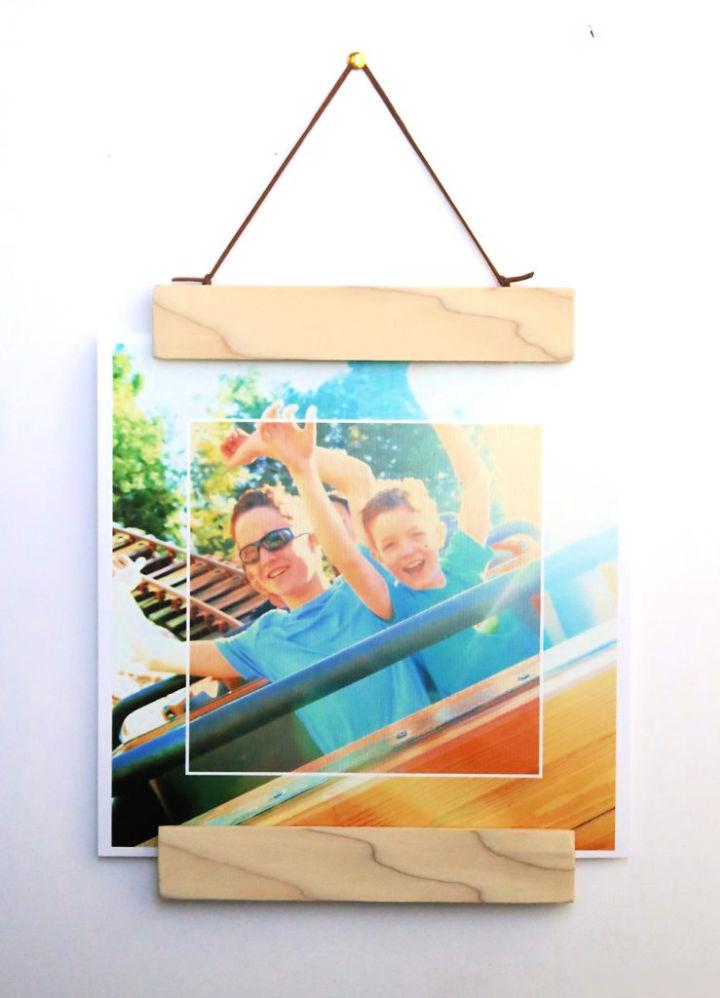
Elevate your home decor with this simple DIY Modern Wood + Magnet Photo Frame project! Not only does this frame offer a sleek, contemporary aesthetic, but the ingenious use of magnets allows for effortless photo swapping. To make your own, start with two wooden strips cut to your desired frame length. Sand them smooth for a refined finish.
Next, attach strong, small magnets to each wood piece’s inner edges. When these strips are aligned, the magnetic force will clamp your photo in place. Hang the frame with a twine loop or a wall mount. Now, you can showcase your cherished memories with a personal touch that blends functionality with modern design. This DIY frame is perfect for any skill level and adds a custom look to your space. Itsalways Autumn
6. Make a Printed Map Picture Frame
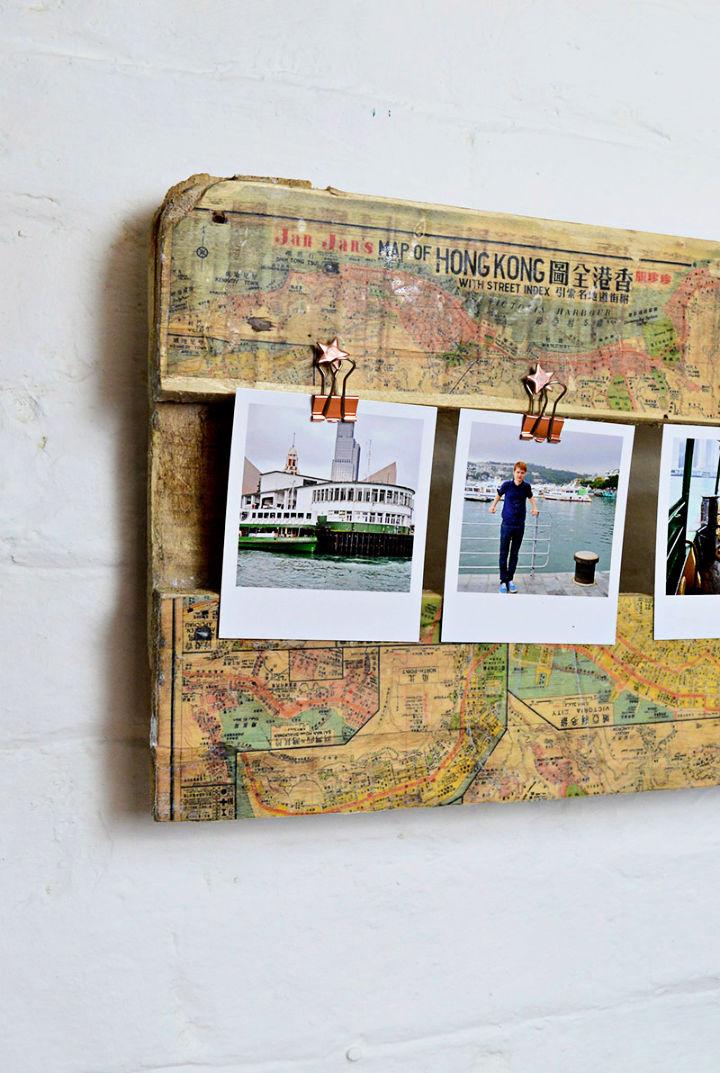
Discover how to craft a stunning printed map picture frame with this engaging guide from Pillar Box Blue. Transform your cherished holiday memories into a unique wall display using pallet wood, an old map, and a touch of creativity. This DIY project is perfect for anyone who loves to personalize their home decor with meaningful touches.
You’ll learn to print maps directly onto wood for a charming vintage effect and how to effortlessly switch out photos with the clever use of bulldog clips and push pins. Embrace this easy-to-follow, helpful tutorial and elevate your space with a custom map picture frame that captures the essence of your adventures.
7. DIY Boho Macrame Picture Frames
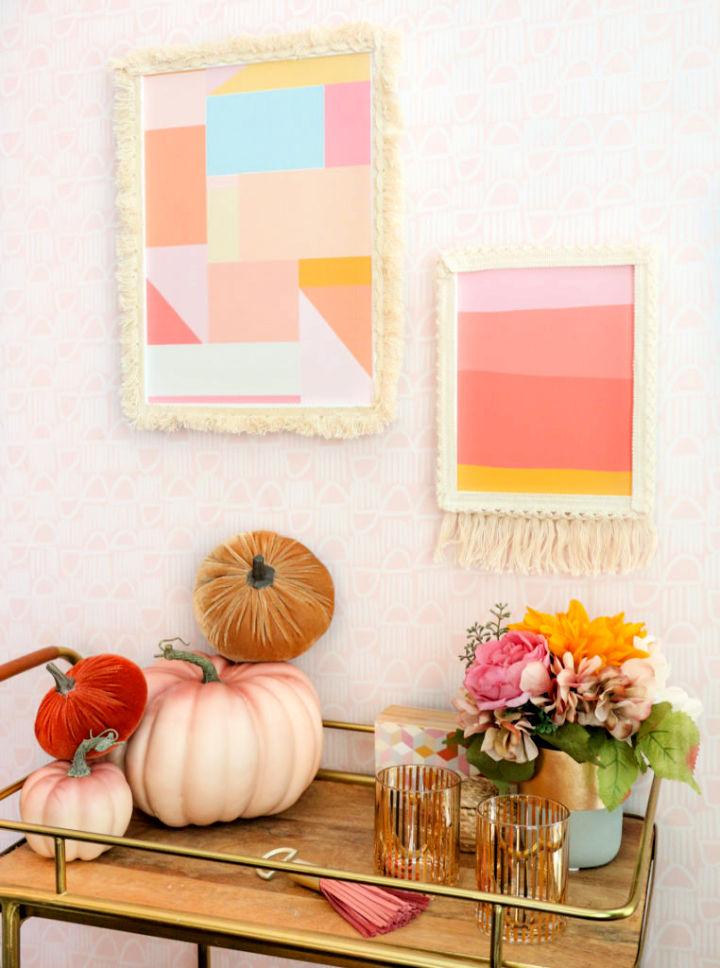
Make unique boho macrame picture frames with a simple DIY approach from A Kailo Chic Life. Transform ordinary frames into stunning, textural decor with macrame and tassel trim, easily sourced from your local fabric store. All you need is a hot glue gun, scissors, and your chosen frames to start. Begin by adhering the trim around your frame, cutting and folding at corners for a neat look.
For a personalized touch, consider dyeing the trim before attaching. Add in your favorite fall-inspired artwork, and you’ll have a set of beautiful frames that add a cozy, boho charm to any room. With clear, step-by-step guidance, crafting these frames is both enjoyable and rewarding.
8. Upcycled Old Picture Frames with Decoupage
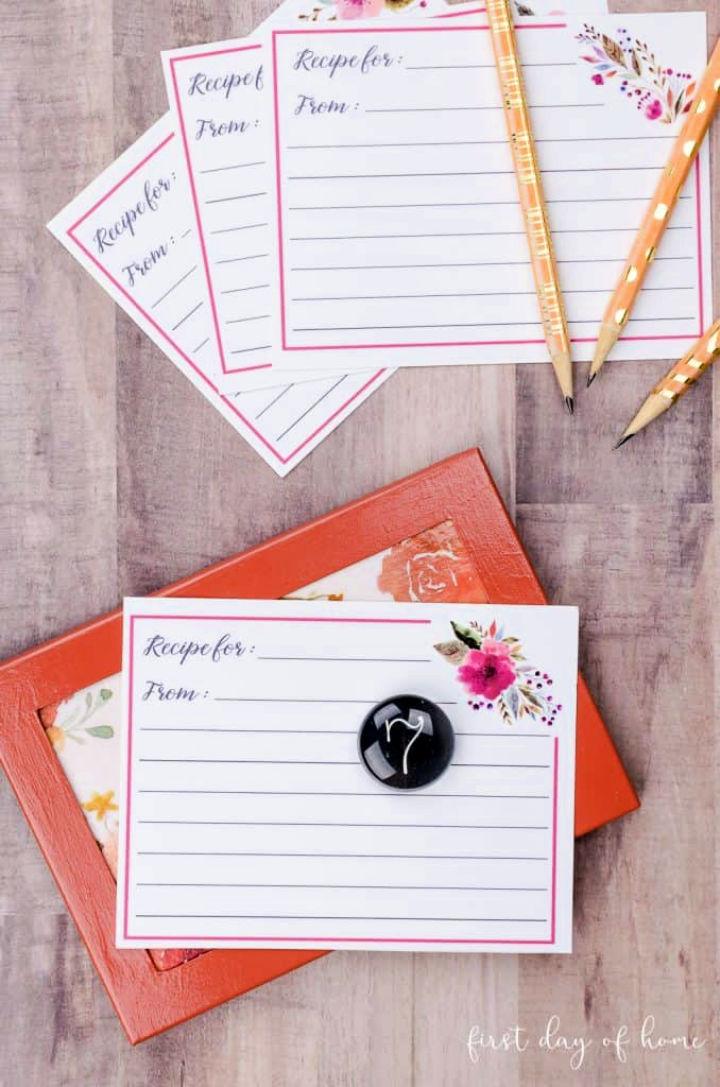
Transform an old picture frame into a charming magnetized recipe card holder with this creative upcycling guide from First Day of Home. With a few supplies like scrapbook paper, Mod Podge, and a galvanized steel sheet, you can breathe new life into a once-forgotten item. Follow the simple steps to paint, cut, and decoupage your way to a unique kitchen accessory. Ideal for displaying recipes or notes, this craft not only reduces waste but also adds a personalized touch to your home decor. Get ready to enjoy the satisfying results of your handiwork.
9. Modern Smaller Wood Burning Picture Frame
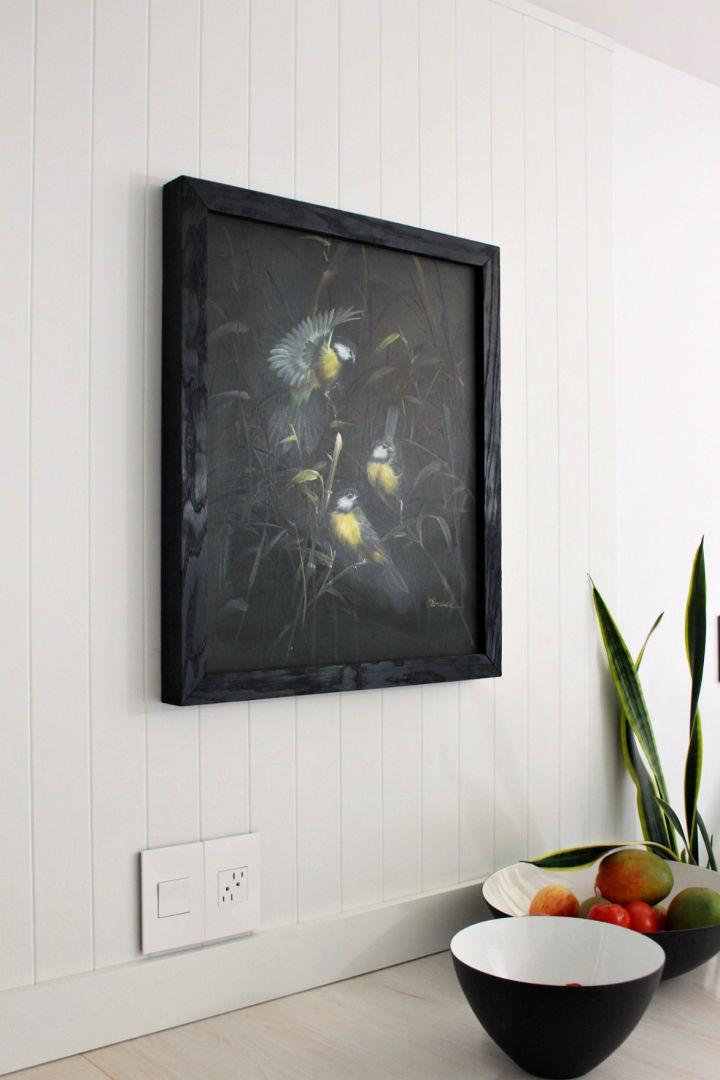
Discover a new DIY wood burning project on Dans le Lakehouse that’s perfect for adding a touch of earthiness to your home decor. Tanya shares a captivating kitchen art upgrade, featuring a wood burned picture frame that enhances a cherished painting inherited from her grandparents. This instructive guide takes you through the process of making a modern black frame using shou sugi ban, a traditional Japanese wood charring technique.
Ideal for those ready to tackle a smaller wood burning endeavor, Tanya’s guide is complete with a supply list and tips on how to seal in the charred texture for a lasting finish. With engaging and easy-to-follow instructions, it’s an enjoyable project that invites a bit of the wilderness into your home.
10. DIY Large Scale Print Wood Frame
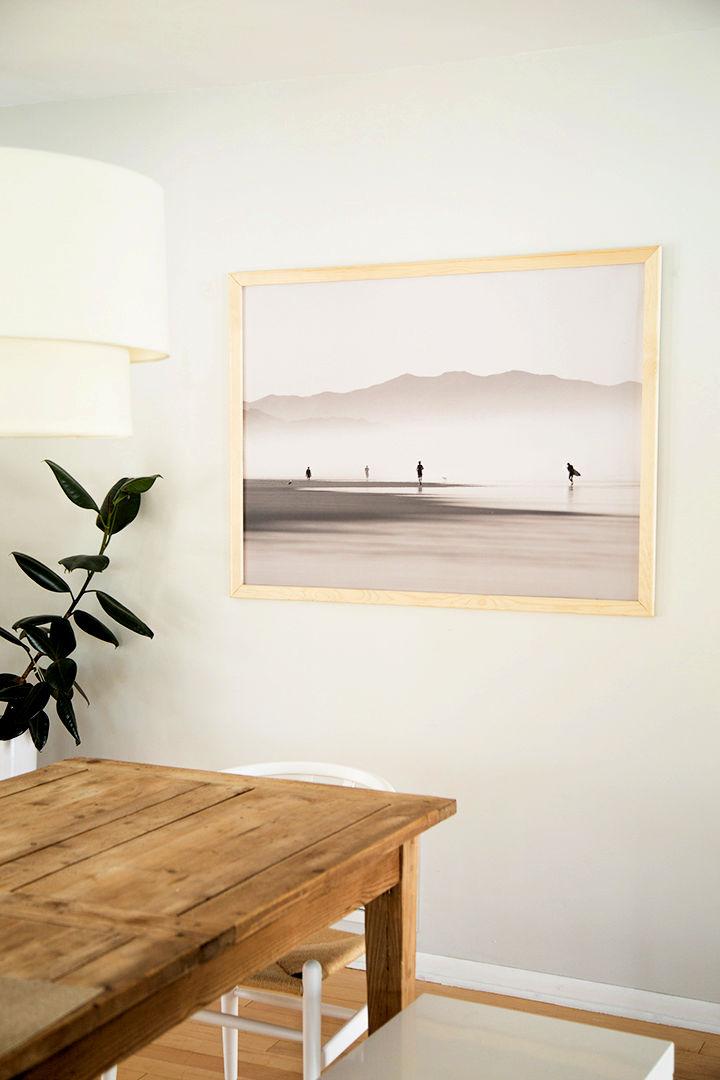
Looking to elevate your home decor with large-scale artwork without breaking the bank? Alice and Lois offer a DIY tutorial that guides you through making a wood frame for your oversized prints. This project is ideal for showcasing striking black and white photography or any high-resolution image.
With a list of simple supplies, like canvas stretcher bars and double-sided tape, you can assemble a custom frame that allows for easy print updates. The instructions are clear and concise, ensuring a smooth process even if you’re crafting such a piece for the first time. Add a personal touch to your space with a framed piece that speaks to your style and creativity.
11. How to Make 2D Color Block Paper Frames
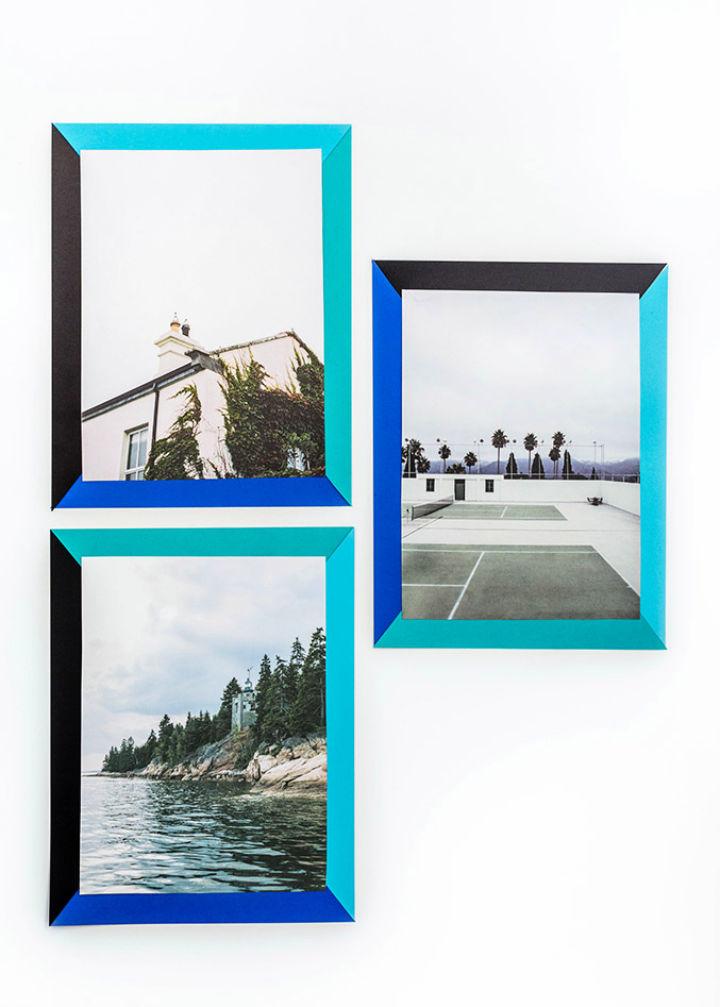
Looking to add a splash of color and creativity to your home decor? Dream Green DIY has a simple yet stunning solution: DIY 2D Color Block Paper Frames. With just a few sheets of Astrobrights® paper and some basic supplies like scissors, pencil, straight edge, and tape, you can make eye-catching art that reflects your personal style.
This instructive guide walks you through each step, from cutting and arranging vibrant paper pieces to attaching your favorite images for display. Dive into this easy-to-follow tutorial and transform your space with personalized paper art that’s as unique as you are.
12. DIY Paper Easel Picture Frames
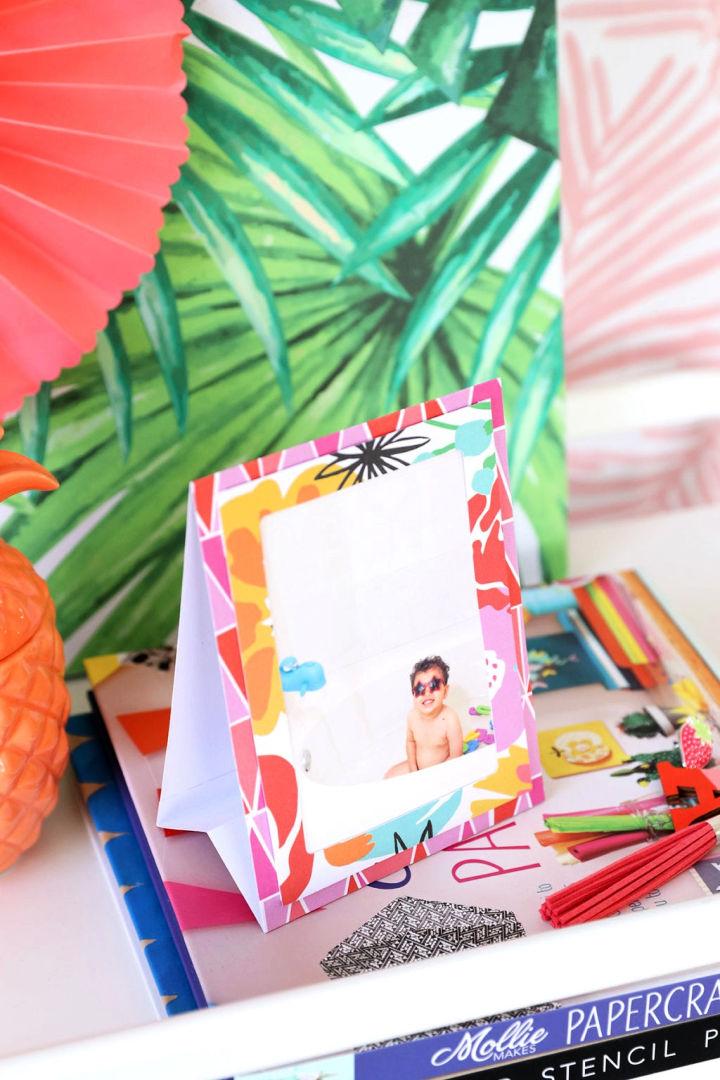
Making personalized gifts just got easier with this DIY paper easel frames tutorial from Damask Love. Ideal for showcasing cherished photos, these paper crafts are simple to make and can be customized with various patterns and decorations. All you need is a scoring board, patterned paper, a frame punch board, adhesive, and your favorite photos.
Follow the step-by-step instructions to craft a unique easel frame that folds flat, making it a perfect alternative to traditional greeting cards. This engaging project allows you to merge creativity with functionality, offering a memorable keepsake that slips neatly into an envelope for a pleasant surprise.
13. Make Pom Pom Picture Frames
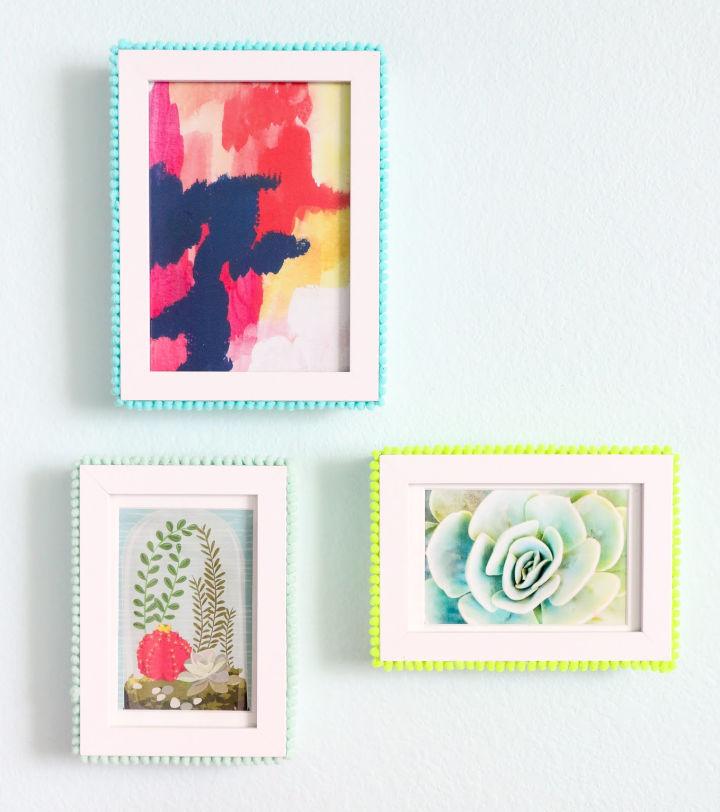
Add a whimsical touch to your home decor with pom pom picture frames, as featured on A Kailo Chic Life. These vibrant and playful frames are a simple yet effective way to spice up your interior design. To make your own, gather mini pom pom trim, a picture frame (the Ikea Ribba frames work well), and some craft glue like hot glue or E6000.
Start by applying a small amount of glue to the frame’s edge and press the pom pom trim into place, working your way around the frame. The result is a charming and colorful addition to any room, perfect for showcasing your favorite photos with a dash of personality. With easy-to-follow instructions, you can quickly transform plain frames into eye-catching pieces that complement your unique style.
14. DIY Painted Dipped Picture Frame
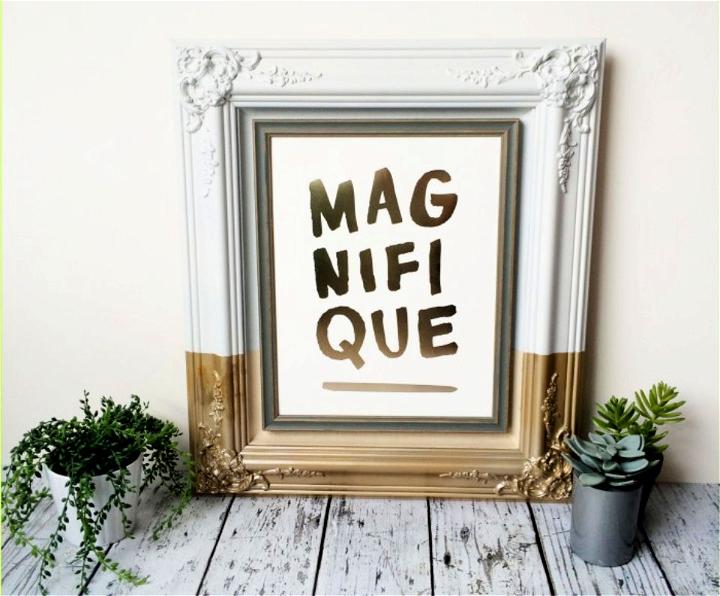
Transform your wooden picture frame into a chic and stylish home decor piece with the Paint Dipped Frame #12monthsofDIY project. Embracing the trend of dipped paint effects, inspired by artist Oliver Jeffers, this DIY offers a step-by-step guide to rejuvenating an old frame with Fusion Mineral Paints. The process involves careful taping, spray painting, and a choice of colors for a customized look. Fusion Mineral Paints provide a smooth application, eliminating the need for a top coat.
The paint dries to a durable finish, ideal for frames. To achieve this updated aesthetic, follow our instructions for a simple yet impactful transformation that will enhance any room’s ambiance. Brooklyn Berry Designs shares this creative endeavor, showing how easy it is to bring new life to wooden accessories.
15. How to Make a Floating Acrylic Frame
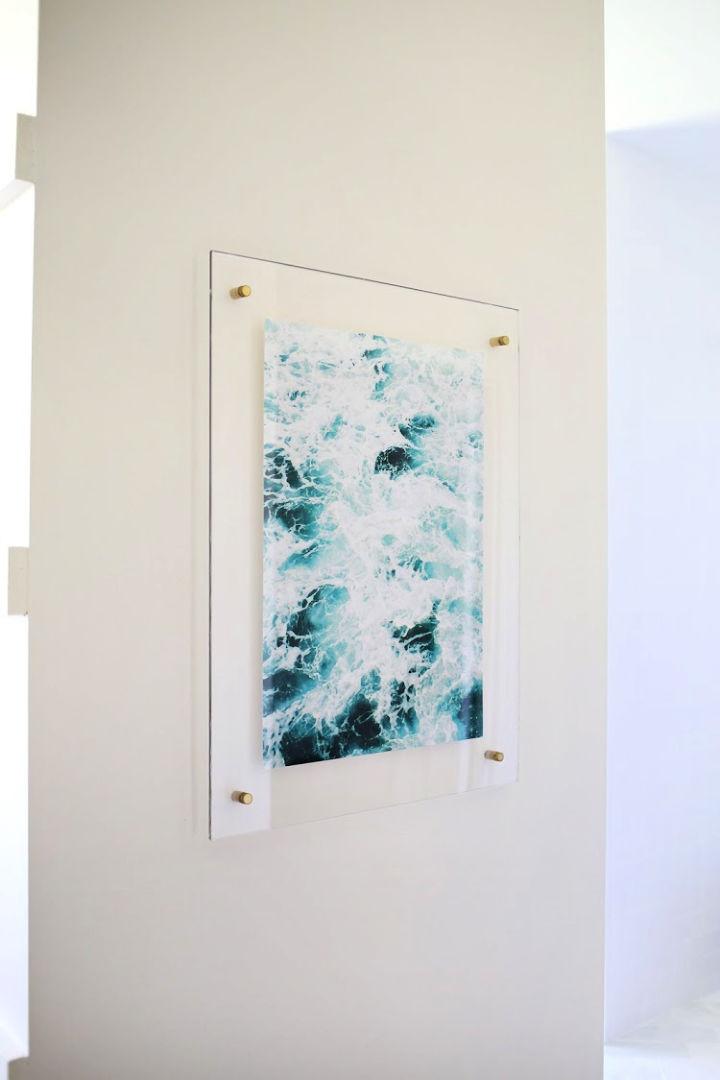
Ready to elevate your home decor with a personalized touch? A Beautiful Mess offers a fantastic DIY guide to making a stylish floating acrylic frame that’s both affordable and easy to make. Transform your favorite photograph into an eye-catching statement piece using simple materials like a custom-cut acrylic sheet, standoff mounting hardware, and a reliable Canon PIXMA iP8720 Crafting Printer for a stunning, borderless print.
The step-by-step instructions are clear and detailed, ensuring you avoid common pitfalls like cracking the acrylic. With the addition of gold spray paint and glue dots, you’ll craft a frame that looks professionally made, adding a modern and polished flair to any room. Embrace this engaging and helpful DIY project and give your space the artful finish it deserves.
16. Homemade Dyed Picture Frames
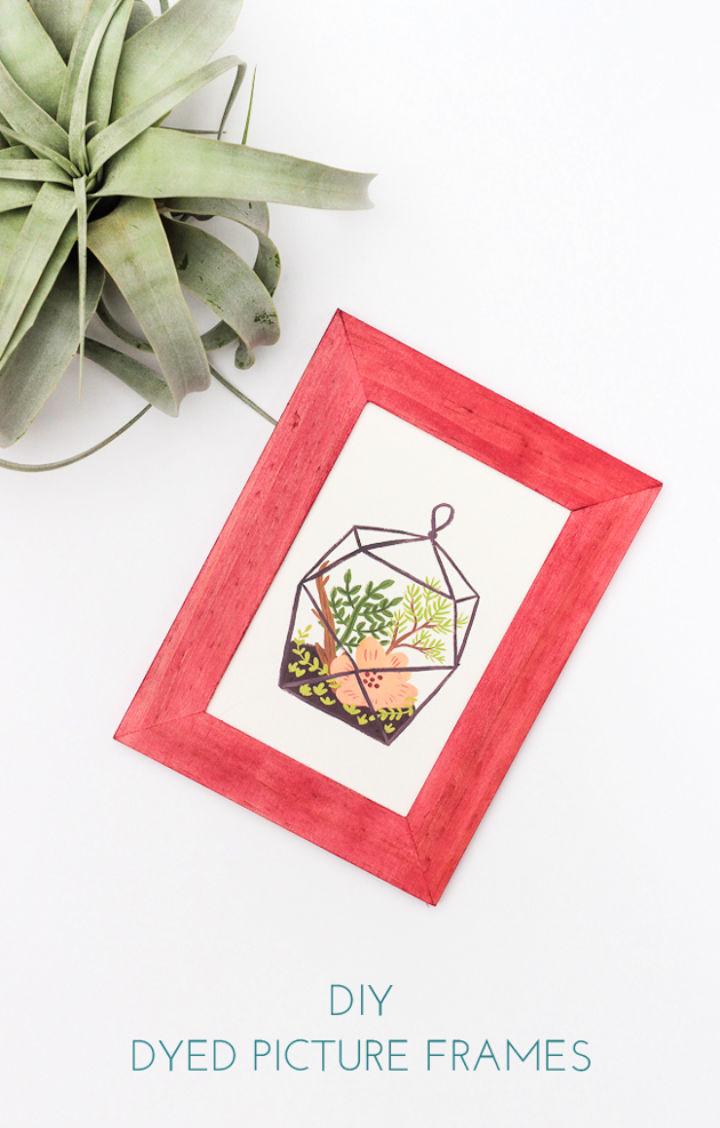
Transform your plain wooden picture frames into vibrant works of art with a simple and organic dyeing technique! Rachel Mae Smith of The Crafted Life shares an engaging and easy-to-understand guide on using fabric dye to add a burst of color to unfinished frames.
This instructive method maintains the wood’s natural grain and texture, offering a unique alternative to paint. In just 10 minutes plus drying time, you can apply the dye with a sponge brush, let it set, and seal your frame for a striking finish. Perfect for anyone eager to elevate their home décor, this DIY project is not only helpful but also incredibly satisfying to execute. Visit The Crafted Life for full details and more inspiring ideas.
17. DIY Oversized Frame for a Fraction Of The Price
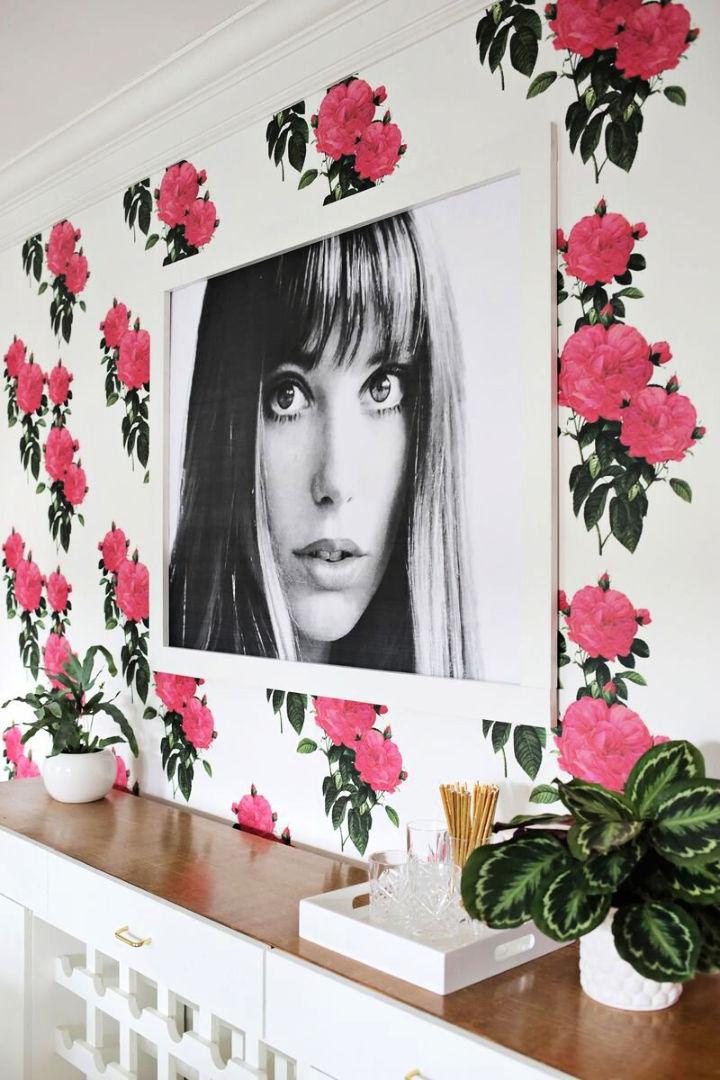
Transform your space with an oversized frame crafted at home, courtesy of A Beautiful Mess‘s ingenious DIY guide. Learn how to make a large-scale, custom-sized frame without the need for a saw. This step-by-step tutorial shows you how to use simple materials like wood boards, metal corner braces, and spray paint to assemble a stylish frame that complements any print or photo.
Save money without sacrificing aesthetics, and hang your art seamlessly with the help of sawtooth frame hangers. Whether filling gaps with caulk or staining your frame, the instructions are clear, engaging, and easy to follow. Elevate your décor with a handmade frame that looks professionally made and fits your budget perfectly.
18. Simple DIY Frames With Gold Hardware
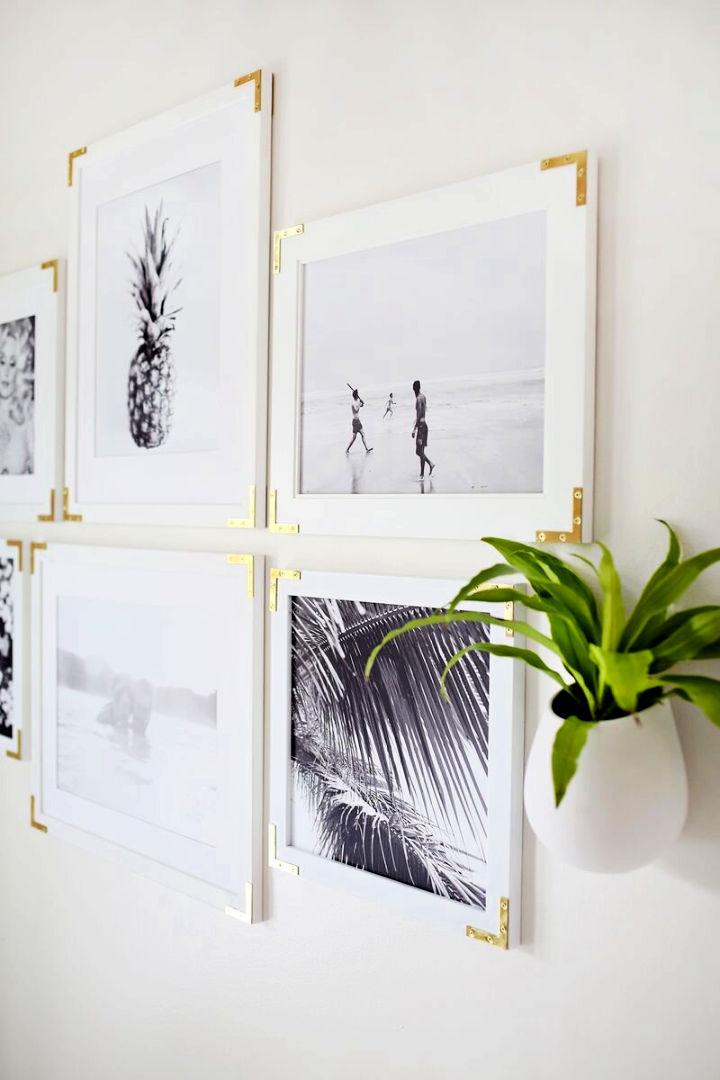
Elsie Larson’s creative project is a breath of fresh air for anyone aiming to infuse their living space with a touch of elegance. In her guide, presented on A Beautiful Mess, Elsie showcases how to update simple white frames with luxurious gold hardware, transforming them into chic wall art. By teaming up with Canon USA, she prints striking B&W images using the Canon PIXMA iP8720 printer, achieving a sleek look that complements any room.
With Elsie’s instructions, anyone can easily replicate this stylish DIY, elevating their home decor with minimal effort and maximum impact. Her step-by-step tutorial is insightful and perfect for those eager to personalize their surroundings with unique and eye-catching art pieces.
19. From Tray to Display Pictures
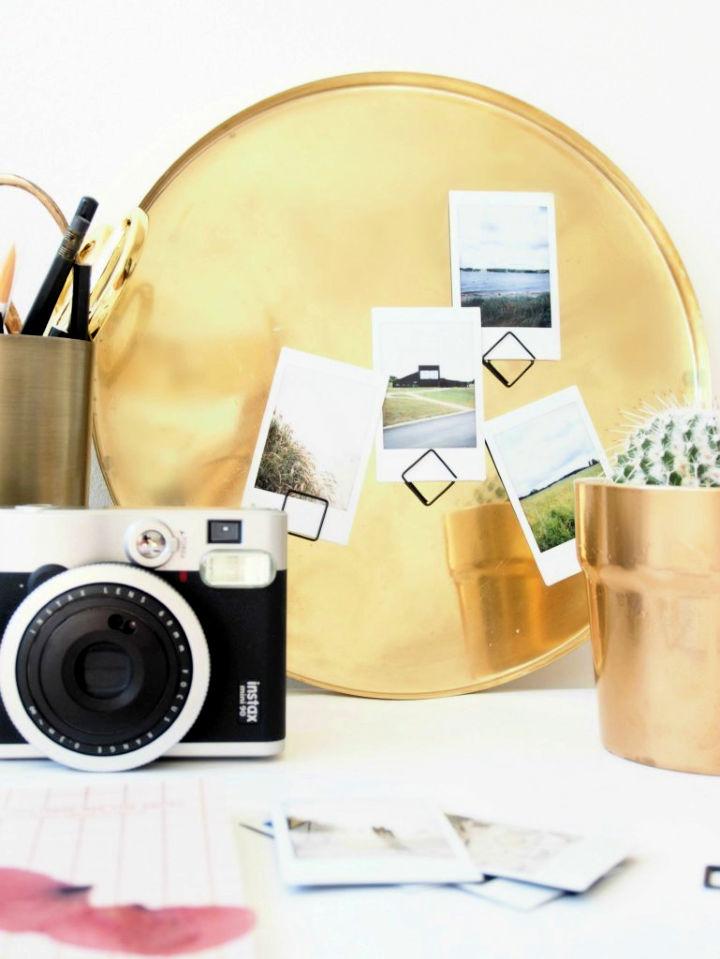
Transform an old brass tray into a unique and stylish magnetic photo holder with the creative tips from monsterscircus. This DIY project is perfect for those who love displaying their favorite memories in a charming and personal way. The instructions are simple: attach a paper-clip to your photo, then place the photo and a magnet on opposite sides of the tray to make an eye-catching mood board.
Ideal for anyone seeking a blend of nostalgic charm and modern functionality, this magnetic photo holder breathes new life into your home decor. Get inspired and display your photos with a personalized touch!
20. Build a Rustic Picture Frames in 20 Minutes
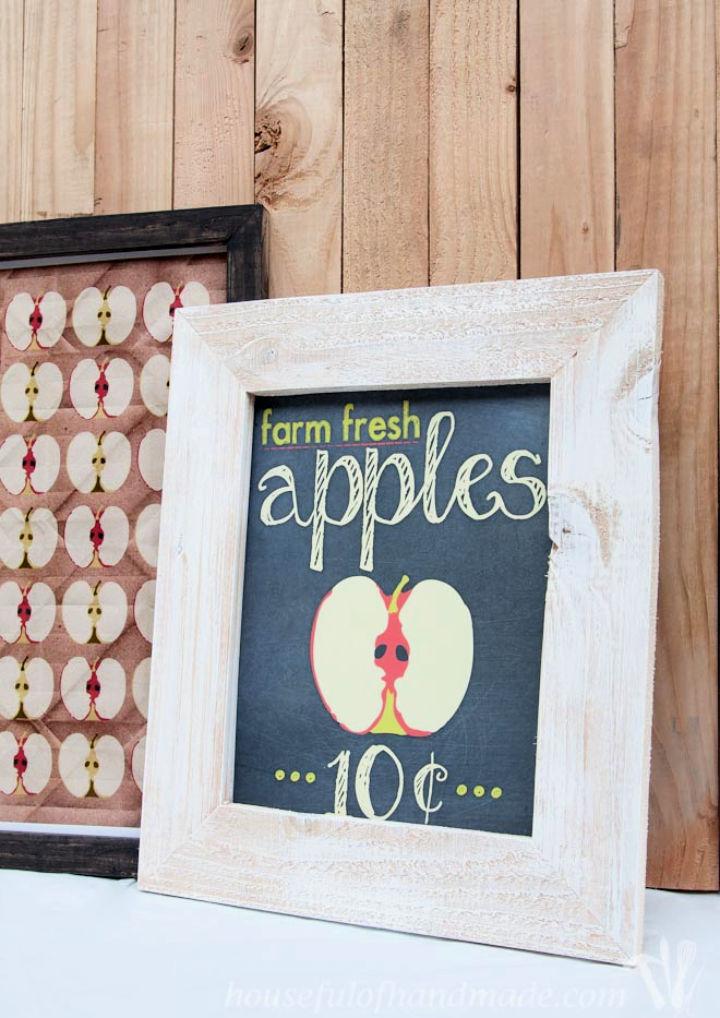
Making DIY picture frames has never been easier, thanks to the comprehensive guide from Houseful of Handmade. Ideal for crafters who love personalizing their home decor, this tutorial outlines a swift 20-minute project to build beautiful frames, suitable for any picture size.
With clear instructions on materials, cutting lists, and assembly, you’ll be ready to add a personal touch to your walls or mantle. Learn the tricks of the trade, including a dry brush painting technique that enhances the wood’s natural texture, adding a rustic charm to your frames. Dive right in and craft a frame that’s not just a holder for memories, but a piece of art in itself.
21. Build Your Own Wooden Picture Frame
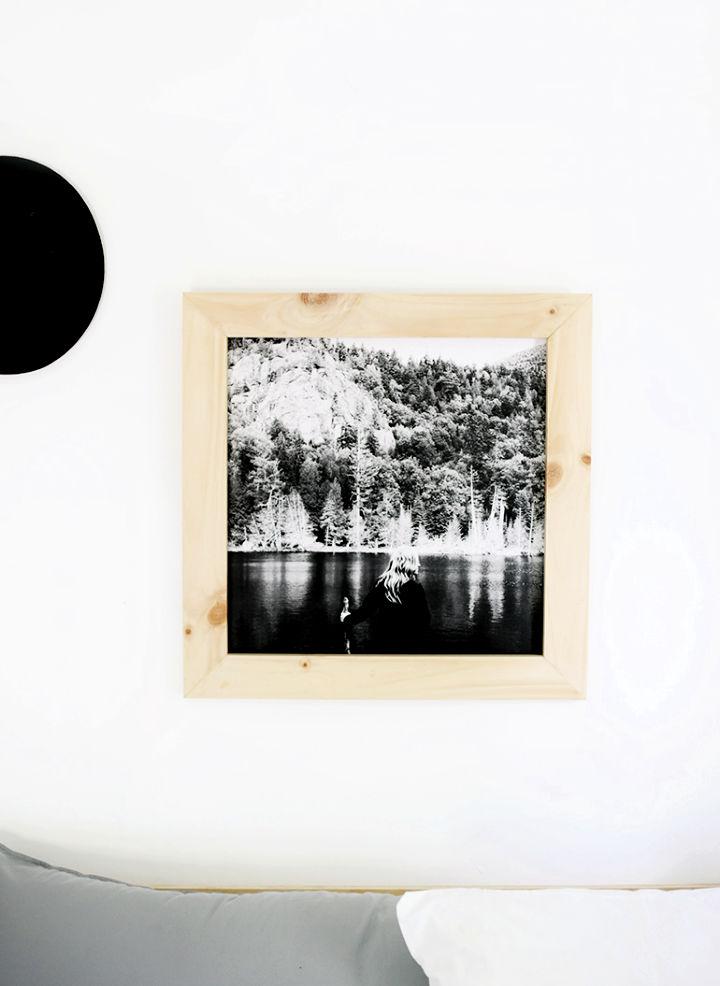
Transform your cherished Instagram memories into stunning wall art with The Merrythought‘s DIY Easy Wooden Frame tutorial. Caitlin McGrath walks you through a simple step-by-step process to make a durable wooden frame, ideal for showcasing your favorite photos.
With just a few tools like a miter saw, wood glue, and a nail gun, you’ll craft a personalized display piece. This project suits anyone eager to add a homemade touch to their decor, requiring only basic carpentry skills. By following this guide, you’ll enjoy a creative way to enliven your living space with your most treasured moments.
22. Make Picture Frames for a Few Bucks
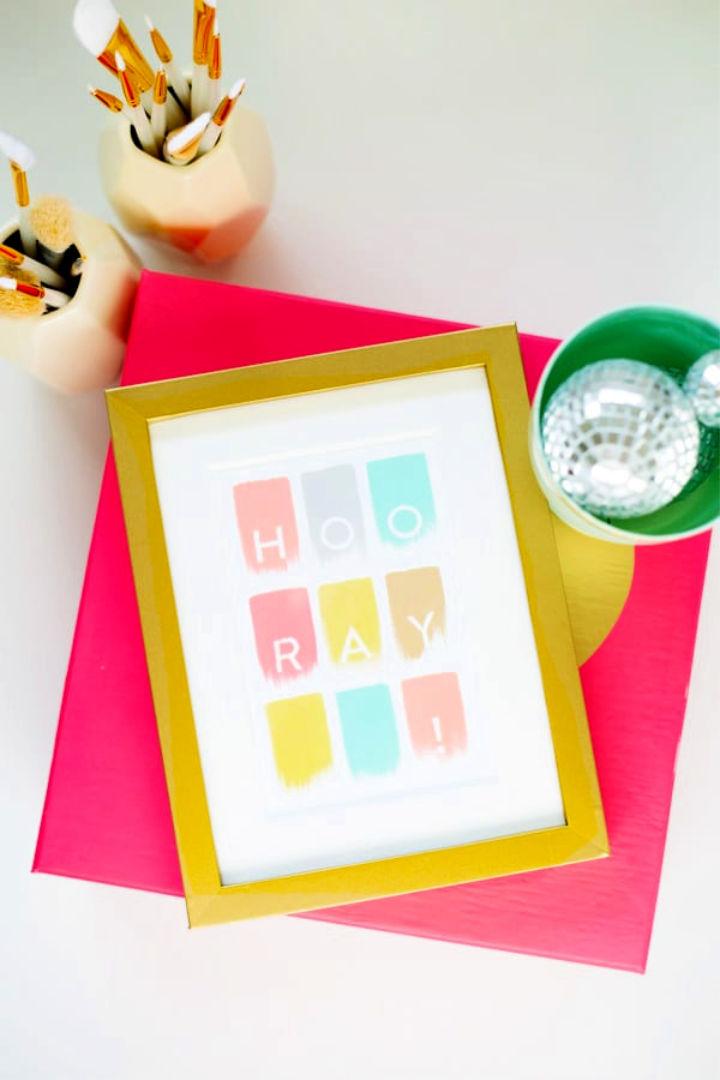
Refresh your picture frames easily with Lovely Indeed‘s clever DIY method! All you need are some old frames, adhesive vinyl or contact paper, scissors, and an X-Acto knife. With a bit of cutting and smoothing, you can give your wall art a fresh look without the mess of spray paint or the expense of new frames. This simple project is perfect for a quick home update, offering a budget-friendly way to enhance your decor. Follow these instructive steps for an engaging transformation, ensuring your cherished memories are displayed in style.
23. Simple & Stylish DIY Circle Picture Frames
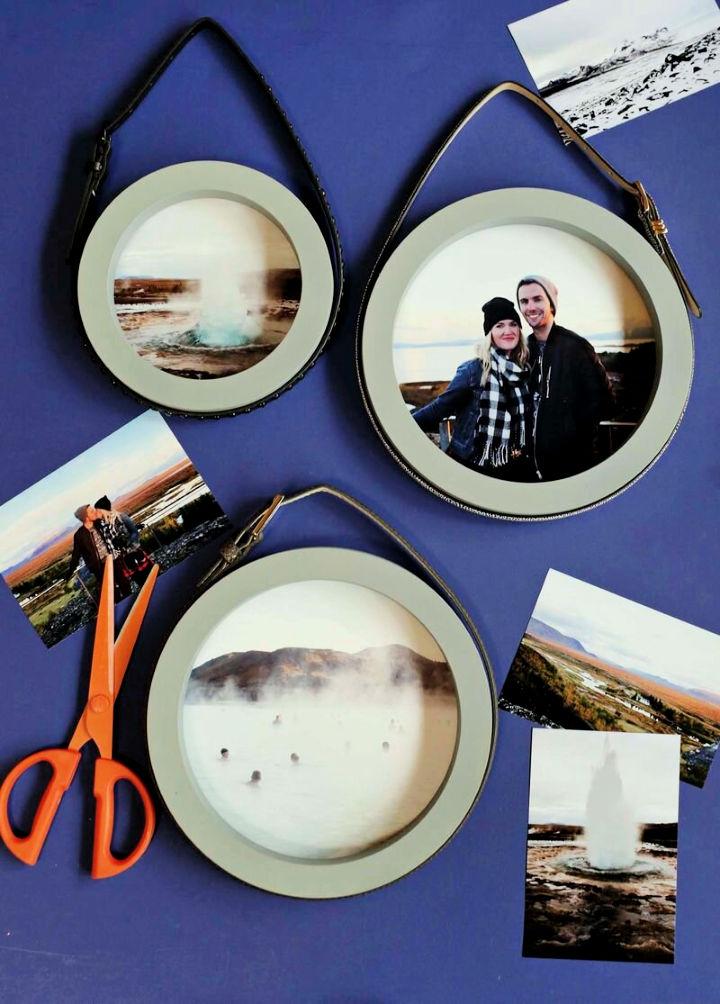
Transform your cherished memories into eye-catching decor with Emma Chapman’s guide to making stylish circle frames. In a recent entry on A Beautiful Mess, Emma shares her personal experience with fast-paced life events and her passion for preserving memories. Her post focuses on an easy, yet impactful DIY project that showcases the beauty of printed photographs.
By selecting meaningful pictures and using simple materials like painted circle frames and belts for hanging, Emma demonstrates how to craft a personalized and welcoming display for any home space. Perfect for photo enthusiasts and DIY lovers, her step-by-step approach ensures a satisfying project outcome that breathes life into your favorite moments.
24. How to Make a Plain Photo Mat Pop
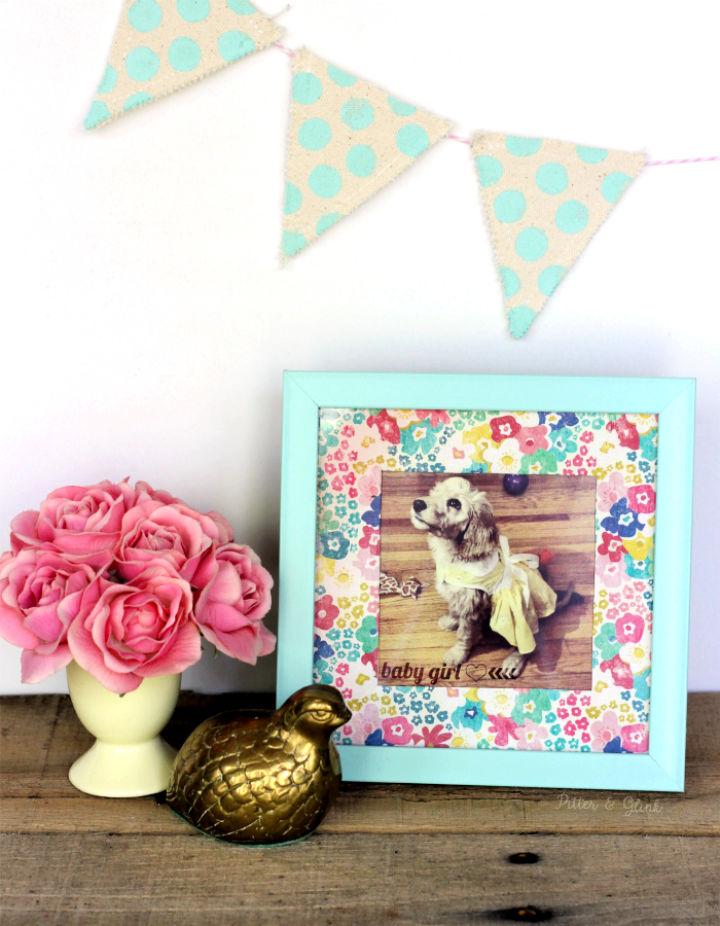
Transform a plain photo mat into a charming display piece with ease. Dive into a simple, engaging tutorial that guides you through upgrading a basic frame mat using patterned scrapbook paper. Grab your scissors, glue, and favorite paper design to personalize your picture frames.
This project suits any style, from floral prints to classic stripes. It’s an ideal way to add a touch of personality to your cherished photos. Follow these straightforward steps, and let your creativity lead the way to a beautifully customized photo mat that screams “you.” Pitter and Glink
25. Easy Picture Frame Makeover
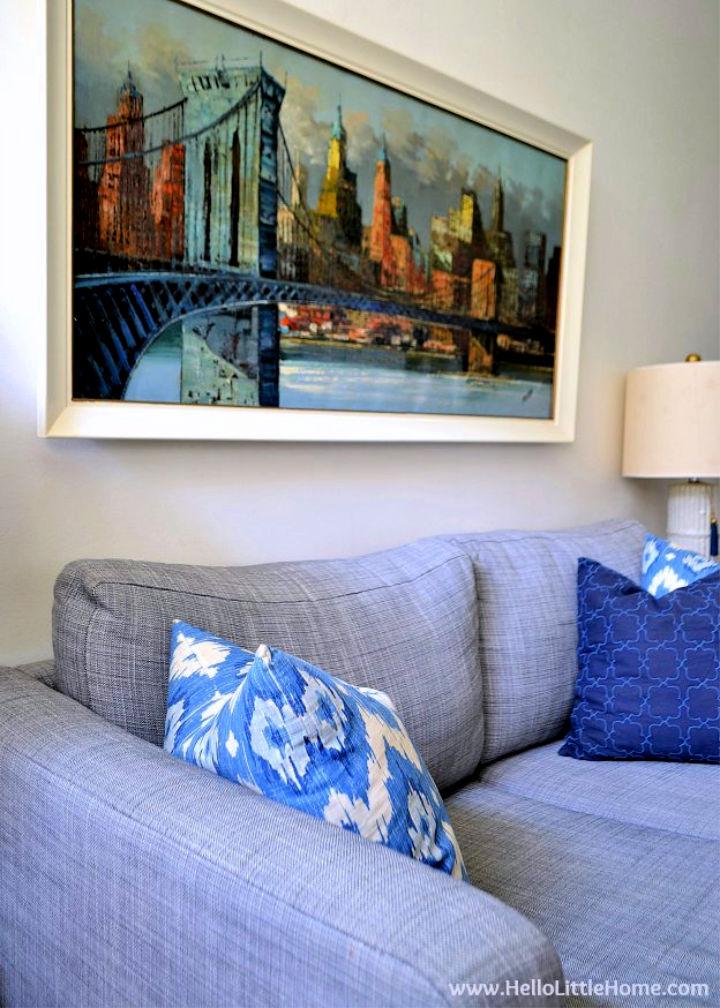
Transform your artwork with a simple picture frame makeover using Hello Little Home‘s step-by-step guide. If your cherished art is encased in a less-than-appealing frame, a little paint can work wonders. You’ll need painter’s tape, craft paint, a foam brush, and optional sandpaper for a glossy finish.
Begin by securing the edges with tape to prevent seepage, then apply thin paint layers, allowing each to dry. Once you’re satisfied, remove the tape and let the paint set completely before rehanging your piece. With a fresh frame, your art will take on a new lease of life, seamlessly blending with your interior decor. This affordable and quick method will leave you with a satisfying result that brightens your space.
26. DIY Hanging Wall Chart
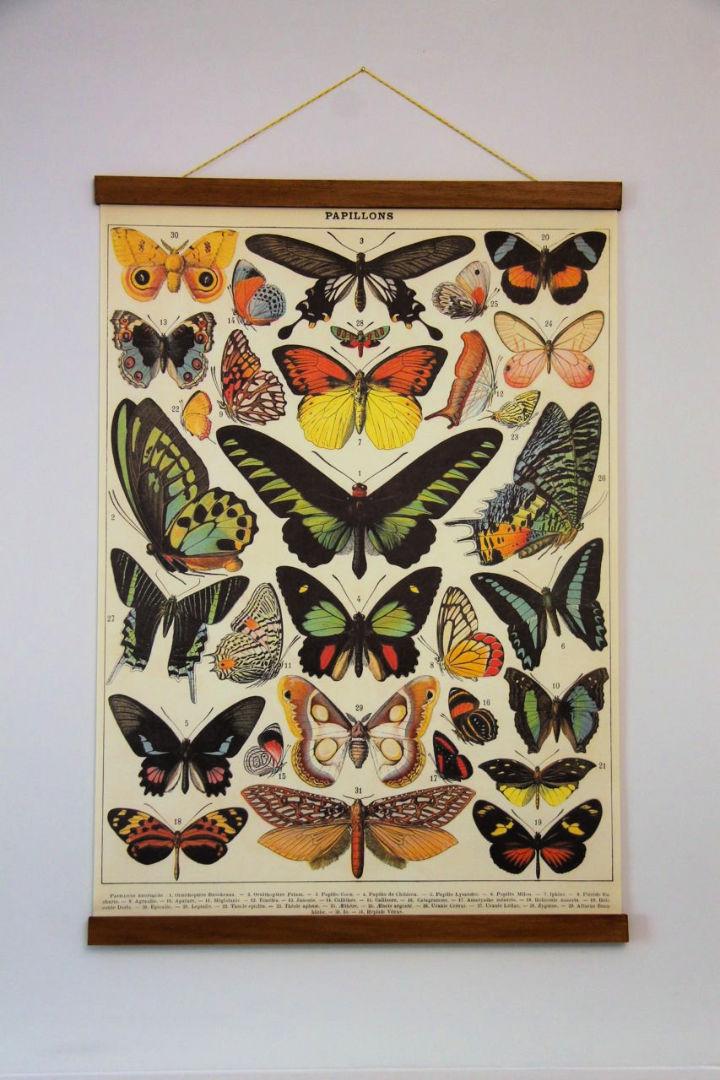
Make a chic hanging wall chart with ease using this straightforward tutorial that eschews the need for a saw. Ideal for adding a personal touch to your home decor, this DIY project transforms wrapping paper into stylish wall art using balsa wood and double-sided tape.
Follow these simple steps to cut, sand, and assemble your materials, including a crafty trick for staining the wood with watercolor paint. Customize with colored string to match your interior, and enjoy a handmade creation that’s not only budget-friendly but also a perfect statement piece for any room. Visit Wrapped Upin Rainbows for a complete guide to making your own elegant wall hanging.
27. DIY Copper Picture Frames
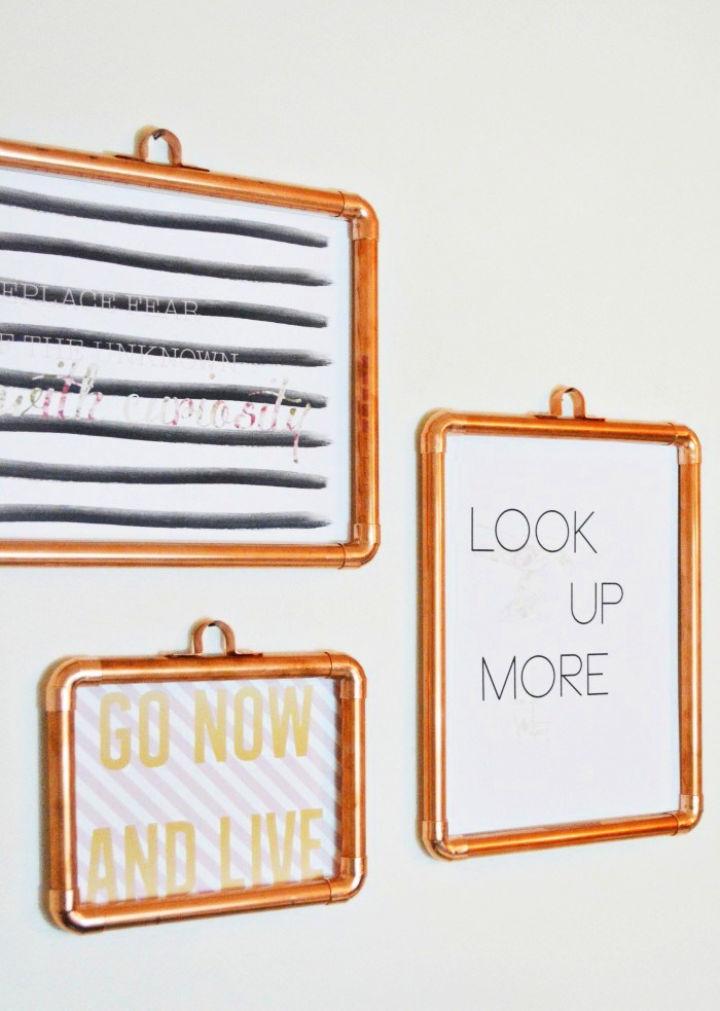
Making your own copper frames is a simple and stylish way to display your favorite prints or photos. A Joyful Riot offers a clear and concise tutorial that guides you through crafting elegant copper pipe frames, perfect for adding a personal touch to your decor.
With just a few materials like copper pipe, pipe cutters, Gorilla glue, and copper elbows, you can assemble a frame in any size you desire. This DIY project is not only easy to follow but also results in a unique, minimalist look that complements any space. So grab your tools and get ready to enhance your walls with custom-made copper frames!
28. How to Make Arrow Picture Frames
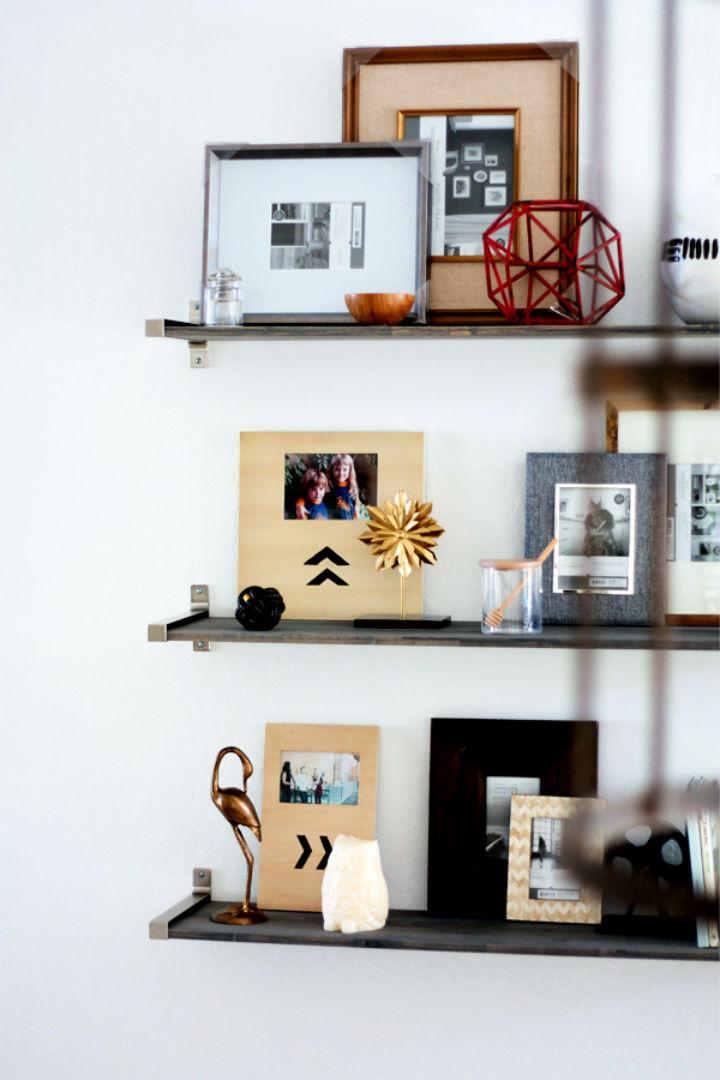
Transform your living space with a personalized touch using Kristi Murphy‘s DIY Arrow Frame project. Perfect for adding a stylish flair to your decor, this DIY guide offers a step-by-step process for making chic arrow frames. With a simple list of supplies like frames, black paint, a small paint brush, and blue painter’s tape, you can make your own custom artwork. Kristi Murphy’s DIY Blog provides clear instructions, ensuring a seamless experience for all craft enthusiasts. Get creative and showcase your favorite pictures in these unique, hand-painted frames that are sure to be a conversation starter.
29. Make a Textured Picture Frame
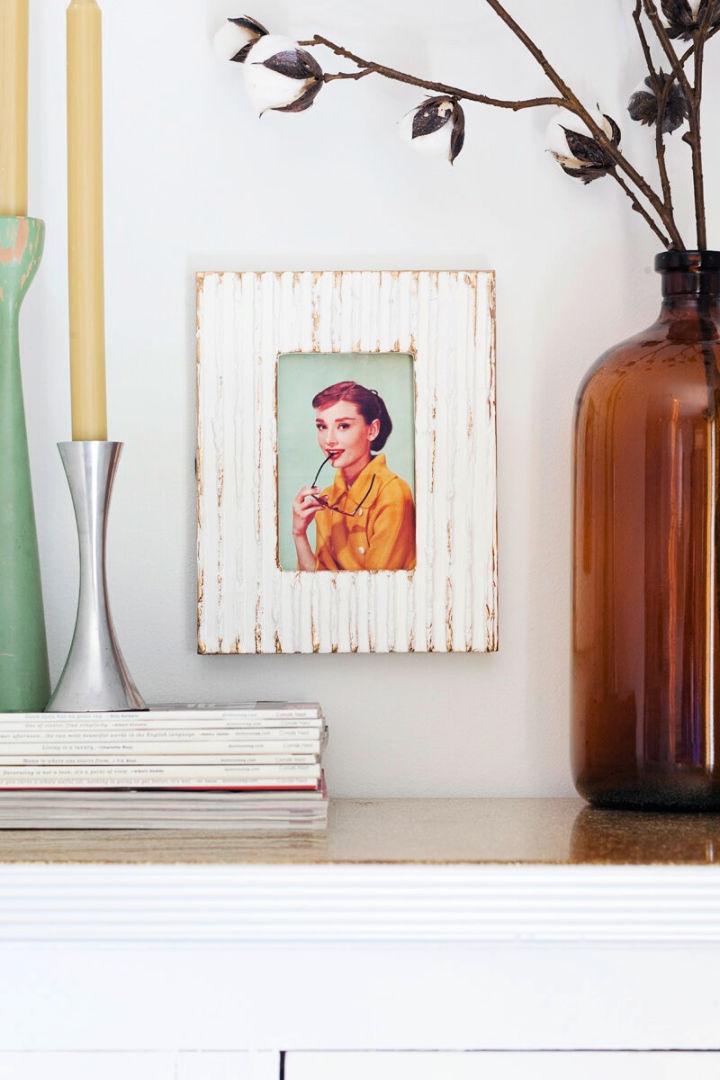
Making a textured picture frame can add a unique and personal touch to your home decor. A Beautiful Mess guides you through an easy DIY process to transform a plain wooden frame into a stylish piece for your gallery wall. Begin by mixing drywall compound, applying it to the frame, and using a notched trowel to craft a pattern. Once set, sand the rough areas, apply primer and paint, and accent with metallic hues if desired. This project is perfect for those who enjoy customizing their space with handcrafted items.
30. Picture Frames Using Creative Duct Tape
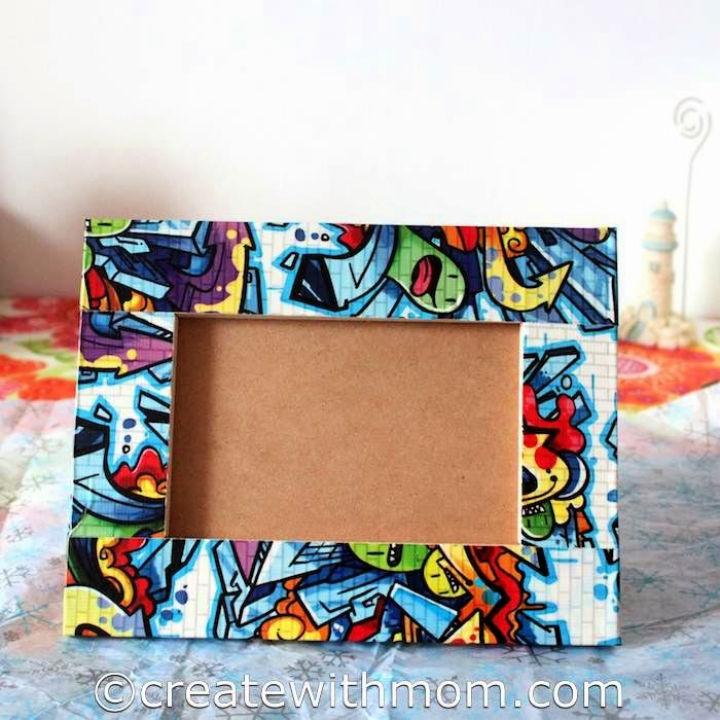
Get crafty with your home decor by adding a personal touch to picture frames using creative duct tape. Make With Mom brings you an engaging and simple way to transform plain wooden frames into colorful, eye-catching pieces. With a variety of duct tape designs available, you can choose to match your room’s theme or let your imagination run wild.
Perfect for a rainy day activity or as thoughtful, handmade gifts, this DIY project requires only a few materials like a frame, duct tape, scissors, and a craft mat. Follow the step-by-step instructions to measure, cut, and apply the tape for a smooth finish. Your frames will go from ordinary to outstanding in no time, and you’ll have fun in the process. Visit Make With Mom for more inspirational ideas to enhance your living space with creativity and flair.
31. Easy DIY Picture Frame Under $5
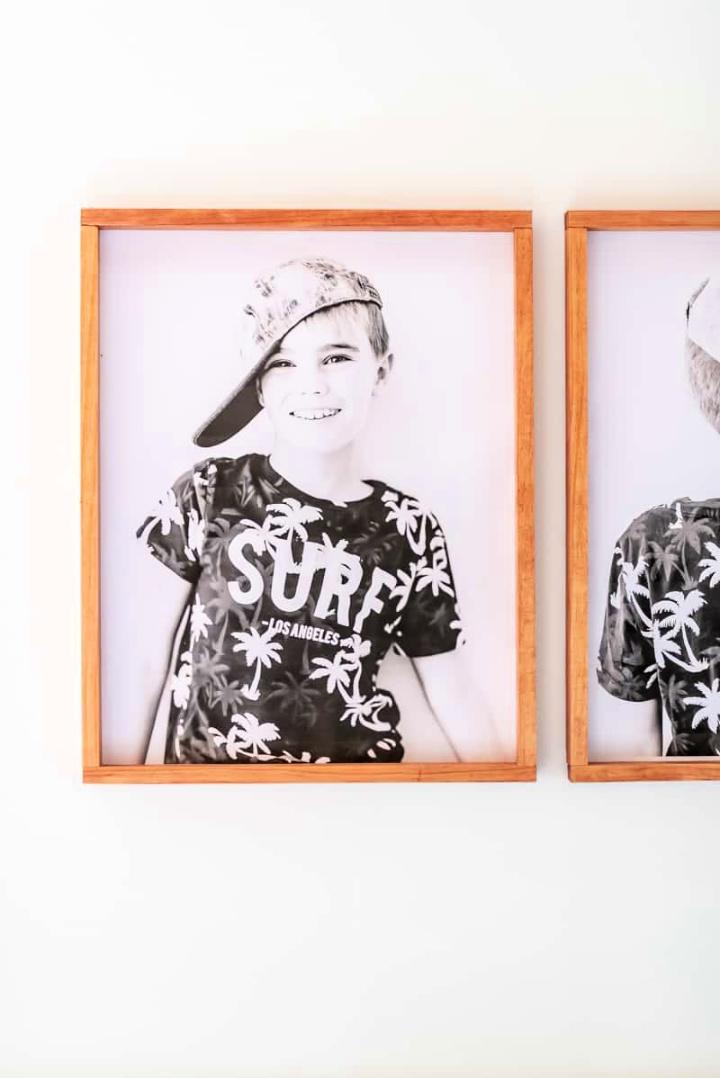
Ready to make a charming DIY picture frame for under $5? Place Of My Taste shares an engaging and simple tutorial for crafting a custom photo frame that adds a personal touch to any room. Perfect for showcasing those precious memories, this project is not only budget-friendly but also quick to complete.
With easy-to-follow steps and a list of basic materials like pine boards, screws, and wood stain, you’ll be able to measure, cut, assemble, and stain your way to a beautiful picture frame. Whether for your own home or as a heartfelt gift, this DIY frame will be a hit. Get your tools ready, and let’s make something special together!
32. DIY Antique Window Picture Frame
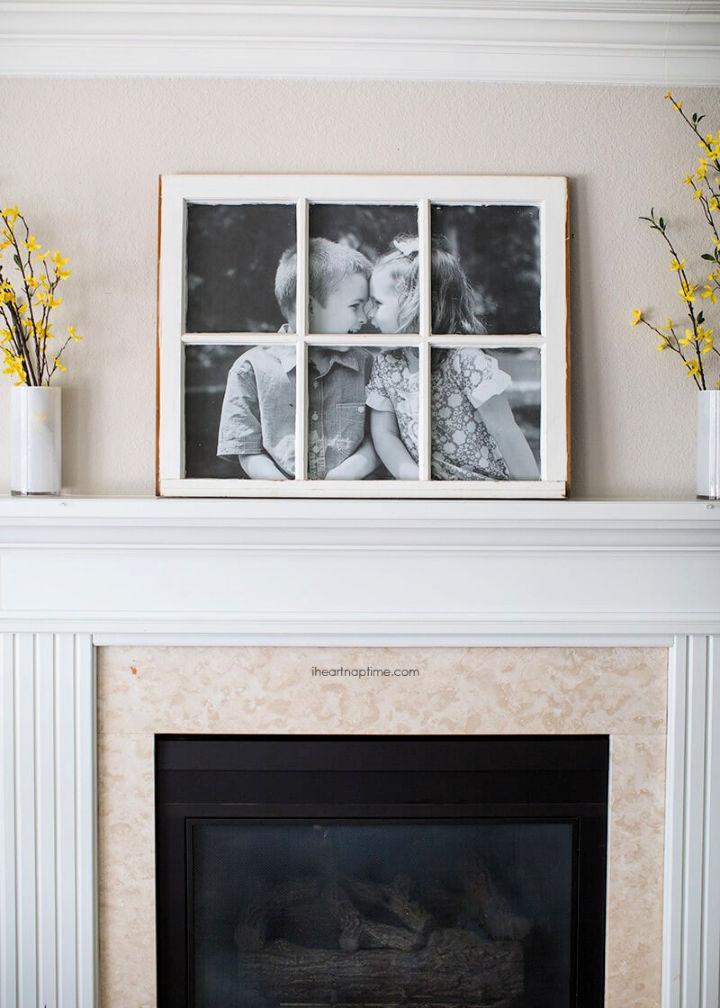
Transform an old window into a charming rustic picture frame with ease, thanks to The Inspiration Board‘s DIY guide. Jamielyn Nye shares a straightforward, budget-friendly method to repurpose these vintage finds into eye-catching home decor. Start by cleaning the window, then simply print an oversized photo, trim the edges, and secure it behind the glass with tape.
If you plan to mount your creation, add sawtooth hangers for a sturdy hold. This project is a splendid way to infuse personality into your living space, whether it’s gracing a mantelpiece or a hallway. Bring new life to your interiors with a touch of rustic nostalgia.
33. How to Make a $3 Bow Picture Frame
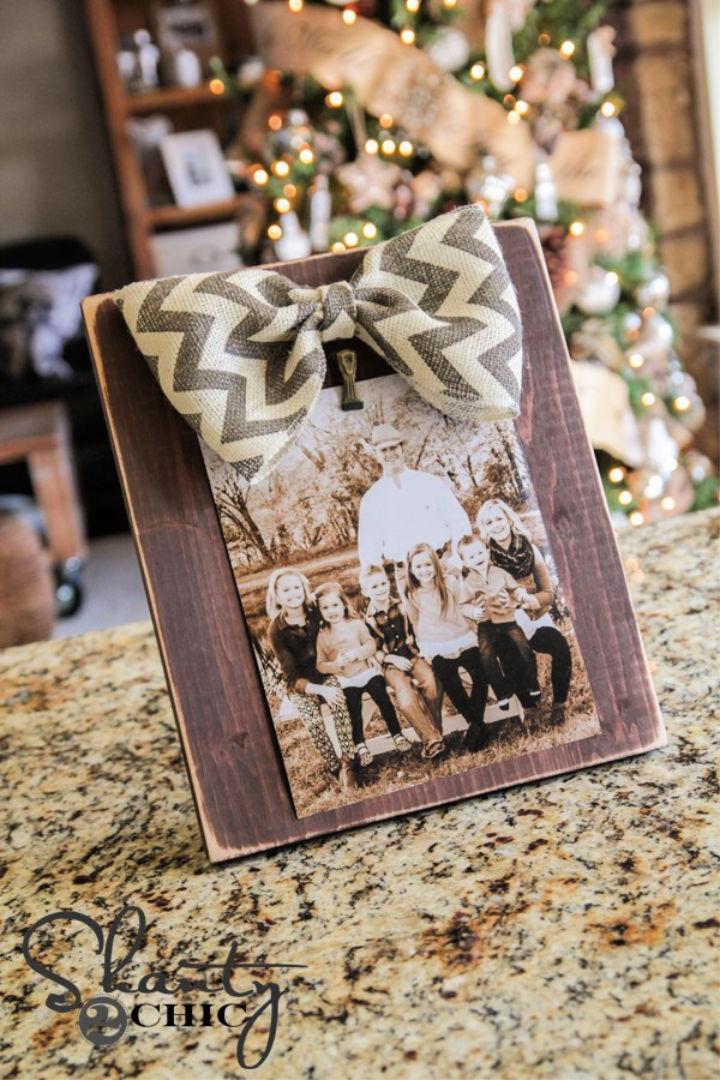
Get crafty this holiday season with a DIY Bow Picture Frame! Shanty 2 Chic‘s guide takes you through an easy-to-follow, budget-friendly project to make charming picture frames for less than $3 each. Perfect for gifting or decorating your home, this tutorial covers all the steps, from cutting and assembling the wood to making adorable bows and adding a rustic touch with sanding techniques.
Whether you plan to showcase your favorite 5×7 or 8×10 photos, these frames add a personalized element to your festive decor. Ready your tools and materials, and let’s start crafting some beautiful picture frames that are sure to impress.
34. DIY Origami Chicken Wire Frame
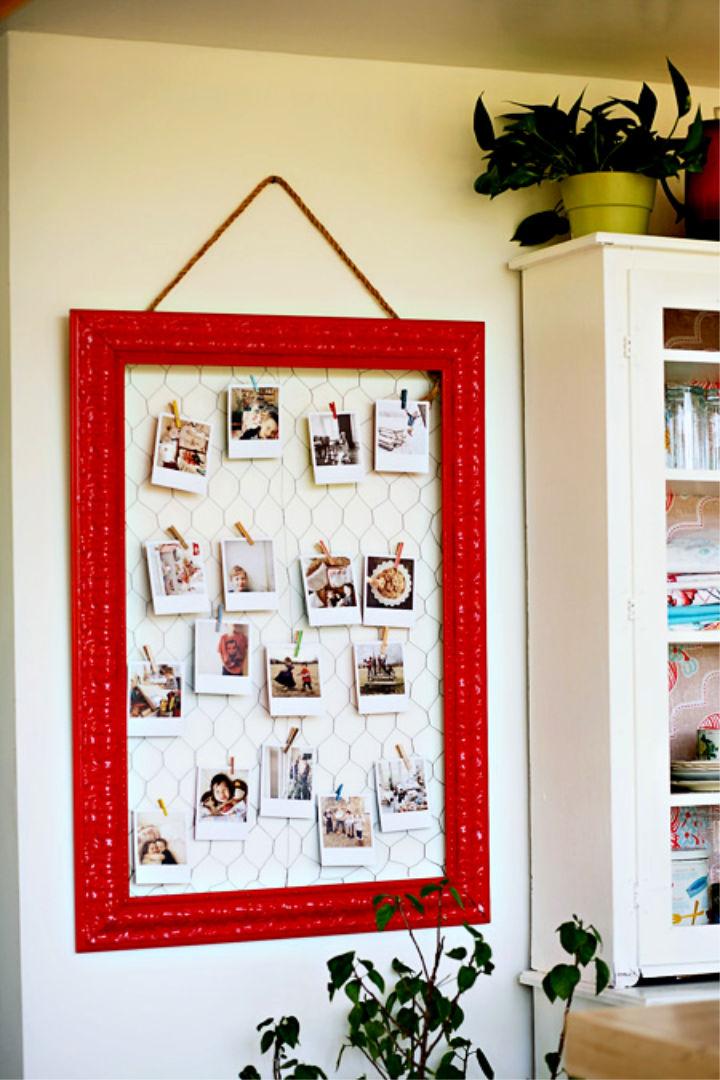
Transform your space with a creative touch by crafting a DIY chicken wire frame, perfect for displaying cherished memories. Ashley from Under the Sycamore shares her personal project, where she revamped her vibrant yellow chicken wire frame into a stunning red accent piece for her studio.
By utilizing little clothespins, you can effortlessly attach photos printed on durable matte paper, each with its own date and details on the back. As you gather more clothespins, you can add to your collage, and even consider embellishing the display with a handmade garland for an extra dash of charm. This instructive guide ensures a seamless process, leaving you with an engaging wall feature that adds warmth to any room.
35. Upcycled Rolled Paper Frame Ideas
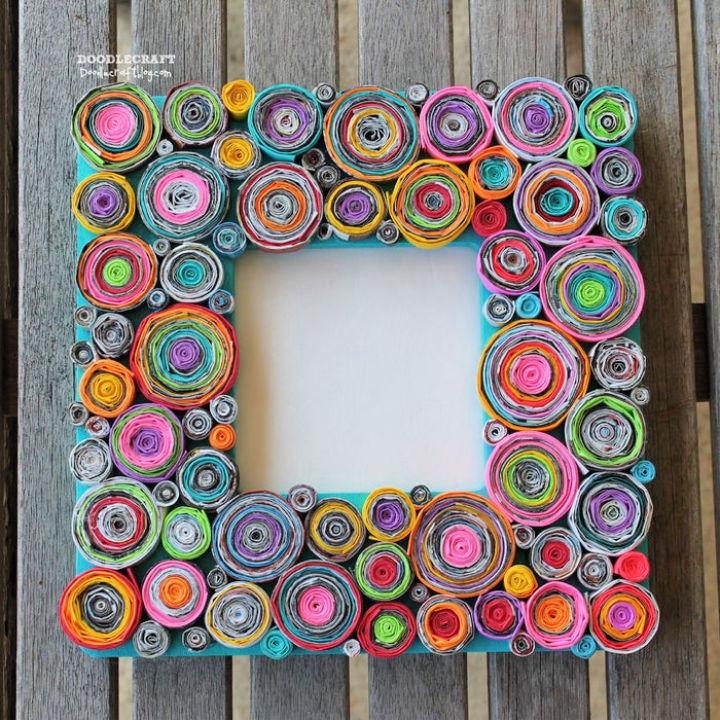
Delve into a creative project with Instructables‘ Upcycled Rolled Paper Frame guide. This hands-on tutorial takes you through the steps of making a striking frame that’s not only a work of art but also an eco-friendly endeavor. By transforming old magazines, flyers, or any paper scraps into a decorative frame, you add a personal touch to your decor and reduce waste.
The process is detailed, with a focus on clear instructions and practical tips, ensuring a fun and rewarding crafting experience. Perfect for an engaging activity to enjoy on your own or with family, this frame adds texture and a burst of color to any room. Get ready to roll up your sleeves and make a unique piece that’s as sustainable as it is stylish.
36. DIY Large Picture Frame
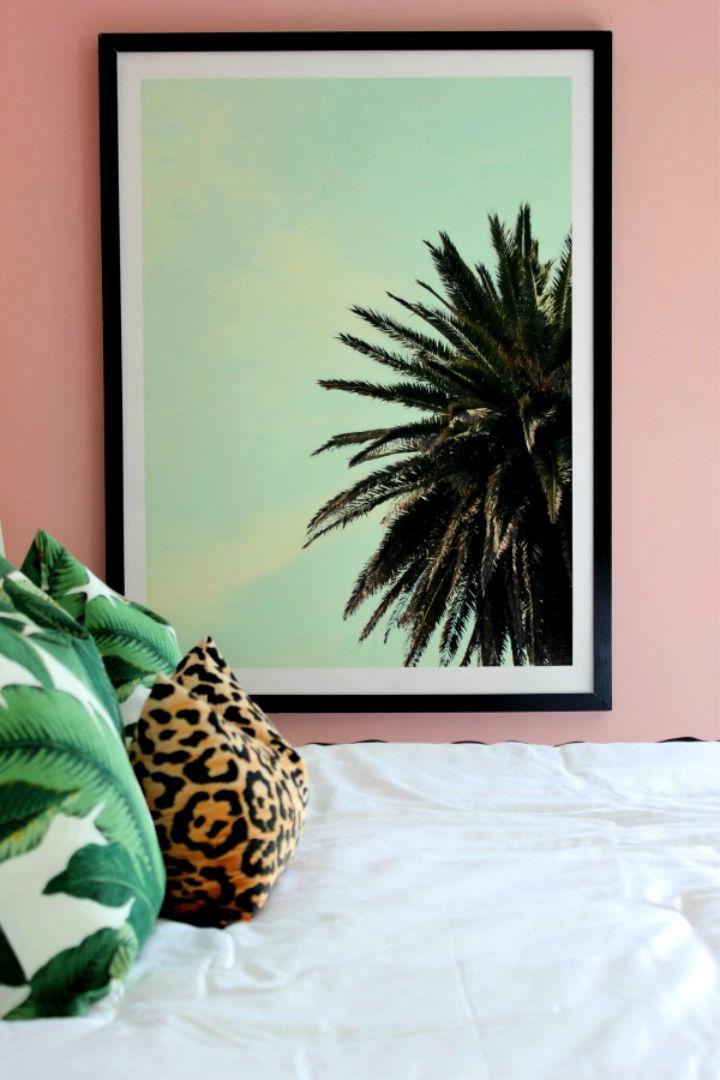
Making a large picture frame on a budget is easier than you think! Jenna from Rain on a Tin Roof shares an accessible guide for crafting an affordable DIY frame that’s perfect for oversized art prints. With a clear list of materials, step-by-step instructions, and smart tips like using corner braces for added support, you can assemble a stylish frame for around $25.
Ideal for anyone keen to display large artwork without the hefty price tag, this DIY project marries simplicity with practicality, ensuring you can hang your art securely and with confidence. Dive into this guide to add a personal touch to your home decor today.
37. Making a Professional Photo Frame
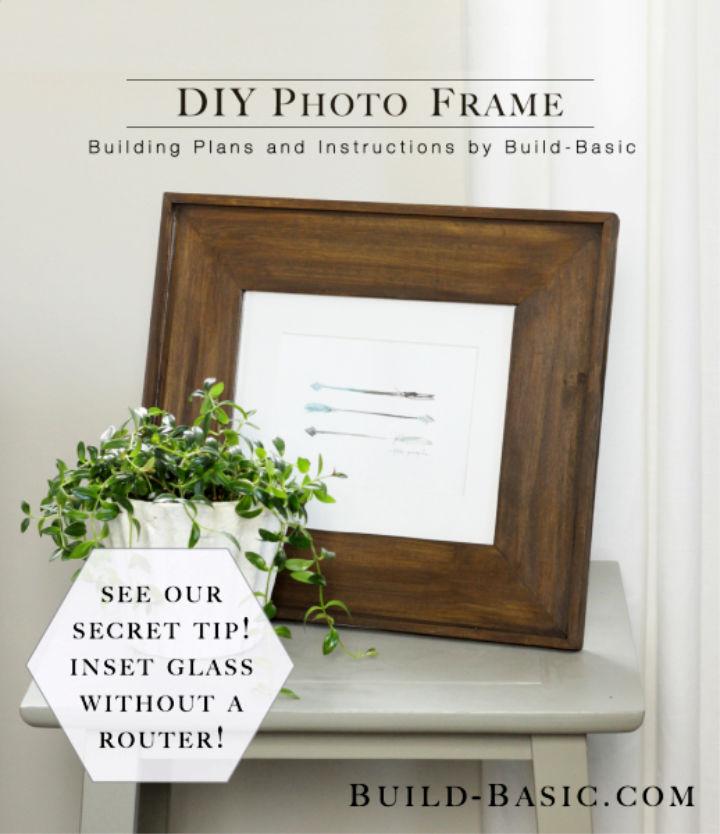
Building a DIY photo frame is a satisfying project that enhances your home decor. With Build Basic‘s easy-to-follow guide, you can construct a professional-looking frame with an inset glass without using a router. By repurposing simple materials like paint sticks for the inset and adding a trim piece for a polished look, this guide makes it easy for anyone to achieve great results.
Ideal for an 8″x10″ photo, the instructions include a materials list, cut list, and step-by-step process, all designed to make the building experience straightforward and enjoyable. Add a personal touch to your space with this charming and practical DIY craft.
38. How to Make a Cardboard Photo Frame
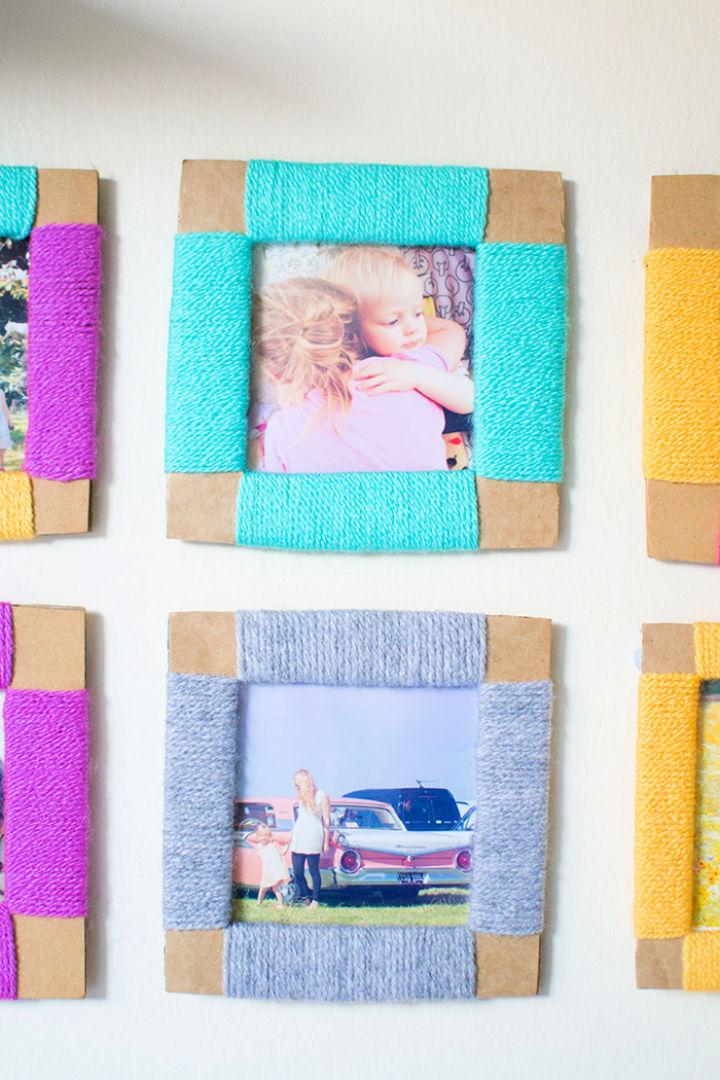
Transform your cherished memories into unique decorations with a DIY cardboard photo frame! Let’s Do Something Crafty provides a fun and easy guide to making personalized frames using simple materials like cardboard, yarn, and photos. Cut, wrap, and glue your way to a colorful display that’s perfect for any room. With options to paint or add glitter, kids can join in, too. Get crafty and frame your favorite moments in a truly special way that reflects your style.
39. Old Window Turned Picture Frame
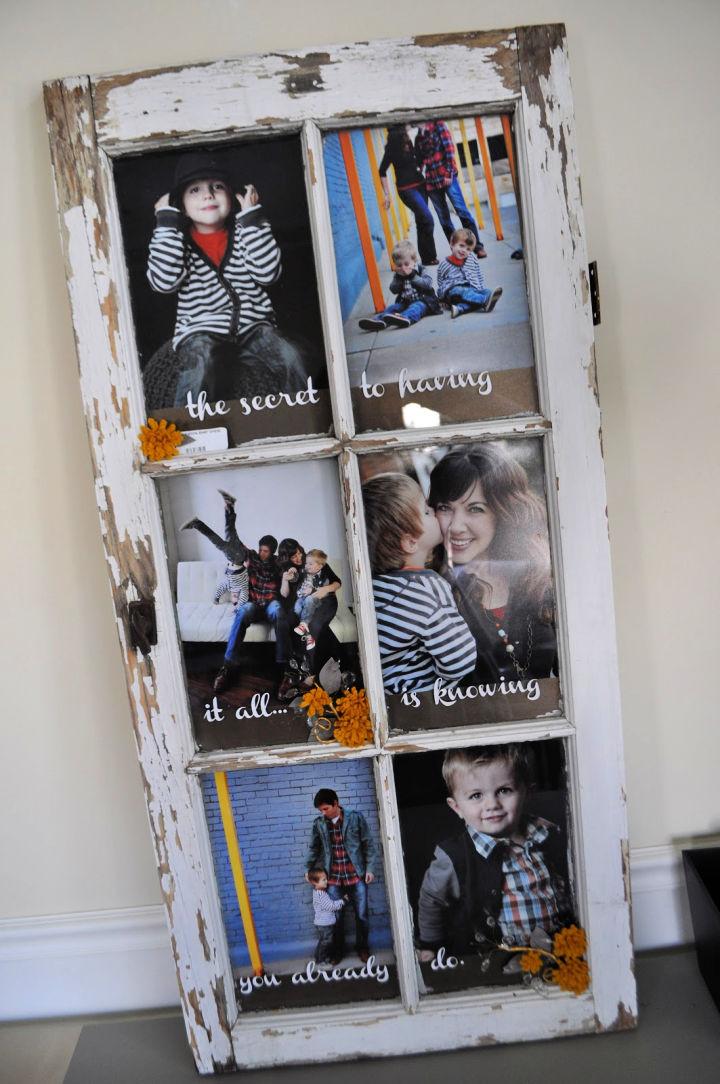
Transform an old window into a charming picture frame with this DIY guide from I Am Momma, Hear Me Roar. Perfect for showcasing your treasured family photos, this project is a blend of creativity and upcycling. The author takes you through a step-by-step process, from selecting photos to adding personalized touches like vinyl phrases and handmade embellishments.
With a nod to vintage aesthetics, the finished piece adds character to any space. This instructive article makes it easy to make a unique display piece that’s not only engaging but also a heartwarming addition to your home decor.
40. DIY Mummu’s Bragging Picture Frame
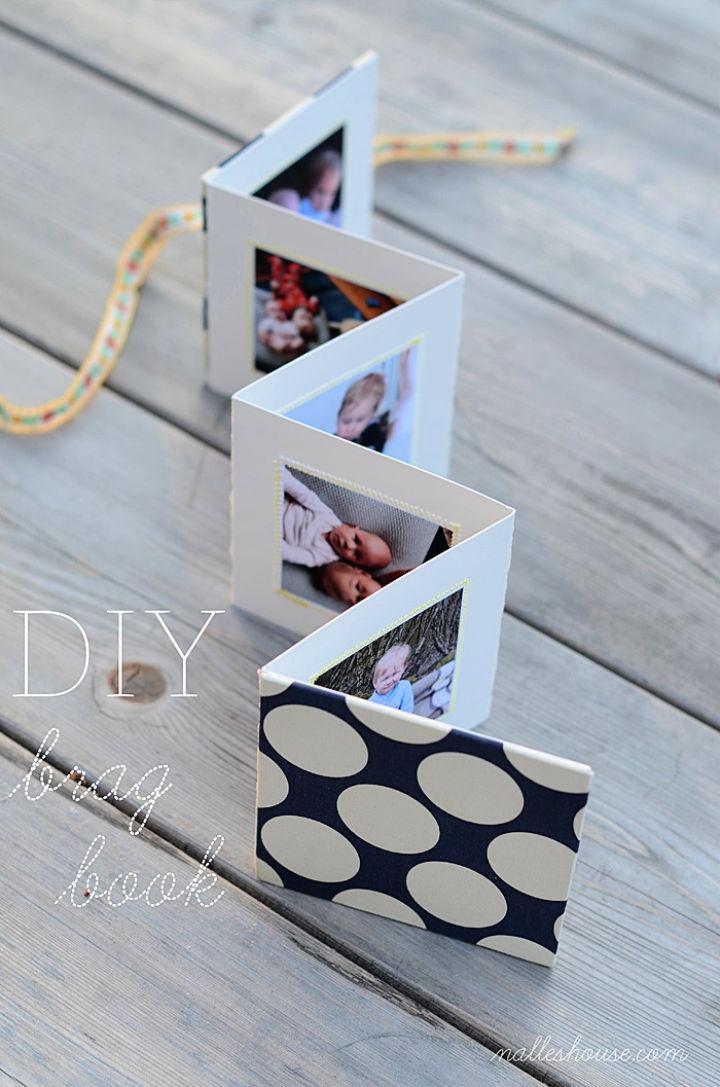
Make a personalized and charming brag book for Mother’s Day with this simple craft project, ideal for showcasing cherished memories with loved ones. Gather some fabric scraps, photos, and minimal crafting supplies to assemble a thoughtful gift that will warm any mother’s heart. This brag book is a 5″ square creation, perfect for Instagram snaps or any 3″ square images.
It features a sturdy accordion-style photo board and adorable fabric covers that are customizable to your taste. The step-by-step guide on our website ensures a smooth crafting experience, resulting in a beautiful keepsake that your Mummu will treasure. Crafting a brag book is a fun and meaningful way to express your appreciation and love. Nalles House
41. Rustic DIY Pallet Picture Frames
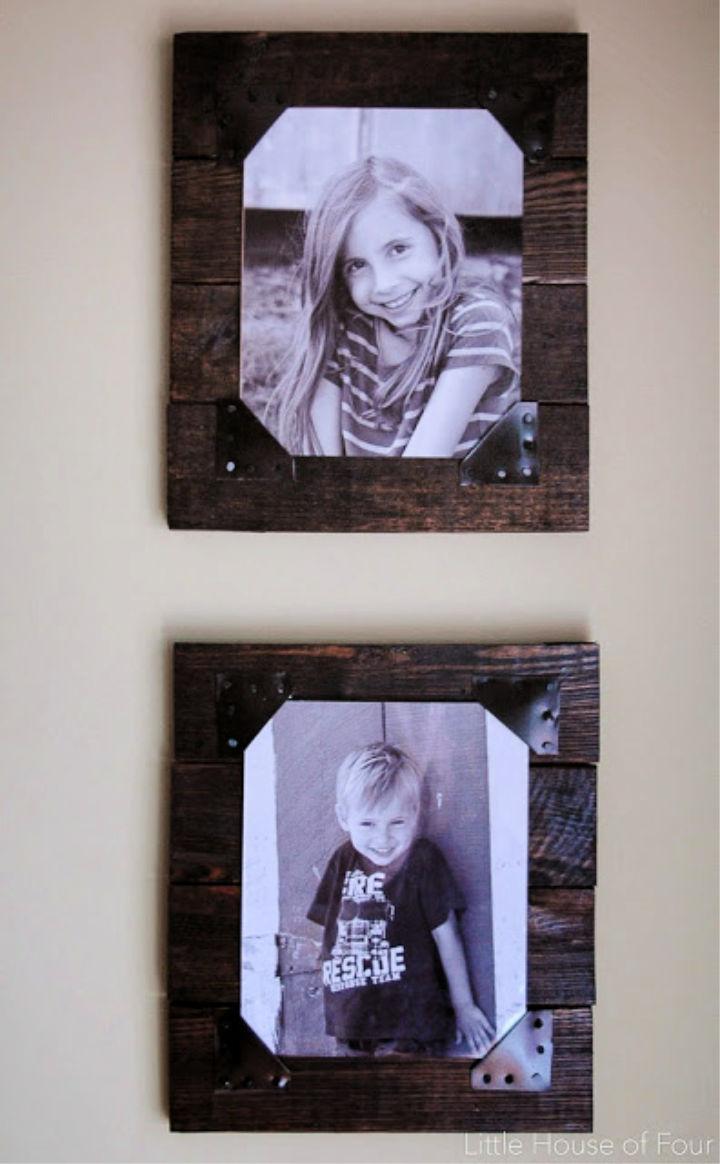
Transform old pallets into charming rustic picture frames with this simple DIY guide from Little House of Four. Begin by dismantling a pallet using a circular saw, then trim the boards to an even length with a chop saw. Attach the boards to a scrap piece of lauan for support using wood glue, weighing them down overnight. Stain with Minwax Jacobean and apply a poly coat for a polished look.
Add character by attaching cut and painted sheet metal pieces to the corners. Opt for plexiglass rather than glass to complete your frame, securing your photos with nails. With a little creativity and minimal expense, you can make bespoke decor that adds warmth and personality to your space.
42. Build $15 Wooden Picture Frames
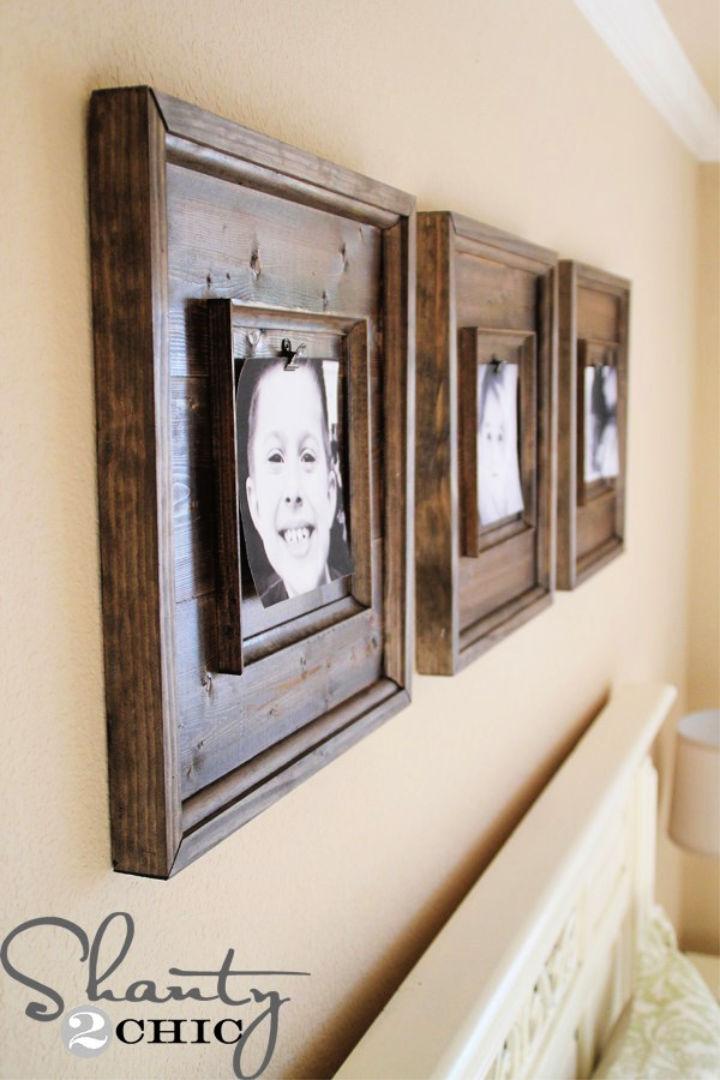
Transform your living space with Shanty 2 Chic‘s DIY guide on making stunning wooden frames for wall art. This helpful tutorial provides a step-by-step approach to crafting beautiful, large frames on a budget of just $15 each. Discover how to cut and assemble wood boards, add trim, and apply finish to make a custom look that enhances any room.
With clear instructions and a few tools, anyone can produce these impressive pieces. Perfect for displaying cherished photos or artwork, these homemade frames add a personal touch to your décor and can be completed in just one day. Embrace this engaging project and add a handmade charm to your home with ease.
43. DIY Striped Washi Tape Frame
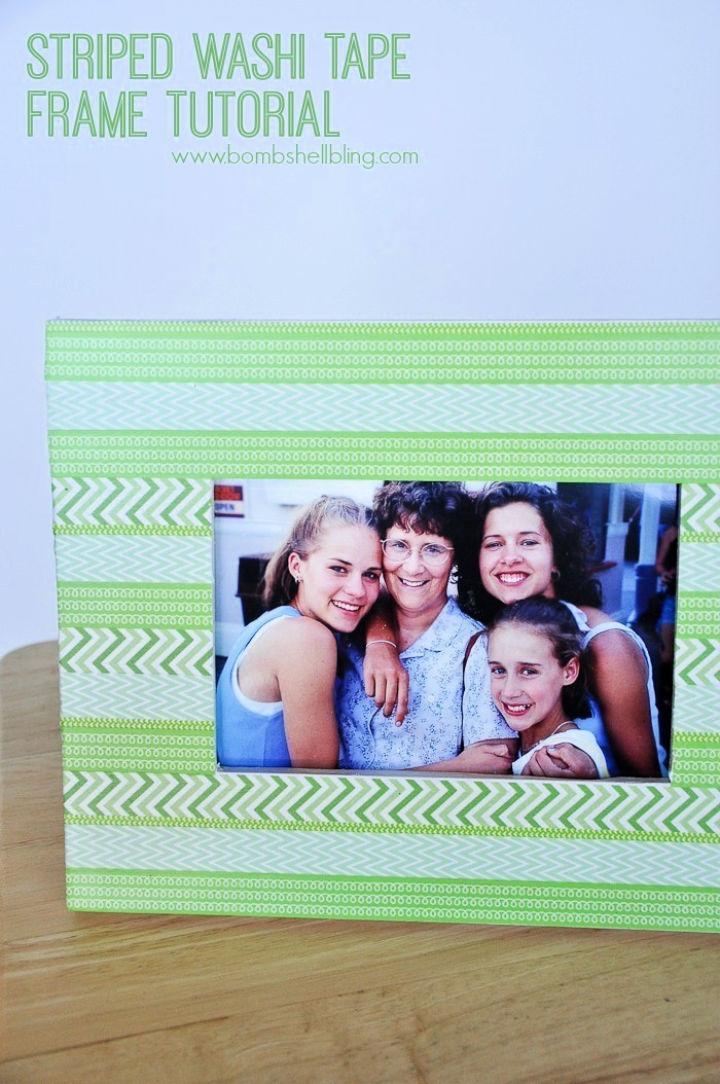
Making a personalized washi tape frame is a fun and creative project, ideal for sprucing up your home decor or crafting a unique gift. Bombshell Bling‘s tutorial provides an engaging and straightforward guide on using striped washi tape to customize a plain wooden frame. Start by painting your frame white for a fresh backdrop that will make the tape’s colors truly pop.
Select your favorite washi tape patterns, and apply them with ease, knowing you can reposition them as needed. For a polished look, trim any excess and seal your design with a coat of Mod Podge. Get ready to transform an ordinary frame into a vibrant piece of art that holds cherished memories.
44. DIY Marbled Picture Frames
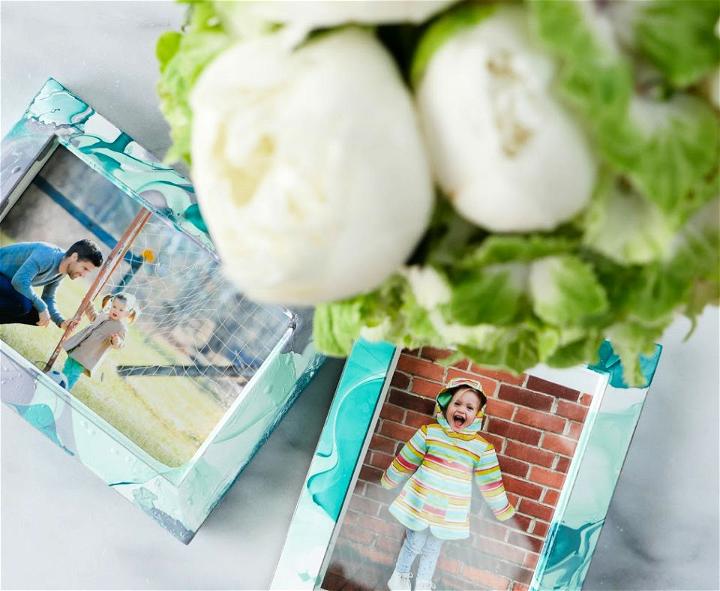
Revitalize old picture frames with a splash of color and creativity using a simple marbling technique with nail polish. Happily Eva After presents a DIY project perfect for adding a personalized touch to your home decor or making thoughtful gifts. With just a couple of nail polish colors, a wooden frame, warm water, and some basic tools, you can transform ordinary frames into eye-catching pieces.
Follow these easy steps: drop nail polish onto warm water, swirl to make a marbled effect, and dip the frame to transfer the design. Let it dry overnight for a unique and stylish addition to any space. Dive in and give your memories a vibrant new home!
45. Make a Yarn Wrapped Picture Frame
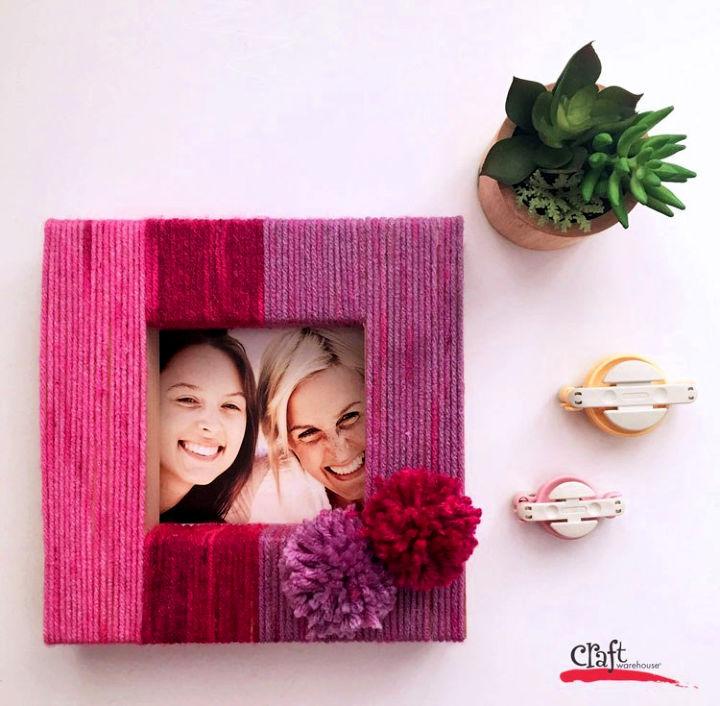
Transform a simple picture frame into a personalized piece of home decor with this yarn-wrapped frame guide from Craft Warehouse. Select your favorite yarn colors to add warmth and texture to any room. Start by removing the back and glass from the frame, then carefully wrap yarn around the edges, securing it with small dots of Beacon Fabri-Tac Glue. Focus on the top and bottom ledges for an extra touch of style. Finish by enclosing your chosen photo and adding handmade pompoms for a cozy, crafted look. With these clear instructions, you’ll elevate a basic frame into a charming display in no time.
46. Easy to Make Picture Frame
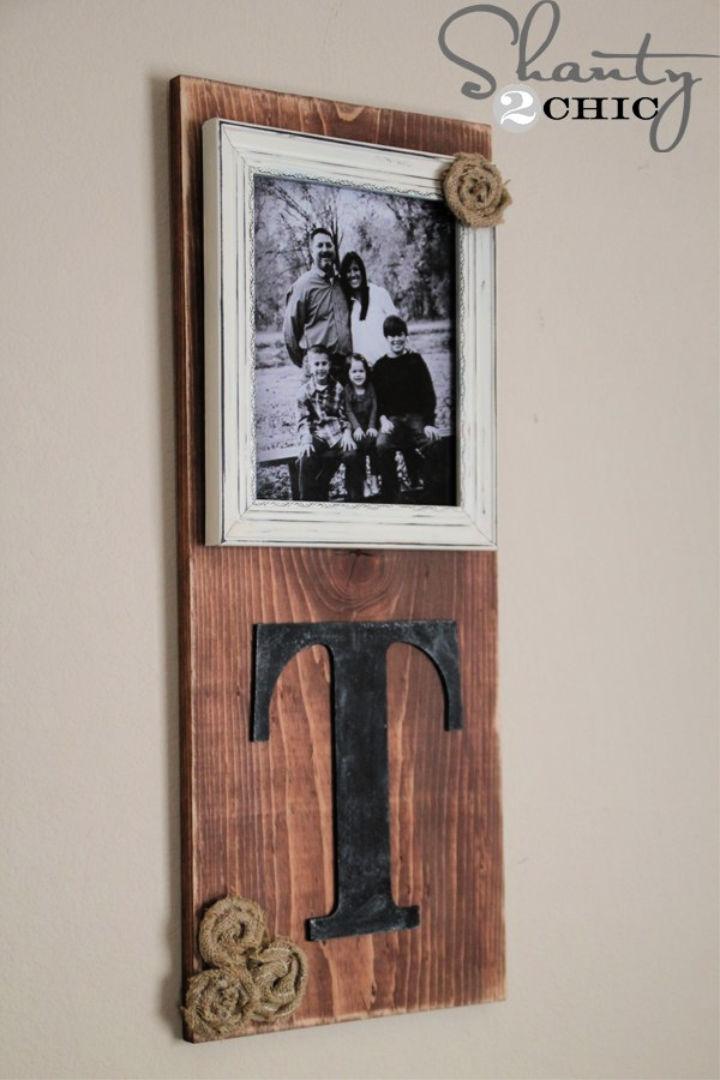
Make a charming DIY Picture Frame with Shanty 2 Chic‘s simple tutorial that promises to spruce up your weekend crafting session. Learn how to transform a standard 1×12 board into a personalized display for your favorite memories, all while keeping your budget under $10.
With easy-to-follow steps, you’ll stain, paint, and assemble a rustic yet elegant picture frame, complete with a custom monogram and burlap rosettes for a finishing touch. This project is not only cost-effective but also versatile, making it an ideal handmade gift for any occasion. Get creative and start framing your moments in a unique way today!
47. Easiest Picture Frame Made With Love
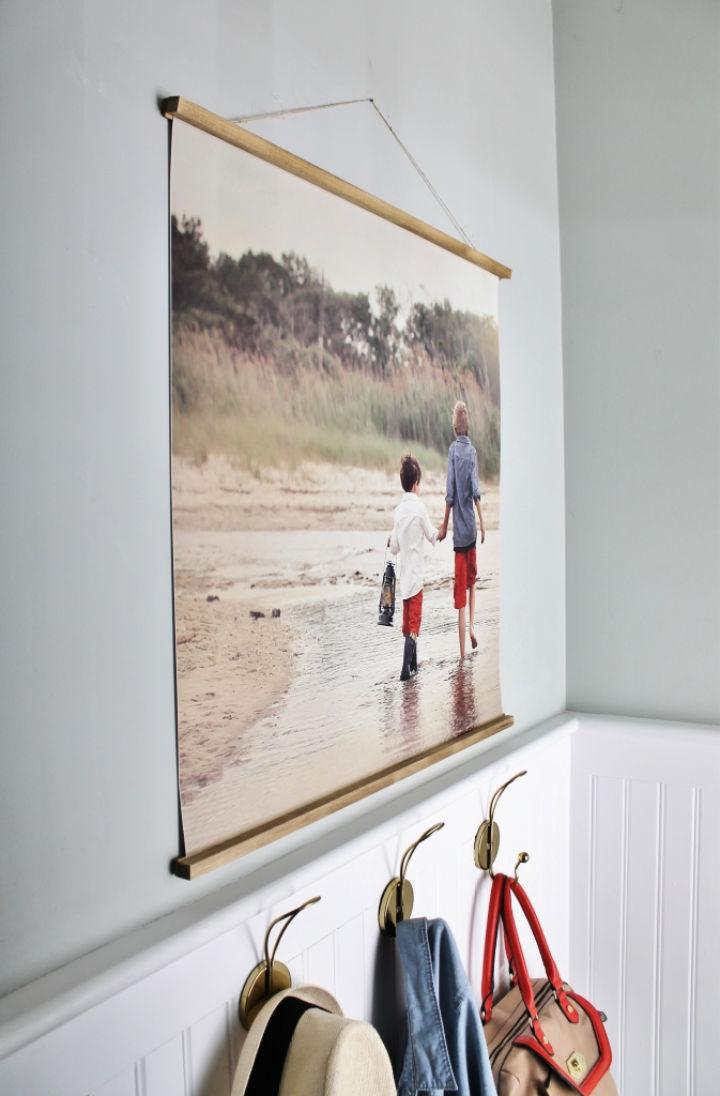
Make a cherished keepsake and a striking display piece for your home with a DIY picture frame that’s as meaningful as it is easy to assemble. Jennifer O’Brien from City Farmhouse guides you through a simple process using just a few materials like wood pieces, stain, and jute to transform your favorite family photo into wall art. Perfect for adding a personal touch to any room, this budget-friendly project, crafted with love, turns memories into lasting artwork. Follow the step-by-step instructions and watch your space come alive with a frame that tells a story across generations.
48. Build a Large Picture Frame With a Mat
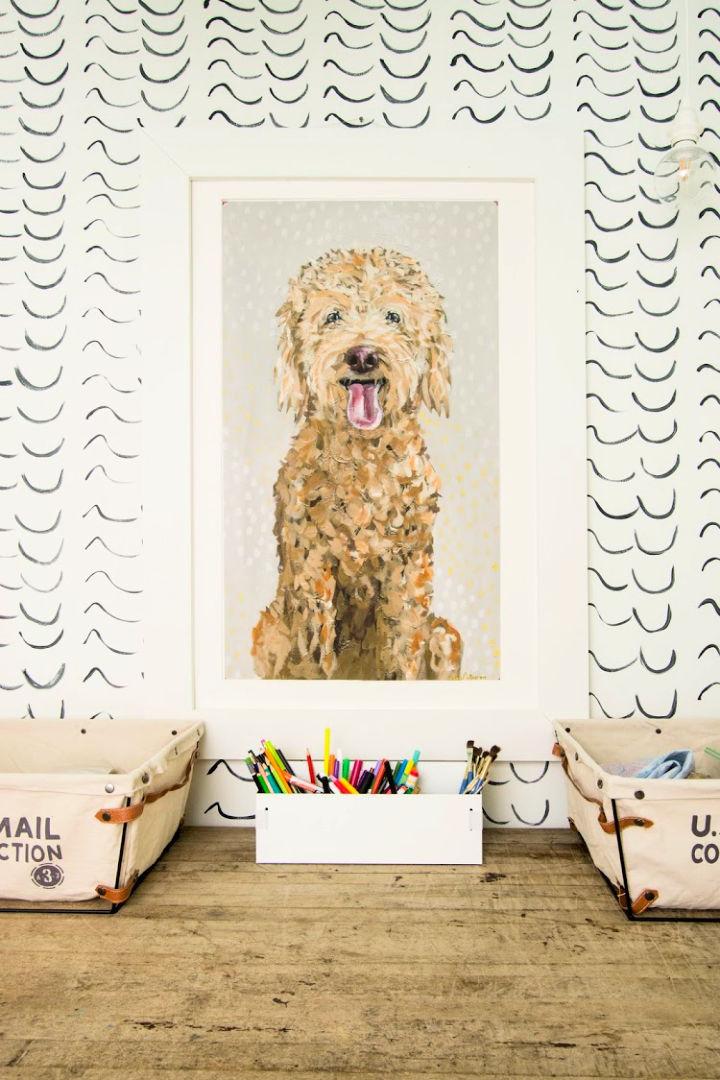
Making an oversized picture frame on a budget can be a rewarding DIY project. With a detailed tutorial from Grace In My Space, you can construct a large, stylish picture frame with a mat for under $25. This step-by-step guide provides all the information needed, including a list of simple materials like pine boards and foam board, and clear instructions on how to measure, cut, and assemble your frame. Perfect for giving your artwork a polished look without breaking the bank, this project is ideal for enhancing any playroom or living space. Get ready to elevate your home decor and enjoy the satisfaction of a DIY well done.
49. Easy DIY $5 Picture Frame
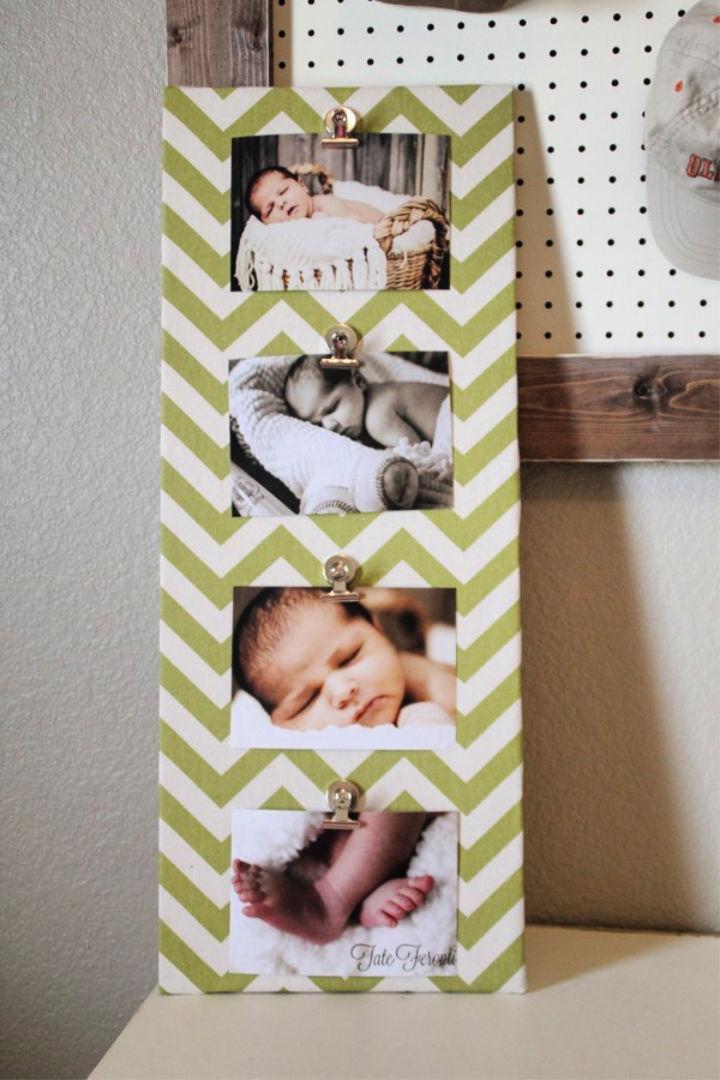
Discover a charming and budget-friendly way to showcase your favorite memories with a DIY Picture Frame tutorial from Shanty 2 Chic. For roughly $5, you can make a personalized photo display using a few simple supplies. This project requires a piece of fabric, a set of magnetic clips, and a 1×12 MDF board.
By wrapping the fabric around the board and securing it, then attaching the clips with hot glue, you craft an interchangeable frame that can suit any room or style. Perfect for adding a homemade touch to your decor, this DIY craft is not only cost-effective but also a fun activity that results in a piece you’ll be proud to display.
50. Make a Floating Canvas Frame
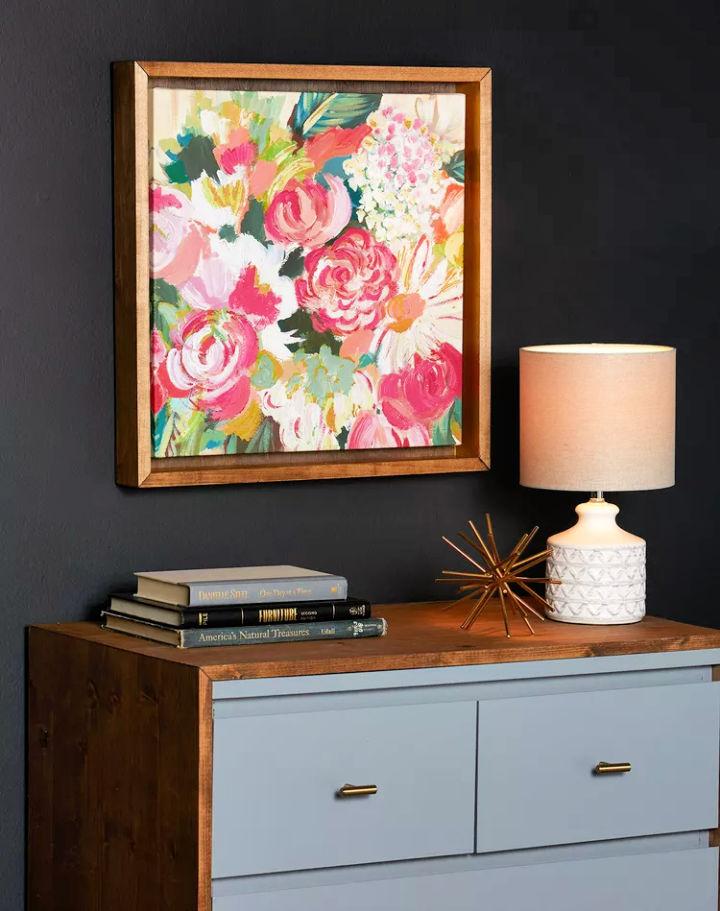
Transform your favorite canvas art into a stunning showcase with a handcrafted wood frame. Better Homes & Gardens offers an easy-to-follow DIY guide for making a floating canvas frame, ideal for sprucing up your interior decor. With simple tools and materials, you can assemble a customized frame that lends a sophisticated “floating” appearance to your artwork.
The process involves precise cuts, sturdy construction with wood glue and nails, and a personalized touch with your choice of stain and paint. Perfect for hanging in your space, this project not only enhances the art but also injects a sense of accomplishment into your creative endeavors. Get ready to give your canvas the elegant presentation it deserves with this approachable weekend project.
Conclusion
In conclusion, embarking on the journey of making your own DIY picture frame is not only a pathway to showcase your photos in a unique way but also a creative avenue to express your individuality. Our guide on 50 DIY picture frame ideas aims to inspire you to design frames that complement your personal style and the essence of the memories they hold. From selecting the right materials to including eco-friendly practices, we hope our tips and creative ideas embolden you to craft picture frames that stand out. Whether it’s for decking your halls or gifting someone special, the art of making a picture frame is sure to add a personal touch to every snapshot.
