Preparing for your special day involves sharing the news with friends and family, and what better way to announce it than with DIY save the date ideas? Our collection of 30 unique save the date projects offers a variety of creative ways to let your guests know about your upcoming nuptials. These ideas are not just a formality; they are a prelude to your big day, reflecting your personal style and excitement.
Creating your own save the dates is a wonderful opportunity to infuse your personality into every detail. Our guide provides you with cost-effective, DIY solutions that can be quickly crafted to match any wedding theme. Whether your preference is vintage charm or modern elegance, we have options for every taste. Keep reading to uncover the steps to crafting beautiful, memorable invitations that will surely delight your invitees.
Why Make DIY Save The Dates?
Making DIY Save The Dates for your wedding not only personalizes your announcement, but also offers several other benefits:
- Cost-Effective: By taking the DIY route, you can significantly reduce costs compared to ordering custom cards from a professional service.
- Creative Freedom: You have the liberty to design your Save The Dates exactly how you want them, from colors to themes to materials.
- Personal Touch: Adding elements like your own photos or hand-written notes makes your Save The Dates uniquely yours and can be more meaningful to your guests.
- Fun Experience: Crafting your own Save The Dates can be a fun and rewarding experience. It can also serve as a bonding activity with your partner, family, or bridal party.
- Eco-Friendly Options: You have the control to choose eco-friendly materials like recycled paper, reducing the environmental impact of your wedding.
Tips for DIY Success:
- Start Early: Begin your DIY project well in advance to avoid last-minute stress and ensure you have time for do-overs if needed.
- Keep It Simple: Simple designs can be just as beautiful and are often easier to execute successfully.
- Use Templates: Take advantage of free templates and tutorials online to guide your design process.
- Quality Materials: Invest in good quality paper and printing methods to ensure a professional look.
- Proofread: Always double-check dates, times, and spellings. It’s helpful to have someone else review your design as well.
By considering these factors, your DIY Save The Dates will not only be a beautiful prelude to your wedding but also a reflection of your personal style and care for your guests.
How to Make Unique DIY Save The Date Cards
Making DIY save the date cards is not only a fun and creative activity, but it also adds a personal touch to your wedding announcements. Below is a simple, step-by-step guide to help you make unique and memorable save the date cards that your guests will love.
Step 1: Choose Your Theme and Design
Before you begin, decide on the theme of your wedding, as this will influence the design of your save the date cards. Whether you’re going for a rustic, modern, or vintage look, your theme should reflect the overall style of your big day.
Step 2: Gather Your Materials
Once you have your theme, gather all the necessary materials for your project. Here’s a basic list to get you started:
- Cardstock or specialty paper
- Envelopes
- Craft scissors or a paper cutter
- Glue or double-sided tape
- Stamps or ink (optional)
- Embellishments (e.g., ribbons, stickers, glitter)
- Printer (if you’re printing at home)
Step 3: Design Your Save The Date Cards
You can either handcraft your design or use a computer program like Photoshop to make it digitally. If you’re not comfortable with design software, free online templates as a starting point- Highlight: Keep the design simple and on the essential details: your names, the date, and the location of your wedding.
Step 4: Print and Assemble
If you’ve created a digital design, print a test copy to ensure everything looks right. Then, print your save the dates on your chosen paper. If you making handcrafted cards, use your materials to them according to your design.
- Tip: Always double-check the date, location and spelling before printing your final copies.
Add Personal Touches
Personalize each card by adding special touches, such as a hand-painted element, a photo of you and your partner, or a custom stamp.
- List form example for personal touches:
- a watercolor border
- Attach a mini photo with decorative washi tape
- Use a custom rubber stamp for a rustic look
Step 6: Address and Send Your Cards
Carefully write or print the addresses on your envelopes. If you’re not sure about your handwriting, consider printing labels or hiring a calligrapher for an elegant touch.
- Highlight: Send your save the date cards 4-6 months before your wedding to ensure your guests can make arrangements to attend.
Step 7: Enjoy the Process
Remember, the goal is to make something that represents you as a couple. Don’t stress about making each card perfect. Enjoy the crafting process and the fact that you’re making something special for your big day.
- Final Tip: Have a friend or family member review your design and a sample card before you send them out to catch any errors you might have missed.
By following these simple steps and tips, you’ll make beautiful, customized save the date cards that set the tone for your wedding and get your guests excited about the celebration to come!
FAQs on DIY Save The Dates Ideas
Discover creative and affordable DIY save the date ideas with our comprehensive FAQs. Get inspired and make your special day even more memorable.
What are some affordable materials I can use for DIY save the dates?
Affordable materials for DIY save the dates include:
- Cardstock
- Kraft paper
- Recycled paper
- Printer paper with a creative design
- Twine or ribbon for embellishments
Can I make my DIY save the dates look professional?
Absolutely! To achieve a professional look:
- Use high-quality paper
- Ensure your printer is producing crisp images
- Follow a consistent theme or design
- Utilize online templates for a polished layout
- Consider a simple design for elegance and readability
How far in advance should I send out my DIY save the dates?
Send out your save the dates 4-6 months before your wedding. If it’s a destination wedding or during holiday seasons, consider sending them out even earlier.
Do I need special software to design DIY save the dates?
Not necessarily. While software like Photoshop can be helpful, there are free online tools with templates, such as Canva, that are user-friendly for beginners.
What are some creative DIY save the date ideas?
Here are a few creative ideas:
- Magnet save the dates with a calendar
- Save the date postcards with a watercolor touch
- Luggage tag save the dates for destination weddings
- Photo booth strip-inspired cards
- Miniature bunting with your date displayed
How can I personalize my DIY save the dates?
To add a personal touch:
- Include a photo of you and your partner
- Handwrite the addresses or a note on the card
- Use stamps that reflect your wedding theme or location
- Choose colors and fonts that match your wedding palette and style
What is the most important information to include on a save the date?
Essential information to include:
- The names of the couple
- The wedding date
- The wedding location (city and state or country)
- A note stating that a formal invitation will follow
How can I make my DIY save the dates eco-friendly?
For eco-friendly save the dates:
- Use recycled paper or seed paper
- Consider digital save the dates to save on paper
- Limit the size of your save the dates to reduce waste
- Opt for natural embellishments like dried flowers or leaves
Is it okay to use templates for DIY save the dates?
Yes, templates are a great starting point, especially for those who are not design-savvy. They can provide a foundation to customize and make your own.
Remember, your DIY save the dates don’t have to be overly complicated to be beautiful and effective. They’re a reflection of your personality and a preview of your wedding, so have fun with the process!
Unique DIY Save The Dates Ideas
Discover 30 unique and creative DIY save the date ideas to make your special day even more memorable. Get inspired and plan the perfect announcement for your upcoming event.
1. Papel Picado Inspired Save The Dates
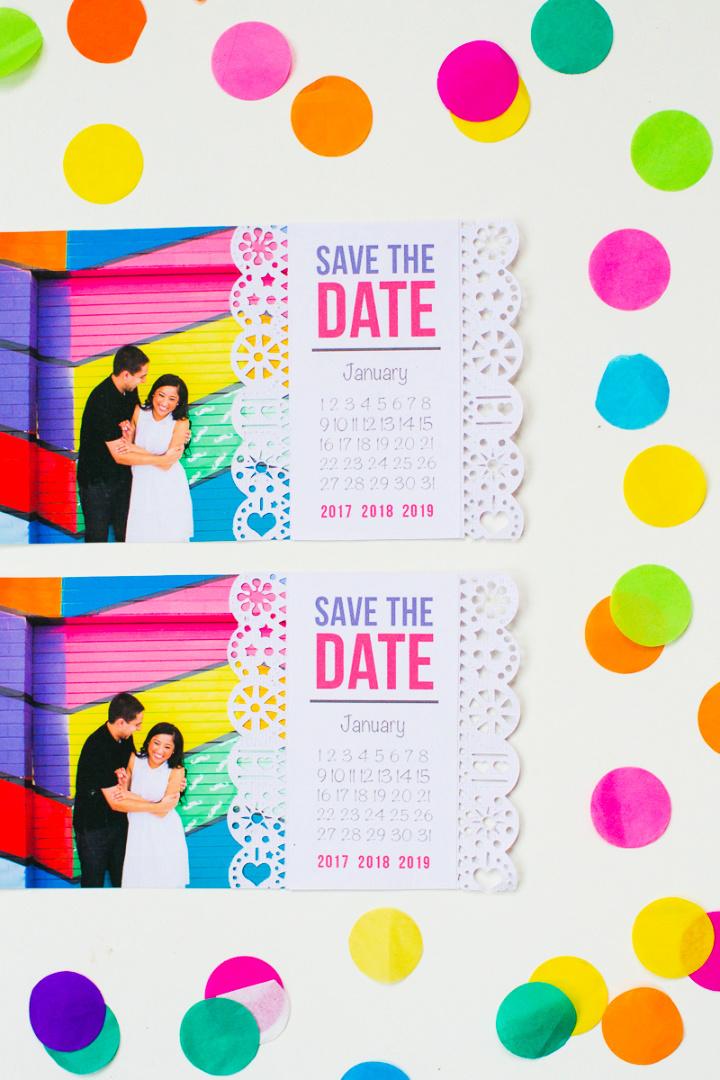
Make vibrant, Mexican-inspired Save the Dates with a DIY papel picado twist, courtesy of Bespoke-Bride: Wedding Blog. This engaging guide walks you through crafting personalized invitations using bright colors and intricate cutouts. You’ll need a few simple materials, like printed photos, white card, a Cricut Explore, and craft glue, to bring this festive project to life.
Follow the step-by-step instructions to upload templates, cut designs, and add a touch of personal flair to your wedding announcements. Ideal for couples who enjoy adding a handmade element to their special day, these Save the Dates will impress guests with their unique charm and creativity.
2. DIY Page a Day Calendar Save The Dates
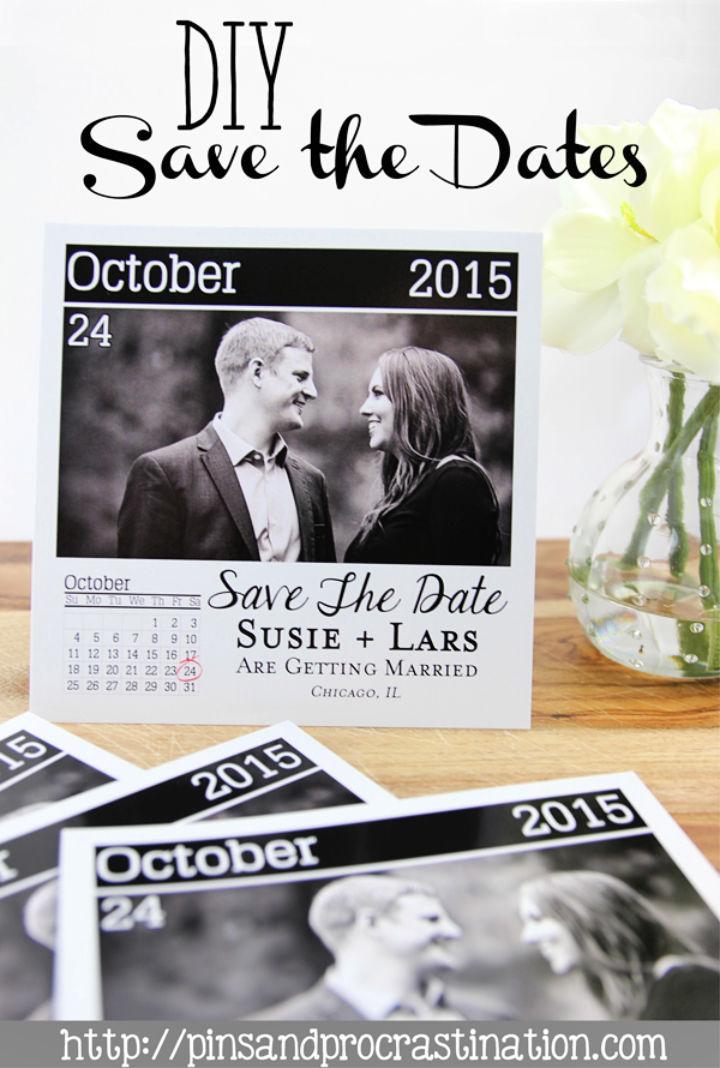
Planning a wedding can be a whirlwind of excitement and creativity, especially when it comes to announcing your special day. Pins and Procrastination introduces a charming DIY project for couples ready to share their date: a page-a-day calendar Save the Date. If you’re eager to add a personal touch to your wedding preparations, this delightful idea might just be the perfect fit.
The blog offers a simple Photoshop template and a selection of stylish fonts, making it easy to customize your announcement with a favorite photo and details of your upcoming nuptials. Dive into this crafty endeavor and make a memorable first impression for your guests with a Save the Date that stands out!
3. Watercolor Save The Date Postcards
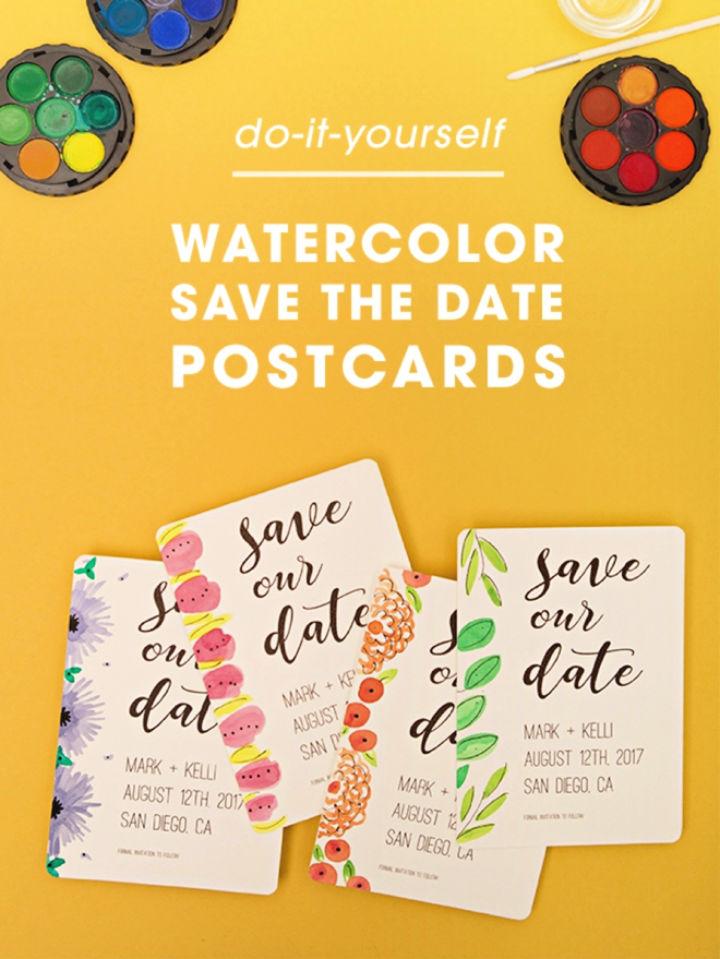
Make your own personalized Save the Date Postcards with a touch of artistic charm! Something Turquoise offers a delightful DIY tutorial that guides you through crafting unique wedding announcements. With a free printable template, a splash of watercolor, and some easy-to-follow steps, you can design invitations that will impress your guests and set the tone for your special day. These cost-effective and customizable postcards are a fun way to announce your wedding date. Get ready to print, paint, and send out your love-filled creations!
4. Free Printable Thumbprint Save The Date
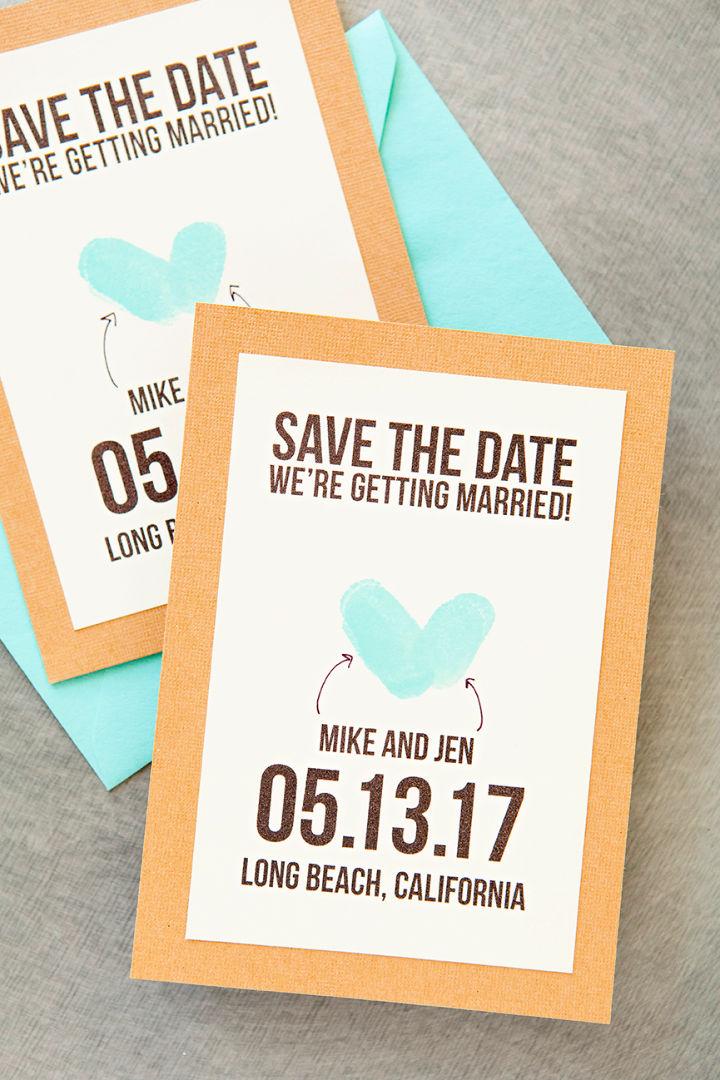
Make personalized save-the-dates for your wedding with a charming thumbprint heart design using The Budget Savvy Bride‘s free printable. This DIY project allows couples to add a unique touch to their wedding announcements. With simple supplies like cardstock, an ink pad, and a printer, you can customize your cards to fit your style and wedding theme.
Choose from two sizes, select your preferred text font, and match the thumbprint ink to your color scheme. Whether you mount your printables on colorful paper or send them as postcards, your guests will be delighted by this creative gesture. Visit Something Turquoise for a step-by-step guide to assembling these lovely keepsakes.
5. DIY Wedding Save The Date Luggage Tags
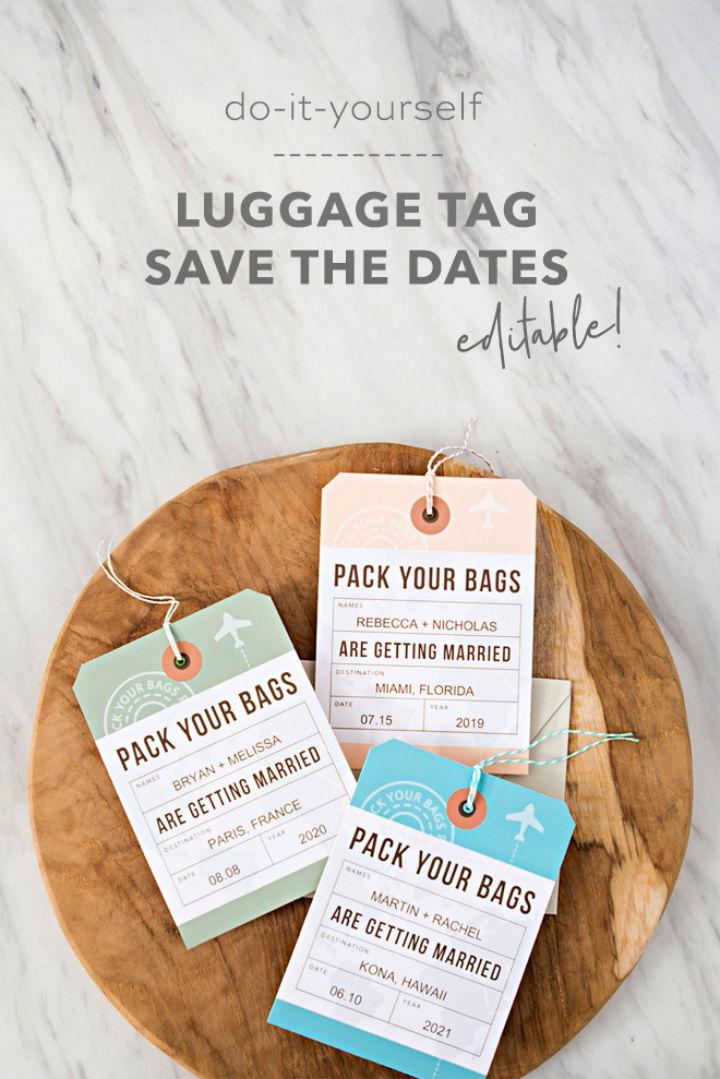
Planning a destination wedding? Something Turquoise has a charming DIY project for you—luggage tag-style save the dates! These adorable and customizable tags are a breeze to create. Simply download the template, personalize it with your details, and print on white cardstock.
For an authentic luggage tag appearance, trim the corners and, if you like, add eyelets for durability. Thread some twine through the hole, and your unique save the dates are ready to delight your guests. It’s a fun and cost-effective way to kick off your wedding festivities, perfectly setting the tone for your special day.
6. Neon and Kraft Paper Save The Dates
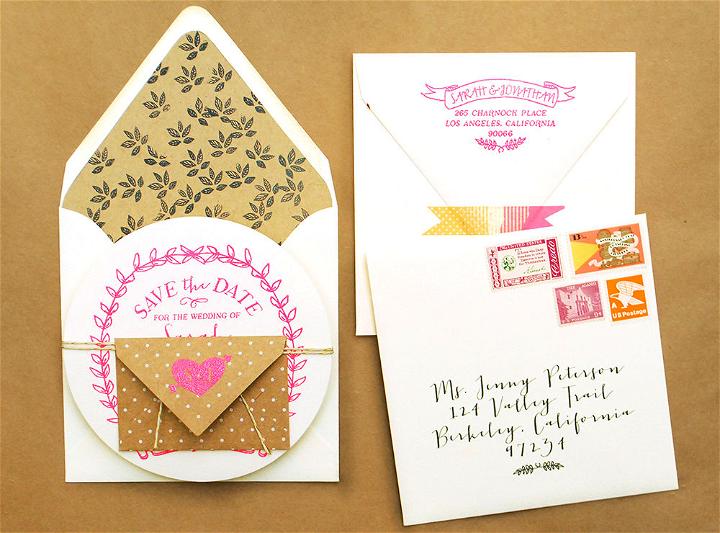
Embrace the vibrant trend of neon with a DIY tutorial that transforms kraft paper into modern, eye-catching save-the-date cards for your spring wedding. Antiquaria’s step-by-step guide on Oh So Beautiful Paper walks you through making circular neon-embossed cards, complete with matching liners and website information cards.
Learn to master the art of embossing with neon powder, craft a chic envelope liner, and assemble a memorable prelude to your big day. Perfect for crafty couples, this tutorial offers a stylish way to announce your nuptials with a pop of color and personalized flair. Keep your tools ready, and let’s start crafting an unforgettable announcement!
7. Save The Dates Using Fujifilm Instax Mini 70 Camera
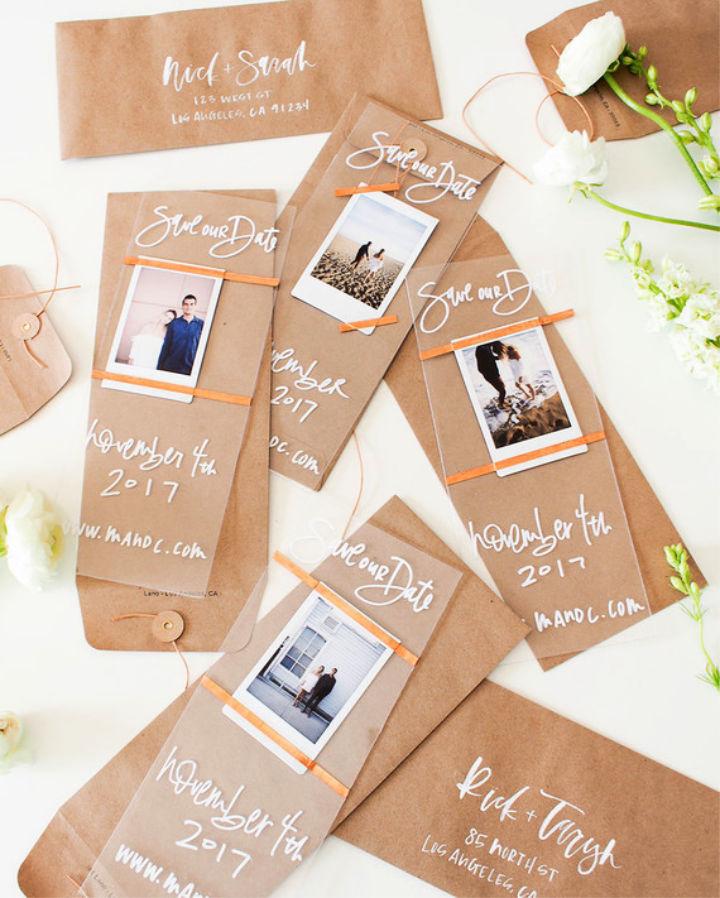
Planning a wedding is an exciting journey, and your Save the Dates offer a glimpse into the celebration that awaits your guests. 100 Layer Cake has teamed up with FUJIFILM Instax to bring you creative DIY ideas to craft unique and personalized Save the Date cards using instant film photos. With a FUJIFILM Instax Mini 70 camera, you can capture special moments and integrate them into custom-designed announcements.
The tutorial includes instructions for making wood-backed and acrylic Save the Dates that reflect your style and set the tone for your big day. Plus, there’s an opportunity to win an Instax Mini 70 to kickstart your project. Get inspired and add a personal touch to your wedding preparations with these inventive DIY Save the Date ideas.
8. DIY Botanical and Watercolor Save The Dates
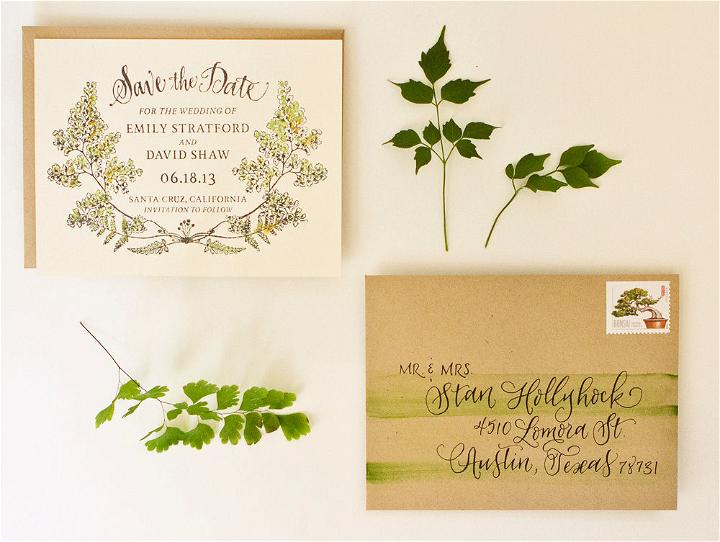
Develop beautiful botanical save-the-dates with a watercolor touch following Antiquaria’s DIY tutorial. Ideal for those who appreciate the natural elegance of ferns, this guide simplifies the process of making personalized stationery. Learn to ink a stamp perfectly, paint with watercolors, and add a chic touch to envelopes.
With clear, step-by-step instructions, this tutorial is perfect for crafters looking to add a personal flair to their event announcements. Embrace the joy of handmade invitations and impress your guests with your creativity. Visit Oh So Beautiful Paper for more inspiration and ideas on crafting your unique save-the-dates.
9. Beach Theme Save The Date Cards Tutorial
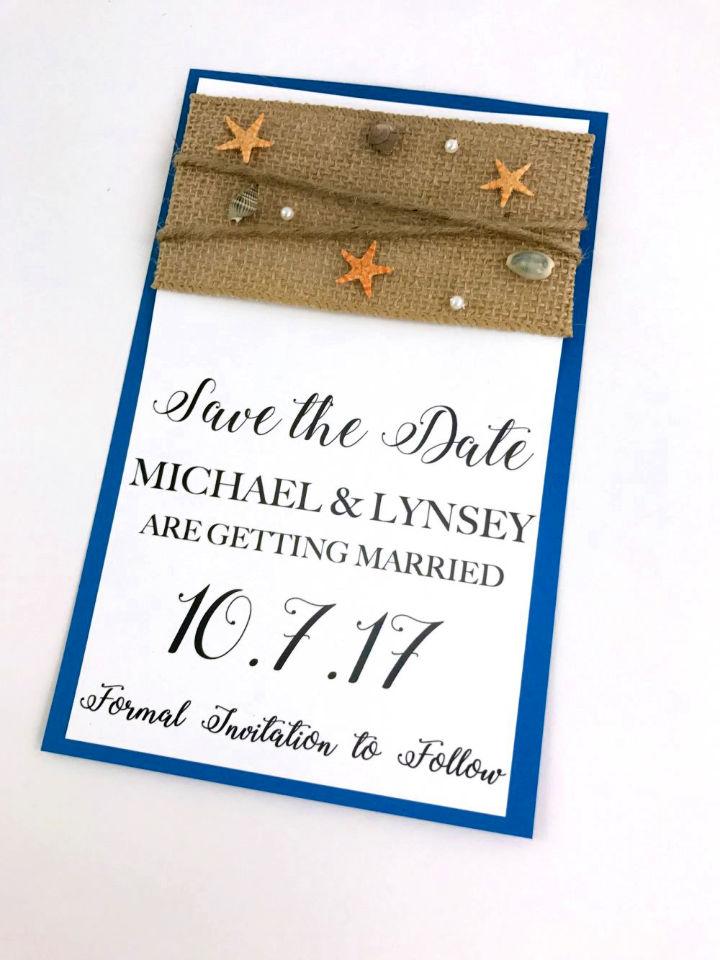
Planning a beach-themed wedding? Moscato Mom offers a creative solution with a step-by-step guide on crafting personalized Save The Date Cards. Lynsey’s DIY approach not only adds a personal touch to your wedding announcements but also allows you to integrate your love for the seaside into your special day. With detailed instructions and a free printable download, you can easily make beautiful, unique cards that will impress your guests.
The process is straightforward and budget-friendly, making it an ideal project for those who want to infuse their wedding preparations with individuality and charm. Get ready to set the tone for your beach wedding with these charming, handcrafted invitations.
10. Magnet Save the Date With Free Printables
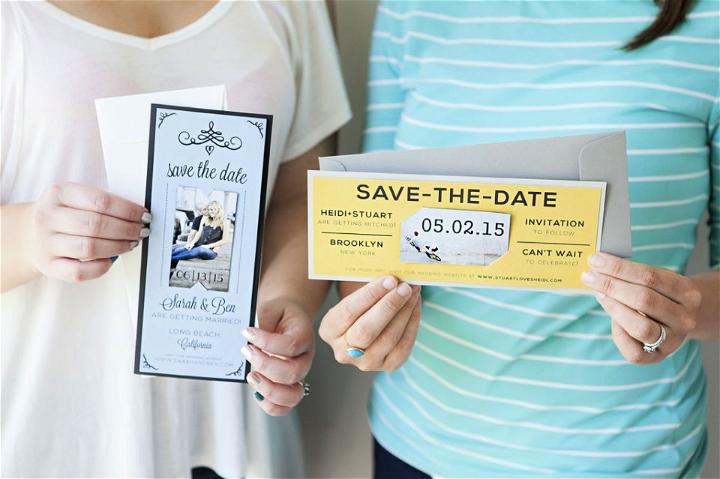
Planning a wedding on a budget? The Budget Savvy Bride offers an easy DIY Magnet Save the Date tutorial with free printables. Collaborating with Something Turquoise, they provide a creative way to announce your special day. Customize your save the dates by choosing paper that matches your wedding theme.
With free downloadable templates and a step-by-step guide, crafting personalized magnet reminders for your guests is both simple and cost-effective. Engage in this DIY project and add a personal touch to your wedding preparations. Visit their website for the full tutorial and more budget-friendly wedding tips.
11. Palm Springs Mod Watercolor Save The Date
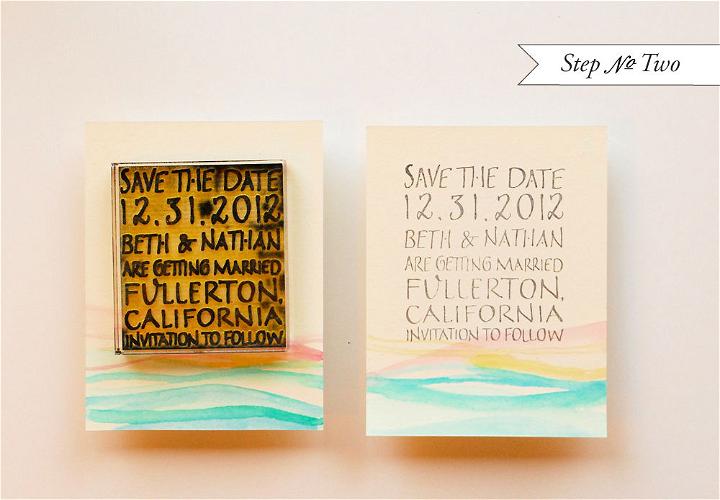
Make a charming Palm Springs-inspired Save the Date with this DIY watercolor tutorial from Oh So Beautiful Paper. Perfect for adding a personal touch to your wedding announcements, the guide takes you through painting with soft pastels on high-quality paper and stamping with a modern, hand-lettered design. Materials like watercolor paints, a brush, and Art Deco stamps are used to craft a unique and retro invitation suite. Step-by-step instructions ensure a fun and successful crafting experience, ideal for setting the tone for your special day.
12. DIY Instagram Photo Save The Date Invitation
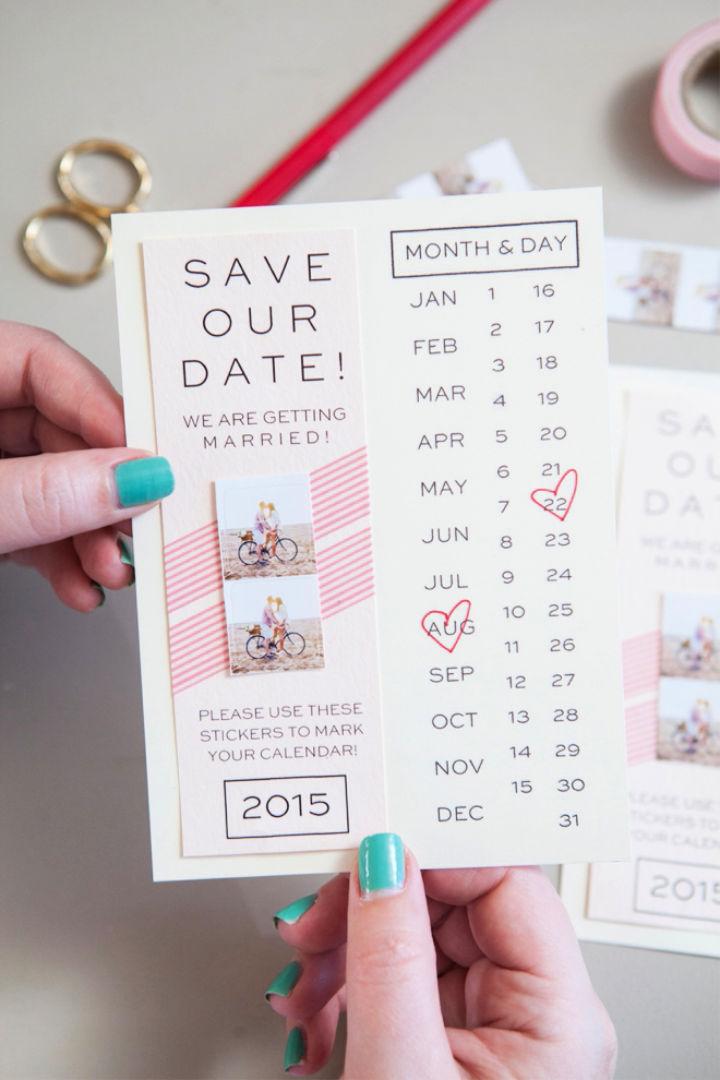
Planning a wedding can be an exciting time, and your Save the Date invitations are a perfect opportunity to express your creativity. Something Turquoise offers a charming DIY Instagram Save the Date invitation tutorial that’s easy to follow and allows for plenty of personalization.
With free downloadable designs and cute sticker options, you can craft a unique announcement that sets the tone for your special day. You’ll need cardstock, envelopes, washi tape or paper clips, and a few other supplies listed on their site. So gather your materials, and let’s start making an invitation that your guests will adore!
13. How to Make Wooden Slices Save the Date
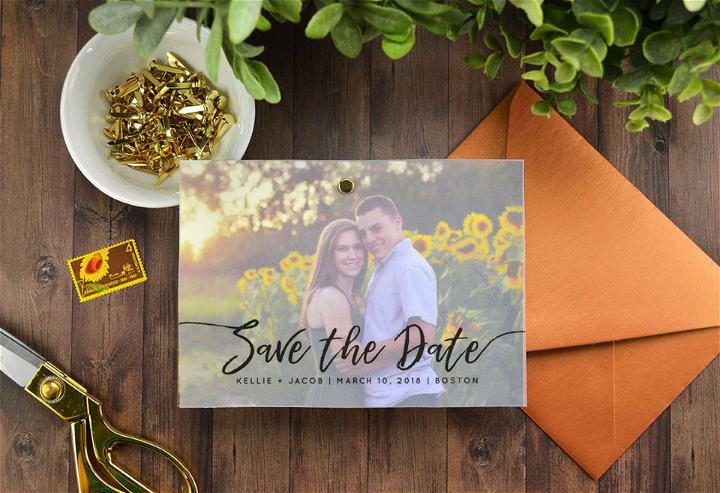
Design elegant and memorable save-the-date cards for your wedding with a simple DIY project from Cards & Pockets Design Idea Blog. This easy-to-follow tutorial guides you through crafting layered vellum save-the-date cards that are sure to impress your guests.
With minimal materials such as cardstock, vellum paper, paper fasteners, and a paper trimmer, you can personalize your announcement with a favorite photo and essential wedding details. For added convenience, Cards & Pockets offers printing and trimming services so you can focus on adding the final touches. Engage your creativity and give your wedding guests a beautiful prelude to your special day with these DIY save-the-date cards.
14. Homemade Instagram Photo Save The Dates
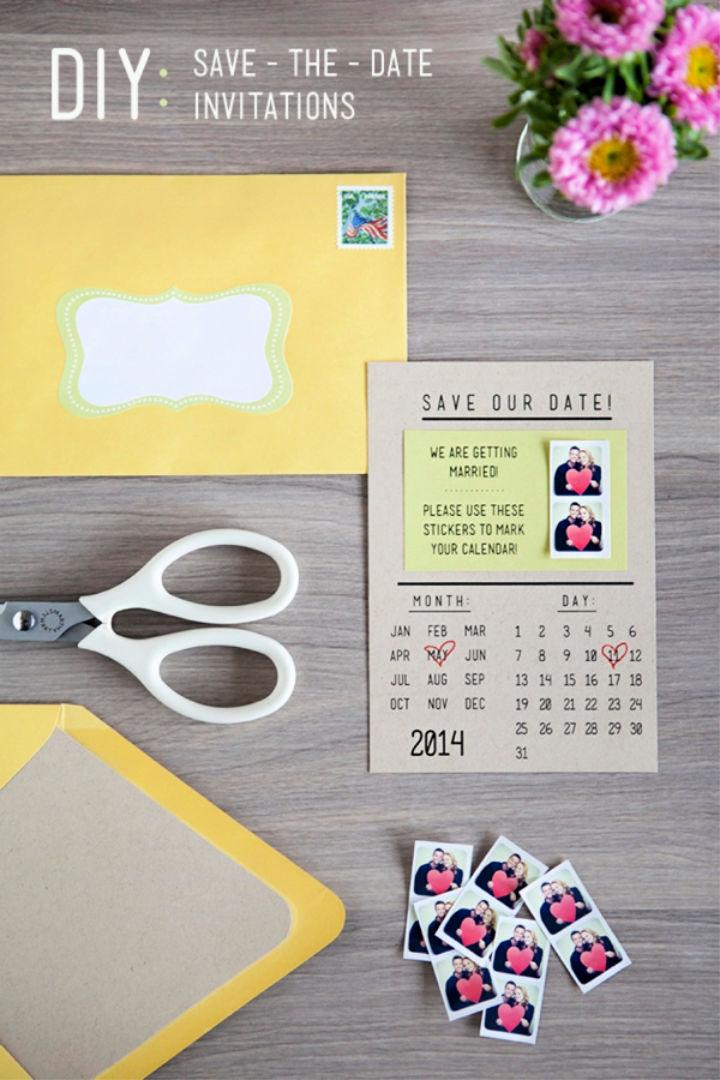
Ready to craft unique save-the-date invitations that capture the essence of your special day? Something Turquoise offers a fantastic DIY project to make Instagram-inspired notifications with a personal touch. Download their free design templates and gather some basic supplies like cardstock, envelopes, and adorable mini-stickers.
With easy-to-follow instructions, you can assemble these charming cards that double as calendar stickers for your guests. Mark the date in style and give your wedding announcement a memorable spin. Get creative and start making your bespoke save-the-dates today!
15. DIY Hand-Painted Save the Dates
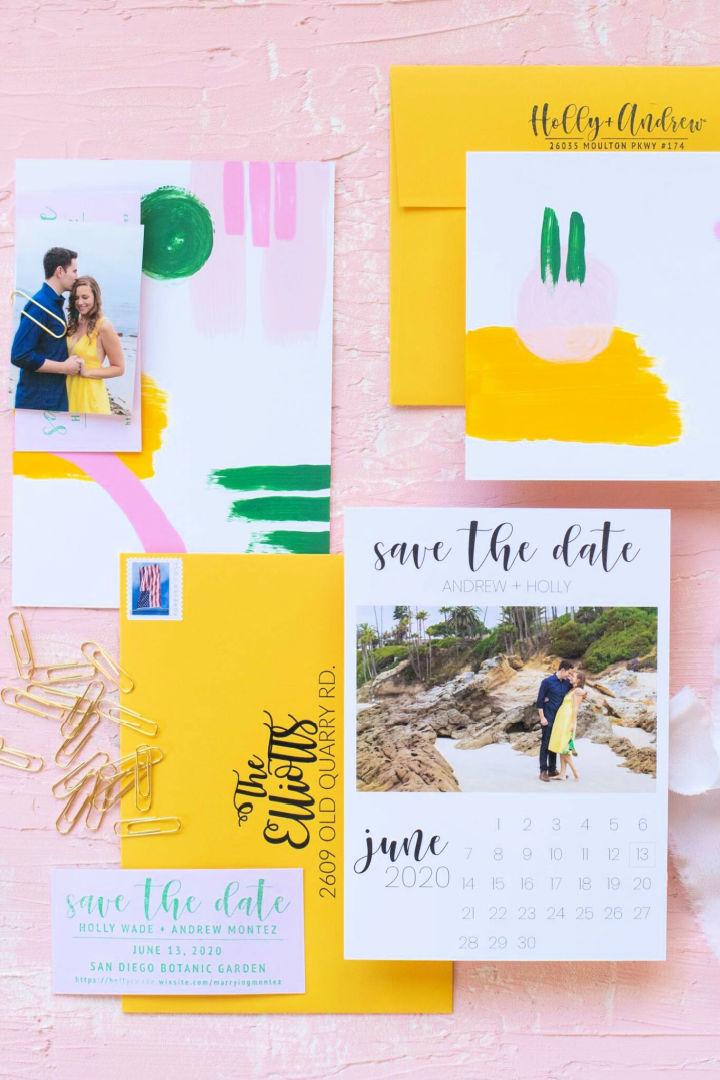
Planning a wedding can be a daunting task with a myriad of decisions to make. At Club Crafted, the struggle turned into a creative journey as the author shares her experience of crafting hand-painted save the dates. Infused with personal style and vibrant colors, these unique save the dates feature elements like custom stamps, calendar-style cards, and even handy magnets.
The author takes readers through her process, from selecting a color palette to the meticulous design of printed envelopes, providing inspiration and a glimpse into the joy of making something truly special for her big day. If you’re navigating the wedding planning process and seeking a personal touch for your announcements, Club Crafted’s story may just spark your own DIY spirit.
16. Make Your Own Save the Date Magnets
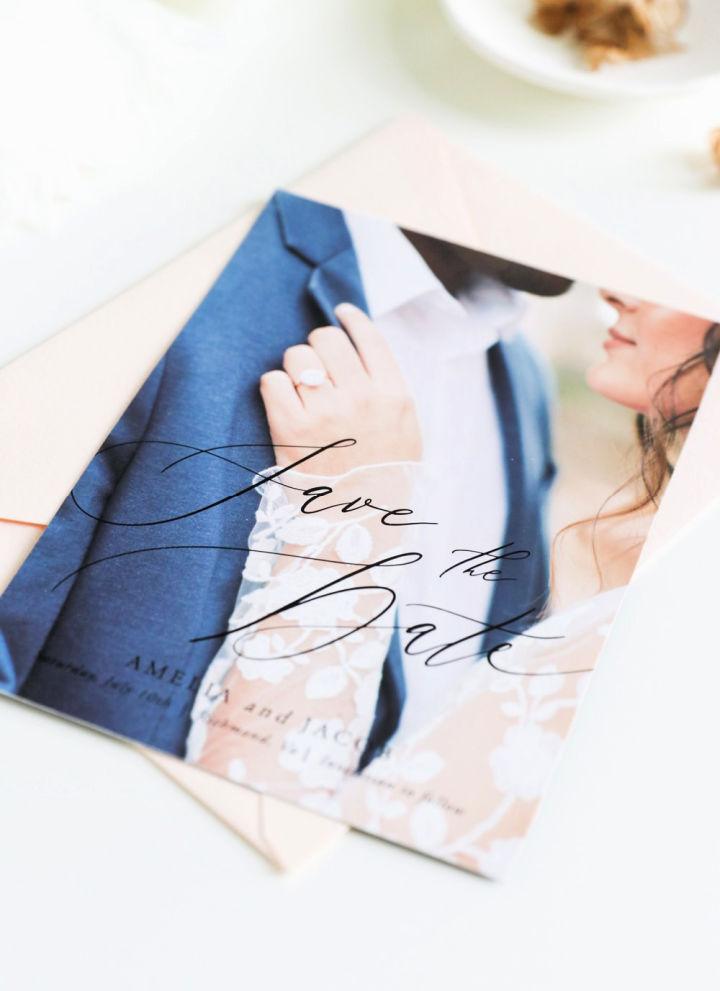
Making personalized save the date magnets at home is a fun and cost-effective way to announce your special day. With a few simple materials like adhesive magnet sheets, 80# cardstock, and a printable template, you can craft beautiful reminders for your guests. Pipkin Paper Company guides you through the process, ensuring that even those new to DIY projects can achieve professional-looking results.
Cut, stick, and trim your way to custom magnets that not only serve a practical purpose but also become cherished keepsakes. Follow our easy steps for a wedding DIY that’s both enjoyable and impressive.
17. Easy DIY Save the Dates
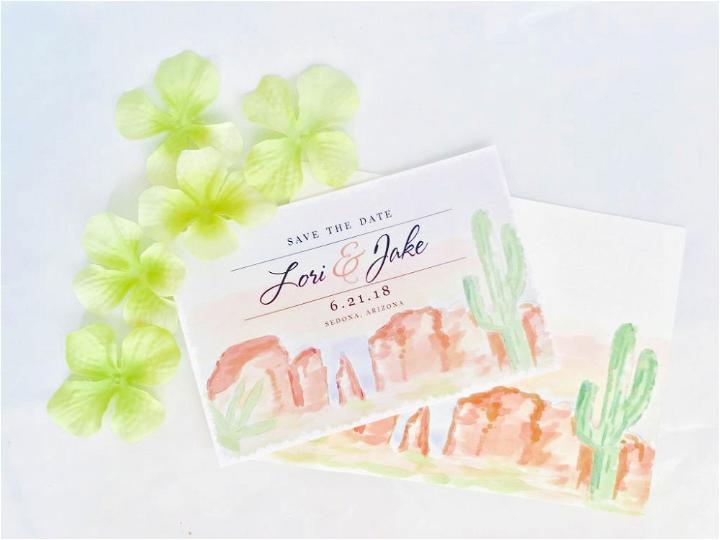
Planning a wedding on a budget doesn’t mean sacrificing style or sentiment. Guitar & Lace offers a creative and budget-friendly approach to crafting your own Save the Dates. Embrace the charm of DIY by using simple materials like watercolors and paper to design a personalized announcement for your special day.
With easy-to-follow steps and the use of online tools like Fotor Photo Editor and VistaPrint, you can produce beautiful, keepsake-worthy Save the Dates that won’t break the bank. Join thrifty brides in celebrating love and savings, and stay tuned for more inspiring DIY wedding invitation ideas.
18. Floral Save The Date Postcards
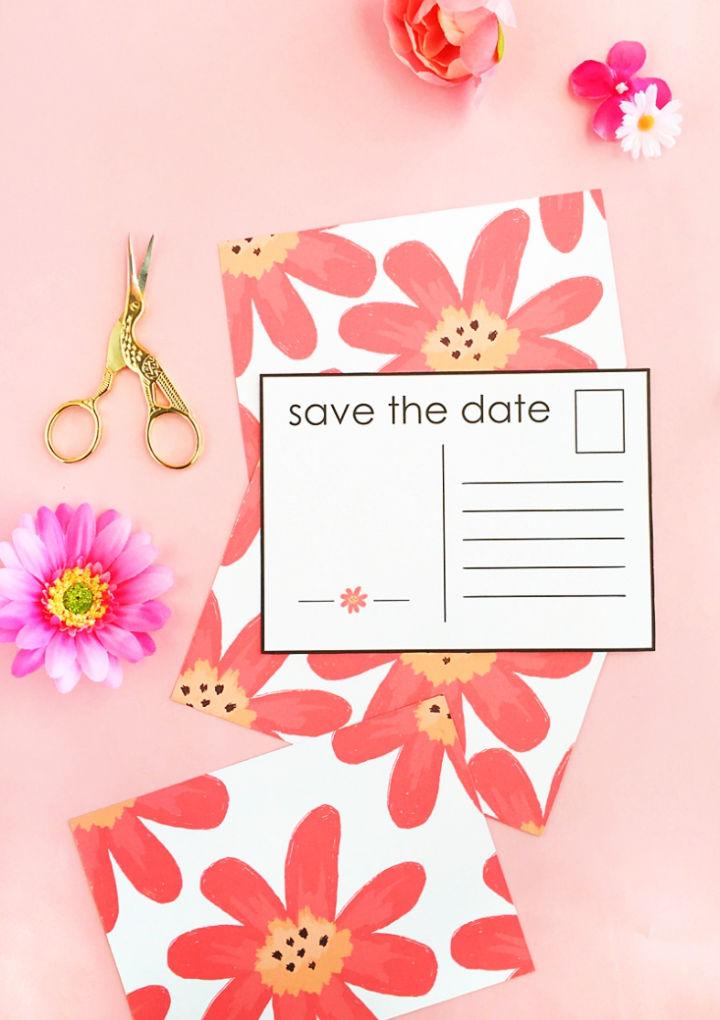
Planning a wedding and eager to announce your date with a personal touch? Maritza Lisa‘s DIY Floral Save The Date Postcards tutorial is your perfect guide. This step-by-step instruction makes it easy to make elegant, custom postcards using a Silhouette cutting machine or a simple craft knife and cardstock.
With a downloadable floral design from Creative Market, you can print a beautiful pattern on one side and your event details on the other. This approach adds a unique, handmade charm to your wedding preparation, ensuring your guests receive a memorable notice they’ll want to keep. Get creative and choose your favorite florals to share your special day in style!
19. DIY Paper Dolls Save The Dates
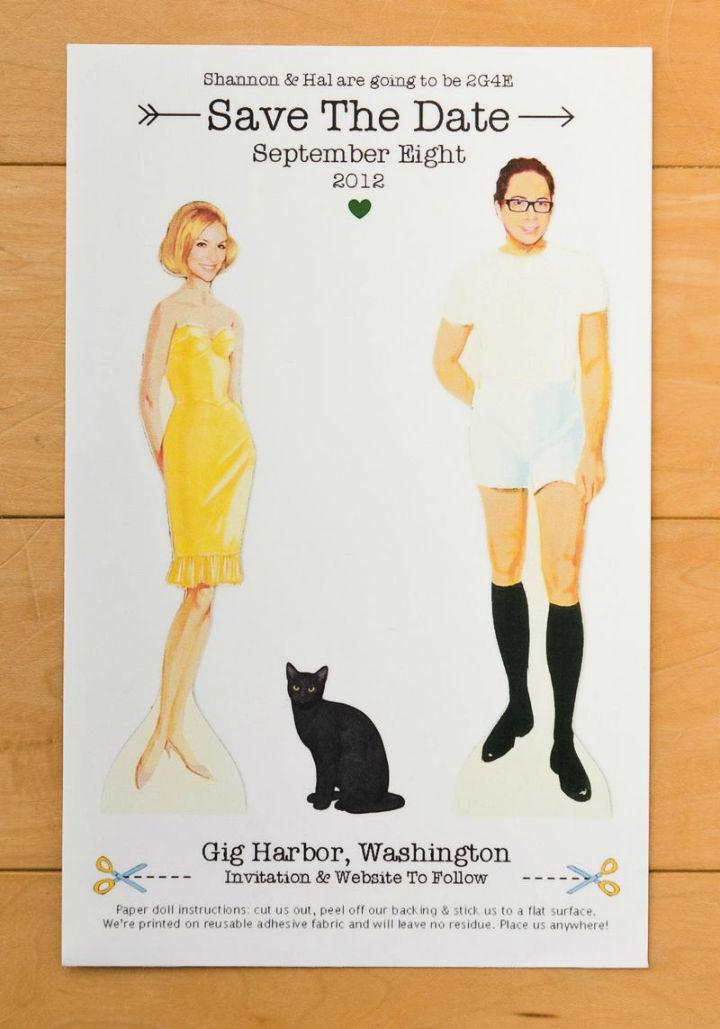
Looking for a unique and playful way to announce your special day? “HAPPINESS IS…” offers a creative twist on save-the-date announcements with DIY paper dolls. Channeling vintage charm, these customizable paper dolls are not only a joy to receive but also serve as a whimsical reminder of your upcoming nuptials.
The blog post details a step-by-step process, from selecting the perfect vintage doll images to printing on adhesive fabric for easy display. Accompanied by personalized touches like hand-carved stamps and a custom address rubber stamp, these save-the-dates will surely leave a lasting impression on your guests. Dive into the details and get inspired to craft an invitation that’s as memorable as your wedding will be.
20. Make Save The Date Dish Towels
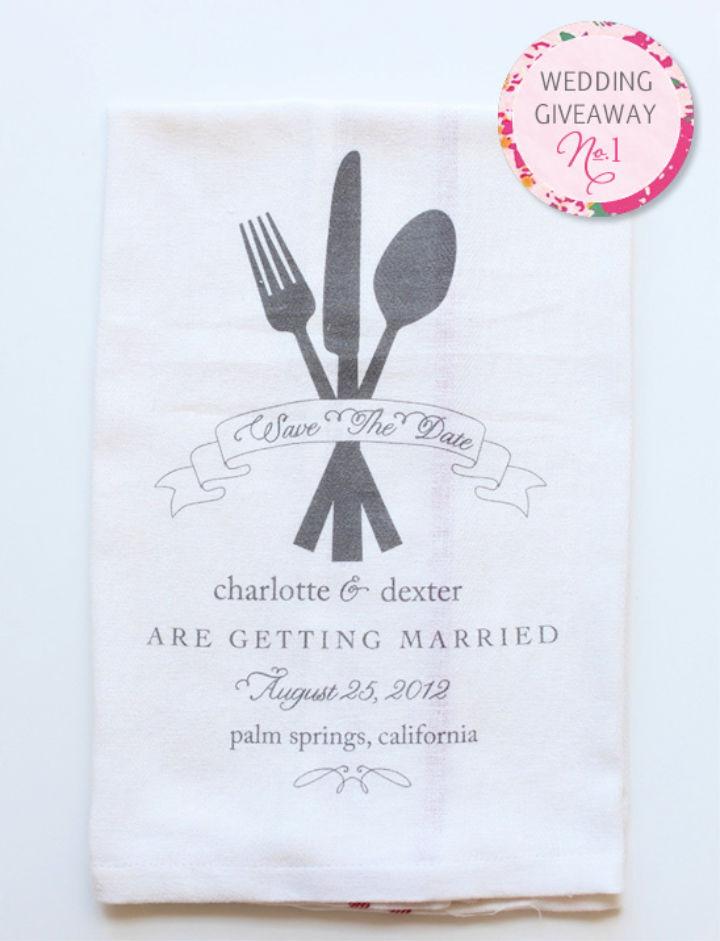
Planning your special day and seeking a unique keepsake for guests? Wedding Chicks introduces a limited edition Save The Date Dish Towel that’s eco-friendly and adorable. These towels serve as a lasting reminder of your celebration, blending practicality with personalized charm. Enter the summer giveaway for a chance to win 100 custom towels that feature your chosen wedding color and a utensil design.
Leave a comment on Weddingchicks about why these towels caught your eye for multiple entries. Winners will be revealed in Sweet Treats, and shipping tubes are provided for easy distribution. Stay tuned for more giveaways, including a sparkling surprise from Weston Jewelry.
21. Wedding Save the Date Cards Tutorial
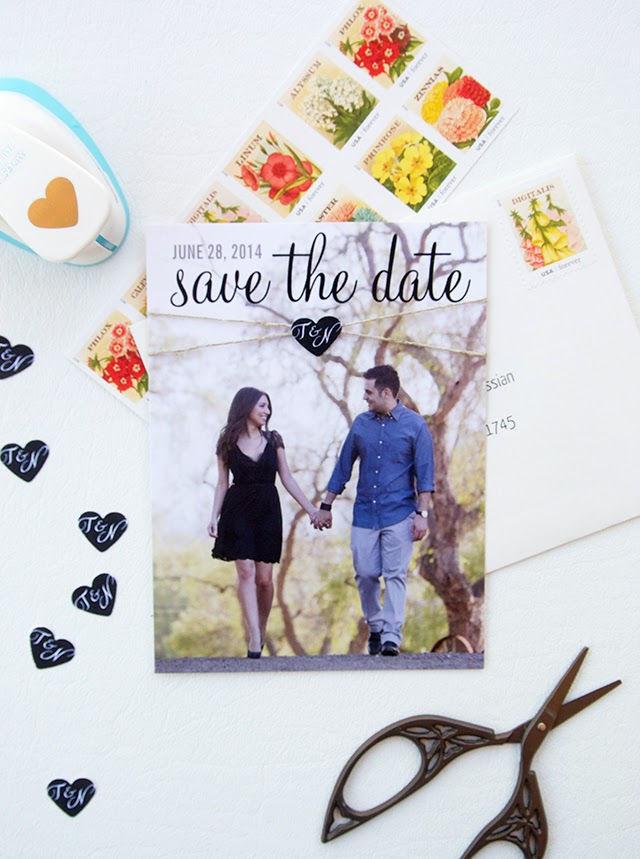
Planning your special day and looking for a personalized touch for your save the date cards? The unique idea is to add a crafty element by incorporating your initials and a three-dimensional embellishment to your cards. By using simple materials like twine, cardstock, and a heart-hole punch, you can make a charming and customized announcement that will impress your guests.
For a helpful guide on how to execute this DIY project, follow the easy steps outlined in the content. Emphasizing the beauty and individuality of your upcoming wedding, these handcrafted cards are a perfect way to share the news. Remember, choosing a skilled photographer like Luna Photo can capture the essence of your relationship, making your save the dates truly unforgettable. Creme Dela Craft
22. DIY Bookmark Save The Dates
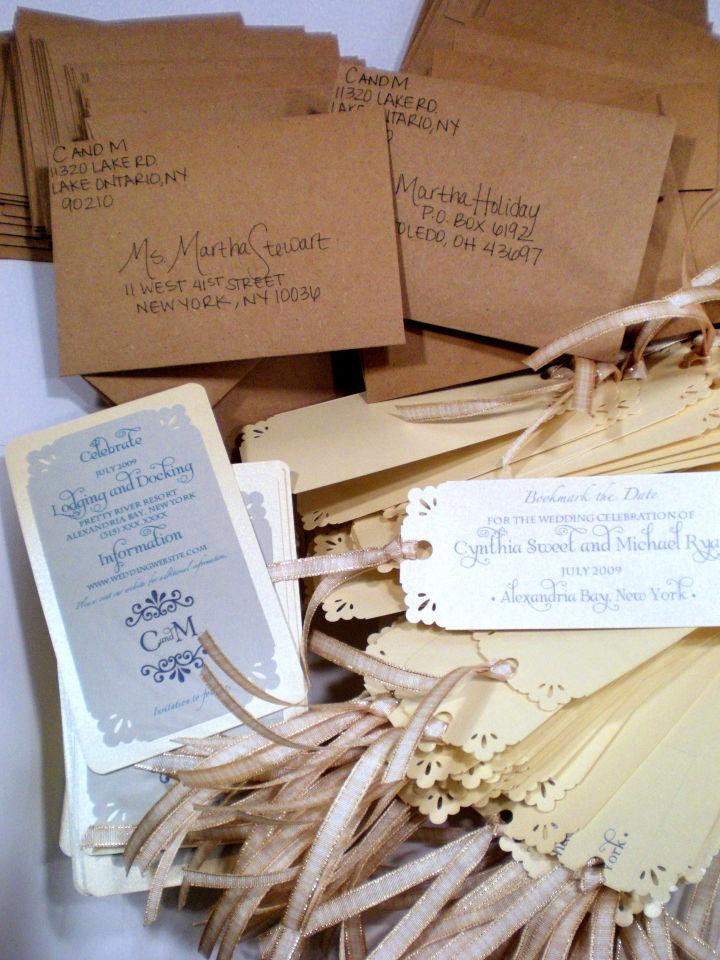
For book lovers planning a wedding, incorporating a personal touch into your special day can be as simple as crafting bookmark save the dates. Elizabeth Anne Designs: The Wedding Blog shares an engaging DIY project that transforms bookmarks into a charming invitation to “Bookmark the Date.”
With detailed instructions and a list of materials, including corner punches, card stock, and ribbon, you can make a memorable keepsake for your guests. This project is perfect for those who appreciate handcrafted details and literature, adding a unique and heartfelt element to your wedding preparations. Keep your sentences short and your creativity flowing with this instructive guide.
23. Save The Date Luggage Tag Ideas
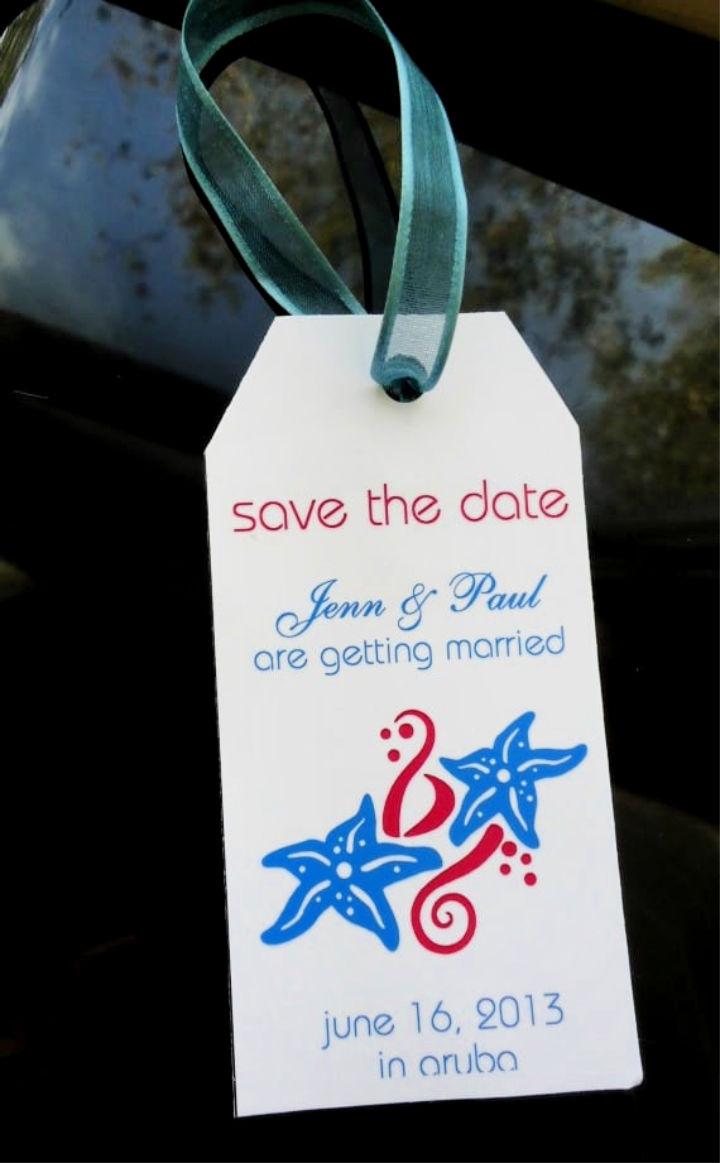
Planning a destination wedding and need a creative way to announce the date? Destination Wedding Details offers a free luggage tag save-the-date template that’s perfect for the occasion. This easy-to-use DIY project adds a personal touch to your wedding announcements, and it’s also a budget-friendly option.
Simply download the template, customize it with your details, and follow the step-by-step instructions for cutting and assembling. Your guests will be delighted to receive these charming reminders of your upcoming special day. Get started on crafting these unique save-the-dates and tick one more thing off your wedding planning checklist.
24. Save the Date Invitation Design With a Calendar Sticker
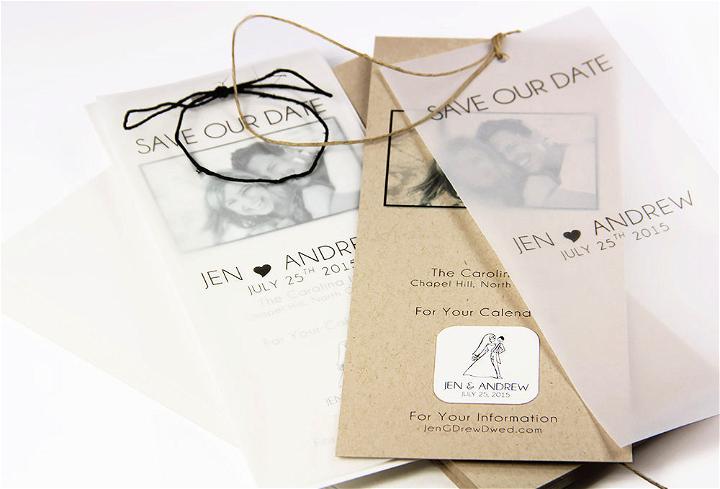
Make your own personalized save the dates with ease using LCI Paper‘s DIY guide. Our tutorial offers a step-by-step process, complete with a video, free print templates, and a materials list to help you craft a memorable announcement. Choose from a variety of papers and envelopes to match your event’s theme. Learn to assemble pre-cut slim cards, vellum overlays, and calendar stickers, all bound together with a touch of twine. With our helpful instructions, you’ll have custom save the dates ready to impress your guests in no time.
25. How to Make a Save The Date Banner
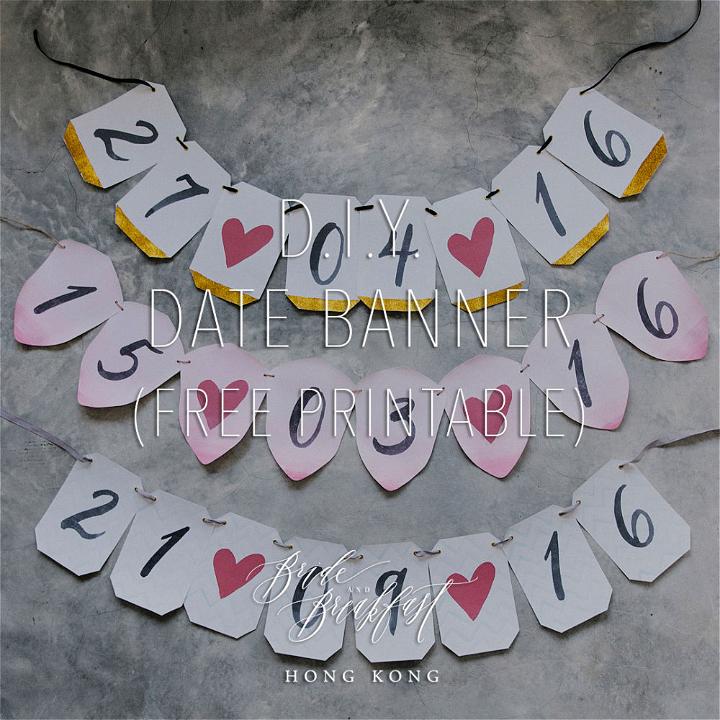
Get crafty with Bride and Breakfast HK‘s latest D.I.Y. Date Banner guide! Perfect for personalizing your engagement party, wedding day, or save-the-date photos, this do-it-yourself project is delightfully simple. With a free printable template featuring elegant brush calligraphy, you can make a charming date banner that adds a special touch to your celebration.
The instructions are clear, requiring just a few materials like card stock, scissors, and ribbon. Customize your banner with creative decorations like watercolor patterns or glitter accents to match your event’s theme. Enjoy crafting a unique piece that’s both beautiful and meaningful for your big day.
26. Destination Wedding Save the Date
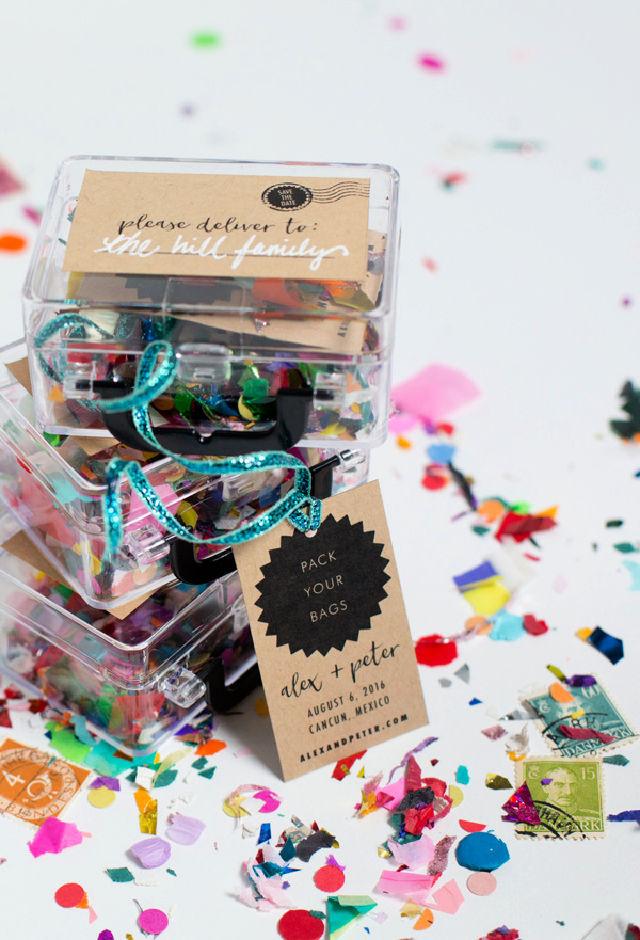
Planning a destination wedding just got more charming with Ruffled‘s DIY Save the Date mini suitcase guide. In collaboration with Beau-coup, this creative project is a whimsical way to announce your special day. Easy to follow, the tutorial provides a step-by-step approach to crafting these adorable mini suitcases filled with confetti.
With a printable address label and tips on presentation, these Save the Dates will excite your guests for the upcoming journey to your wedding celebration. Visit Beau-coup for even more inspiring wedding favor ideas.
27. Photostrip Magnet Save the Dates With Free Templates
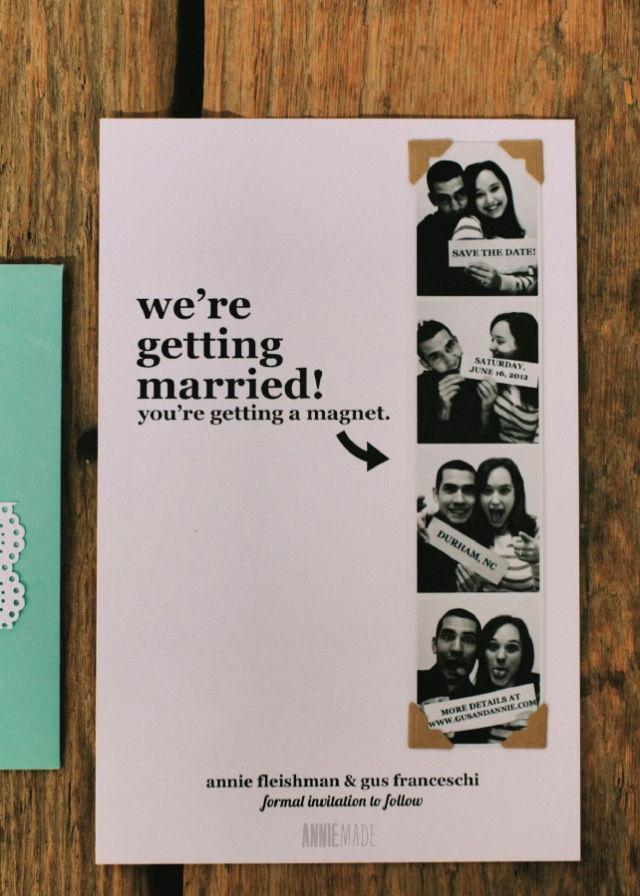
Craft your own unique wedding Save the Dates with Annie Franceschi‘s DIY Photostrip Magnet tutorial. Perfect for couples who want to infuse personality into their wedding announcements, this guide offers a step-by-step approach to making magnetic photostrips.
With free templates included, you can easily customize your Save the Dates with personal photos and text. The final product not only serves as a charming prelude to your special day but also as a keepsake for friends and family. Visit Annie Franceschi’s site for more creative wedding project ideas and embrace a hands-on approach to your wedding stationery.
28. DIY Vellum Save the Dates
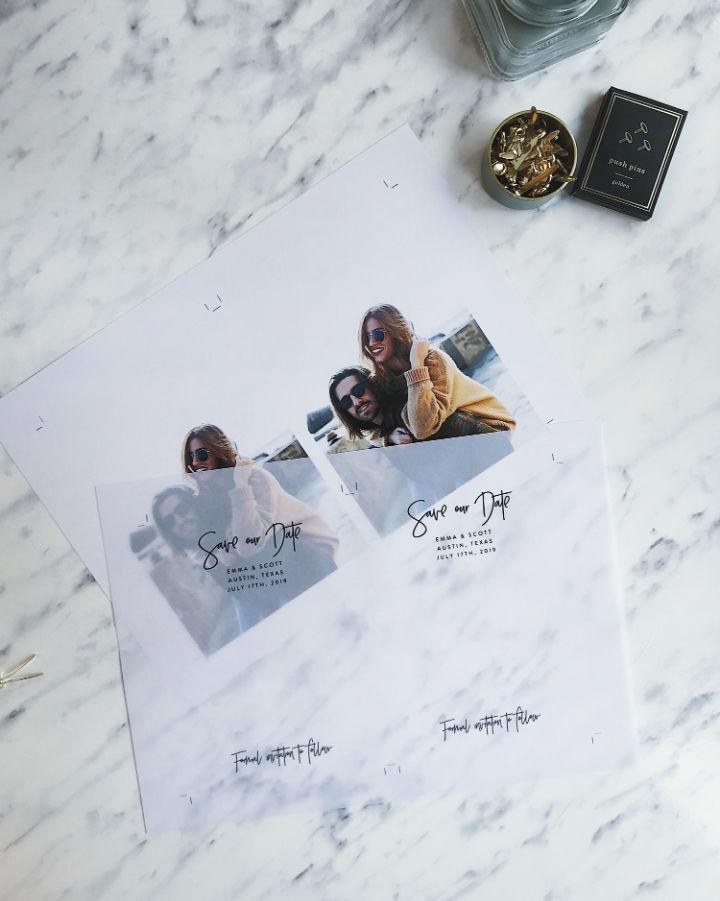
Get creative with your wedding announcements using DIY Vellum Save the Dates from Blanche Paperie. Vellum paper adds a sleek, modern twist to traditional save-the-date cards, offering a semi-transparent look that showcases engagement or couple photos with subtlety. This easy-to-follow guide instructs you on how to make these elegant announcements.
Purchase a template from the Etsy shop, print on vellum and cardstock, then cut to size. For a personal touch, bind the layers with ribbon or a brad. Impress your guests with handmade sophistication and check out the instructional video for additional help. Crafting your unique save-the-dates has never been simpler or more stylish.
29. Making Save the Date Wording
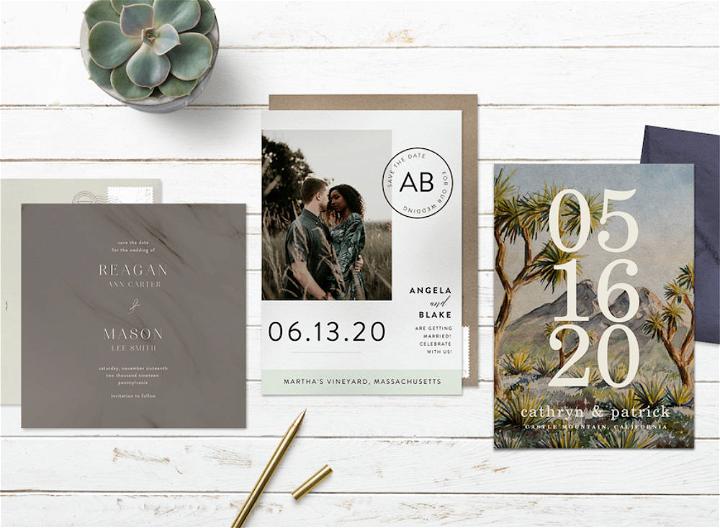
Planning your wedding day is an exciting journey, and ensuring your loved ones can join you is crucial. STATIONERS provides an insightful guide on save the date wording to help announce your special occasion effectively. Learn when to send out these important notices, what information to include, and explore various wording ideas to match the tone of your event.
With tips for formal, modern, and playful approaches, you can craft the perfect pre-invitation that captures the essence of your upcoming celebration. Get ready to mark calendars and spark anticipation for your big day with ease and style.
30. DIY Handkerchief Save the Dates
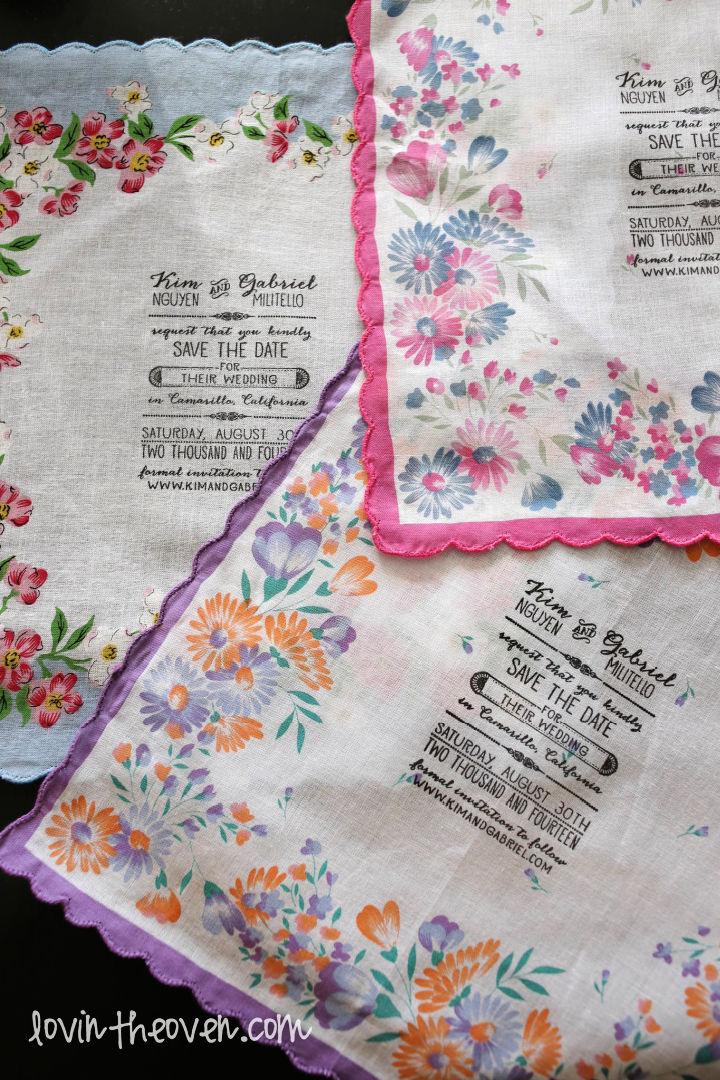
Discover how to make vintage-inspired save the dates with a DIY handkerchief twist on Lovin’ From the Oven. This crafty guide offers a step-by-step approach to designing and assembling personalized handkerchief save the dates that can add a touch of elegance to your wedding announcements.
Learn about selecting the right materials, from handkerchiefs with a vintage feel to the best ink pads for fabric, and find out how to wrap your save the dates beautifully for mailing. Ideal for those who love personalized snail mail and are eager to engage in a fulfilling arts and crafts project, this instructive post is both engaging and practical, ensuring your save the dates are as unique as your special day.
Conclusion:
In conclusion, these 30 easy and unique DIY save the dates ideas provide an excellent way for couples to announce their special day with a personal touch. From whimsical watercolor postcards to cleverly crafted luggage tags, there’s a myriad of styles to match any wedding theme. Crafting your save the dates is not just a way to express creativity but also a meaningful gesture that your guests are sure to appreciate. So, grab your crafting supplies, and let’s make your wedding announcement as unforgettable as the day itself!
Related DIY Wedding Ideas
- 20 Simple DIY Wedding Bouquet Ideas To Please The Bride
- 10 Easy To Make DIY Boutonniere Ideas
- 20 Easy DIY Pop Up Cards Tutorial for Every Event
- Dates To Remember – Free Printable
- 20 Best DIY Luggage Tags To Easily Identify Your Bags
- 25 Simple DIY Flower Crown Ideas For a Queen Look
- 20 Simple DIY Corsage Ideas | How To Make A Corsage
