Making a DIY sensory table can be a fulfilling project for many people, giving them the opportunity to craft something unique and beneficial for sensory play. These DIY sensory table ideas offer an engaging way for children to explore textures, colors, and various materials. This guide focuses on how to build a DIY sensory table, providing you with 30 homemade DIY sensory table plans tailored for different skill levels and preferences. Our guide ensures you have all the information to start your project confidently.
Understanding the basics of a sensory table and choosing the right type for your needs are crucial first steps. This guide breaks down the process into manageable sections, from planning your project to enjoying the reward of your efforts. With safety tips and ideas for filling your table, we’ve covered all the essentials. So, get ready for a journey into building a creative and stimulating space for sensory play. Let’s dive into how to build a sensory table, ensuring you’re fully prepared for this exciting project.
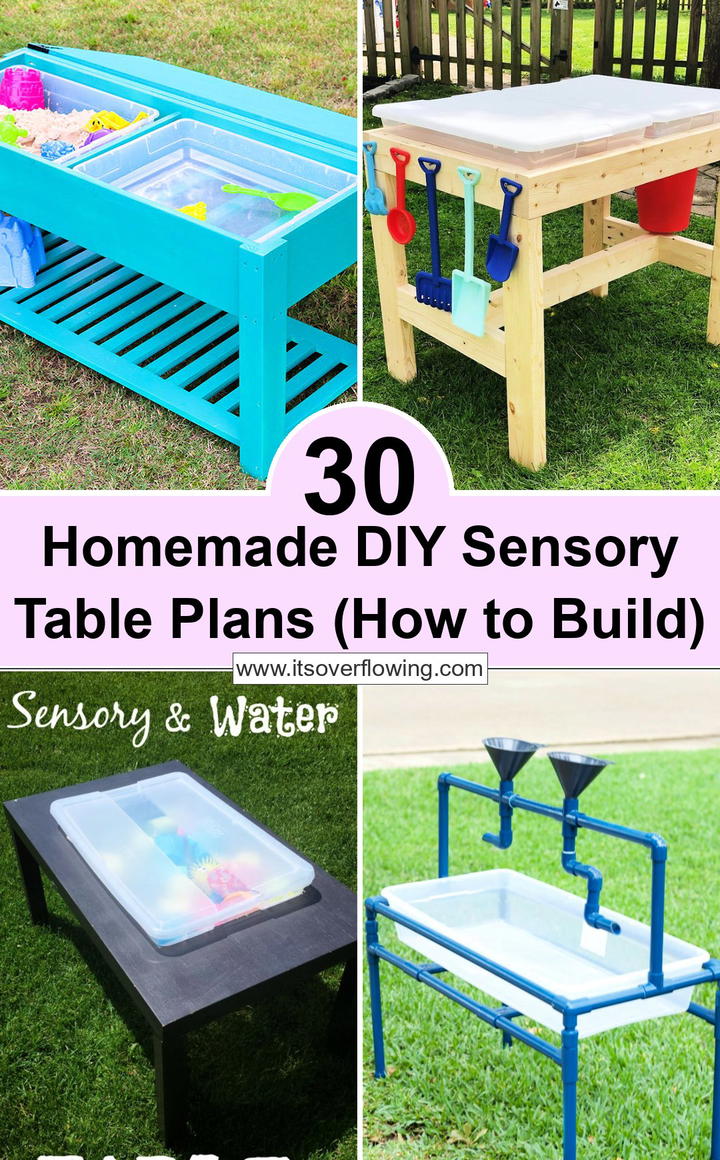
Why Build a DIY Sensory Table
Making a DIY Sensory Table is an excellent way to engage children in hands-on learning and exploration. Sensory tables can benefit children in numerous ways:
- Enhances Fine Motor Skills: Scooping, pouring, and picking up objects improve hand-eye coordination and dexterity.
- Stimulates the Senses: Touching different textures and interacting with a variety of materials engage the senses, fostering sensory development.
- Encourages Exploration: A sensory table invites curiosity and exploration, allowing children to learn and discover at their own pace.
- Promotes Cognitive Growth: As children experiment with materials, they learn cause and effect, sorting, and problem-solving skills.
- Supports Language Development: Describing their play experience, children expand their vocabulary and language skills.
- Fosters Social Interaction: When used in a group setting, it encourages sharing, cooperation, and social skills.
A DIY sensory table is not just a play area; it’s a dynamic learning environment that supports growth and development across several domains, making it a valuable addition to any play space.
How to Get Started with Building a Sensory Table
Making a sensory table can be a fantastic DIY project that not only provides endless hours of entertainment and learning for children but also offers a sense of accomplishment for the builder. Sensory tables can be simple or elaborate, depending on your skill level, budget, and the space you have available. Here’s how to start your journey towards building your own sensory table.
Understand What a Sensory Table Is
A sensory table, often used in classrooms, therapy centers, and homes, is a table filled with materials that stimulate the senses. These tables help children explore textures, colors, smells, and sometimes sounds, fostering learning through sensory play. Materials often used in sensory tables include water, sand, rice, beads, and more.
Decide on the Type of Sensory Table
There are many types of sensory tables, ranging from simple, single-bin tables to more complex, multi-bin tables with sections for different materials. The type you choose to build will depend on the age and number of children using it, as well as your budget and space requirements.
Plan Your Project
- Choose Your Design: There are plenty of plans available online for DIY sensory tables. Look for one that suits your needs in terms of size, materials, and complexity.
- Gather Materials: Once you’ve selected your plan, compile a list of materials you’ll need. Common materials include wood, screws, sealant, and bins or tubs for holding sensory materials. Don’t forget tools like a saw, drill, sandpaper, and paint or stain if you wish to customize the look.
- Prepare Your Space: Make sure you have a clean, safe workspace for your project. If you’re working with wood, you’ll need an area where you can cut, sand, and paint or stain safely.
Start Building
- Follow your chosen plan step by step. Don’t rush through the instructions; ensure each piece is correctly measured and cut to avoid any misalignments.
- After the structure is built, ensure all edges are smooth and safe for children. Sand any rough areas to prevent splinters.
- Apply any finish (paint or stain) if desired. Let it fully dry according to the product’s instructions.
- Finally, add the bins or tubs and fill them with the sensory materials of your choice. Water, sand, and rice are excellent starters for a sensory table.
Safety First
Remember, when building and filling your sensory table, always consider the safety of the children who will be using it. Avoid sharp edges, small parts that could be choking hazards, and toxic materials. Regularly check the table and its contents for wear and tear, and replace anything that could potentially harm a child.
Enjoy the Reward
Once your sensory table is complete, you’ll enjoy watching children explore and learn from it. Sensory tables are not only fun but educational, aiding in the development of fine motor skills, language, and cognitive growth. Building your own sensory table can be a rewarding project that offers lasting value to young learners.
FAQs for DIY Sensory Table Plans
Here, we aim to answer the most common questions about building your own sensory table, ensuring you have all the information you need for a successful DIY project.
What is a sensory table?
A sensory table is an interactive table designed for children to explore different textures, materials, and objects through touch, sight, and sometimes smell and hearing. These tables are excellent for developing sensory awareness, fine motor skills, and encouraging imaginative play.
What materials are needed to build a sensory table?
Typically, you’ll need:
- Wood (size and amount depend on your design)
- Screws or nails
- Sandpaper
- Paint or varnish (optional)
- Tools (saw, drill, screwdriver)
- Protective gear (gloves, goggles)
Choice of sensory materials (sand, water, rice, pasta, etc.) is also essential but varies based on what sensory activities you plan to host in the table.
How much does it cost to build a sensory table?
The cost can vary greatly depending on the materials used and whether you already have some of them. On average, building a basic sensory table can cost between $30 to $60. More elaborate designs or larger tables may increase the cost.
Is it difficult to build a sensory table?
The difficulty level depends on the design you choose. Simple designs can be quite straightforward, even for beginners. More complex designs might require some woodworking skills or experience with power tools. Following detailed plans and starting with easier projects might help ease the process.
Can I build a sensory table if I have limited space?
Absolutely! Part of the beauty of DIY is customizing to fit your needs. You can design a smaller table or even a portable sensory bin that can be stored when not in use.
What are some ideas for filling the sensory table?
The possibilities are almost endless. Here are a few ideas:
- Water play (add cups, funnels, and waterproof toys)
- Sand (with shovels, rakes, and molds)
- Rice or pasta (for scooping and pouring)
- Nature exploration (leaves, stones, twigs)
Remember, the fillers should be safe for children and appropriate for their age to avoid choking hazards.
How do I keep the sensory table clean?
Hygiene is crucial, especially when using organic materials or if the table is played with by multiple children:
- Regularly replace materials like rice, sand, or water.
- Use a cover to keep the sensory materials clean when not in use.
- Wipe down the table and wash any toys or tools used in the table with soap and water.
Making a DIY sensory table not only offers a fun and educational tool for children but also provides a rewarding project for the builder. With the right tools, materials, and a bit of creativity, you can craft a unique and engaging sensory experience tailored to your child’s needs and interests.
30 Homemade DIY Sensory Table Plans
Discover 30 homemade sensory table plans for kids to engage in hands-on exploration and learning. Make your DIY sensory table today!
1. How to Make a Water Table
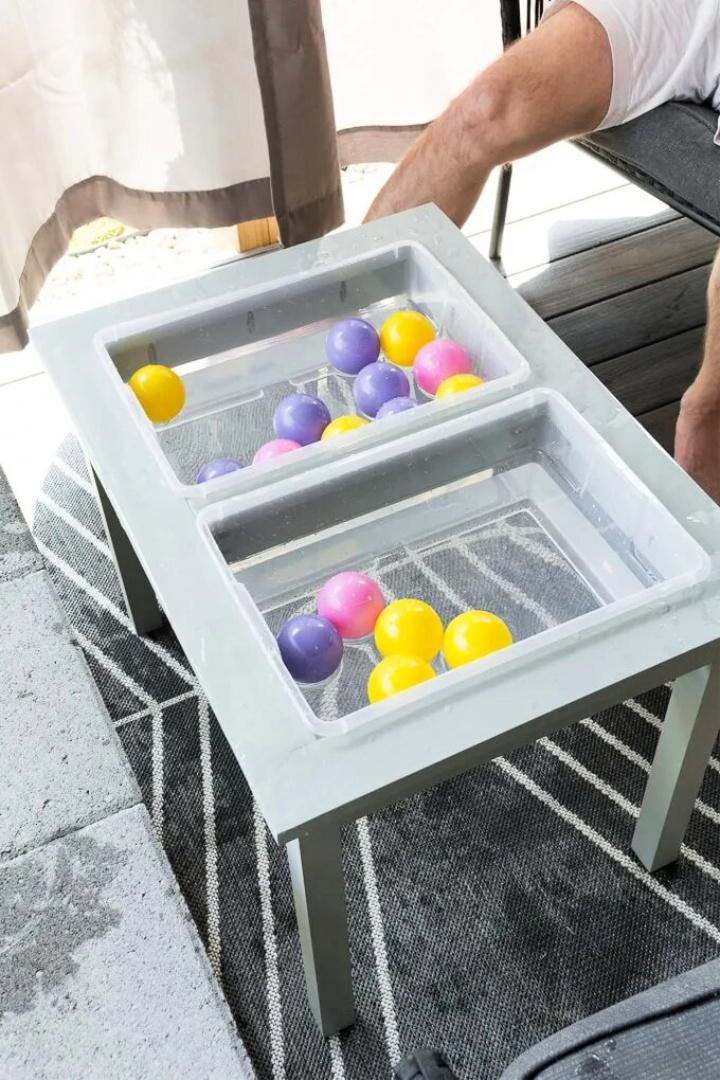
If you are looking for a fun and budget-friendly outdoor activity for your little ones, opt for these free build plans to guide you in crafting the perfect DIY water table for toddlers. You can easily make a functional and eye-catching water table with just some basic tools and materials, including lumber, kreg jig k4, a saw, a cordless drill, an orbital sander, and more.
Remember to add sterlite 16-quart bins from target to complete the project. Your kids will love playing with this sturdy wooden water table that can withstand any weather condition while providing endless hours of entertainment. Get started today! bybrittanygold
2. Homemade Wooden Sensory Table
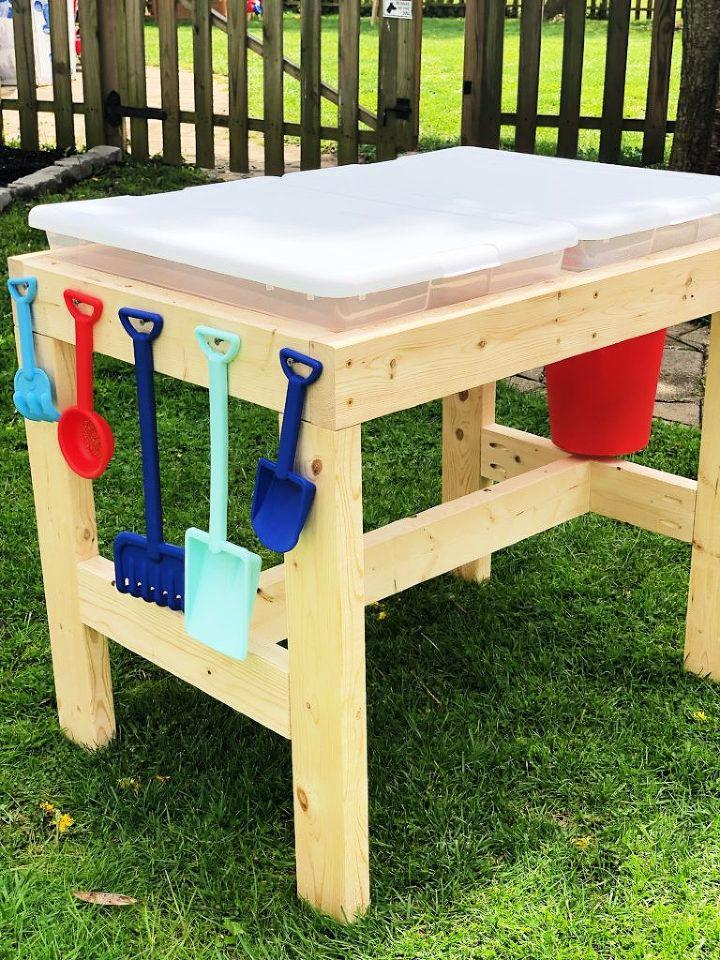
Embark on a budget-friendly adventure and elevate your children’s outdoor playtime with a DIY sensory table project. Skip expensive store-bought options and utilize essential materials such as a miter saw, speed square, tape measure, and 2x4x8′ boards to make an engaging space for your little ones.
Remember to add a wood sealer for durability! With just 3 hours of crafting time, you can incorporate two 28-quart tubs with lids into the design and witness the immeasurable joy it brings your children. Transform ordinary outdoor play into an extraordinary sensory experience without breaking the budget! ourgatheredco
3. DIY Sensory Table With Removable Bins
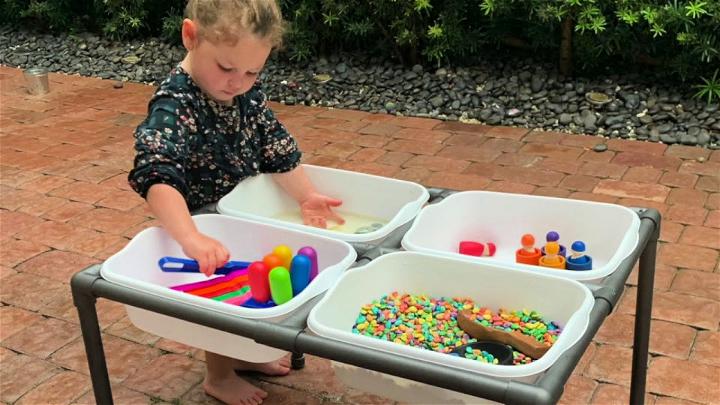
Unleash your child’s imagination with the perfect DIY sensory table for an exceptional play experience. In just 30 minutes, make a source of immense pride versatile enough for indoor and outdoor use. This lightweight wonder boasts easy assembly and disassembly, with removable bins and adjustable height to accommodate growing kids. Gather materials like pvc pipes, fittings, spray paint, and bins from Dollar Tree to craft this masterpiece that will captivate young minds through sensory play. Watch in awe as their creativity unfolds!
4. Sensory Bin Table Setup for Kids
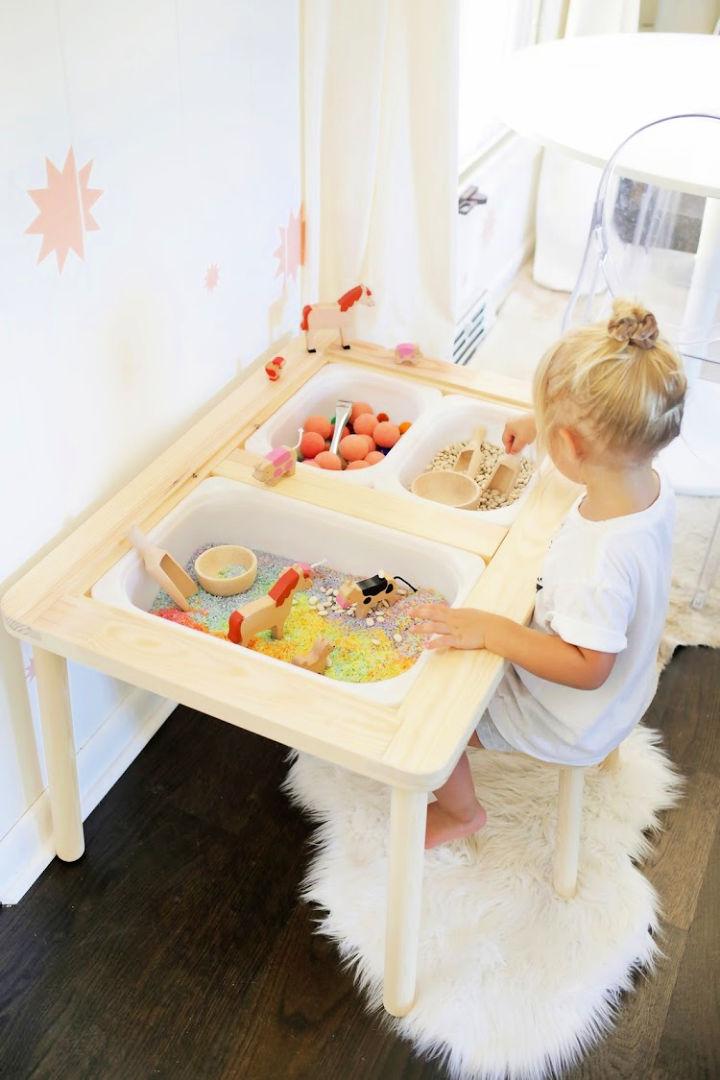
Inspire your child’s imagination as they journey through the enchanting world of sensory play with this thoughtfully designed table. Delight in watching them delve into bins filled with vibrant treasures, indulging in the ultimate tactile experience. This article introduces an innovative transformation of an IKEA desk into a versatile sensory haven, complete with separate areas for drawing, coloring, and, of course, endless sensory fun.
With its lightweight design and portability, this setup is perfect for indoor and outdoor use on sun-kissed days. Discover the magic of filling these bins with carefully selected materials that will captivate your child’s senses and provide hours of entertainment. abeautifulmess
5. Making a PVC Water Table
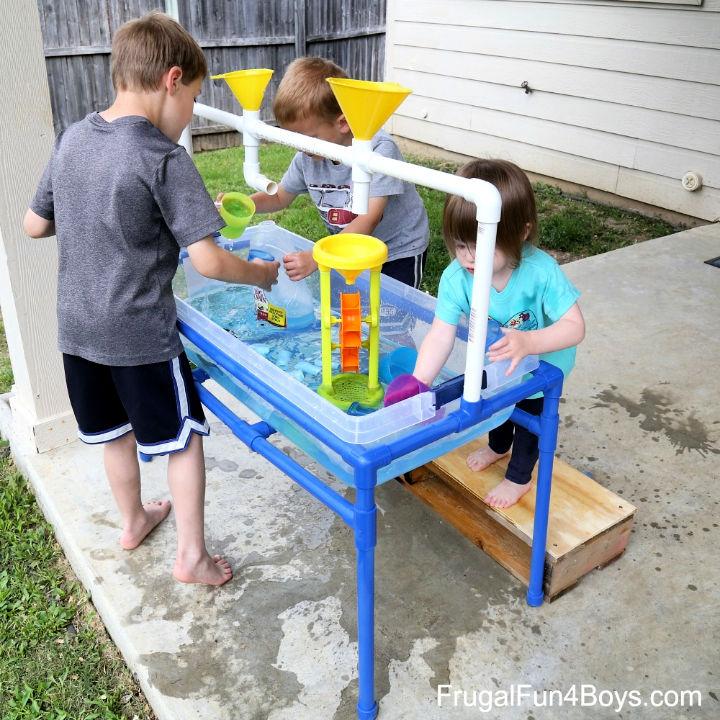
Experience the ultimate sensory play with this ingeniously crafted pvc pipe table for kids! This sand and water table is a must-have for any young explorer, offering endless possibilities and adaptable features. Separate tubs ensure no mixing of materials, while funnels and customizable pipe arrangements enhance creativity.
Transform the experience with colored water as you procure top-quality 3/4 inch pvc pipes and connectors, expertly secured with durable glue. Perfectly tailored to your child’s height and tub size, this thrilling play table will have them squealing with delight! frugalfun4
6. How to Build a Sensory Table
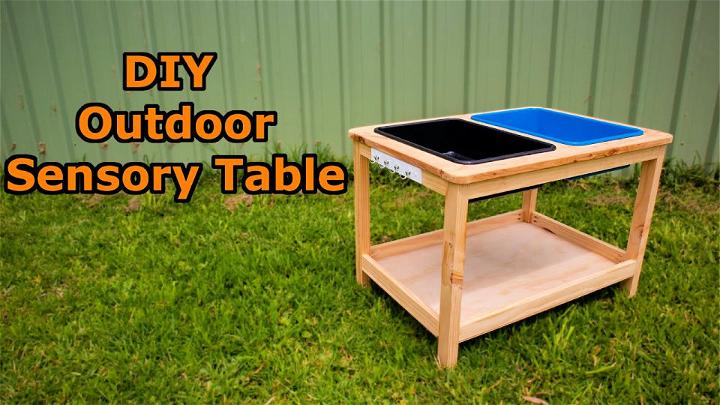
Give a spark to your creativity with this step-by-step guide to building the ultimate sensory table for kids. Crafted from sturdy pine and cypress, this DIY project boasts separate sand and water compartments and a convenient storage bottom shelf.
With an affordable price tag of just $60 compared to a $100 IKEA alternative, this weekend endeavor promises long-lasting durability and endless fun for children. Take advantage of making a one-of-a-kind sensory experience – watch this engaging video now!
7. IKEA Sensory Table Hack
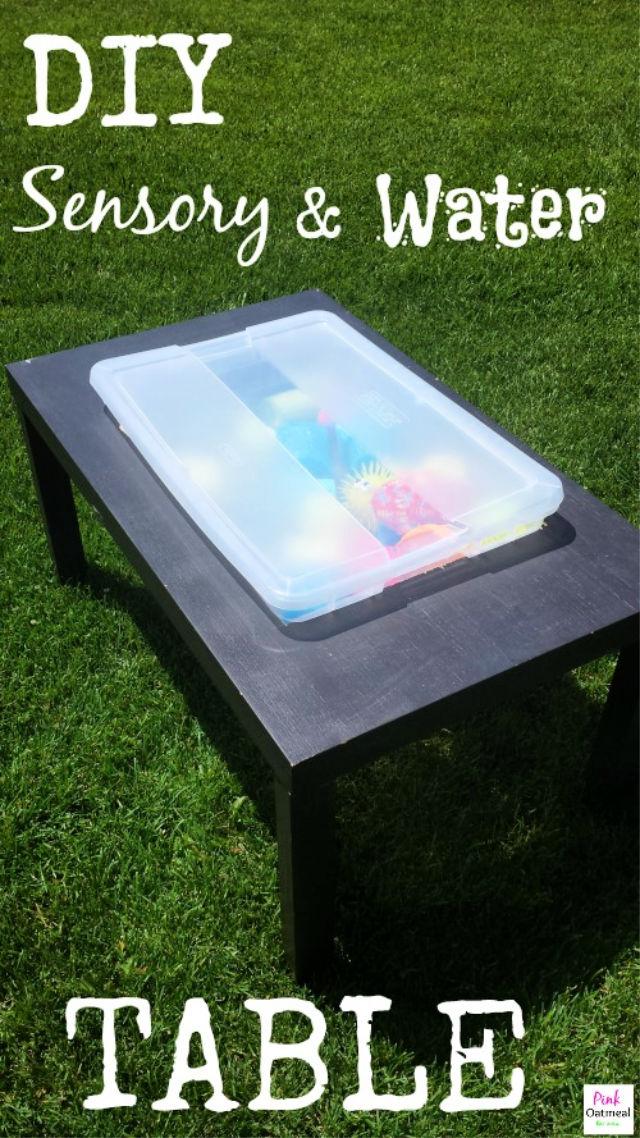
Let your child’s creativity run wild with this innovative DIY sensory and water table, crafted from a repurposed IKEA table. With minimal cost starting at $9.99, this budget-savvy project transforms an old piece into a versatile play space.
Measure and cut out a hole to accommodate a plastic bin within the table’s dimensions, ensuring endless sensory fun for your little ones. Let creativity flow while making lasting memories – all without getting expensive! It’s one of the best DIY sensory table projects ever! pinkoatmeal
8. DIY Sand and Water Play Table
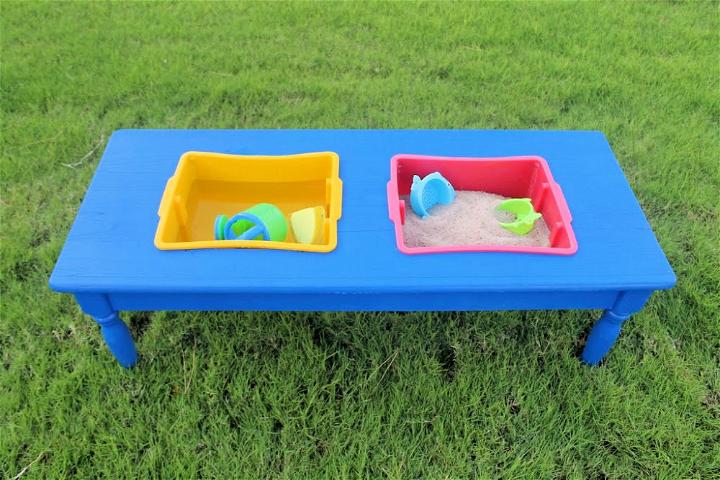
Revamp a thrift store treasure and elevate it to new heights of fun with this ingenious DIY project. Easily transform a lackluster coffee table into an interactive sand and water oasis for children, with sturdy tubs securely fitted into the design.
By meticulously tracing and cutting holes for the tubs, sanding edges for safety, and adding a fresh coat of spray paint from a trusted brand, you’ll make an affordable masterpiece that promises endless outdoor playtime for only $30. Let their imaginations run wild as they splash and make in their personalized, beach-inspired haven. deonnawade
9. Make a Sensory Table for Toddlers
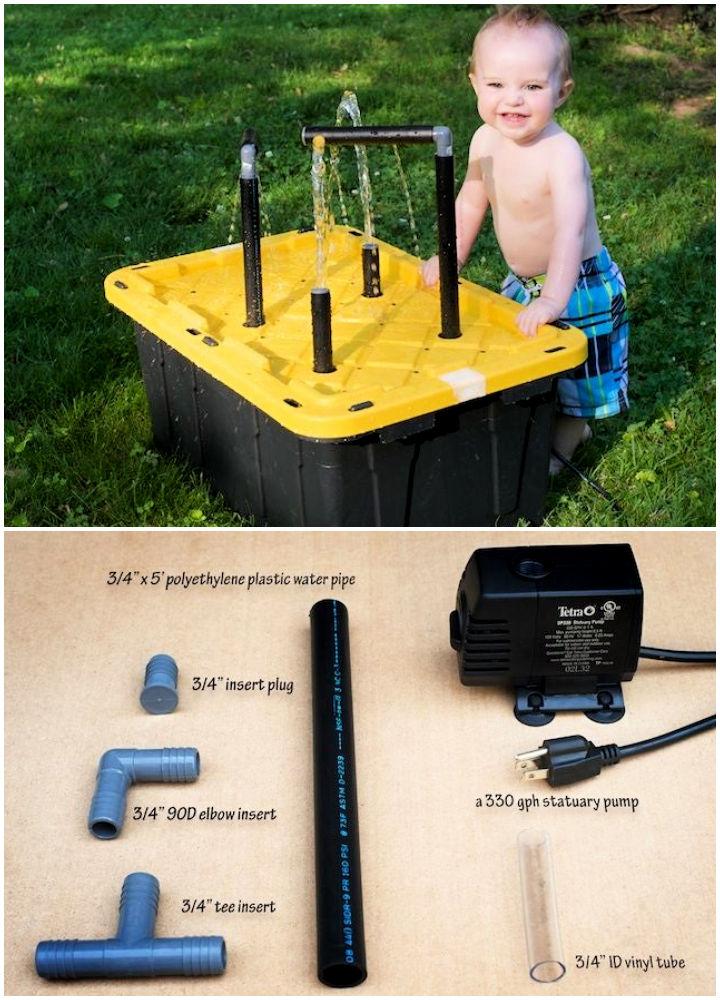
Experience the thrill of making your very own water oasis for your child with this step-by-step guide! Craft a magnificent water table using a secure storage bin, powerful statuary pump, and plumbing essentials.
Head to your local home-improvement store armed with tools like a hand saw and power drill, and watch as you transform into a DIY pro. With drainage holes on the lid to prevent excess water and an intricate plumbing structure for fountain functionality, this project will make waves in your child’s playtime! instructables
10. DIY Sensory Table for Preschools
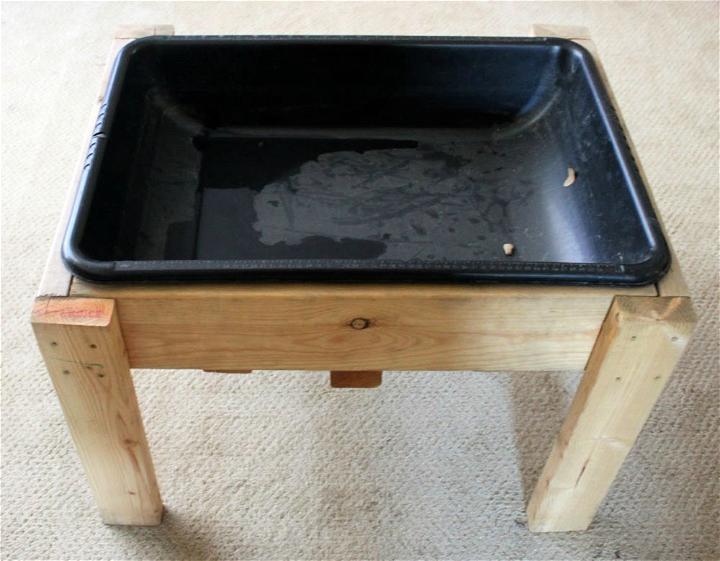
Encourage your child’s creativity to soar and foster sensory development with this budget-friendly DIY water table under $15. Crafted from a sturdy concrete mixing tub and reinforced with lumber, this durable water play station is perfect for endless hours of engaging fun.
With easy-to-follow instructions, make a 28×20-inch table that will withstand even the most enthusiastic little ones. Let their creativity flow as they splash and explore in this specially crafted water wonderland. barefeetonthe
11. Homemade Sand Table
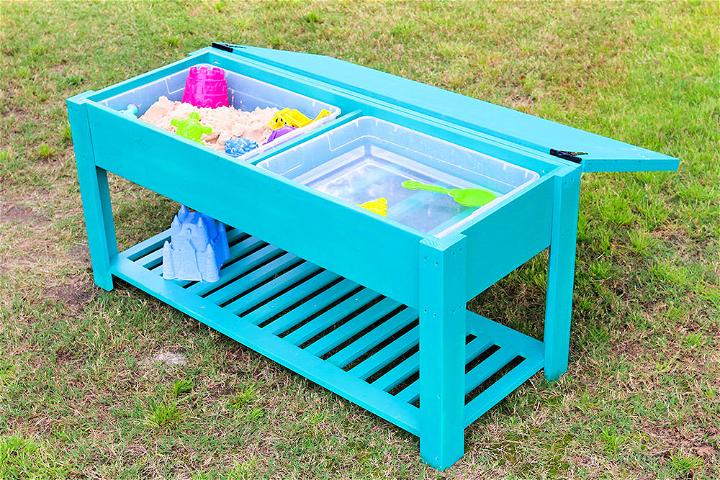
Unleash your child’s boundless imagination with a custom-built sand and water play table – a perfect combination of functionality and creativity! Crafted from 2 boards of 1x8x96″, 1 board of 1x6x24″, 4 boards of 1x3x96″, 7 boards of 1x2x96″, and sturdy plywood, this project boasts a chalkboard lid and can accommodate two store-bought tubs. Moderate in difficulty but endless in fun, let your little ones dive into hours of imaginative play with this one-of-a-kind DIY masterpiece. buildsomething
12. DIY Outdoor Sink Table
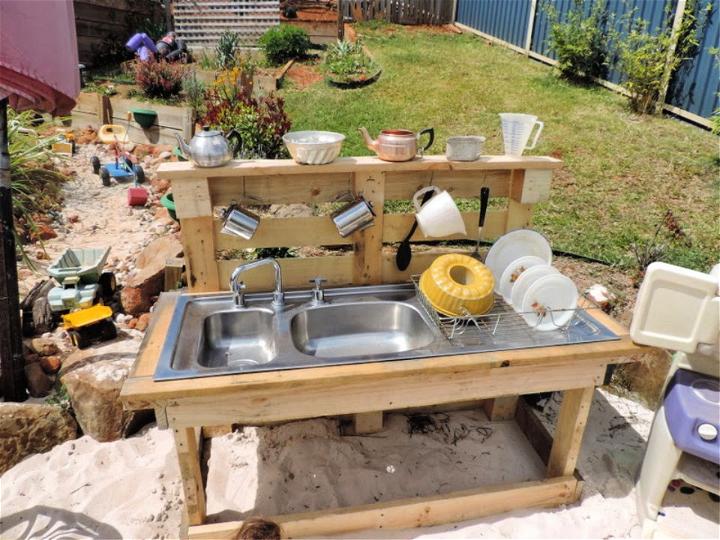
With this DIY pallet sink project, everyone will love the enchanting transformation of discarded pallets into a captivating play resource. This sustainable and fulfilling endeavor will charm you with its reused materials and step-by-step accessibility.
It showcases creativity and promotes an important lesson about waste reduction through hands-on exploration at a local revolve store and salvaging discarded items. Witness the joy of repurposing “trash” into treasures while sparking environmental consciousness within your community. theempower
13. DIY Outdoor Nesting Activity Table
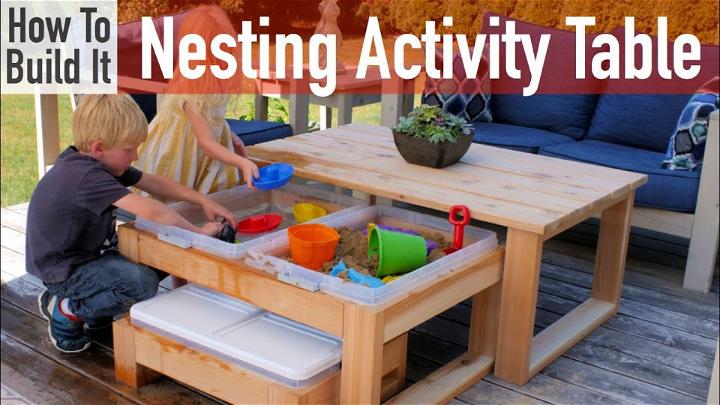
It is time to inspire your inner craftsman and embrace the great outdoors with this expert guidance on crafting an exceptional nesting activity table. From start to finish, this step-by-step tutorial showcases the simplicity of pocket hole joinery while utilizing premium materials like cedar for a durable and stylish result.
Elevate your family bonding experience by adding protective feet to this versatile project, perfect for children of all ages. With detailed plans and instructions in the video, making treasured memories has never been easier or more enjoyable!
14. Children’s Sensory Table Tutorial
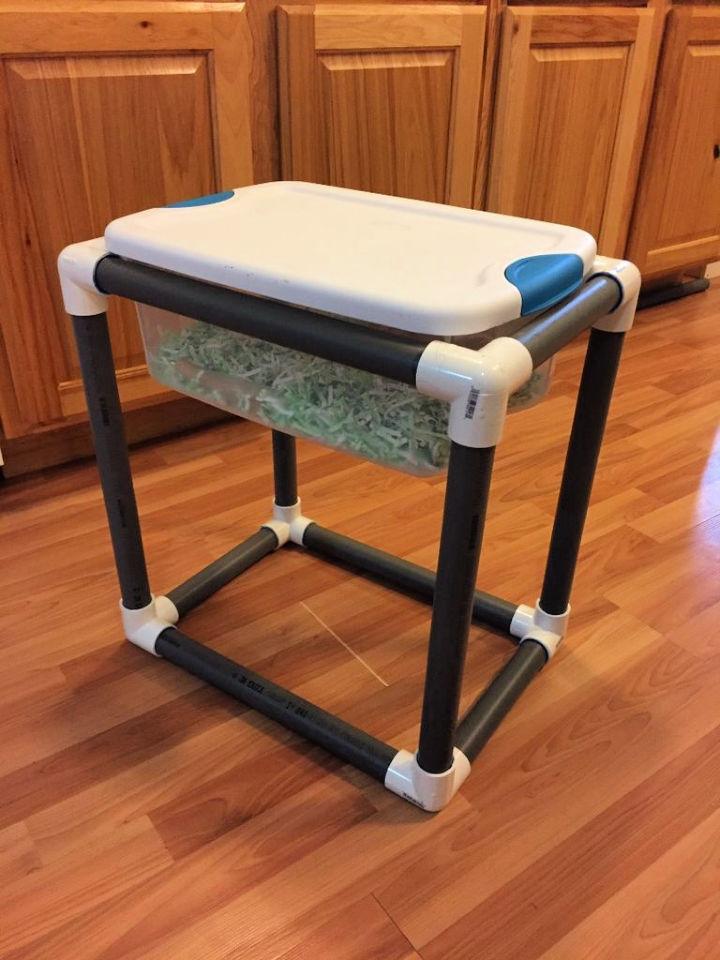
Discover the secrets to making a budget-friendly sensory table for early childhood settings. With a trip to your local home improvement store, this step-by-step guide will lead you through selecting the necessary materials, such as pvc pipe, connectors, cutters, glue, and a storage tub.
The detailed recommendations for choosing the right type and size of pvc pipe and purchasing tips for cutters and glue guarantee a smooth DIY process. Let this DIY tutorial show you how cost-effectiveness meets creativity with this essential sensory play tool that will have little ones exploring their senses in no time! instructables
15. DIY Kids Table
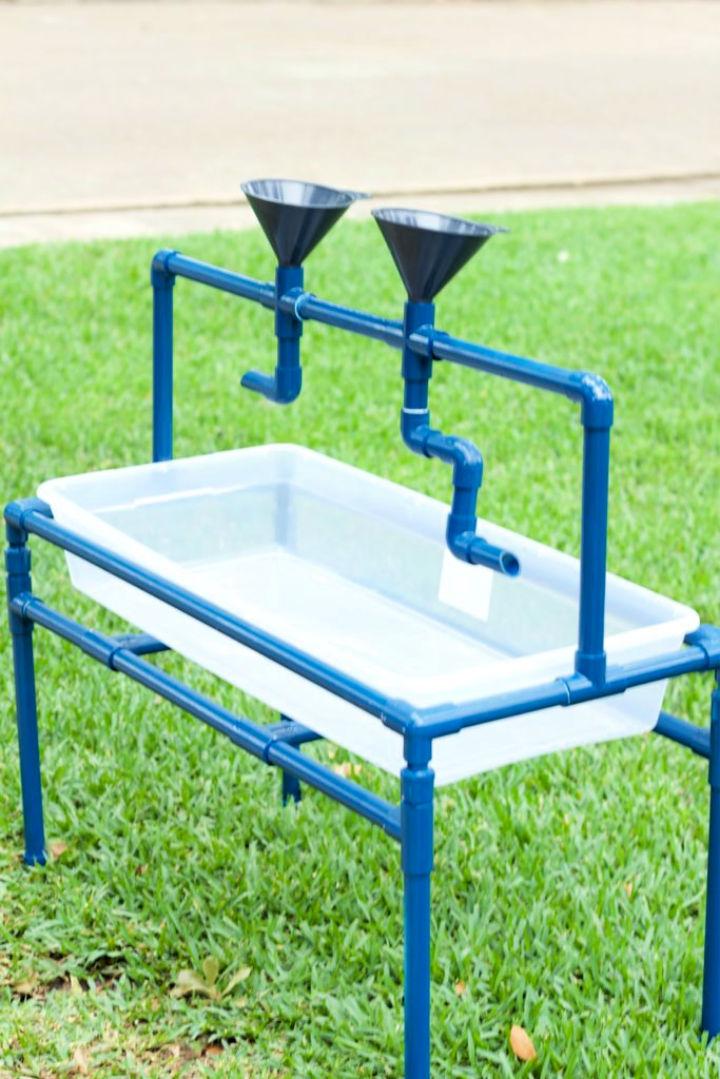
Indulge in a wallet-friendly summer adventure with this ingenious guide to crafting your DIY sensory table! With just 3/4 inch pvc pipes, connectors, and a tub, unleash endless possibilities for sensory play. Follow the expert measurements and let your imagination run wild while cutting and assembling the materials.
And for an extra flair, why not give it a pop of color with spray paint? Not only is this project quick and family-friendly, but at around $50, it’s also a budget-savvy alternative to store-bought options. Let your little ones’ creativity soar as they explore different sensory materials in their customized table – perfect for exciting sunny days! momswithoutanswers
16. Make a Sandbox Picnic Table
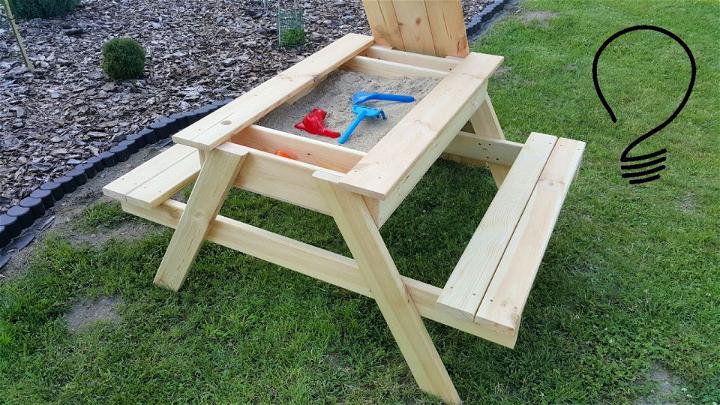
Free your inner DIY genius with this innovative video tutorial on crafting a multifunctional sandbox picnic table. From essential materials to precise measurements, this DIY tutorial will guide you through building a space-saving outdoor furniture piece that doubles as storage.
With step-by-step instructions and dual functionality, this versatile creation caters to those seeking convenience and practicality in their backyard oasis. Start making your unique masterpiece today!
17. Water and Sand Table from 2x4s
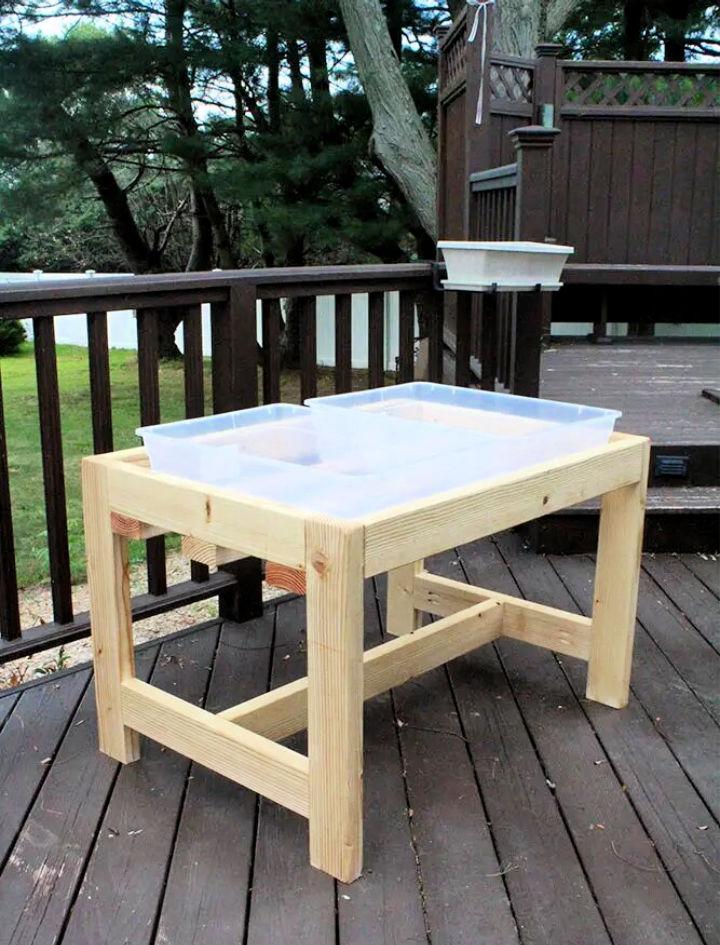
Elevate your outdoor play space with this innovative water and sand table. Crafted from durable 2×4 boards, this h-shaped design features interchangeable bins with lids for endless sensory fun. This step-by-step guide includes a color-coded diagram for precision cutting and assembly using pocket holes to achieve a sleek finish.
With just a few materials- including a kreg pocket hole jig and waterproof sealer- you’ll have the ultimate summer oasis in no time! One of the best DIY sensory tables to make at home without getting a bit expensive! Every beginner can make it like a pro! justmeasurin
18. DIY Sandbox Table
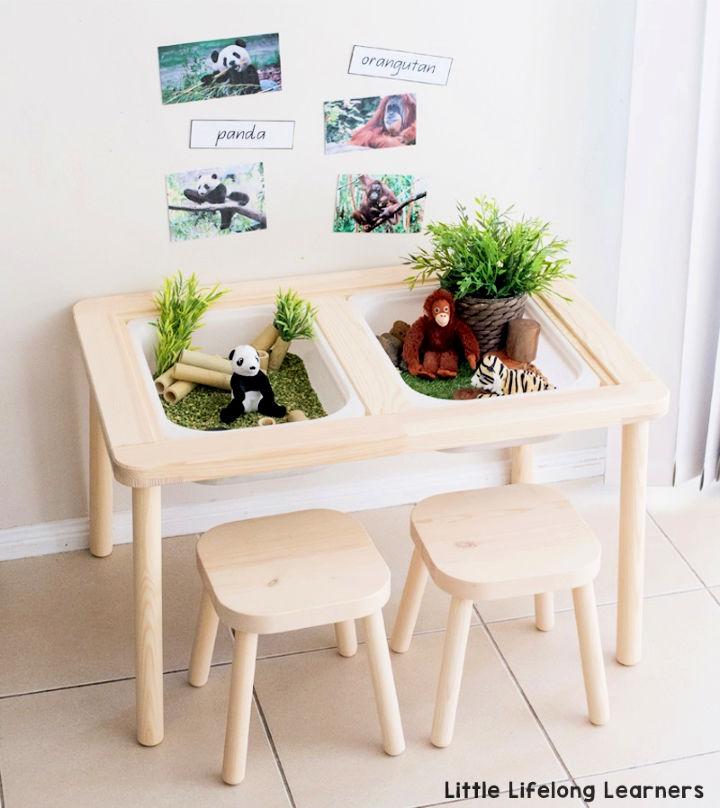
Enter the captivating world of sensory exploration with the versatile IKEA flisat sensory table. Unleash your child’s imagination as they engage in hands-on learning while playing at the perfect height. This cleverly designed table can be transformed into a sensory wonderland by simply adding trofast storage tubs, making it an ideal addition to any playroom or classroom.
Assemble effortlessly with little helpers and complete the experience with matching flisat stools for ultimate comfort during playtime. Let your kids embark on an enchanting adventure as they discover endangered animals through interactive play using IKEA’s djungelskog soft toys. Elevate your sensory game and bring magic to every session with this must-have table – because nothing beats learning through play! littlelifelong
19. Simple DIY Sensory Bin Stand
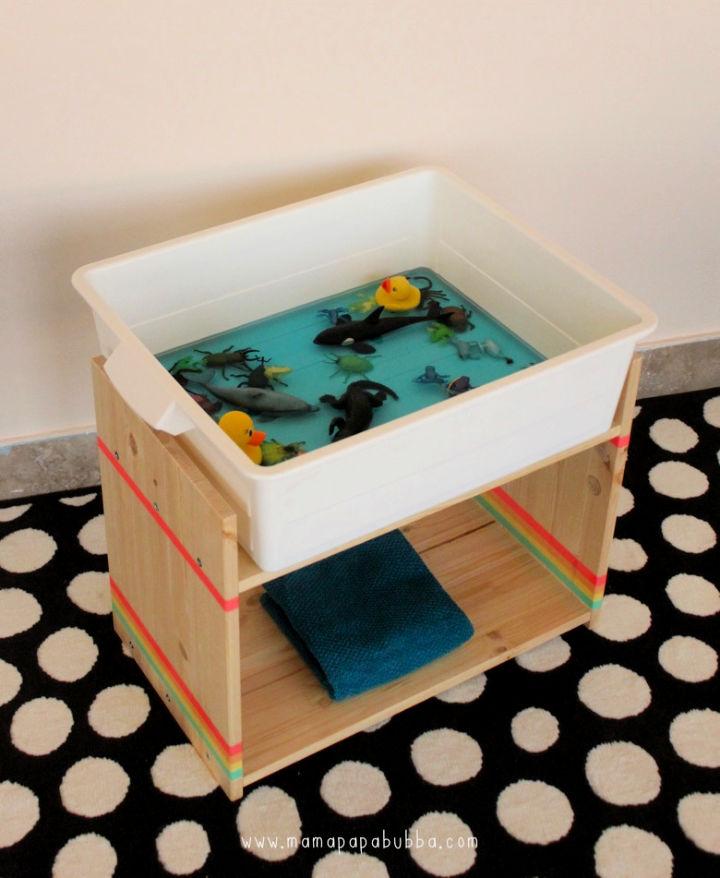
Transform any space into a sensory wonderland with this ingenious and budget-friendly DIY sensory bin stand! Crafted from an IKEA nightstand flipped upside down, this simple yet creative project allows you to easily assemble the stand using the ‘legs’ as posts to hold the bin in place. For added stability and storage, keep the top of the nightstand intact.
Personalize your creation with washi tape for a unique touch. Choose a plastic drawer bin that fits perfectly on top and secure it with a no-slip grip or strong velcro. You can customize the stand according to your child’s sensory play needs. Unleash their imagination and creativity while engaging in fun-filled sensory activities – all thanks to this easy-to-make sensory bin stand! mamapapab
20. DIY Light Table – Sensory Play
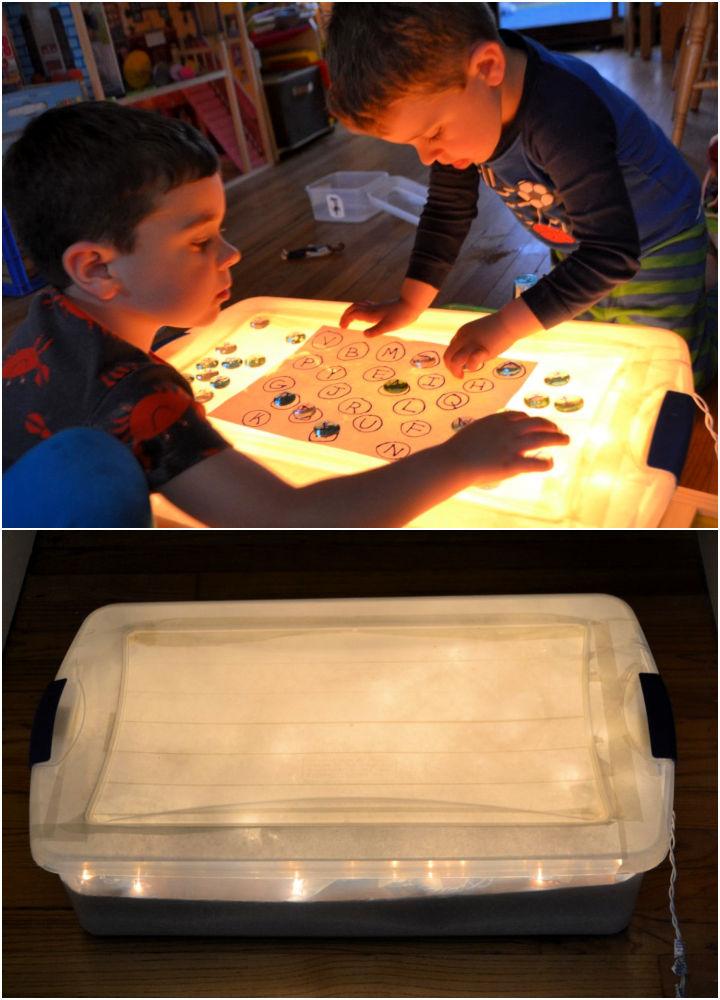
Unlock the wonders of sensory play with this ingenious and budget-friendly DIY light table! Make a magical world for your little ones using everyday household items such as a transparent storage bin, cardboard box, white Christmas lights, and masking tape.
Assemble the materials to construct a see-through surface within the bin, perfectly illuminated by strategically placed lights. Watch as your child’s imagination comes to life on this enchanting canvas, providing hours of fun-filled learning experiences. Get ready to be amazed by the endless possibilities that await! pick ease
21. Deluxe Water Table from Scrap Wood
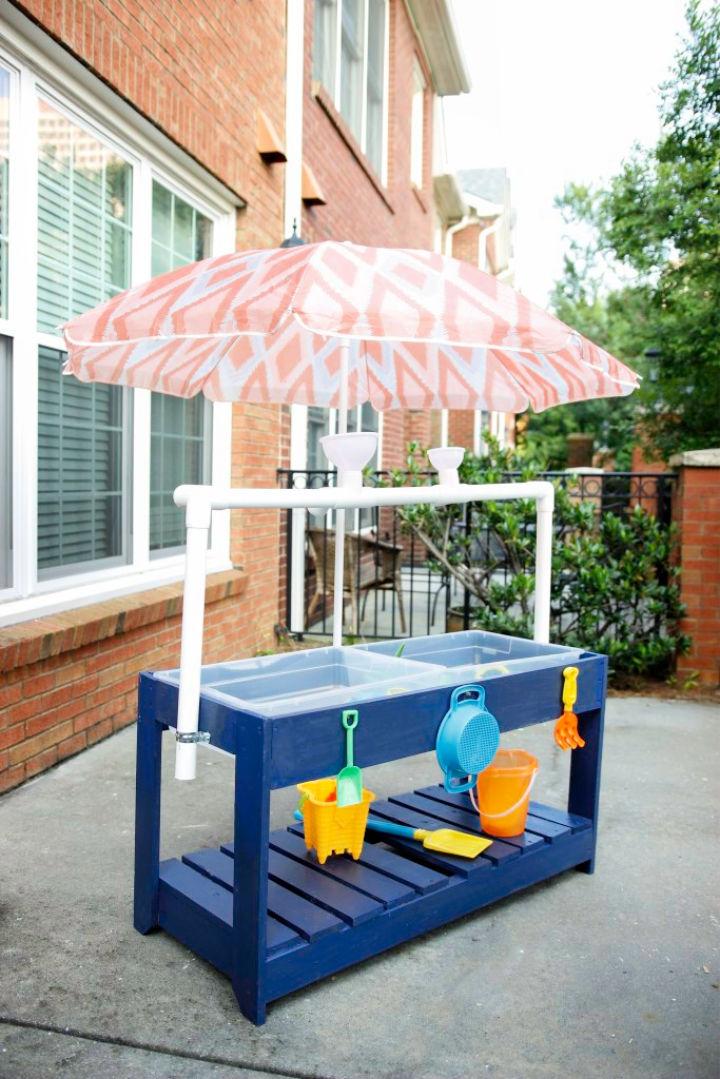
Go for a luxurious water table creation with leftover scrap wood, displaying ingenuity without breaking the budget. Unleash your creativity by repurposing various scrap boards, celebrating their unique flaws for a charming rustic look. Construct the sturdy base using precise 2×4 and 1″x4″ cuts, securely fastened with high-quality grk screws for long-lasting durability.
Lay down the slats at even intervals, utilizing reclaimed 1″x4″ slats from previous projects. Elevate the design with legs cut at an elegant 45-degree angle for aesthetic appeal and stability, ensuring proper alignment. Let this effortless and budget-friendly DIY project amp up your outdoor playtime to new levels of joy! thewoodenma
22. DIY Sand and Water Table
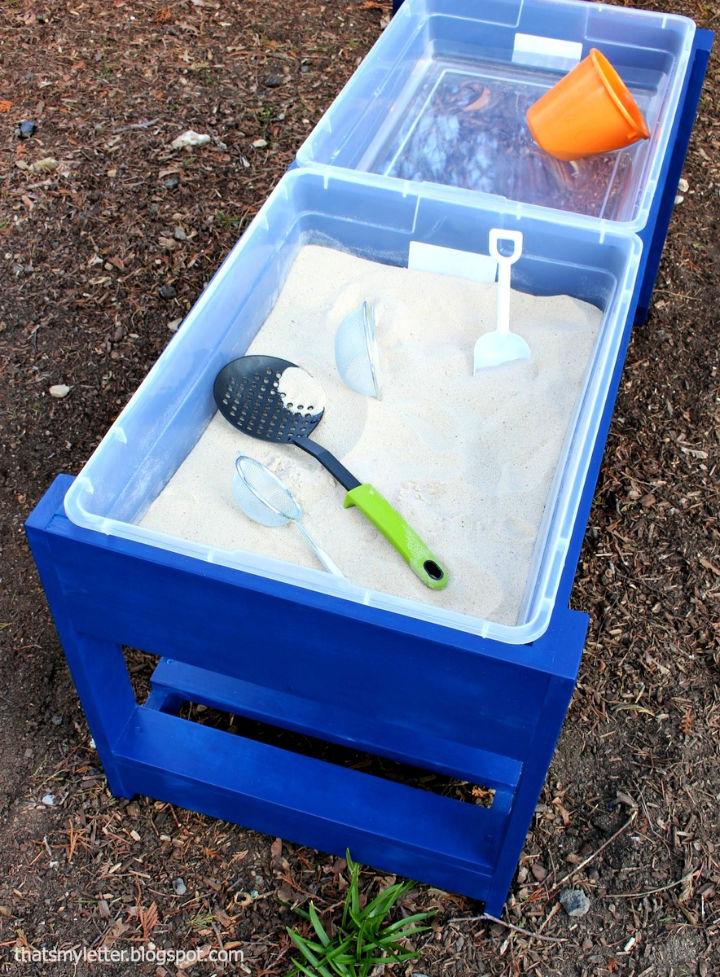
Indulge in hours of imaginative play with the ultimate sand and water play table, crafted effortlessly with these foolproof plans. This DIY project is designed to perfection, featuring a precise shopping list, including two durable plastic tubs and custom dimensions for sturdy wooden support.
Enhance longevity with #8 exterior-rated self-tapping screws in 2″ and 1-1/4″ lengths, perfect for outdoor use where moisture may cause wood swelling. Perfect for beginners and budget-conscious individuals, you can easily source $6 storage bins and basic wood supplies from your local hardware store. Elevate your backyard fun today! ana white
23. How to Make a Sensory Water Table
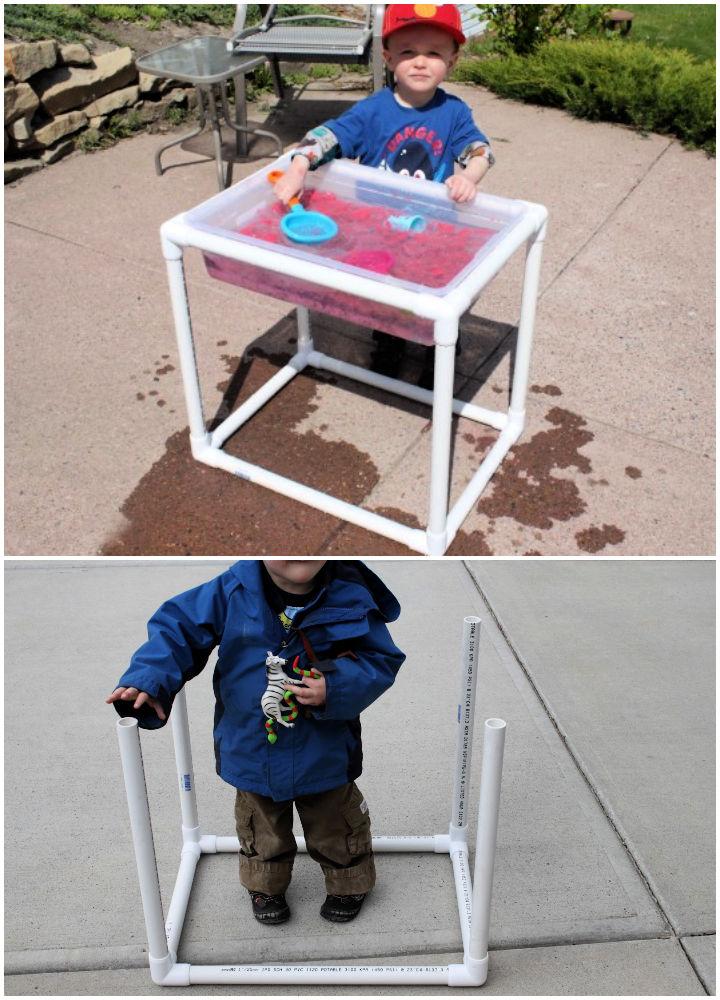
Unleash your ingenuity with this innovative guide to building a dynamic water table using clear plastic tubs and sturdy pvc pipes. Achieve optimal balance and stability by selecting high-quality, uniform-lipped tubs for even weight distribution on the durable frame. With options of 56 qt. And 28 qt storage containers, this versatile design is perfect for engaging in a wide range of sensory activities.
Complete your DIY project with essential materials such as pvc pipes, 3-way connectors, saw for precision cutting, and measuring tape to ensure precise dimensions that fit snugly into the tub’s interior space. Enhance learning and exploration through an affordable yet easily storable solution that guarantees endless hours of fun! busybugs
24. Make Your Own Water Table
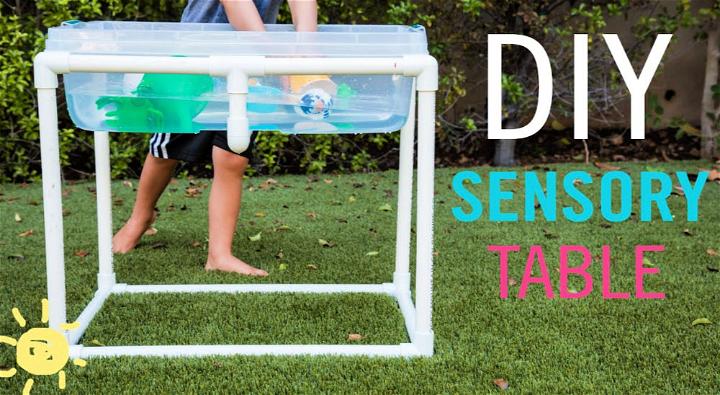
Get ready to turn your backyard into a summer oasis with this ingenious DIY water table guide. Using just 19ft of easily accessible 3/4″ pvc pipes, (8) three-way connectors, (2) tee joints, and (2) elbow connectors – make endless hours of fun in the sun effortlessly.
Simply cut the pipes to size, assemble, and secure a spacious 40 quart storage bin for optimal splash-tastic results. Get ready to dive into an exciting outdoor project that guarantees engaging entertainment for all ages. It will be the best way to make your kids busy creatively and make a great handmade birthday gift!
25. DIY PVC Sensory Table
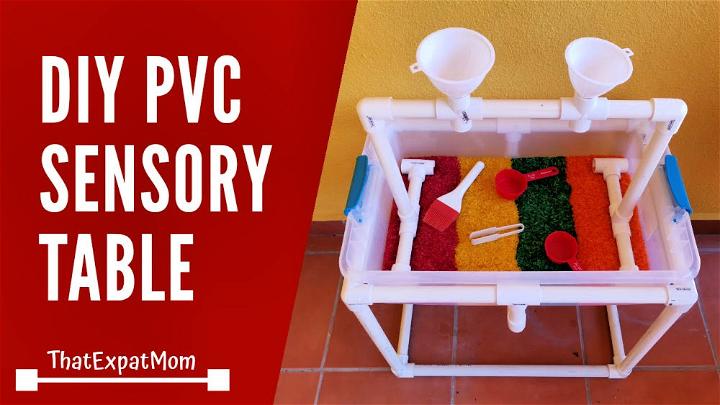
Get creative and explore the endless possibilities of sensory play with this budget-friendly pvc sensory table guide. Learn how to construct a customizable table using 3/4″ pvc pipes, corner joints, t joints, l joints, and a plastic bin for under $30! But that’s not all – this DIY tutorial will also show you how to make an exciting funnel accessory for even more sensory fun using t joints, c pipes, a pieces, l pieces, a four-way joint, and b pieces.
Get ready to assemble like adult legos and watch as this DIY masterpiece becomes the centerpiece of imaginative playtime. Discover the ultimate combination of affordability and entertainment by crafting these must-have additions to your child’s sensory toolkit!
26. DIY Sensory Table for Toddlers
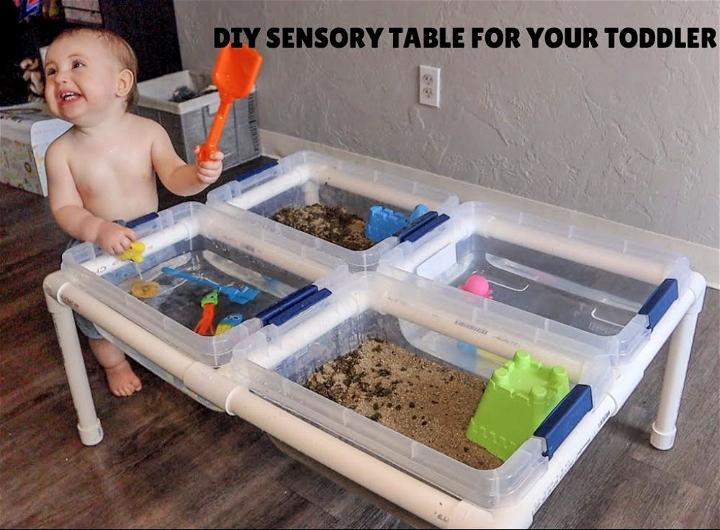
Set free your inner DIY expert and unlock boundless creative play for your toddler with this step-by-step guide to making a pvc pipe activity table. This captivating video will take you through the materials needed, including easy-to-find items from your local hardware store, such as pvc pipes, corner pieces, feed covers, a cross joint, and a pipe cutter.
Don’t let a minor technical hiccup deter you – watch as this DIY tutorial flawlessly constructs this engaging table that your little one will love. Complete with buckets, sand, and charming marine-themed toys, this inexpensive project will keep your child entertained for hours. Join in the world of creativity and make cherished memories with this delightful pvc pipe activity table! youtube
27. Build Your Own Sand Table
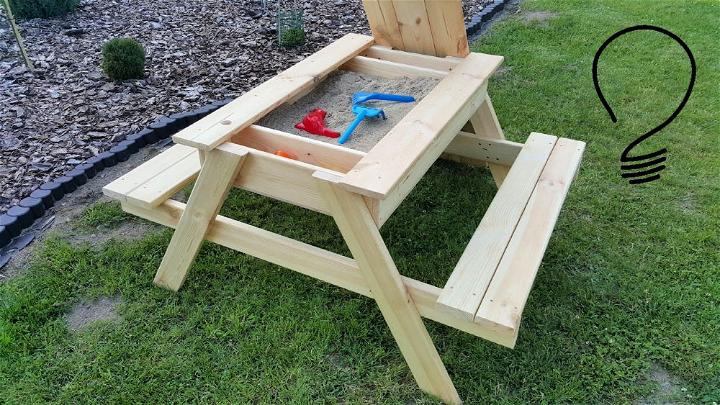
Experience the thrill of transforming a simple picnic table into a multi-functional masterpiece with this captivating DIY video. Unleash your inner crafter as you follow the detailed steps to make an innovative piece that provides seating and dining space and doubles as a sandbox.
This tutorial showcases all the materials and precise measurements needed for this versatile creation and estimated costs. Elevate your outdoor area by adding this practical two-in-one piece with built-in storage, perfect for kids and adults to enjoy picnics and sandbox play. Enjoy the opportunity to enhance your outdoor space with this functional and fun addition!
28. Building a Water Table
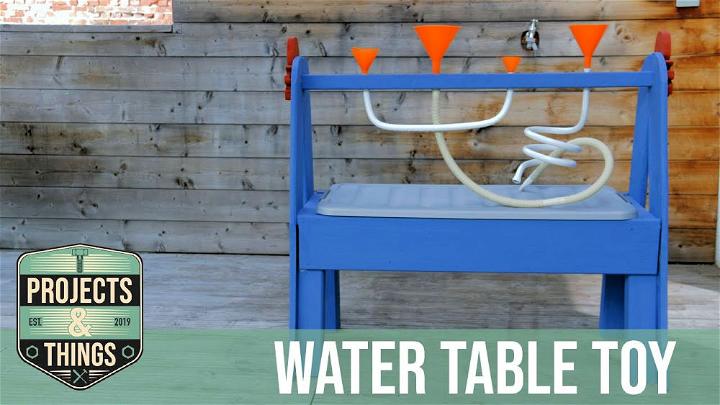
Unlock the secrets of making a captivating water table toy for little ones with this innovative DIY project. Utilizing durable legs made from resealable plastic boxes, quirky funnels, and repurposed plumbing materials, this endeavor guarantees endless amusement for toddlers.
Follow the step-by-step guide to construct sturdy legs, customize them for balance, integrate pipes and funnels, and adorn your creation with vibrant hues. This DIY provides a delightful and refreshing way to keep youngsters entertained while adding a touch of creativity to outdoor playtime.
29. Outdoor Nesting Activity Table
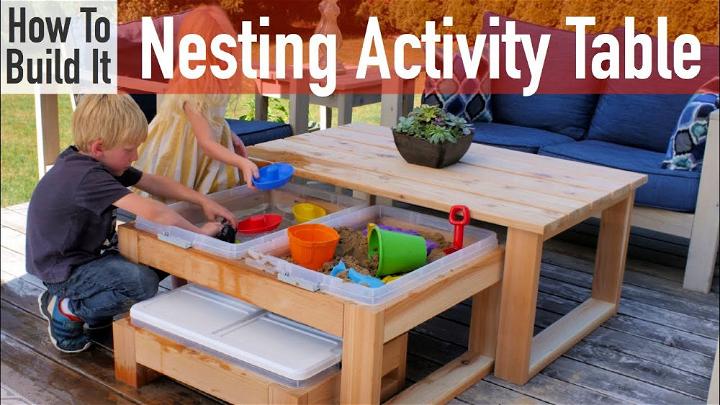
Begin an adventure of discovery and creativity as you learn to build your outdoor nesting activity table with the expert guidance of rogue engineer. This project utilizes versatile cedar wood (or other lumber options) to craft a functional and stylish table using innovative pocket hole joinery techniques.
Perfect for storing toys, sand, and water essentials, this family-friendly addition promotes endless fun while keeping your backyard clean. Prepare for an engaging DIY adventure with comprehensive plans, including detailed cut lists and step-by-step instructions. Elevate your outdoor experience with this captivating yet simple project!
30. DIY PVC Water Table
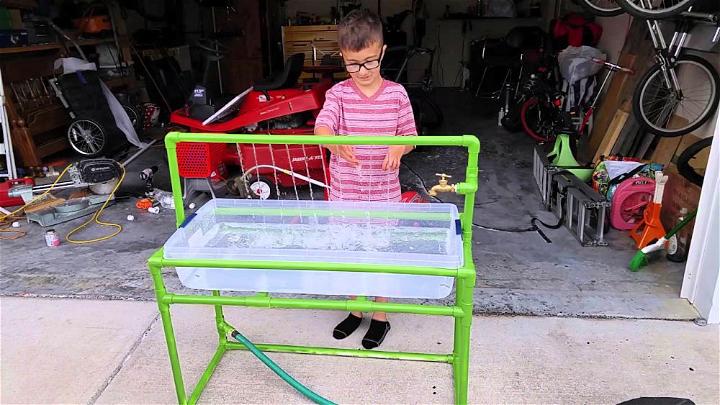
Embark on an imaginative journey with this DIY project! Explore the world of sensory play through this captivating video tutorial on making a pvc water table. This step-by-step guide will walk you through the process, from gathering materials and taking precise measurements to assembling your water table masterpiece.
Watch as your child’s curiosity and creativity are sparked by this engaging project, providing endless learning and fun in a sensory-rich environment. Take advantage of this opportunity to enhance your child’s development while having a blast making something special together!
Conclusion:
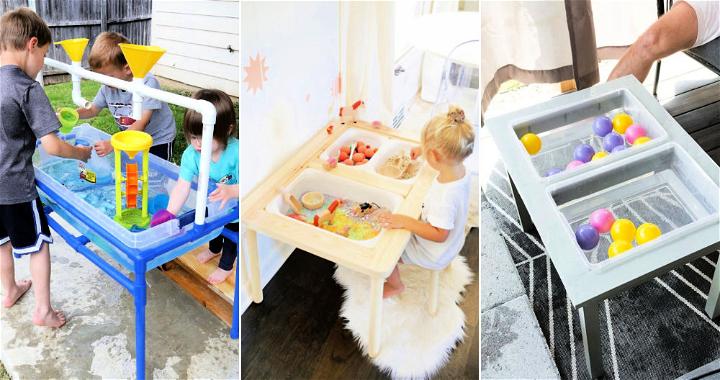
In conclusion, making your own DIY sensory table from the 30 homemade DIY sensory table plans provided is not only a rewarding experience but also a fantastic way to engage children in sensory play. Each step, from understanding what a sensory table is to filling it with creative materials, has been outlined to help you start and complete your project successfully. By focusing on how to build and ensuring safety, you’re well on your way to providing an enriching environment for sensory exploration. So, gather your materials, and let’s make a playful and stimulating space for kids to learn and grow.
