Making DIY shutters can be a rewarding project that not only adds charm to your windows but also offers privacy and light control. Whether your home style is modern or rustic, learning how to build shutters for windows can help personalize your space and may even increase your home’s value. Crafting shutters yourself allows for customization in size, color, and style, making sure they perfectly match the aesthetic of your home.
Taking on a project like building your own shutters can initially seem daunting. However, with the right guidance, materials, and a simple step-by-step approach, anyone can transform their windows with beautiful, handcrafted shutters. From selecting materials to the final touches, every step offers an opportunity to build something unique.
Get ready to add a personal touch to your home with these DIY shutter projects that are both cost-effective and stylish. Continue reading as we delve into the essentials of making your own shutters, ensuring you have all the tools and knowledge to begin this fulfilling project.
Why Build Your Own DIY Shutters?
Building your own DIY shutters offers numerous advantages. Here are some key reasons why you should consider taking on this rewarding project:
- Cost Savings: Store-bought shutters come with a high price tag, especially when you factor in custom sizing and installation costs. DIY shutters allow you to build a similar look at a fraction the cost.
- Personalization: By building your own shutters, you have the freedom to choose the materials, styles, and finishes that best match your home’s aesthetic. You can tailor them to your exact preferences, which is not always possible with pre-made options.
- Skill Development: Crafting shutters is a fantastic way to improve your woodworking and tool-handling skills. It’s a practical project that can bolster your DIY confidence and expertise.
- Quality Control: When you’re in charge of the building process, you ensure the use of high-quality materials and can pay close attention to the construction details, resulting in durable and long-lasting shutters.
- Sense of Achievement: There’s a unique satisfaction that comes with completing a home improvement project on your own. You’ll take pride every time you see your handmade shutters, knowing they are a product of your hard work.
- Eco-Friendly: DIY projects give you the opportunity to repurpose materials, such as old wood or pallets, reducing waste and the environmental impact associated with manufacturing new products.
Remember, the key to successful DIY shutters is planning, taking accurate measurements, and following a step-by-step guide. With patience and creativity, you can enhance your home’s curb appeal and functionality through a fulfilling DIY endeavor.
How to Build Your Own DIY Shutters
Making your own DIY shutters is not only a cost-effective way to enhance the curb appeal of your home but also a rewarding project that allows you to tailor the design and finish to your specific taste. Here’s a straightforward guide to help you embark on this project with confidence.
Selecting Your Materials
Before diving into the construction process, it’s crucial to choose the right materials. For exterior shutters, cedar wood is often recommended due to its natural resistance to weather and decay. For interior shutters, poplar can be a great choice for its smooth finish and paintability. Remember, the material you choose will impact the durability and appearance of your shutters.
Measuring Your Windows
Accurate measurements are key to ensuring your shutters fit perfectly. Measure the height and width of each window from the outside edges. For traditional appeal, your shutters should each be half the width of your window, ensuring that when closed, they appear functional.
Cutting and Assembling
- Cutting to Size: Once you have your measurements and materials, cut your wood to the required lengths using a saw. If you’re making louvered shutters, you’ll need to cut angled slats. For board and batten shutters, you’ll cut vertical boards and horizontal battens.
- Assembling: Lay out your cut pieces on a flat surface to form your shutter design. For a simple board and batten style, align your vertical boards side by side and then attach the horizontal battens across them using wood glue and screws.
Finishing Touches
- Sanding: Smooth out any rough edges with sandpaper to prepare your shutters for painting or staining.
- Painting or Staining: Choose a paint or stain that complements your home’s exterior. Apply with a brush or roller, ensuring even coverage. Let dry according to the product’s instructions.
- Sealing: To protect your shutters from the elements, apply a clear outdoor sealant over the paint or stain. This step is especially important for shutters made from materials other than naturally weather-resistant woods like cedar.
Installing Your Shutters
- Positioning: Hold your shutters up to the window to mark the desired position. It’s helpful to have someone assist you with this step to ensure accuracy.
- Drilling Pilot Holes: Once positioned, mark where your screws will go and drill pilot holes to make the installation process smoother.
- Securing: Fasten the shutters to your home using screws that are appropriate for your house’s siding material. Be sure to use a level to keep them straight.
Enjoying Your Handiwork
After installation, step back and admire your custom, handcrafted shutters. Not only have you saved money by doing it yourself, but you’ve also added a personal touch to your home’s exterior.
Building your own DIY shutters can be a fulfilling weekend project that enhances the beauty and value of your home. With the right tools, materials, and a bit of patience, you’ll build shutters that you can be proud of for years to come.
FAQ Section on DIY Shutters
Here’s a comprehensive FAQ section designed to answer your most common questions about DIY shutters in a straightforward and easy-to-understand manner.
What materials do I need to build DIY shutters?
To build DIY shutters, you’ll typically need:
- Wood (cedar, poplar, or a wood of your choice depending on indoor or outdoor use)
- Wood glue
- Screws
- Sandpaper
- Paint or stain
- Sealant (for outdoor shutters)
- Tools like a saw, drill, and screwdriver
How do I measure my windows for DIY shutters?
Measure the height and width of your windows from the outside edges. For aesthetic purposes, each shutter should be half the width of the window to appear functional when closed. Don’t forget to account for any space you’ll need for mounting.
Can I build shutters if I’m new to woodworking?
Yes, DIY shutters can be a great project for beginners. Start with a simpler design like board and batten shutters. Make sure to follow a detailed guide, take your time, and practice safety measures while using tools.
How long does it take to build and install DIY shutters?
The time it takes can vary based on your experience, the complexity of the shutter design, and the number of shutters you’re making. Generally, it could take a few hours to a whole day for a beginner to build and install a set of shutters for one window.
How can I ensure my DIY shutters last long?
To ensure longevity:
- Choose durable wood like cedar for outdoor shutters.
- Apply a sealant to protect against weather elements.
- Ensure proper installation to prevent damage from strong winds or heavy rain.
- Regularly check and maintain your shutters, touching up paint or sealant as needed.
Are DIY shutters cost-effective compared to buying pre-made ones?
Yes, DIY shutters can be significantly more cost-effective. You save on the markup of pre-made shutters and installation costs. With a bit of time and effort, you can achieve a similar look and quality at a fraction of the price.
Can I use recycled materials to build my shutters?
Absolutely! Repurposing materials like old wood pallets can not only save costs but also add unique character to your shutters. Just ensure the materials are sturdy enough for the purpose and treat any reclaimed wood to prevent decay.
What’s the best way to finish my DIY shutters?
The best finish depends on your aesthetic preference and whether the shutters are indoors or outdoors. For outdoor shutters, consider using exterior paint or stain followed by a weather-resistant sealant. For indoor shutters, a simple paint or stain to match your interior decor works well.
How do I mount my DIY shutters to the house?
- Mark the position where the shutters will go next to your windows.
- Drill pilot holes in the shutters and the wall to avoid splitting the wood.
- Use screws suitable for your home’s exterior siding to secure the shutters, ensuring they’re straight with a level.
Can DIY shutters add value to my home?
Yes, well-made and aesthetically pleasing DIY shutters can enhance curb appeal and potentially increase your home’s value. They add a custom touch that distinguishes your home, making it more attractive to potential buyers.
30 DIY Shutters You Can Build on Low Budget
1. Easy DIY Board and Batten Shutters
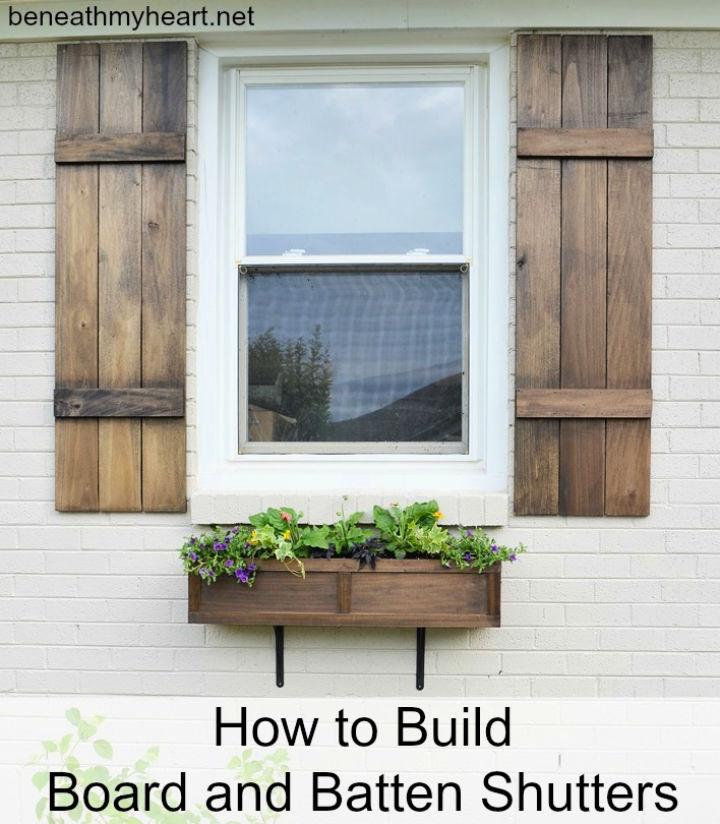
Looking to add a touch of rustic charm to your home’s exterior? Beneath My Heart provides an instructive guide on crafting board and batten shutters, a project that can enhance your curb appeal. With a detailed video tutorial by Steve, you’ll learn to cut, assemble, and finish shutters using simple materials like poplar boards and basic tools.
The process is made clear with tips on using wood glue, a nail gun, and the right staining techniques. Dive into this engaging DIY project and give your windows a custom, handcrafted upgrade that reflects your style and adds value to your home.
2. Make a Wood Shutters Under $40
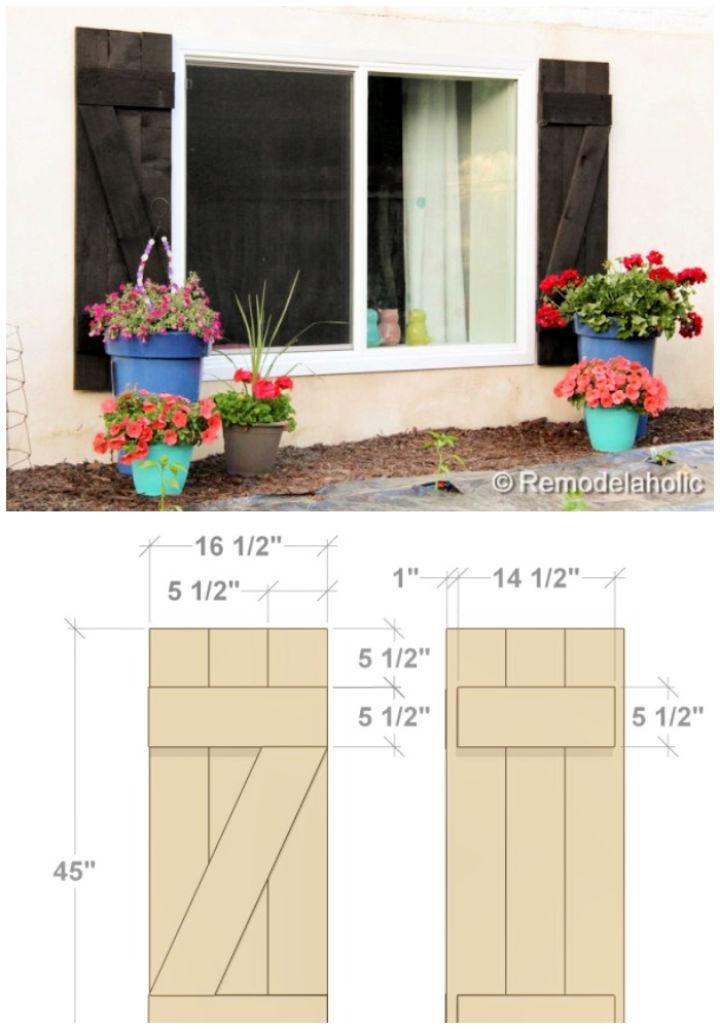
Remodelaholic presents an instructive guide on crafting your own wood shutters for less than $40, offering a budget-friendly alternative to store-bought options. The tutorial is engaging and easy to understand, making it perfect for anyone looking to enhance their home’s curb appeal without breaking the bank.
Learn the steps to measure, cut, assemble, and install your shutters with a simple list of tools and materials. The process is clearly laid out, ensuring you can confidently tackle this DIY project and achieve a high-end look for your windows.
3. How to Build Wooden Window Shutters
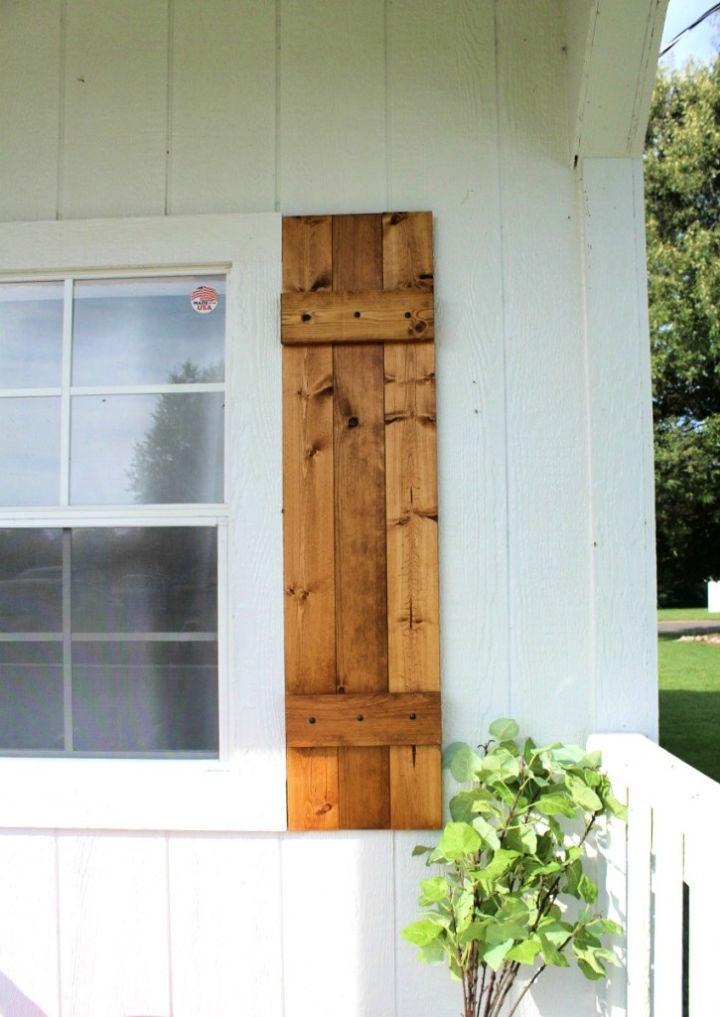
Ready to enhance your home’s exterior with a personal touch? Woodshop Diaries provides a straightforward guide to building DIY shutters in just five steps. Transform your windows with custom shutters made from affordable 1x4s, bringing charm and curb appeal to any abode.
With clear instructions, you’ll cut, finish, and assemble your shutters with ease. Add a final flourish with decorative nailheads, and secure your creation with confidence. Dive into this engaging project, perfect for hands-on homeowners eager to add character to their space.
Check out the simple formula for making a window shutter at home. With just a few tools and supplies like a drill, wooden pallets, screws, miter saw, and jigsaw, you can accomplish this project swiftly. Plus, the sleek character of these DIY window shutters looks quite eye-catchy!
4. Homemade Exterior Window Wooden Shutters
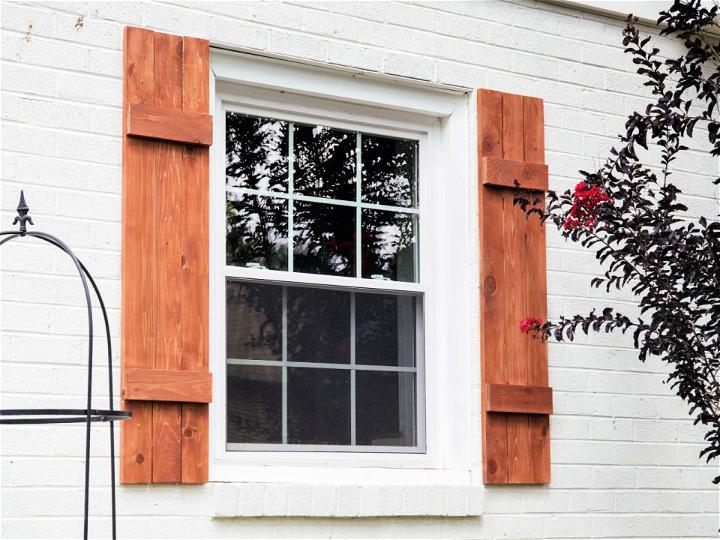
Enhance your home’s exterior appeal with custom-made wood window shutters, a project that adds charm and character to any dwelling. HGTV offers a guide on crafting board-and-batten-style cedar shutters, ideal for those seeking a DIY touch for their windows.
Learn how to select the best materials, like natural basswood, and understand the different shutter styles, from traditional paneled to rustic board and batten. With a focus on durability and aesthetics, this tutorial is tailored to help you elevate your home’s façade with shutters that are not only visually pleasing but also built to last.
5. DIY Interior Plywood Window Shutters
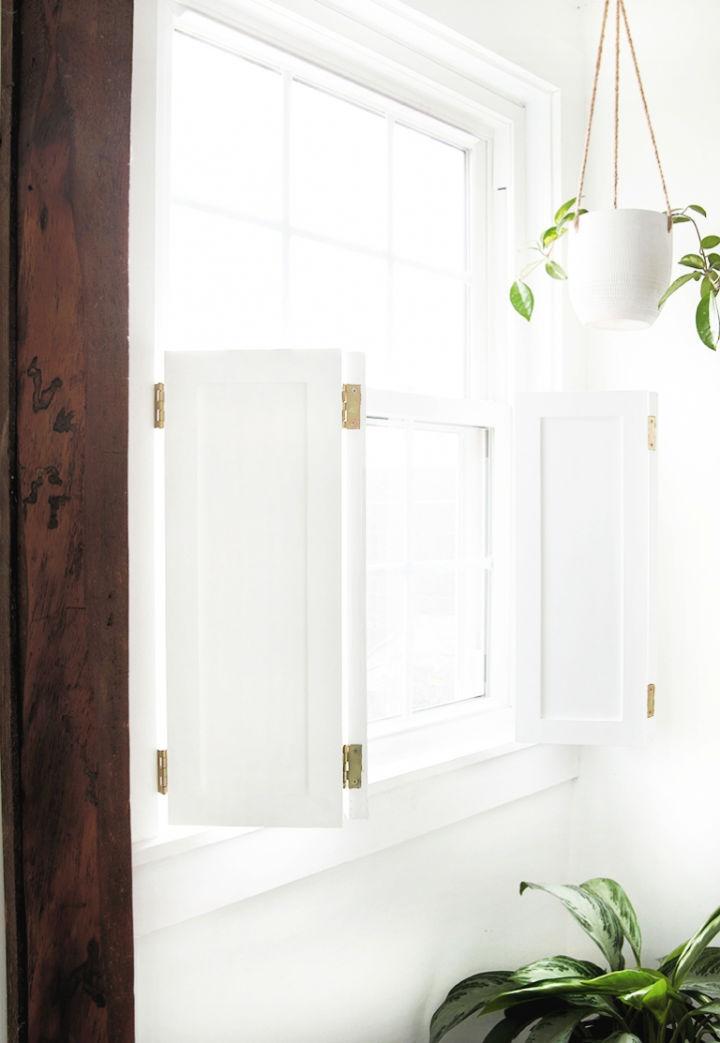
Making interior window shutters adds a touch of character and ensures privacy for your home. The Merrythought provides a detailed guide on how to build these stylish shutters yourself. With a list of materials and clear step-by-step instructions, you can transform plywood into elegant window treatments that are both functional and aesthetically pleasing.
Perfect for those who appreciate natural light and simplicity, these shutters can be customized to fit any window size, bringing a modern yet timeless look to your space. Engage in this practical project and enhance the privacy and design of your interiors with your handcrafted shutters.
6. How to Make Wood Shutters – Step by Step
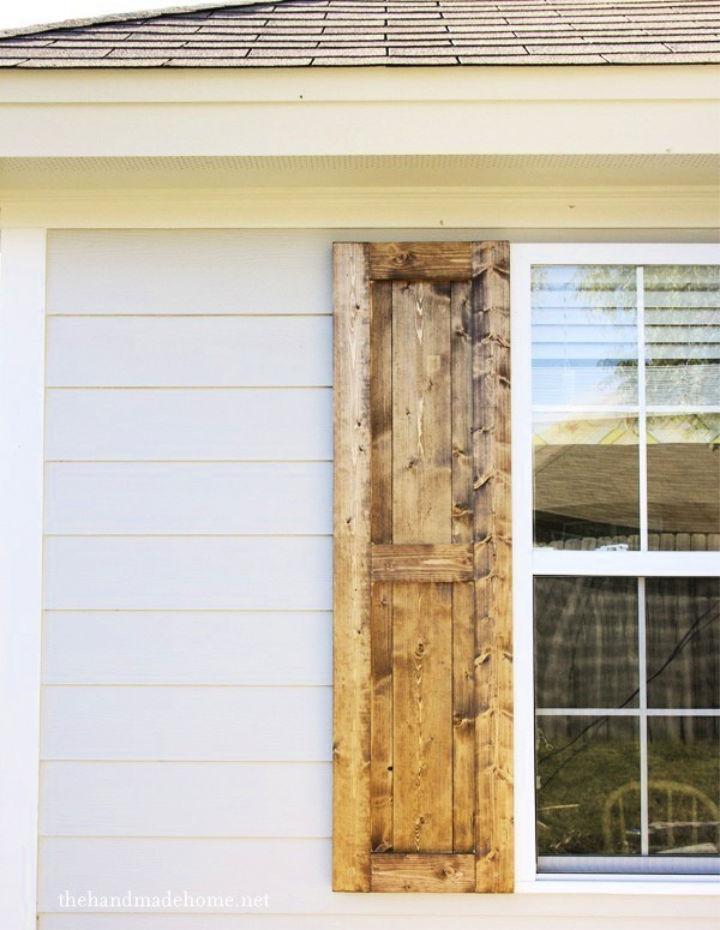
Enhance your home’s curb appeal with handmade shutters, a simple and cost-effective DIY project. Our step-by-step guide walks you through the process, from measuring and cutting to building and staining, ensuring your shutters complement your home perfectly.
Learn the essentials of selecting the right wood, screws, and weatherproofing finishes. With helpful tips and clear instructions, you’ll be ready to mount your shutters and enjoy a refreshing new look. Get ready to tackle this transformative home improvement task with confidence and ease. The Handmade Home
7. Handmade Pallet Wood Shutters
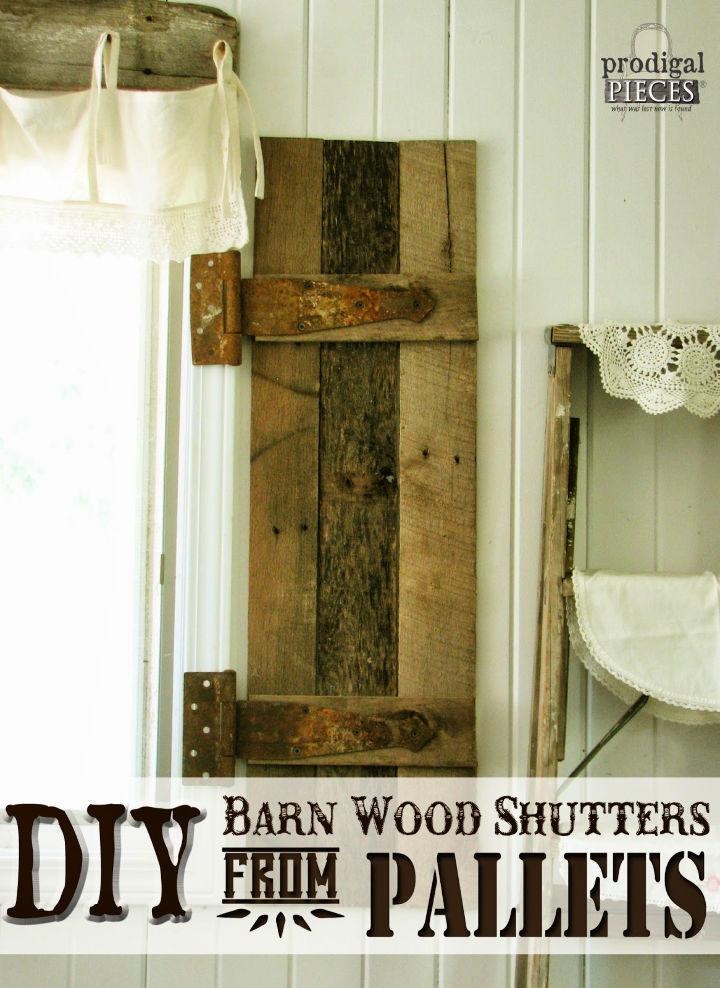
If you’re captivated by the rustic charm of barn wood decor, Prodigal Pieces offers a creative solution to craft your own barn wood shutters from repurposed pallets. Larissa’s DIY tutorial walks you through the process, from sourcing weathered pallets to the final touches of mounting your homemade shutters.
With clear instructions and helpful tips, you can transform simple pallets into stunning window dressings that evoke a cozy, rustic vibe in your home. This engaging guide is designed to help you add a personal and resourceful touch to your living space, regardless of your crafting experience.
8. Affordable DIY Interior Cedar Shutters
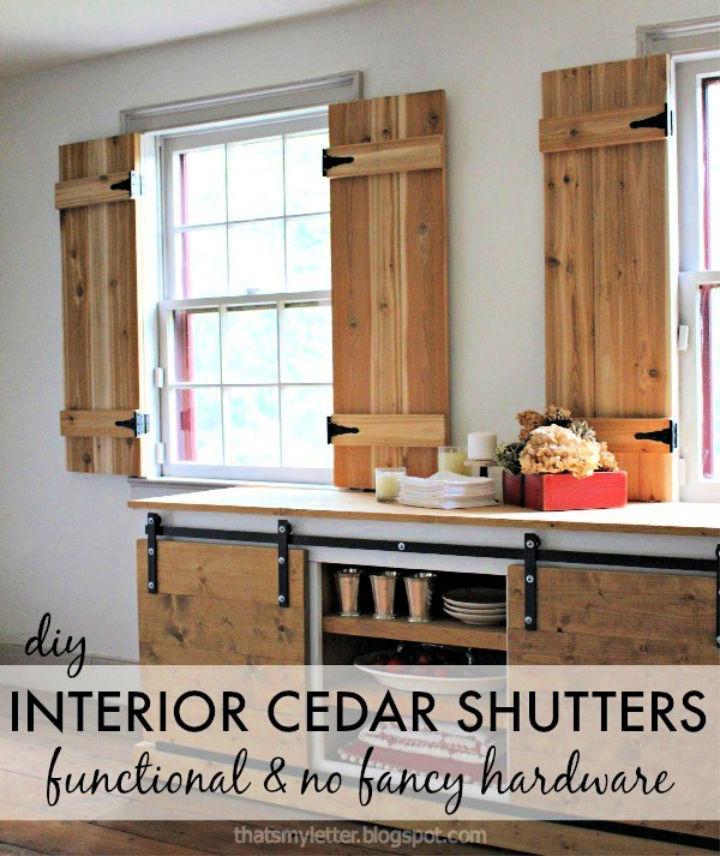
Designing functional and stylish interior cedar shutters is a breeze with the guidance provided by Pretty Handy Girl. This DIY project is perfect for those looking to enhance their living space with a unique window treatment that offers both privacy and protection from the sun’s glare.
With a list of easily accessible materials and clear, step-by-step instructions, you can build these shutters to add a charming touch to any room. The process is straightforward, requiring basic tools and no special hardware, making it an ideal weekend endeavor for enhancing your home’s aesthetic and functionality.
9. Making a Window Box and Shutters
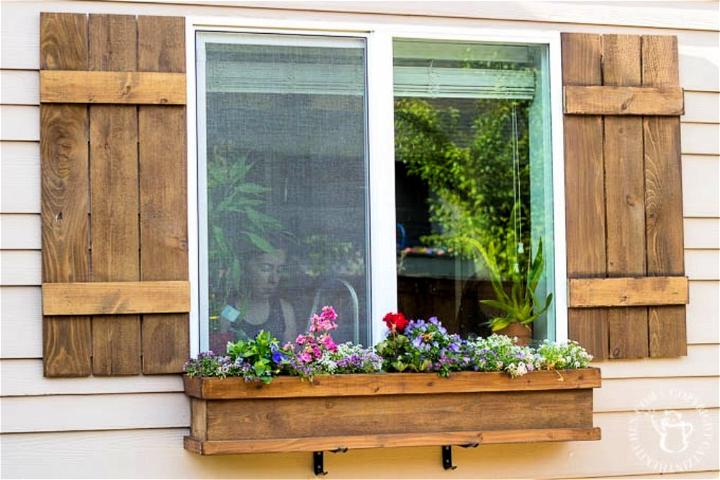
Transform your home’s exterior with a simple yet impactful DIY project from Catz in the Kitchen. Learn to build your own window box and shutters with this engaging and easy-to-follow guide. Ideal for homeowners looking to add a touch of charm without breaking the bank, this plan provides step-by-step instructions using affordable materials. Perfect for customizing to the size of your windows, these rustic additions can be made with basic tools and a bit of creativity. Dive into this helpful tutorial and elevate your curb appeal with a personalized, handcrafted touch.
10. Build Bahama Shutters With Written Instructions
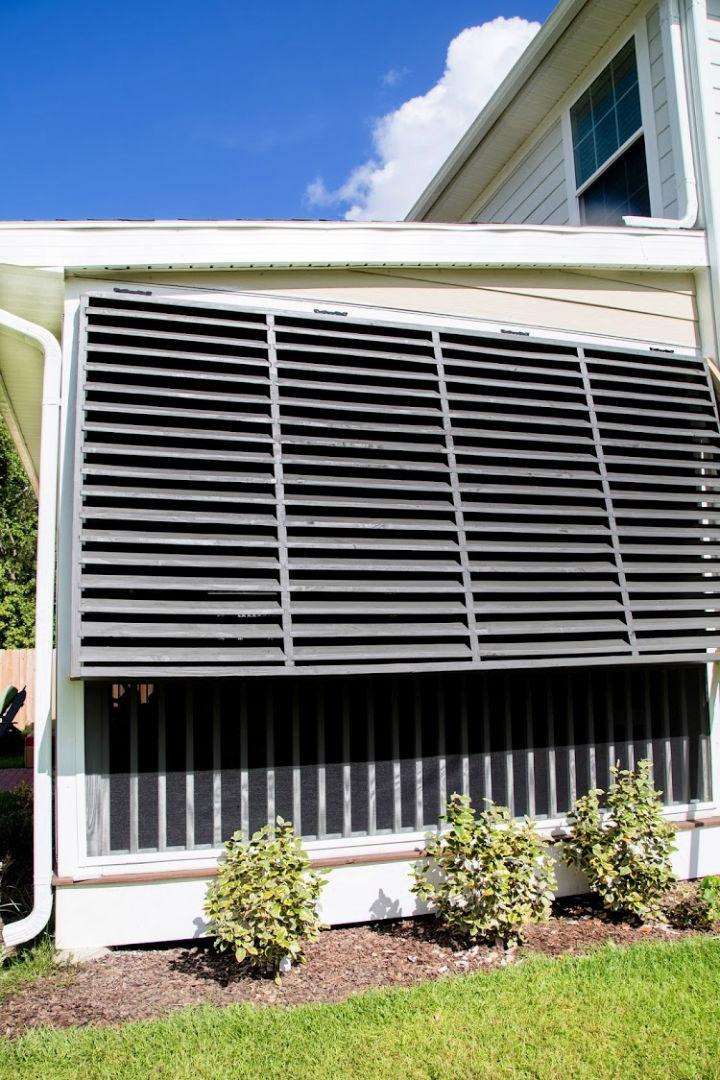
Transform your back porch into a serene and private retreat with DIY Bahama shutters, as demonstrated by Josh Jones on GHD. Discover a cost-effective solution to enhance your outdoor space without compromising on style or quality. With a step-by-step guide to building your own shutters using affordable materials like treated pine boards and heavy-duty hardware, you’ll achieve a look that rivals custom options without the hefty price tag.
This approach offers not only privacy and shade but also stands strong against harsh weather, making it a practical and satisfying project for any homeowner. Embrace the satisfaction of building something beautiful for your home while saving significantly on costs.
11. Budget-Friendly DIY Wood Shutters
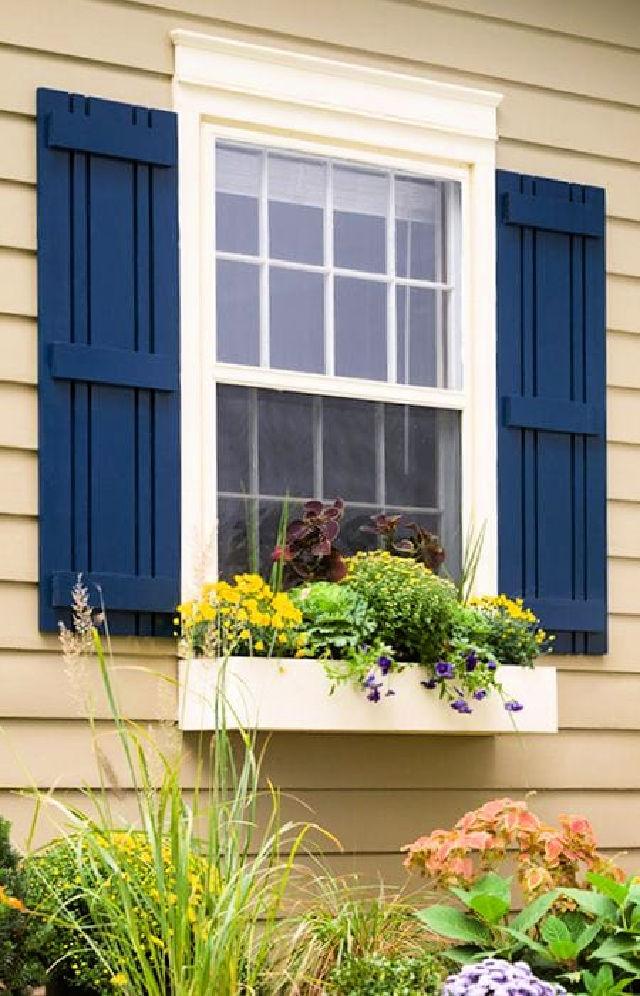
Enhance your home’s curb appeal with DIY window shutters, a project that’s simple yet transformative. At Lowe‘s, find everything you need to build custom outdoor shutters that will frame your windows beautifully. Our guide leads you through each step, from selecting materials to applying the perfect coat of paint.
With clear instructions and a variety of styles to choose from, your home will boast a fresh, personalized look in no time. Perfect for weekend warriors, this project is not only cost-effective but also a satisfying way to upgrade your exterior on your own terms.
12. Make Your Own Cedar Shutters
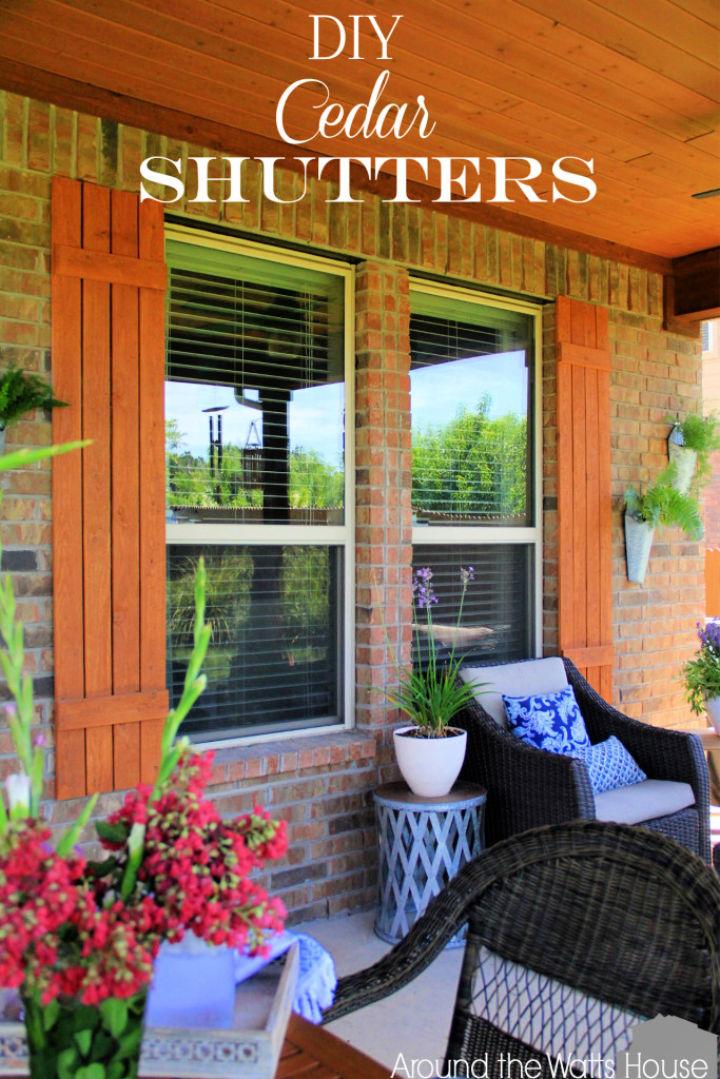
Transform your outdoor space with a touch of rustic charm by crafting your own cedar shutters, following the straightforward tutorial from Iris Nacole. Ideal for those who enjoy DIY projects, this guide offers step-by-step instructions on building stylish shutters that add character to any home.
Learn how to measure, cut, sand, and finish cedar planks with ease. Plus, discover tips on securing your shutters for a durable and attractive addition to your porch or windows. Iris Nacole provides all the details you need to ensure your project is successful and satisfying. Dive into this popular tutorial and elevate your home’s exterior today.
13. Turn IKEA Bed Slats Into Indoor Shutters
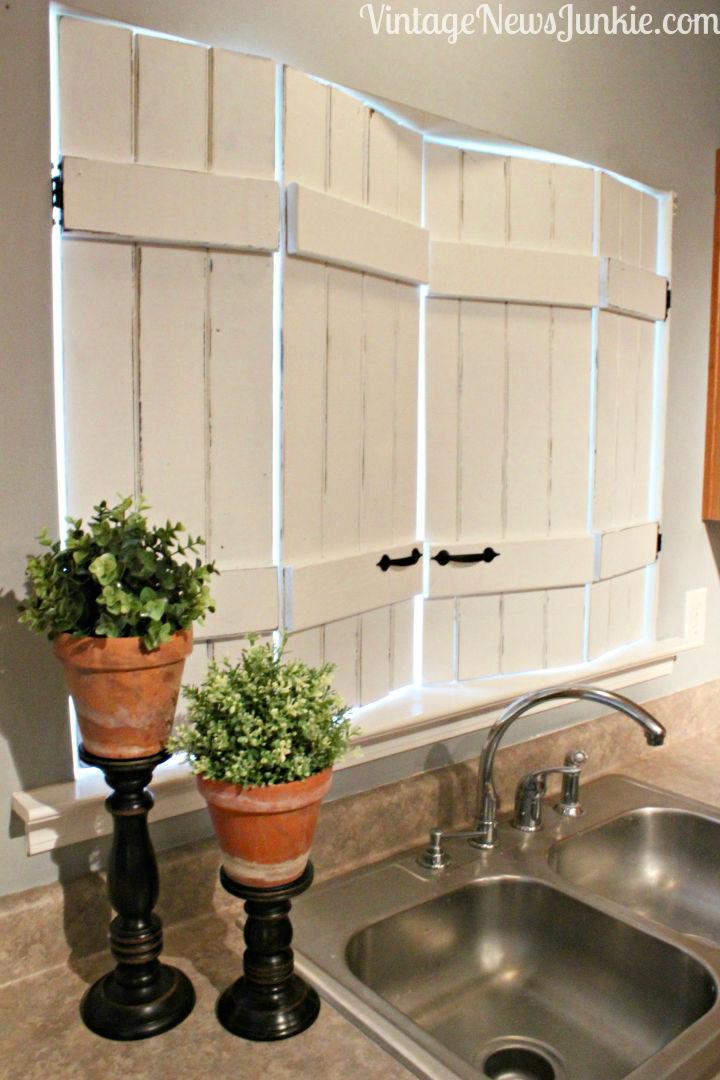
Transform your space with a touch of creativity and repurposed materials by following Candace from Vintage News Junkie’s inspiring guide to making indoor shutters from IKEA bed slats. Perfect for DIY enthusiasts, this project offers a practical solution to manage sunlight while adding a charming, rustic element to your home.
With a straightforward approach, you’ll learn how to measure, prep, and assemble wooden slats into custom shutters, complete with a personalized finish to suit your decor. Candace’s journey through trial and error emphasizes the beauty of the DIY process, leading to a satisfying and stylish end result. Get ready to enhance your windows and embark on a fulfilling crafting adventure. At The Picket Fence
14. Cheap DIY Board and Batten Shutters
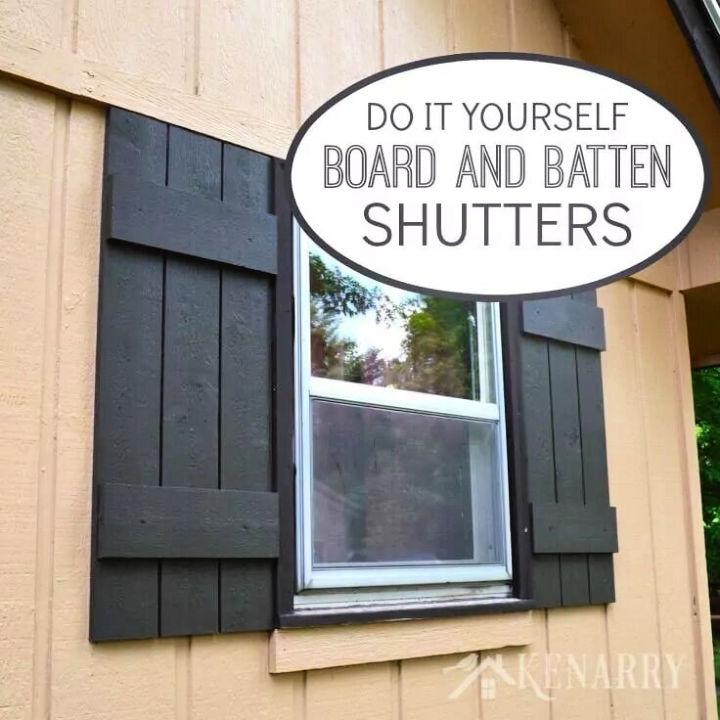
Add a touch of rustic charm to your home with a DIY board and batten shutter project, as detailed by Kent Ypma on Ideas for the Home. This tutorial guides you through the process of building your shutters and enhancing the exterior of your house or cottage.
With a list of materials, step-by-step instructions, and helpful tips for consistency and precision, this guide is perfect for anyone looking to tackle a home improvement project. Short, clear sentences make the information easy to digest, ensuring a smooth and successful DIY experience. Kenarry
DIY Barn Door Plans: Craft your statement piece with our Free DIY Barn Door Plans! Easy-to-follow, budget-friendly guide for a unique rustic touch.
15. Making Farmhouse Shutters Under $150
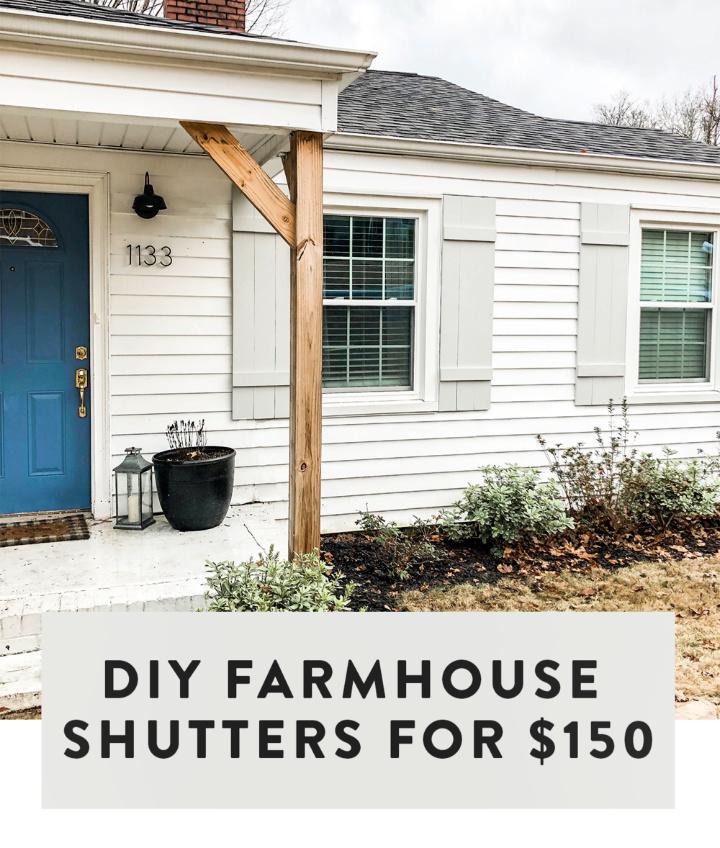
Discover a budget-friendly way to enhance your home’s curb appeal with The Modern Renovator‘s guide on crafting board and batten shutters for just $150. This step-by-step tutorial provides clear instructions and a list of materials and tools you’ll need to build professional-looking shutters that boost your home’s value.
Learn how to select the right wood, assemble the boards using a Kreg Jig, cut and sand for a smooth finish, and apply stain for durability. The guide also covers how to securely attach the shutters to your home for a transformation that’s both cost-effective and stylish. With this instructive and engaging walkthrough, you’ll be well-equipped to tackle this DIY project with confidence.
16. How to Make Wooden Shutters
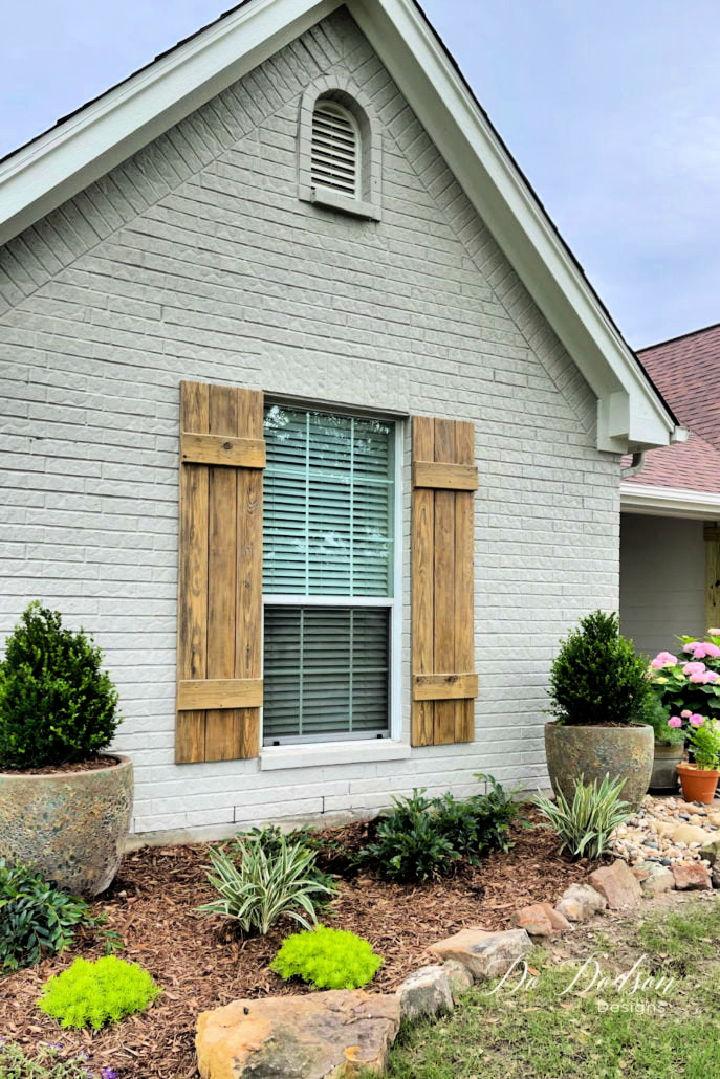
Transform your home’s exterior with a rustic touch by crafting your own wood shutters, following the guide from Do Dodson Designs. With a few basic tools and some repurposed pressure-treated decking, this DIY project is not only cost-effective but also a creative way to enhance curb appeal.
Sand down your lumber for a clean finish, pre-drill to avoid splitting, and secure with screws for sturdy construction. Don’t forget to apply a water-repellant topcoat to preserve the natural wood charm. This simple, step-by-step approach is perfect for giving your home a farmhouse flair without breaking the bank.
17. Build Your Own Wooden Shutters
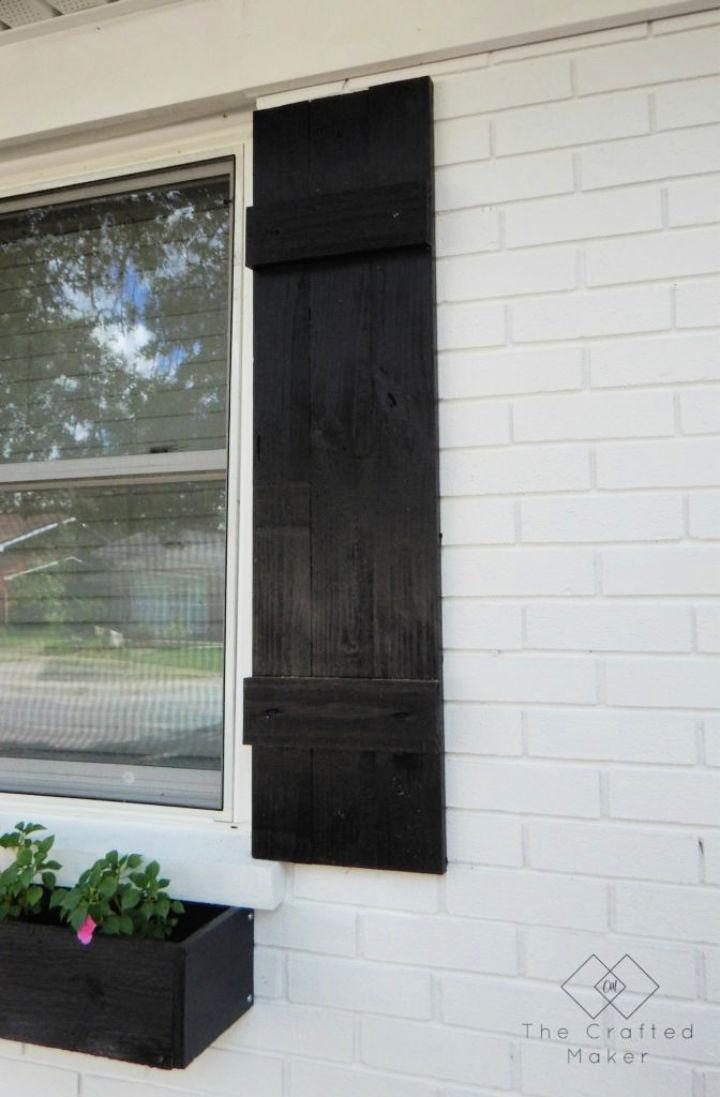
Enhance your home’s curb appeal with a simple DIY project from The Crafted Maker. Discover how to craft your own exterior shutters that bring a touch of elegance to your windows. With a straightforward guide, you’ll learn to use basic tools and supplies like a saw, drill, and pocket hole jig to build stylish, functional shutters.
Ideal for homeowners looking to personalize their space, this tutorial provides step-by-step instructions, ensuring a satisfying and successful DIY experience. Transform your home’s facade with these easy-to-make shutters and give it a fresh, inviting look.
18. DIY Wood Shutters Under $0
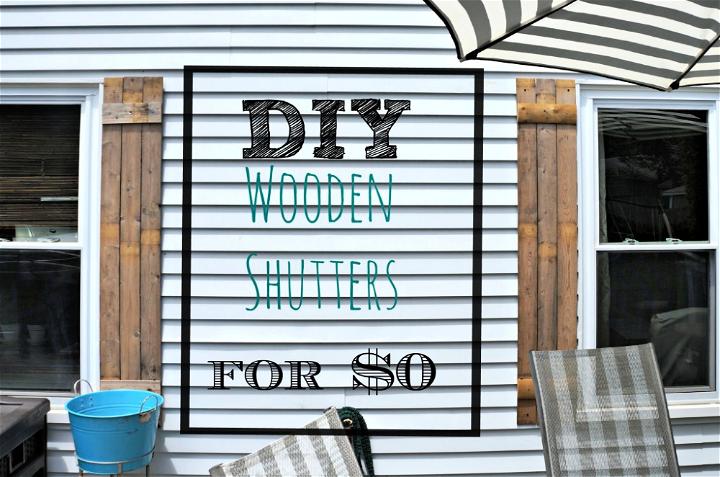
Making DIY wood shutters can transform the exterior of your home with a touch of rustic charm, and it doesn’t have to cost a penny. At Seeking Lavender Lane, discover how to repurpose wooden fence pieces into stylish shutters with a simple tutorial that’s perfect for sprucing up your windows.
You’ll need some basic tools and a helping hand to make precise cuts and assemble the pieces. Sanding them down for a smooth finish and securing them to your home will complete the look. With these shutters, you can achieve a beautiful aesthetic without spending on new materials, making it an environmentally friendly and cost-effective project for any homeowner.
19. Make Colorful Shutters at Home
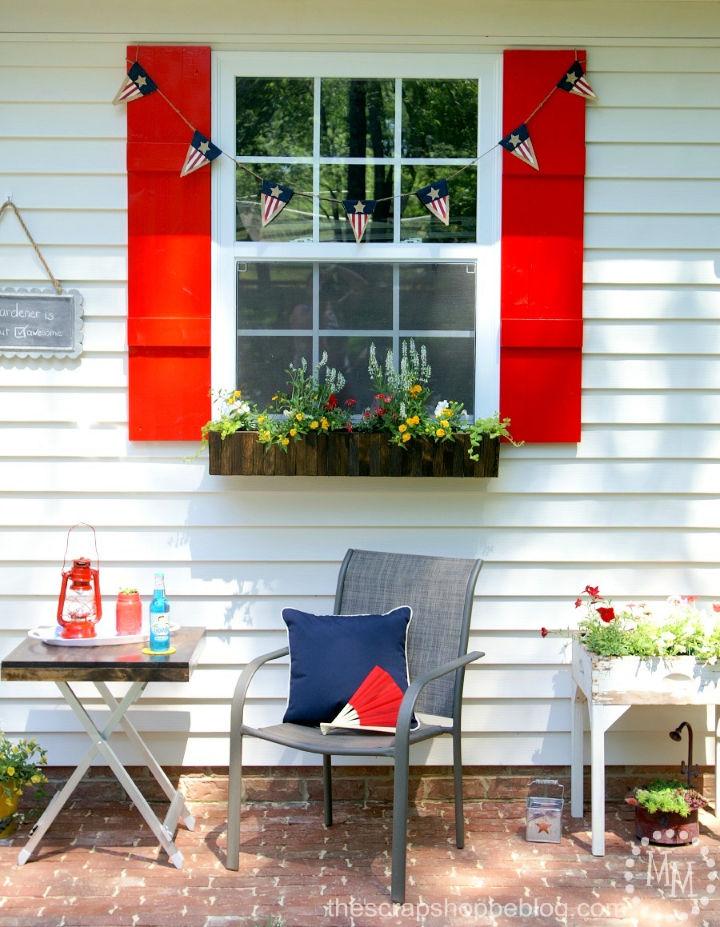
Enhance your home’s charm with a touch of color by building DIY shutters, as detailed on The Scrap Shoppe. This simple project can significantly boost curb appeal with shutters tailored to your preferred style and hue. The guide walks you through selecting the right materials, ensuring straight boards, and the straightforward process of assembling and installing the shutters.
With helpful tips on securing the shutters to your home and adding a vibrant coat of paint, you can achieve a stunning transformation for your windows. Ready to revitalize your space? Check out the full tutorial and other related projects from the potting shed makeover for a comprehensive upgrade.
20. How to Build Barn Wood Shutters
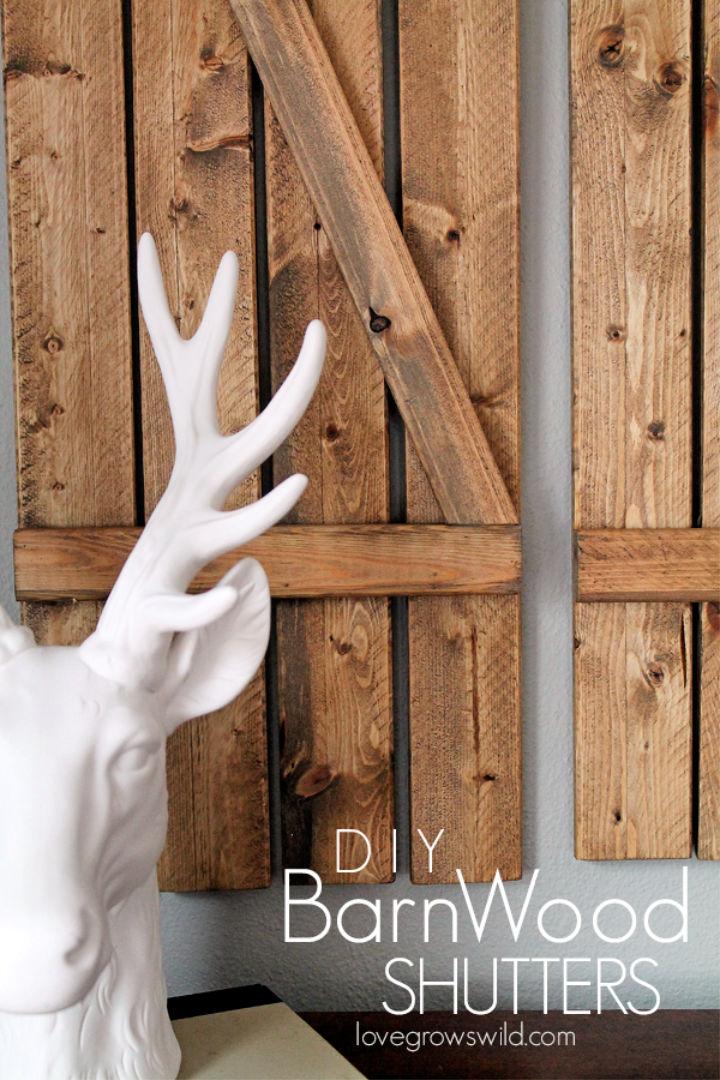
Ready to add a touch of rustic charm to your living space? Love Grows Wild presents an engaging DIY Barn Wood Shutters project that’s perfect for enhancing your home decor. Liz Fourez guides you through building these beautiful shutters, ideal for filling up that empty wall space above your fireplace or anywhere you desire a cozy, rustic vibe.
With a simple list of materials, including affordable wood furring strips and basic tools like a miter saw and wood glue, you can craft stunning shutters for under $12. The tutorial is straightforward and helpful, ensuring you can achieve a gorgeous, aged look with a mix of gray and dark walnut stains. Whether you want to complement your living room’s aesthetic with natural wood tones or add a pop of color, these DIY shutters are a budget-friendly and rewarding project to elevate your home’s style.
21. DIY Wooden Kitchen Shutters
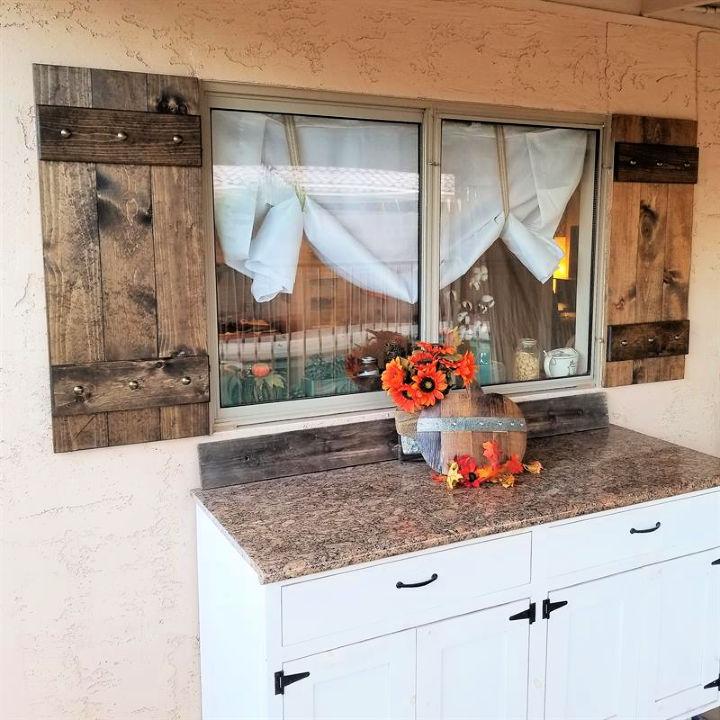
Transform your outdoor living space with a simple and impactful DIY project—building customizable wood shutters. Perfect for 40″ tall windows, these shutters can be easily adjusted to fit any size. Kreg Tool’s step-by-step guide ensures a smooth process, from cutting materials and drilling pocket holes to assembly and installation.
Choose your finish, be it a rich stain or a protective paint, to enhance durability and aesthetic appeal. Add a final touch of character with optional upholstery tacks. With a little effort and creativity, you’ll elevate your home’s exterior with shutters that are both functional and stylish. Learn Kregtool
22. Make Decorative Wood Shutters
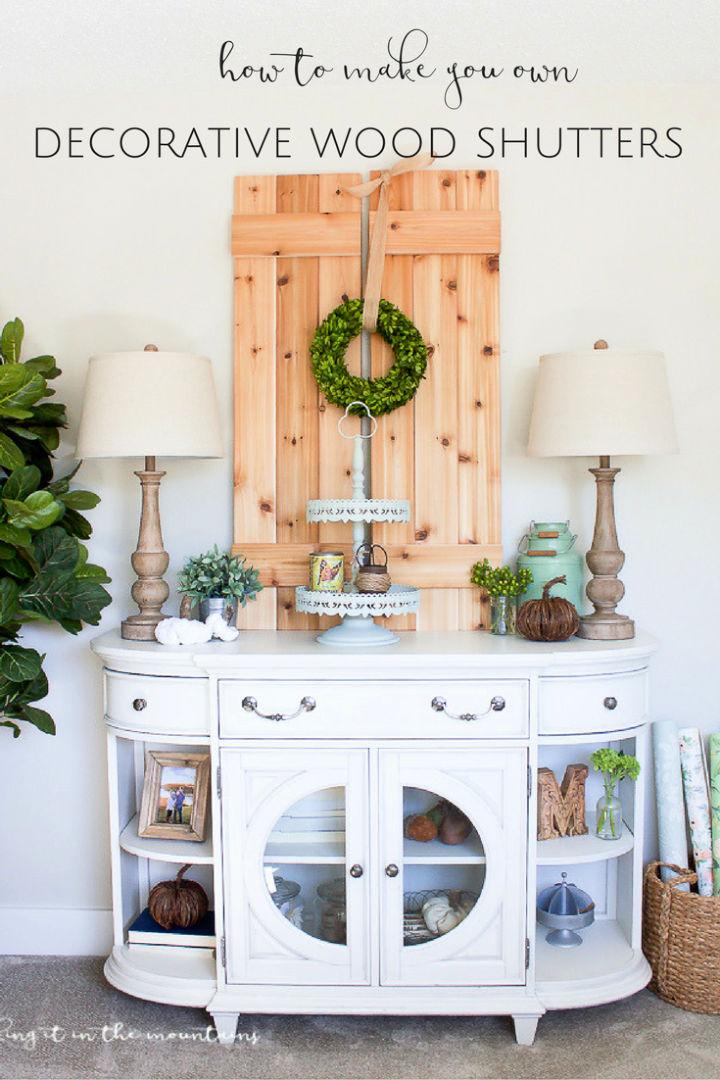
Make a charming farmhouse-style decor with a personal touch by crafting your own rustic DIY wood shutters. With a simple and engaging tutorial from Making it in the Mountains, you’ll learn how to quickly transform cedar boards into decorative shutters that add warmth and character to any room.
Perfect for those who love to infuse their spaces with the timeless appeal of vintage architectural elements, these shutters are an affordable alternative to hunting down antique pieces. Dive into the tutorial and start enhancing your home with these delightful wood creations today.
23. DIY Farmhouse Style Weathered Shutters
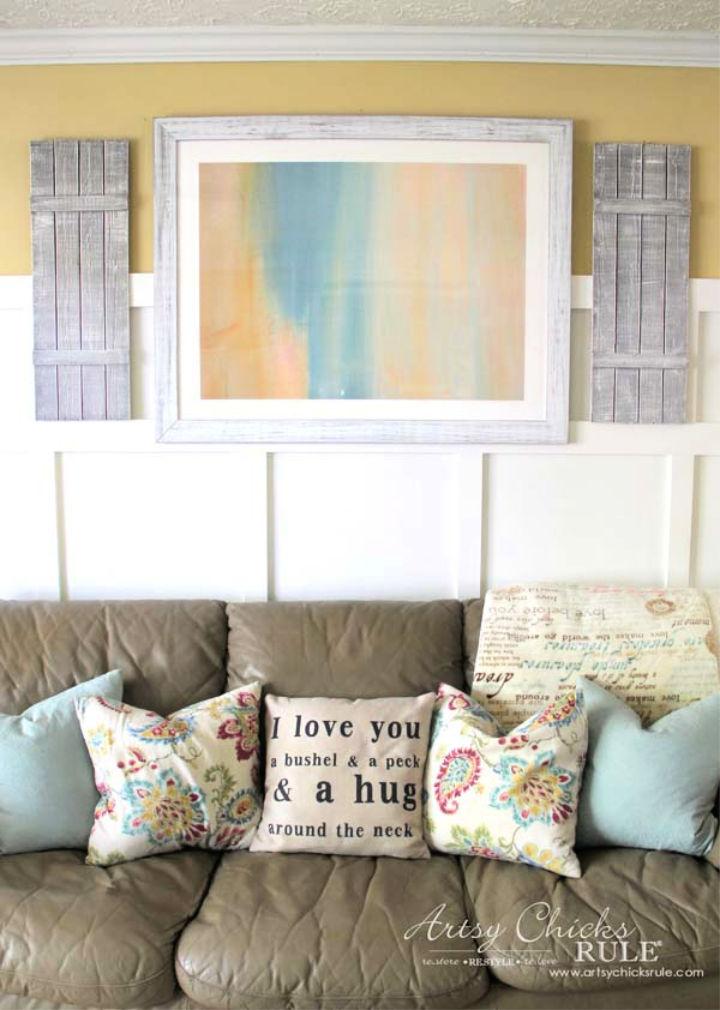
Transform your home decor with a touch of rustic charm by crafting your own weathered wood shutters, as showcased on Artsy Chicks Rule®. Nancy provides a simple and engaging tutorial that guides you through building farmhouse-style shutters that add character to any room.
With a materials list that includes basic craft boards and common household tools, this project is accessible for DIY enthusiasts looking to infuse their space with a cozy, vintage feel. Learn how to achieve a realistic weathered finish with stain and paint, and gain tips for customizing the shutters to your desired level of rusticity. This project is not just about aesthetics; it’s a hands-on way to bring a personalized and inviting look to your living space.
24. How to Make Your Own Outdoor Shutters
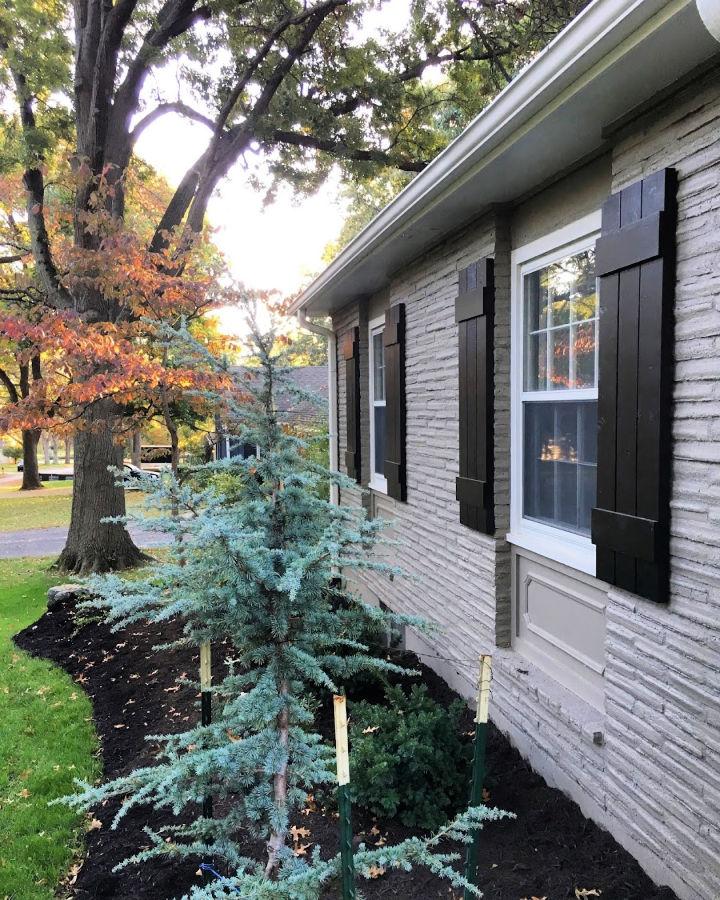
Transform your home’s exterior with DIY outdoor shutters following the comprehensive guide from Mindfully Gray. Jamie shares her hands-on experience, detailing the steps to build and install stylish, cost-effective shutters. Learn how to measure, cut, and assemble pine boards, as well as tips for priming and painting to achieve a professional finish.
The instructive walkthrough includes a list of essential supplies and a step-by-step process for securely mounting the shutters onto your home. This engaging and helpful guide ensures you can confidently enhance your curb appeal with homemade shutters that are built to last.
25. DIY Board and Batten Shutter Project
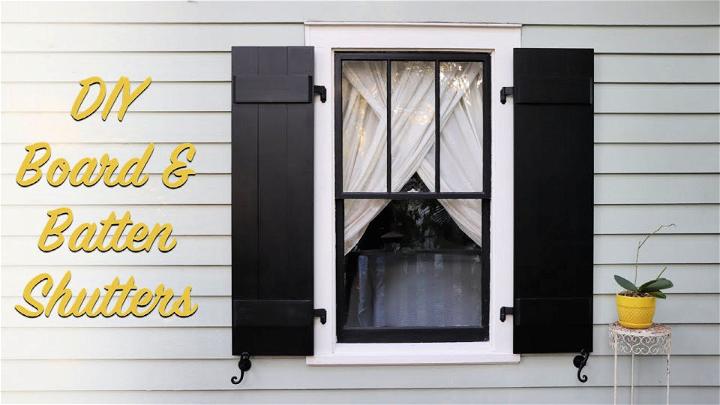
Elevate your home’s curb appeal with a custom DIY Board & Batten Shutter project! This guide takes you through crafting authentic, functional shutters, a superior alternative to store-bought vinyl versions. Starting with precise measurements for a perfect fit, you’ll work with pre-primed cedar, including 1x6s and a 1×8 board. The process involves cutting, beveling battens for style and ease of use, and meticulous sanding for a smooth finish.
Stainless steel nails ensure durability, while sustainable wood filler and careful sanding prep the shutters for painting. Choose a color that complements your home’s aesthetic, and apply it with a roller and brush for a professional look. Finally, learn to install them with the right hardware, including strap hinges and shutter dogs, for a charming, functional upgrade to your home’s exterior.
26. Best Way to Build Hurricane Shutters
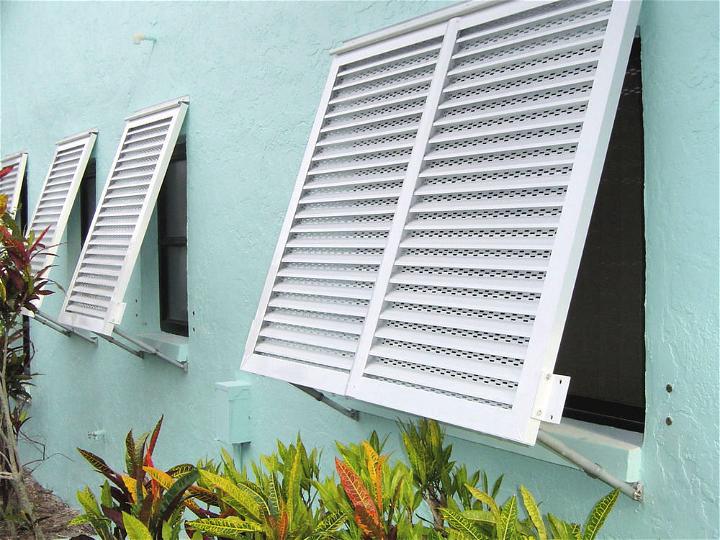
Do you happen to reside in an area that is prone to frequent hurricane occurrences? If so, you can safeguard your home by easily installing these do-it-yourself (DIY) hurricane shutters. With just a few simple steps, you can fortify your property against the powerful forces of nature. All you’ll need are some essential supplies, including plywood, Philips wood screws, a tape measure, a drill bit, and a sturdy CDX plywood. By taking these proactive measures, you can protect your home and ensure the safety of your loved ones during hurricane events.
27. Modern Exterior Storm Shutters
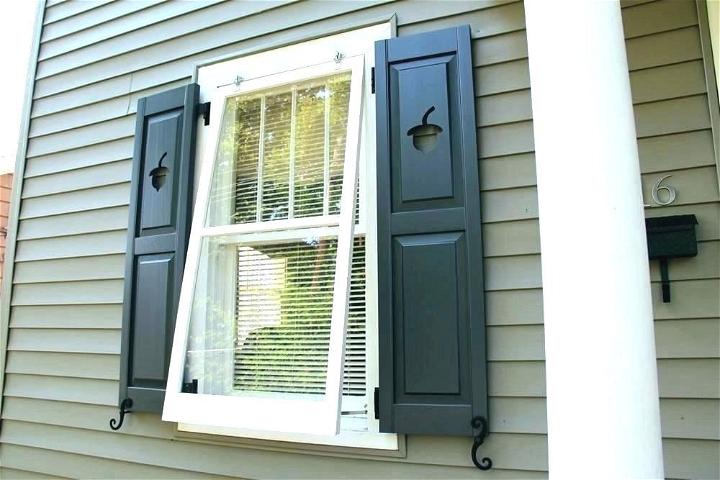
Ensure your utmost preparedness with these top-of-the-line storm shutters! Crafted not only to withstand the harshest storms but also to enhance the contemporary aesthetics of your exterior. These storm shutters provide unparalleled safety and security, shielding your place from the brunt of any storm. Transform your outdoor space into an ideal sanctuary where safety meets style!
28. DIY Outdoor Hurricane Shutters
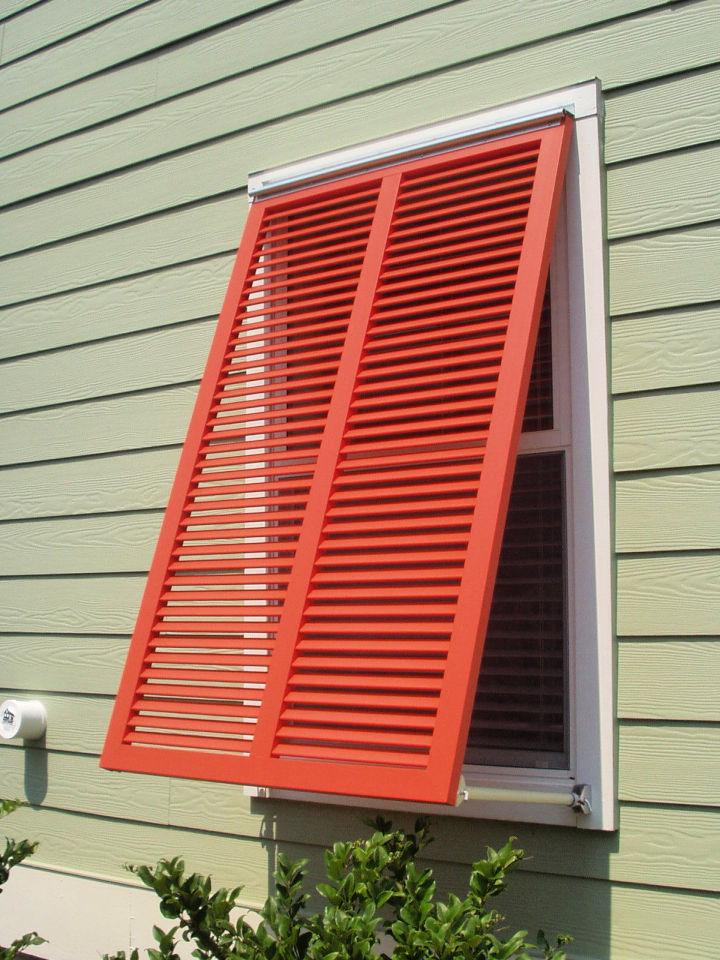
Are you a fan of bright and bold colors? Who says only interior decor matters? Your outdoors don’t have to be boring and dull! Check out these uber-lively and chic outdoor hurricane shutters. With their vibrant hues and stylish design, they will not only make your place hurricane-resistant but also make a bold statement in your outdoor decor. Transform your outdoor space into a vibrant oasis that reflects your unique style and personality.
29. Building Plantation Shutters for Sliding Glass Doors
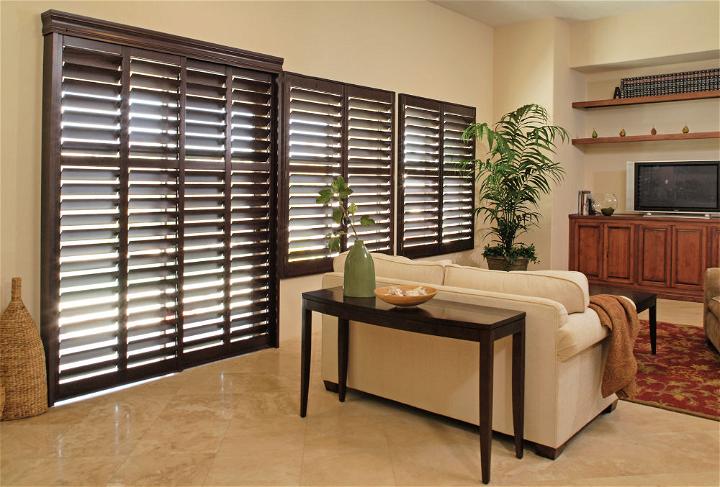
Are you a fan of indoor plants? There’s no denying that they have the power to transform any space into a vibrant and rejuvenating oasis. However, it’s worth noting that indoor plants can sometimes introduce a bit of humidity into the environment. But worry not!
You can effortlessly tackle this issue with the help of these incredibly affordable plantation shutters designed specifically for sliding doors. Not only do they add a touch of elegance to your sliding door, but they also allow you to invite a breath of fresh air into your living space. It’s the perfect solution to brighten up your home while maintaining a comfortable and refreshing atmosphere.
30. Make Roll Down Hurricane Shutters
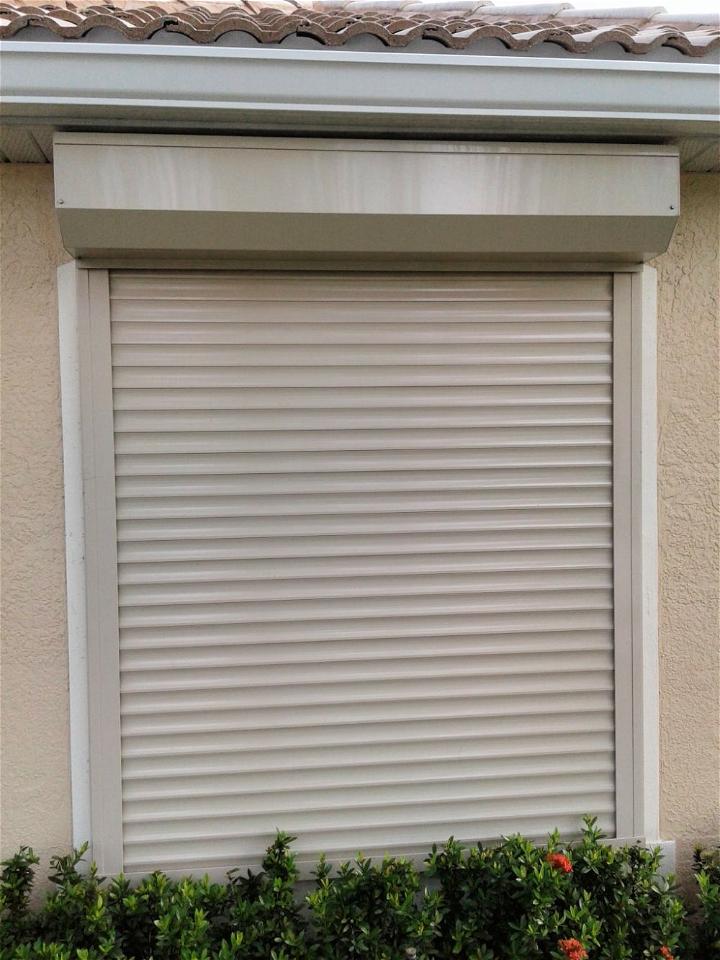
These roll down hurricane shutters can be an excellent addition to your home in preparation for those unpredictable and wild weather days! With the ability to completely close down the shutters, you can build a barrier that keeps your place safe from the destructive forces of a hurricane, minimizing any potential damage to your property and ensuring peace of mind during severe weather events.
Conclusion:
In conclusion, embarking on a journey to build 30 DIY shutters can significantly enhance the aesthetics and functionality of your windows. This guide on how to build shutters for windows provides a comprehensive pathway for anyone looking to add a personal touch to their home. By selecting the right materials, measuring accurately, and following through with careful assembly and installation, you can achieve professional-looking results that boast both beauty and durability.
Remember, building DIY shutters is not just about saving costs; it’s about instilling a piece of yourself into the very fabric of your home. So, take this knowledge, get creative, and start building shutters that will leave a lasting impression on any onlooker.
