Making a DIY swamp cooler can be a rewarding project, offering a cost-effective and efficient way to beat the heat. This guide is designed to walk you through 10 homemade DIY swamp cooler ideas, providing clear and straightforward how-to instructions. Whether you’re aiming to cool a small room or a larger space, these ideas are crafted to cater to a variety of needs, ensuring you can find a solution that’s just right for you.
In the following sections, we will delve into why building your own swamp cooler is a wise choice, covering everything from the basics of how they work to step-by-step guides on creating one. We also equip you with tips for optimal performance and maintenance, guaranteeing your homemade swamp cooler runs efficiently. Let’s explore these innovative ideas together, making sure your next DIY project not only cools your space but also gives you a sense of accomplishment.
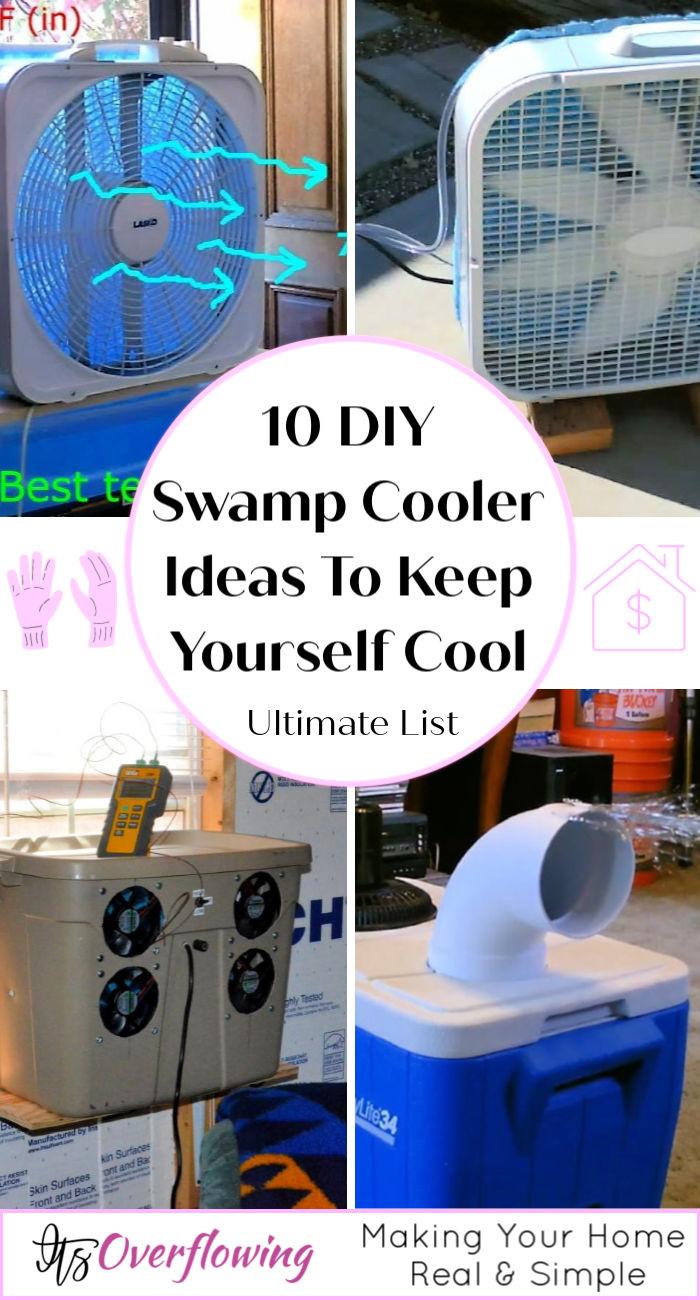
Why Build a DIY Swamp Cooler?
Building a DIY swamp cooler can be a rewarding and beneficial project, especially as temperatures begin to soar. Here’s why you might consider making one yourself:
- Cost-Effective: Traditional air conditioning can be pricey, not just in terms of initial purchase but also when you consider the ongoing energy costs. A DIY swamp cooler is a low-cost alternative that can save you money.
- Eco-Friendly: These coolers are environmentally friendly because they consume significantly less electricity compared to standard AC units. Plus, if you opt for solar-powered models, your carbon footprint shrinks even more.
- Educational Experience: Assembling a swamp cooler yourself can be a fantastic learning opportunity. It’s a hands-on way to understand basic principles of mechanics and physics.
- Customization: You have the freedom to tailor the design to your specific needs. Whether you want a portable unit or one that can cool a larger space, you can adjust the size and components accordingly.
- Simple Maintenance: Unlike complex AC systems, swamp coolers have fewer mechanical parts, making them easier to clean and maintain.
- Resourcefulness: Utilizing everyday materials, such as buckets, fans, and sponges, demonstrates innovation and resourcefulness. It’s a proactive way to repurpose items you might already have at home.
Remember, while swamp coolers are ideal for dry climates, they may not be as effective in areas with high humidity. Always consider your local weather patterns before deciding to create one.
How to Build a DIY Swamp Cooler
When summer heat becomes unbearable, air conditioning can seem like the only escape. However, traditional air conditioning units are expensive to operate and not always an option for everyone. This is where a DIY swamp cooler comes in as a cost-effective, eco-friendly solution to keep you cool. Let’s dive into how to build one.
Understanding the Basics
A swamp cooler, also known as an evaporative cooler, works on the principle of evaporative cooling. It uses the evaporation of water to cool air. As the water evaporates, it absorbs heat from the air, effectively lowering the temperature. Swamp coolers are especially effective in dry climates where the evaporation process can proceed rapidly.
Building Your DIY Swamp Cooler
1. Gather Materials:
First, you’ll need to collect all necessary materials. This typically includes:
- A durable container (like a 5-gallon bucket)
- A small, powerful fan
- Absorbent pads (cooling pads)
- A small submersible water pump
- PVC pipe or similar for air outlet
- Power source (can be a solar panel for an eco-friendly option)
2. Prepare the Container:
- Drill holes in the sides of the container, near the bottom, for water to circulate.
- Cut a hole in the lid of the container for the fan. Ensure the fan can be securely mounted.
3. Set Up the Cooling Pad:
- Fit the cooling pad around the inside perimeter of the container. It should cover the holes you drilled and allow air to pass through while getting saturated with water.
4. Install the Water Pump:
- Place the submersible pump inside the container. Attach a piece of PVC pipe or hose to direct water from the pump to the top of the cooling pad. The goal is to keep the pad moist.
5. Mount the Fan:
- Secure the fan to the lid of the container, ensuring that when it’s operational, it will pull air through the cooling pads, causing the water to evaporate and cool the air.
6. Power It Up:
- Connect the fan and the pump to your power source. If you’re using a solar panel, make sure it’s placed in a sunny spot to ensure efficient operation.
Tips for Optimal Performance
- Placement is Key: Position your swamp cooler in a shaded area if possible and ensure it has access to fresh air. This will maximize its cooling efficiency.
- Regular Maintenance: Keep the cooler clean by regularly changing the water and cleaning the pads and container to prevent mold and bacteria buildup.
- Ice Boost: For an extra cooling boost, add ice to the water in the container. This will help lower the air temperature even more as the ice melts and evaporates.
Building a DIY swamp cooler is a rewarding project that can provide you with a cost-effective way to stay cool during the hot summer months. By following these steps and ensuring regular maintenance, you can enjoy a cool breeze without breaking the bank or harming the environment.
DIY Swamp Cooler FAQs
Get answers to your DIY Swamp Cooler FAQs in this concise and informative guide. Discover tips and tricks for setting up your own swamp cooler and beating the heat.
What is a DIY Swamp Cooler?
A DIY swamp cooler, also known as an evaporative cooler, is a device that cools air through the evaporation of water. It’s a cost-effective and eco-friendly alternative to traditional air conditioning, especially suited for dry climates. These coolers work best in areas with low humidity, as the process relies on the ability of the air to absorb moisture.
How Does a Swamp Cooler Work?
Swamp coolers work on the principle of evaporative cooling. When air moves over or through water-saturated pads, the water evaporates, absorbing heat from the air. This process cools the air, which is then circulated in the room or space. It’s an efficient way to lower temperatures using only water and a fan.
Can I Build a Swamp Cooler Myself?
Absolutely! Building a swamp cooler is a manageable project for most DIY enthusiasts. You’ll need basic materials like a fan, a container (like a 5-gallon bucket), absorbent pads, and a small water pump. Detailed guides and instructions, like those mentioned in the article, can walk you through the process step by step.
What Materials Do I Need to Build a DIY Swamp Cooler?
The basic materials you’ll need include:
- A durable container or bucket
- A small, powerful fan
- Absorbent or cooling pads
- A small submersible water pump
- PVC pipe or similar for the air outlet
- Power source, which can be a solar panel for an eco-friendly option
Is a DIY Swamp Cooler Expensive to Make?
No, one of the advantages of a DIY swamp cooler is its cost-effectiveness. The materials required are affordable and often readily available. The operational cost is also lower compared to traditional air conditioning, as it uses only a small amount of electricity to power the fan and water pump.
How Effective is a DIY Swamp Cooler?
The effectiveness of a DIY swamp cooler largely depends on the climate. They are most effective in hot, dry areas where the humidity is low. In humid conditions, the air is already saturated with moisture, making it difficult for the cooler to further cool the air through evaporation. However, in the right conditions, a DIY swamp cooler can significantly reduce indoor temperatures, making it a great alternative to traditional AC units.
Can I Use a Swamp Cooler in a Humid Climate?
Swamp coolers are not as effective in humid climates because the air cannot absorb much more moisture, which limits cooling. If you live in a humid area, you might want to explore other cooling options that are more suited to your climate.
How Can I Maximize the Efficiency of My Swamp Cooler?
To maximize efficiency:
- Place your swamp cooler in a shaded area.
- Ensure it has a fresh air supply for optimal evaporation.
- Regularly clean and maintain the cooler to prevent mold and bacteria buildup.
- Consider adding ice to the water for an extra cooling effect.
How Do I Maintain My DIY Swamp Cooler?
Maintenance involves:
- Changing the water regularly to prevent stagnation.
- Cleaning the pads and the container to avoid mold and bacteria growth.
- Ensuring the fan and pump are in good working condition.
- Drying the components thoroughly if you’re not planning to use the cooler for an extended period.
Building and maintaining a DIY swamp cooler is a rewarding project that not only provides relief from the heat but also aligns with eco-friendly practices. With simple materials and a bit of elbow grease, you can enjoy a cooler space without the high costs associated with traditional air conditioning.
10 Homemade DIY Swamp Cooler Ideas
Explore 10 DIY Swamp Cooler Ideas to beat the heat efficiently at home. Save money and stay cool with these creative homemade solutions.
1. Homemade 5 Gallon Bucket Swamp Cooler
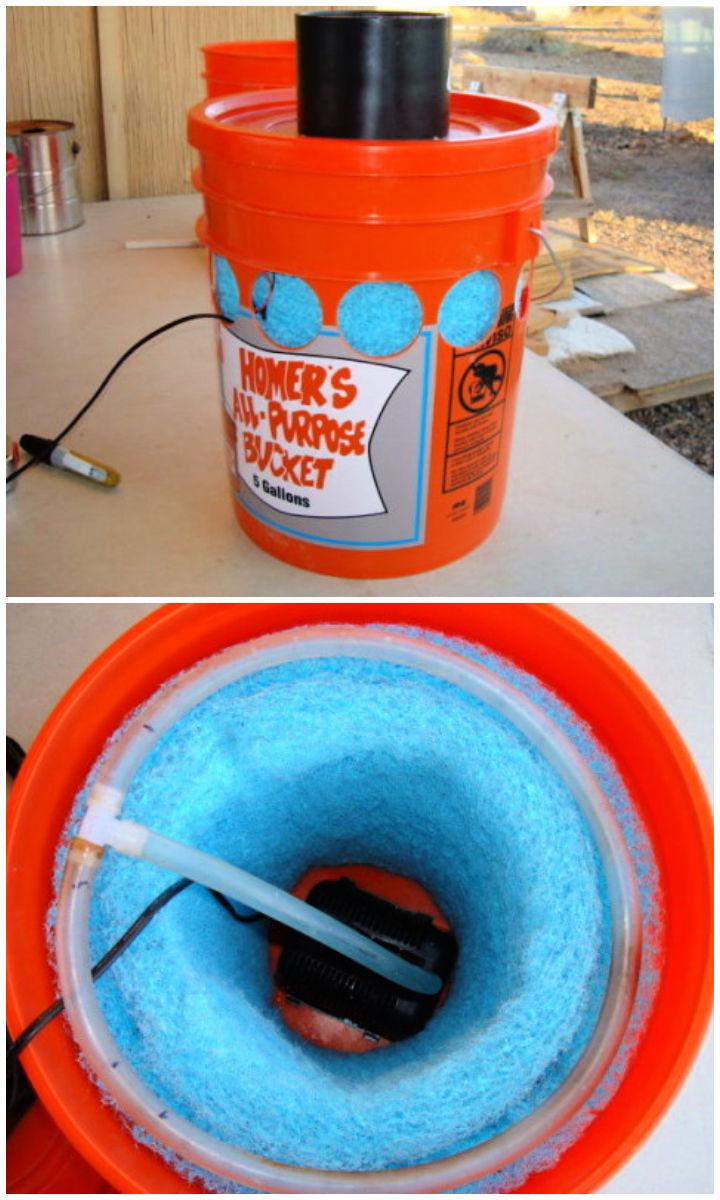
Struggling with the scorching heat at Burning Man? The Playa Labs offers a comprehensive guide to building your own swamp cooler, also known as the Figjam swamp cooler. This DIY tutorial is perfect for anyone wanting to keep their cool in the desert. It provides a detailed list of playa-tested parts and clear, step-by-step instructions to ensure a successful build.
With this informative guide, you’ll learn how to prepare your bucket, create an effective drip ring, and assemble the unit for optimal cooling. The tutorial emphasizes the importance of placing the cooler outside your shelter for maximum efficiency. Get ready to beat the heat with a custom-made swamp cooler from The Playa Labs.
2. How to Make Evaporative Cooler
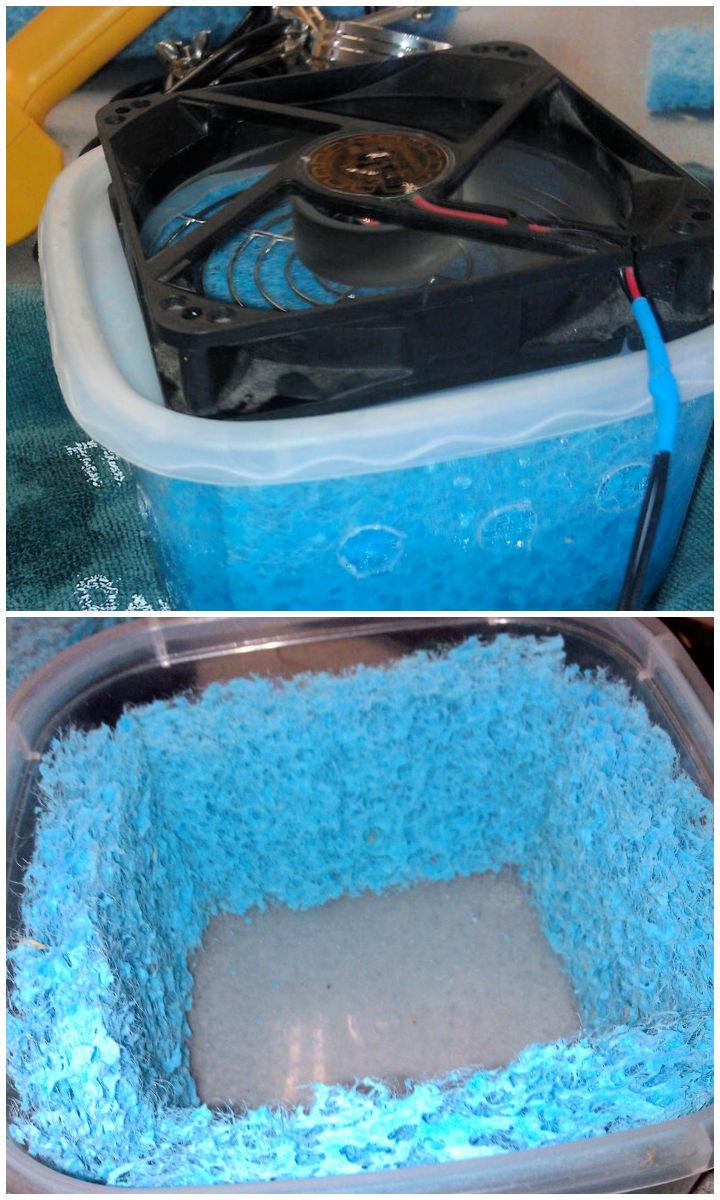
Beat the heat with a homemade evaporative cooler, affectionately dubbed “Baby Swampy.” Ideal for hot, dry climates, this DIY project is a breeze to create using household items and simple tools. Instructables offers a step-by-step guide to assembling your personal cooler with a fan, swamp cooler pads, and a few other essentials. Perfect for a single room, this cost-effective solution can be powered by a standard power supply or even a 9V battery. Get ready to enjoy a refreshing, cool breeze with your very own Baby Swampy.
3. Burning Man Evaporative AC Swamp Cooler
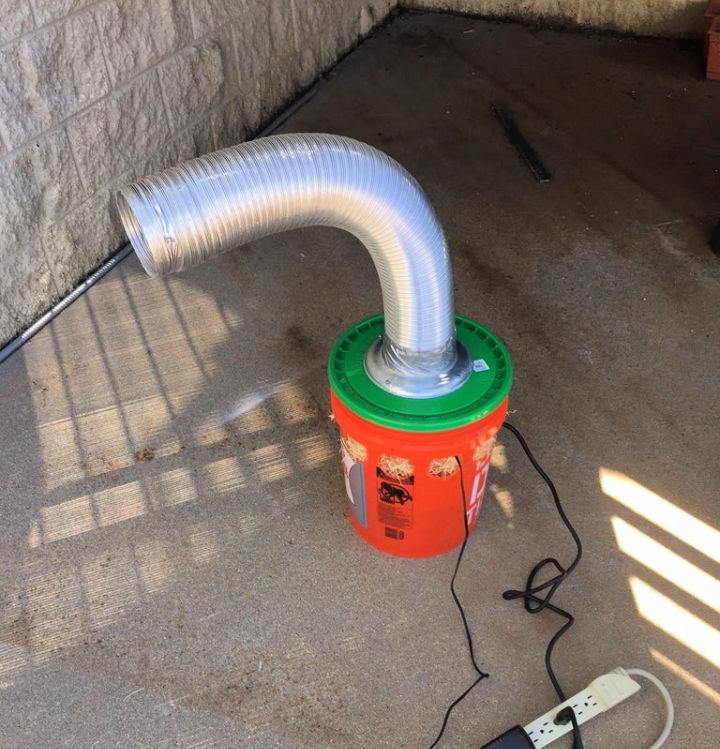
Ready to beat the heat at Burning Man or any outdoor adventure? Arobodude’s DIY Burning Man Evaporative AC Swamp Cooler guide on Instructables is your go-to resource for creating a personal cooling oasis. With detailed instructions and a list of materials, this DIY project is perfect for those seeking relief from the scorching sun.
The evaporative cooler is designed for efficiency and portability, ensuring you stay cool while enjoying the festivities. By following this guide, you’ll not only enhance your comfort but also gain the satisfaction of building a functional device with your own hands. Get ready to transform your hot tent into a cool haven!
4. Making Your Own Swamp Cooler
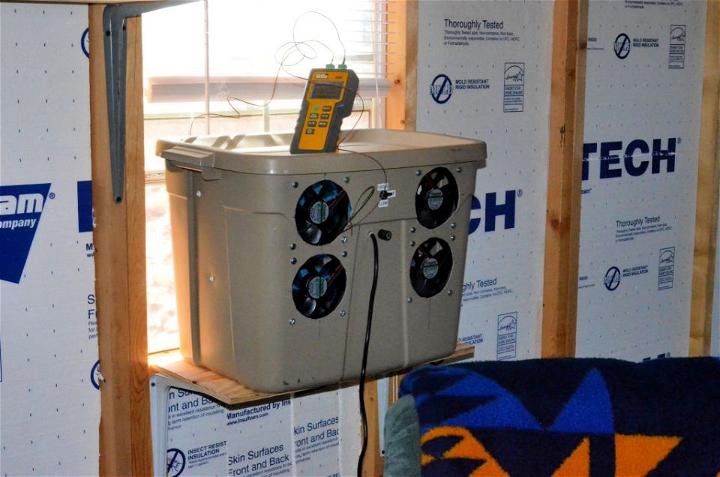
Learn how to build a homemade swamp cooler for your off-grid cabin with our step-by-step guide. Ideal for those hot days in arid climates, a swamp cooler is an effective way to lower indoor temperatures using the principles of evaporative cooling.
Discover the materials you’ll need, such as a porous pad and a plastic tote, and follow the instructions to assemble your own eco-friendly cooling unit. Powered by solar panels or a wind turbine, this DIY project is perfect for sustainable living enthusiasts seeking comfort in their remote retreats. Get started on enhancing your cabin’s climate control today. Md Pub
5. DIY 5 Gallon Bucket Swamp Cooler
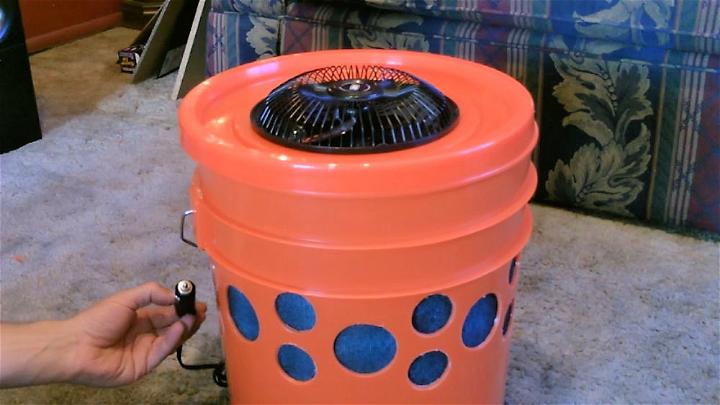
Escape the heat with a homemade Evaporative Air Cooler, ingeniously crafted from a simple 5-gallon bucket! This DIY swamp cooler is not only efficient but can also be powered by solar energy. Start by modifying the bucket with strategically placed holes above the waterline and filling it with two gallons of water. Utilize a cooling pad, cut to fit the bucket’s dimensions, and a screen layer to distribute moisture evenly.
A small fountain pump and a fan complete the setup, ensuring a smooth airflow. Remarkably, this cooler can reduce indoor temperatures significantly, offering a cost-effective and eco-friendly solution to beat the summer heat. Remember to maintain hygiene by drying components after use and consider adding ice for an extra chill. This DIY project promises a refreshing retreat in your own home!
6. Handmade Evap Air Cooler Tutorial
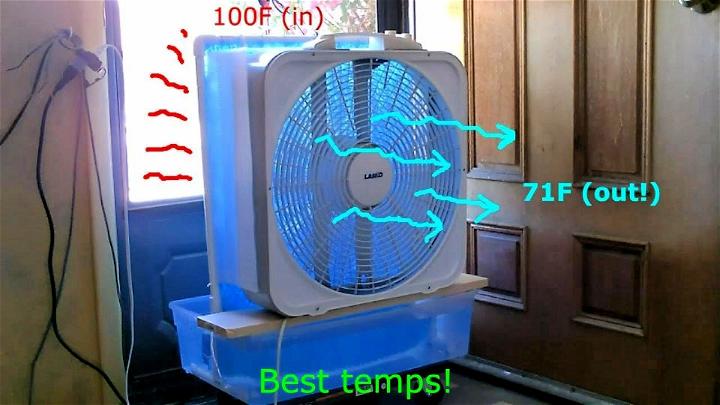
Elevate your cooling game with a DIY Evap Air Cooler, perfect for large areas. This final version boasts significant upgrades for maximum efficiency. Key improvements include tighter wire fittings and a crossbar for stability, ensuring the cooling pad stays in place. The cooler’s capacity has been expanded with a 10-gallon tub, reducing water refill frequency.
Plus, the cooling pad is now a generous 23 inches, enhanced by strategically spaced holes for even water distribution. Constructed with materials easily sourced from local hardware stores, this cooler is both lightweight and mobile, thanks to an inexpensive plastic mover’s dolly. It’s a cost-effective, eco-friendly solution to beat the heat, with a simple build process that offers immense satisfaction and comfort.
7. DIY Evaporative Cooler – Step by Step Instructions
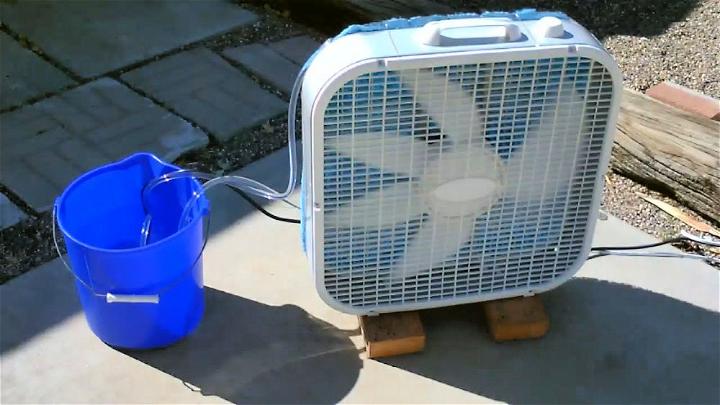
Transform your standard box fan into an efficient evaporative air cooler with this ingenious DIY guide! Ideal for those hot summer days, this project is straightforward and cost-effective. You’ll need a 20-inch box fan, a cooling pad, a screen, a bucket, a water pump, and about 10 feet of clear aquarium tubing. The process involves cutting the screen and cooling pad to fit the fan, securing them with washers, and setting up the tubing to evenly distribute water over the pad.
The result? A refreshingly cool breeze with minimal effort and expense. Perfect for indoor or outdoor use, this homemade air cooler is a clever way to beat the heat while being mindful of energy consumption. Plus, with the option to solar-power it, you can enjoy cool air with even less impact on your electricity bill. Get ready to create a comfortable and cool environment in your home with this simple yet effective DIY project!
8. How to Make Your Own Swamp Cooler
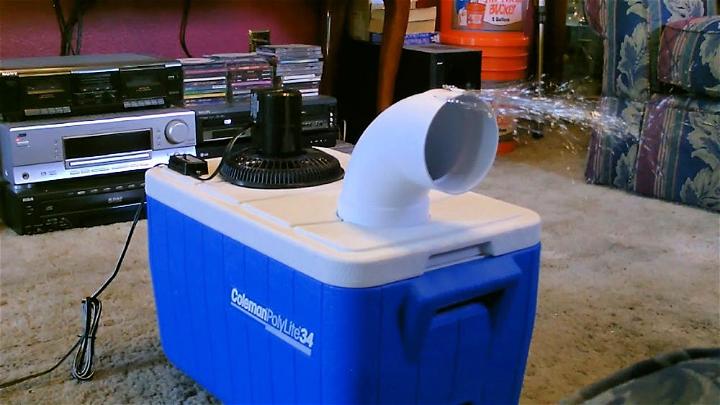
Stay cool with a homemade solar-powered air conditioner, an innovative and eco-friendly solution for beating the heat. This DIY project is straightforward, requiring basic materials like a fan, solar panel, and plastic bottles for ice. Ideal for those looking to harness solar energy, this air cooler is both cost-effective and efficient.
You’ll learn how to connect the fan to a solar panel for sustainable power, or switch to a battery setup for flexibility. The design allows for quiet operation and impressive airflow, making it perfect for hot days. Experience the satisfaction of creating your own cooling system, and enjoy a refreshing breeze powered by the sun!
9. DIY Powerful Air Cooler at Home
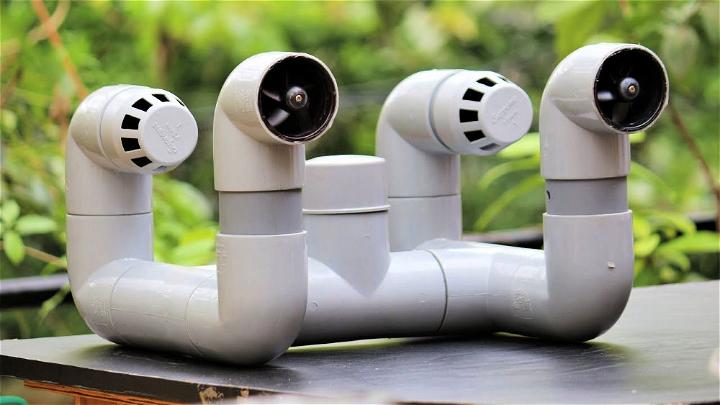
Ready to build a powerful air cooler right at home? Our instructional video on YouTube provides an easy-to-follow guide on creating a DIY air cooler that’s both effective and budget-friendly. With clear steps and practical tips, you’ll learn how to assemble this cooling device using readily available materials. Perfect for hot summer days, this project not only offers relief from the heat but also gives you the satisfaction of crafting something with your own hands.
Whether you need to cool down your room or workspace, our video ensures that you have all the information you need to make a homemade air cooler that really works. Tune in, gather your tools, and start building your own air cooler today with guidance from our detailed tutorial.
10. Simple DIY Small Personal Swamp Cooler
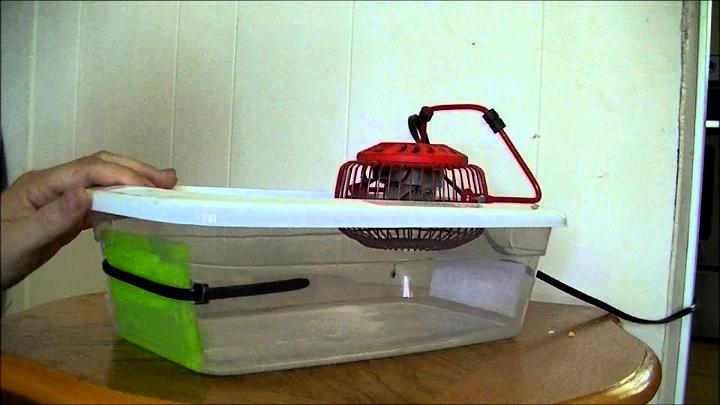
Elevate your personal cooling experience with this DIY Small Personal Swamp Cooler, perfect for beating the heat efficiently and cost-effectively. This project, ideal for a hands-on DIY enthusiast, involves crafting a cooling device using simple materials like a plastic container, a small fan, and a sponge or filter.
By cutting a slot in the container, inserting the sponge to absorb water, and placing the fan on top, you create an ingenious system where air passes through the damp sponge, offering a refreshing breeze. This cooler is customizable in size, making it suitable for personal use or cooling a small room. With minimal tools and straightforward instructions, it’s an enjoyable and practical project for anyone seeking a homemade solution to stay cool.
- 25 Homemade DIY Air Conditioner Projects To Make This Summer
- 10 Homemade DIY Bucket Air Conditioner Ideas – DIY AC
Conclusion:
In conclusion, mastering the craft of creating a DIY swamp cooler presents an efficient, cost-effective solution for combating the heat. This guide offers a comprehensive walkthrough, from understanding the basics to building and maintaining your own unit. By exploring our 10 homemade DIY swamp cooler ideas, you’ll discover a range of innovative approaches to keep your space comfortably cool. Remember, the success of your DIY project hinges on attention to detail and adherence to the how-to guide provided. Start this DIY swamp cooler project today and enjoy the benefits of a cooler environment without the hefty price tag!
