Making a DIY tapestry can transform your living space with a personal touch, offering both style and warmth. Understanding the basics of what is a tapestry and the techniques of tapestry art will boost your confidence in tackling projects, from a simple DIY tapestry to more elaborate tapestry wall hangings. This guide provides easy steps and inspiration to get started, ensuring that even those new to tapestry weaving can enjoy the process of making a tapestry.
This guide promises to equip you with 15 easy DIY tapestry ideas that cater to a range of skills and artistic preferences. Whether you seek to incorporate whimsical patterns, meaningful quotes, or intricate designs, these DIY tapestry ideas serve as a springboard for your creativity. If you’re eager to transform your living space with hand-crafted decor, the following sections will unveil a world of options in tapestry making. Let’s dive into these DIY tapestry inspirations and start weaving your masterpiece today.

Why Make Your Own DIY Wall Hanging Tapestry?
Creating your own wall hanging tapestry is not just about saving money, it’s also about unleashing your creativity and personalizing your space. Here’s why you should consider it:
- Cost-Effective Decor: Wall art can be expensive, but DIY tapestries offer a budget-friendly alternative. With minimal materials, you can craft a piece that looks just as chic as store-bought options.
- Customization: When you make your own tapestry, you control the design, colors, and size. It ensures your decor is a perfect match for your personal taste and home’s aesthetic.
- No Skills Needed: Many DIY tapestry projects are designed for beginners, meaning you don’t need to be an expert crafter to create something beautiful.
- Therapeutic Activity: Crafting is a relaxing hobby that can help reduce stress. The process of creating a tapestry can be a peaceful retreat from the hustle and bustle of daily life.
- Sense of Accomplishment: There’s nothing quite like the pride you feel when you make something with your own hands. Displaying your DIY tapestry is a constant reminder of your creativity and hard work.
- Eco-Friendly: By using upcycled materials or repurposing old fabrics, you’re making an environmentally friendly choice that contributes to sustainability.
- Quality Time: Crafting a tapestry can be a fun activity to share with friends or family, fostering bonds and creating memories together.
Whether you’re looking to spruce up your walls or searching for a new hobby, making a DIY wall hanging tapestry is a rewarding endeavor that ticks all the right boxes.
How to Make a DIY Tapestry
Creating a DIY tapestry is a fulfilling project that adds a touch of personality and warmth to any room. Whether you want to make a statement wall piece or a cozy throw, these easy ideas will help you embark on your tapestry-making journey. Let’s dive into what you need and how you can begin.
Choosing Your Design and Materials
Before diving into the weaving process, selecting a design and gathering your materials is crucial. For beginners, simple geometric patterns and abstract designs can be a great starting point. Here’s what you’ll need:
- Yarn: Choose various colors to match your design preference. Cotton or wool yarn works best for beginners.
- Loom: A small handheld loom is perfect for starters. If you’re on a budget, you can make one from a sturdy cardboard.
- Weaving tools: A tapestry needle, shuttle, and comb or fork for pushing the weft tight.
- Other essentials: Scissors, a dowel or rod for hanging, and a sketch of your design.
Step-by-Step Guide to Making Your Tapestry
Step 1: Setting Up Your Loom
- Wrap the warp: Securely attach your warp yarn (the vertical threads) to the top and bottom of your loom, ensuring they are evenly spaced and taut.
Step 2: Planning Your Pattern
- Sketch it out: Draw your design or use online templates as a guide. Keep it simple for your first project to ensure a smooth process.
Step 3: Beginning Weaving
- Start weaving: Using your tapestry needle, weave the weft yarn (the horizontal threads) over and under the warp yarns. Remember, the first few rows are crucial for laying a strong foundation.
Step 4: Adding Colors and Patterns
- Change colors: To add a new color, simply tie the end of one weft yarn to the start of another. Tuck the ends into the weave to keep them hidden.
- Create textures: Experiment with different weaving techniques, like the soumak weave for raised textures or loops for added dimension.
Step 5: Finishing Your Tapestry
- Remove from the loom: Carefully cut or untie your tapestry from the loom, leaving enough warp thread to tie off or weave in the ends.
- Secure the edges: Tie the warp threads in groups or weave them back into the tapestry to prevent unraveling.
- Hang your masterpiece: Attach your tapestry to a wooden dowel or rod, and it’s ready to display.
Tips for Successful Tapestry Making
- Start small to gain confidence.
- Keep tension consistent to avoid puckering.
- Don’t be afraid to undo and redo sections as needed for the perfect weave.
- Practice different weaving techniques to discover your unique style.
Engaging in DIY tapestry projects not only nurtures creativity but also results in a distinctive piece of art that reflects your personal taste. Each tapestry you create carries a story and adds a layer of warmth to your home. With these easy ideas and guidelines, you’re well on your way to becoming a proficient tapestry maker. Happy weaving!
FAQs about Making a Tapestry
Discover answers to frequently asked questions about making a tapestry. Learn the art of tapestry creation and unleash your creative potential.
What materials do I need to start making a tapestry?
To begin making a tapestry, you will need:
- Yarn or thread of different colors and textures based on your design.
- A loom which can be store-bought or DIY from cardboard or wood.
- Weaving tools such as a tapestry needle, scissors, and a comb.
- A dowel, rod, or stick for hanging your finished tapestry.
Can I make a tapestry without a loom?
Yes, you can make a simple tapestry without a traditional loom by using alternative methods such as:
- Branch weaving: Using a sturdy branch as a base to tie warp threads.
- Embroidery hoop weaving: For small, circular tapestries.
- Cardboard loom: A simple and cost-effective solution for beginners.
How long does it take to make a DIY tapestry?
The time it takes to make a DIY tapestry depends on several factors including the size of the project, the complexity of the design, and your weaving speed. A small, simple tapestry can take a few hours, whereas larger or more detailed pieces may take several days to weeks.
What are some easy tapestry ideas for beginners?
Beginners can start with these easy tapestry ideas:
- Geometric patterns using basic shapes and a few colors.
- Abstract designs that allow for more freeform weaving.
- Nature-inspired motifs like leaves or mountains with simple outlines.
- Text quotes with bold letters against a simple background.
How do I choose the right yarn for my tapestry?
When choosing yarn for your tapestry, consider:
- Texture: Wool, cotton, and acrylic yarns are popular choices that offer different textures.
- Color: Select colors that match your design vision and room decor.
- Thickness: Thicker yarns create a more substantial and cozy feel, while thinner yarns are good for detailed work.
Can I wash my DIY tapestry?
Yes, most tapestries can be washed, but the method depends on the materials used:
- Machine washable yarns: Use a gentle cycle and cold water, then air dry.
- Hand wash only: Gently wash with cold water and mild detergent. Avoid wringing. Lay flat or hang to dry.
How can I hang my tapestry without damaging the wall?
To hang your tapestry without damaging the wall, you can use:
- Adhesive wall hooks designed for hanging decor without leaving marks.
- Command strips that stick to both the tapestry and the wall securely.
- Clothespins and string for a more bohemian look that’s easy to change.
We hope these FAQs help you start your tapestry-making journey with confidence and creativity. Remember, making a tapestry is about expressing yourself, so have fun and experiment with different materials and techniques to create something truly unique.
15 Easy DIY Tapestry Ideas
Discover 15 simple and creative DIY tapestry ideas that you can try out. Get inspired and bring a touch of artistic charm to your space with these easy DIY projects.
1. Cool DIY Wall Hanging Tapestry
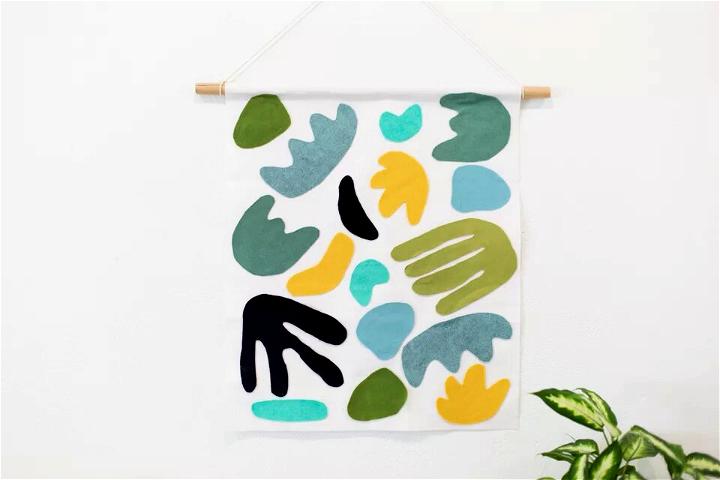
Make a chic and modern wall tapestry with this DIY guide from The Spruce Crafts. No sewing skills? No problem! This project is accessible for all crafting levels and requires just a few materials like felt, fabric, and a glue gun. Follow simple steps to cut and arrange felt shapes onto a sturdy base, attach a wooden dowel, and add a hanging cord. The result is a personalized decor piece that’s sure to elevate your space. Get ready to transform your walls with a tapestry that reflects your unique style.
DIY Flower Wall Decor Ideas: Unleash your creativity with these Simple DIY Flower Wall Decor Ideas. Transform your space into a blooming paradise.
2. Handmade Large Wall Hanging Tapestry
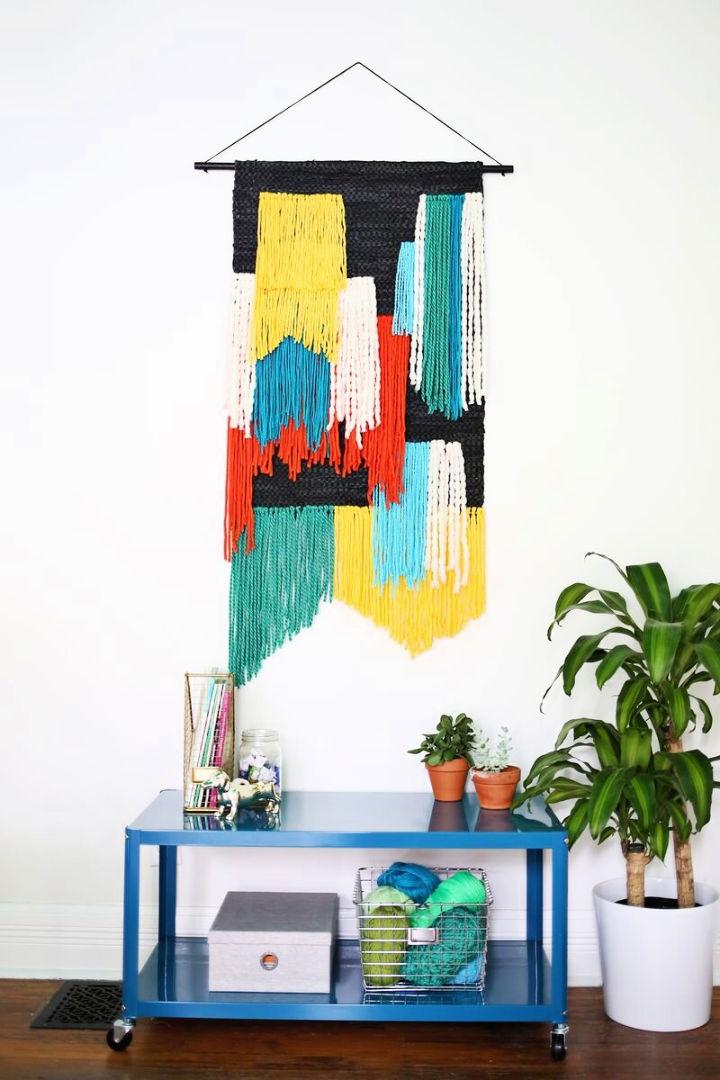
Make a stunning large tapestry wall hanging with ease using Laura Gummerman’s guide on A Beautiful Mess. Transform a plain woven rug into a vibrant piece of art by simply tying in various yarns. All you need is a rug with a loose weave, yarn in different colors and textures, a small crochet hook, a dowel rod, and some string.
The process involves making rows of knotted yarn and layering them to achieve a rich tapestry effect. Once all the yarn is in place, secure a pocket for the dowel at the top of the rug, and give your creation a final trim for a polished look. This project is perfect for crafting enthusiasts looking to add a handmade touch to their decor without spending countless hours weaving. Get ready to enjoy a new tapestry in just about three hours!
3. How to Make a Wall Hanging Yarn Tapestry
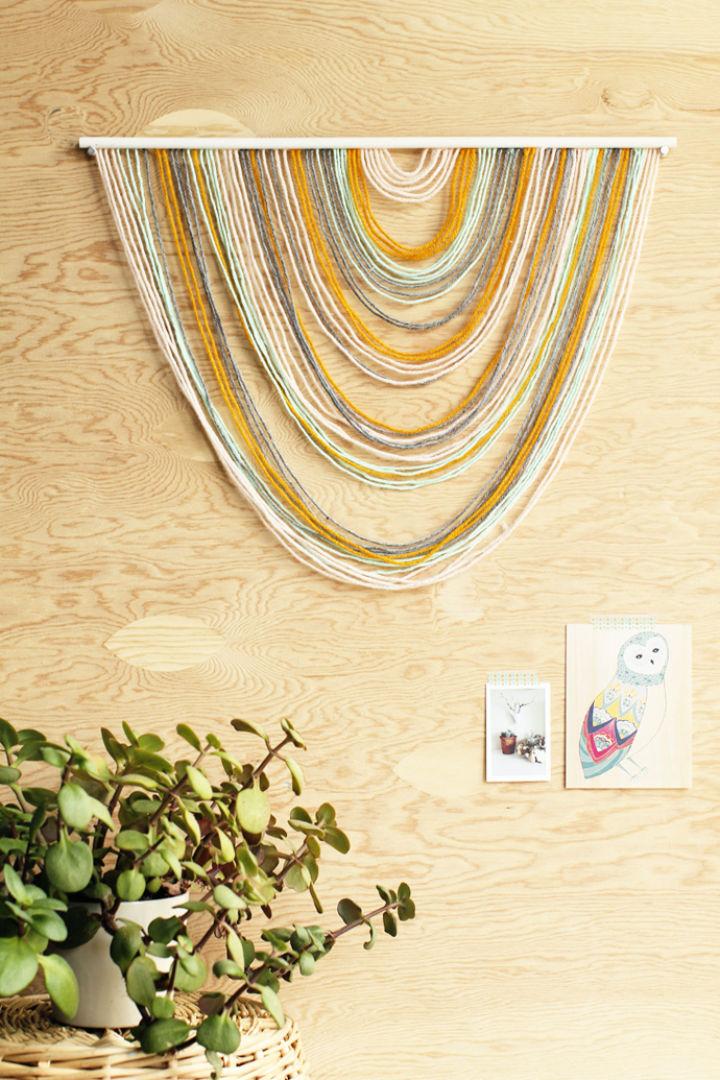
Making a DIY yarn tapestry is a simple and enjoyable way to add a personal touch to your home decor. With a few basic supplies like yarn, a wooden dowel, white paint, and a hot glue gun, you can design a wall tapestry that complements your style. Start by painting the dowel white to let your chosen yarn colors shine.
Cut yarn pieces in varying lengths for a dynamic look, and glue them onto the dowel to form a cascading “U” shape. Customize the color pattern to your liking and trim any excess yarn for a neat finish. Hang your handmade tapestry for a cozy and artistic addition to any room. Visit Howe We Live for more creative DIY projects to enhance your living space.
If talking about the best interior home decor, you will give ten out of ten to this wall hanging yarn tapestry, will win your heart at a very first look. Grab a wood dowel, or a stick, white paint, and painting sponge brush, and hot glue to make this lovely wall hanging yarn tapestry.
4. Homemade Wall Hanging Tapestry
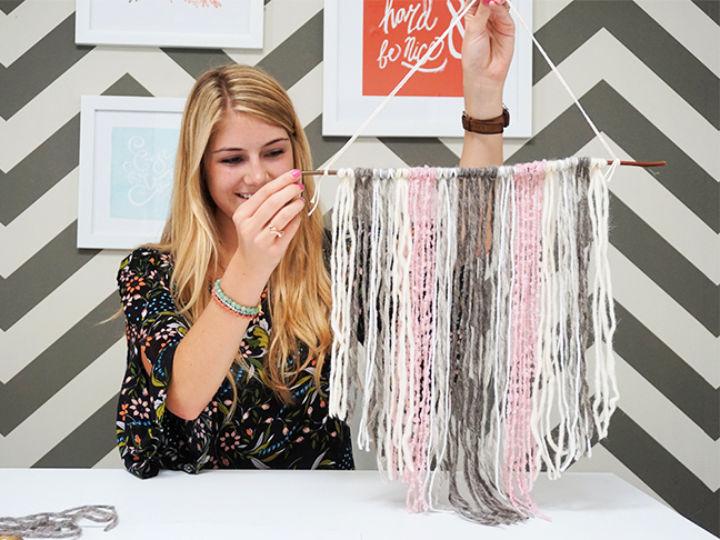
Add a personal touch to any room with a handmade yarn tapestry! Perfect for a baby’s nursery or as a cozy addition to your living space, this DIY project from Momtastic is both simple and rewarding. Gather your favorite yarn colors, a dowel, and some string, and follow our easy steps to create a charming wall hanging.
Cut, knot, and arrange your yarn into a unique pattern, then trim for a custom look. Hang your creation with pride, knowing it’s a one-of-a-kind piece that brightens your home. Get crafting and enjoy the splash of color and texture it brings!
5. DIY No Weave Large Wall Hanging Tapestry
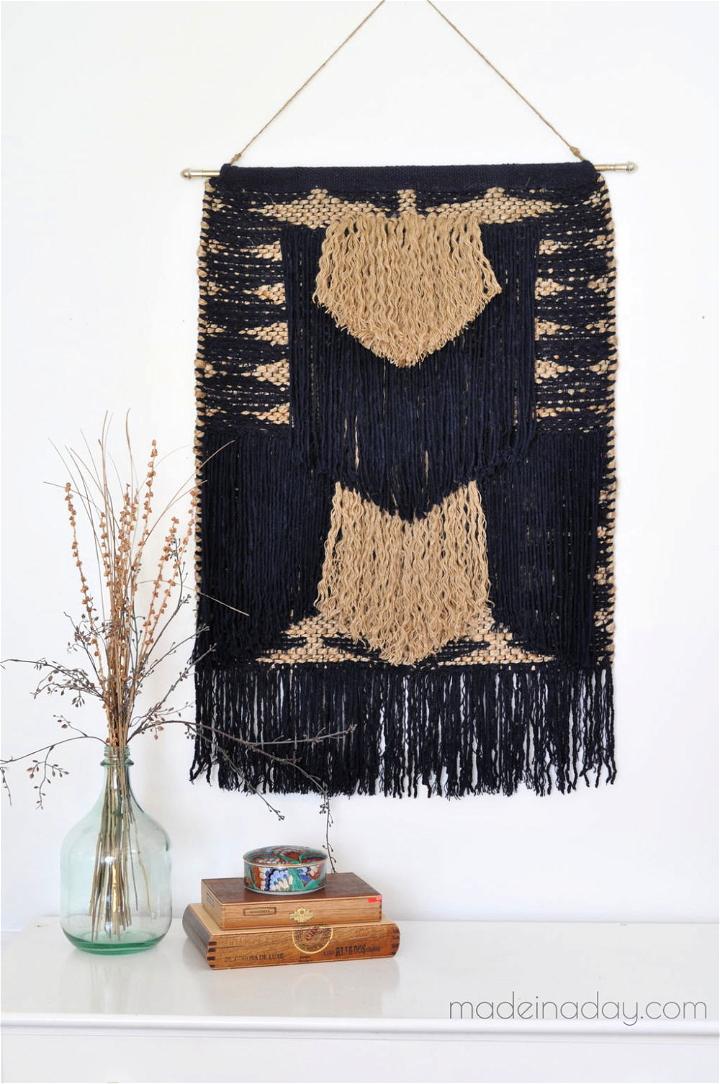
Transform your living space with a DIY woven wall hanging using a simple throw rug. Made in a Day offers a step-by-step guide that empowers you to create a boho-chic decor piece that infuses your room with personality and style. With clear instructions on how to unravel, knot, and secure your rug into a beautiful tapestry, this project is a delightful way to spend your crafting hours.
You’ll need a few supplies like a rug, yarn, rope, and a crochet hook, but the process is straightforward and yields impressive results. Hang your finished piece with pride, knowing you’ve crafted a unique wall hanging that elevates your home’s aesthetic.
6. Making a Wall Hanging Yarn Tapestry
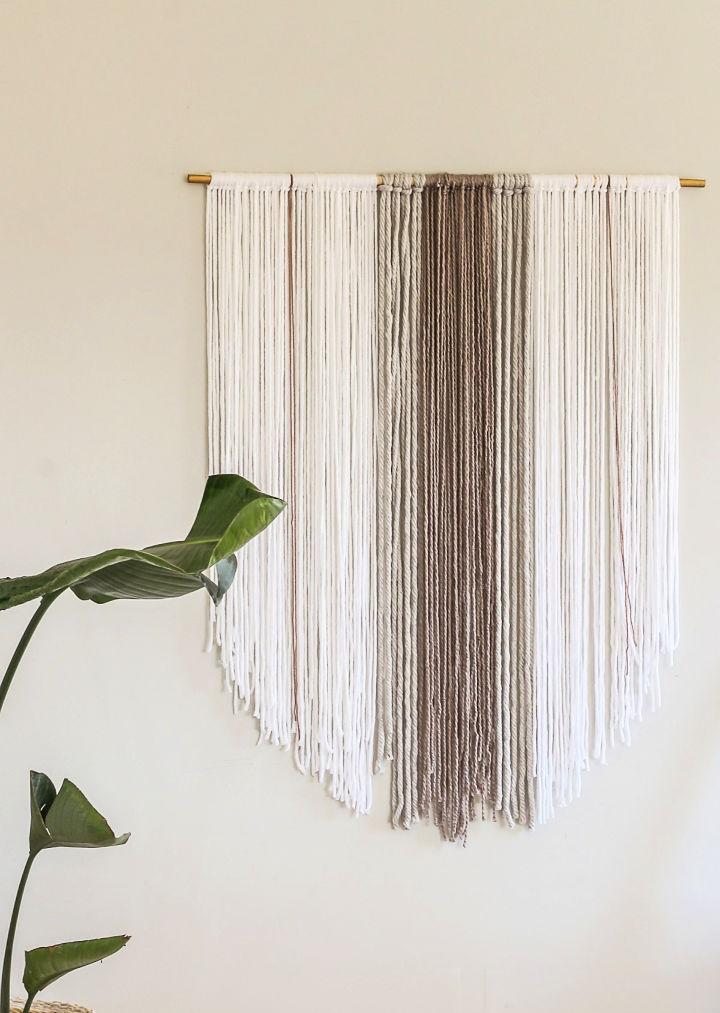
Dive into the world of DIY with Designing Vibes‘ Oversized Boho Tapestry Tutorial. Creating your own yarn wall hanging is not only budget-friendly but also an enjoyable crafting experience. With a clear and engaging guide, you’ll learn how to transform yarn and a dowel rod into a chic bohemian decor piece.
This tutorial breaks down the process into simple steps, from selecting materials to tying the final knot. No sewing skills? No problem. Grab your scissors, choose your yarn colors, and start crafting a beautiful tapestry that will add a personalized touch to any room.
7. DIY Wall Hanging Yarn Tapestry Tutorial
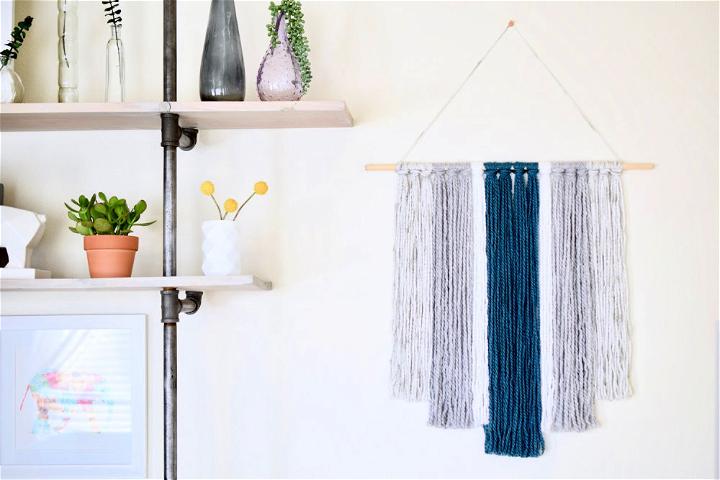
Make a charming yarn tapestry with ease using Mint & Pine Design’s DIY guide. Perfect for adding a touch of personality to any room, these tapestries are a trendy choice for wall art. With a straightforward approach, you’ll find the process of looping and trimming yarn both relaxing and rewarding. Gather your yarn, a wooden dowel, and scissors, and let your creativity flow as you craft a unique piece. This guide is designed to help crafters of all levels produce a beautiful yarn tapestry that’s sure to impress.
8. Make Your Own Wall Hanging Tapestry Using Mod Podge
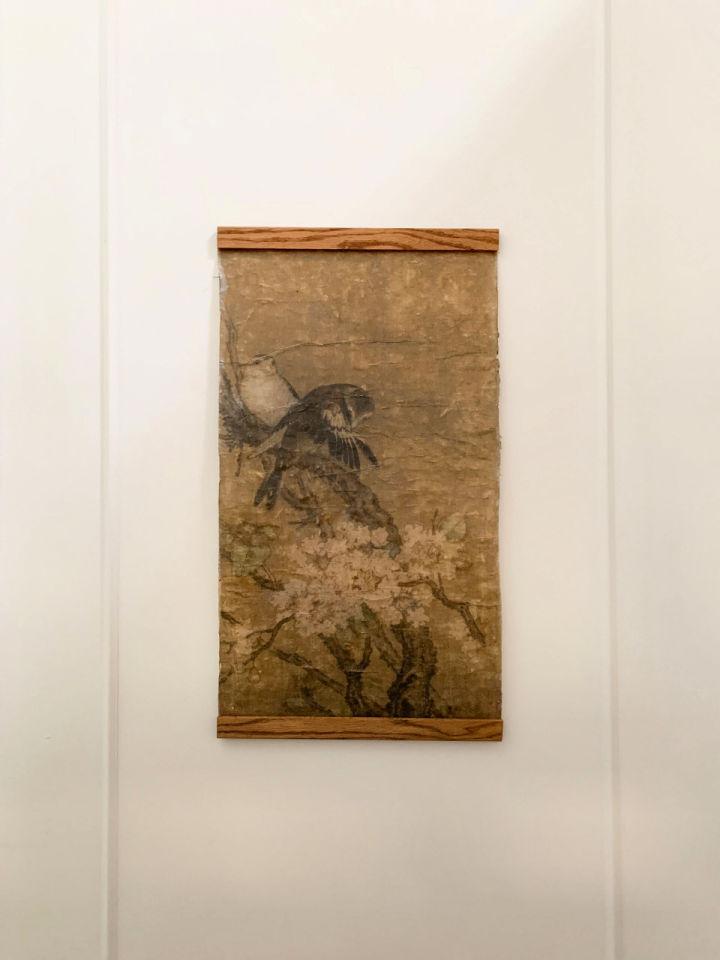
Transform your stairwell or any room with a personalized touch by creating a DIY Wall Tapestry using Mod Podge. Erin Zubot Design guides you through an easy-to-follow process that starts with selecting public domain art and printing it as an engineering print. With simple materials like white fabric, Mod Podge, and a frame or wooden dowel, you can craft a unique piece of wall art tailored to fit any space.
This project is not only budget-friendly but also allows for creative expression, resulting in a one-of-a-kind tapestry that adds charm and character to your home. Dive into this DIY adventure and elevate your decor with a handmade masterpiece that reflects your style.
9. Turn a Rug Into a Wall Art Tapestry
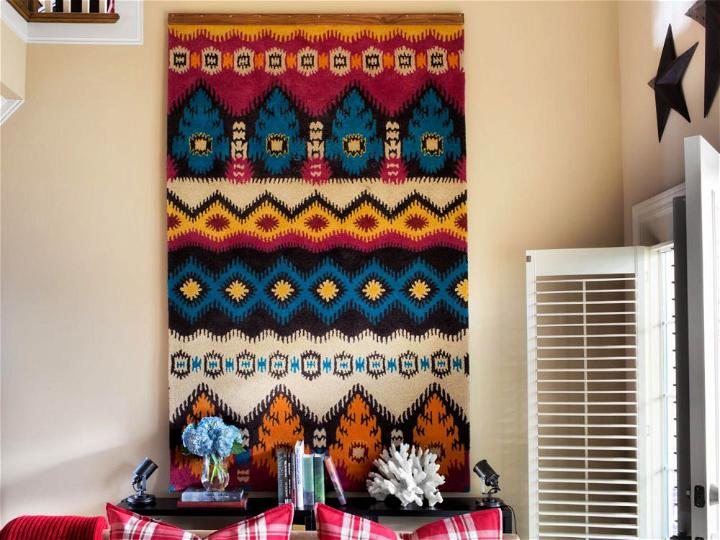
Transform your cherished rug into a unique wall tapestry with this simple DIY guide from HGTV. With just some basic lumber and a few tools, you can showcase your rug as a stunning piece of handmade art. Begin by brewing tea to age your printable artwork, giving it a vintage look.
Create a faux rust effect using common spices and decoupage glue for an authentic touch. Finally, drill, paint, and hang your creation with a homemade twine hanger. This project not only adds a personalized, moody vibe to your space but also repurposes materials creatively. Follow these steps to elevate your home decor with a touch of handcrafted charm.
10. Colorful DIY Fabric Wall Hanging Tapestry
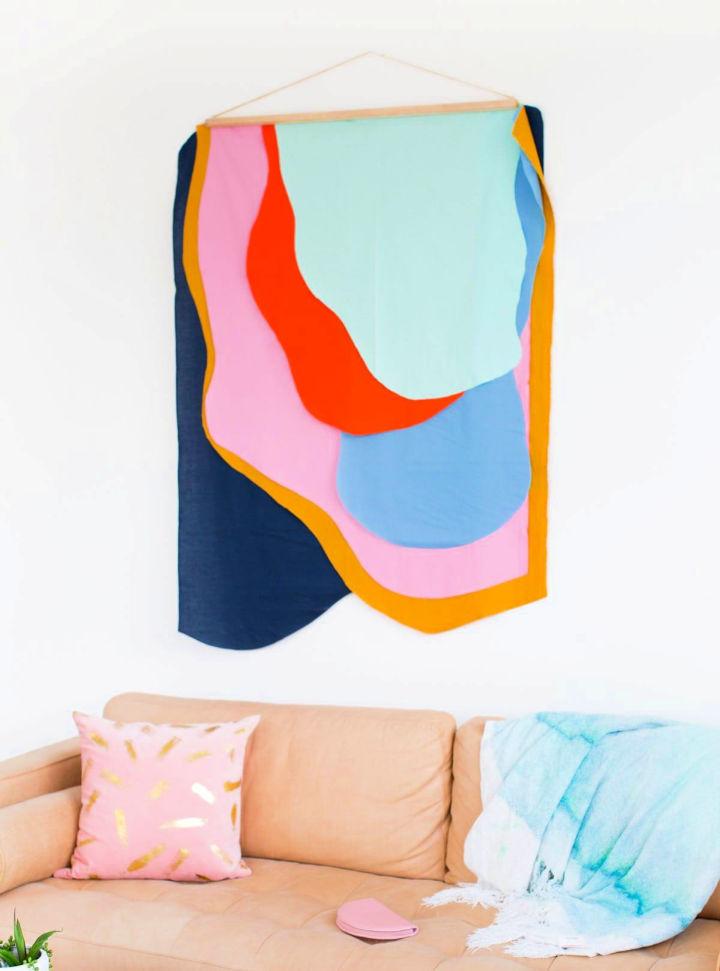
Make a vibrant statement in your home with a DIY Fabric Wall Hanging that’s simple to craft and stunning to display. Sugar & Cloth presents an engaging guide for those eager to add a personalized touch to their space. This project is budget-friendly and perfect for adding a splash of color and texture to your walls.
With easy-to-follow instructions, you’ll layer cotton fabrics, cut abstract shapes, and secure them to a wooden dowel. In under an hour, you’ll transform your room with a unique piece of art that’s sure to draw compliments. No need for complex tools; a staple gun, fabric scissors, and some creativity are all you need. Hang it up without wall damage using removable tape, and enjoy your custom, eye-catching decor.
11. Make a Mudcloth Wall Hanging Tapestry
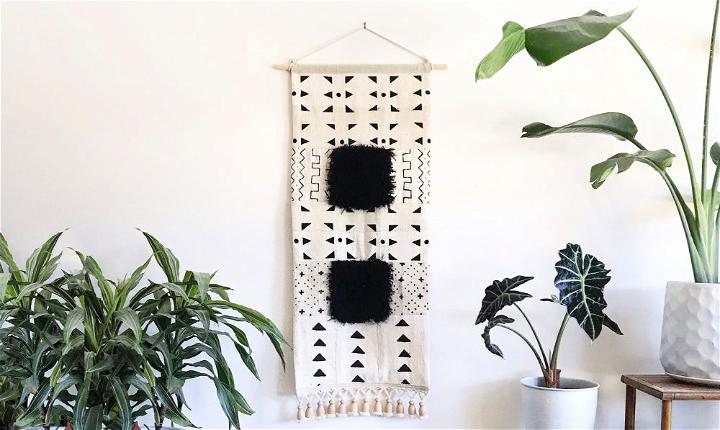
Elevate your home decor with a DIY mudcloth wall hanging, as outlined on Craftsy. This intermediate-level project transforms your walls with a blend of faux fur and authentic African mudcloth, or any fabric scraps you have. The guide is thorough, providing step-by-step instructions, from planning your design to the final hanging.
With dimensions adaptable to your space, and a focus on texture and pattern, you’ll create a unique piece that’s both a statement and a reflection of your personal style. Get ready to cut, sew, and assemble your way to a stunning textile masterpiece that’s sure to impress.
12. How to Make a Wall Hanging Tapestry Under $7
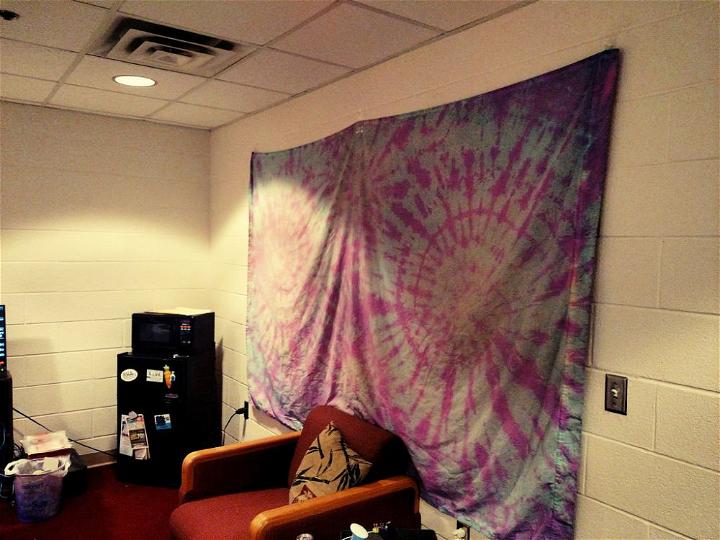
Make a stunning tapestry on a budget with this DIY guide from Instructables. Perfect for college dorms or adding a personal touch to any room, this project is not only affordable but also simple to follow. With a cost of just $7 and some creativity, you can transform a space with your own handmade piece. This tutorial provides step-by-step instructions to ensure your crafting success. Dive in and personalize your living area with a unique tapestry that reflects your style.
13. DIY Macrame Wall Hanging Tapestry
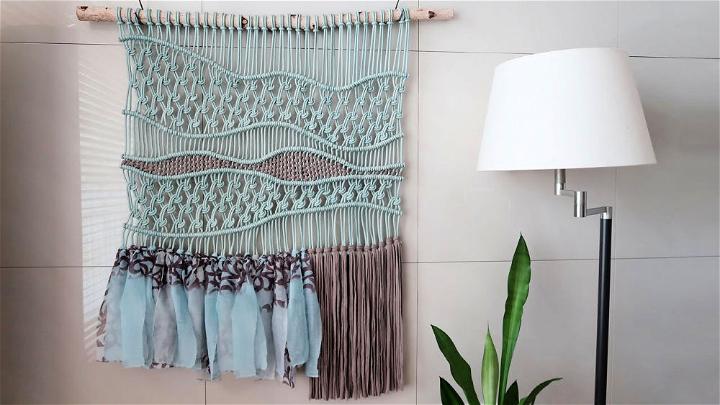
If crafting a unique piece of home decor excites you, exploring the art of macrame could be your next favorite hobby. YouTube offers a treasure trove of DIY tutorials, including the one featured here, which guides you through creating a stunning macrame tapestry wall art. This particular video, hosted by Made in May, provides step-by-step instructions on how to weave your very own macrame masterpiece, perfect for adding a touch of bohemian elegance to any room.
With clear, easy-to-follow guidance, you can transform simple knots into intricate patterns and textures that bring warmth and style to your living space. Ideal for those who enjoy hands-on projects, this tutorial will help you master the basics of macrame and inspire you to design your own woven wonders.
14. Beautiful Large-Scale Wall Hanging Tapestry

Are you ready to transform your living space with a touch of personal flair? Crafting a DIY large-scale wall tapestry is a creative and cost-effective way to make a statement in any room. Our easy-to-follow tutorial will guide you through the process of selecting the perfect fabric, courtesy of Fabric.com, and turning it into a stunning piece of wall art.
With a few simple tools like a staple gun and eye hooks, you’ll learn how to stretch and secure your chosen fabric onto a wooden frame for a professional-looking finish. Whether it’s to complement your home decor or to express your artistic side, this DIY project is both rewarding and accessible. Dive into our video on YouTube and let’s start making your space more you!
15. How Do You Make a Wall Hanging Tapestry
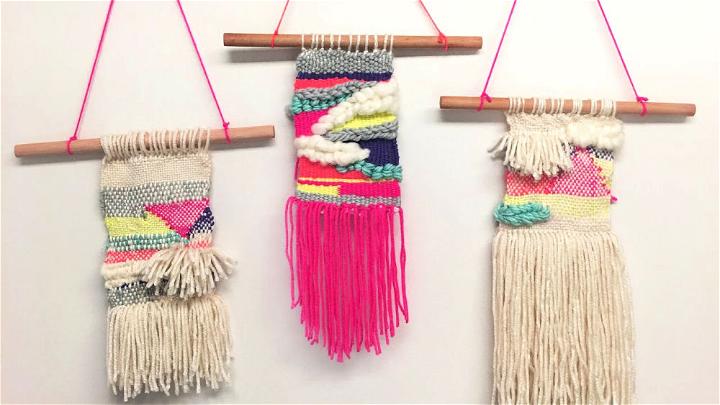
Craft a stunning, handmade Tissage Woven Wall Hanging with this easy-to-follow DIY guide! Begin by constructing a loom using a wooden frame, marking it, and adding nails or draping pins. The weaving starts by wrapping yarn around the pins, using a wooden dowel and a tapestry needle for intricate patterns.
The guide instructs on creating a firm base, adding fringe for a chic finish, and incorporating chunky yarn for texture. Finalize your creation by tying knots and securing it on a wooden stick or branch. Perfect for adding a personal touch to any space, this wall hanging is an elegant testament to your crafting skills.
Conclusion:
In conclusion, mastering how to make a tapestry with these 15 easy DIY tapestry ideas is both an enjoyable and rewarding endeavor. By gathering just a few materials and tapping into your creative spirit, you can bring personalized art into your space that speaks to your style and personality. From selecting your yarn to hanging your finished piece, every step in the process offers a chance to learn and grow in your tapestry-making skills. Whether it’s your first project or you’re adding yet another unique creation to your collection, the world of DIY tapestry making is vast and vibrant, waiting for you to weave your next masterpiece.
