Making a DIY wood headboard can transform your bedroom into a personalized haven. Our collection of 30 simple DIY wood headboard ideas caters to all skill levels, offering a range of styles from rustic herringbone patterns to modern storage solutions. With a focus on practicality and self-expression, these diy wood headboard ideas promise a rewarding experience while saving you money.
Looking to add a bespoke touch to your sleep sanctuary? Dive into our easy-to-follow diy wood headboard ideas and get ready to craft a stunning centerpiece for your bedroom. Each DIY wood headboard plan comes with detailed steps, ensuring that you’re equipped to build a headboard that reflects your unique taste. As you read on, discover the perfect project to enhance your bedroom’s decor and embark on a fulfilling DIY journey.
Why Build a DIY Wood Headboard?
Building a DIY wood headboard can be a transformative home improvement project that combines creativity, practicality, and personal expression. Here’s why you might consider taking on such a project:
- Personalized Touch: Infuse your personality into your bedroom with a DIY headboard design that matches your taste and decor, whether rustic, modern, or eclectic.
- Cost-Effectiveness: Save money by using repurposed or affordable materials to create a stunning headboard without breaking the bank.
- Functionality: Enhance the usability of your space with a DIY headboard that includes built-in storage, shelves, or even lighting.
- Skill Building: Develop or refine woodworking skills while learning about tools, materials, and construction techniques.
- Quality Time: Engage in a fun activity with a partner, family member, or friend while accomplishing a productive task.
- Satisfaction: Experience a unique sense of pride and satisfaction by building something with your own hands. Enjoy the tangible result every time you enter the room.
Remember to plan, gather the right tools and materials, and follow safety precautions when undertaking a DIY wood headboard project.
Materials and Tools You’ll Need for DIY Wood Headboard Projects
Creating a DIY wood headboard for your bedroom is not just a way to save money but also an opportunity to add a personal touch to your space. To ensure you’re prepared for the project, here’s a helpful list of materials and tools you might need.
Materials:
- Wood: Depending on the design, you may need plywood, 2x4s, cedar boards, or reclaimed wood. Choose the type and quantity based on your headboard design.
- Stain or Paint: Select a stain or paint color that complements your bedroom’s decor.
- Wood Finish: A polycrylic or polyurethane finish will protect the wood and give it a polished look.
- Adhesive: Wood glue or construction adhesive is essential for securing pieces together.
- Fasteners: Screws, nails, or bolts will be necessary for assembling the headboard. The size and type depend on the design.
- Upholstery Materials: If you’re adding padding, you’ll need foam, batting, fabric, and possibly buttons for tufting.
- Mounting Hardware: Depending on your headboard design, you may need a French cleat, flush mounts, or brackets to attach it to the wall or bed frame.
Tools:
- Measuring Tape: For precise measurements of wood and fabrics.
- Saw: A hand saw, circular saw, miter saw, or table saw will be needed to cut wood to size.
- Drill: A power drill is necessary for making holes and driving screws.
- Sander or Sandpaper: To smooth the wood surfaces before staining or painting.
- Paintbrushes or Rollers: For applying stain, paint, and finish.
- Staple Gun: Useful for attaching fabric to upholstered headboards.
- Screwdriver or Drill Bits: To secure screws or bolts.
Remember to always prioritize safety when working on DIY projects. Wear protective eyewear, gloves, and masks as needed. Keep your workspace clean and organized to avoid accidents. With the right materials and tools at hand, you’ll be ready to create a beautiful and functional wood headboard that you can be proud of.
How to Build Your Own Wood Headboard: A Beginner’s Guide
Building a wood headboard from scratch can be a fulfilling project that adds a personal touch and rustic charm to your bedroom. Here’s a simplified step-by-step guide to help you get started, regardless of your woodworking experience.
Step 1: Gather Your Materials and Tools
Before diving into the project, make sure you have all the necessary materials and tools:
- Wood: Plywood or planks, depending on your preferred design
- Stain or Paint: Choose a color that matches your bedroom decor
- Wood Finish: A sealant like polyurethane for protection
- Adhesive: Wood glue for joining pieces
- Fasteners: Screws, nails, or bolts for assembly
- Measuring Tape, Saw, Drill, Sander: Essential tools for measuring, cutting, and smoothing wood
- Safety Gear: Gloves, goggles, and a mask for protection
Step 2: Plan Your Design
Sketch out your headboard design, keeping in mind the size of your bed and the style you’re aiming for. Whether you want a classic panel headboard or a more intricate herringbone pattern, planning is key.
Step 3: Measure and Cut the Wood
Using your measuring tape, carefully measure and mark where you need to cut. For a seamless process, ensure all measurements are precise. Then, using the appropriate saw, cut the wood according to your design.
Step 4: Sand and Finish the Wood
Sand the wood to remove any rough edges and create a smooth surface. Once sanded, apply your chosen stain or paint, and finish with a sealant to protect the wood.
Step 5: Assemble the Headboard
Lay out your wood pieces as per your design. Use wood glue and fasteners to join the pieces together. If your design includes additional features like built-in shelves or upholstery, add these elements before attaching the headboard to the frame or wall.
Step 6: Mount the Headboard
Decide how you’d like to mount your headboard. Options include attaching it directly to the bed frame or mounting it on the wall using brackets or a French cleat system.
Tips for Success:
- Take Your Time: Don’t rush the process. Woodworking requires patience and attention to detail.
- Safety First: Always wear protective gear and follow safety guidelines when using tools.
- Ask for Help: If you’re unsure about a step, don’t hesitate to seek advice from more experienced woodworkers or DIY forums.
- Customize: Feel free to add personal touches, like a unique stain color or decorative trim, to make your headboard truly one-of-a-kind.
Remember, the goal is not only to create a beautiful headboard but also to enjoy the process of making something by hand for your home. With these steps, you’re well on your way to crafting a wood headboard that will be the centerpiece of your bedroom for years to come.
Frequently Asked Questions About Building a DIY Wood Headboard
Discover answers to common inquiries about building a wood headboard. Get expert insights and tips in this informative FAQ guide.
What materials do I need to build a wood headboard?
To build a wood headboard, you will need:
- Lumber (1x2s, 1x3s, 1x4s, 1x6s, and a 2×4), the quantity and lengths depend on the size of the bed.
- Finish nails (1 1/4 inch and 2 inch).
- Sandpaper (120 grit).
- Wood filler (for finishing touches).
- Tools for cutting wood and a hammer or a nail gun.
Can I build this headboard if I’ve never done a woodworking project before?
Yes, this project is beginner-friendly. You’ll just need to be able to make straight cuts and nail pieces together. Just follow the step-by-step instructions provided.
How can I attach the headboard to my bed frame?
To attach the headboard to a bed frame, drill holes into the front of the legs at the appropriate height and use bolts and nuts to secure it to the bed frame, ensuring it aligns with the mounting holes on the frame.
How long will it take to build this headboard?
The time it takes can vary, but many builders complete this project in a few hours. It’s perfect for a weekend or a day off.
What if my measurements are slightly off?
Measure twice, cut once is a good rule of thumb. However, for pieces like the top trim and top of the headboard, measure to fit based on your actual headboard dimensions. Always use the provided measurements as a guide, not absolute values.
Can I customize the headboard to fit a non-standard bed size?
Yes, you can adjust the measurements provided in the plans to fit a custom bed size. Just make sure to adjust all related dimensions accordingly.
What kind of wood should I use for this project?
Pine boards or furring strips are recommended for their affordability and ease of use. However, you can use any type of wood you prefer, keeping in mind different woods may require different tools and treatments.
Do I need to sand and finish the headboard?
Yes, for a smooth, professional look, sand the wood with 120 grit sandpaper and then apply your desired finish, whether it’s paint, stain, or sealant.
Is it possible to add decorative elements to the headboard?
Absolutely! Feel free to get creative by adding elements like trim details, carving, or even upholstering certain sections for a personalized touch.
Can I make the headboard without power tools?
Yes, this project can be done with a hand saw and a hammer if you do not have access to power tools. It might take a bit longer, but it is definitely achievable.
Can I make a rustic look without using pallet wood due to allergy concerns?
Yes! You can achieve a rustic look by purchasing new, untreated wood and using a mix of stains to give it a weathered appearance. This way, you avoid the potential allergens and contaminants found in pallet wood.
What materials do I need to build a rustic wooden
How do I ensure the headboard is securely attached and safe to use?
After constructing your headboard, make sure to:
- Use glue and pilot holes to prevent wood splitting when attaching parts.
- Drill through the posts and use bolts, nuts, and washers to secure the headboard to the bed frame.
- For extra stability, especially if the bed sees rough use, consider using L brackets to attach the headboard to wall studs.
What tools are essential for ensuring the headboard is squared and well-assembled?
A speed square is essential for ensuring your boards are square and aligned correctly during assembly. You’ll also need a drill for pilot holes and attaching parts, as well as finish nails and a hammer or nail gun for securing the boards.
Can I add a light fixture to the headboard?
Absolutely! To add a light fixture:
- Choose an outdoor light or a simple lamp fixture that suits your style.
- Buy a lamp cord with a plug on one end and bare wires on the other.
- Connect the lamp cord to the light with wire nuts and secure with electrical tape.
- Drill holes to mount the light and run the cord through the headboard for a seamless look.
Remember, for non-electrical box lights, you might need to improvise a mounting solution like attaching a piece of wood to the back of the headboard to hold the light fixture.
How can I achieve a nice rustic color on my headboard?
To stain your wood for a rustic color:
- Sand the wood thoroughly to prepare it for staining.
- Apply a coat of Rustoleum wood stain in Sunbleached, wiping it off quickly to create a grayish undertone.
- Follow with a coat of Minwax wood stain in English Chestnut, wipe it off and allow it to dry for a rich, rustic hue.
What is the best way to get rid of the stain smell before using the headboard?
After staining, let your headboard air out for a couple of days in a well-ventilated space to allow the odor to dissipate before bringing it inside.
How can I touch up any scrapes or scratches on the headboard after assembly?
For any minor damages:
- Use a small brush to apply a bit of the same stain you used originally.
- Allow it to dry completely before handling the headboard further.
Remember to always wear appropriate safety gear when working on DIY projects, and work on a stable, clean surface to ensure the best results.
DIY Wood Headboard Ideas
Explore creative and budget-friendly ideas for DIY wood headboards. Get inspired to add a touch of rustic charm to your bedroom with these unique and stylish designs.
1. DIY Herringbone Wood Headboard
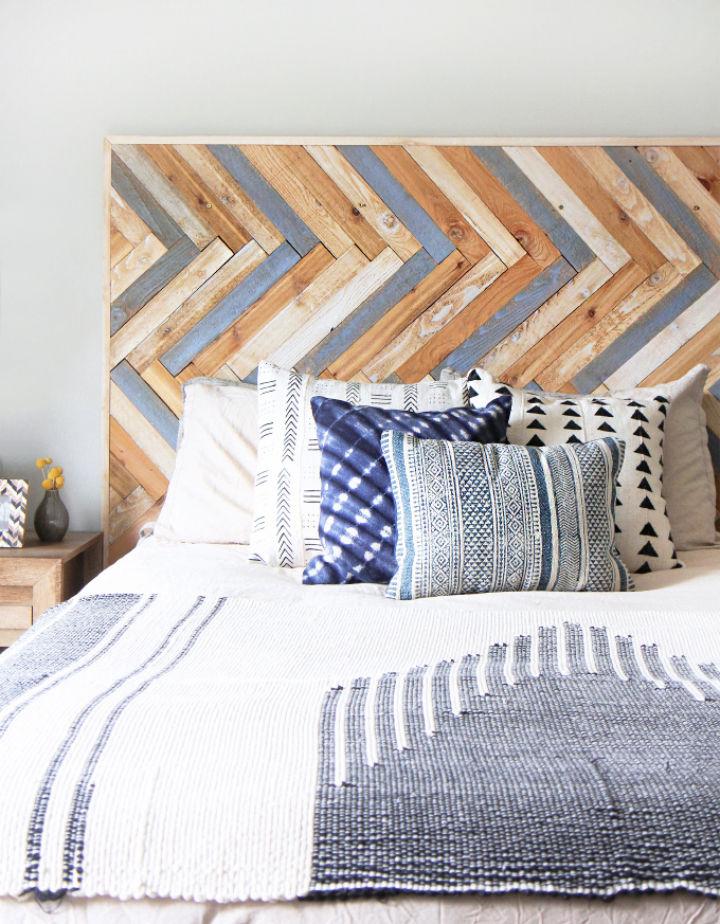
Make your custom herringbone wood headboard with ease by following the DIY guide on I SPY DIY. Jenni provides a step-by-step tutorial that transforms cedar boards and plywood into a stylish and personalized bedroom focal point. With an investment of $150 and a timeframe of about 5 hours spread over two days, you can bring this eye-catching design to life.
Jenni’s instructions are clear, and the process is simplified to ensure a fun and rewarding crafting experience. Remember to apply a polycrylic finish to highlight the natural beauty of the wood. Get ready to upgrade your bedroom decor with a unique headboard that’s sure to impress.
2. Colorful and Rustic Plank Headboard Wall
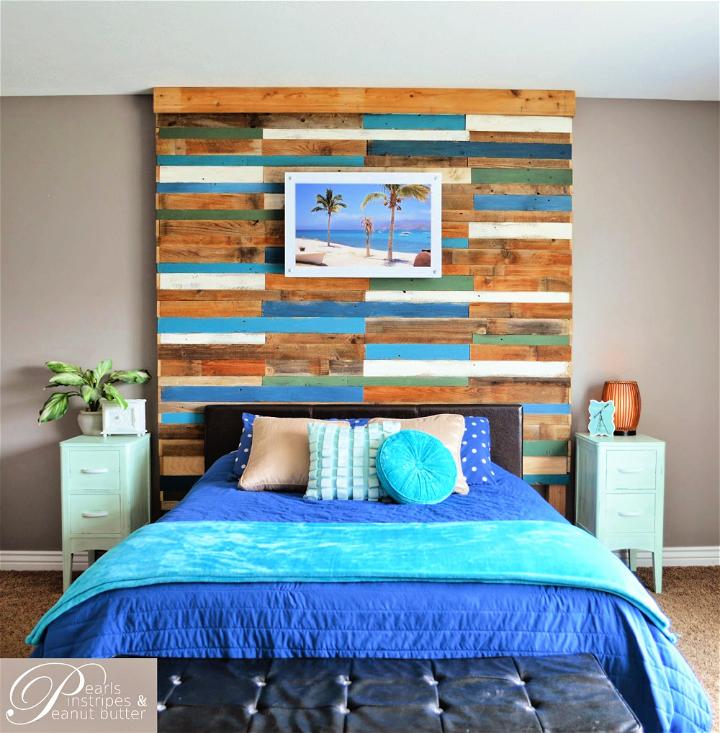
Transform your bedroom into a coastal retreat with a rustic wood plank headboard wall, as shared by Kristianne from Pearls Pinstripes and Peanut Butter on Remodelaholic. This DIY project combines the charm of an accent wall with the practicality of a headboard, offering a step-by-step guide to infuse color and personality into your sleeping space.
Discover how to repurpose wood planks and make a unique, eye-catching feature that’s budget-friendly and tailored to your style. With a mix of natural stains and vibrant paint hues, you can craft a beautiful backdrop that serves as the centerpiece of your room. Read on for the full tutorial and learn how to elevate your bedroom’s decor with this creative and engaging project.
3. How to Build a Wood Headboard
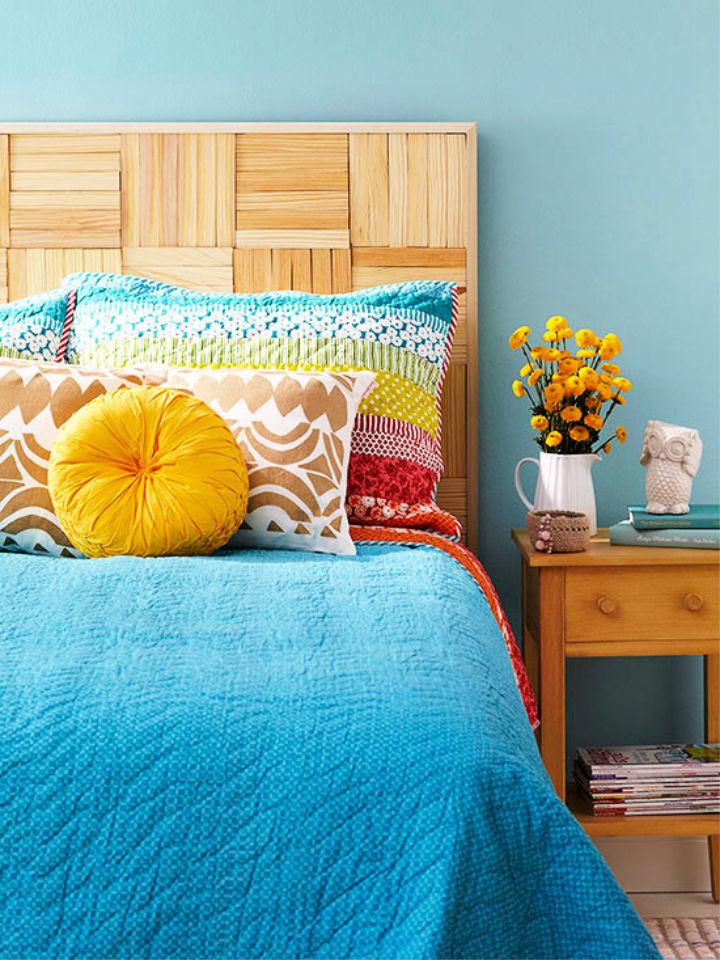
Transform your bedroom with a custom-made wood block headboard that not only enhances the room’s aesthetic but also showcases your DIY prowess. Follow Better Homes & Gardens‘ simple guide to make a stunning headboard using cedar posts, a chop saw, and a few other supplies.
Sand and stain your wood slices for a polished look, then arrange them on an MDF backing for a unique pattern that captures attention. Secure the slices with adhesive, attach a metal cleat for easy hanging, and enjoy the fruits of your labor as you revamp your bedroom without overspending. With these straightforward steps, crafting an eye-catching headboard is within reach, adding a personal touch to your home decor.
4. Build a Wooden Storage Headboard
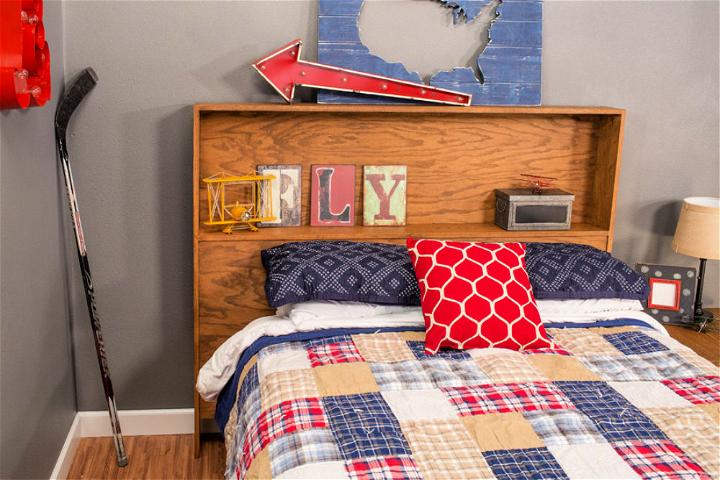
Elevate your bedroom with the Kreg Tool‘s storage headboard, a stylish and functional addition that keeps essentials within arm’s reach. Comprising only seven parts, this headboard is simple to build, requiring just a few basic tools. With options for a traditional or contemporary finish, based on your wood choice and finish application, this headboard seamlessly blends with any decor.
Follow our step-by-step guide to cut, assemble, and finish the pieces for a custom headboard that not only supports your bedtime reads but also adds a touch of sophistication to your space. Once complete, easily attach it to your bed frame and enjoy the convenience and improved aesthetics of your new, handcrafted furniture piece.
5. Beginner-Friendly DIY Wood Headboard
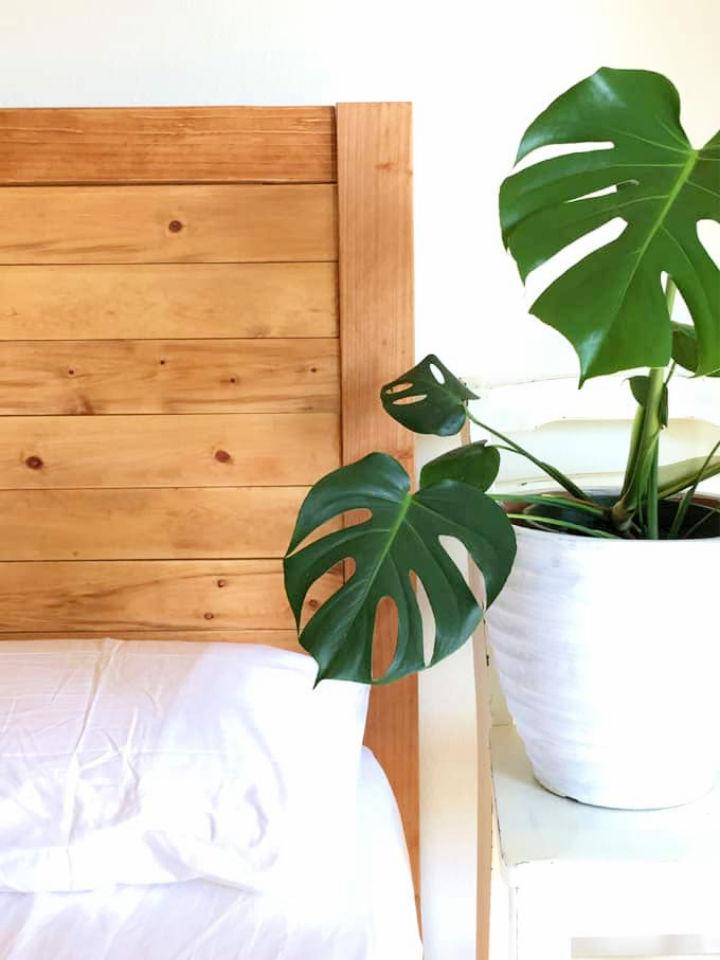
Ready to enhance your bedroom’s ambiance with a handmade touch? A Piece Of Rainbow offers a step-by-step guide on crafting a wood DIY headboard that suits twin, queen, and king-sized beds. The tutorial is designed for ease and is complete with a materials list and detailed plans, ensuring a smooth project flow.
From selecting the right wood to applying the perfect finish, the instructions are clear, thorough, and engaging. Emphasizing safety and simplicity, even those new to DIY can achieve a polished, comfortable, and durable headboard. Dive into this rewarding home decor project and give your bedroom a personal and stylish update.
6. Making a Wood Round Headboard
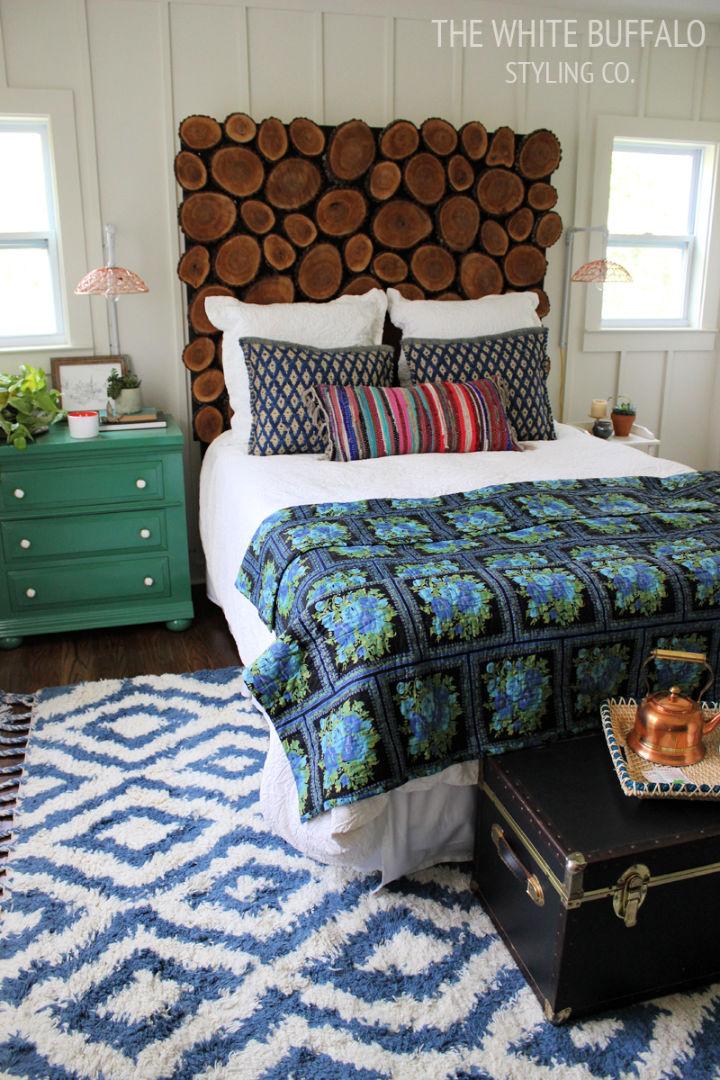
Ready to add a touch of rustic charm to your bedroom with a unique DIY headboard? At The White Buffalo Styling, you’ll find a step-by-step guide to building your very own wood round headboard. Drying the wood rounds thoroughly is crucial to prevent mold—a process that can take up to a month.
Once dry, assemble them on a plywood base, glue, and securely screw them in place for safety. Finish with a coat of polyurethane for a clean look. The result is a statement piece that effortlessly enhances the room’s aesthetic, providing both style and satisfaction from your crafting efforts.
7. Ana White Reclaimed Wood Headboard
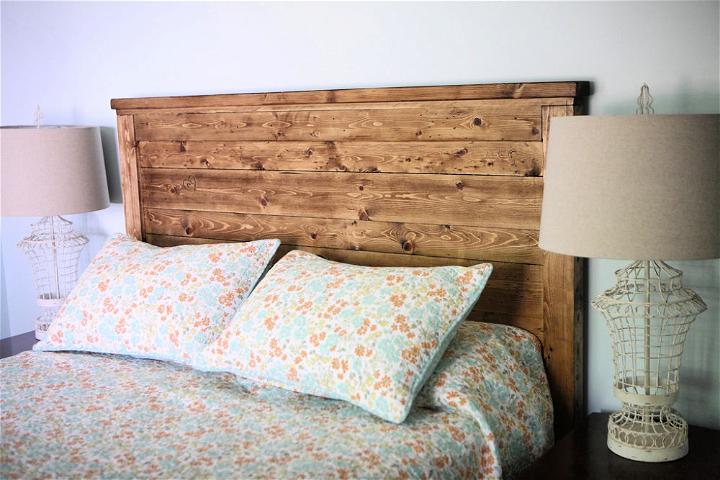
Make a cozy and personalized touch to your bedroom with the Easy Build Wood Headboard, designed to fit all mattress sizes. Ana-White.com provides free, straightforward plans for this beginner-friendly DIY project that can be executed with simple tools like a saw and nails.
Constructed with affordable pine or furring strips, this wood headboard introduces a natural texture to your room without breaking the bank. The guide is easy to follow, complete with a shopping list, cut list, and step-by-step instructions, ensuring that even those new to woodworking can achieve stunning results. Make this project your own with a customized stain or paint finish to match your decor.
8. DIY Barn Door Headboard
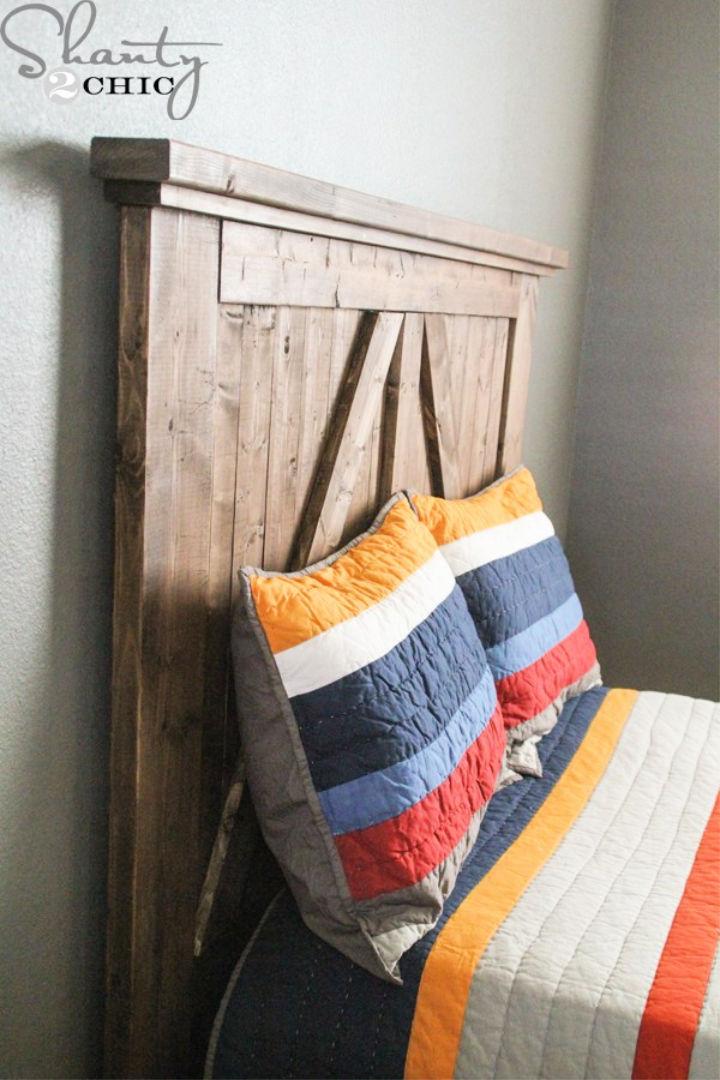
Dive into the rustic charm of building your own barn door headboard with a guide from Shanty 2 Chic. This DIY project is perfect for adding a personal touch to any bedroom, offering a blend of function and style. The step-by-step instructions are straightforward, ensuring a smooth crafting experience even for those new to woodworking.
For just $60 worth of materials and some basic tools, you can make a standout piece that brings character to your space. The tutorial includes everything from constructing the frame to the final staining, guaranteeing a rewarding build and a headboard you’ll be proud to display. With the option to modify measurements for various bed sizes, this headboard plan adapts to fit your unique needs, making it a versatile choice for your next home project.
9. Mid-Century Modern Wood Headboard Plans
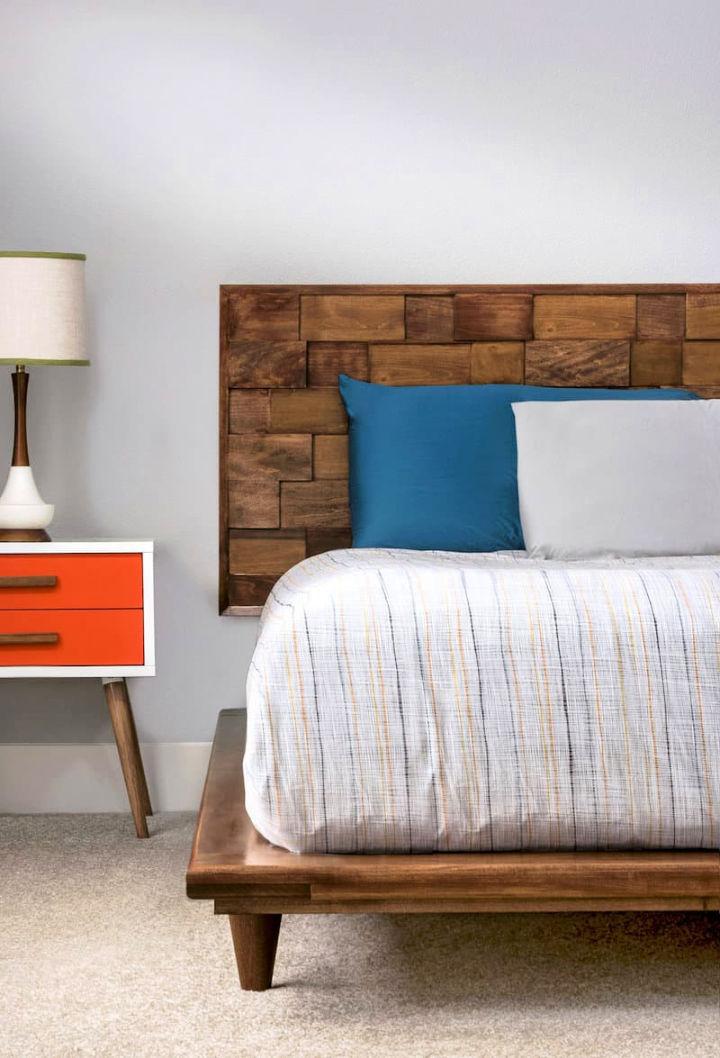
Embrace your inner woodworker with DIY Candy‘s tutorial on crafting a mid-century modern-inspired wood headboard. Perfect for intermediate DIYers, this step-by-step guide equips you with the know-how to use essential tools like a miter saw, table saw, and drill. By following this tutorial, you can make a stylish and high-quality king-sized headboard tailored to your personal decor.
Not only does this project allow for customization in color and size, but it also offers the satisfaction of building something truly unique for your home. With a focus on meticulous measuring and clean lines, patience is key, but the result is a bespoke piece that could easily become the centerpiece of your bedroom. Get ready to transform your space with a touch of mid-century flair.
10. How to Make a Reclaimed Wood Headboard
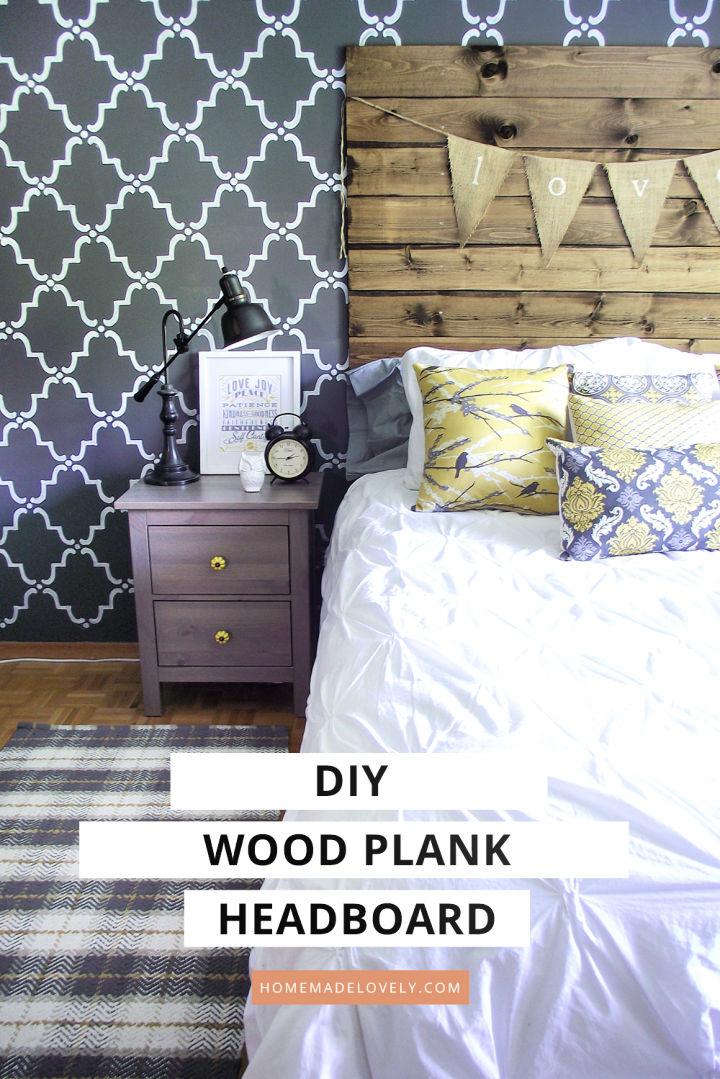
Craft a stylish and budget-friendly headboard for your bed with this easy DIY guide from Home Made Lovely. With less than $50 and some basic supplies like new wood, screws, and stain, you can make a rustic “reclaimed” wood headboard with minimal effort. The tutorial includes simple steps like sanding, staining, and attaching the wood to your wall for an impressive result. Perfect for adding a personal touch to your bedroom, this project is both instructive and rewarding, providing a cost-effective solution to enhance your space.
11. Rustic DIY Wood Headboard
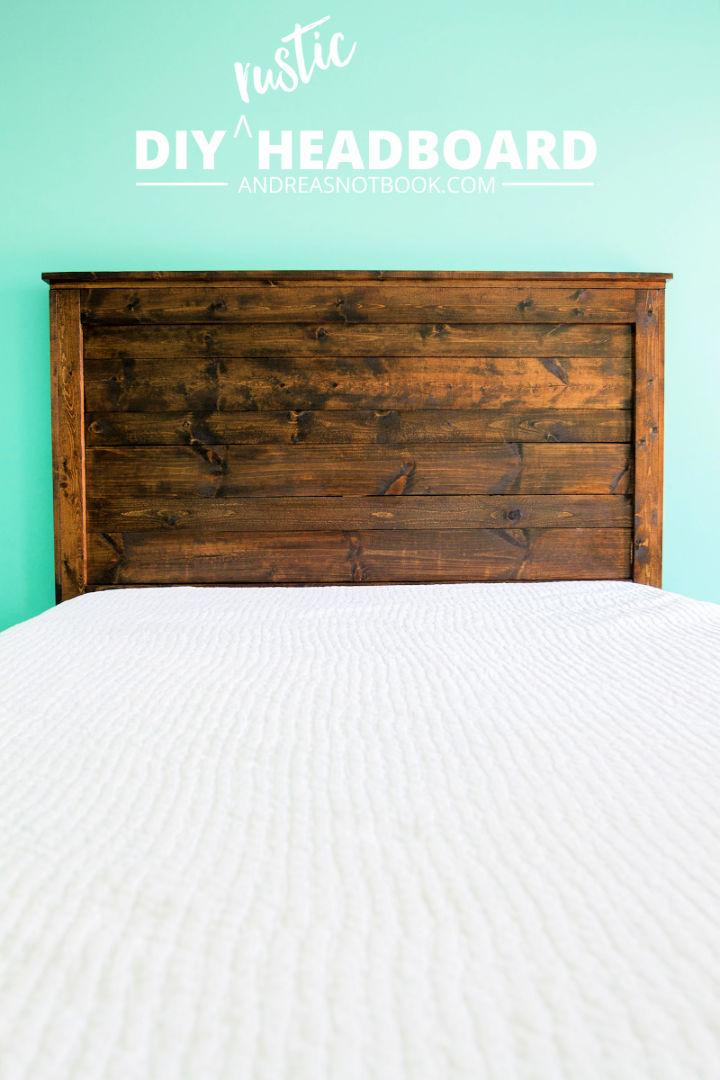
Transform your bedroom with a touch of rustic charm by crafting a DIY rustic headboard, as detailed on Andrea’s Notebook. No woodworking expertise is needed to make this eye-catching piece. Just choose straight wood planks, apply pre-stain wood conditioner, and stain with your preferred shade for a custom look.
For added durability, consider an extra brace at the back. Remember, staining can be odorous, so work in a ventilated area. This engaging, step-by-step guide ensures a rewarding project, resulting in a beautiful headboard that enhances your sleep sanctuary.
12. DIY Wood & Upholstered Headboard
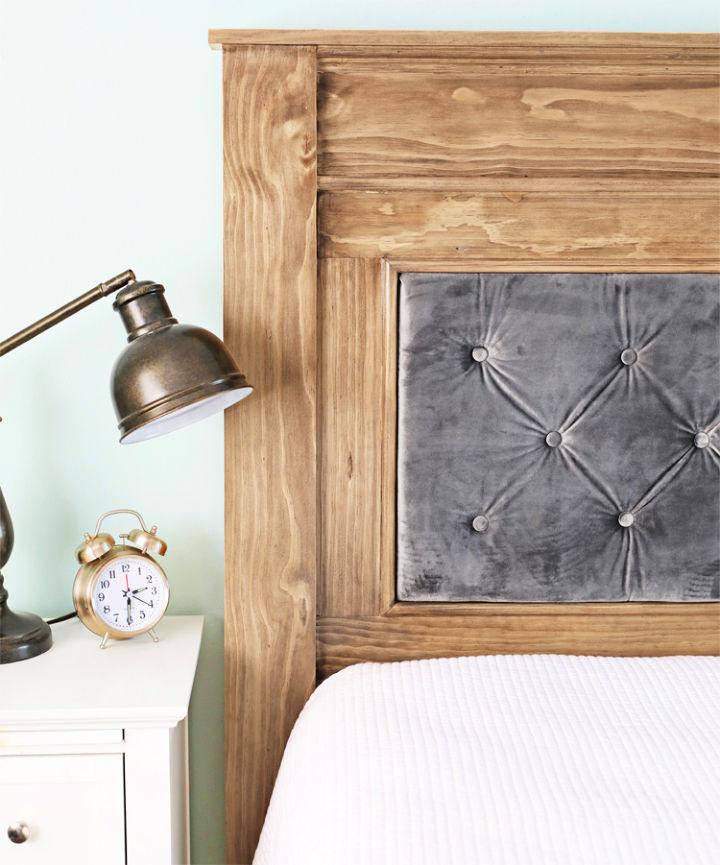
Elevate your bedroom’s ambiance with a custom-made wood and upholstered headboard that combines the elegance of plush velvet tufting with the warmth of wood. The Craft Patch shares a comprehensive guide, including a detailed video tutorial, to help you construct this queen-sized masterpiece.
With a materials list, tool requirements, and step-by-step instructions, you can make a statement piece that’s both luxurious and personal. Dive into this DIY project and enjoy the satisfaction of crafting a headboard that brings a touch of sophistication to your sleeping space.
13. Wooden Headboard With Stikwood
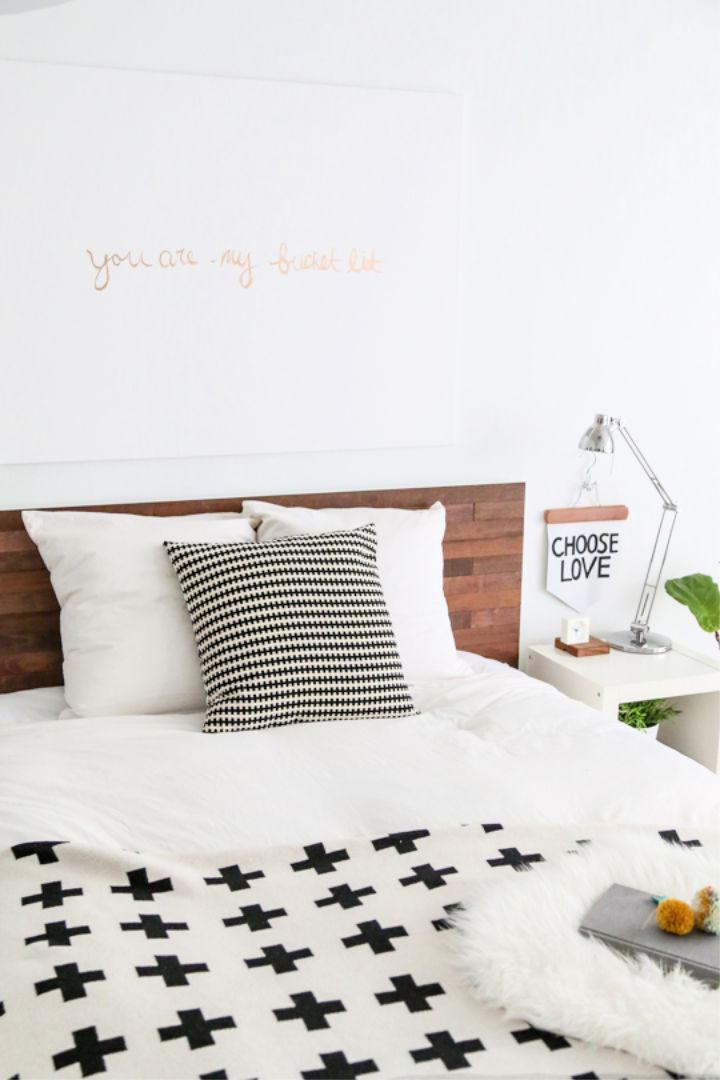
Revamp your bedroom aesthetic with a creative touch using the Ikea Headboard Hack from Sugar & Cloth. This DIY guide offers a step-by-step process to transform a simple bed frame into a chic, rustic focal point with Stikwood adhesive panels. No need for expert woodworking skills; the simplicity of Stikwood’s peel-and-stick application makes it ideal for a hassle-free project.
Spruce up your space while keeping costs manageable by following this instructive and engaging tutorial. Not only will it elevate your room’s style, but it will also give you the satisfaction of personalizing your living space with your own crafted headboard.
14. Make Your Own Chevron Headboard
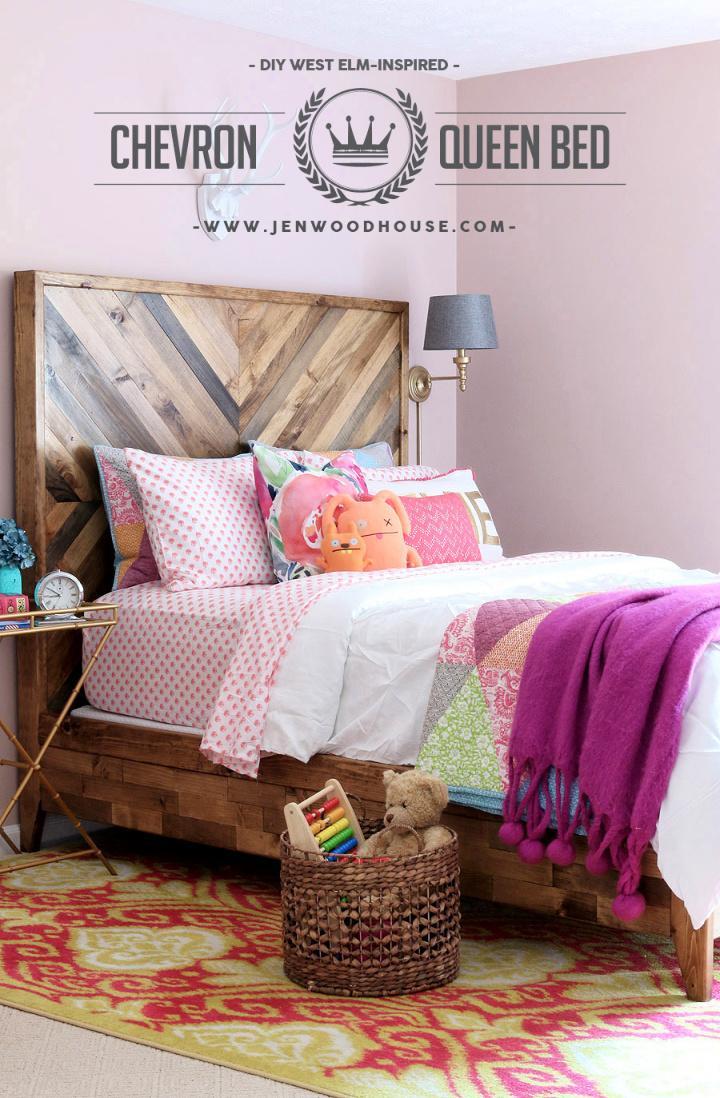
Transform your bedroom with a touch of rustic charm by building your own chevron reclaimed wood bed inspired by West Elm’s Alexa Bed. The House of Wood offers a detailed tutorial to help you make this beautiful piece for under $200, a fraction of the cost of the original.
Dive into the step-by-step guide that makes use of Purebond Hardwood Plywood and common tools like the Kreg Jig for pocket holes. Staining tips are included to achieve that reclaimed wood look, and metal bed rail brackets ensure easy assembly and disassembly, perfect for those who move often. Get ready to elevate your room’s aesthetic and enjoy the satisfaction of a DIY well done.
15. Cheap DIY Distressed Headboard
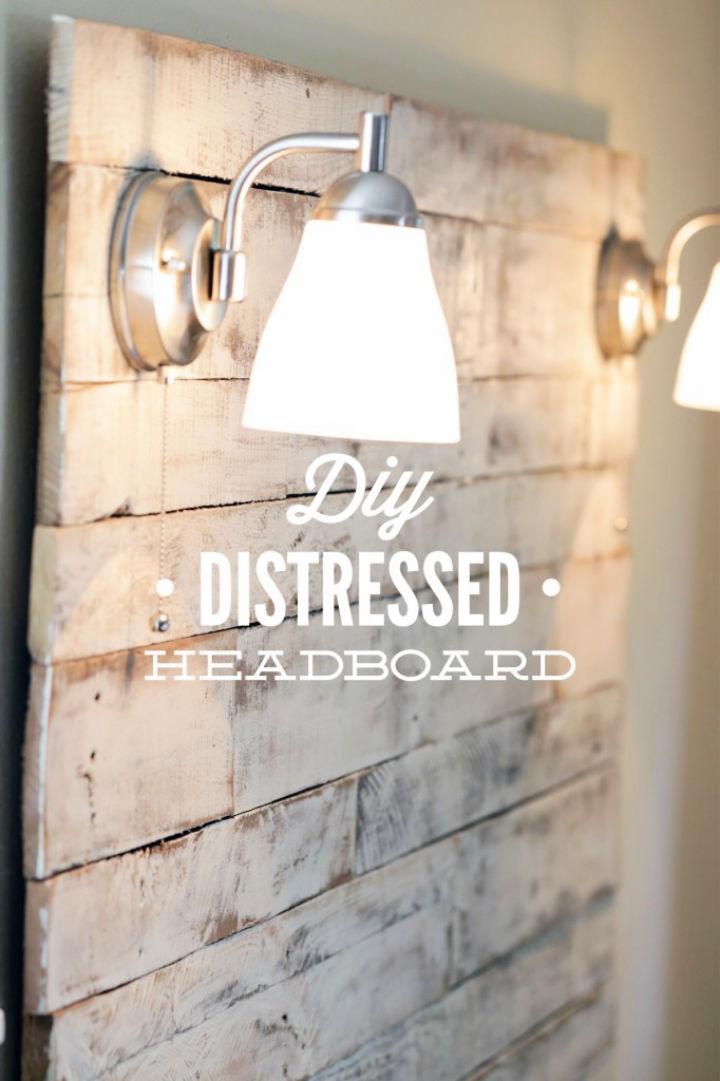
Transform your bedroom with a touch of rustic charm by crafting a DIY distressed headboard using Live Simply‘s easy-to-follow guide. With a few simple tools, salvaged wood pallets, and a sprinkle of creativity, you can make a stunning centerpiece for your sleep sanctuary.
This engaging tutorial walks you through each step—from sourcing materials to the final touches of adding soft lighting—ensuring a satisfying project outcome. Dive into this instructive DIY guide for a rewarding weekend project that will elevate your home decor and add a personalized, cozy feel to your space.
Don’t have money to throw toward buying a brand-new bed? Check out these 30 easy and free DIY platform bed plans and build one by yourself.
16. How to Build a Headboard at Home
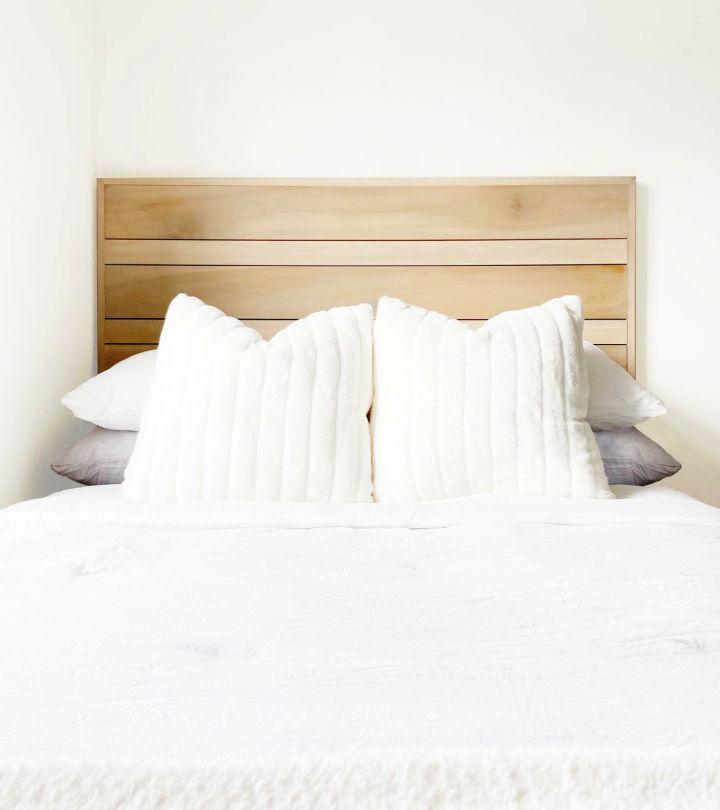
Crafting a chic DIY headboard can elevate your bedroom’s style and comfort, and with Plank and Pillow‘s straightforward tutorial, you can effortlessly make a custom piece that fits your space perfectly. With a comprehensive list of materials, tools, and clear, step-by-step instructions, this guide empowers you to construct a sturdy, eye-catching headboard.
Ideal for dorm rooms, apartments, or children’s bedrooms, this project is perfect for those eager to add a personal touch to their decor. Learn how to measure, cut, assemble, and finish a headboard with precision and ease. Embrace the satisfaction of a well-made, homemade addition to your home today!
17. Simple and Easy DIY Plywood Headboard
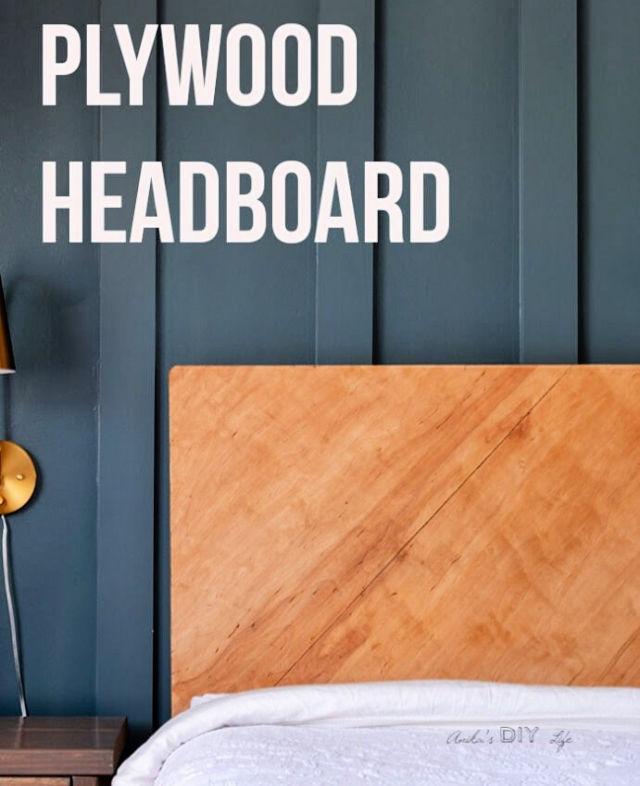
Make a cozy, personalized bedroom space with this DIY plywood headboard guide from Anika’s DIY Life. This project is perfect for a weekend activity, offering step-by-step instructions to transform a single sheet of plywood and some 2x4s into a stylish headboard. With options to stain and add finishing touches, you can customize the headboard to suit your decor.
The result is a piece that not only elevates your room’s aesthetic but also showcases your handiwork. Ideal for those who love to craft their home furnishings, this tutorial is designed to be straightforward and satisfying, even for those new to woodworking. Dive into this project and craft a headboard that’s both functional and a testament to your DIY skills.
18. Awesome DIY Light Up Headboard
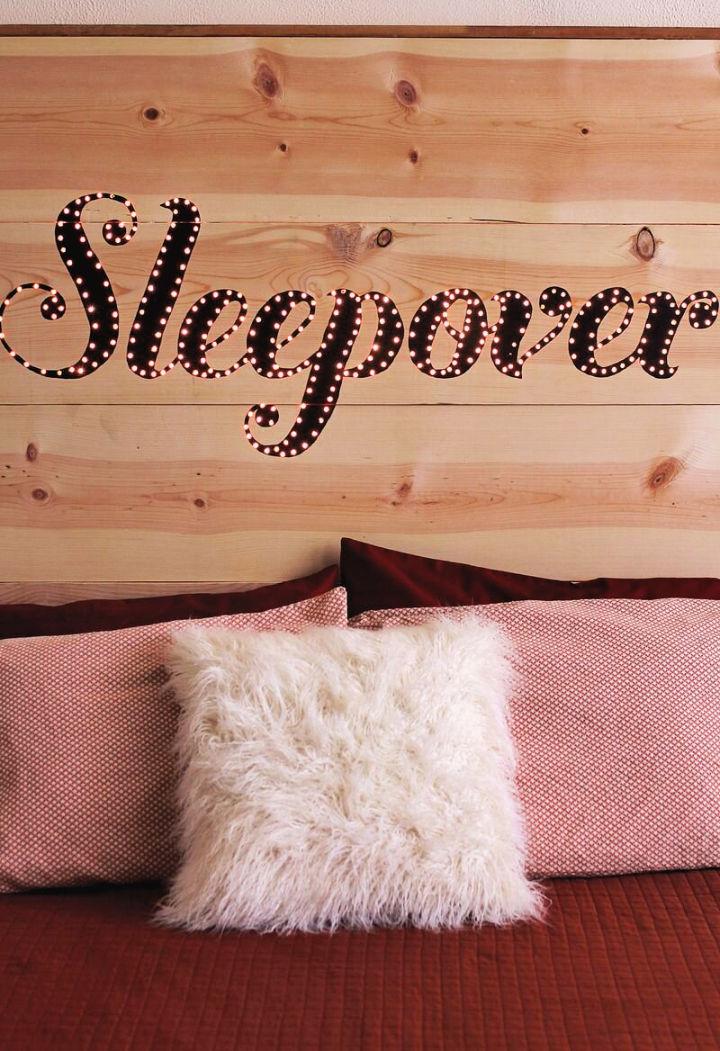
Elsie Larson from A Beautiful Mess unveils a creative DIY light-up headboard to transform any guest bedroom into a cozy retreat. The guide is clear and engaging, making the project approachable for anyone keen on adding a personal touch to their space. Tips include constructing a headboard to conceal electrical elements and using a projector for precise word placement.
After drilling holes and painting, over 300 Christmas lights are added for a charming glow. Safety is paramount, so adhering to guidelines provided by fire safety professionals is a must. The result is a charming and inviting bedroom highlight, sure to impress visitors.
19. Reclaimed Wood Headboard Ideas
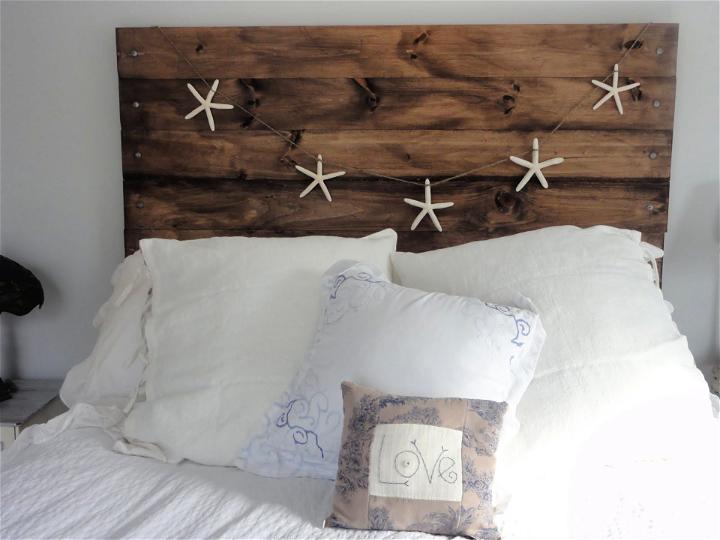
Transform your bedroom with a DIY ‘Reclaimed’ Wood Headboard, an inspiring project detailed on Finding Silver Pennies by Danielle Driscoll. This engaging guide provides a step-by-step approach to crafting a rustic and elegant headboard, ideal for adding a personal touch to your space. Learn how to select and prepare wood, measure and cut with precision, assemble with sturdy bolts, and finish with a rich stain.
With clear instructions and helpful tips, you’ll make a statement piece that brings warmth and charm to your home. This project is budget-friendly, too, with an approximate cost of $89, ensuring that style is accessible to all. Embrace this creative endeavor and enjoy the satisfaction of a beautiful, handcrafted headboard.
20. Simple Shutter Headboard Project
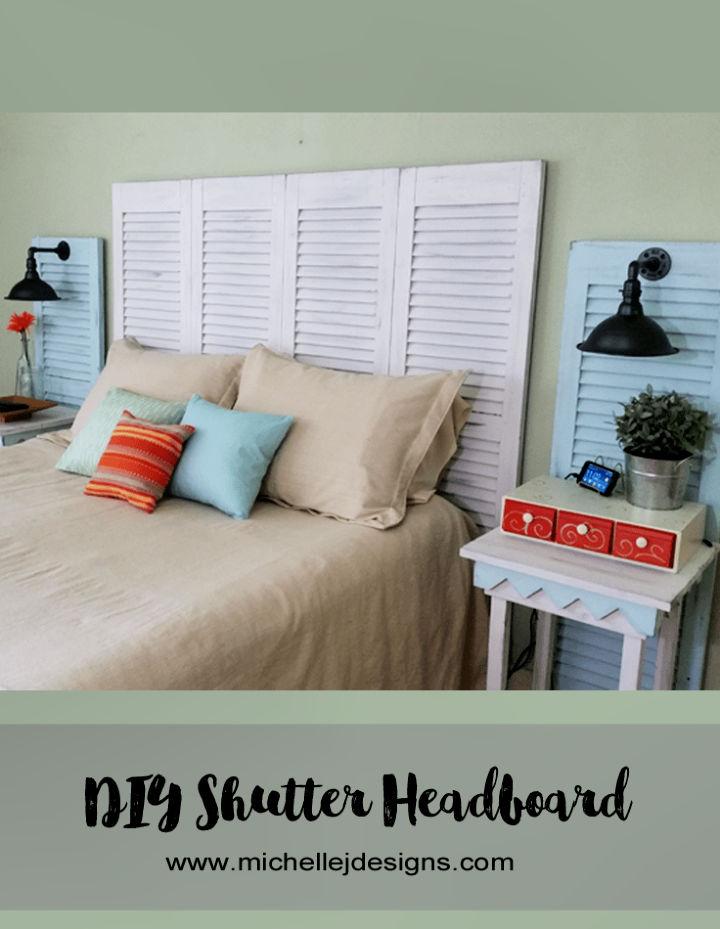
Discover how to transform old garage sale shutters into a stunning DIY shutter headboard with inspiration from Michelle James Designs. Michelle shares her journey of repurposing these finds into a chic addition to the bedroom, demonstrating a smart way to upcycle with style.
She provides a step-by-step guide on cleaning, priming, and painting shutters using Country Chic Paint, a VOC-free product perfect for eco-friendly DIYers. Her tips on using a paint sprayer to save time and achieve a smooth finish, along with distressing techniques for a rustic charm, are invaluable. If you’re looking to give your space a personalized touch, Michelle’s project is an excellent example of how creativity and a little paint can go a long way in home decor.
21. DIY Geometric Wood Headboard
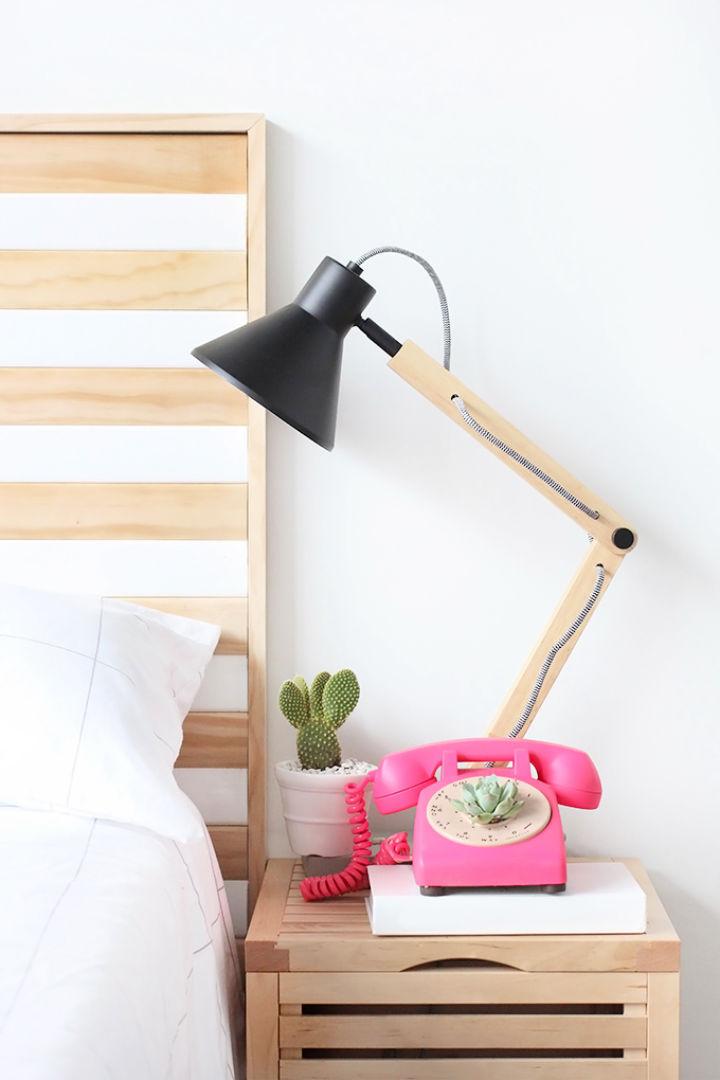
Transform your bedroom with a touch of DIY flair by building a geometric wood headboard, as shown on I SPY DIY. Perfect for adding a personalized, stylish element to your sleep space, this project is a fantastic weekend endeavor for those who enjoy woodworking. With a clear list of supplies, including plywood, wood glue, a miter saw, and casing, you’ll follow straightforward steps to craft an eye-catching headboard.
The pattern, inspired by a coffee table design, involves cutting and assembling wood pieces into a striking geometric pattern. Once complete, secure your handcrafted masterpiece to the wall behind your bed to refresh your room’s ambiance. It’s a rewarding project that not only elevates your decor but also instills a sense of pride in your handiwork.
22. Building a Pallet Wood Headboard
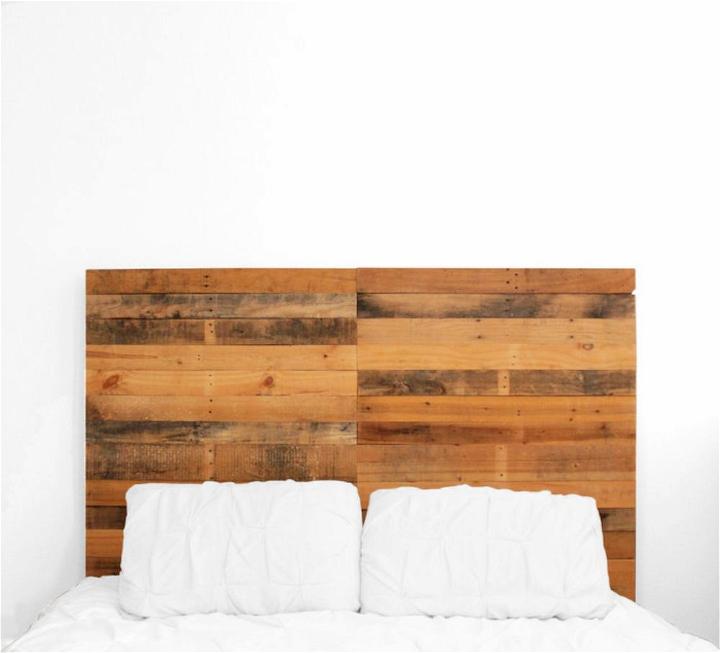
Building a pallet wood headboard can infuse your bedroom with a rustic and personalized charm. Instructables presents a thorough guide to crafting your own headboard from repurposed pallet wood, ensuring you have a unique piece that enhances your space.
With detailed instructions, from material gathering to final assembly, this DIY project is accessible and rewarding. Tips on selecting heat-treated pallets for safety and comfort are provided, along with a comprehensive list of tools and materials. Engage in this creative venture and add a touch of handcrafted warmth to your bedroom decor.
23. Pallet Wood Herringbone Headboard
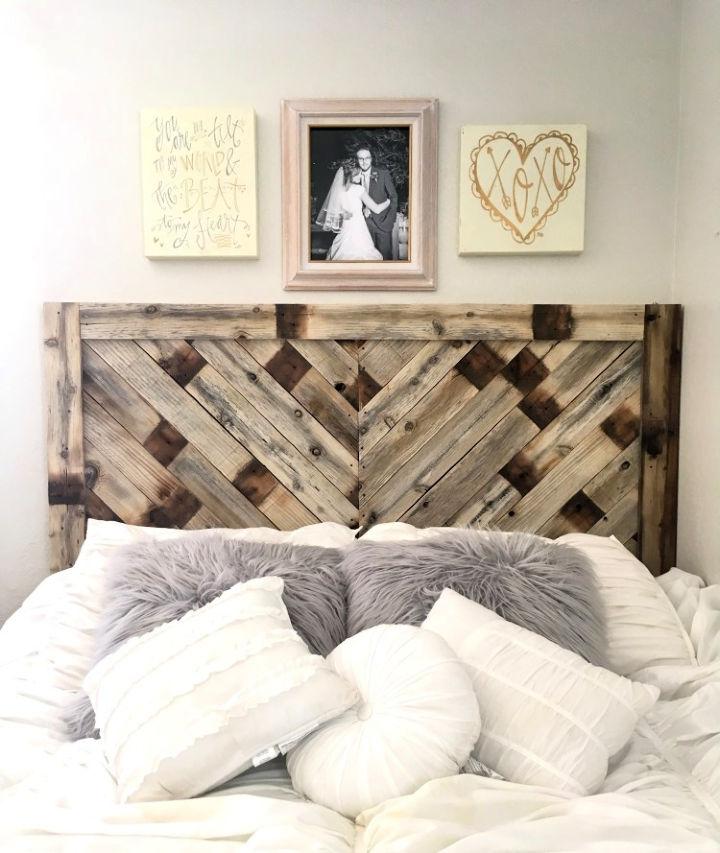
Transform your bedroom with a touch of rustic charm by making a pallet wood herringbone headboard, as shown by Six Clever Sisters. Abby Robinson guides you through an easy-to-follow afternoon project that yields stunning results, appearing as though it took weeks to complete.
With reclaimed cedar fence wood, you can craft a headboard that not only adds warmth and character to your space but also speaks to your eco-friendly spirit. Step-by-step instructions will have you cutting, arranging, and securing wood in a herringbone pattern, framing, and finishing with a protective coat for a durable and stylish addition to your bedroom decor. Get inspired and personalize your sleeping quarters with a unique, handcrafted headboard.
24. DIY Reclaimed Wood Headboard
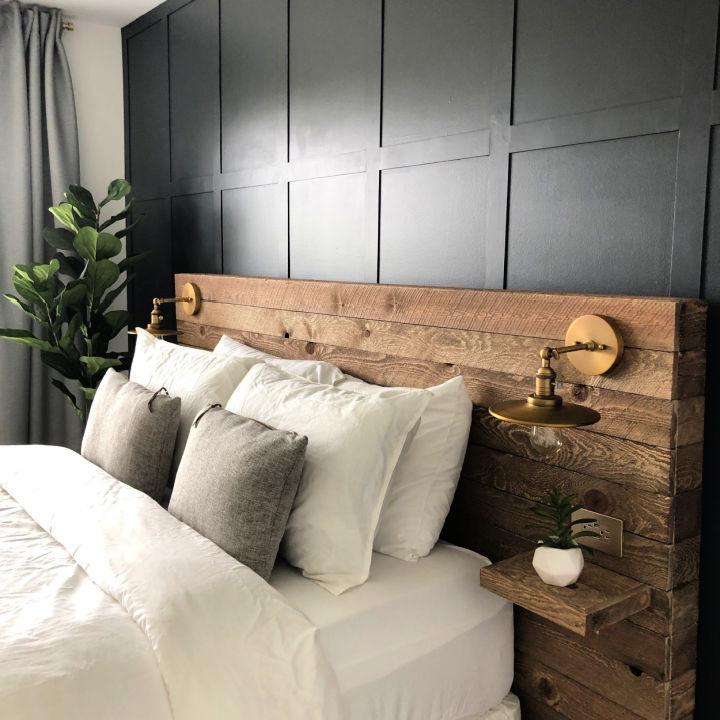
Make a stunning headboard using reclaimed wood with Colors and Craft‘s DIY guide. Sarah shares her innovative project, blending rustic charm with functionality, by incorporating a built-in lamp, outlet, and shelf into the headboard design. Her process began with constructing a simple frame and then skillfully attaching the wood pieces.
Although the electrical additions required a handoff to her husband, the result is a bespoke piece that adds warmth and convenience to any bedroom. Learn how to transform your space with this unique and practical headboard creation that can elevate your room’s aesthetic while serving as a smart space-saver.
25. DIY Planked Headboard
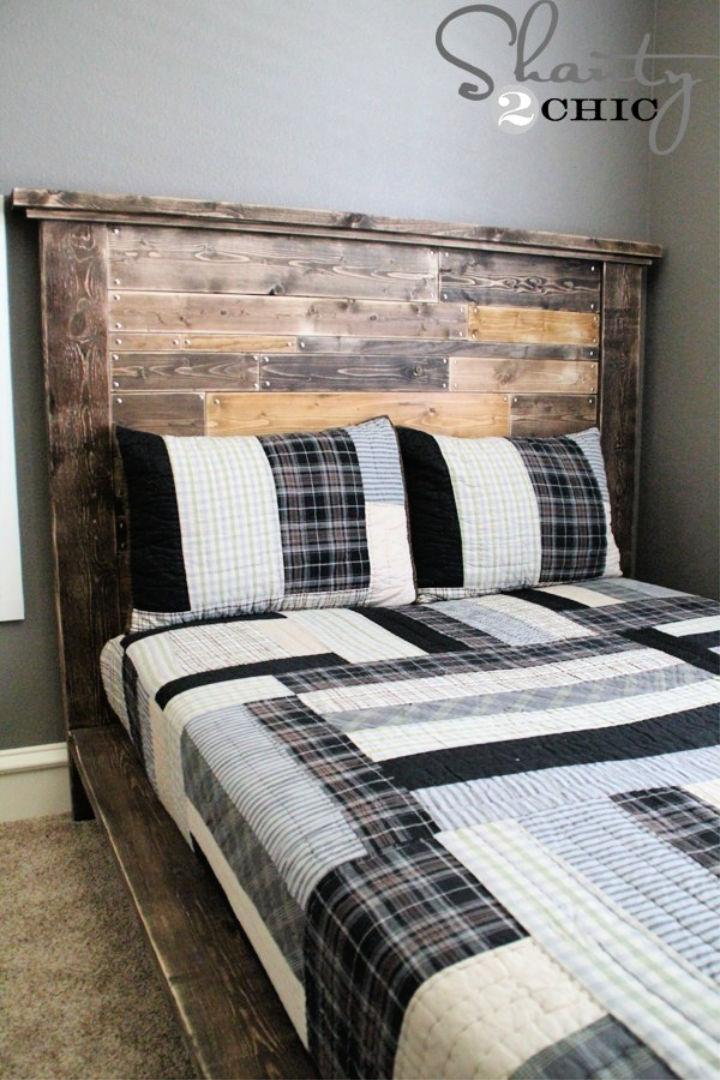
Get inspired to elevate your bedroom decor with the DIY Planked Headboard tutorial by Shanty 2 Chic. This guide walks you through building a charming and rustic headboard that is perfect for giving your bed a custom look. Learn how to select and stain wood planks and distress edges for an authentic feel, and assemble the pieces with easy-to-follow instructions.
Whether repurposing scraps or starting fresh, this project is designed to be adaptable for various bed sizes, ensuring a great fit for your space. Discover the satisfaction of crafting your furniture and give your bedroom a cozy, personalized touch.
26. Upcycled Headboard from a Wood Pallet
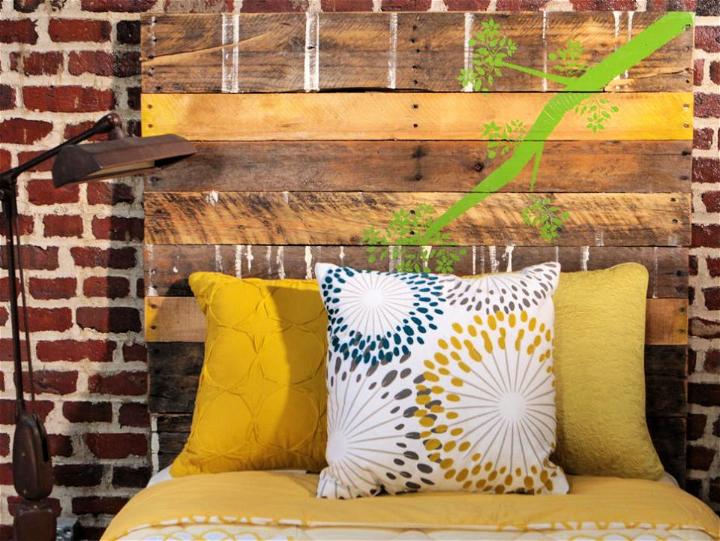
Creating a rustic headboard from upcycled wood pallets is a charming and budget-friendly way to add personality to your bedroom. HGTV guides you through this simple DIY project that can be completed in a few hours for approximately $20. Start by sourcing used pallets, ensuring they’re free of contaminants. With a reciprocating saw, cut the planks, then determine the height based on your bed and preferences.
Construct legs and a middle support from salvaged wood, and attach the planks with construction adhesive and nails. Overcome any warping with drywall screws. Sand the headboard for a smooth finish, and consider adding a personal touch with custom paintwork. Seal it with shellac to enhance the wood’s natural beauty and mount it to your bed frame or wall. This eco-friendly project not only recycles materials but also provides a unique focal point for your space.
27. Make Your Own Wood Headboard
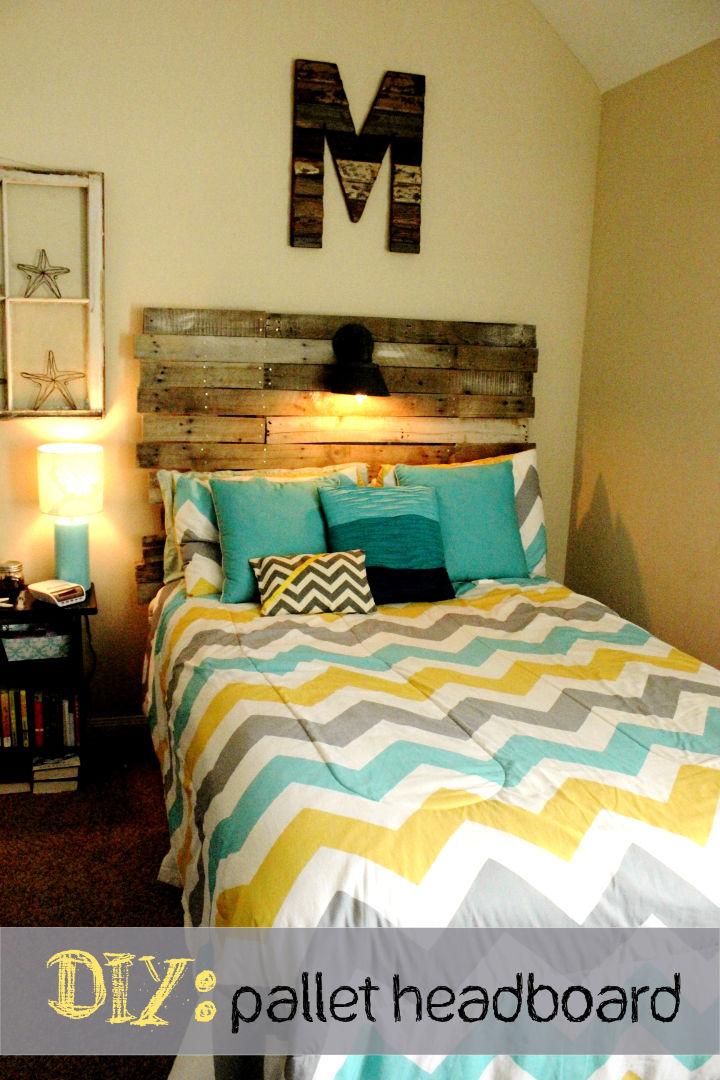
Make a charming pallet headboard with ease following Kristen Welch‘s guide. This DIY project transforms weathered pallets into a stylish bedroom feature. Gather 2-3 old pallets, a couple of 2x4s, and a light kit for an optional touch of ambiance. Prying the wood off the pallets is the most challenging part, but the results are worth it. Nail the planks to the 2x4s, and consider a white-wash finish for that trendy look.
This resourceful headboard, with a hint of vintage charm, can elevate your room’s aesthetic and become a cherished piece. Crafting your own pallet headboard is not just cost-effective; it’s also a creative way to add a personal touch to your space.
28. Build a Pallet Headboard
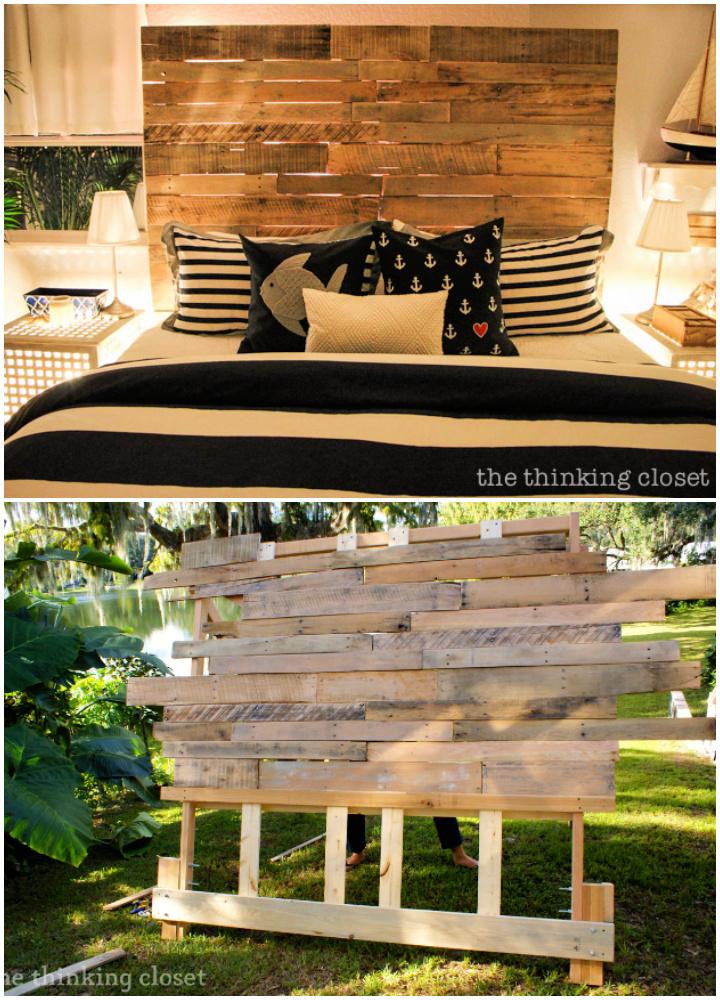
Transforming reclaimed pallet wood into a headboard can add a unique, rustic charm to your bedroom decor. The Thinking Closet offers guidance on selecting durable pallets, dismantling them efficiently, and piecing together a beautiful headboard that infuses nature with purpose.
With tips on identifying hardwoods and the use of tools like a sawzall and belt sander, readers can confidently make a statement piece that’s as sturdy as it is stylish. Sanding is crucial for a splinter-free finish, while the creative arrangement of the boards ensures a headboard with character. By following these helpful instructions, even the most ordinary materials can be crafted into a work of art that transforms your space.
29. Queen-sized DIY Wooden Headboard
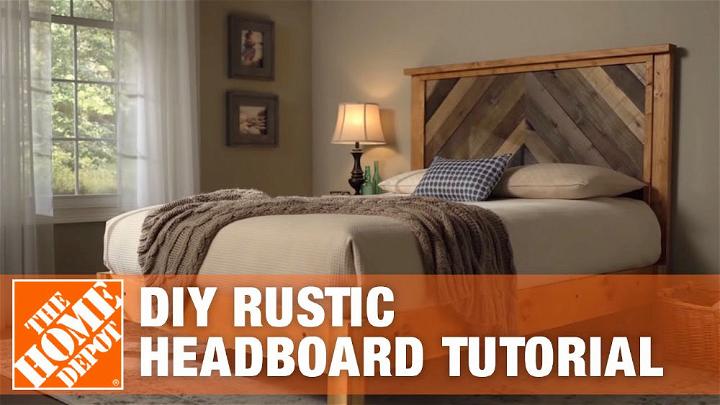
Transform your bedroom ambiance with a DIY rustic headboard crafted by your own hands. Home Depot’s instructional video guides you step-by-step through the process, making it simple to make a cozy, farmhouse vibe in your sleeping space. From selecting the right materials to assembling the chevron design, this tutorial ensures an enjoyable project experience.
By following the clear instructions, even those new to woodworking can build a stunning queen-sized headboard. Additionally, find a full list of materials and necessary measurements within the video, streamlining your DIY journey. Get ready to enhance your bedroom’s aesthetic with a personal touch and the satisfaction of self-made craftsmanship.
30. Make a Reclaimed Wood Headboard
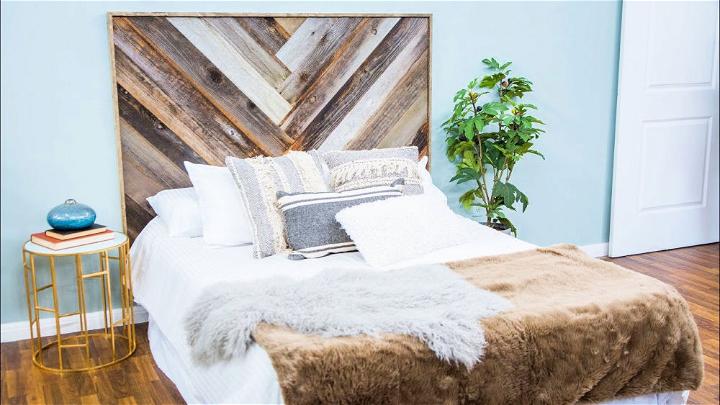
Transform your bedroom with a touch of rustic charm by building a DIY Recycled Wood Headboard, just as showcased on Home & Family. This affordable project breathes new life into discarded wood, giving you the designer look without the hefty price tag. With a straightforward tutorial and a little effort, you can construct a stylish and eco-friendly headboard that becomes the focal point of your room. Get the full instructions and unleash your DIY spirit to make a unique and personalized statement in your home. Visit the Hallmark Channel website for all the details and step-by-step guidance on this sustainable home upgrade.
Do you love woodworking?
Are you new to woodworking and looking for free woodworking projects, plans, tips, ideas & more? Here are 150 simple woodworking projects that will get you comfortable with the basics of building with wood.
Conclusion:
In conclusion, making a DIY wood headboard is a fantastic way to personalize your bedroom while honing your woodworking skills. Our guide to 30 simple DIY wood headboard ideas you can build yourself offers a treasure trove of inspirations, catering to a variety of styles and preferences. Each project promises not only to enhance the aesthetics of your space but also to provide a sense of accomplishment as you craft a beautiful, functional piece for your home. So, gather your tools, select your design, and start building a headboard that will become the highlight of your bedroom decor.
