Making a DIY worm farm is a rewarding way to reduce kitchen waste while producing nutrient-rich compost for your garden. By learning how to make a worm compost bin, you’re taking a step towards sustainable living. It’s not only beneficial for your plants but also helps in cutting down waste that would otherwise end up in landfills. This guide outlines ten different ways to build your worm farm, making it easy for anyone to get started, regardless of your DIY skills or space constraints.
Setting up your own worm compost bin is straightforward and can be done in numerous creative ways to suit your needs. From constructing a homemade wormbin using recycled buckets to building a stackable worm farm, this guide provides step-by-step instructions that guarantee success. Get ready to transform your kitchen scraps into black gold for your plants as you explore the next sections on choosing your bin, setting up your worm farm, and maintaining it for maximum efficiency.
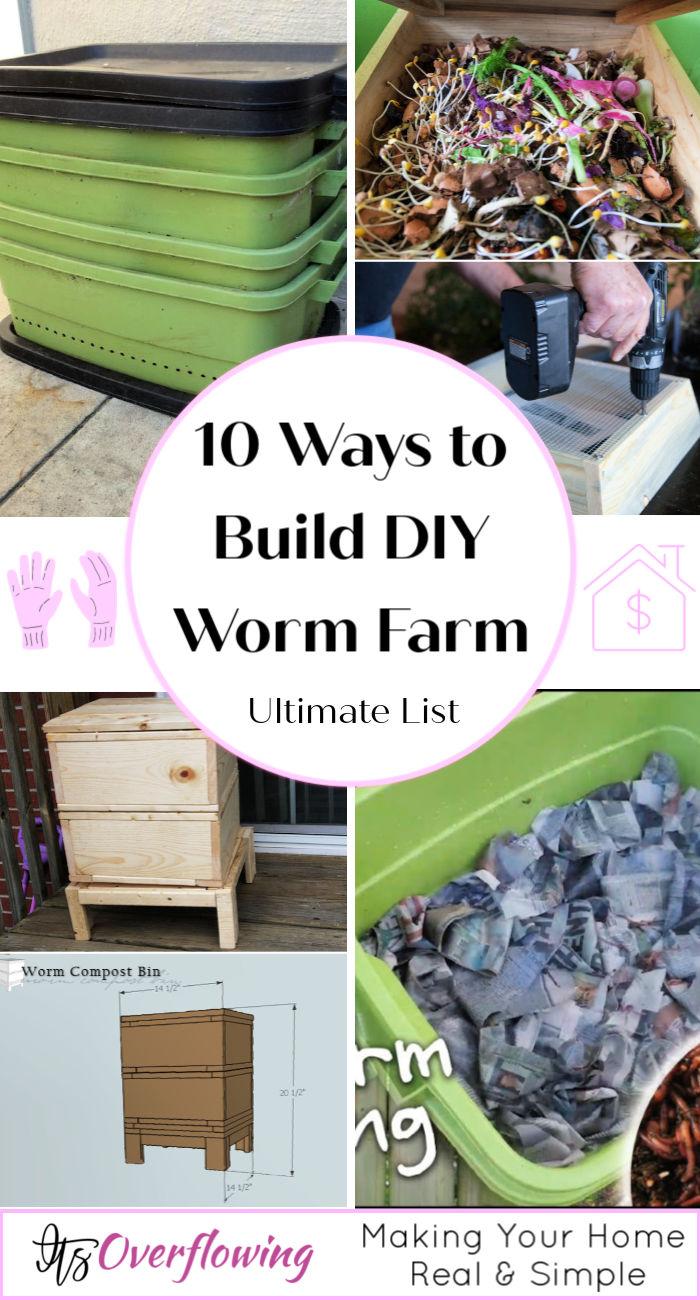
Why Build Your Own DIY Worm Farm?
Building a DIY worm farm has multiple benefits that cater to both environmental consciousness and practical gardening. Here’s why you should consider creating one:
- Waste Reduction: By turning your kitchen scraps into compost, you’re contributing to less waste in landfills. Worm farms are an excellent way to manage organic waste at home.
- Nutrient-Rich Soil: Worm castings, also known as vermicompost, are packed with nutrients that are beneficial for your plants, leading to healthier, more robust growth.
- Cost-Effective: Starting a worm farm can be done with materials you may already have at home or can obtain cheaply. It saves you money on fertilizer and soil amendments.
- Eco-Friendly: Worm farming is a natural process that does not require energy inputs or produce emissions, making it a sustainable choice for the environmentally minded.
- Educational: For families with children, a worm farm is a great educational tool to teach about the environment, recycling, and biology in a hands-on manner.
- Soil Aeration: The movement of worms through the soil creates channels that allow air and water to penetrate, improving the soil structure for plant roots.
- Natural Fertilizer: The liquid byproduct, often called “worm tea,” is an excellent liquid fertilizer that can be used to give your plants an extra boost without chemicals.
By creating a worm farm, you’re not just benefiting your garden; you’re taking an active step towards a more sustainable lifestyle. Plus, it’s a simple and rewarding project that doesn’t require a significant investment or advanced skills.
How to Make a Worm Farm
Making a worm farm (or vermicomposting) is a great way to recycle kitchen waste into nutrient-rich compost for your plants. Plus, it’s surprisingly simple and eco-friendly! Here’s a step-by-step guide to help you start your own worm compost bin.
Choosing Your Bin
First, decide on the type of bin you want to use. You can either purchase a commercially available worm farm kit or make one yourself from a plastic storage container. If DIY is your route:
- Select a Container: Pick a dark colored bin since worms thrive in dark environments. Ensure it’s at least 12 inches deep to provide enough space for your worms and compost.
- Prepare Your Bin: Drill 8–10 drainage holes in the bottom of your bin to avoid soggy conditions. Add a few holes around the sides for aeration.
Setting Up Your Worm Farm
Bedding
- Shred newspaper or cardboard into strips for bedding. Avoid glossy paper.
- Moisten the bedding with water, ensuring it’s damp but not wet.
- Fill the bin with the moist bedding, leaving space at the top.
Adding Worms
- Worm Selection: Red wigglers (Eisenia fetida) are the most recommended type for worm farms. They are voracious eaters and reproduce quickly. You’ll need about 1,000 worms (or one pound) for a standard-sized bin.
- Introduce the worms to the bin by scattering them over the top. Give them some time to burrow into the bedding.
Feeding Your Worms
- Start slow with small amounts of food scraps. Worms can eat half their weight in food per day, but it’s best to observe and adjust gradually.
- Best foods to include: vegetable and fruit scraps, coffee grounds, crushed eggshells, and tea bags.
- Foods to avoid: dairy products, meats, fats, and oily foods, as they can attract pests and cause bad odors.
Maintaining Your Worm Farm
- Keep it moist: The bedding should remain damp. Sprinkle water if it starts to dry out.
- Aerate the bin: Gently turn the compost every couple of weeks to introduce air.
Harvesting Your Compost
After 3-6 months, you should have your first batch of compost ready. Here’s a simple method to harvest it:
- Move the compost: Push the finished compost to one side of the bin and add fresh bedding to the other half.
- New feeding zone: Only add new food scraps to the side with fresh bedding. Over a few weeks, the worms will migrate to the new food source, leaving the compost ready for use.
Using Your Compost
Your worm compost, known as vermicompost, is a fantastic addition to your garden soil or potting mix. It’s rich in nutrients and helps improve soil structure.
Troubleshooting
- Odors: If your bin starts to smell, it might be too wet or have too much food. Remove excess food and stir the bin to improve air flow.
- Pests: Keep the lid on your bin to deter flies and other pests. If ants become a problem, ensure your bin isn’t too dry.
Worm farming is an enjoyable and sustainable way to deal with kitchen scraps. It’s a small step you can take to reduce your environmental impact while providing excellent benefits for your garden. Happy vermicomposting!
FAQs on DIY Worm Farming
Making your own worm farm is an exciting project that can help you turn kitchen waste into rich compost for your garden. Here are answers to some commonly asked questions to get you started on the right foot.
What type of worms should I use for my worm farm?
Red wigglers (Eisenia fetida) are the best choice for worm farming. They are efficient at breaking down organic material and thrive well in a composting environment.
How many worms do I need to start my worm farm?
For a standard sized bin, you’ll need about 1,000 worms (or one pound). This is enough to get the composting process started and can handle the average amount of kitchen waste from a small household.
What can I feed my worms?
Worms love:
- Vegetable and fruit scraps
- Coffee grounds and filters
- Tea bags (without staples)
- Crushed eggshells
Avoid feeding them meat, dairy, oily foods, or citrus fruits, as these can attract pests or harm the worms.
How often should I feed my worms?
Start by feeding your worms a small amount of food scraps initially and gradually increase as you observe their consumption pace. A good rule of thumb is that worms can eat about half their body weight in food per day.
How do I avoid bad odors?
Bad odors are usually a sign of overfeeding or too much moisture. To prevent this:
- Feed worms the right amount of waste.
- Balance the bin’s moisture by adding dry bedding if it’s too wet.
- Aerate the bin regularly by gently turning the compost.
Can I keep my worm farm indoors?
Yes, a worm farm can be kept indoors, such as in a basement or garage. Ensure the location is away from direct sunlight and extreme temperatures for the worms to thrive.
What do I do if ants invade my worm bin?
Ants usually invade if the bin is too dry. To deter ants:
- Keep the bin’s moisture at an optimal level.
- Place the bin legs in containers of water to create a moat ants can’t cross.
How will I know when the compost is ready to use?
The compost is ready when it looks like rich, dark soil and you can no longer identify the original kitchen waste. This usually takes 3-6 months. You can then harvest the compost and use it for your plants.
Remember, worm farming is a process of learning and tweaking. If your first attempt isn’t perfect, don’t worry. Use these questions as a guide, but feel free to experiment and find what works best for your setup. Happy composting!
10 Ways to Make a DIY Worm Farm
Discover 10 easy ways to make your own DIY worm farm and start composting with worms. Learn how to recycle organic waste and harness the power of nature for sustainable gardening.
1. Cheap DIY Worm Compost Bins
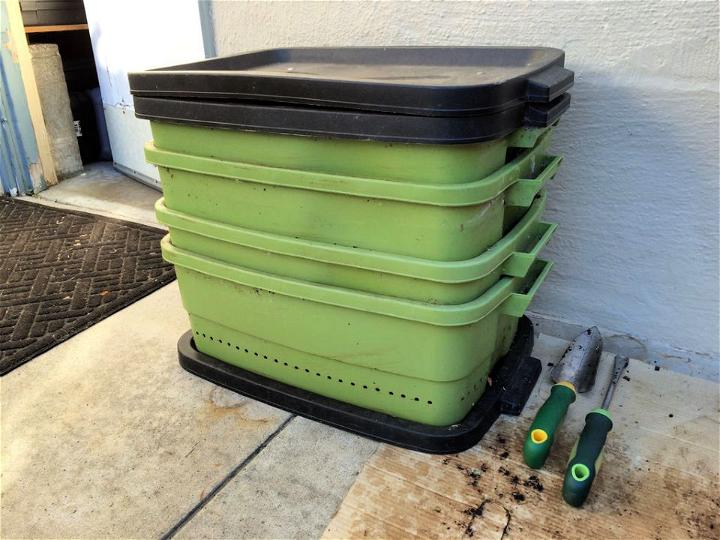
Make your very own worm compost bins and transform kitchen scraps into nutrient-rich “Black Gold” with this DIY guide from Instructables. Vermicomposting is a low-labor, efficient method that speeds up the composting process and can be done indoors. By using readily available materials like plastic bins, window screen, and red wiggler worms, you can build a sustainable system for under $50.
Learn how to maintain your bins for odor-free composting and reap the benefits of homemade vermicast—a powerful soil amendment and natural fertilizer. Get ready to give your garden a boost with this eco-friendly and cost-effective composting technique.
2. Handmade Vermicomposter for Home
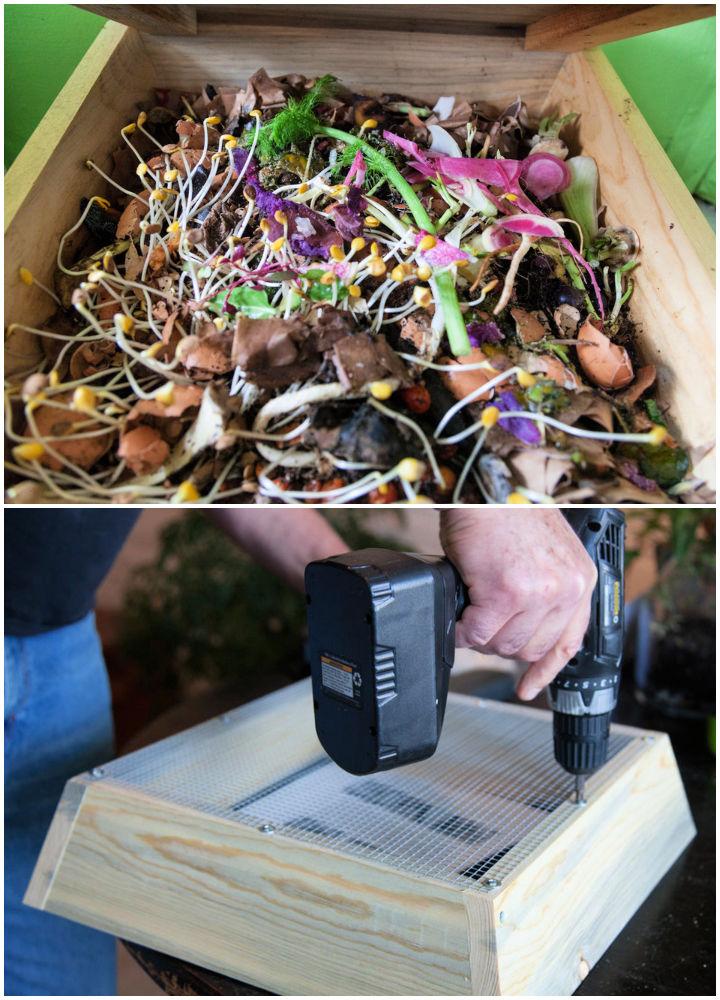
Transform your kitchen scraps into nutrient-rich compost with a DIY vermicomposter. Homestead Brooklyn‘s guide offers clear, step-by-step instructions to build a sustainable, three-tier vermicomposter from beetle-kill pine wood. Ideal for eco-conscious home gardeners, this tutorial simplifies the process, ensuring a practical and aesthetically pleasing addition to your home. Learn to assemble the wooden structure, prepare the bedding, and maintain ideal conditions for your worms. Embrace the rewarding practice of vermicomposting and contribute to a healthier environment right from your kitchen.
3. How to Make a Worm Bin for Less Than $5
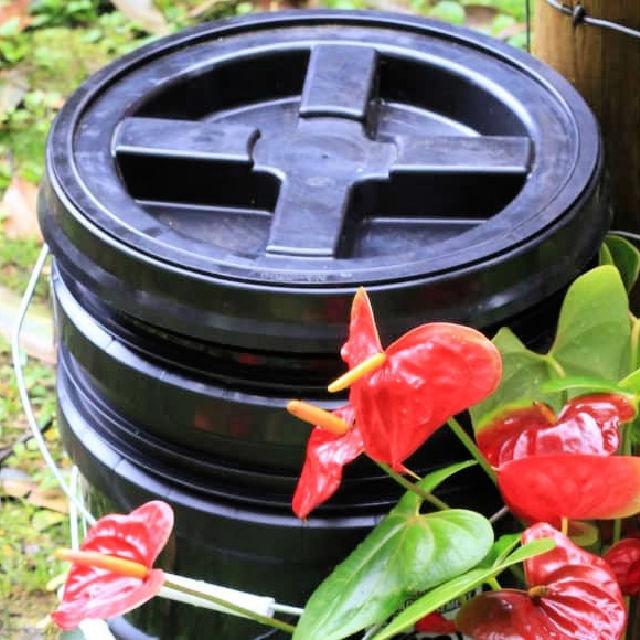
Transform your kitchen scraps into nutrient-rich garden gold with this easy DIY worm bin guide from Attainable Sustainable®. Learn how to craft a vermicompost system for under $5 and in just 30 minutes, perfect for small spaces and eco-conscious gardeners. Follow simple steps using basic tools to create a welcoming environment for red wiggler worms that will efficiently process your organic waste. Keep your worm bin odor-free and thriving with helpful tips on what to feed your worms and how to harvest the valuable castings for a flourishing garden.
4. Homemade Wormbin Using Recycled Buckets
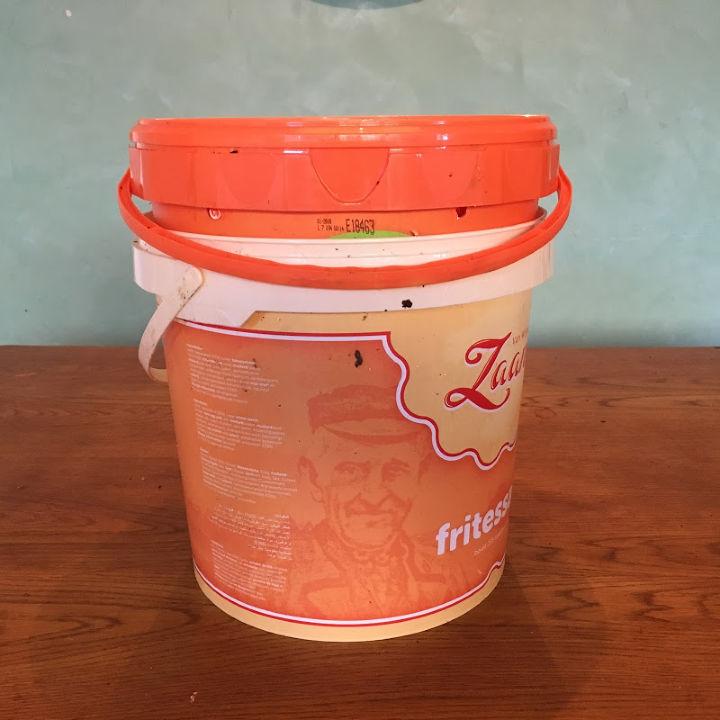
Transform your kitchen scraps into nutrient-rich compost with a homemade worm bin! Our easy-to-follow guide teaches you to repurpose old plastic buckets into an efficient vermicomposting system. By drilling holes for aeration and drainage, layering moist cardboard and soil, and introducing composting worms, you create a living ecosystem right in your home. Manage your organic waste responsibly while nurturing your garden with your very own worm castings. Get started on this eco-friendly project today and give back to the earth with every peel and leftover. compostier
5. Beginner-Friendly DIY Worm Compost Bin
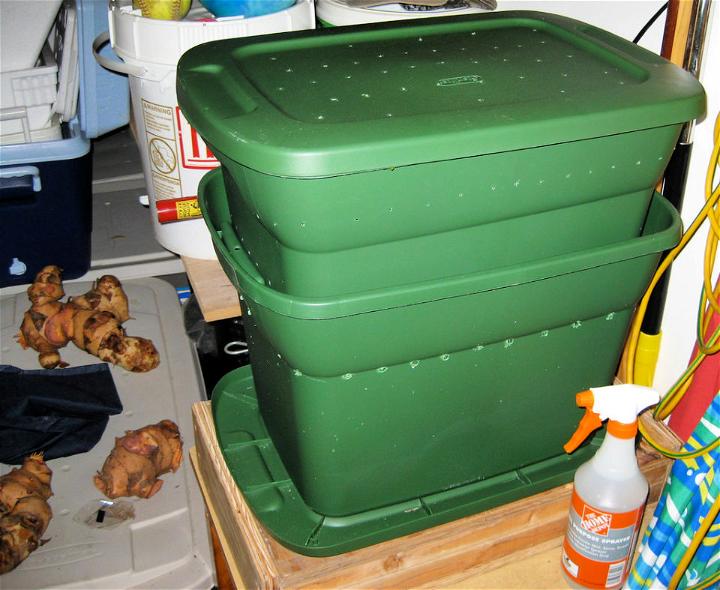
Learn how to build a worm composter with the guidance of Dr. Mark Merriwether Vorderbruggen. His instructive blog post provides a step-by-step process for creating a vermiculture worm bin from common household items. Discover how to use two opaque plastic bins, shredded newspaper, and kitchen scraps to cultivate red wiggler worms for nutrient-rich soil.
With practical tips on maintaining the ideal environment for your worms, you’ll be equipped to produce natural fertilizer for your garden while reducing food waste. Keep your sentences concise and clear as you delve into this eco-friendly project on Foraging Texas.
6. Make a Worm Farm With Ste by Step Guide
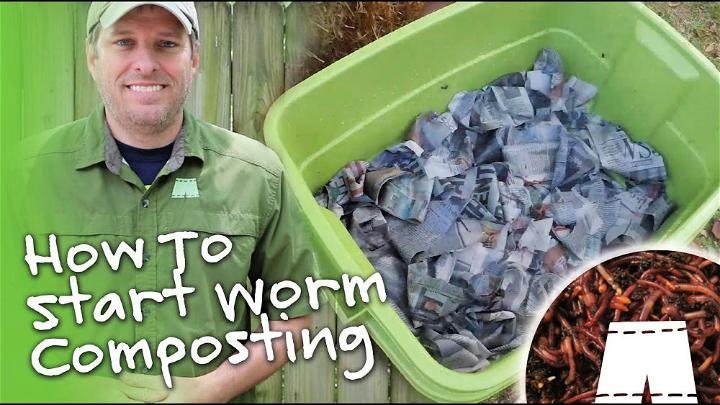
Interested in transforming kitchen scraps into nutrient-rich garden soil? GreenShortz DIY’s video on building a worm composting bin is a fantastic guide to creating a simple yet effective two-bin system using easily sourced materials. The DIY approach not only offers a way to enrich your garden but also helps reduce waste.
By following the step-by-step instructions, you can construct a worm bin that facilitates the production of both solid compost and liquid fertilizer, all while providing a sustainable solution for your organic waste. With clear, easy-to-understand directions, this resource is perfect for anyone eager to start vermicomposting at home. Watch the video on YouTube and get started on your eco-friendly composting project today.
7. Building a Stackable Worm Farm Under $30
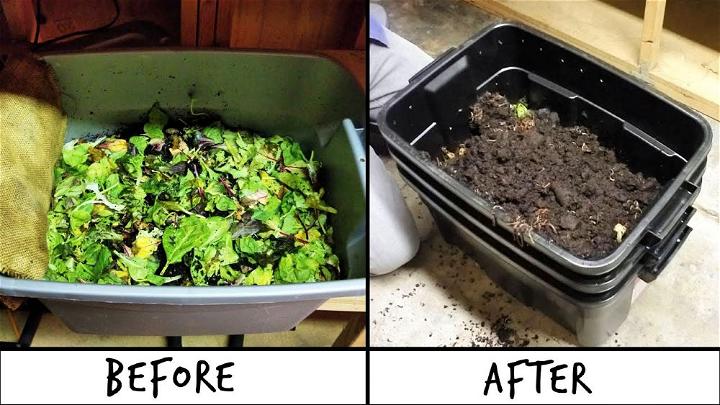
Transform your kitchen scraps into nutrient-rich compost with a DIY stackable worm farm! Epic Gardening’s instructional video on YouTube demonstrates how to build an affordable and efficient vermicomposting system for just $30. With a three-tote design, this stackable farm optimizes space, simplifies the harvesting of worm castings, and ensures proper drainage of excess moisture.
Learn the step-by-step process of creating this eco-friendly setup, which not only adds fertility to your garden but also provides a sustainable way to manage organic waste. Dive into the world of vermiculture and give your garden a boost with this practical and budget-friendly project.
8. Easy DIY Wooden Worm Compost Bin
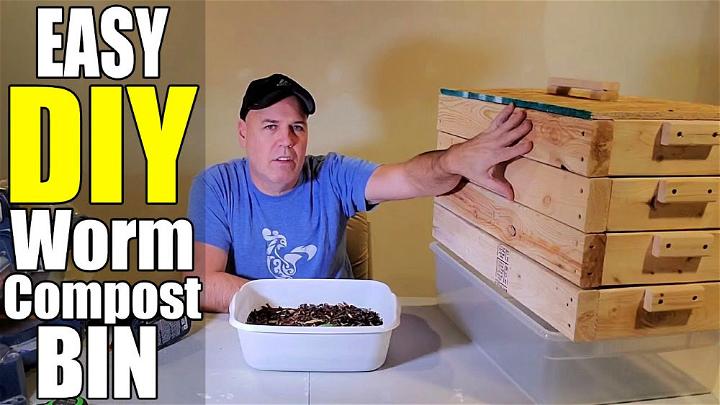
Building a DIY worm compost bin is an eco-friendly and effective way to recycle kitchen scraps into nutrient-rich soil for your garden. YouTube’s “Easy DIY Worm Compost Bin” video offers a straightforward guide to building your own vermicomposting system with minimal tools and materials. With a focus on simplicity, the design ensures that even those new to composting can successfully nurture worms and produce vermicompost, worm castings, and compost tea.
The video also touches on how to maintain optimal conditions for your worms, keeping them moist and well-fed. If you’re ready to dive into sustainable gardening practices, this engaging tutorial is a great starting point.
9. How to Create a Maintain Worm Bin
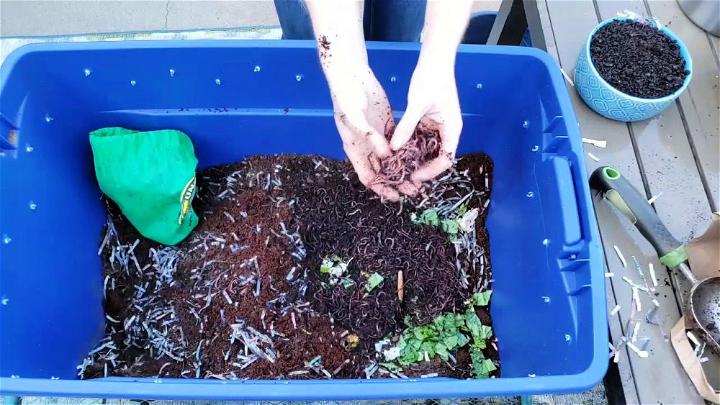
Dive into sustainable gardening with our easy-to-follow Vermicomposting 101 guide! Learn how to create a thriving worm bin using a simple plastic storage tote and essentials like bedding (coco coir or newspaper) and red wiggler worms. Our method, honed over 12 years, transforms kitchen scraps into nutrient-rich worm castings, a perfect soil conditioner.
You’ll discover the importance of maintaining moisture without drainage holes and using a solid, dark container. Ideal for any living situation, our guide includes tips for optimal worm care and feeding, with a focus on non-acidic, non-spicy food choices. Embrace eco-friendly composting and enrich your garden with our straightforward vermicomposting approach!
10. DIY Stackable Worm Composting Bin
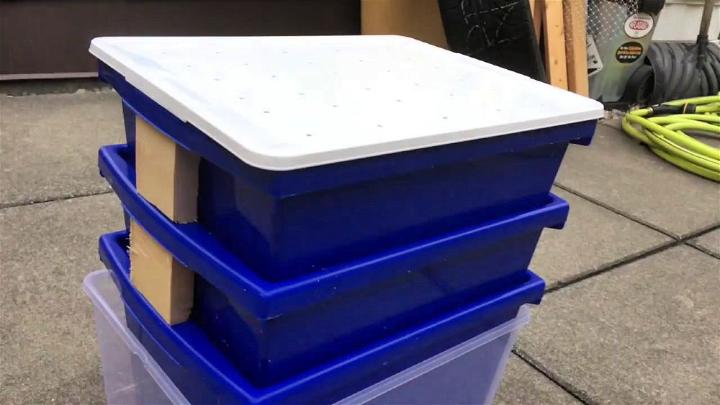
Interested in eco-friendly waste management and gardening? YouTube’s Saffron Coconuts channel offers a practical guide to creating a DIY stackable worm composting bin. In this engaging Part 1 tutorial, viewers learn how to build an affordable and efficient vermicomposting system that fits neatly under a kitchen sink.
Discover how to construct the bin, encourage worm migration, and collect nutrient-rich worm tea for your plants. With a focus on simplicity and cost-effectiveness, this video is perfect for those eager to reduce kitchen waste and enrich their garden soil naturally. Stay tuned for the next installment to see the bin come to life with worms!
Conclusion
In conclusion, making your own DIY Worm Farm offers not only an effective way to repurpose kitchen scraps but also enriches your garden with high-quality compost. Whether you’re crafting a simple bin or venturing into making a stackable worm composting bin, the steps provided in this guide ensure a fulfilling and successful journey into worm farming. Embrace the satisfaction of producing your own compost by exploring the “10 Ways to Make a DIY Worm Farm”, and contribute positively to a sustainable environment. Happy composting!
Related DIY Gardening Ideas
- 10 DIY Grow Tent Plans – Build Your Own DIY Grow Box
- DIY Raised Garden Bed (Ultimate Guide to Start Gardening)
- 17 Easy DIY Garden Tool Storage Ideas
- 42 Hummingbird Flowers That Can Attract Them To Your Garden
- DIY Potting Bench Plan
- 25 DIY Mason Jar Herb Garden Ideas for Indoor
- DIY Cedar Planter Box Under $5
