Making friendship bracelet patterns is a heartwarming way to express your affection for those special people in your life. Our collection of 50 simple friendship bracelet patterns caters to everyone looking to craft a symbol of their cherished bonds. Each pattern is thoughtfully curated to be engaging and straightforward, ensuring that your DIY experience is as fulfilling as the friendships you celebrate.
Friendship bracelets are timeless tokens of love and appreciation. As you explore these easy-to-make simple friendship bracelet patterns, you’ll find diverse designs ranging from chic word beads to unique hand-engraved pieces. Our guide is designed to help you select the perfect pattern to convey your message, making the creative process both enjoyable and meaningful. Now, let’s delve into the colorful world of friendship bracelets and start crafting your personal tributes to friendship.
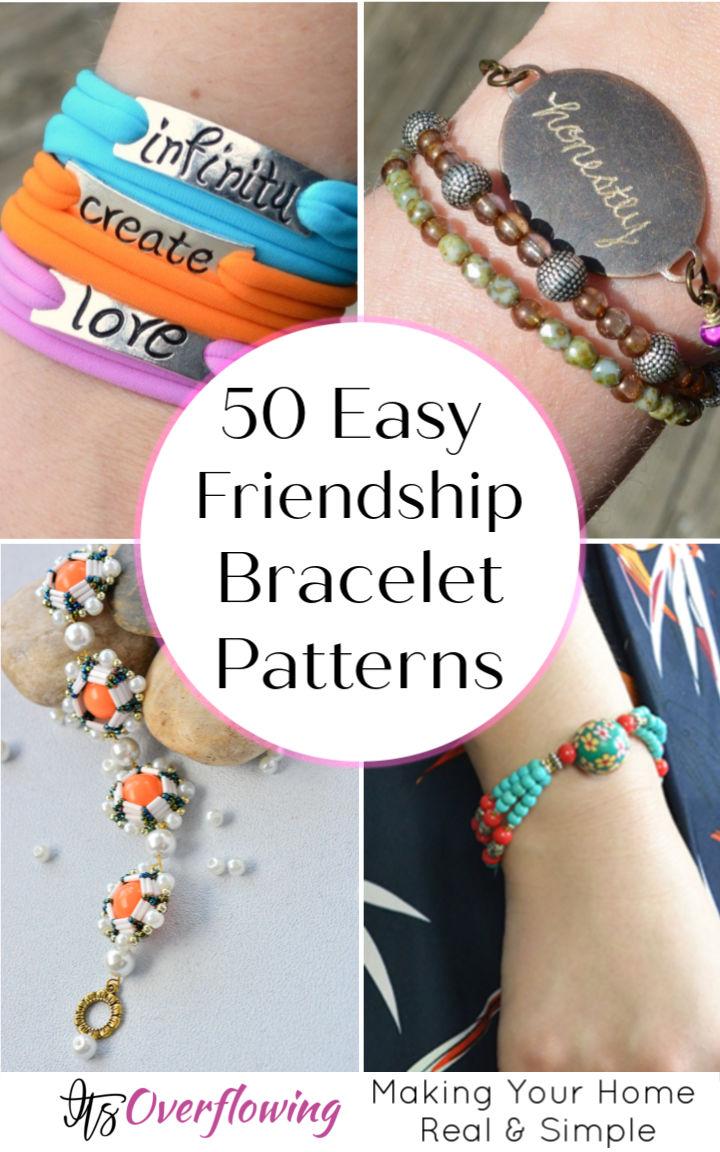
Why Make Friendship Bracelets?
Making friendship bracelets is a delightful way to show your friends how much they mean to you. Here’s why you should consider making these small tokens of affection:
- Personal Touch: Handmade bracelets carry a special significance because they are crafted with love and care. Each knot and bead represents the time and thought you’ve put into the gift.
- Customizable: You can personalize bracelets to match your friend’s favorite colors, styles, or even include beads that spell out their name or a special message.
- Cost-Effective: Most patterns require minimal materials, which can often be found at home or purchased at a low cost. This makes it an affordable way to give a meaningful present.
- Therapeutic Activity: The process of making bracelets can be meditative and relaxing. It’s a creative escape that can reduce stress and provide a sense of accomplishment.
- Strengthen Bonds: Crafting bracelets can be a shared activity. It’s a fun way to spend time together and strengthen your bond as you engage in this shared hobby.
- Inclusive Hobby: Anyone can take part in bracelet making. It requires no special skills, making it an inclusive activity for all ages and abilities.
- Memorable Keepsake: A friendship bracelet serves as a lasting memento of a cherished relationship. It’s a keepsake that your friend can wear and remember the good times you’ve shared.
In essence, friendship bracelets are much more than just accessories. They are a heartfelt expression of affection, a symbol of a bond that can be as unique and special as the friendship it represents.
How to Make a Simple Friendship Bracelet
Making a friendship bracelet is a wonderful way to show appreciation to your friends. It’s a creative, fun, and thoughtful activity that results in a meaningful keepsake. Here’s a step-by-step guide to making a simple friendship bracelet that anyone can follow.
Materials You’ll Need:
- Embroidery floss or yarn in various colors
- Scissors
- Tape or a safety pin
- A ruler or measuring tape
Step 1: Choose Your Colors
Start by selecting the colors you want to use for your bracelet. You can choose colors that represent your friend’s personality, their favorite colors, or colors that signify your bond.
Step 2: Measure and Cut the String
Measure and cut about 24 inches of each color of embroidery floss. If you want a thicker bracelet, you can cut longer strands and fold them in half to double the thickness.
Step 3: Secure the Strings
Gather all your strings together, make a knot about an inch from the top, and secure the knotted end to a table with tape or pin it to a cushion. Make sure it’s tight and secure to prevent the bracelet from unraveling as you braid.
Step 4: Start Braiding
Arrange the strings in the order of the color pattern you want for your bracelet. Begin braiding by crossing the right string over the middle string, then left string over the new middle string, and continue this pattern. Keep your braids tight and consistent.
Step 5: Check the Length
Periodically measure the length of your bracelet against your friend’s wrist or your own to ensure the proper fit. Remember to leave enough room for the bracelet to slide on and off easily.
Step 6: Finishing the Bracelet
Once you have reached the desired length, tie a knot at the end of the braid to secure it. You can either leave the strings at the end for a tasseled look or trim them for a cleaner finish.
Step 7: Tie It On
Wrap the bracelet around your friend’s wrist and tie the two knotted ends together. Make sure it’s snug but comfortable.
Tips for a Perfect Friendship Bracelet:
- Keep Tension Consistent: Ensure your braiding tension is consistent for a uniform look.
- Experiment with Patterns: Once you’re comfortable with a simple braid, try different patterns like the Chevron or Candy Stripe.
- Personalize Your Bracelet: Add beads or charms to the bracelet for a personal touch.
- Practice Makes Perfect: If you’re new to bracelet making, practice with spare threads before starting on your final piece.
Making a friendship bracelet is not just about the final product; it’s about the time, effort, and thought you put into it. Your friend will surely appreciate this heartfelt gift, symbolizing the care and value you have for your bond.
How to Read Friendship Bracelet Patterns
Reading through friendship bracelet patterns can sometimes be overwhelming, especially if you’re new to DIY projects. To make sure you get the most out of the “50 simple friendship bracelet patterns” article, follow these easy and structured steps:
Before You Begin: Understand the Basics
- Familiarize with Terms: If there are any crafting terms you don’t understand, look them up or refer to a crafting dictionary. Words like “braid,” “knot,” and “weave” are commonly used in bracelet patterns.
- Identify Skill Level: Check if the patterns are labeled by difficulty, such as “beginner” or “advanced,” and choose ones that match your skill level.
Step-by-Step Reading Guide
Step 1: Preview the Patterns
- Skim Through: Briefly go over the entire post to get an idea of what types of patterns are included. Look at the pictures for a visual understanding.
- Highlight Favorites: Mark or note down any patterns that immediately catch your eye.
Step 2: Gather Your Materials
- Check the List: Each pattern should have a list of required materials. Make sure you have everything before starting.
- Organize: Keep your materials handy and organized for easy access while working on the bracelet.
Step 3: Follow the Instructions Carefully
- Read Slowly: Read through the pattern instructions slowly to make sure you understand each step.
- One Step at a Time: Focus on one step at a time to avoid confusion. Don’t rush ahead.
Step 4: Refer to Visual Aids
- Use Pictures: Patterns usually come with accompanying images. Refer to these visuals to ensure you’re on the right track.
- Video Tutorials: If available, watch any linked video tutorials for a more hands-on demonstration.
Step 5: Check Your Progress
- Pause and Review: After completing a few steps, pause to compare your work with the pattern or pictures to make sure it looks right.
- Correct Mistakes Early: It’s easier to undo and correct mistakes if you catch them early.
Step 6: Finishing Up
- Final Steps: Pay close attention to the finishing instructions to secure your bracelet properly.
- Admire Your Work: Once completed, take a moment to appreciate your craftsmanship.
Tips for a Better Reading Experience
- Keep Notes: Jot down any tips or personal reminders as you read through the pattern.
- Bookmark Pages: If you’re reading online, bookmark the page or pattern for easy reference later.
- Ask for Help: Don’t hesitate to ask for help from more experienced crafters if you’re stuck.
- Practice: If you’re new, practice with some spare materials before starting on your final piece.
Remember, the key to successfully reading and following friendship bracelet patterns is patience and practice. Don’t get discouraged if it doesn’t come out perfectly the first time. Enjoy the process, and soon, you’ll be making beautiful friendship bracelets with ease.
FAQ Section: Simple Friendship Bracelet Patterns
Looking for simple friendship bracelet patterns? Check out our FAQ section for easy-to-follow instructions on making beautiful bracelets with your friends.
What materials do I need to start making friendship bracelets?
To begin making friendship bracelets, you typically need:
- Embroidery floss or yarn in various colors
- Scissors
- Tape or a safety pin
- A ruler or measuring tape
- Beads or charms (optional for added decoration)
How do I choose the right colors for my friendship bracelet?
Select colors that represent your friend’s personality, their favorite colors, or shades that signify your bond. Combining colors that have personal meaning can make the bracelet even more special.
Can beginners make friendship bracelets?
Absolutely! Friendship bracelets are perfect for beginners. Start with simple patterns like the braided bracelet or a basic knot pattern and gradually work your way up to more intricate designs as you gain confidence.
How long does it take to make a friendship bracelet?
The time it takes to make a friendship bracelet can vary from a few minutes to several hours, depending on the complexity of the pattern and your skill level. Simple braided bracelets can be made quickly, while more intricate patterns with beads or charms may take longer.
Are friendship bracelets only for kids?
No, friendship bracelets can be enjoyed by people of all ages. They are a timeless way to express affection and can be crafted and worn by both children and adults.
How do I secure the strings when starting a bracelet?
Gather all your strings together, tie a knot about an inch from the top, and secure the knotted end to a table with tape or pin it to a cushion. Ensure it’s tight to prevent unraveling as you work on your bracelet.
What are some easy patterns for beginners to try?
Some easy patterns for beginners include:
- The simple braid
- The Chinese Staircase
- The Candy Stripe
- The Chevron pattern
How can I personalize my friendship bracelet?
Personalize your bracelet by:
- Using beads to spell out your friend’s name or a special message
- Choosing colors that have a special meaning
- Adding charms that reflect your friend’s interests or your shared experiences
Is it expensive to make friendship bracelets?
Making friendship bracelets is generally a cost-effective hobby. The materials needed are relatively inexpensive, and many patterns require minimal supplies that you might already have at home.
Can I make a friendship bracelet if I don’t have embroidery floss?
Yes, you can use other materials like yarn, thin fabric strips, or even thin leather cords, depending on the design you want to achieve.
How do I finish and secure the bracelet on the wrist?
Once you have reached the desired length, tie a knot at the end of the braid to secure it. Then, tie the bracelet around the wrist, ensuring it’s snug but comfortable. If the bracelet is designed with a clasp, attach it according to the instructions for your particular pattern.
Remember, making friendship bracelets is not only about crafting an accessory but also about the sentiment and care put into the creation. Whether you’re a seasoned crafter or a beginner, the act of making and giving a bracelet can strengthen bonds and make lasting memories.
Simple Friendship Bracelet Patterns for Beginners
Learn how to make beautiful friendship bracelets with these simple friendship bracelet patterns that are perfect for beginners. This guide will help you master the art of bracelet making.
1. DIY Stacking Lycra Wrap Friendship Bracelet
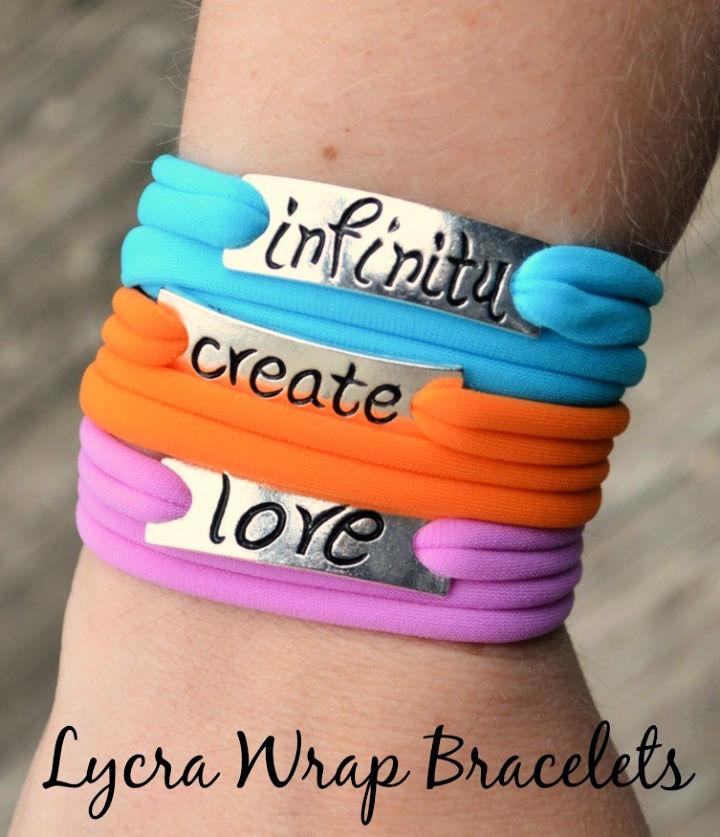
Discover how to craft chic lycra wrap bracelets with Amy Latta Creations‘ super simple guide. In just a couple of minutes, you can make your own stylish accessory with just lycra cord, word beads, and scissors—no special tools or skills required! Choose your favorite colors, personalize with meaningful words, and stack them up for a unique look.
These cost-effective bracelets are perfect for adding a personal touch to your wardrobe or gifting to friends. Get creative and enjoy this quick and easy DIY jewelry project today!
2. Homemade Essential Oil Diffuser Bracelet
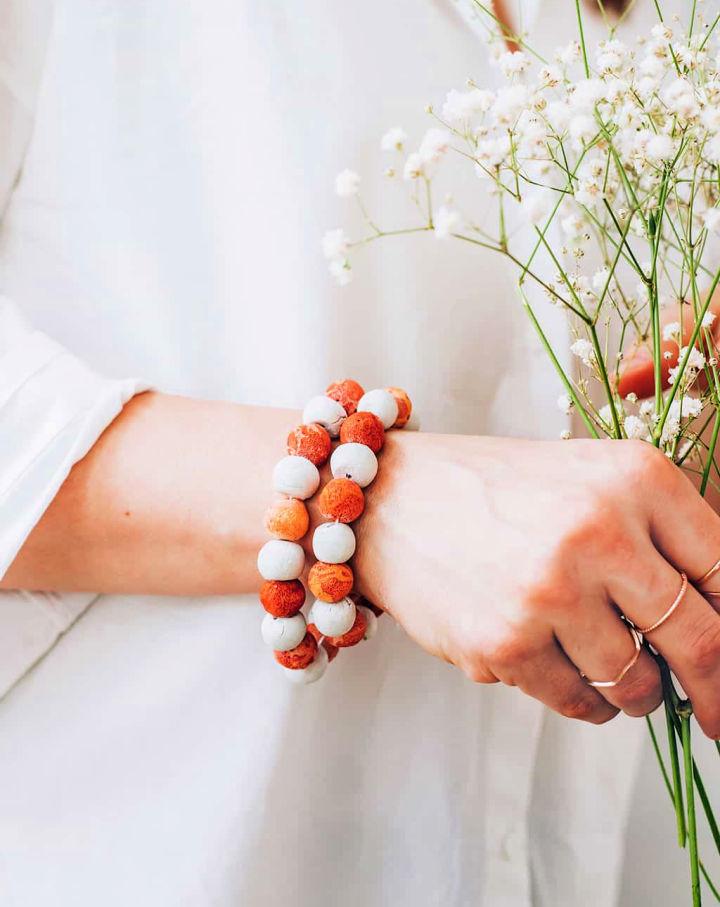
Making your own essential oil diffuser bracelet is a simple and enjoyable way to carry the benefits of aromatherapy with you all day. With just air-dry clay, a wooden skewer, stretchy jewelry cord, and your choice of beads, you can design a unique accessory that not only looks good but also promotes wellbeing. Customize your bracelet with gemstones for added healing properties.
Once finished, apply your favorite essential oil blend to the clay beads for a natural fragrance. Hello Glow offers a step-by-step guide to crafting this chic and functional piece of jewelry, ensuring that your DIY experience is as rewarding as it is therapeutic.
3. Easy DIY Leather Cuff Friendship Bracelet
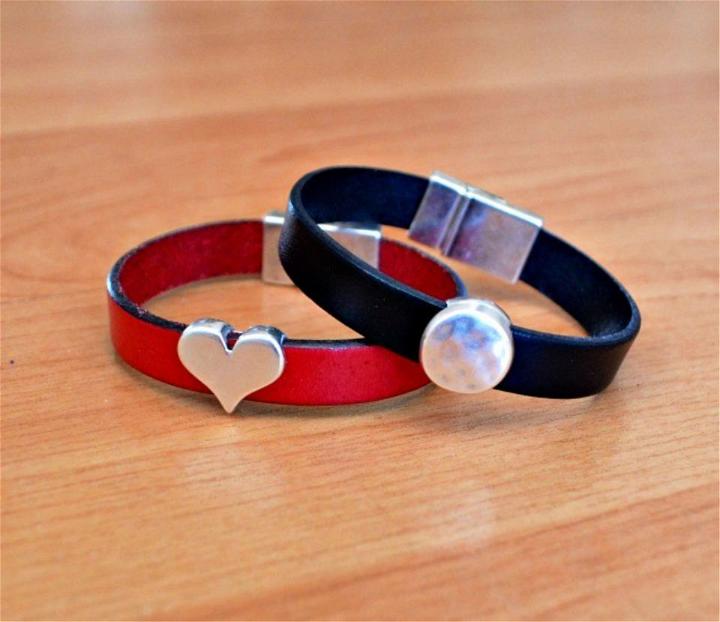
Make stylish leather bracelets in a snap with the easy-to-follow guide from Amy Latta Creations. Ideal for quick crafting, these bracelets require just a few materials, including flat leather, a slider, a magnetic clasp, and some glue. Simply thread the slider onto the leather, measure for fit, trim the excess, and secure with glue.
In no time, you’ll have a unique accessory to wear or give as a gift. Perfect for those who appreciate handmade jewelry, these leather cuffs offer a personalized touch to any outfit. Get creative and mix colors and charms for a bracelet that’s uniquely yours.
4. How to Make Your Own Friendship Bracelet
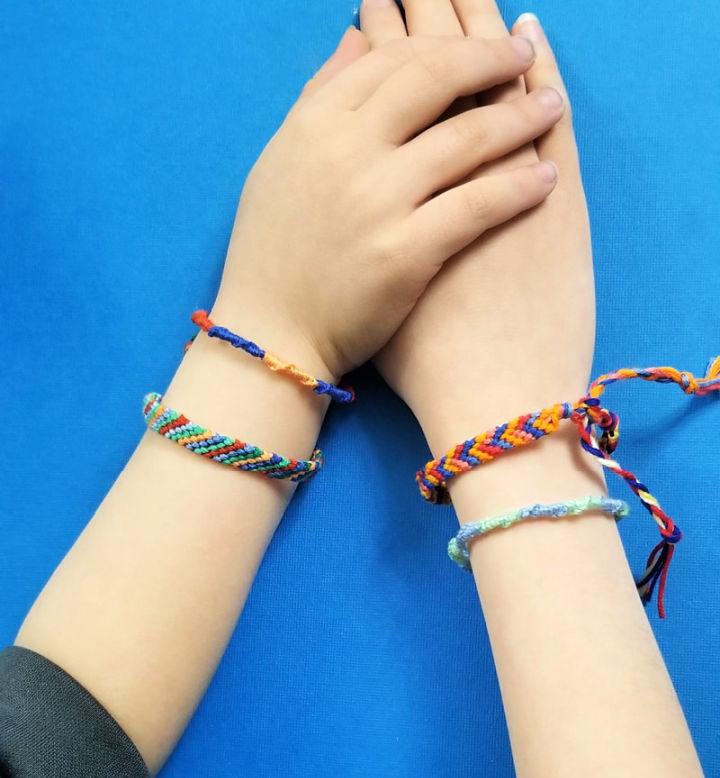
Ready to craft personalized friendship bracelets? Moms and Crafters offers a comprehensive guide for making these charming accessories. Starting with simple knots and finishes, the instructions are perfect for crafting enthusiasts eager to add a handmade touch to their style. The tutorial includes three basic patterns: the Chinese Staircase, Candy Stripe, and Chevron, each designed to help you master essential techniques with ease.
With step-by-step directions and helpful tips, you’ll be on your way to fashioning beautiful, meaningful bracelets to share with friends or cherish yourself. Keep your knots consistent and enjoy the therapeutic process of bracelet making with Moms and Crafters.
5. Make a Ribbon Wrap Friendship Bracelet
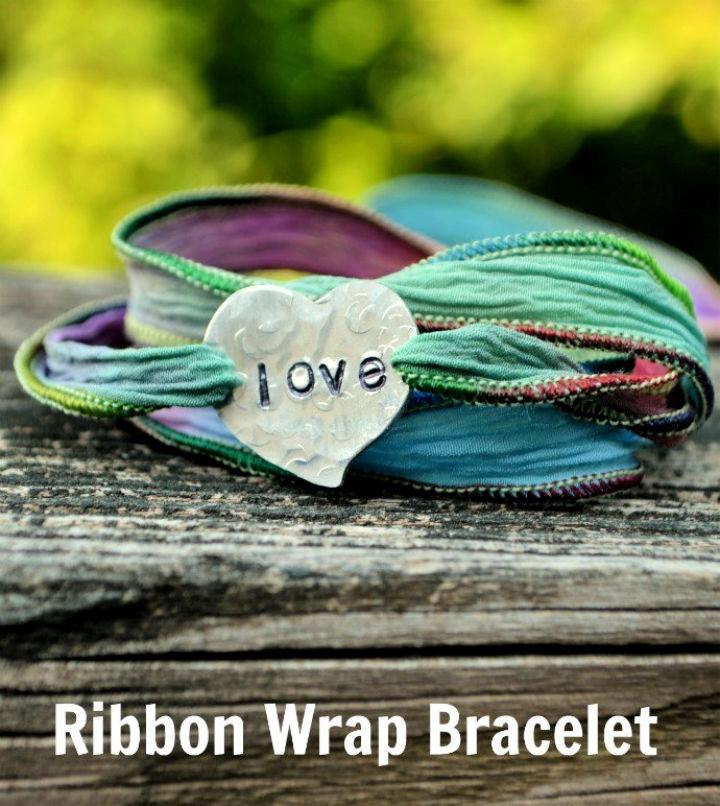
Make a chic ribbon wrap bracelet with this straightforward tutorial from Amy Latta Creations. Perfect for fashion enthusiasts, this project transforms simple silk ribbon and a few jewelry-making supplies into a stylish accessory in less than 15 minutes. Whether you opt for a personalized stamped metal charm or a pre-made one, you’ll enjoy crafting a bracelet that’s uniquely yours.
Choose your favorite ribbon color, follow the easy steps, and soon you’ll have a lovely piece of arm candy to show off or gift to someone special. With clear instructions and a list of materials, this guide ensures a fun and rewarding crafting experience.
6. How to Make a Heart Friendship Bracelet
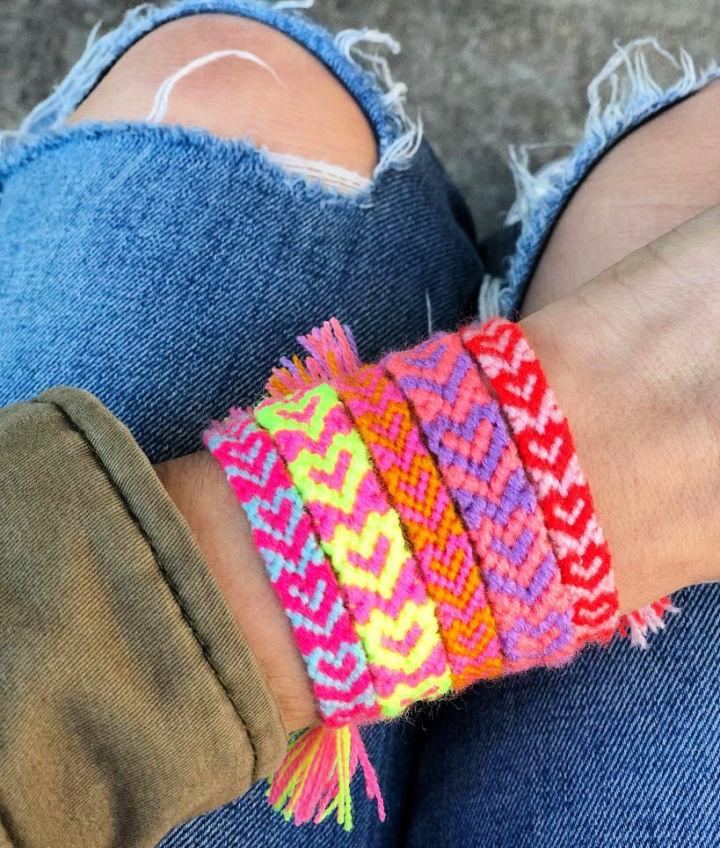
Get ready to add a personal touch to your Valentine’s Day gifts with a heart friendship bracelet DIY from the neon tea party. Ideal for expressing affection to friends on this special day, these bracelets are not only fun to make but also a thoughtful present. The tutorial guides you through each step, from selecting vibrant Omegacryl yarn or embroidery floss to finishing off with neat braids. Customize your creation by alternating heart colors or doubling the yarn for a chunkier look.
With clear instructions, you’ll quickly master the pattern and have a unique accessory ready for February 14th. If questions arise, simply refer back to the guide for assistance. Enjoy crafting a heartfelt token of friendship that’s sure to be cherished.
7. Metal Stamped Bangle Bracelet Ideas
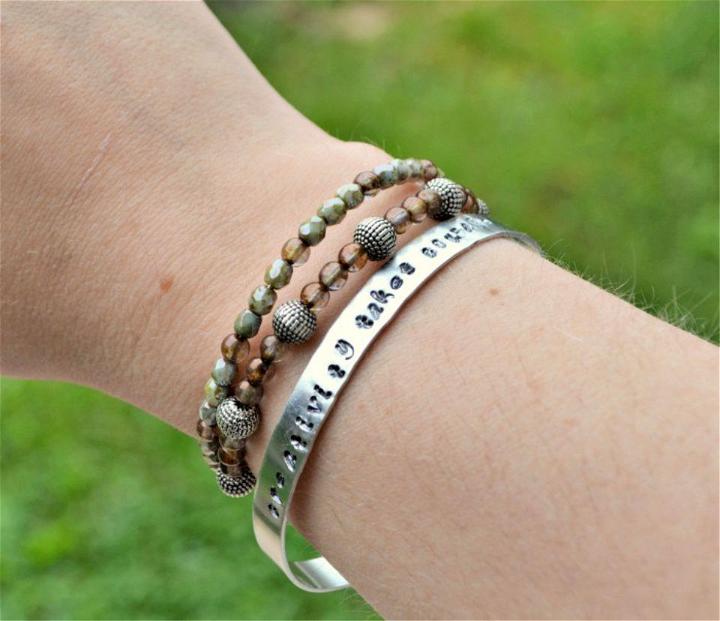
Discover the joys of metal stamping with Amy Latta Creations‘ engaging tutorial on making a personalized metal stamped bangle bracelet. In just 15 minutes, you can craft a unique piece of jewelry that reflects your style or conveys a meaningful message. With intermediate difficulty, this project requires some basic metal stamping skills and special tools, including bracelet bending pliers.
The step-by-step guide ensures that you can easily follow along, even if metalwork is new to you. Learn how to center, stamp, and bend your bracelet to perfection, and find out the secret to achieving a professionally darkened finish on your stamped letters. Add a special touch to your accessory collection or make a thoughtful gift for someone special with this creative and fulfilling craft project.
8. Boho Chic Stacking Bangle Watch
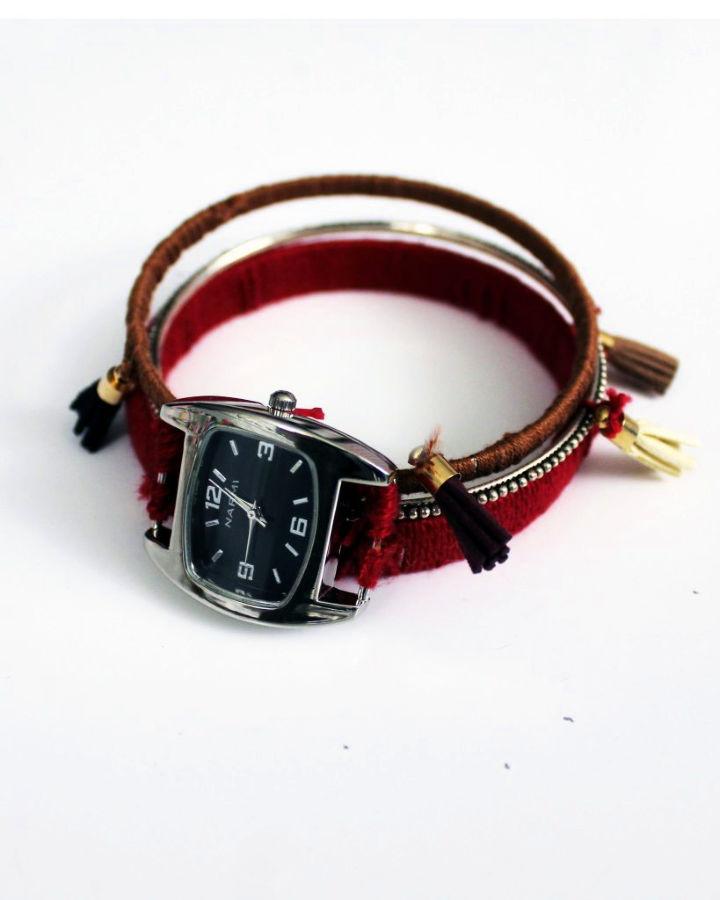
Elevate your style with a DIY Boho Chic Stacking Bangle Watch, as featured on Creative Fashion Blog. This engaging tutorial walks you through making a statement jewelry piece using wire bangles, colorful embroidery floss, and a blank watch face. Perfect for adding a personal touch to your wardrobe, this project is easy to follow and yields a fashionable accessory in about an hour.
With clear instructions and helpful tips, you can craft a watch that complements your look and showcases your crafting skills. Get ready to pair your new watch with your favorite outfits and enjoy the boost of confidence it brings.
9. Free Hand Engraved Bracelet Pattern
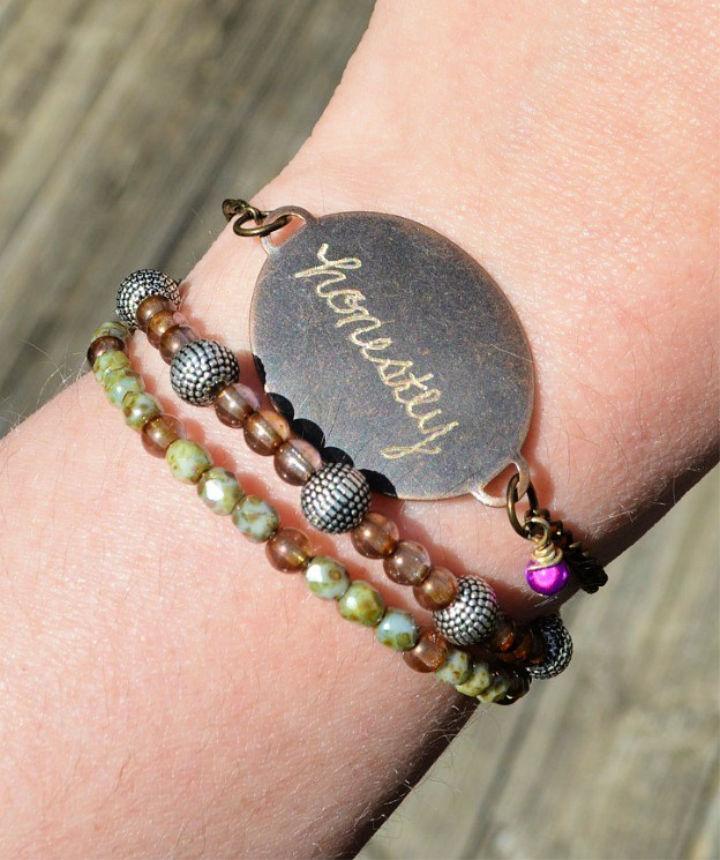
Discover how to make a personalized hand-engraved bracelet with Amy Latta Creations‘ straightforward guide. Equipped with a micro engraver, you can etch your unique designs onto metal pieces right from the comfort of your home. This cost-effective and user-friendly tool is perfect for adding a meaningful touch to gifts or personalizing your own jewelry collection.
The process is simple: secure your metal blank, use tape as a guide for precision, and engrave with care. Remember to practice on less valuable pieces before moving on to cherished items. Dive into the world of engraving with Amy Latta’s helpful tips and transform simple materials into treasured keepsakes.
10. DIY Leather Cuff With Secret Pocket
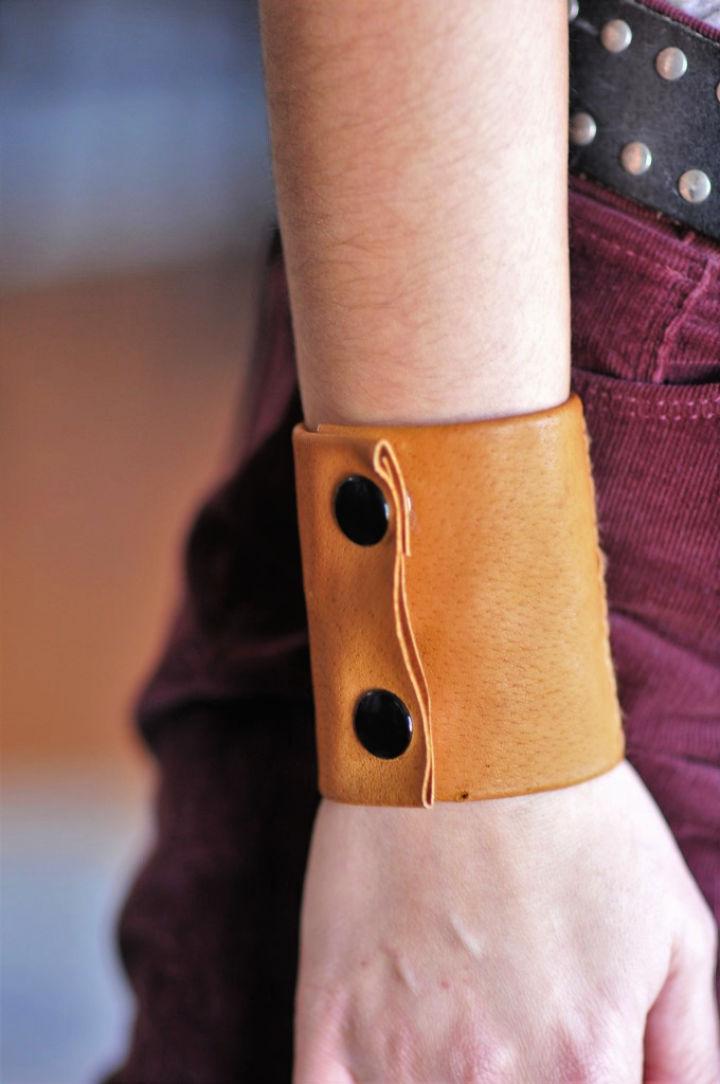
For avid walkers seeking a functional accessory, Kiku Corner offers a clever DIY guide on crafting a leather cuff with a hidden pocket. Perfect for storing essentials like cash, a key, or a subway token, this stylish cuff keeps your hands free while on the move. The step-by-step instructions are clear and engaging, ensuring a smooth crafting experience.
With a leather piece, snap fasteners, and a few tools, you can make a practical and chic wristband that blends utility with fashion. Remember to adjust the leather size to fit your wrist comfortably. Embrace the joy of making your own leather cuff and add a personalized touch to your walking gear.
11. Embroidery Rose Bangle Friendship Bracelet
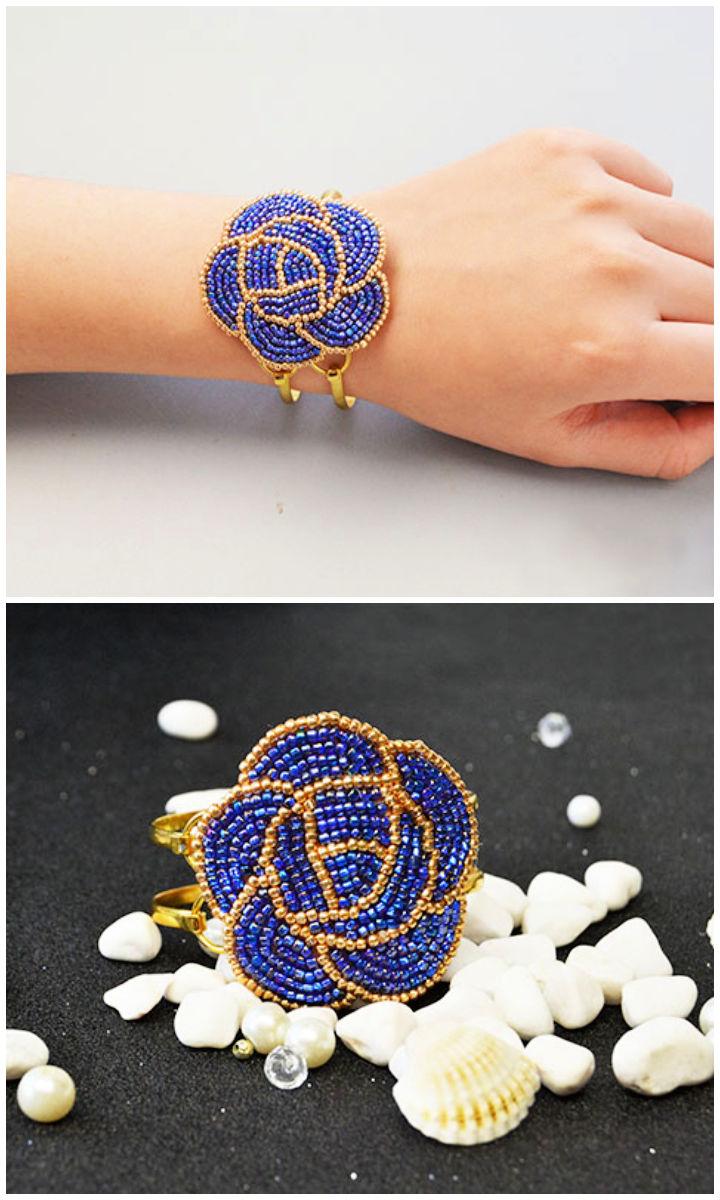
Discover how to craft a stunning blue seed bead embroidery rose bangle bracelet with our helpful guide. This project combines the elegance of seed beads with the timeless beauty of roses, resulting in a unique piece of jewelry that’s sure to impress. Ideal for personal adornment or as a thoughtful handmade gift, this bangle bracelet requires just a few supplies, including blue and golden seed beads, a golden bangle, lemon chiffon felt, a needle, sewing thread, scissors, and a glue gun.
Our step-by-step instructions will lead you through the process of making the bead-embroidered rose and assembling the bracelet. With clear, concise directions, you’ll find the crafting experience both enjoyable and rewarding. Perfect for adding a touch of handcrafted charm to any outfit, this bangle bracelet is a chic addition to any jewelry collection. Give it a try and elevate your accessory game! Pandahall
12. Friendship Bracelet Using Macrame Knots
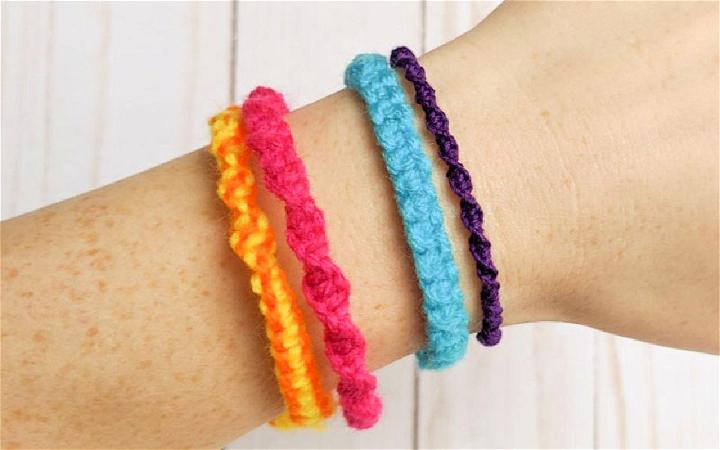
Discover how to craft unique friendship bracelets with Jennie Masterson‘s guide on macrame knots. This engaging tutorial provides step-by-step instructions for making personalized accessories using simple materials like yarn or embroidery floss. Perfect for crafting with friends, these bracelets are not only a nostalgic nod to childhood but also a fun project for all skill levels.
With helpful tips on securing your work and finishing touches, Jennie Masterson’s site is your go-to resource for adding a handmade touch to your jewelry collection. Dive in and start knotting today for a wearable piece of art that celebrates friendship and creativity.
It is always a good idea to express your love to your best friends by making handmade bracelets for them! This Friendship Paper bracelet looks timeless, giving a very rustic look. All you need is some printed paper, some wire, and washi tape! How easy and quick is this creation! journeycreativity
13. Simple Agate Beaded Suede Cord Bracelet
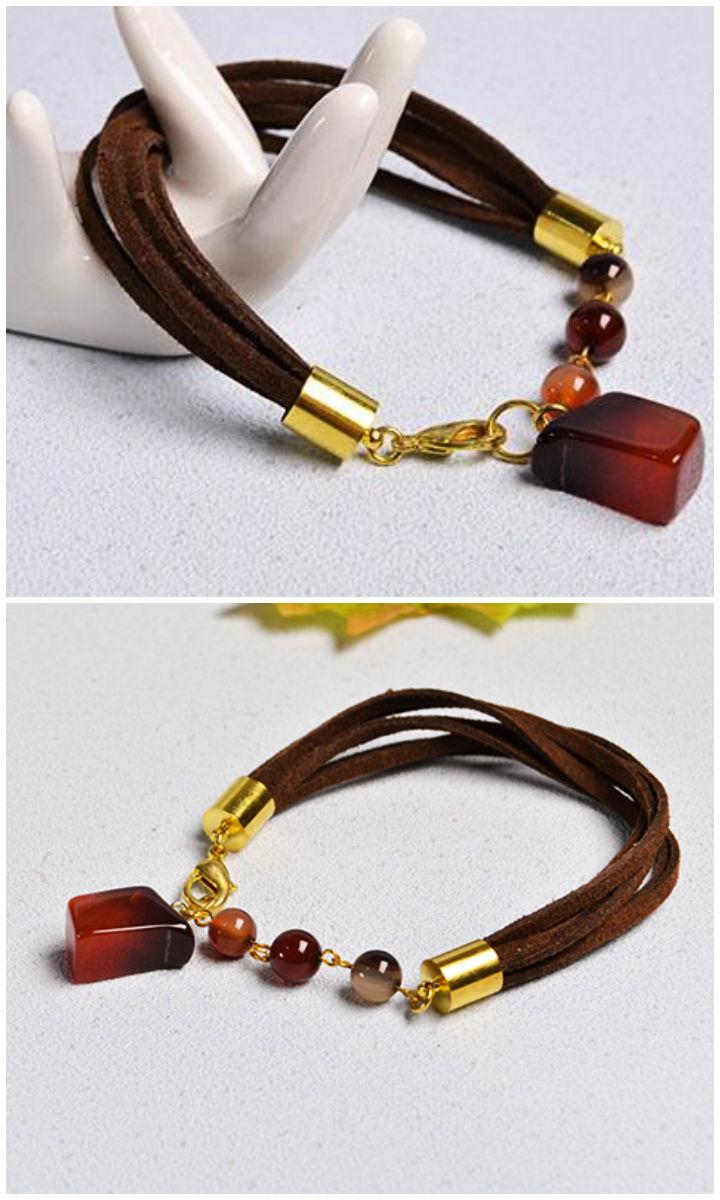
Making a simple agate beaded suede cord bracelet is a rewarding DIY project that adds a touch of elegance to any outfit. With Pandahall‘s original tutorial, you can craft a stylish accessory using vibrant agate beads and soft suede cords. This guide is perfect for those who love handmade jewelry and are keen to learn new crafting techniques. The instructions are clear and easy to follow, ensuring a smooth crafting experience.
Gather your 8mm agate beads, suede cord, and a few basic jewelry-making tools, and get ready to make a bracelet that’s sure to impress. Remember to use a glue gun to secure the cord ends for a durable finish. Enjoy crafting your unique piece of jewelry with this engaging and creative activity.
14. Beaded Grown Up Friendship Bracelet
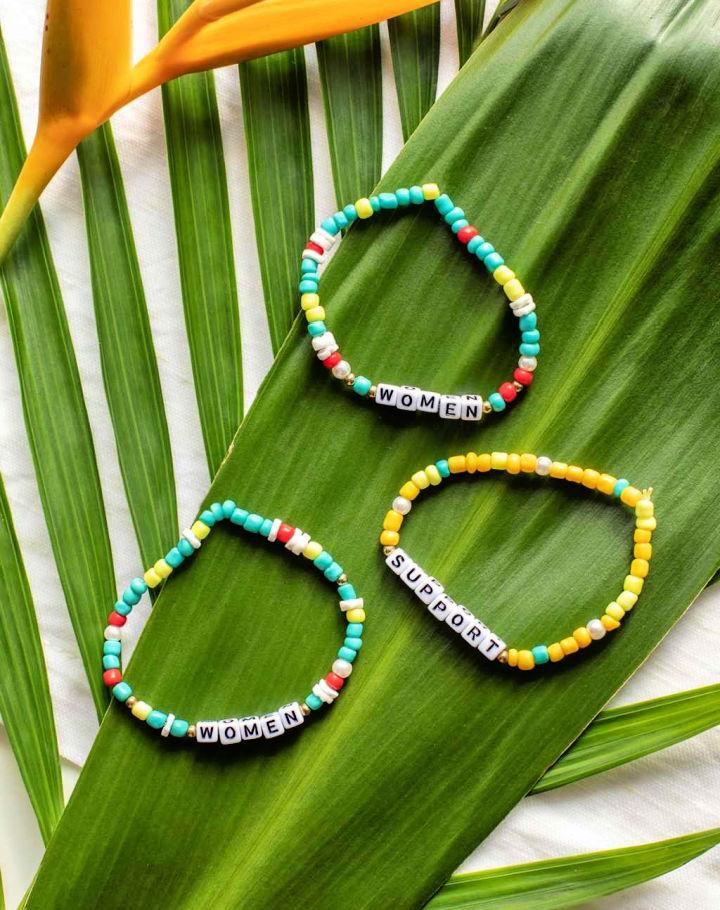
Revive the charm of handmade friendship bracelets with a grown-up twist using ctrl + curate‘s DIY guide. Crafting these personalized beaded bracelets is not only a fun activity to share with friends but also a creative way to express yourself. With simple materials like colorful seed beads, letter beads, and stretch elastic cord, you can design a unique piece that resonates with your style.
The process is straightforward—measure, design, thread, and knot. Accentuate your wrist with a custom bracelet stack that’s both meaningful and stylish. Perfect for gifting or adding a personal touch to your jewelry collection, these bracelets are a testament to friendship and fashion.
These handmade fabric bracelets are the best handmade gift you can give your friends! All you need is some fabric, poster paints, a brush, and a wooden bracelet! The best thing about these bracelets is that you can customize it and have a unique and different bracelet for everyone else! journeycreativity
15. Ombre Cord Curved Bar Friendship Bracelet
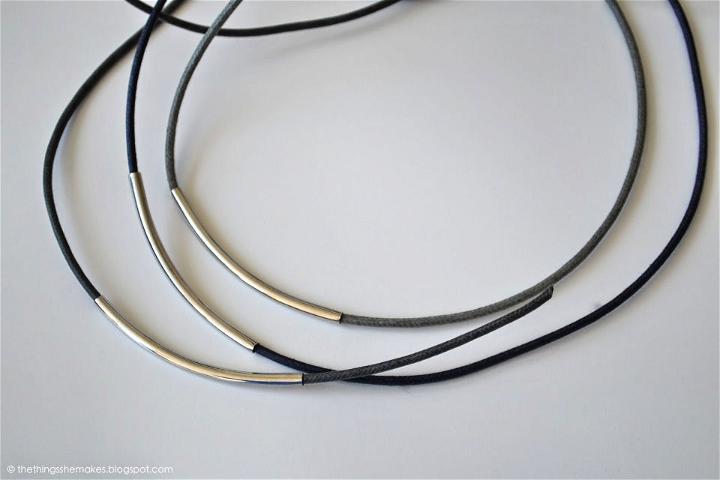
Crafting a chic ombre cord curved bar bracelet is a fun and trendy DIY project you can complete in no time. With The Things She Makes‘ straightforward guide, you’ll learn how to combine cord thread, curved bars, and bracelet clasps to make a stylish accessory. This engaging tutorial provides step-by-step instructions, making it simple for anyone to fashion their own unique piece of jewelry.
Whether pairing with casual wear or adding a touch of elegance to an evening outfit, your handmade bracelet will be a standout addition to any ensemble. So grab your scissors, pliers, and glue gun, and let’s get started on this creative endeavor!
16. Charming Multi-Strand Beaded Ethnic Bracelet
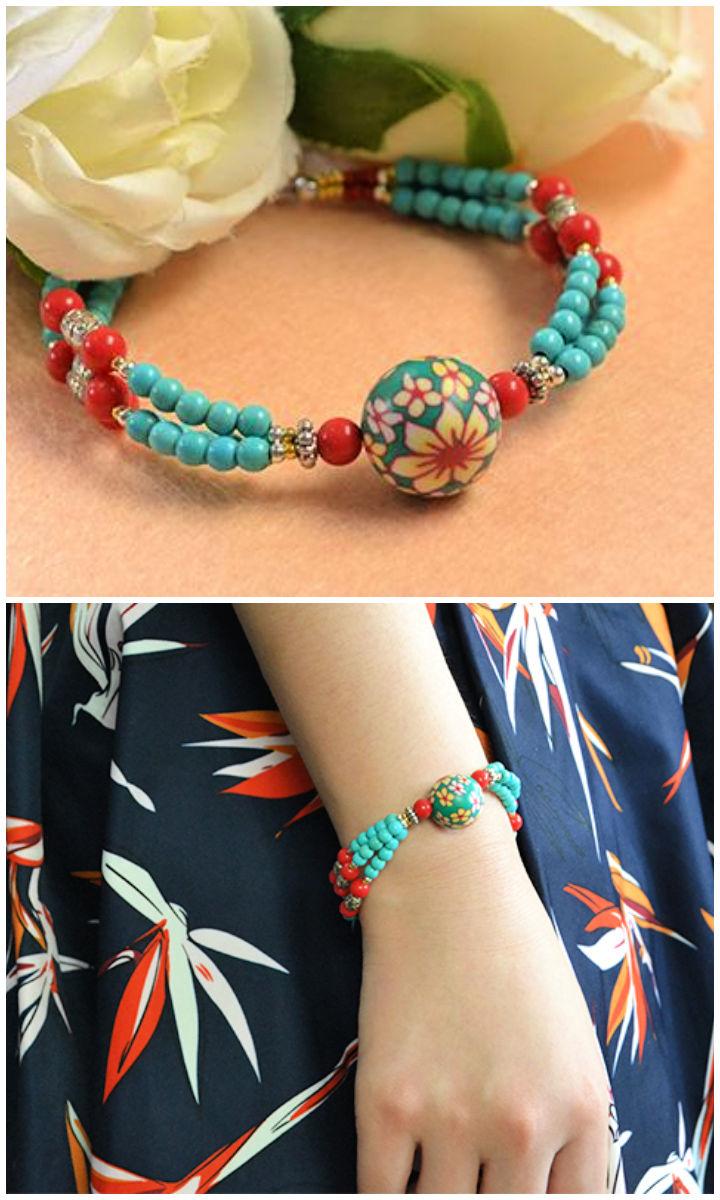
Pandahall presents a free tutorial on crafting a multi-strand beaded ethnic bracelet that’s sure to add a touch of charm to any outfit. Engaging and easy to understand, this guide walks you through the process, from gathering colorful beads to assembling the final piece.
With step-by-step instructions, this DIY project is perfect for anyone who loves to make unique jewelry. Dive into this creative activity and soon you’ll be sporting your own handmade ethnic bracelet or gifting them to friends. Embrace the joy of making something beautiful today with Pandahall‘s helpful tutorial.
17. Handmade Zipper Friendship Bracelet
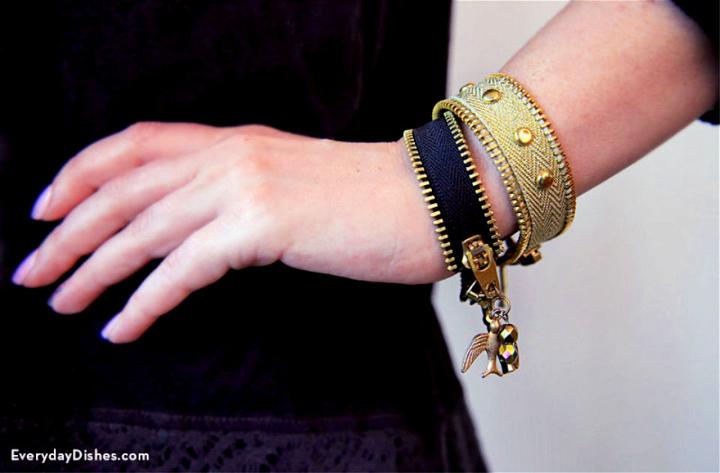
Craft a stylish zipper bracelet with a personalized touch using this simple DIY guide from Everyday Dishes. Ideal for adding a bit of flair to your accessory collection, this project requires a seven-inch zipper, additional zipper pull, scissors, a hot glue gun or strong glue, studs, optional embellishments, a hammer, a lobster claw clasp, a jump ring, and pliers.
Measure and cut the zipper to wrap snugly around your wrist, glue the pieces together, adorn with studs or embellishments, and secure the ends with zipper pulls and clasps. Make an eye-catching piece that showcases your creativity and adds a rockstar edge to any outfit.
18. How to Make a Woven Findings Bracelet
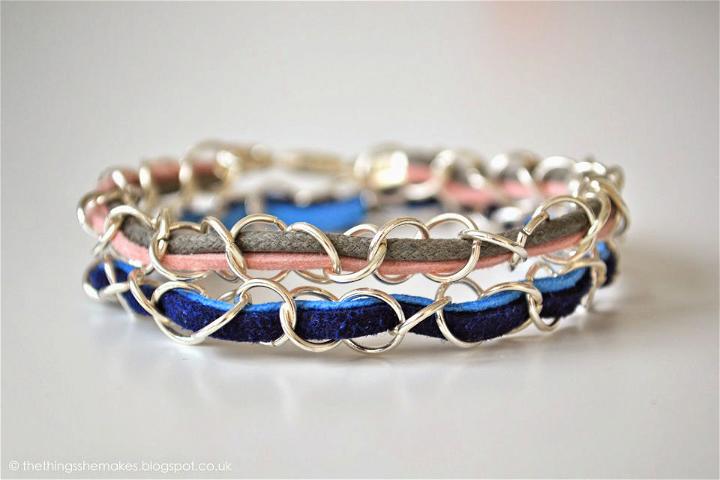
Making a woven findings bracelet is a fun and stylish DIY project. The Things She Makes blog provides a step-by-step guide for crafting a unique accessory using simple materials like suede cord, jewellery findings, and pliers. Start by measuring the findings to fit your wrist, but hold off on attaching the clasps until after the weaving to ensure a perfect fit.
Weave your chosen thread through the findings, secure the ends with clamps, and trim any excess for a clean finish. With the addition of a bracelet clasp, your handmade piece is ready to wear. Customize your bracelet by experimenting with different colors and textures, and enjoy a touch of personalized flair on your wrist.
19. DIY Metal Stamped Pearl Bracelet
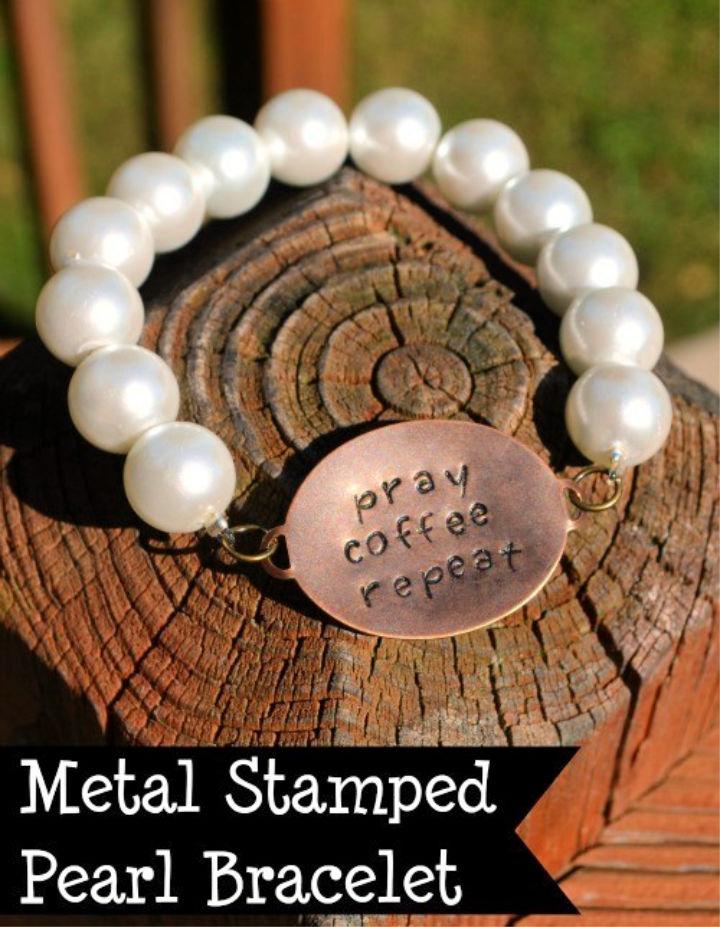
Make a charming metal stamped pearl bracelet with this easy-to-follow guide from Amy Latta Creations. Dive into your bead collection and repurpose those lovely pearls into a stylish accessory. You’ll need pearls, elastic string, crimp beads, jump rings, and a metal stamping blank to start. First, string the pearls on elastic tailored to your wrist size, leaving room for the stamped charm. Secure the ends with crimp beads and jump rings.
Then, personalize your bracelet by stamping a meaningful phrase onto the blank. If stamping isn’t your forte, opt for a pre-made charm. Add a touch of elegance with ImpressArt Stamp Enamel for a professional finish. Finally, attach your custom charm to the bracelet, and voilà—a bespoke piece that’s both heartfelt and fashionable. This bracelet not only accessorizes your outfit but also keeps your favorite sentiments close at hand.
20. Beaded Two in One Necklace and Bracelet
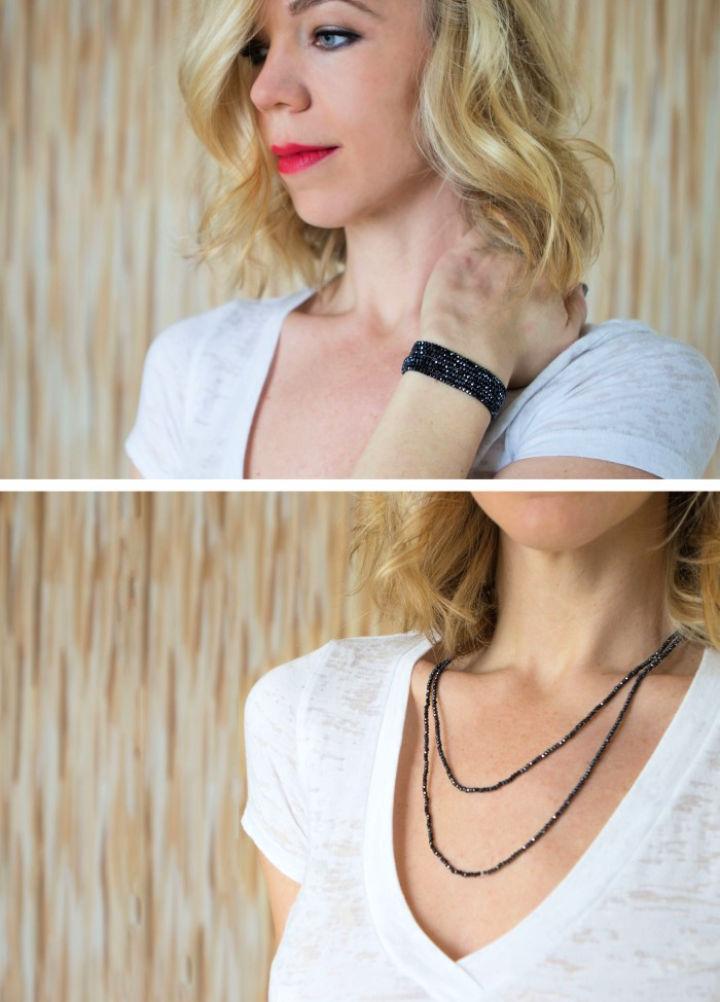
Discover the joys of crafting with a simple and engaging DIY beading project from sisoo.com. Perfect for those who appreciate versatility in accessories, this tutorial guides you through making a beaded piece that doubles as both a necklace and a bracelet. With clear instructions, you’ll need 3mm glass crystal beads, clear 0.5mm elastic, threading wires, and scissors to start.
Patience and dexterity are your allies as you thread beads onto elastic, making a stylish, multifunctional accessory ideal for travel or everyday wear. Follow the step-by-step process to fashion a beautiful, handcrafted addition to your jewelry collection.
21. Unique Beading Ball Friendship Bracelet
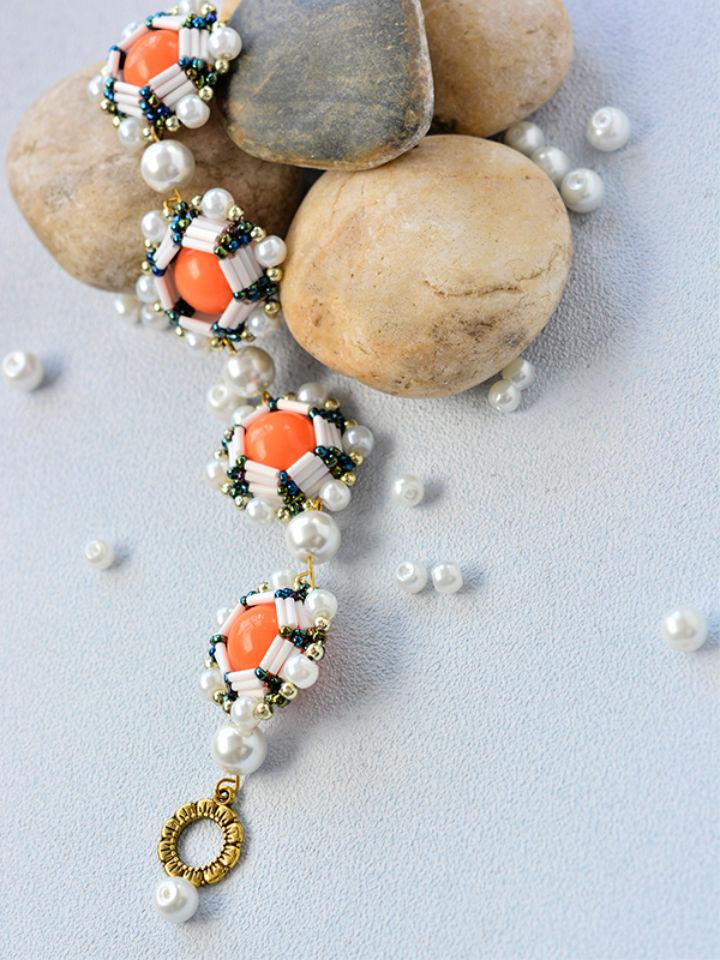
Ready to craft a unique beading ball bracelet with a vibrant touch of orange acrylic beads? The Pandahall tutorial offers a step-by-step guide for making an eye-catching accessory that’s perfect for women who love add a handmade flair to their style. Gather your materials, including pearl beads, tiger wire, and seed beads, and follow the clear instructions to assemble the base, layer your beads, and secure the centerpiece.
Finish off by connecting your beading balls with eyepins and adding a stylish Tibetan toggle. Get creative and enjoy the process of making a stunning bracelet that’s sure to be a conversation starter.
22. DIY Fitbit Leather Cuff Bracelet
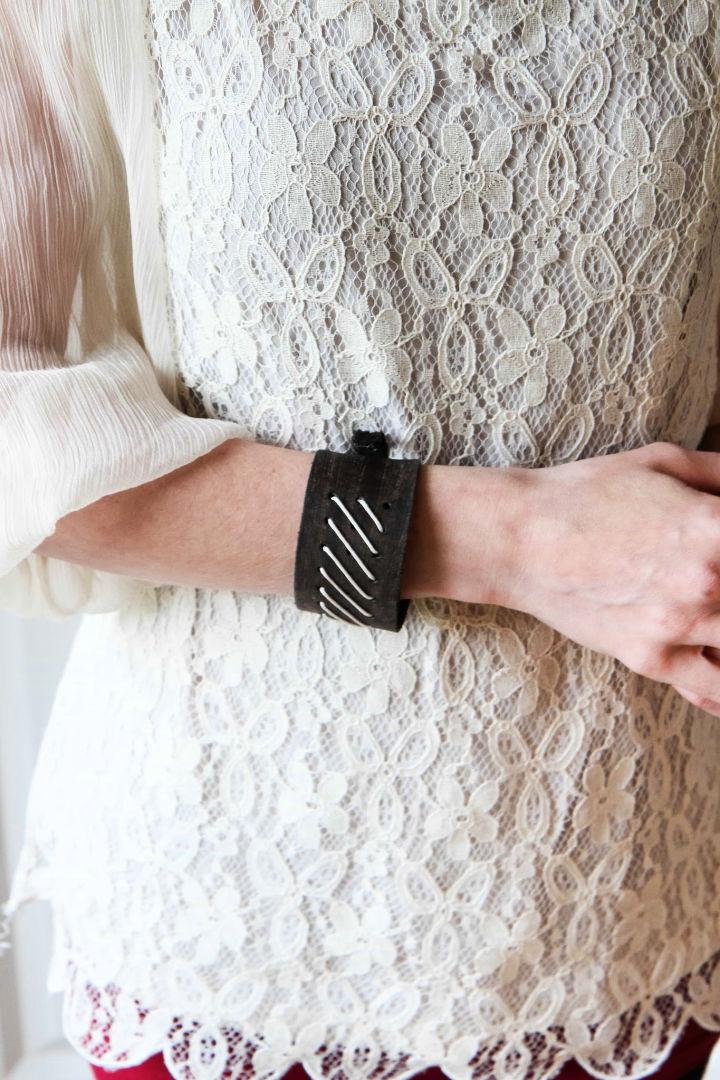
Transform your Fitbit Flex into a stylish accessory with this DIY Fitbit Bracelet tutorial from MomAdvice. If the standard plastic band doesn’t match your aesthetic, this guide offers a creative leather cuff alternative that’s not only budget-friendly but also customizable to suit your style. In just five simple steps, using easily accessible materials like a leather cuff bracelet, hemp cord, and an old t-shirt, you can craft a unique and secure housing for your Fitbit.
Ideal for daily wear, this bracelet ensures your fitness tracker blends seamlessly with your fashion sense. Follow this instructive, engaging tutorial and elevate your Fitbit to a fashionable statement piece.
23. Upcycled Denim Wrap Friendship Bracelet
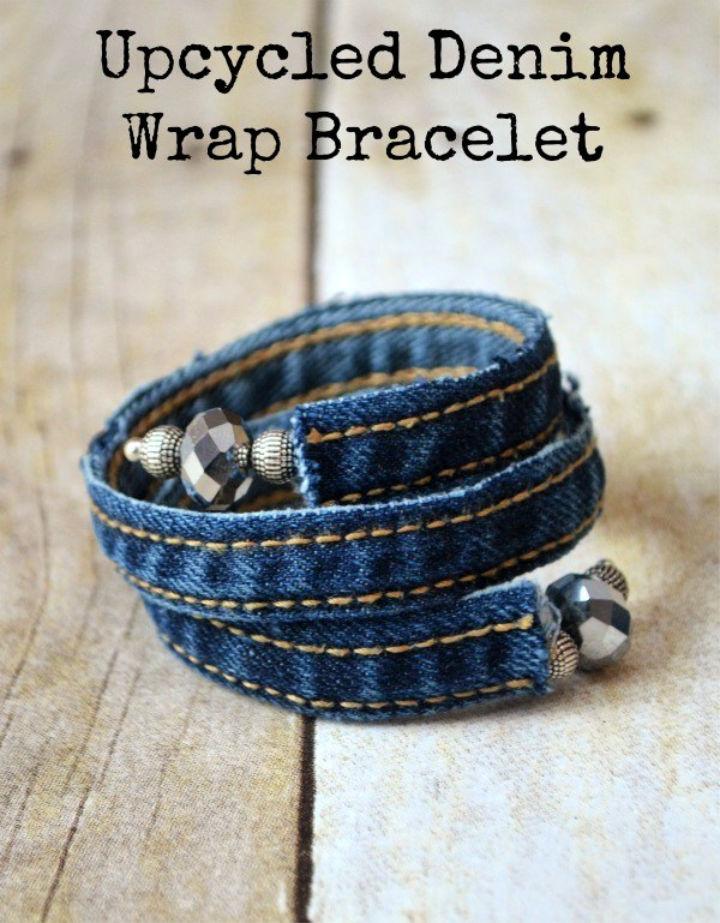
If you’re keen on eco-friendly crafting and giving new life to old items, Amy Latta Creations offers an engaging tutorial on transforming worn jeans into a chic, upcycled bracelet. This instructive guide walks you through each step, from selecting materials to threading beads, ensuring your crafting experience is both enjoyable and rewarding.
By repurposing denim and incorporating personal touches with beads, you’ll craft a unique accessory while contributing to environmental sustainability. Additionally, the site highlights the use of EcoAdvanced recycled batteries, promoting greener choices in everyday life. Get inspired and start crafting with purpose today.
24. Tassel Friendship Bracelet Pattern
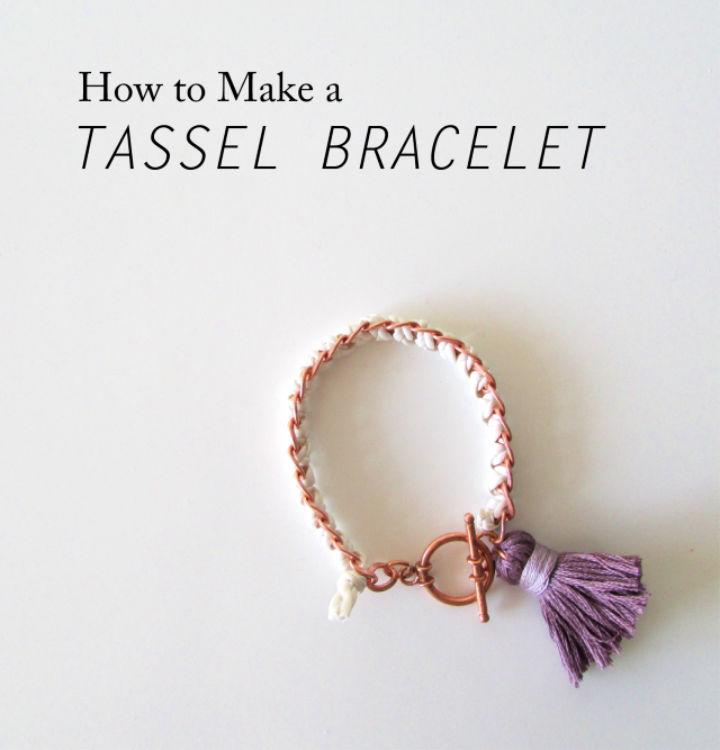
Dive into the creative process of tassel making with Francois et Moi‘s engaging tutorial! Crafting tassels is a fun and simple way to add a personalized touch to your home decor, fashion accessories, or party themes. Our step-by-step guide ensures that anyone can learn the art of tassel creation with ease.
From selecting vibrant embroidery floss to the final touches of attaching them to jewelry or decorative pieces, our instructions are clear, concise, and perfect for a satisfying DIY project. Add a pop of color and texture to your life by mastering the trendy craft of tassel-making today!
25. Metallic Flowers Bangle Bracelet
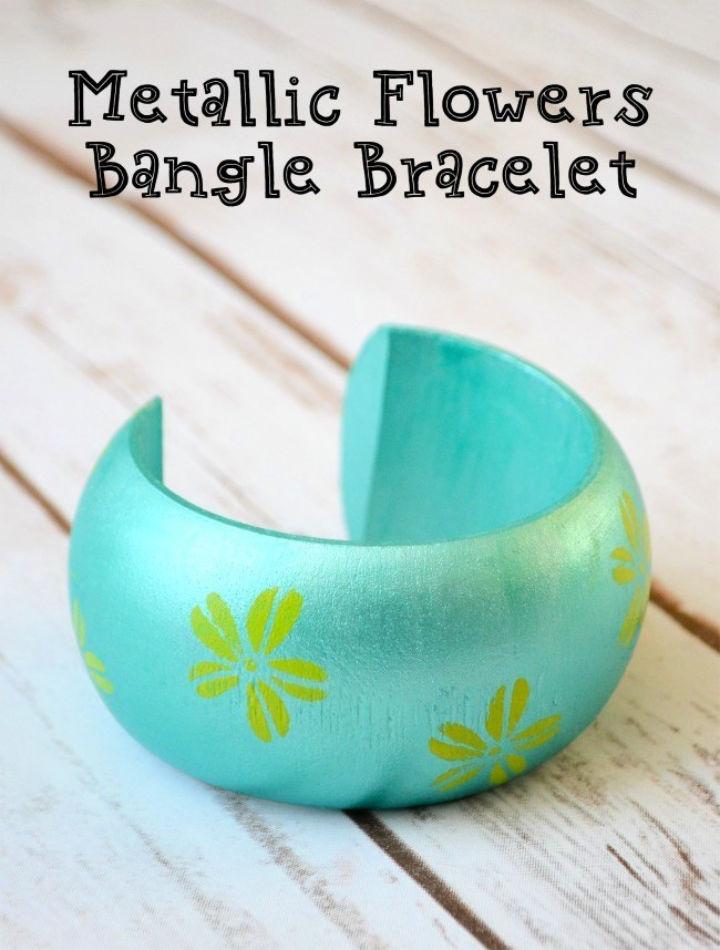
Escape the winter doldrums and add a splash of summer to your wardrobe with Amy Latta Creations‘ easy-to-follow guide on crafting a Metallic Flowers Bangle Bracelet. With a simple set of materials including a wooden bangle, vibrant Folk Art Paints, and playful stencils, you can make a unique accessory that’s perfect for sunny days ahead.
The metallic sheen of the paints infuses a touch of glamour, while the floral pattern brings to life the joyful essence of summer. Dive into this fun DIY project and let your creativity bloom as you paint your way to a personalized fashion statement. Get ready to complement your favorite outfits with a handmade bangle that’s sure to turn heads and brighten your mood.
26. Classic Chevron Friendship Bracelet Pattern
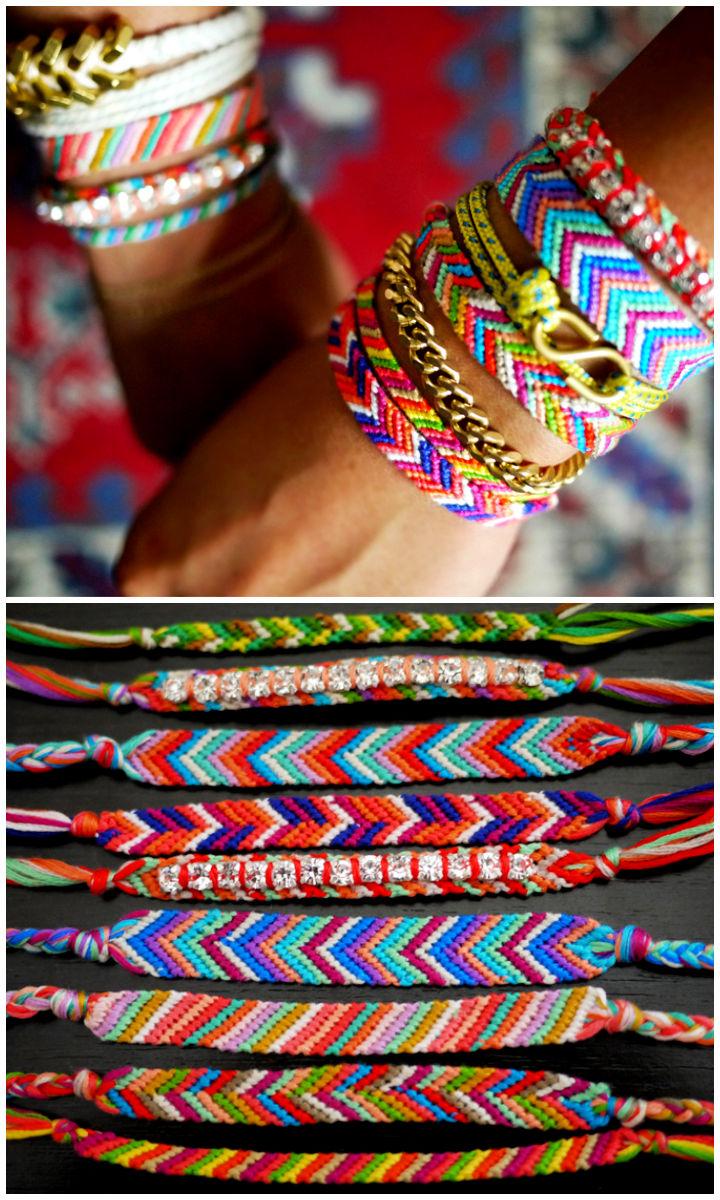
Ready to craft a personalized accessory? Honestly WTF‘s DIY Friendship Bracelet guide is your go-to for making a classic chevron pattern. With a simple list of materials including embroidery thread, scissors, and a safety pin or tape, you can start this creative project. The tutorial is structured with clear, step-by-step instructions that are easy to follow, ensuring a smooth crafting experience.
Perfect for reviving old skills or starting a new hobby, the guide also offers variations like striped or embellished bracelets to match your style. Get ready to make a unique piece that’s all about connection and style.
27. Braided Thread and Rhinestone Bracelet
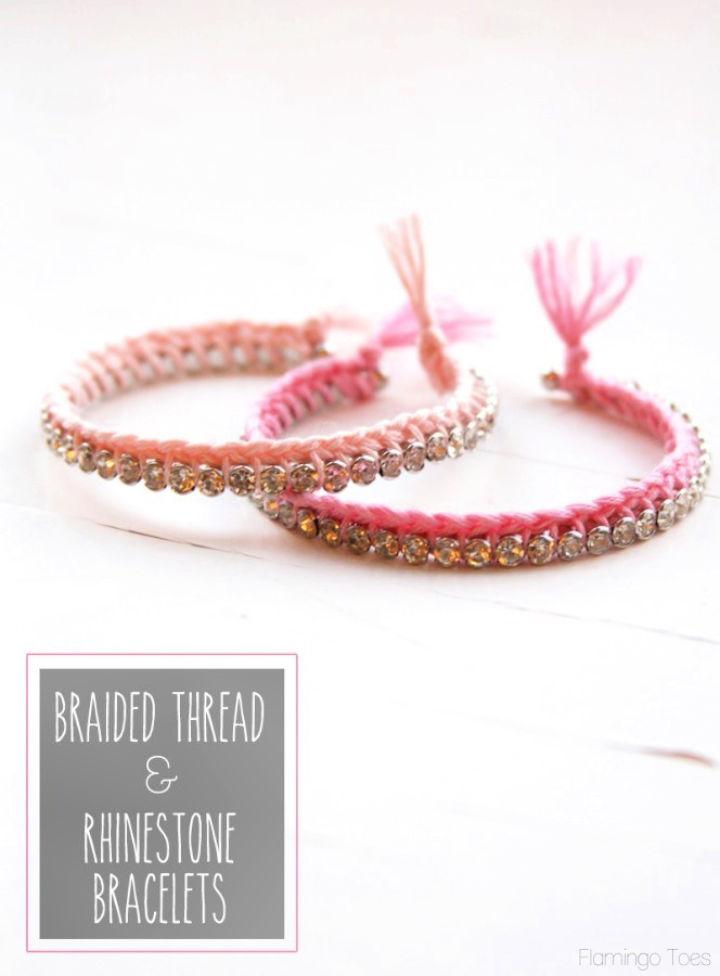
Make your own stylish Braided Thread and Rhinestone Bracelets with this simple DIY from Flamingo Toes. Ideal for adding a touch of handmade elegance to any outfit, these bracelets blend the soft texture of braided embroidery floss with the sparkle of rhinestones. Gather some embroidery floss, a rhinestone bracelet cuff, a clothespin, and a yarn needle to get started.
With a straightforward braiding technique and some basic “sewing” of the floss to the rhinestones, you’ll have a unique accessory in no time. Perfect for game days or to match with your favorite colors, these bracelets are not only easy to make but also make for charming gifts. Get creative and enjoy crafting a piece of jewelry that’s as fun to make as it is to wear!
28. Easy Friendship Bracelets Macrame Pattern
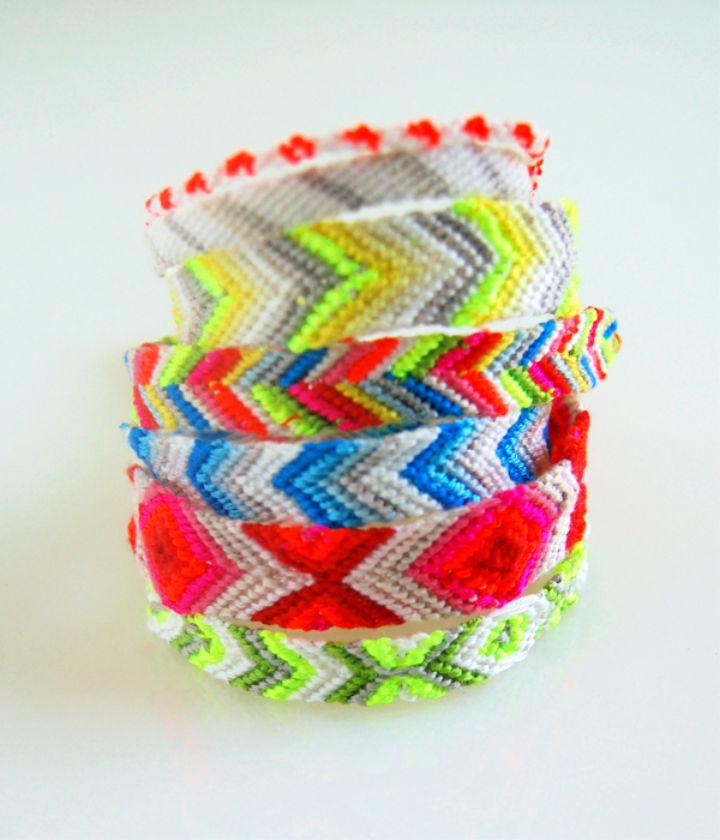
Purl Soho brings the nostalgia and charm of the eighties to modern crafters with their comprehensive guide on making friendship bracelets. These macramed wonders are a perfect craft for all ages, combining ease with the potential for intricate designs. Discover how to master the two fundamental knots and explore a variety of patterns, from basic stripes to elegant diamonds.
With a wide selection of vibrant DMC Cotton Embroidery Floss, including fluorescent hues, your creations will be as unique as the bonds they celebrate. Dive into this timeless activity and craft a piece of wearable joy to share with friends.
29. DIY Heart Friendship Bracelet
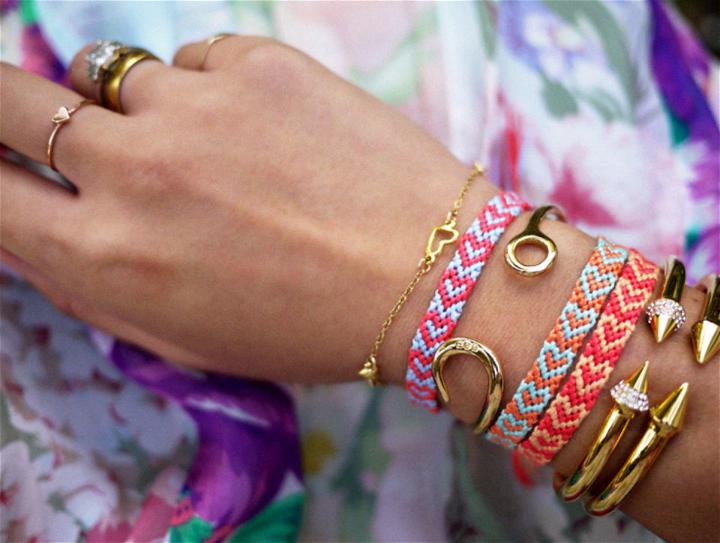
Make a charming heart patterned friendship bracelet with Honestly WTF‘s DIY guide, perfect for Valentine’s Day or as a heartfelt gift. This tutorial simplifies the process, using candy-colored embroidery floss and a chevron pattern as the base. With clear instructions, you’ll cut and knot your way to a beautiful, handcrafted token of affection.
Start with strands of two different colors, learn to make forward and backward knots, and watch as the heart pattern emerges. Once you’ve reached the desired length, finish with a knot and trim the ends. Enjoy crafting this personalized bracelet for someone special or as a fun project for yourself.
30. Making a Multi-Strand Friendship Bracelet
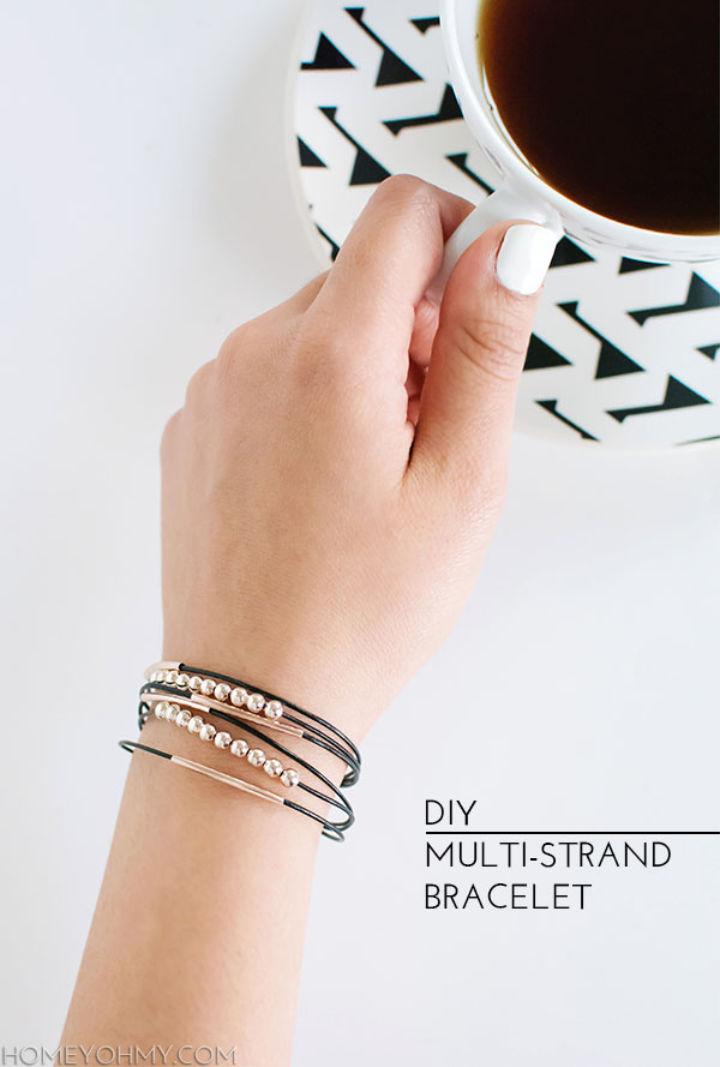
Discover how to make a chic multi-strand bracelet with a simple DIY guide from Homey Oh My. Amy provides an easy-to-follow tutorial for fashioning a stylish accessory using black leather cord and rose gold beads. Learn to cut, assemble, and secure your bracelet with practical tools like needle nose pliers and Mod Podge.
This engaging project is perfect for those who appreciate handmade jewelry and are keen to add a personal touch to their style. Get all the details and step-by-step instructions to enhance your crafting skills and update your accessory collection.
31. Easy DIY Button Friendship Bracelet
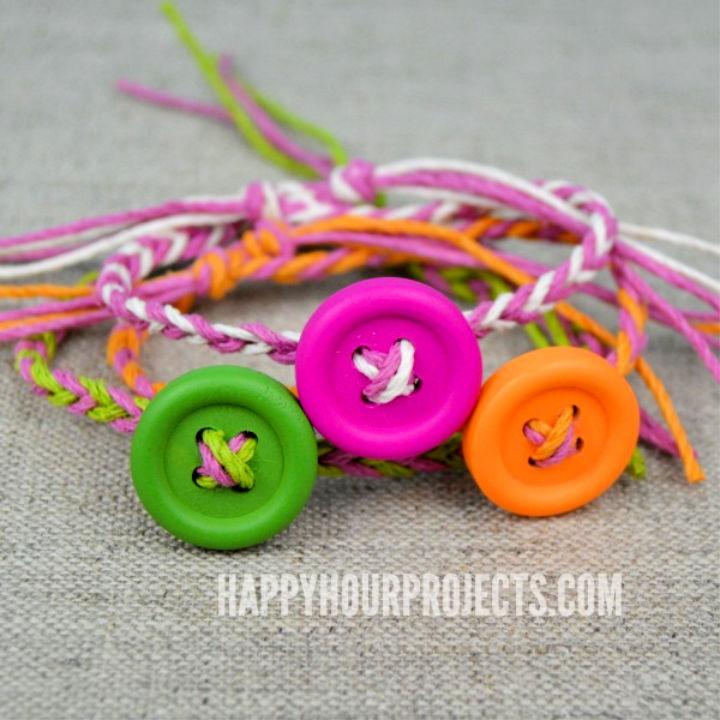
Discover how to make vibrant button friendship bracelets with ease on Happy Hour Projects. This DIY craft is perfect for adding a splash of color and personal touch to your accessory collection. With a simple list of materials—wooden buttons and hemp cord—you can weave a unique piece of jewelry in less than 10 minutes. The step-by-step guide ensures a smooth crafting experience, guiding you through the process of making four-strand braids and attaching the button centerpiece.
Ideal for gifting or wearing, these handmade bracelets are a charming way to celebrate connections with friends. Happy braiding and enjoy this quick, affordable, and enjoyable project!
32. Polka Dot Friendship Bracelet
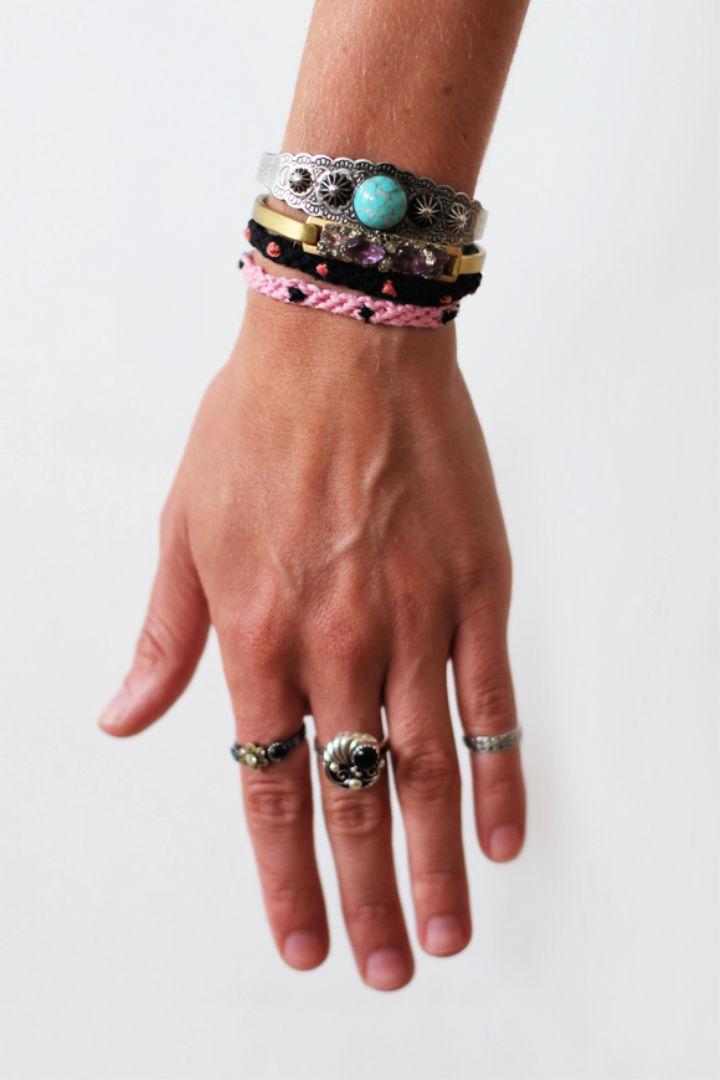
Learn to craft a charming DIY polka dot friendship bracelet with this simple tutorial from Free People Blog. Perfect as a heartfelt gift or a personal keepsake, this guide walks you through the process using basic materials like embroidery thread, a needle, and scissors. Make a loop, knot your threads, and weave a pattern of colorful dots to make a unique accessory.
This engaging activity not only nurtures creativity but also revives the timeless tradition of exchanging handmade tokens of friendship. Follow these steps to add a personal touch to your summer style or to share a bit of warmth with someone special.
33. Beaded Tassel Friendship Bracelet Pattern
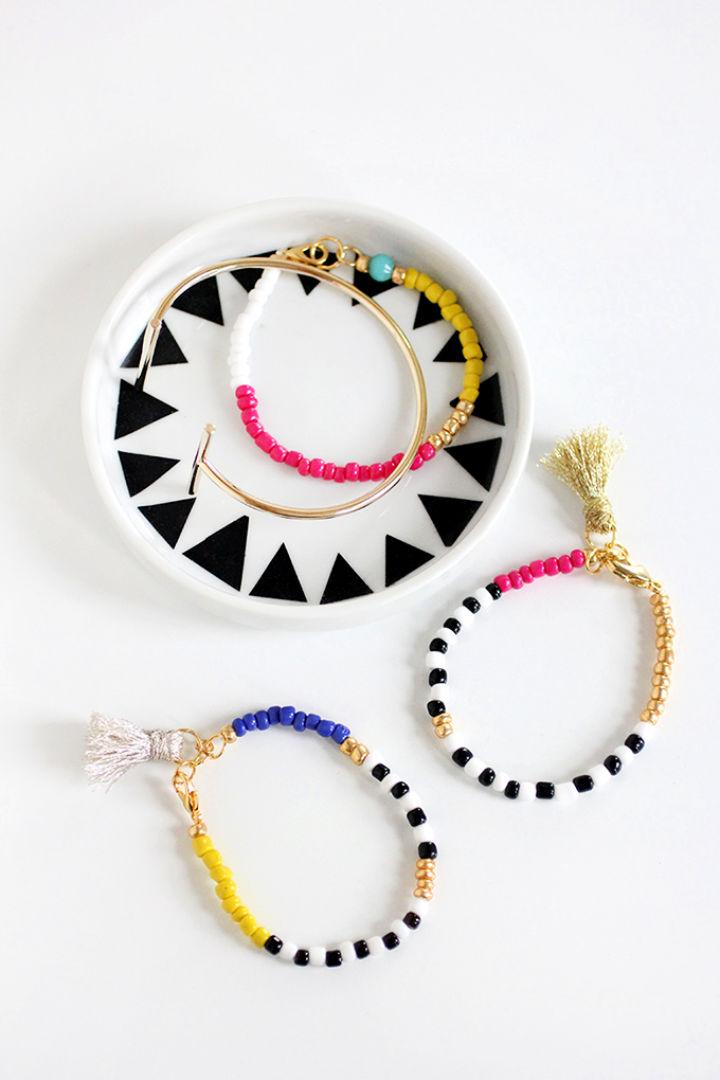
Get ready to add a pop of color and some trendy flair to your wardrobe with a DIY beaded tassel jewelry project from I SPY DIY. This fun and creative activity is perfect for those looking to handcraft their own fashion accessories. You’ll need some basic materials like colorful seed beads, gold seed beads, metallic embroidery floss, lobster clasps, jump rings, jewelry pliers, and monofilament.
The process is straightforward: start by threading beads onto the monofilament, secure a clasp, and then make a chic tassel to complete your bracelet or necklace. With clear steps and simple techniques, you can make stunning jewelry pieces that reflect your style.
34. DIY Rainbow Friendship Bracelet
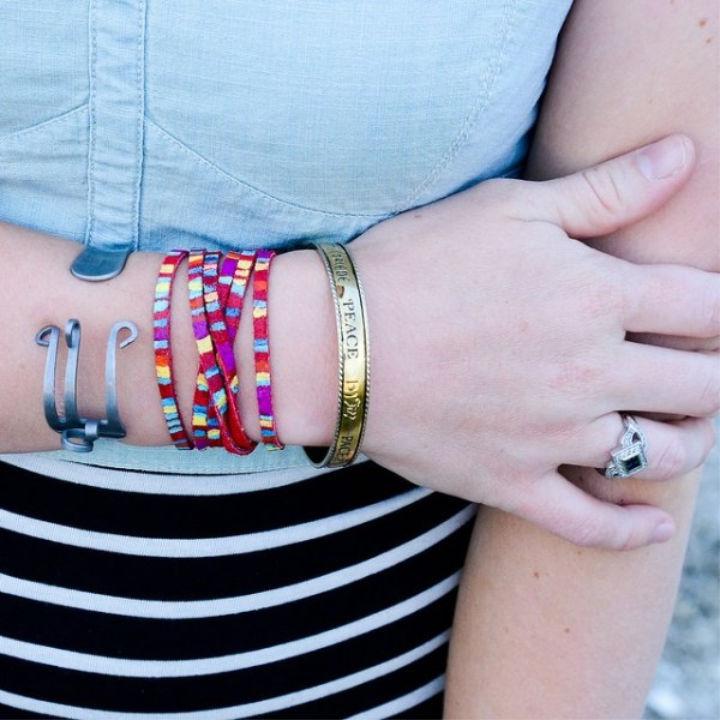
Make your own rainbow friendship bracelet with this easy-to-follow guide from Stars for Streetlights. Perfect for adding a splash of color to your summer wardrobe, this DIY project transforms simple materials like leather cording, paint, and Fabric Mod Podge into a charming accessory.
No intricate braiding is necessary! Just knot, paint, and seal for a fun and personalized piece that’s sure to evoke those nostalgic, sun-soaked vibes. Get creative and make a unique bracelet that’s all about friendship and bright, cheerful days ahead.
35. Make a Breezy Friendship Bracelet
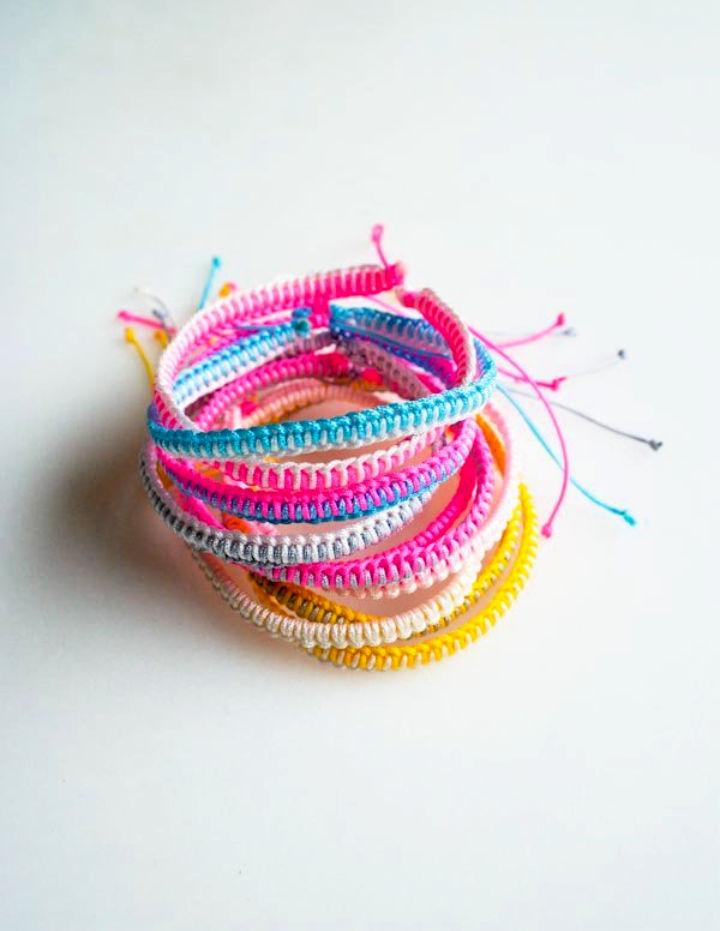
Make beautiful Breezy Friendship Bracelets with ease using Purl Soho‘s simple and engaging guide. Ideal for crafters seeking a fun summer project, these bracelets feature a streamlined, adjustable closure and require just two basic knots. The instructions are clear and concise, making the process enjoyable and doable for everyone.
With just a few materials like 1mm Chinese Knotting Cord, a lighter, and a safety pin, you can whip up a colorful collection of these charming accessories. Perfect for gifting or wearing, these friendship bracelets can be customized in length to fit any wrist, ensuring a personal touch to your handmade creations.
36. DIY Woven Yarn Bangles at Home
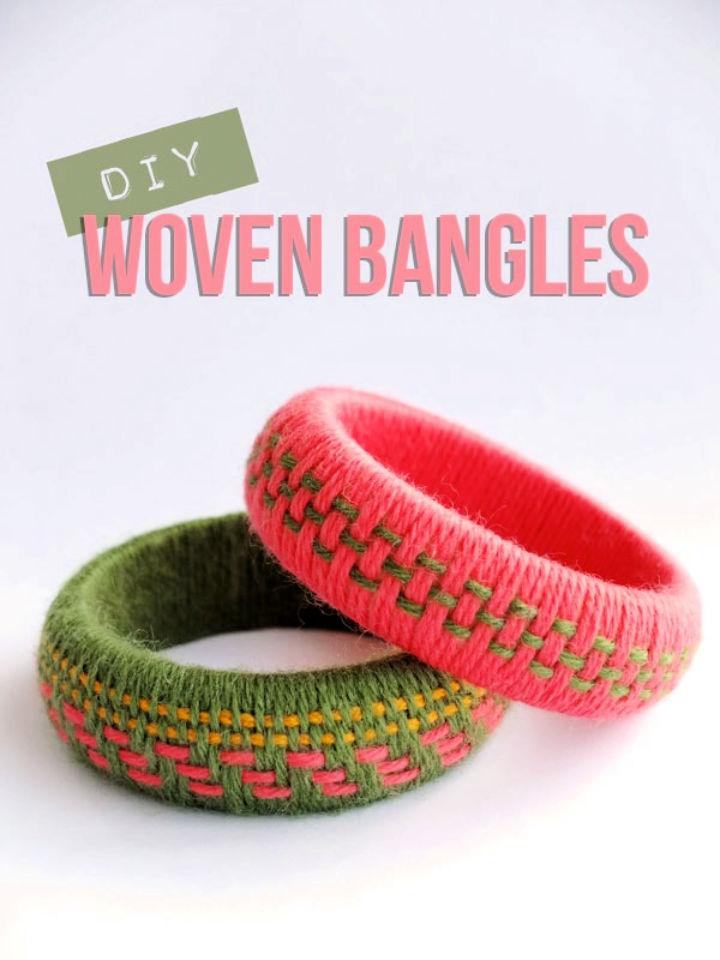
Revamp your wardrobe with a touch of handcrafted charm by making Woven Yarn Bangles, as showcased on My Poppet Makes. Ideal for using up yarn scraps, these bangles introduce a cozy, vibrant element to any autumn or winter ensemble. Start with wooden or thrifted plastic bangles and wrap them in colorful yarn, weaving in patterns for a personalized touch. The process is simple: apply double-sided tape, wrap the base yarn, and then weave in contrasting hues to form your design.
Finish by securing the ends, and you’ve crafted a fashionable accessory that’s uniquely yours. Not only does this DIY project help in repurposing materials, but it also offers a creative way to experiment with weaving techniques on a small scale.
37. Petite Fishtail Friendship Bracelet Pattern
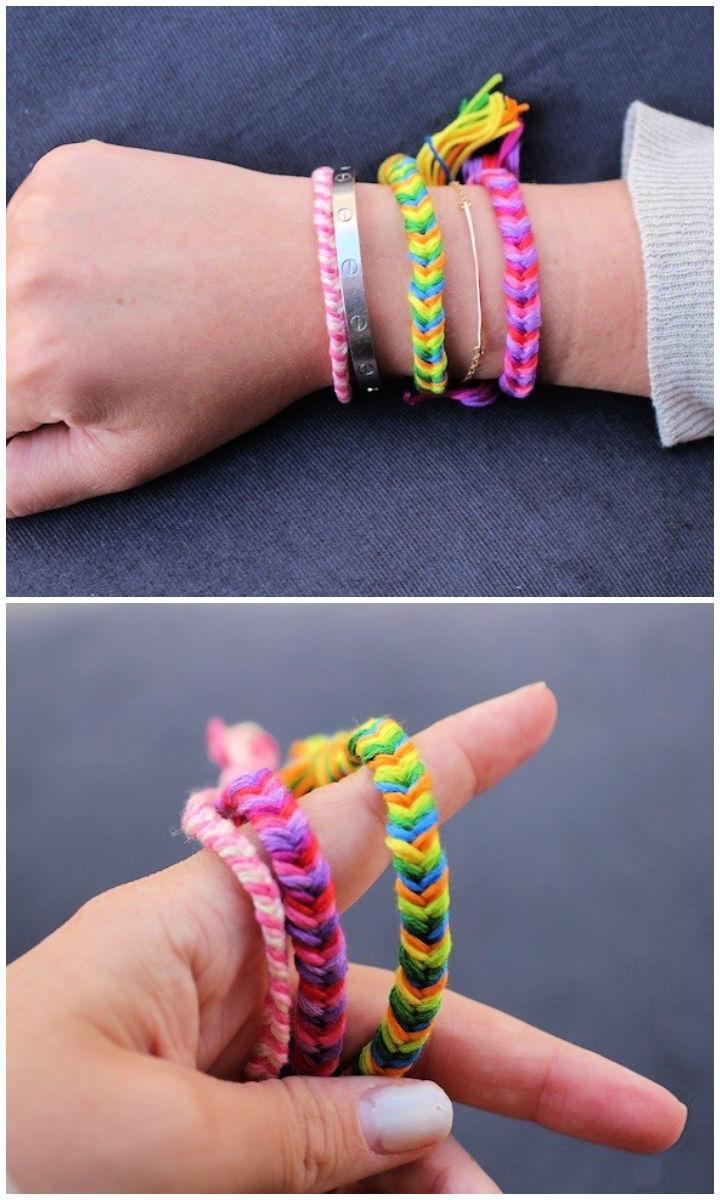
Crafting a DIY friendship bracelet with a fishtail braid design is a fun and stylish way to add a personal touch to your summer accessories. The Stripe offers an easy-to-follow tutorial for making these charming bracelets. All you need is embroidery floss in your favorite colors. Start by sorting your threads and making a loop at the top. Then, criss-cross the strands in a fishtail pattern, ensuring each color is tight and organized.
As you braid, a beautiful chevron pattern will emerge. Once you’ve reached the desired length, finish with an overhand knot and trim the ends. The result is a snazzy, handmade piece perfect for mixing and matching with other bracelets. It’s a creative and engaging project that yields a delightful accessory to wear or share with friends.
38. DIY Sea Glass Bracelet and Earring
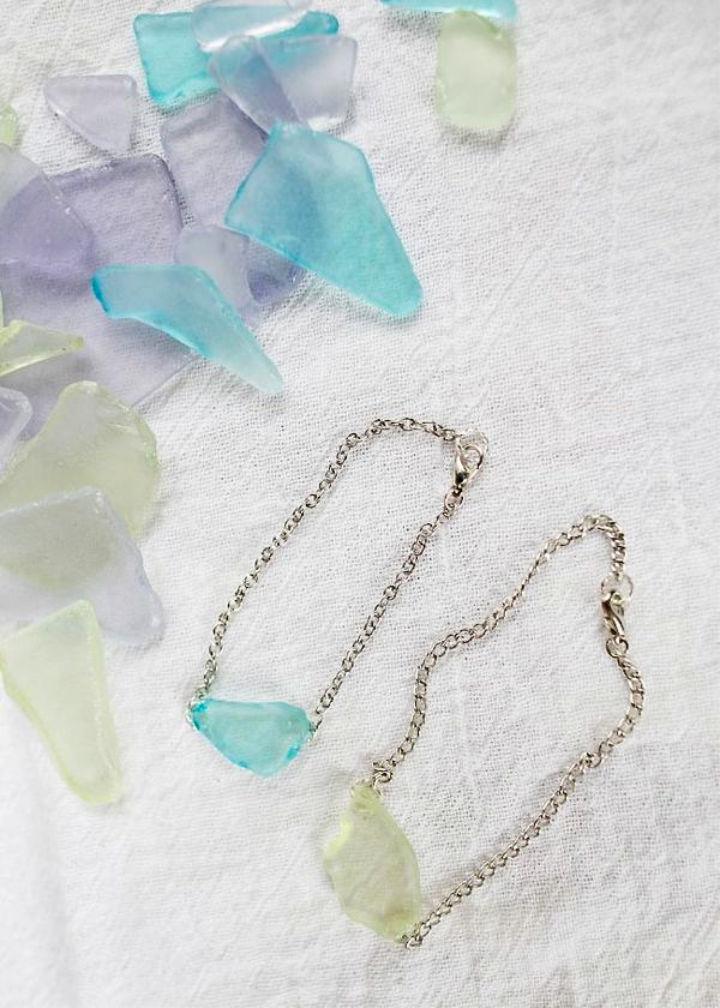
Make a charming sea glass bracelet and earrings set with this easy-to-follow DIY guide from The Sweetest Occasion. Ideal for adding a touch of summer to your style, this tutorial shows you how to craft delicate jewelry pieces perfect for stacking or wearing individually. Gather sea glass mosaic pieces, silver chains, jump rings, and E-6000 glue to begin.
The step-by-step instructions help you securely attach the sea glass to the chains and stud backs, ensuring a professional finish. Whether you’re longing for the beach or simply love unique accessories, this project is a delightful way to make your own sea-inspired jewelry.
39. How to Make a Brass and Rope Bracelet
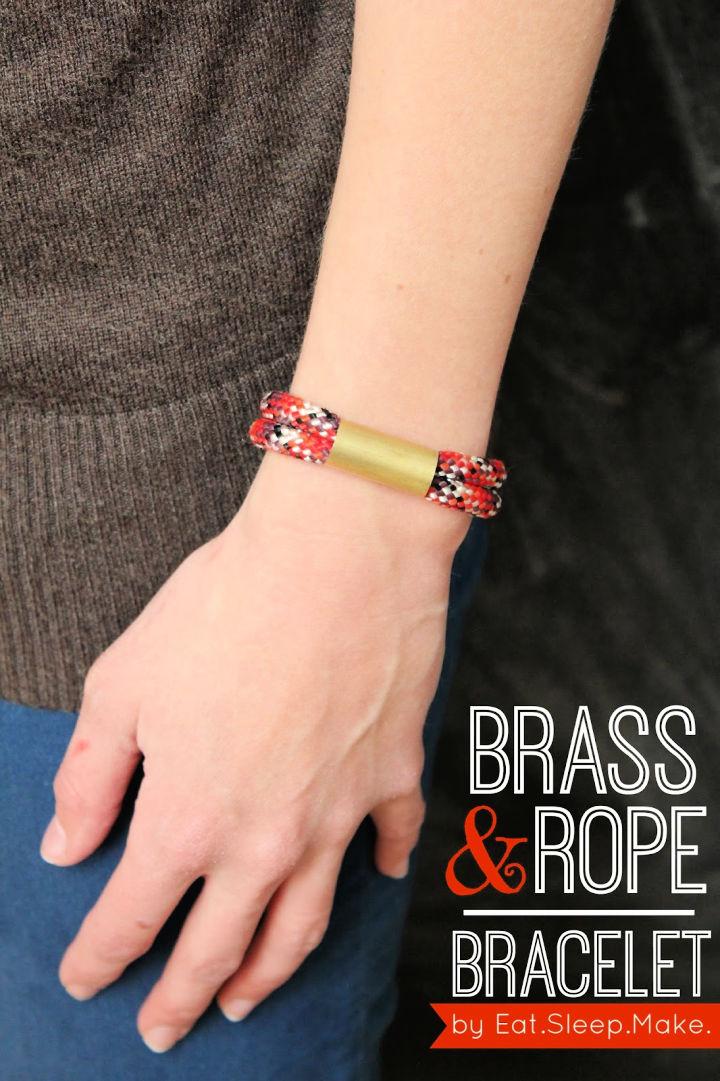
EAT+SLEEP+MAKE offers a fantastic DIY guide for crafting a chic brass and rope bracelet, perfect for adding a modern touch to your accessory collection or gifting to friends and family. The tutorial is clear and concise, making it easy to follow along, even if jewelry-making is new to you. With a few simple tools from your local hardware store, and a bit of creativity, you’ll be on your way to making a unique piece of jewelry.
The blog also includes a giveaway, giving you a chance to win a handmade bracelet and other jewelry items. Get inspired and start making your own brass and rope bracelet with EAT+SLEEP+MAKE‘s helpful instructions.
40. DIY Stamped Initial Friendship Bracelet
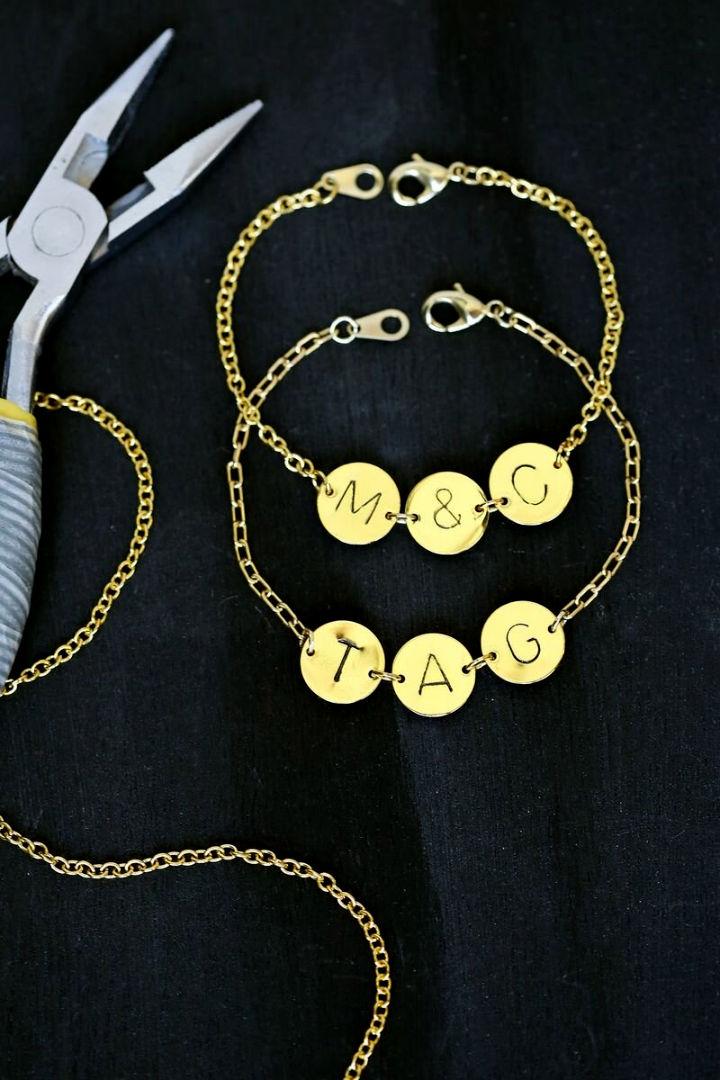
Making a hand-stamped initial bracelet adds a touch of personal flair to your jewelry collection. Laura Gummerman’s DIY guide on A Beautiful Mess offers a step-by-step approach to crafting this unique accessory. Gather your supplies, including gold coin discs, chain, jump rings, and a letter punch stamp. Begin by securing your coin disc onto a jeweler’s bench block and imprint your chosen initial with a hammer.
Enhance the letter’s visibility with a marker and rubbing alcohol. Connect the stamped discs with jump rings and assemble the bracelet with a lobster claw closure for a professional-looking finish. Perfect for gifting or adding a personalized element to your ensemble, this bracelet project is fun, fulfilling, and fashion-forward.
41. Make Your Own Beaded Friendship Bracelet
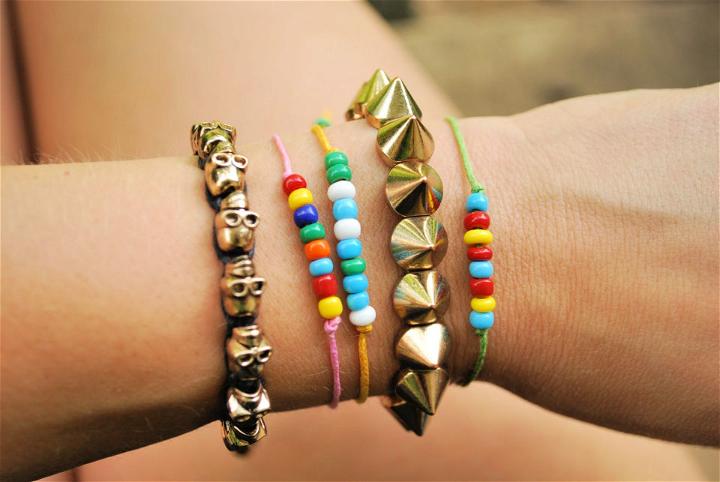
Hey Wanderer offers a fantastic DIY guide for crafting beaded friendship bracelets that are both stylish and easy to make. Ideal for gifting to friends, these bracelets are a fun way to express your creativity without investing too much time. With clear instructions, you’ll learn how to assemble these charming accessories using braiding cord and beads. Just cut, knot, and bead your way to a lovely handmade piece.
This engaging, step-by-step tutorial ensures that even those new to DIY crafts can confidently make a personalized bracelet with ease.
42. Free Fabric Bead Bracelet Pattern

Discover a stylish way to upcycle and craft with Hello Glow‘s fabric bead bracelet tutorial. Transform scraps of organic fabric into chic, hand-rolled beads for a personalized statement piece. The process is engaging and suitable for all crafting levels. Follow clear, step-by-step instructions to make your unique bracelet using simple materials like memory wire, crimps, and a touch of fabric glue.
Perfect for a fun family activity, this tutorial encourages creativity and results in a fashionable accessory that adds flair to any outfit. Get ready to design a one-of-a-kind bracelet that showcases your crafty side!
43. Best DIY Jeweled Ribbon Friendship Bracelet
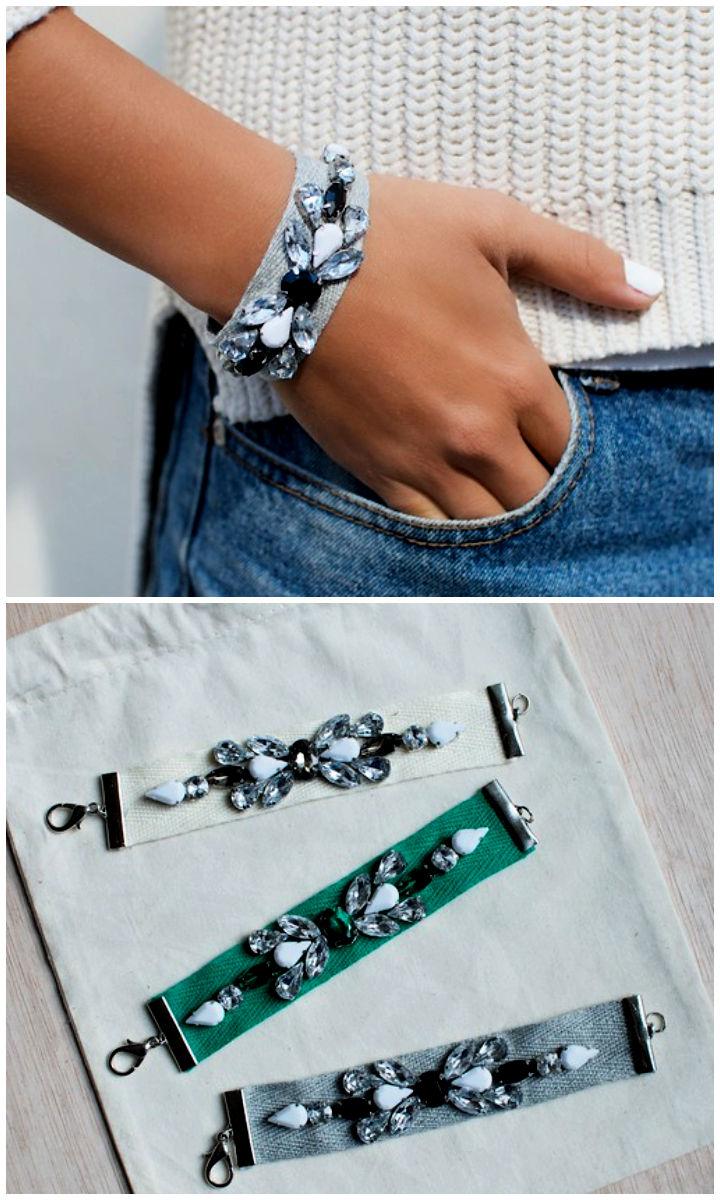
Brighten up your February days with a touch of DIY glam by making your own jeweled ribbon bracelets, courtesy of Collective Gen. These handcrafted accessories add a personalized sparkle to your wrist, perfect for gifting or treating yourself. Start by measuring your wrist and cutting cotton ribbon to size. Select your favorite rhinestones and plan out a dazzling pattern.
With some glue, attach the stones to the ribbon, ensuring a centered design. After drying overnight, secure the ribbon with end clamps and add a lobster clasp and jump rings for closure. Follow these simple steps and you’ll have a unique piece of jewelry that’s all your own.
44. How to Do You Make a Friendship Bracelet
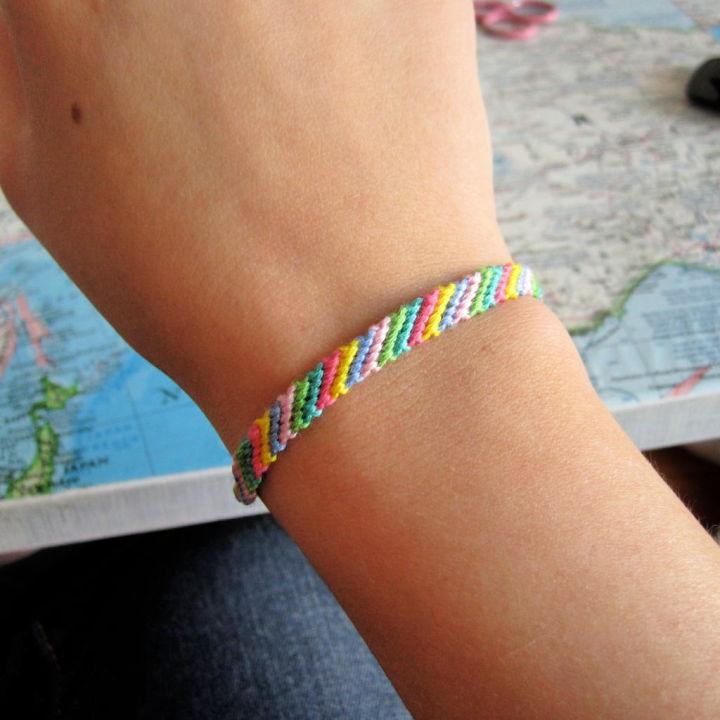
Learn how to craft a beautiful friendship bracelet with ease by following this step-by-step guide from Instructables. Perfect for taking on the go, these bracelets are a charming way to express creativity and make a thoughtful gift for friends. With simple materials like embroidery floss and a few handy tools, you can start making a candy stripe pattern, a classic in friendship bracelet designs.
This tutorial ensures a fun crafting experience, providing clear instructions and helpful tips to ensure your bracelet turns out just right. So grab your floss, scissors, and get ready to knot your way to a lovely handmade accessory.
45. Summer Statement Bracelet Using Fresh Flowers
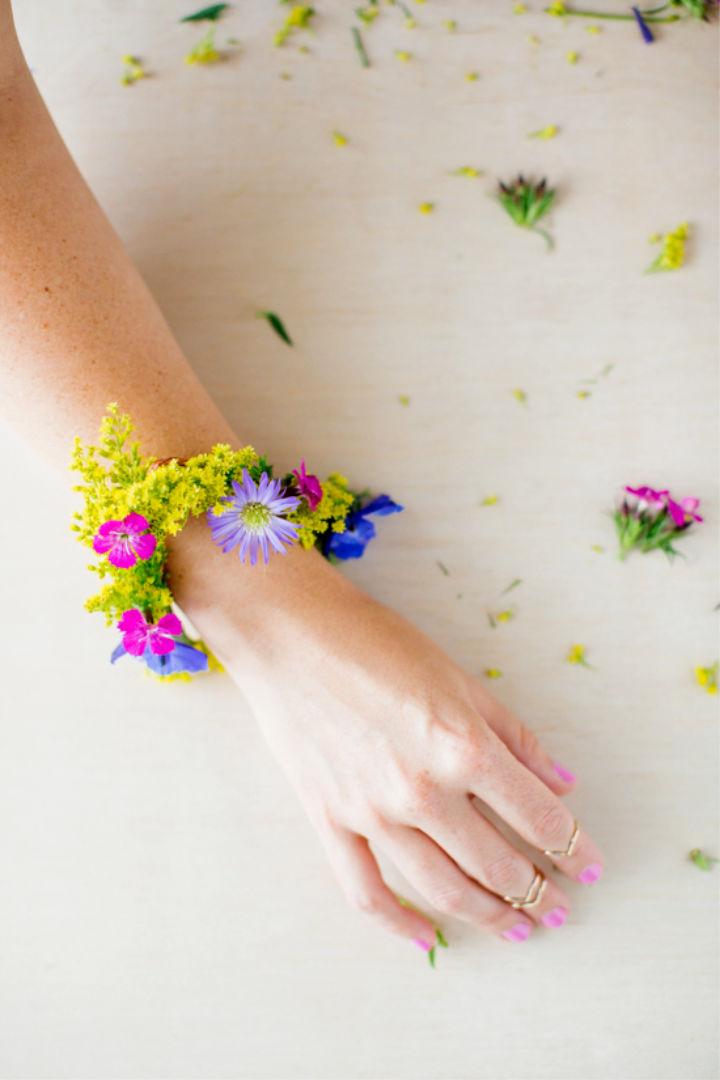
Make your own summer statement jewelry with a DIY flower bracelet that’s perfect for sunny days and outdoor gatherings. At Paper and Stitch, you’ll find an easy-to-follow guide to crafting a unique accessory using fresh flowers. With just floral wire, tape, scissors, and your choice of blooms, you can fashion a geometric bracelet in under 15 minutes.
This piece is ideal for dinner parties, weddings, or simply elevating your everyday style. Keep your creation vibrant by storing it in the fridge to extend its freshness. Dive into this fun project and add a touch of nature to your wardrobe.
46. Fastest Friendship Bracelet With Details Instructions
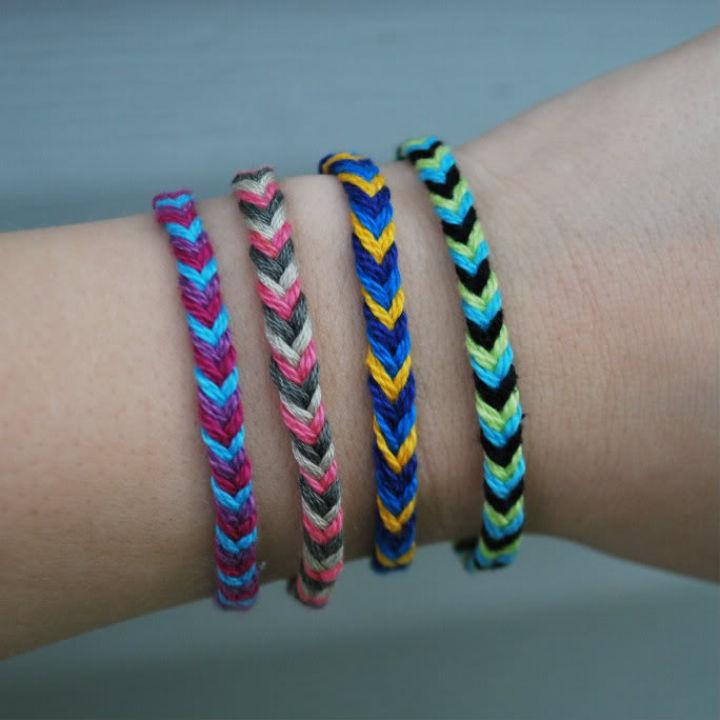
Discover how to make a vibrant friendship bracelet quickly with Hey Wanderer‘s DIY tutorial. The guide simplifies the process, offering a streamlined method that’s perfect for crafting enthusiasts who want to make a stylish accessory in less time. With clear instructions on selecting thread colors, knotting techniques, and finishing touches like adding a bead, you’ll have a personalized bracelet in no time.
Ideal for gifting or adding a pop of color to your wardrobe, this tutorial makes it easy to weave a little joy into your day. Keep your crafting sessions fresh and fun with Hey Wanderer’s fastest friendship bracelet ever.
47. Personalized Macrame Friendship Bracelet
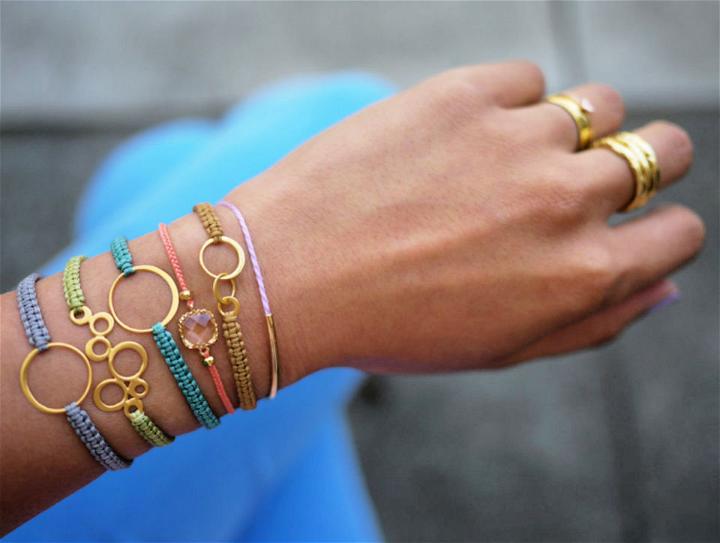
Ready to craft a personalized macrame bracelet with a touch of modern flair? Honestly WTF guides you through making an adjustable knotted bracelet using colorful nylon cord and your choice of metal charms. Begin by cutting your cord into specific lengths and follow the straightforward square knot technique to weave your design.
Secure the knots by sewing the ends and trim any excess for a neat finish. Add a sliding closure for an adjustable fit, ensuring your bracelet sits perfectly on your wrist. With clear instructions and helpful tips, you’ll enjoy making a stylish accessory that’s uniquely yours.
48. Make a Trendy Rope Friendship Bracelet
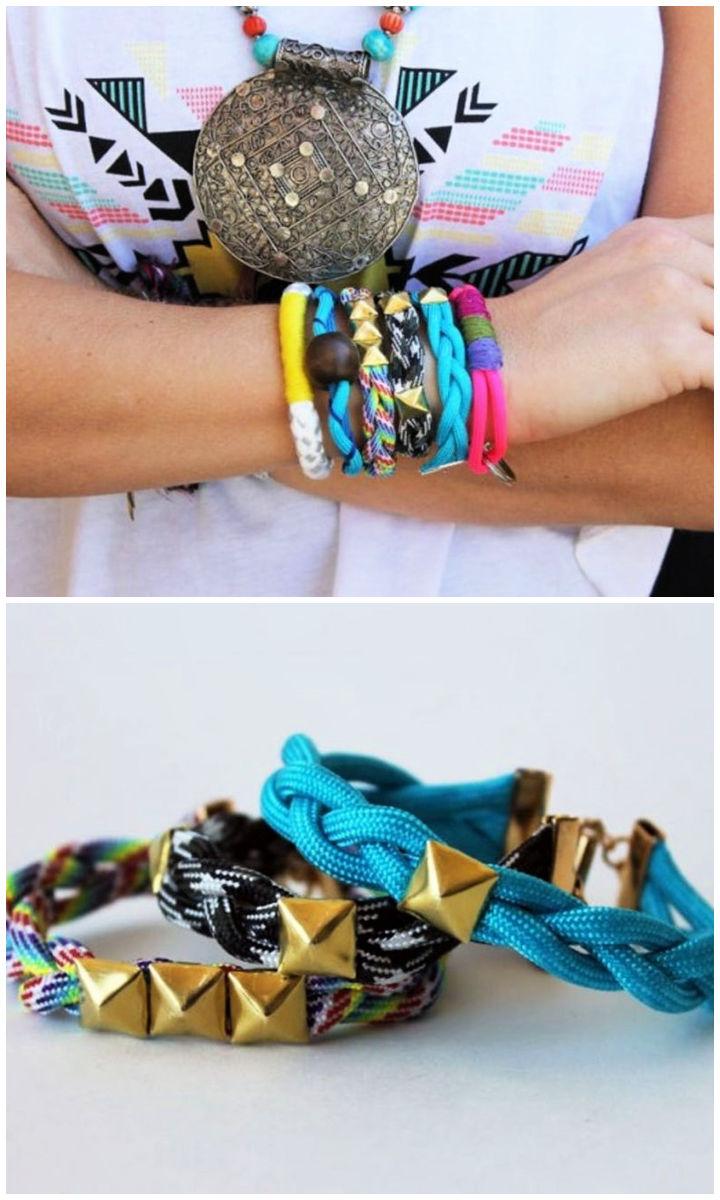
Ready to add a touch of summer flair to your wardrobe? Brit + Co presents a creative guide on making trendy rope bracelets that are perfect for stacking or gifting. With easy-to-follow instructions, you’ll learn to craft stylish accessories using materials like paracord, embroidery floss, and studs.
From a chic woven cuff to a braided bead design, these bracelets are an ideal DIY project to elevate your style game. Get your tools ready and dive into the fun of bracelet-making with this engaging and instructive guide.
49. DIY Monochrome Friendship Bracelet
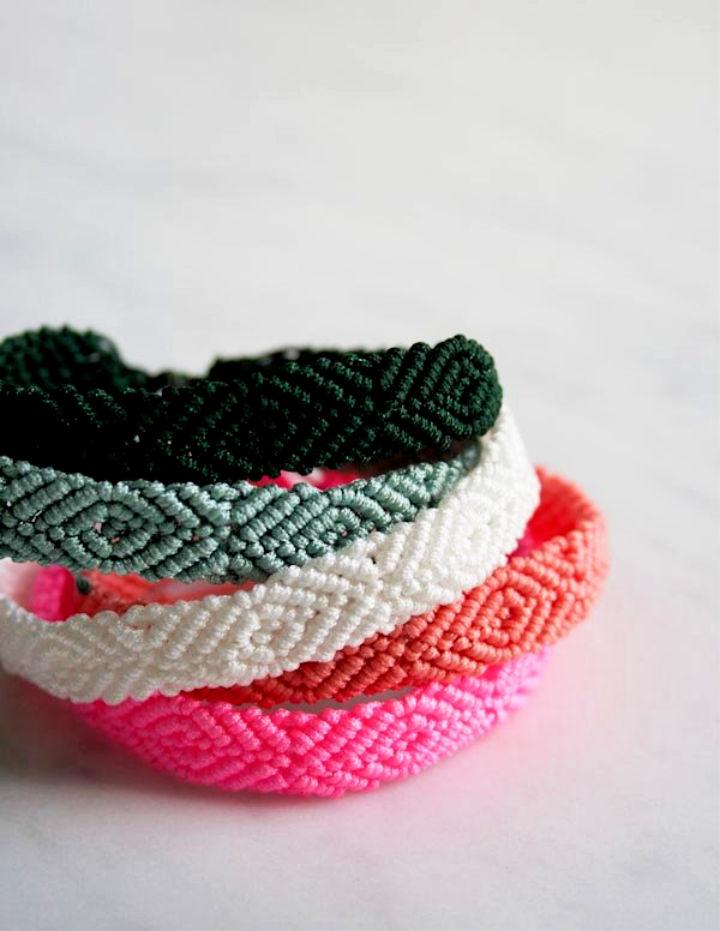
At Purl Soho, discover how to craft unique Monochrome Friendship Bracelets with a twist. These bracelets feature a single color that, when flipped over, reveals a captivating swirly pattern reminiscent of beading rather than traditional macrame. To make your own, use the Diamond Bracelet instructions from the Classic Friendship Bracelet Kit or Pattern, ensuring you differentiate your cords by tying knots at the ends for identification.
While this project is a step up in difficulty, it promises a rewarding and beautiful result. Keep your cords organized and enjoy the creative challenge of this monochromatic craft.
50. Simple DIY Bracelet With Half Hitch Knots
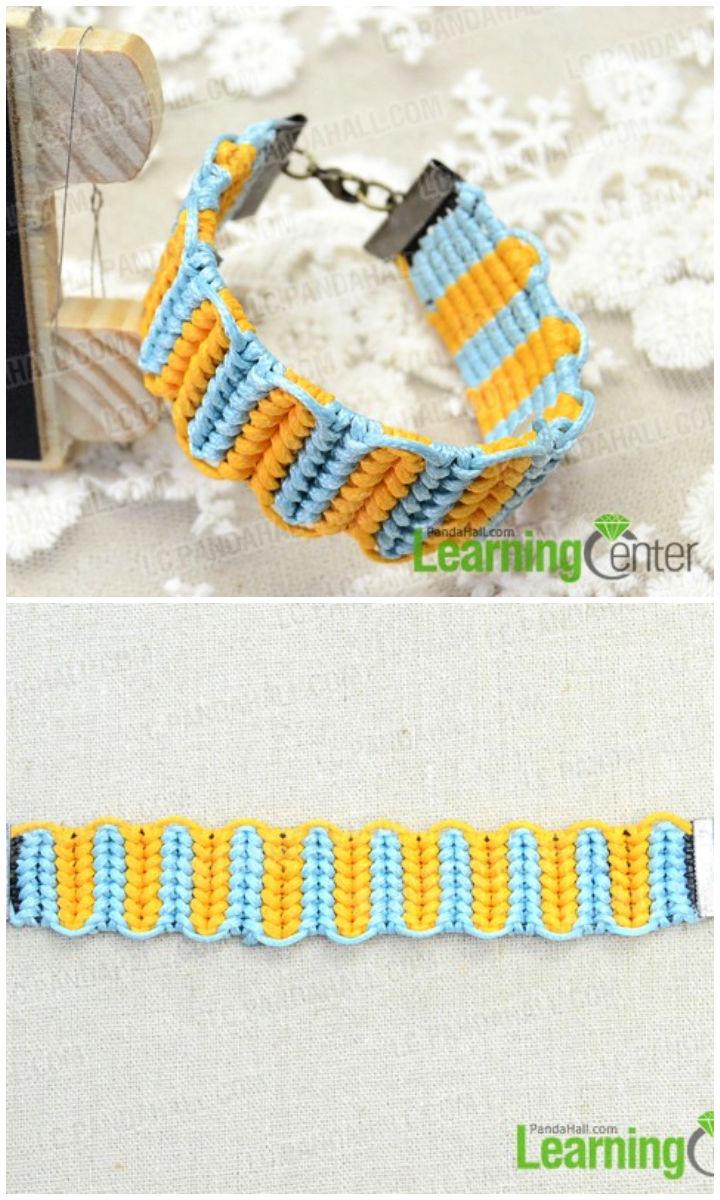
Making a handmade bracelet with half hitch knots is a thoughtful and personal way to show appreciation for your friends. Our tutorial simplifies the process, guiding you through each step with clarity and ease. You’ll need some waxed polyester cord in light cyan and black, a gold Korea wax cord, along with a few jewelry findings like ribbon ends, a lobster claw, and jump rings.
The instructions are straightforward: start by braiding with half hitch knots, secure the ends, and add the clasp for a polished finish. This project is engaging, fun, and perfect for crafting a meaningful gift. Dive into the craft and make a special token of friendship today! Pandahall
Conclusion
In conclusion, our collection of 50 simple friendship bracelet patterns provides a wonderful array of choices for crafting heartfelt tokens of friendship. From chic word beads to hand-engraved pieces, there is a design to suit every style and level of crafting skill. Engage in this therapeutic and inclusive hobby, and create lasting memories with personalized bracelets that celebrate the cherished bonds in your life. Embrace the joy of DIY and start making these friendship bracelets today.
