Summer is right around the corner, and that means leisurely days on the porch are within reach. Enhance your outdoor space with custom-built free standing wooden steps, a project that not only adds beauty but also ensures safety and functionality. Building your own free standing stairs allows for a personalized touch, aligning with your home’s aesthetics and your specific needs.
Making free standing wooden steps doesn’t have to be an intimidating task. With our 20 easy ideas on how to build free standing wooden steps guide, you’ll gain the knowledge and confidence to build steps that are sturdy, reliable, and perfectly suited to your outdoor setting. Embrace the satisfaction of DIY while saving on costs and learning valuable skills. Let’s gear up to make those sun-soaked porch gatherings even more welcoming!
Continue reading to dive into the materials, tools, and step-by-step instructions you’ll need to bring your free standing wooden steps to life.
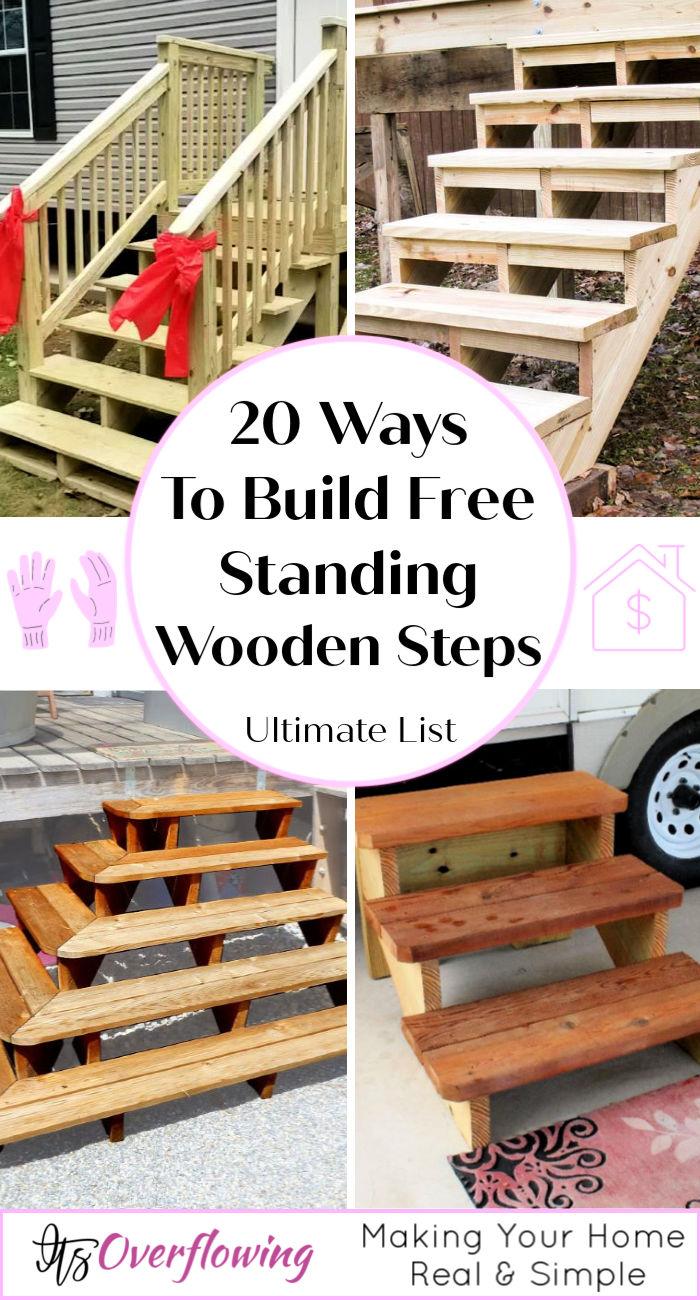
Why Build Your Own Free Standing Wooden Steps
Building your own free standing wooden steps can be a rewarding task for several compelling reasons. Free standing wooden steps are an essential addition to any home, offering not only improved accessibility but also enhancing the aesthetic appeal of your outdoor space. Here’s why you should consider taking on this project:
- Enhanced Safety: Custom steps designed with wider treads and robust construction can greatly reduce the risk of trips and falls, ensuring a safer environment for everyone, especially children and pets.
- Personalization: Tailor the design to fit your unique space and needs. Choose the exact height, width, and materials to match your outdoor aesthetic and functional requirements.
- Cost Savings: By doing it yourself, you can save on labor costs. Allocate your budget towards purchasing high-quality materials or invest in other home improvement areas.
- Skill Building: Learn valuable carpentry skills along the way. Each measurement, cut, and assembly strengthens your DIY knowledge and confidence.
- Aesthetic Upgrade: Well-crafted wooden steps can significantly improve your home’s exterior, adding charm and character to your outdoor living space.
Remember, with a well-organized plan and careful execution, you can create a set of steps that not only looks great but also stands strong for years to come.
Materials and Tools You’ll Need for Building Free Standing Wooden Steps
Building your own free-standing wooden steps can be a fulfilling DIY project. To ensure your success, you’ll need the right materials and tools. Here’s a list to get you started:
Materials:
- Pressure-Treated Lumber: This will be used for the stringers, treads, and supports. It’s essential for outdoor projects due to its resistance to rot and insects.
- Deck Screws: Choose screws that are appropriate for outdoor use to secure the wood together.
- Galvanized Metal Hardware: Necessary for reinforcing the stairs and providing extra stability. This includes joist hangers, angle brackets, and ties.
- Plywood: For the risers and treads, depending on your design.
- Pea Gravel and Landscaping Fabric (Optional): For certain designs, gravel can be used for the steps’ surface, and fabric helps prevent weed growth.
- Concrete Pavers (Optional): To create a stable and level base for the stairs.
- Wood Stain or Sealant: To protect your stairs from the elements and extend their lifespan.
Tools:
- Tape Measure: For precise measurements.
- Circular Saw or Miter Saw: To cut lumber to the correct sizes.
- Carpenter’s Square: For accurate angles and layouts.
- Level: To ensure your steps are even and stable.
- Drill with Bits: For pre-drilling holes and driving screws.
- Jigsaw (Optional): If your design requires intricate cuts.
- Shovel: For ground preparation, if needed.
- Safety Gear: Including gloves, safety glasses, and ear protection.
Note: Before beginning your project, verify local building codes to ensure your steps will be compliant. Adjust your materials list accordingly if specific requirements must be met.
By gathering these materials and tools, you’ll be well-prepared to create a beautiful and functional set of free-standing wooden steps that enhance your outdoor space.
How to Build Free-Standing Wooden Steps: A Step-by-Step Guide
Whether you’re looking to add steps to your porch, deck, or garden, building free-standing wooden steps is a practical and rewarding DIY project. This guide will walk you through the process in an easy-to-follow manner, ensuring that you can create safe and attractive steps that enhance your outdoor space.
Materials and Tools Needed
- Pressure-treated lumber (for stringers, treads, and supports)
- Deck screws (outdoor-rated)
- Galvanized metal hardware (joist hangers, angle brackets, and ties)
- Plywood (for risers and treads, if desired)
- Concrete pavers (optional, for a stable base)
- Wood stain or sealant
- Tape measure
- Circular saw or miter saw
- Carpenter’s square
- Level
- Drill with bits
- Jigsaw (optional, for intricate cuts)
- Shovel (for ground preparation, if needed)
- Safety gear (gloves, safety glasses, ear protection)
Step 1: Plan and Design Your Steps
Calculate the Size: Measure the height from the ground to where the top step will be. Determine the number of steps needed by dividing the total height by the height of each step (riser).
Design the Layout: Use a sketch or design software to visualize your staircase. Ensure it meets local building codes for safety.
Step 2: Prepare the Location
Clear the Area: Remove any debris or obstructions where the steps will be placed.
Level the Ground: Use a shovel and level to create a flat surface for your steps to rest upon.
Step 3: Build the Stringers
Measure and Cut: Use the measurements from your design to mark and cut your stringers from the pressure-treated lumber.
Notch the Stringers: Follow your layout to cut notches for each step, ensuring consistency and accuracy with a carpenter’s square.
Step 4: Assemble the Steps
Attach Treads and Risers: Secure the treads (the part you step on) and risers (vertical part) to the stringers using deck screws.
Reinforce with Hardware: Use metal hardware to reinforce the structure, adding durability and stability to your steps.
Step 5: Secure and Finish
Position the Steps: Move your assembled steps to the desired location. Make sure they are stable and level.
Anchor the Steps: If necessary, use concrete pavers beneath the steps for additional stability.
Protect Your Project: Apply wood stain or sealant to protect the steps from the elements and prolong their life.
Safety First
- Always wear safety gear when operating power tools.
- Double-check measurements before cutting to avoid mistakes.
- Regularly inspect your steps for any signs of wear or damage.
Building your own free-standing wooden steps is not only cost-effective but also allows you to customize them to fit your space perfectly. By following these simple steps and putting safety first, you’ll be able to create a functional and stylish addition to your outdoor area.
FAQs on Building Free Standing Wooden Steps
Discover everything you need to know about building free-standing wooden steps in this comprehensive FAQ guide.
What materials do I need to build free-standing wooden steps?
To build free-standing wooden steps, you’ll need:
- Lumber: Treated lumber for the stringers, treads, and risers.
- Screws: Exterior-grade screws to secure the components together.
- Tools: A circular saw, drill, measuring tape, and carpenter’s square.
- Safety Equipment: Safety glasses and gloves.
How do I calculate the number of steps needed for a certain height?
To calculate the number of steps:
- Measure the total height from the ground to the top of where the steps will reach.
- Divide that number by the height of each riser (usually 7-8 inches).
- Round to the nearest whole number to determine the number of steps needed.
What is the recommended width for free-standing wooden steps?
The recommended width for free-standing wooden steps is at least 36 inches for clear passage, but they can be wider depending on personal preference and space availability.
How do I ensure the steps are stable and secure?
To ensure stability and security:
- Use Thick Lumber: Opt for thicker lumber for the stringers to support the weight.
- Bracing: Add diagonal bracing between the stringers for additional support.
- Solid Foundation: Ensure the base of the steps is level and firm.
- Secure Fastening: Use the right length of screws and fasten them securely.
What type of wood is best suited for outdoor steps?
Pressure-treated lumber, cedar, and redwood are good choices for outdoor steps as they resist decay and insects.
Do I need to treat or finish the wood for outdoor use?
Yes, treating or finishing the wood with a water-repellent sealer or stain will help protect it from weathering and extend its lifespan.
How can I make sure the steps are not slippery when wet?
To prevent slippery steps:
- Textured Paint: Apply textured paint that contains a slip-resistant element.
- Anti-Slip Strips: Affix anti-slip strips to the treads.
- Non-Slip Mats: Place non-slip mats or stair treads on each step.
What tools are required to build wooden steps?
The essential tools include:
- Circular saw or handsaw
- Power drill
- Measuring tape
- Carpenter’s square
- Level
Are there any building codes I need to follow when constructing free-standing steps?
Yes, local building codes may specify requirements for the dimensions, materials, and construction methods of free-standing steps. Always check with your local building department before beginning construction.
How do I attach the risers to the treads?
To attach risers to treads:
- Position the riser against the stringer and flush with the top of the step where it will be placed.
- Secure the riser to the stringer with screws from the backside of the stringer.
- Place the tread on top of the riser and fasten it with screws from the top down into the riser and stringers.
Can I add a handrail to my free-standing steps? If so, how?
Yes, you can add a handrail to free-standing steps. The process involves:
- Measuring the height and length of the steps for the handrail.
- Choosing the material for the handrail, such as wood or metal.
- Installing posts securely to the steps or adjacent structure.
- Attaching the handrail to the posts with screws or brackets.
What is the maximum riser height for comfortable and safe step climbing?
The maximum riser height is typically no more than 7 3/4 inches (196 mm) for comfort and safety. However, always check local building codes as they can vary by location.
How can I prevent the wood from rotting or being damaged by insects?
To protect wood from rot and insect damage:
- Use pressure-treated lumber or naturally rot-resistant wood types.
- Apply a water-repellent wood preservative.
- Ensure proper drainage around the steps to prevent water accumulation.
Do I need a permit to build free-standing wooden steps on my property?
Permit requirements vary depending on your location and the project’s scope. It’s best to contact your local building department to determine if a permit is necessary.
How do I properly space the stringers to support the steps?
Stringers should be spaced 16 to 24 inches apart. The width and the weight the steps will support can affect this spacing, so consider these factors during planning.
Can free-standing wooden steps be moved easily once constructed?
Free-standing wooden steps can be moved, but ease depends on their size and weight. Smaller, lighter steps are more easily relocated than larger, heavier sets.
What are the safety considerations I should be aware of when building steps?
Safety considerations include:
- Ensuring all steps are even and secure.
- Providing adequate lighting around the steps.
- Keeping the steps free of obstructions.
- Regularly checking for wear and tear.
How do I cut the stringers for the steps?
To cut stringers:
- Calculate the rise and run for each step.
- Lay out the cuts on a 2×12 using a framing square.
- Cut the notches with a circular saw, and finish with a handsaw.
Is there a standard tread depth for wooden steps?
The standard tread depth is at least 10 inches (254 mm), which allows enough foot space for most individuals. However, consult local codes for specific requirements.
How do I level the ground before placing the free-standing steps?
To level the ground:
- Remove any sod and loosen the soil.
- Use a shovel and rake to create an even surface.
- Compact the soil firmly.
- Add gravel if needed for drainage and stability.
Remember, your steps should be as safe as they are functional, so take your time during construction to ensure a secure and stable structure.
DIY Free Standing Wooden Steps
Learn how to build your own free standing wooden steps with this easy DIY tutorials. Perfect for adding functionality and style to your outdoor space.
1. DIY Standing Stairs for Travel Trailers
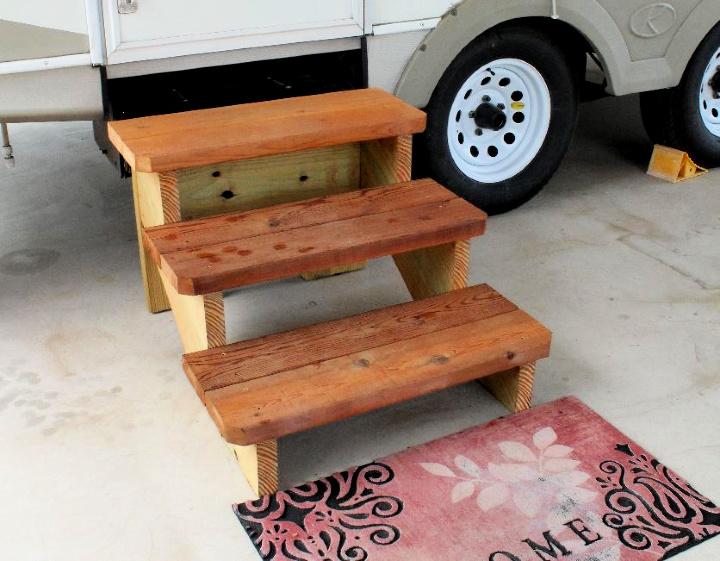
If you need sturdy and versatile free-standing stairs for your RV, deck, or stage, our custom stair designs have you covered. With detailed steps on stringer calculation using Mycarpentry.Com‘s Stair Calculator and SketchUp Pro for 3D modeling, we guide you through creating your own durable stairs. From calculating stair stringers to assembling the final structure, our instructions ensure a seamless process. Elevate the accessibility and style of your outdoor space with our reliable DIY stair solutions.
Here are 20 of the best DIY RVs and van guide we’ve seen. (If you’re looking to do some DIY upgrades on your own camper.)
2. How to Build Wooden Steps/Stairs
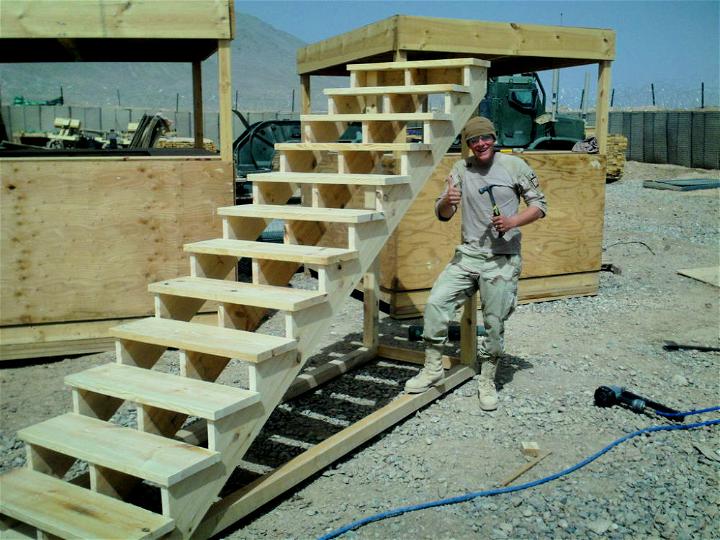
Staircases are a vital part of many structures, providing access and movement between floors. Instructables offers a comprehensive guide to creating a self-standing staircase that is both functional and aesthetically pleasing. This tutorial is perfect for DIY enthusiasts looking to add a unique touch to their home or workspace.
With clear instructions and a focus on safety, readers will learn the importance of precise planning, accurate measurements, and the proper use of tools. Dive into the world of DIY stair-building and enhance your space with a tailor-made staircase that’s sure to impress.
3. Making Your Own Deck Stairs
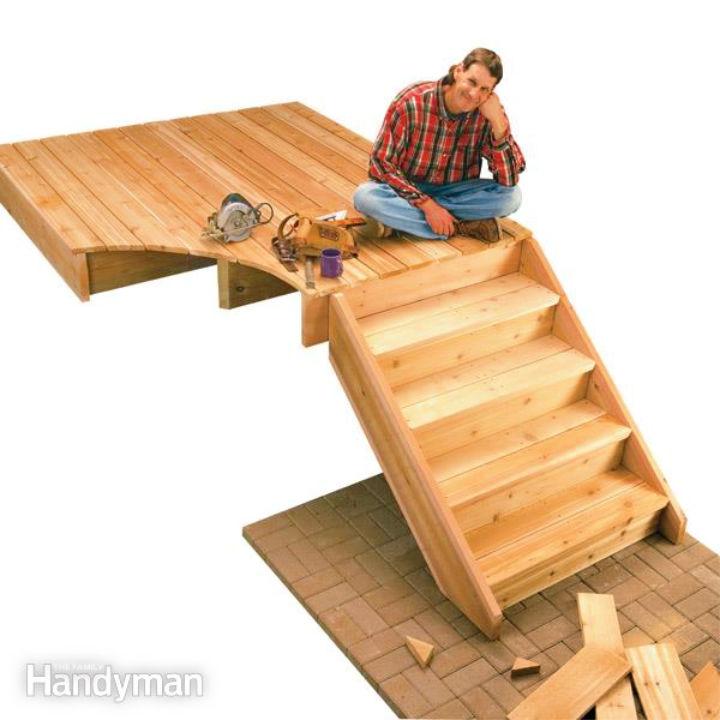
Building deck stairs may seem daunting, but Family Handyman simplifies the process with a comprehensive guide. Discover how to accurately calculate step dimensions, layout stringers, and construct a robust set of stairs to enhance your deck. With clear instructions and helpful tips, you’ll learn to assemble all the stair parts for a durable result.
This guide is designed to be accessible, ensuring even those new to DIY projects can achieve professional-quality stairs that stand the test of time. If you’re ready to connect your deck to your backyard with a practical and well-designed staircase, let’s get started on this rewarding project.
4. How to Build Stairs – Step by Step
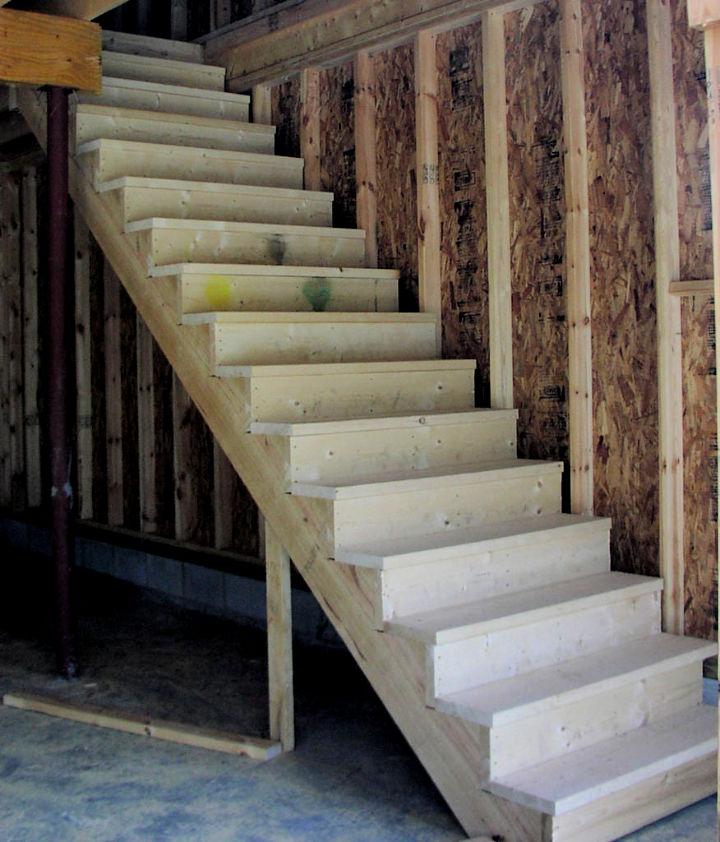
Embarking on a stair-building project requires precision and understanding of key design principles. Instructables offers a comprehensive guide to constructing stairs that cater to any shape or size, equipping would-be builders with essential staircase information. This instructive resource breaks down the process into manageable steps, ensuring your staircase not only meets safety standards but also complements your space aesthetically. With clear instructions and helpful tips, you’ll gain the confidence to tackle this DIY project and enhance the functionality of your home.
5. DIY Wood Stairs and Stair Railings
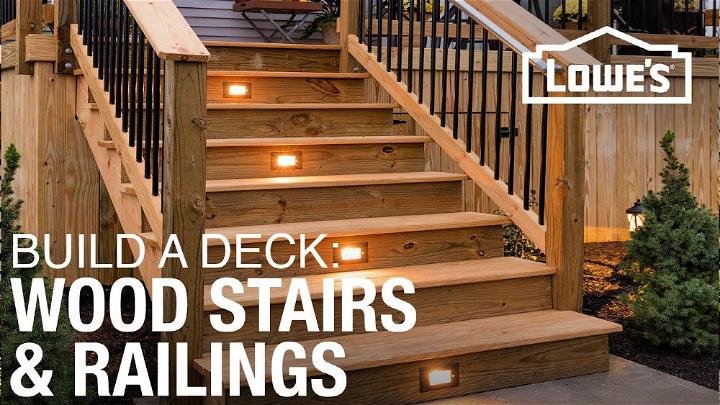
Building a sturdy deck stairway requires precision and knowledge of construction codes. Lowe’s Home Improvement offers a comprehensive YouTube tutorial guiding viewers through the process of constructing safe wood stairs and railings for a deck. The video is detailed, making it an invaluable resource for anyone undertaking this advanced-level DIY project.
It emphasizes the importance of adhering to local building codes and recommends professional assistance if you’re not fully confident in tackling the job yourself. Step-by-step instructions, along with tips for ensuring a strong and lasting build, are provided. If you’re ready to enhance your outdoor space with a functional and attractive deck staircase, Lowe’s tutorial is a must-watch resource.
6. How to Build Outdoor Wooden Steps / Free Standing Stairs
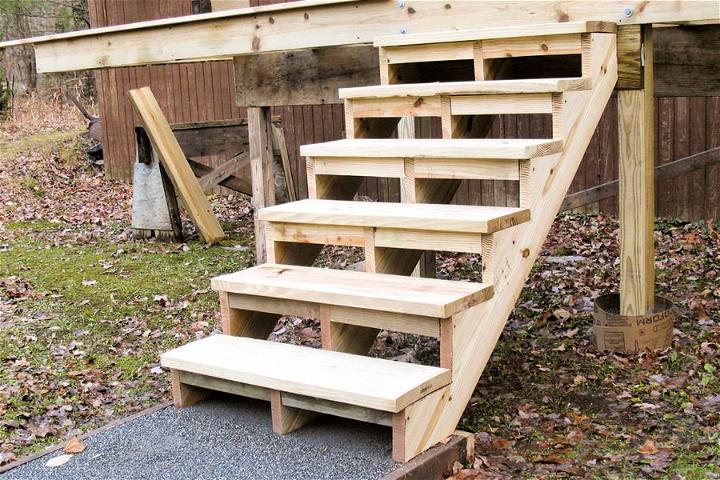
Building deck stairs requires precision and knowledge of certain building codes, and Mike Guertin’s guide on JLC Online provides a comprehensive tutorial on creating a safe and sturdy staircase. Understanding the right techniques for laying out and cutting stringers is crucial, and ensuring all connections with metal hardware are solid can prevent future problems.
From establishing the landing to selecting the best stringer materials, each step is clearly explained. For builders aiming to construct deck stairs that stand the test of time, following these detailed instructions is key. The guide not only ensures compliance with the International Residential Code but also imparts practical tips for both layout and installation.
7. Outdoor Timber and Pea Gravel Stairs
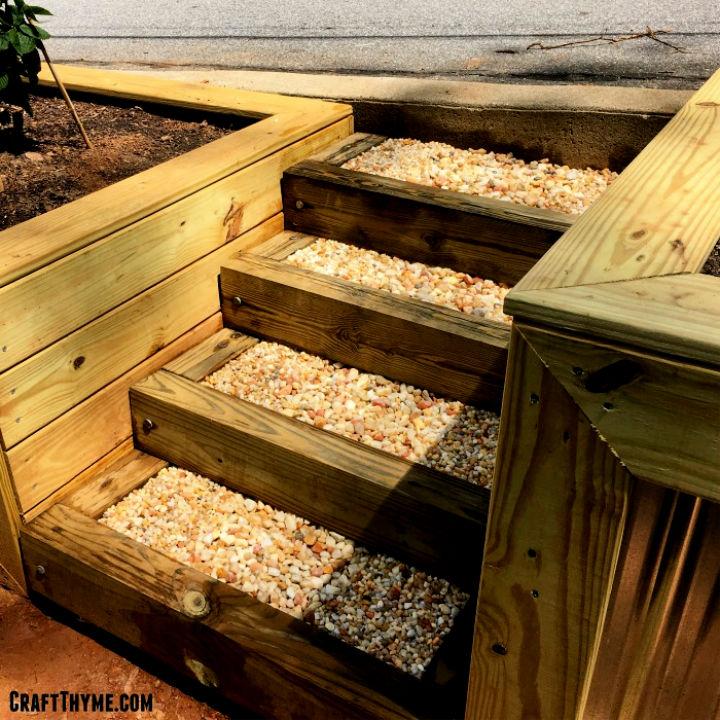
Building timber and pea gravel stairs can transform your outdoor space with a practical and aesthetic appeal. At The Reaganskopp Homestead, we offer a comprehensive guide on crafting sturdy and elegant garden stairs using treated timbers and pea gravel. With a step-by-step approach, our instructions help you create a functional ascent for your tiered garden beds or outdoor areas.
Our method ensures that each stair is leveled and secure, giving you peace of mind. Plus, with tips on choosing materials and adding personal touches, your DIY project is sure to be a success. Dive into our tutorial for a seamless construction experience and elevate your landscape design with these fabulous timber and pea gravel stairs.
8. How to Build Entry Steps
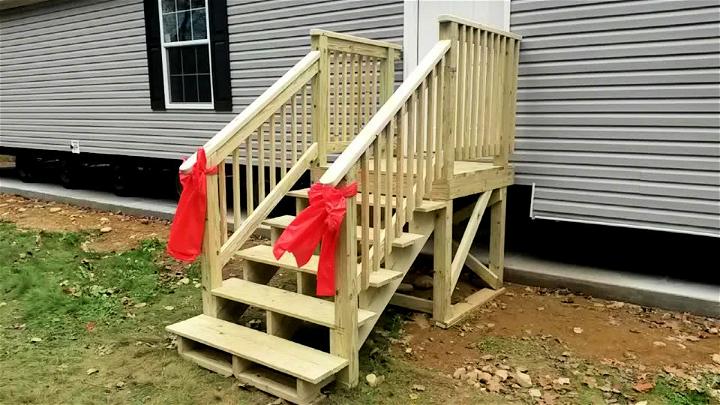
Looking to construct sturdy entry steps for a home? YouTube provides a comprehensive guide by Charles Coushaine on building durable and code-compliant steps, ideal for homeowners who need a functional and safe entryway to their residences. The video tutorial demonstrates each phase of the construction process, from notching posts to support the landing to cutting stringers for the steps.
With easy-to-follow instructions and key moments highlighted for quick reference, viewers gain practical insights into creating a robust stairway. Perfect for enhancing the accessibility of any park model or mobile home, this video offers valuable tips and a chance to engage in a rewarding DIY project.
9. Making Free-Standing Stairs
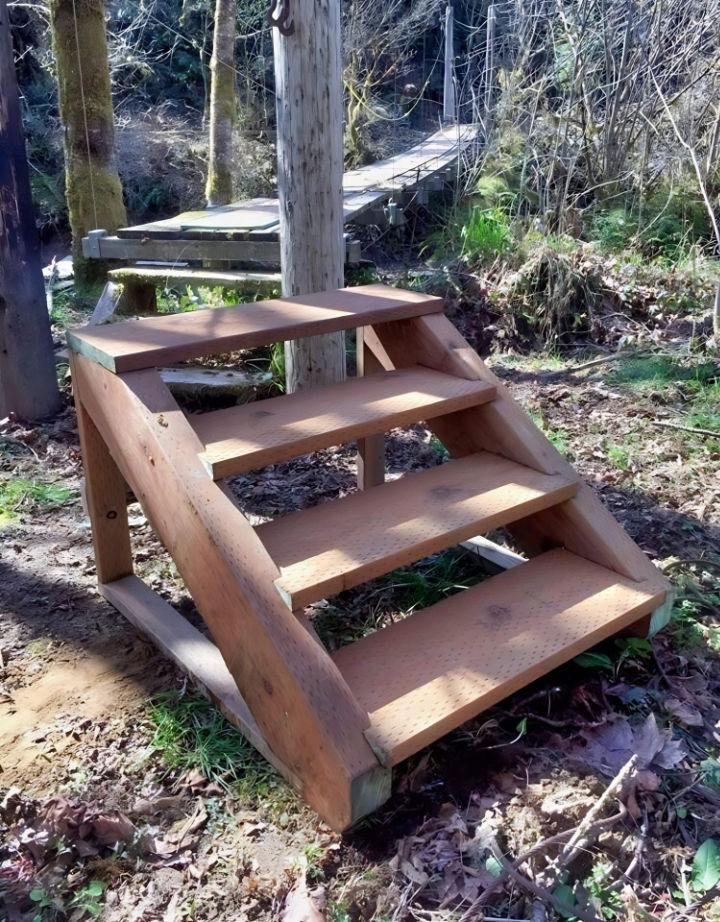
Building free-standing stairs can be a challenging yet rewarding DIY project. Instructables provides an insightful guide that walks you through each step of the construction process. With clear, instructive content, you’ll learn how to measure, cut, and assemble the components for sturdy and functional stairs.
Ideal for homeowners and hobbyists, the instructions are designed to be engaging and easy to understand, ensuring that you can create a reliable staircase while enhancing your woodworking skills. Keep in mind that safety is paramount, so equip yourself with the right tools and protective gear as you embark on this carpentry venture.
10. How to Build Outdoor Stairs
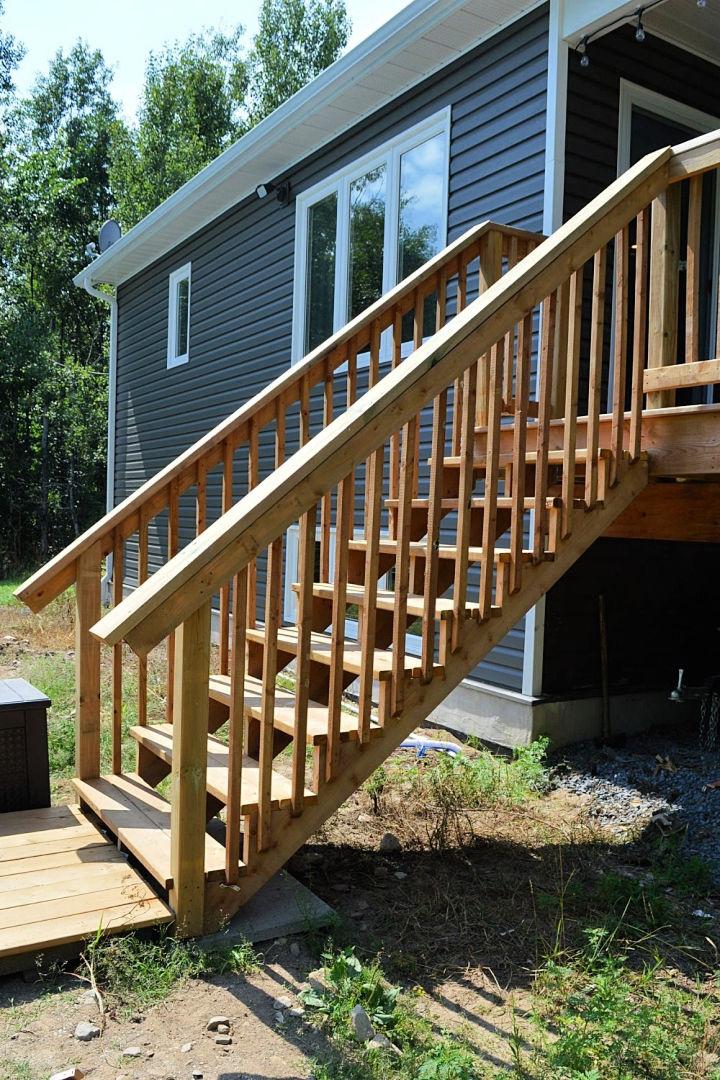
Building deck stairs from pressure-treated lumber can transform your outdoor space, and The Vanderveen House offers a comprehensive guide to help you tackle this project with confidence. Jessica Vanderveen shares her hands-on experience constructing a 6-foot-tall staircase for her above-ground pool deck. The tutorial is peppered with practical advice, ensuring that each step, from calculating measurements to attaching the final rails, is clearly explained.
With an instructive tone and engaging content, readers can follow along easily, turning their deck-building vision into a sturdy and attractive reality. Perfect for DIY enthusiasts, the guide simplifies the process, making it accessible and relevant for anyone looking to enhance their outdoor living area.
11. Homemade Outside Stairs
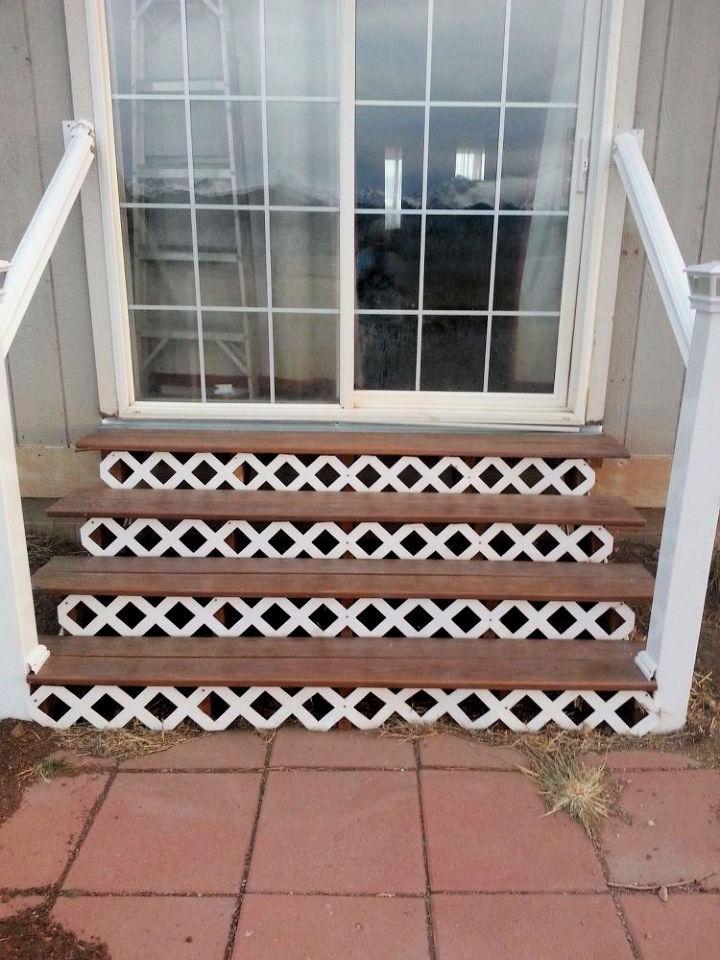
Transforming outdoor stairs can significantly enhance the curb appeal of your home. Hometalk.com presents a DIY guide where an enthusiastic homeowner shares their journey of rebuilding their outside steps at 71 years old.
The step-by-step process begins with the removal of poorly constructed stairs by a previous contractor. With detailed instructions and a list of materials, including PVC pipes, lattice, and proper step brackets, the guide takes you through correcting mistakes and ensuring the new stairs are level, well-supported, and built to last.
Practical tips, like adding patio pavers for the foundation and using a RotoRazor Saw for precision cuts, make the project accessible for DIYers looking to tackle their own stair renovation. The result is a set of sturdy and attractive outdoor stairs that are both functional and inviting.
12. How to Build Pet Steps
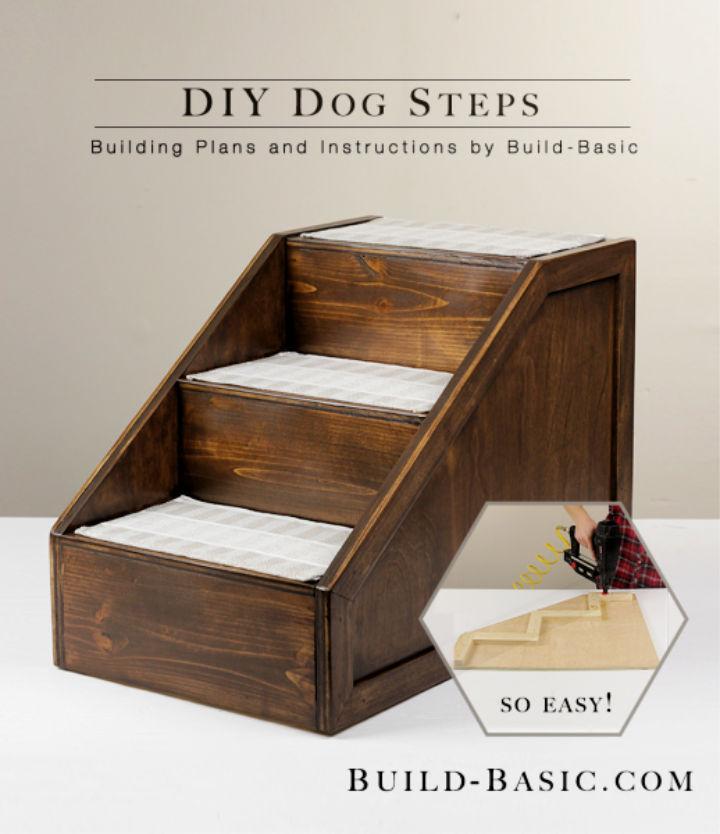
Building your own pet steps is a project that adds value to your furry friend’s life, and with Build Basic‘s easy-to-follow guide, it’s simpler than you think. These DIY pet steps are constructed using affordable materials such as plywood, 1×2 cleats, and optional trim for a polished look. The assembly process, though requiring a bit of precision, can be completed in around three hours, making it a perfect weekend task.
Not only will you save money by sidestepping the costly alternatives in pet stores, but you’ll also get the satisfaction of creating something functional and tailored for your pet. The instructive guide walks you through cutting the pieces, assembling the frame, and adding finishing touches like a stair runner. Remember to use the provided diagrams and measurements to ensure accuracy. With patience and basic tools, you can craft a sturdy set of steps that will make your pet’s life a little easier.
Build your dog a home of their own with these free DIY dog house plans that include diagrams, photos, building instructions, and materials/cut lists.
13. How to Make Outdoor Wood Steps
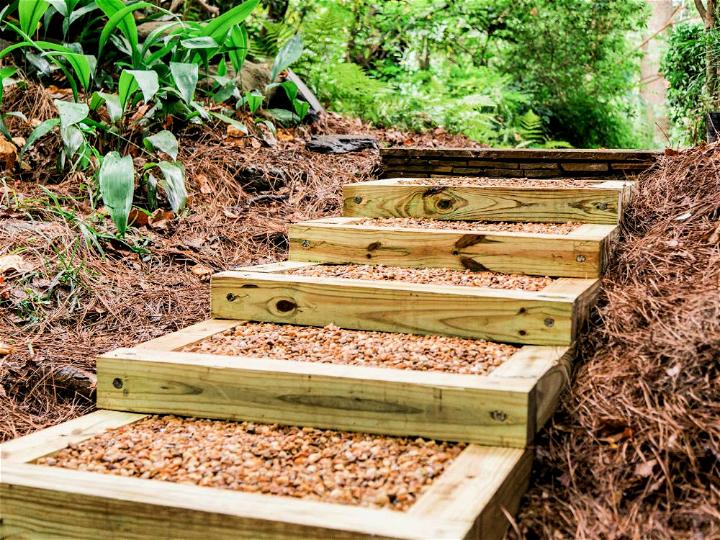
Transform your outdoor space with a custom-built wood and gravel staircase, perfect for managing slopes or enhancing garden pathways. HGTV presents an instructive guide on crafting a durable and attractive stairway using pressure-treated timber and pea gravel. In just a few straightforward steps, you can excavate and grade the area, cut and assemble your wooden posts, secure the frames with rebar, lay weed-blocking material, and fill with gravel for a stable and pleasing result. With our helpful tips, create a functional landscape feature that’s both engaging and easy to navigate.
14. Outdoor Wood Steps – Free Plans
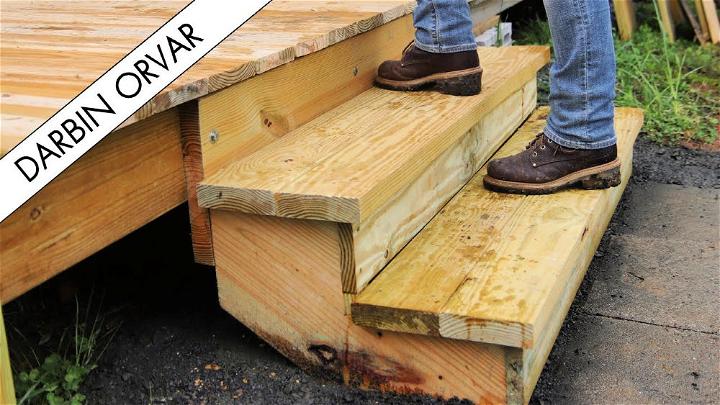
In Darbin Orvar’s YouTube video “Building Stairs to My Workshop,” viewers are treated to a practical guide on adding stairs to a deck. The creator takes you through the process step by step, showcasing the use of tools from Grizzly.com to construct stringers and ensure secure access to a newly converted shed-to-workshop.
This tutorial is a valuable resource for DIY enthusiasts aiming to enhance their outdoor structures with functional and well-crafted stairs. Alongside the project, you can find additional insights and advice by signing up for the newsletter. If tackling home improvement projects like building sturdy stairs appeals to you, this video serves as a handy walkthrough to help you achieve great results.
Woodworking Projects: Discover the Top Woodworking Projects that are not only enjoyable to build but also highly profitable to sell.
15. How to Build Outdoor Wooden Steps
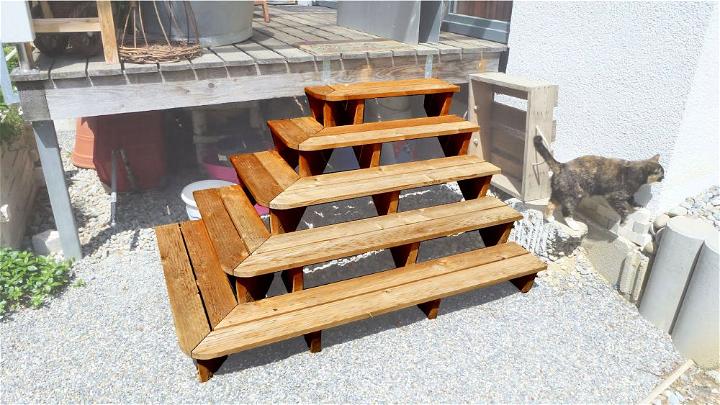
Transform your outdoor space by constructing a sturdy and attractive patio stair with guidance from Marius Hornberger’s comprehensive YouTube tutorial. In his video, Marius takes viewers through the process of building an outdoor stair after modifying his garden landscape. This hands-on project is detailed from the foundation to the finishing touches, showcasing the steps to cut lumber correctly, design the stair layout, and ensure secure assembly.
The content is engaging and informative, making it accessible to those eager to enhance their home’s exterior with a functional and aesthetically pleasing addition. Tune in to Marius’s video for valuable insights and step-by-step instructions on crafting your own wooden patio stair, an excellent alternative to expensive steel options.
16. How to Build a Simple Deck Step
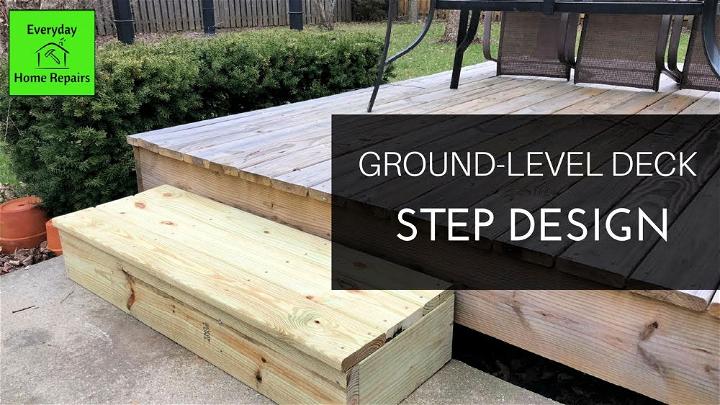
Building a simple deck step doesn’t have to be daunting, and the tutorial on YouTube provides clear, step-by-step instructions to guide you through the process. In this video, you’ll learn how to construct a sturdy deck step using basic materials like 2×8 boards for the frame and 1 1/4 inch thick boards for the treads. The presenter outlines the necessary tools, such as a miter saw or circular saw, tape measure, cordless drill, and carpenter square.
They also detail the types of screws needed to secure the structure. With concise explanations and practical tips, you can create a functional deck step in just over an hour. If you’re tackling a weekend project and want to enhance your outdoor space, this YouTube guide is an invaluable resource.
17. Build Three Step Heavy Duty Plywood Stairs
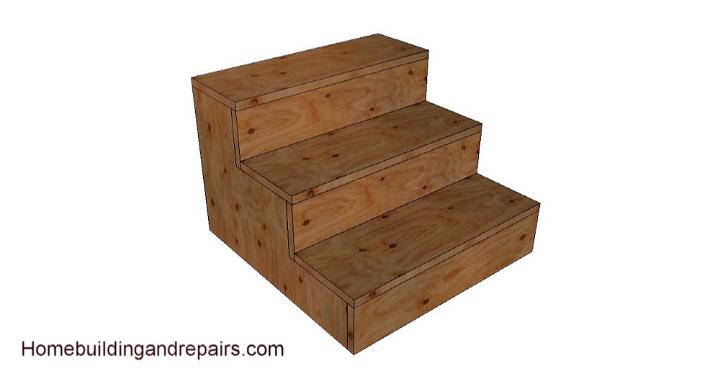
Building sturdy, heavy-duty plywood stairs can be a straightforward task with the right guidance. YouTube offers a video tutorial that meticulously demonstrates how to construct a three-step stair system suitable for various applications such as mobile homes or trailers. The instructive video covers the essentials, from precise measurements to assembly techniques, using 1 1/8″ thick plywood to ensure durability.
It also discusses the benefits of incorporating tread supports for added strength. The step-by-step approach, along with the key moments highlighted in the video, ensures that even those new to stair building can follow along confidently.
18. Building a Large Staircase
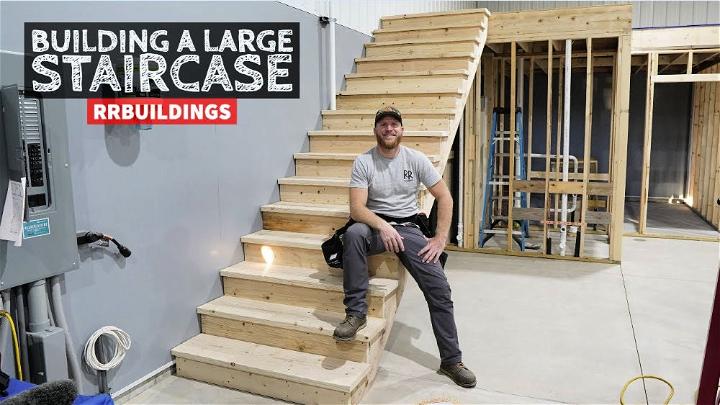
Are you struggling with the stair stringer layout? YouTube’s RR Buildings channel offers an instructive video titled “Building a Large Staircase and How to Layout a Stair Stringer.” The video simplifies the complex task of laying out a stair stringer with clear math and practical tool usage.
You’ll learn valuable tips and techniques that will guide you through the process of constructing a sturdy, large staircase. Whether crafting stairs for a workshop, home, or any other structure, the video provides easy-to-follow guidance that helps ensure your staircase is both safe and well-constructed. Tune in for a step-by-step tutorial that demystifies stair building, making it accessible and manageable.
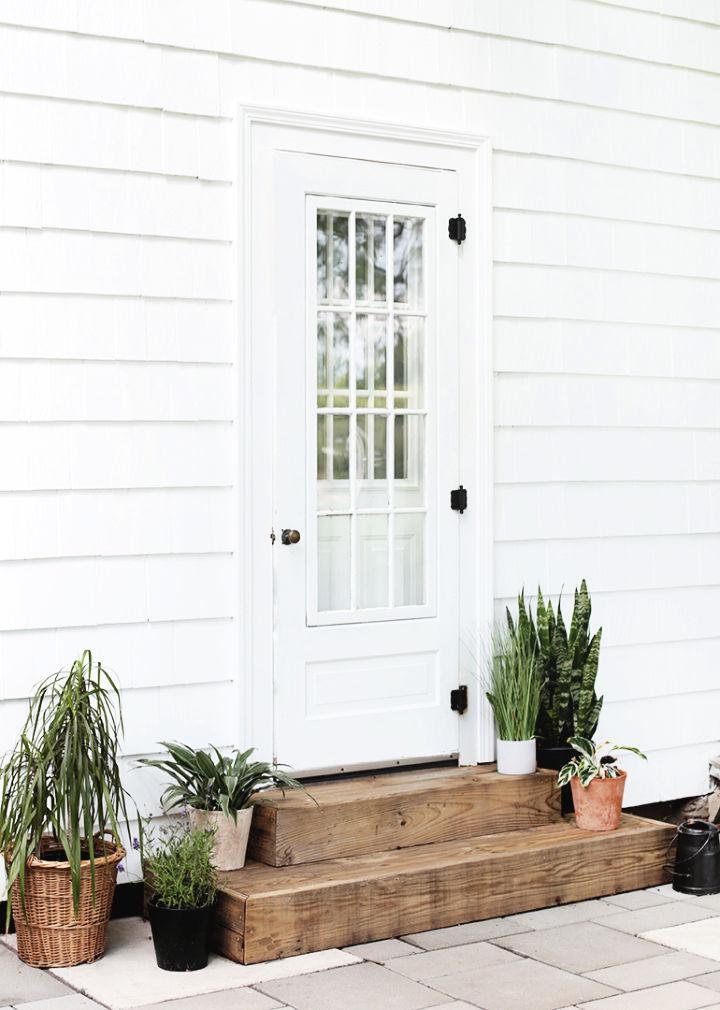
19. DIY Outdoor Wood Steps
Embarking on crochet projects can be an enriching endeavor for crafters at any skill level. The Merry Thought offers a comprehensive guide that caters to anyone eager to learn and expand their crochet capabilities. From simple patterns to more intricate creations, our resources are designed to enhance your crafting journey.
With clear, step-by-step instructions and tips for mastering various stitches, we aim to support your passion for crochet. Explore our site for patterns, inspiration, and advice tailored to your crochet interests. With our help, you’ll be creating beautiful, handmade items in no time.
20. How to Make Wooden Stairs
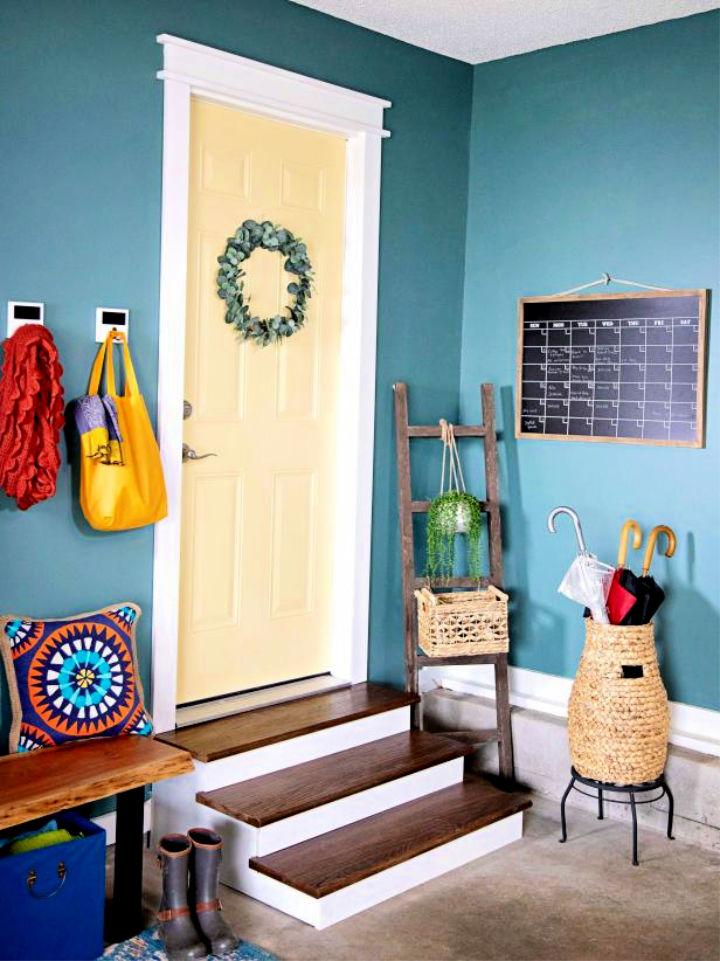
Transform your garage space with a DIY staircase upgrade that not only elevates the aesthetic but also enhances safety. HGTV provides a simple, step-by-step guide to creating a vibrant and patterned staircase that’s easy to follow. From measuring and marking to painting and stamping, this project is tailored for home enthusiasts who appreciate a personalized touch.
Get ready to add character to your garage with this engaging, helpful, and straightforward tutorial that promises a rewarding DIY experience. Keep your tools ready, and let your creativity lead the way to a refreshed and safer staircase.
- 50 DIY Outdoor Bench Plans You Can Build Using Wood
- 100 Unique DIY Shelves That’ll Solve Your Storage Woes
- 50 Walkway Ideas To Install By Yourself Cheaply
Conclusion:
In conclusion, building free standing wooden steps is a fantastic way to enhance the functionality and aesthetic of your outdoor space. As summer approaches, the appeal of a relaxing porch day beckons. With the knowledge from 20 ways to build free standing wooden steps, you’re now equipped to tackle this project with confidence. With a focus on safety, personalization, and cost savings, your newly built steps will be a testament to your DIY skills and dedication to crafting a beautiful home environment.
