Making your own DIY polymer clay earrings can be both a rewarding hobby and a unique way to express your personal style. This guide is designed to help individuals at various skill levels master the art of making DIY clay earrings from scratch. By following a series of simple steps, you will learn how to transform polymer clay into beautiful pieces of jewelry. With clear instructions and essential tips, this 15 DIY polymer clay earrings guide ensures an enjoyable and successful crafting experience.
In this comprehensive tutorial, we will cover everything from selecting the right materials for your project to the final stages of assembling your earrings. Each step is broken down to make the process manageable, even for those who are new to working with polymer clay. Our goal is to provide you with all the information you need to create stunning earrings that you will be proud to wear or share. So, let’s get started and dive into the creative process of making your very own polymer clay earrings.
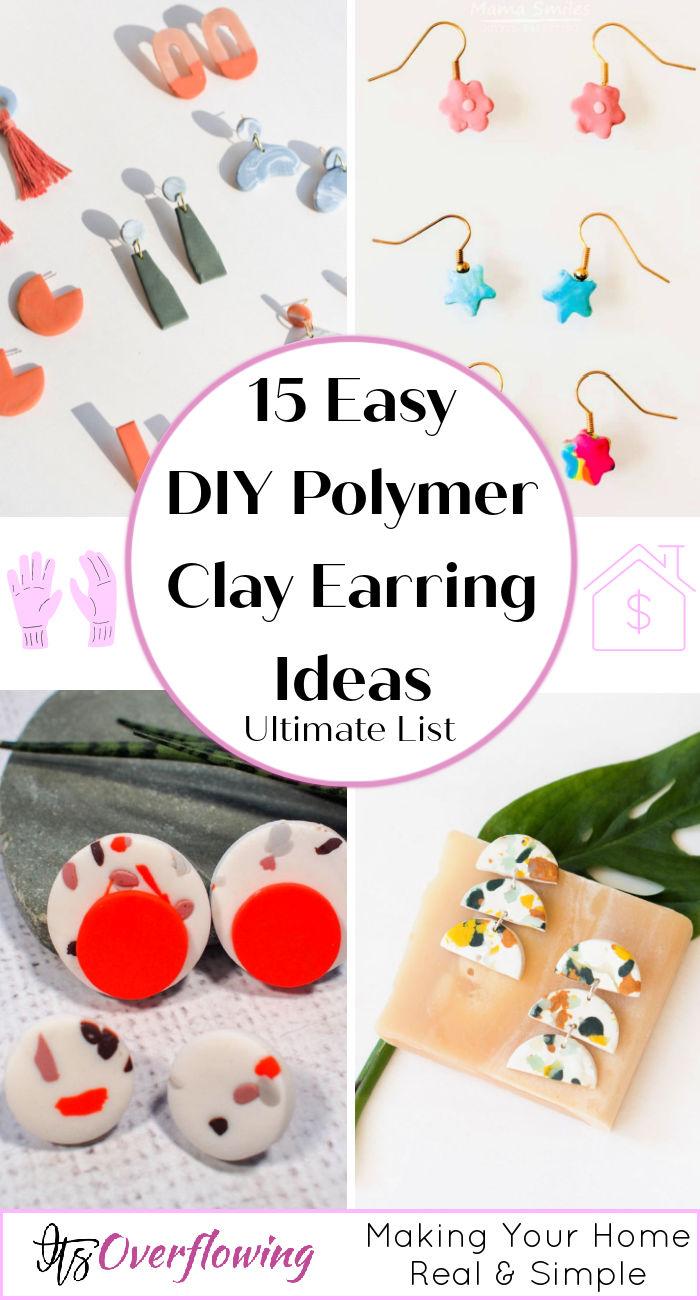
How to Make Polymer Clay Earrings for Beginners
Welcome to your one-stop guide for diving into the vibrant world of DIY polymer clay earrings. Whether you’ve been inspired by the beautiful creations on social media or looking to explore your creativity, this tutorial is crafted to set you on the right path. Let’s jump straight into the captivating journey of making your own polymer clay earrings.
Materials You’ll Need
Before we delve into the creation process, ensure you have the following tools and materials ready:
- Cutting Mat or Ceramic Tile: Provides a smooth surface for rolling and cutting.
- Pasta Machine or Acrylic Rolling Pin: Essential for conditioning and flattening your clay.
- Blade: For cutting shapes and trimming excess clay.
- Dotting Tool or Old Chopsticks: Useful for adding details and making holes.
- Shape Cutters: To easily cut your clay into various shapes.
- Sandpaper: For smoothing edges after baking.
- Oven Thermometer: To accurately monitor your oven’s temperature.
- Pliers: For handling and opening jump rings.
- Jump Rings, Hooks, Posts, and Backings: The hardware needed to assemble your earrings.
- Polymer Clay: Preferably Premo for bases and Sculpey 3 for designs.
Step 1: Conditioning Your Clay
- Choose a color for your base and condition it by running it through the pasta machine or flattening it with a rolling pin. Fold it in half and repeat. Proper conditioning is crucial to eliminate air bubbles and prevent your earrings from breaking after baking.
Step 2: Designing Your Slab
- Use Sculpey 3 to add designs due to its moldability. Mix colors to create unique shades and play around with blobs, patches, lines, and dots to fill your slab. Use the blade for precise cuts and the dotting tool to add minute details. Aim for a well-covered slab with various designs.
Step 3: Cutting Shapes
- With your design slab ready, select shape cutters to cut out earring pieces. Be creative with shapes and sizes to utilize the design slab efficiently. Remember to cut a hole for jump rings using the dotting tool before baking.
Step 4: Preparing for Baking
- Trim any rough edges to minimize post-baking sanding. Preheat your oven ensuring the temperature is accurately set to 130°C using an oven thermometer. Bake your pieces on a ceramic tile or a baking tray lined with parchment paper for at least 50 minutes, checking every 5-10 minutes to prevent burning.
Step 5: Post-Baking Finishing Touches
- Once cooled, sand the edges for a smooth finish. If needed, trim off larger chunks with your blade.
Step 6: Assembling Your Earrings
- To join your earring pieces, open a jump ring with pliers, thread through the holes, and firmly close. Attach hooks or studs, adjusting as necessary for alignment. Repeat these steps for all your pieces until your earrings are fully assembled.
Final Thoughts
Congratulations! You’ve now entered the rewarding world of creating polymer clay earrings. Exploring this craft allows for endless creativity—mixing colors, experimenting with shapes, and playing with designs can yield uniquely beautiful results.
Remember, practice is key to mastering any new skill. Don’t be discouraged by initial imperfections; each piece you create brings you one step closer to achieving the perfect set of handmade earrings.
FAQs on DIY Polymer Clay Earrings
Polymer clay earrings are trendy and fun to craft, but they often come with questions. Let’s address some common FAQs to guide you through your DIY polymer clay earring journey.
Can I Wear Polymer Clay Earrings in Water?
Polymer clay is not entirely waterproof, so it’s best to avoid prolonged exposure to water. To care for your polymer clay earrings when exposed to water, gently wipe them dry and store them in a cool, dry place.
How Long Should I Bake Polymer Clay Earrings?
When baking polymer clay earrings, preheat your oven to 275 degrees Fahrenheit and bake them for 30 minutes to 1 hour, depending on the thickness of the clay. Ensure even baking by following the recommended temperature and duration.
Are Polymer Clay Earrings Heavy?
Polymer clay earrings are extremely lightweight, making them comfortable to wear for long periods. Compared to traditional materials, polymer clay earrings offer a light and effortless accessory option.
Are Polymer Clay Earrings Hypoallergenic?
Polymer clay earrings are hypoallergenic, making them ideal for individuals with sensitive skin. The absence of common allergens in polymer clay ensures a comfortable and irritation-free wearing experience.
How to Prevent Polymer Clay Earrings from Tarnishing?
To maintain the luster of your polymer clay earrings and prevent tarnishing, avoid exposing them to harsh chemicals or direct sunlight. Store them in a jewelry box or pouch when not in use to protect them from environmental factors.
What Shapes and Styles Can I Create with Polymer Clay Earrings?
The versatility of polymer clay allows for endless creativity in designing earrings. Explore various shapes like marbling, terrazzo, ombre, and abstract forms to express your unique style through your DIY creations.
Can I Customize Polymer Clay Earrings?
Customizing polymer clay earrings is a fun way to add a personal touch to your jewelry collection. Experiment with colors, textures, and embellishments to create one-of-a-kind pieces that reflect your individuality.
How to Care for Polymer Clay Earrings?
Proper care is essential to preserve the beauty of your polymer clay earrings. Clean them gently with a soft cloth, store them away from direct sunlight, and handle them with care to ensure their longevity and durability.
What Are the Essential Tools and Supplies for Making Polymer Clay Earrings?
To craft polymer clay earrings, you’ll need basic supplies like polymer clay, cutters, baking tools, and jewelry findings. These tools enable you to mold, shape, bake, and assemble your unique earrings with ease.
How to Troubleshoot Common Issues in Polymer Clay Earring Making?
Encountering issues like cracking, uneven baking, or color blending in your polymer clay earrings is common. Try solutions like adjusting baking time, kneading the clay thoroughly, or using a primer to overcome these challenges and enhance your crafting skills.
15 DIY Polymer Clay Earrings
Discover 15 stunning DIY polymer clay earrings designs for a touch of handmade elegance. Easy to make and perfect for any occasion.
1. How to Make Polymer Clay Earrings
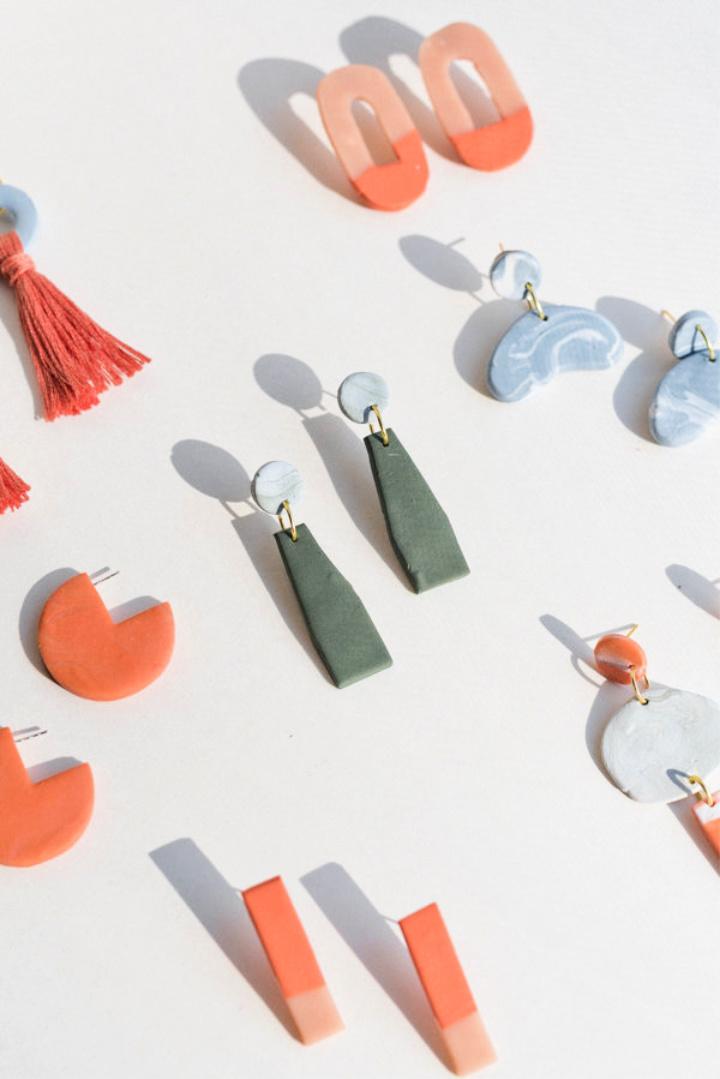
Discover how to create your own polymer clay earrings with Paper and Stitch‘s easy-to-follow DIY guide. From selecting the perfect colors to mastering marbling and color-blocking techniques, this guide provides a step-by-step process for crafting stylish and unique clay jewelry.
Learn how to roll, cut, and bake your designs to perfection, and explore ways to personalize your earrings with additional embellishments. Ideal for crafters who love to add a handmade touch to their accessories, these techniques will enable you to make eye-catching pieces that are sure to garner compliments. Get ready to enhance your jewelry collection with your own custom-made clay earrings.
2. DIY Black and White Gold Marble Polymer Clay
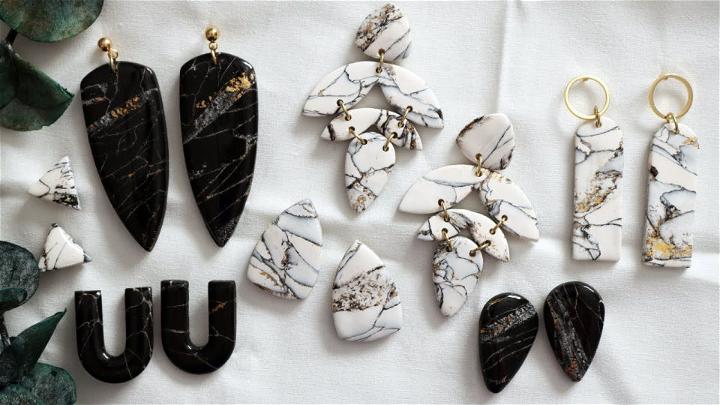
Elevate your jewelry collection with these exquisite DIY Polymer Clay Black & White Gold Marble Howlite Stone Earrings. Ideal for crafters at any level, this tutorial guides you through crafting elegant, marbled earrings using Sculpey Primo clay. The process involves precise chopping for desired marbling effects, integrating black acrylic paint, and an optional touch of gold leaf for an opulent flair.
You’ll learn to form, slice, and roll the clay, choosing your favorite cutters for unique shapes. The finishing touches include smoothing edges with a Dremel or exacto knife, adding gloss with resin, and affixing gold backings for a luxurious look. This simple yet versatile technique produces timeless, classic earrings, perfect for enhancing any outfit.
3. Chamomile Polymer Clay Earrings Tutorial
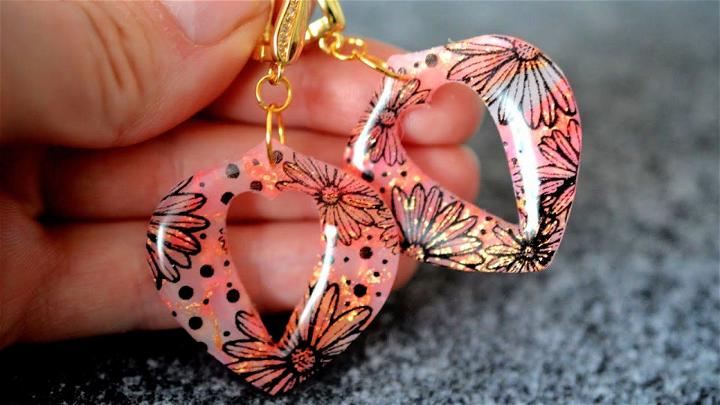
Ready to craft some charming chamomile polymer clay earrings? YouTube offers an easy-to-follow tutorial that guides you through the process step by step. Perfect for DIY jewelry enthusiasts, this tutorial from Alenas Clay Corner demonstrates how to mold polymer clay into beautiful earring designs. You’ll learn to use materials like translucent Cernit clay, silkscreens, alcohol ink, and even gold leaf to add a touch of elegance to your creations.
With the help of a UV lamp and resin, you can give your earrings a professional finish. Whether you’re planning to gift a handmade piece or add it to your jewelry collection, this tutorial makes it simple to create eye-catching accessories. Dive into the world of DIY jewelry making and let your creativity blossom with these floral-inspired adornments.
4. Custom DIY Polymer Clay Earrings

Delve into the craft of creating polymer clay earrings with this informative guide from Craftsy. Perfect for DIY enthusiasts, this tutorial simplifies the process of making marbled earrings with customizable, playful designs. The instructions are clear, concise, and ideal for anyone who enjoys hands-on activities.
Learn to roll, shape, and bake your unique jewelry pieces, ensuring a fun experience with a personal touch. With just a few supplies like polymer clay, a rolling pin, and pliers, you’ll be on your way to crafting stylish earrings that are as unique as you are. So grab your clay and let your creativity flow for a charming addition to your accessory collection.
5. Homemade Polymer Clay Earrings
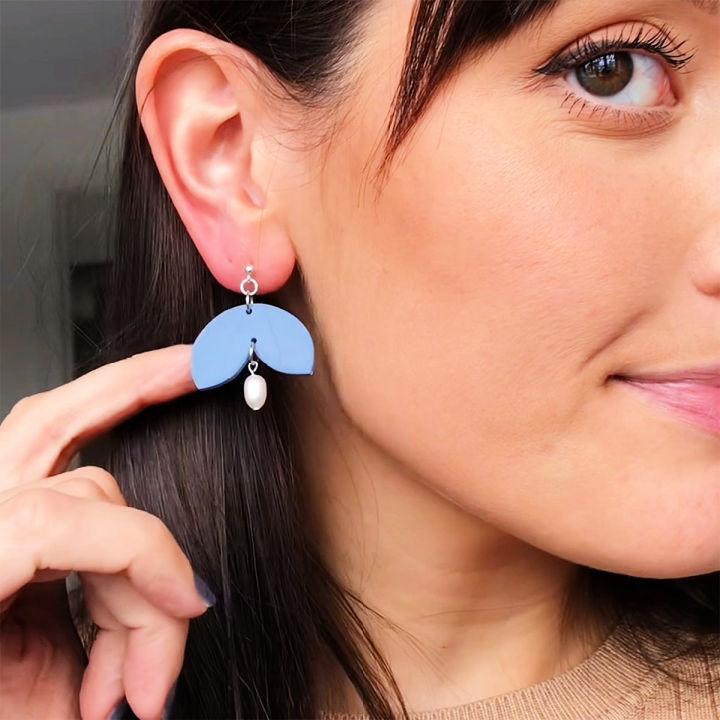
Learn to craft your own polymer clay earrings with a step-by-step guide from guest tutor Polly at Candid. Dive into the process of conditioning, sculpting, and baking polymer clay to create stunning and unique jewelry pieces. This tutorial caters to crafters who wish to add a personal touch to their accessories, offering clear instructions and a list of essential tools and supplies, such as clay cutters, rolling pins, and ceramic tiles.
Finish your earrings with elegant gemstone beads and high-quality findings for a professional look. With Polly’s expertise, you’ll gain the skills to make beautiful earrings that reflect your style and creativity. Visit Kernowcraft for all the necessary findings to complete your designs.
6. Make Neutrals Polymer Clay Earrings
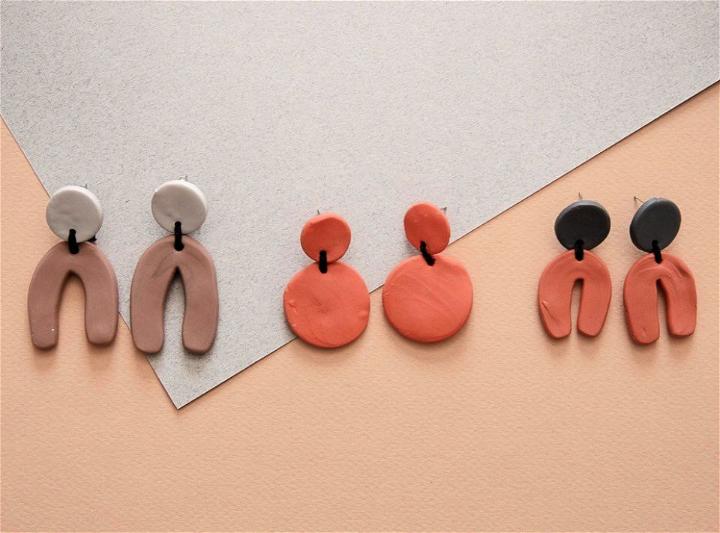
Discover how to create stylish polymer clay earrings with a neutral palette on the xoxojackie blog. Perfect for those who love the understated elegance of earth tones, this DIY tutorial guides you through making your own collection of tan, caramel, and rich brown earrings. With clear, step-by-step instructions, you’ll learn to roll, shape, and bake polymer clay into beautiful accessories.
Jackie also offers a unique touch by using durable thread for assembly, giving the earrings a natural vibe. Whether you’re gifting them or expanding your own jewelry collection, these handmade pieces are sure to add a touch of organic charm to any outfit.
7. DIY Hoop Earrings Using Polymer Clay
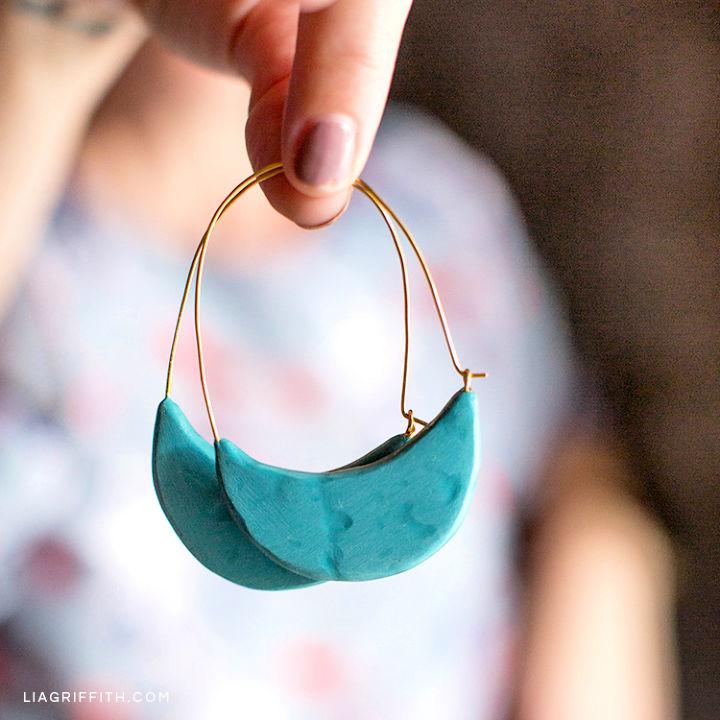
Ready to craft unique polymer clay earrings? Lia Griffith offers a simple guide to creating charming crescent hoop earrings. Ideal for DIY enthusiasts, this project is perfect for those who love to personalize their jewelry. With a handful of tools and materials, you can shape and fashion your own polymer clay designs.
The tutorial is user-friendly, providing step-by-step instructions that make the process enjoyable and rewarding. By becoming a member, you gain access to a wealth of DIY jewelry projects, ensuring you have a trove of creative ideas at your fingertips. Start your crafting adventure with Lia Griffith and add a touch of handmade elegance to your accessory collection.
8. Colorful Polymer Clay Earring Ideas
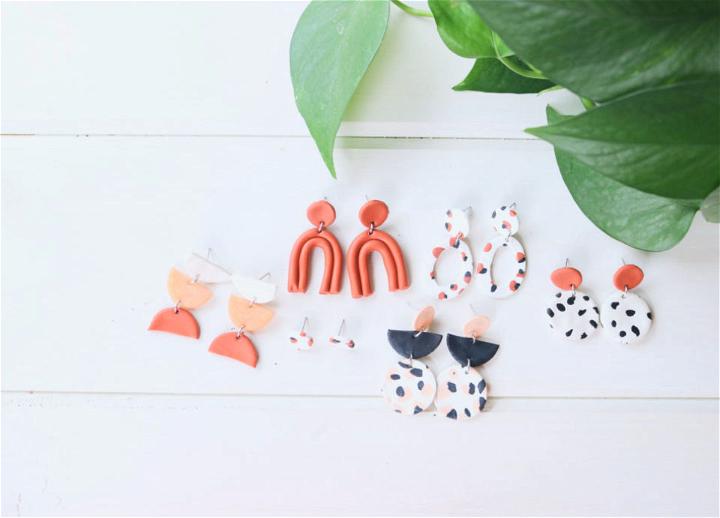
Find how to craft trendy polymer clay earrings with Raising Nobles‘ easy-to-follow tutorial. Learn to select the right materials, from the best polymer clay to suitable cutting tools, and master the art of creating unique, lightweight earrings right at home.
The guide provides step-by-step instructions, from conditioning the clay to the final assembly, ensuring your DIY project is a success. Perfect for personalizing your style or making thoughtful handmade gifts, this tutorial is designed to be both helpful and engaging for crafters eager to explore the endless possibilities of polymer clay earring designs.
9. How to Make Terrazzo Clay Earrings
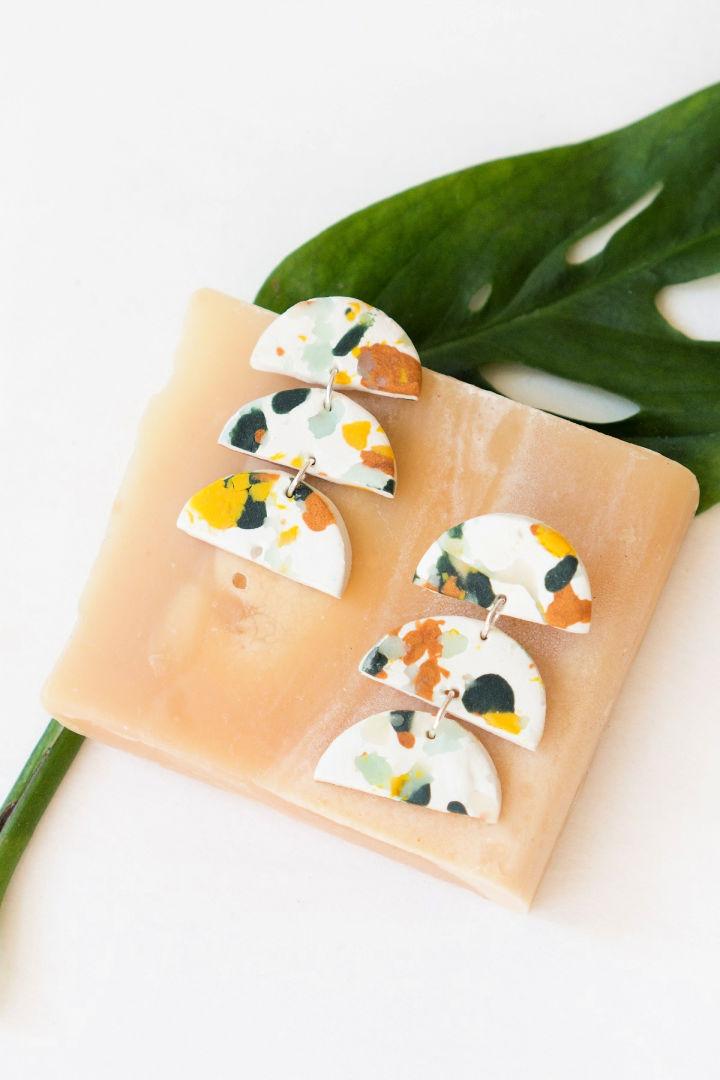
Get creative with your scrap clay and fashion your own terrazzo earrings with this easy-to-follow DIY guide from ctrl + curate. Terrazzo is trending, and you can join in by crafting stylish earrings to add flair to any outfit. You’ll need polymer clay, circle cutters, earring posts, jump links, and E6000 glue. Begin by rolling out your clay to an even thickness on wax paper, then chop it into varied sizes.
For the best results, use clay from the same brand. Once you’ve prepared your base color, sprinkle the pieces on top, roll gently to incorporate, and cut out your desired shapes. After baking according to the clay’s instructions, simply assemble with the earring posts and glue. These handmade accessories are a perfect weekend project and a chic way to upcycle leftover materials.
10. Making a Pair of Earrings With Polymer Clay
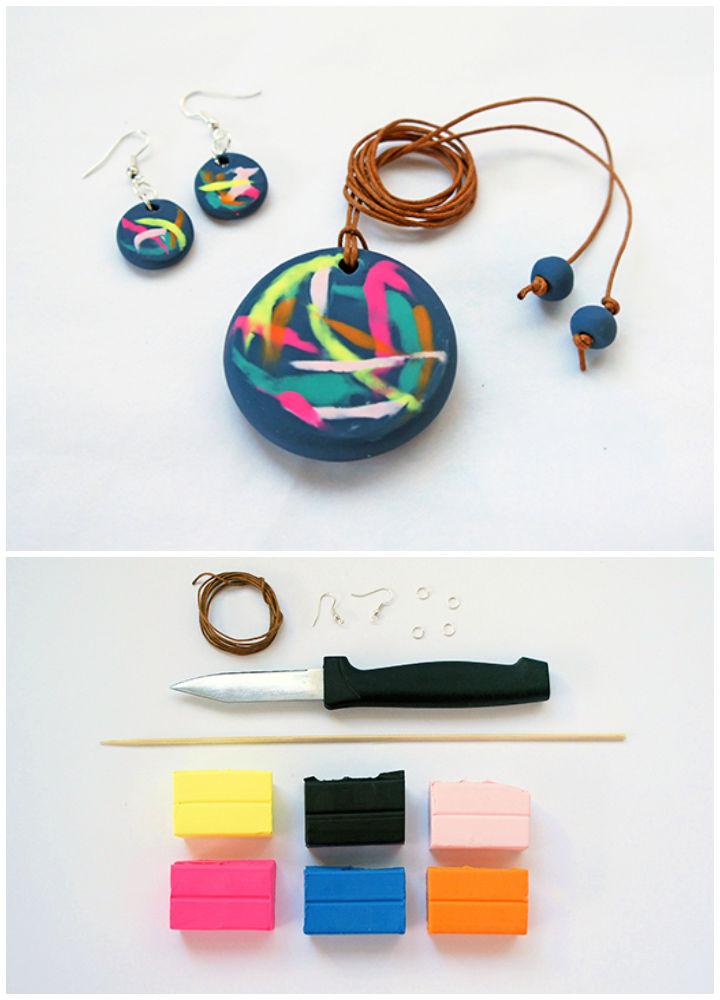
Ready to add a touch of artistic flair to your accessories? Envato Tuts presents a hands-on guide for crafting a unique pendant and earrings set using polymer clay. Inspired by abstract watercolor paintings, this tutorial by Therese Lyons is perfect for anyone who enjoys creating their own jewelry.
With simple, step-by-step instructions, you’ll learn how to blend colors, shape your pieces, and add personal touches with finger painting techniques. Once baked and assembled, you’ll have a bespoke set that’s sure to elevate any outfit. Get your supplies ready, and let’s dive into the world of DIY polymer clay jewelry!
11. DIY Polymer Clay Earrings and Charms
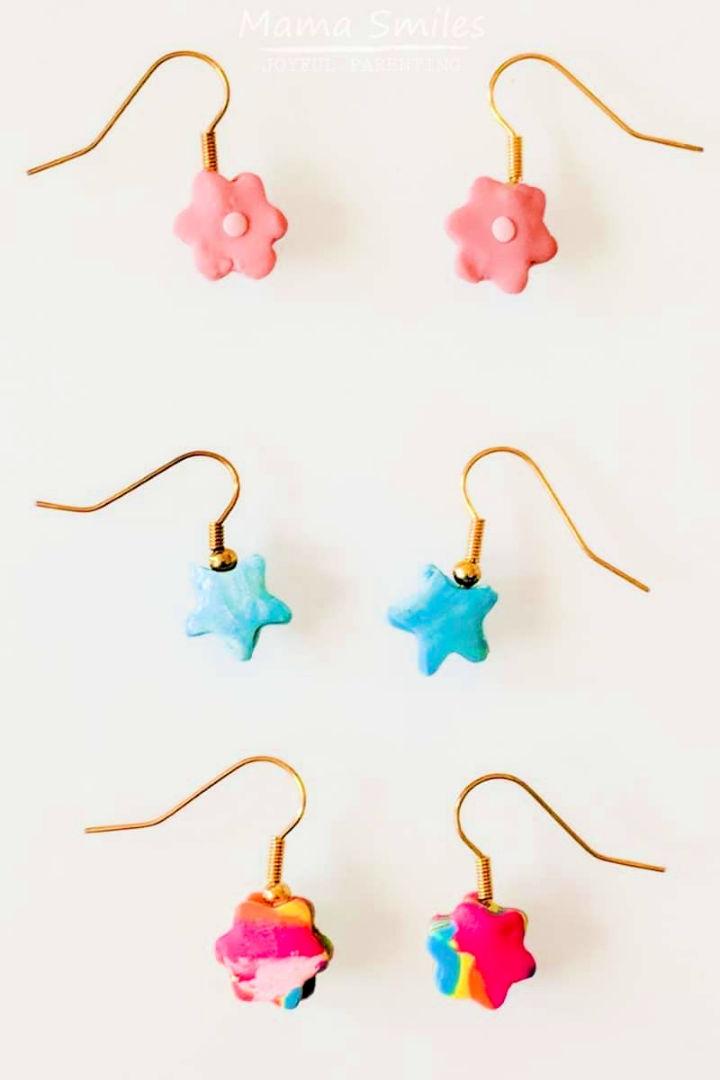
Embarking on the fun world of polymer clay crafts? Mama Smiles – Joyful Parenting offers a treasure trove of polymer clay ideas that are perfect for those just starting out. Discover how to create your own DIY earrings and charms with simple, step-by-step instructions.
With just a few materials like Sculpey polymer clay, acrylic rollers, and earring hooks, you can roll, cut, and bake your way to delightful jewelry pieces. Ideal for kids and craft enthusiasts, these projects not only spark creativity but also result in unique, handmade accessories. Dive into crafting with these easy-to-follow guides and let your imagination take shape!
12. How to Make Terrazzo Earrings Using Leftover Polymer Clay
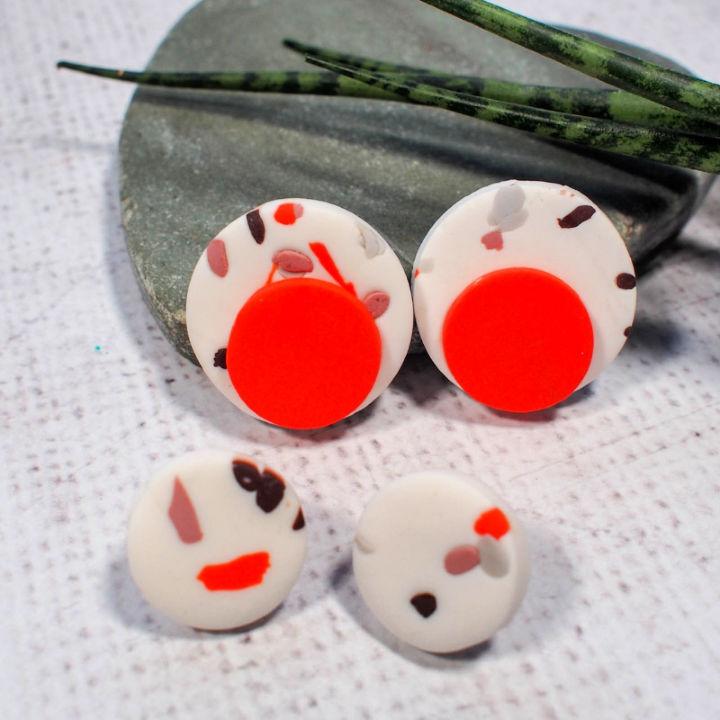
Learn how to transform leftover polymer clay into stylish DIY Terrazzo Earrings with a simple tutorial from Mum In The Madhouse. This creative project is perfect for adding a touch of personalized flair to your accessory collection. By selecting your favorite color combinations, you can craft unique earrings that showcase the trendy terrazzo pattern. The instructions are clear, making the process accessible and enjoyable.
Use everyday tools like a rolling pin and parchment paper to roll out your base clay, sprinkle on the colored pieces, and then bake your creations to perfection. After cooling, a quick sanding ensures smooth edges, and with a dab of glue, your earring posts are secured. Ready to make your own pair? Let’s get crafting and elevate your earring game!
13. Make Your Own Polymer Clay Earrings
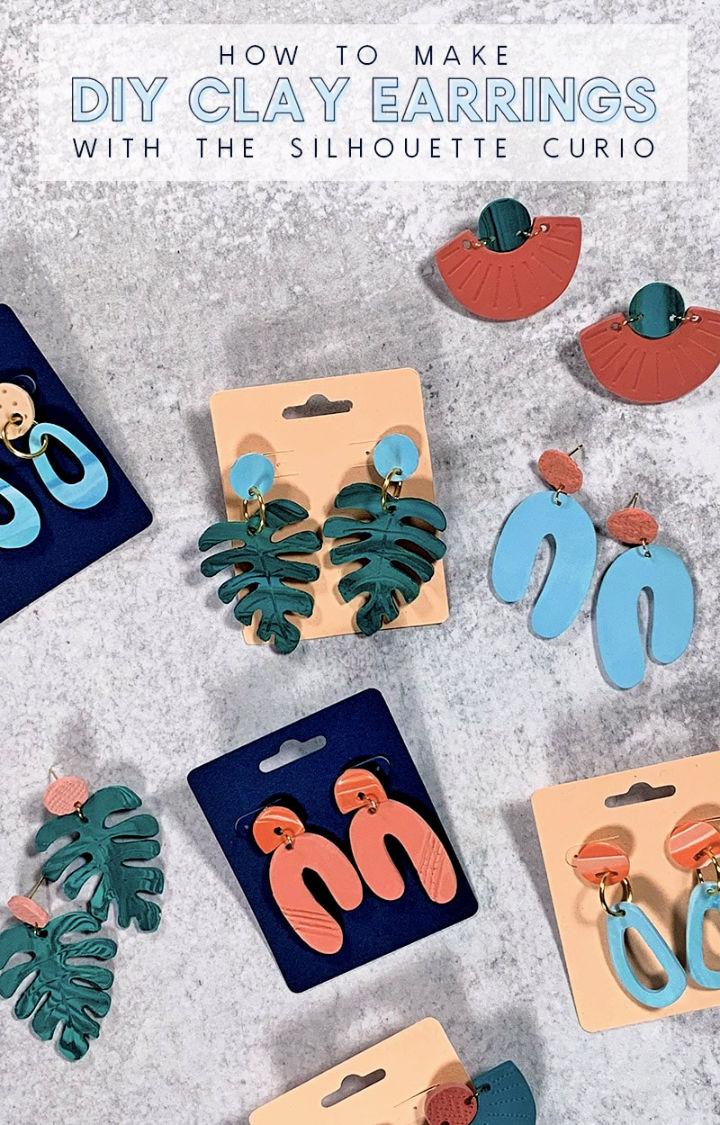
Discover how to craft stunning DIY clay earrings using the Silhouette Curio with Persia Lou‘s comprehensive guide. Dive into the creative process of cutting and embossing polymer clay to fashion your unique earring designs. This instructive post is brimming with tips and techniques for achieving the perfect thickness and texture in your clay pieces, ensuring a professional finish. Learn to assemble and refine your handmade earrings with ease. Whether looking to accessorize your wardrobe or create personalized gifts, this tutorial is your gateway to mastering clay earring creation with the Silhouette Curio.
14. DIY Polymer Clay Earrings for Beginners
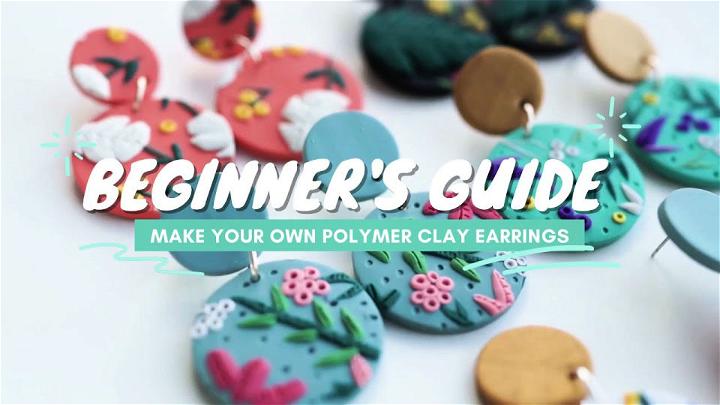
Dive into the world of DIY Polymer Clay Earrings with this comprehensive guide, perfect for beginners! Discover the joy of creating your unique earrings using easily accessible tools like a cutting mat, pasta machine acrylic rolling pin, and a blade. Explore the versatility of polymer clay, especially the recommended Premo for bases and Sculpey 3 for intricate designs.
Learn essential techniques like conditioning the clay, shaping with cutters, and adding personal touches with dots and lines. With detailed instructions on assembly and baking, you’ll master the art of crafting stunning, custom earrings. Elevate your accessory game and unleash your creativity today!
15. DIY Pink and Gold Polymer Clay Earrings
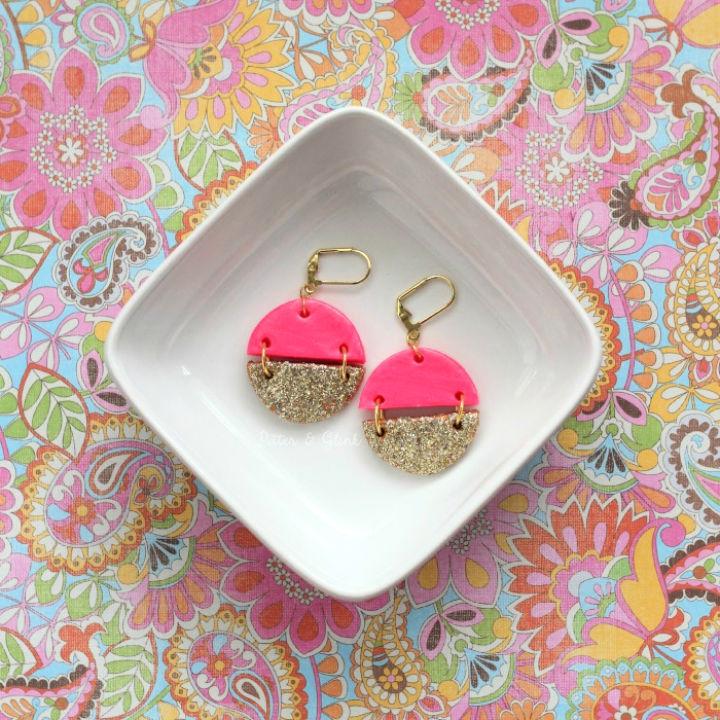
Discover how to create your own stylish pink and gold polymer clay earrings with this fun and engaging DIY tutorial from PitterAndGlink. Perfect for adding a handmade touch to your accessory collection, this guide walks you through the process, from shaping your clay to the final glazing.
Whether you prefer a subtle marble effect or a bold glittery statement, these earrings can be customized to suit your taste. With easy-to-follow steps and a list of simple supplies, you’ll be crafting a unique pair of earrings that are sure to turn heads. Dive into the craft of jewelry making and personalize your style with PitterAndGlink’s DIY Pink & Gold Polymer Clay Earrings tutorial.
Conclusion:
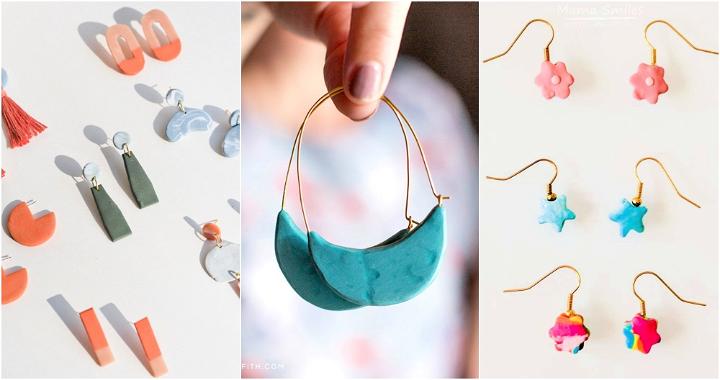
In conclusion, mastering how to make polymer clay earrings enriches your crafting repertoire and lets you fashion personalized accessories right at home. This guide on 15 DIY polymer clay earrings offers a step-by-step approach to help you create your very own beautiful, handmade jewelry. From gathering your materials to the post-baking finishing touches, every section is geared to assist and inspire crafters from all walks of life. As you embark on this creative journey, remember that each DIY polymer clay earring you make is a reflection of your unique style. Keep experimenting, keep learning, and most importantly, enjoy every moment of bringing your ideas to life.
