Explore the art of paper folding with our guide on making origami boxes. Delve into a world where simple A4 papers transform into stylish containers for your treasures. Learn to fold origami boxes that are not only practical for storage but also perfect as personalized gift packaging. From basic shapes to more intricate designs, these 20 easy origami box folding instructions offer a range of ideas that cater to all skill levels.
Ready to enhance your crafting skills with some paper magic? Our collection of 20 origami box ideas is brimming with techniques to master, from square and rectangular to even triangular creations. Each origami box is a delightful project, promising to spark creativity and provide a sense of achievement. Continue reading for accessible, step-by-step guidance that will inspire you to fold your way to beautiful results.
Why Make Origami Boxes?
Discover the joy of making origami boxes and unlock your creativity with this informative guide. Learn why making origami boxes is a rewarding and enjoyable activity for all ages.
Practicality:
- Storage Solutions: Origami boxes offer a convenient and aesthetically pleasing way to organize small items such as jewelry, office supplies, or craft materials. Their customizability in size and shape allows them to fit various spaces and needs.
- Eco-Friendly Packaging: Utilizing origami boxes as gift packaging reduces waste. These reusable and recyclable boxes can be made from any paper, minimizing the need for purchasing plastic or non-biodegradable materials.
Creativity and Personalization:
- Unique Presentation: Handcrafted origami boxes add a personal touch to gift-giving, making the presentation as special as the gift itself. The effort and thoughtfulness behind a custom box often enhance the recipient’s experience.
- Artistic Expression: Origami is an art form. Making these boxes provides a creative outlet, enabling you to experiment with different colors, patterns, and textures.
Skill Development:
- Fine Motor Skills: Folding origami boxes is a great way to improve dexterity and hand-eye coordination. It’s beneficial for all ages, especially for children developing their fine motor abilities.
- Spatial Awareness: Origami requires visualizing the final product and understanding how each fold contributes to the overall structure, fostering spatial intelligence.
Therapeutic Benefits:
- Mindfulness: The focus required to follow origami patterns promotes mindfulness, which can reduce stress and increase mental clarity.
- Sense of Achievement: Completing a box gives a sense of accomplishment and can boost self-esteem, providing a rewarding and productive pastime.
Making origami boxes is a delightful activity that combines practicality with creativity. It’s not only about crafting a useful item but also about enjoying the process and the myriad benefits it brings.
How to Fold an Easy Origami Box
Making an origami box can be a fun, easy, and rewarding project. Whether you’re looking to store small items or want to give a gift a personal touch, an origami box is a great choice. Here’s a simple guide to help you make a basic square origami box.
Materials Needed:
- One square sheet of origami paper (the larger the paper, the larger the box)
- A flat surface
- Your hands
Step-by-Step Instructions:
Prepare Your Paper:
- Place the Paper: Lay your paper on a flat surface, color or pattern side down.
- Make Creases: Fold the paper in half diagonally to form a triangle, then unfold. Repeat with the opposite corners. You should have an X crease on your paper.
Form the Sides:
- Fold Corners to Center: Take each corner and fold it towards the center of the paper where the creases intersect.
- Reinforce Creases: Go over each fold with your finger to make the creases sharp.
Shape the Box:
- Fold Edges: Fold the straight edge of the top flap down to the center line, then unfold. Repeat on the opposite side.
- Make Walls: Lift the paper by the crease you just made, and fold it upward to form one side of the box. Crease the small triangle that forms at the bottom.
- Secure the Edge: Tuck the small triangle flap into the pocket created by the paper’s fold. This holds the side in place. Repeat on the other side to form the second wall.
- Complete the Box: Turn the paper to the unfolded sides and repeat steps 6 and 7 to form the remaining walls.
Tips for a Perfect Origami Box:
- Precision: Make sure all your folds are as precise as possible for a cleaner, more stable box.
- Creasing: Use a bone folder or your nail to make sharper creases.
- Paper Quality: If you’re making a box for a gift, consider using thicker paper for added durability.
- Decoration: Feel free to decorate your box with stickers, markers, or stamps for a personal touch.
Folding a Lid:
If you want a lid for your box, repeat the process with a slightly larger piece of paper or adjust the folds to make the edges a bit taller. This way, the lid will fit snugly over the base of the box.
Origami boxes are not only practical; they also offer a sense of accomplishment once completed. They can be used for gift-giving, organizing small items, or simply as a decorative piece.
Frequently Asked Questions About Origami Boxes
Discover answers to commonly asked questions about origami boxes. Get insights on folding techniques, materials, and more.
What is the best type of paper to use for origami boxes?
The best type of paper for origami boxes is origami paper because it is thin and easy to fold. However, you can also use thicker paper like cardstock for a more durable box or patterned scrapbook paper for a decorative look.
Can origami boxes hold weight?
Origami boxes can hold light items such as jewelry, candy, or small gifts. The weight they can hold depends on the paper’s thickness and the box’s size.
Are origami boxes reusable?
Yes, origami boxes are reusable as long as they are handled with care. To ensure longevity, use thicker paper and avoid overloading the box.
Can I make an origami box waterproof?
To make an origami box waterproof, you can laminate the paper before folding or coat the finished box with a clear sealant. However, this may affect the box’s aesthetics and folding ease.
What if my folds aren’t precise?
If your folds aren’t precise, the box may not come together correctly. Always take your time to align the edges and crease the folds sharply. Practice makes perfect!
How do I keep the sides of my origami box from unfolding?
To keep the sides from unfolding, ensure your creases are sharp. Some designs might require interlocking folds or a small piece of tape for extra stability.
Can I make an origami box out of recycled materials?
Absolutely! You can use pages from magazines, old calendars, or any paper material you have available. Just make sure to cut it into a square shape first.
What’s the simplest origami box design for beginners?
The simplest design is the traditional Masu box, which is made from a single sheet of square paper and involves basic folding techniques.
How can I scale the size of an origami box?
To scale the size of an origami box, start with a larger or smaller square paper. Remember that the size of the finished box will be approximately a third of the diagonal of the square you start with.
Can I make different shapes of origami boxes, not just square ones?
Yes, you can make various shapes like rectangles, triangles, and even pentagonal boxes. The folding techniques will differ, but there are tutorials available for different shapes.
What materials do I need to start making origami boxes?
To begin crafting origami boxes, you’ll need:
- Square sheets of origami paper: The size can vary depending on the desired size of the box.
- A flat surface: To fold the paper on.
- Your hands: No special tools are required, although a bone folder can be helpful for making sharp creases.
Can I make an origami box with regular printer paper?
Yes, you can use regular A4 printer paper for origami boxes. Just make sure to cut it into a square before starting.
Is it possible to make an origami box with a lid?
Absolutely! To make a lid for your origami box:
- Repeat the folding process with a slightly larger piece of paper or adjust the creases to make taller edges.
- Ensure a snug fit: The lid should fit over the base of the box comfortably.
Do I need glue to make an origami box?
Most origami box designs do not require glue. The folding technique itself creates a sturdy structure. However, some more complex or decorative designs might require a bit of glue to hold everything together.
How can I make my origami box look more decorative?
To decorate your origami box:
- Use patterned paper: Choose paper with a design you like.
- Add embellishments: Decorate with stickers, ribbons, or markers.
- Combine colors: Use different colors for the box and lid for a striking effect.
What if my origami box isn’t coming out right?
If you’re having trouble:
- Double-check your folds: Precision is key in origami.
- Refer to tutorials: Re-watch or re-read instructions to ensure you’re following each step correctly.
- Practice: Sometimes it just takes a little more practice to get it right.
Remember, origami is an art that requires patience and practice. Don’t be discouraged if your first few attempts aren’t perfect. Keep folding, and you’ll soon be making beautiful boxes with ease.
Quick and Easy Origami Box Folding Ideas
Learn how to fold origami boxes easily with these quick instructions and get inspired with creative ideas. Perfect for craft enthusiasts of all levels.
1. How to Make Origami Box
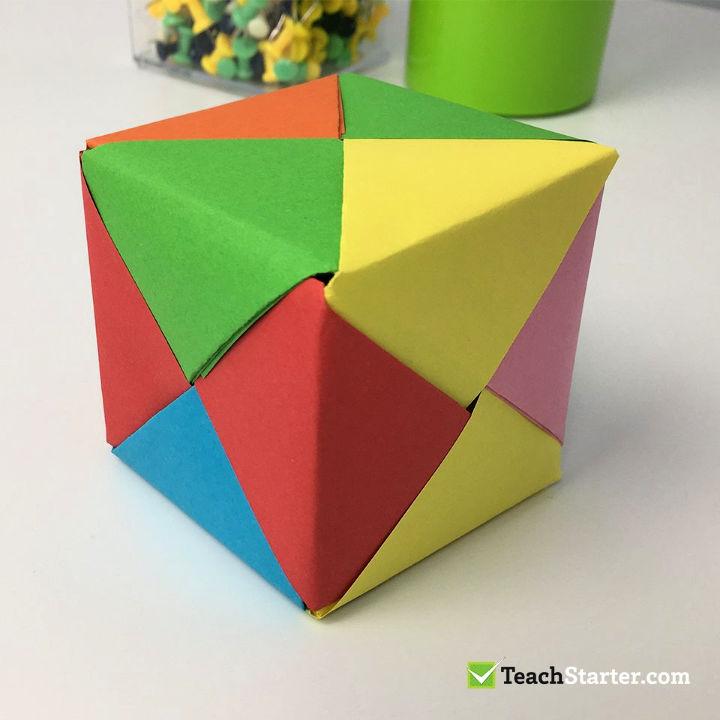
Ready to engage your kids in a creative and skill-building activity? Teach Starter Publishing presents an easy-to-follow guide on crafting an origami box that’s perfect for little hands. With step-by-step instructions and accompanying visuals, this tutorial promises a fun-filled crafting session that enhances spatial awareness, dexterity, and hand-eye coordination.
The process involves simple folding techniques, making it an accessible project for young crafters. By assembling six pieces of origami paper, kids can piece together their very own origami box. Ideal for classroom or home use, the guide also includes a video demonstration and printable instructions to ensure a seamless experience. Get ready to fold, create, and enjoy the magic of origami with your students or children today!
2. DIY Origami Hinged Gift Box
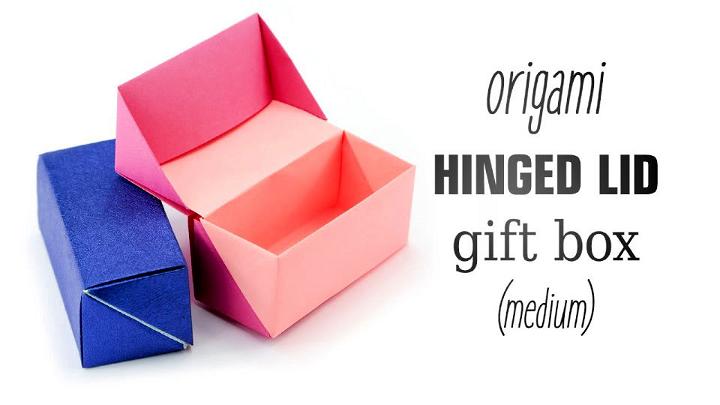
Discover how to make a charming origami hinged gift box with Paper Kawaii’s engaging tutorial. Ideal for wrapping presents or organizing small items, this no-glue craft requires just two sheets of paper. The video provides clear, step-by-step instructions for origami art, making it a fun and accessible project for crafters.
Using sturdy or textured paper can add a touch of elegance and help secure the box’s closure. Visit Paper Kawaii’s website for diagrams and additional resources to enhance your paper crafting skills. With a bit of folding and creativity, you can transform simple paper into a stylish and practical hinged box.
3. Patchwork Paper Origami Gift Boxes
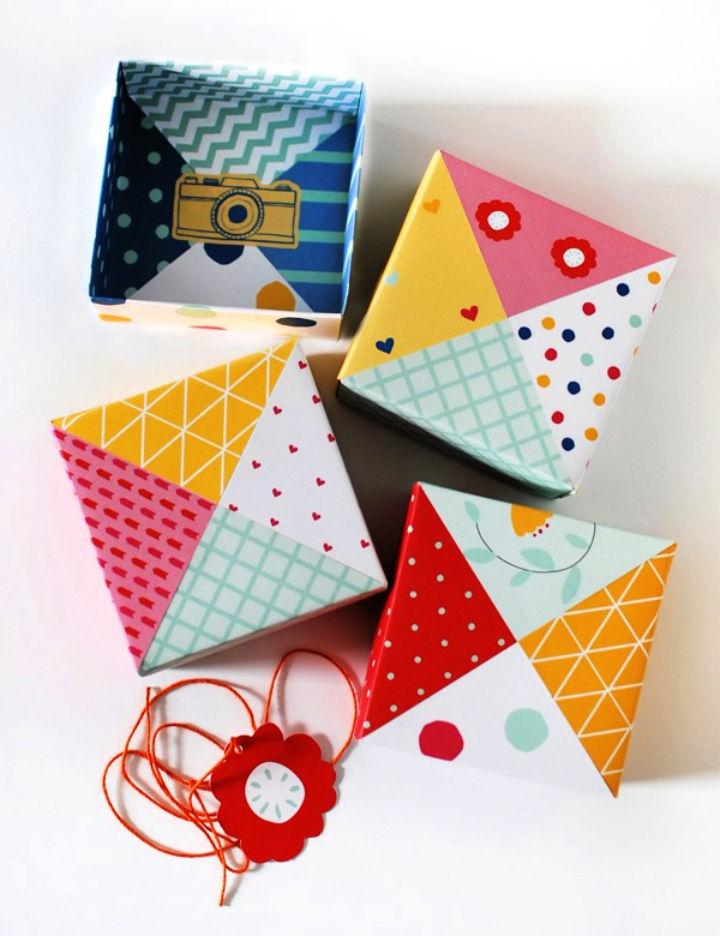
Encounter how to make charming patchwork paper origami gift boxes with a simple and engaging tutorial from We Are Scout. This guide provides a step-by-step process to craft beautiful gift boxes using just squares of paper and washi tape. Ideal for adding a personal touch to your presents, these lidded boxes combine traditional Japanese techniques with a modern twist.
Follow the instructions to fold and assemble the paper into a neat container, perfect for any special occasion. Get creative and personalize your gift box with stickers and tags for that extra flair. Start making your unique origami gift boxes today and impress your loved ones with your crafting skills.
4. DIY Modular Origami Infinity Box
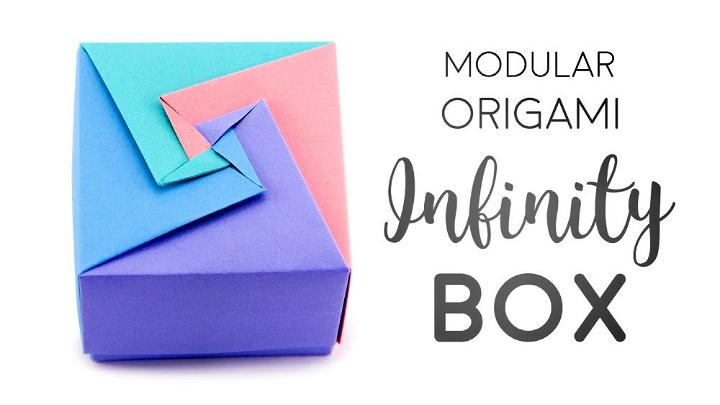
Embarking on a modular origami project can elevate your paper-folding skills to new heights. The Infinity Lid Origami Box is a captivating craft that challenges your dexterity and rewards you with a stunning result. With Paper Kawaii’s comprehensive tutorial, you’ll learn how to make a unique box with a twisted design, showcasing the contrasting colors of your paper.
Ideal for storing trinkets or gifting, this no-glue-required craft is made from four sheets of square paper. For optimal results, choose crisp origami paper or thin cardstock to achieve the intricate twists of the infinity lid. Step into a realm of creativity and fold your way to a beautiful, functional piece of art.
5. Make Your Own Hinged Origami Box
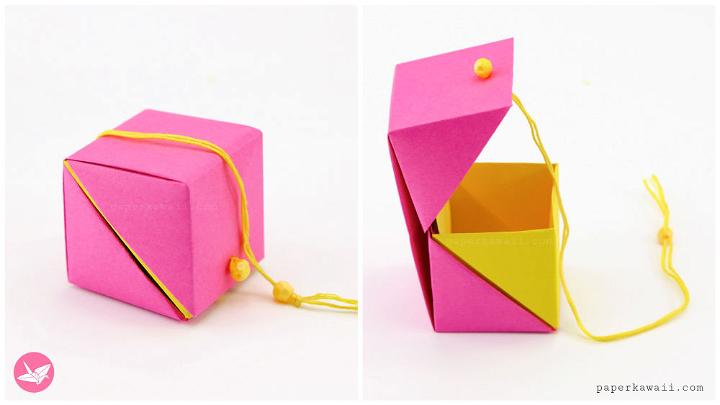
Learn how to craft a charming hinged origami gift box with the help of Paper Kawaii’s easy-to-follow tutorial. This creative project transforms two sheets of paper into a small, cube-shaped box without the need for glue. Ideal for presenting small gifts, the design can be secured with thread and beads or other creative closures.
With step-by-step instructions, even those new to origami can produce a beautiful and functional piece. Visit Paper Kawaii’s website for more origami inspiration, where you can access a wealth of resources, including ebooks, diagrams, and free printable origami paper. Dive into this engaging craft and add a personal touch to your gift-giving with a handmade origami box.
6. How to Fold a Gift Box
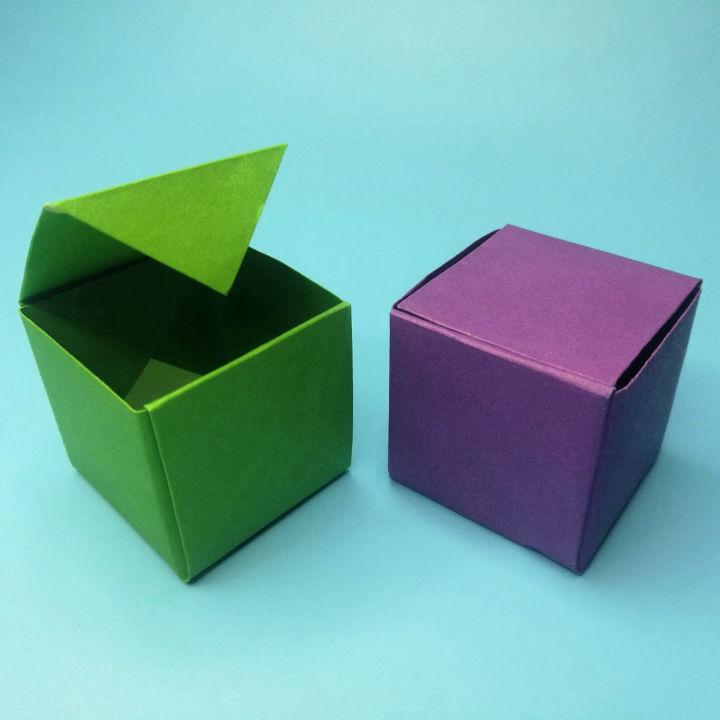
Making an origami gift box is a charming and creative way to present a small token to someone special. Origami Tutorial offers an easy-to-follow guide for crafting a square origami box with a lid using just a single piece of paper. Start by making precise creases and folding the corners to the center.
Step by step, you’ll divide the paper into equal parts, lift and fold sections to form the structure, and finally, shape the lid to complete your miniature gift box. This guide is designed to be clear and concise, ensuring a fun and successful origami experience for all crafters.
7. DIY Origami Paper Box
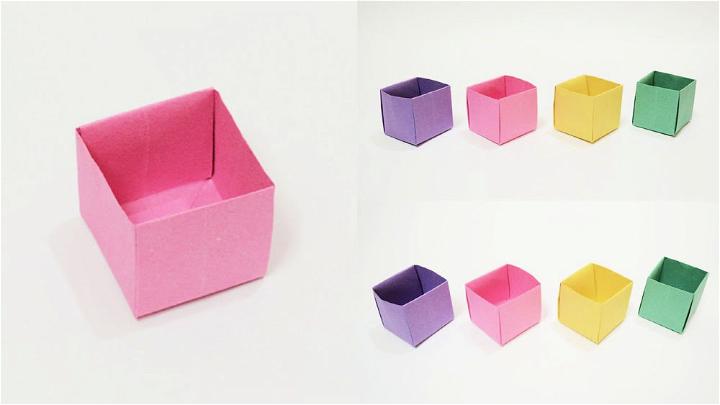
Learn how to make your own paper box with ease by following this engaging tutorial on YouTube. Crafting a paper box through origami is a fun and eco-friendly way to store small items or give a personal touch to a gift. The step-by-step video guide is perfect for those who enjoy hands-on activities and want to learn a new skill.
The instructions are clear, allowing you to fold a sturdy box without the need for glue or scissors. With just a sheet of paper and some precise folds, you can construct a versatile box that’s both practical and pleasing to the eye. Tune in to the tutorial and start folding your way to a charming and useful paper creation.
8. Making a Origami Box Fairy Lights
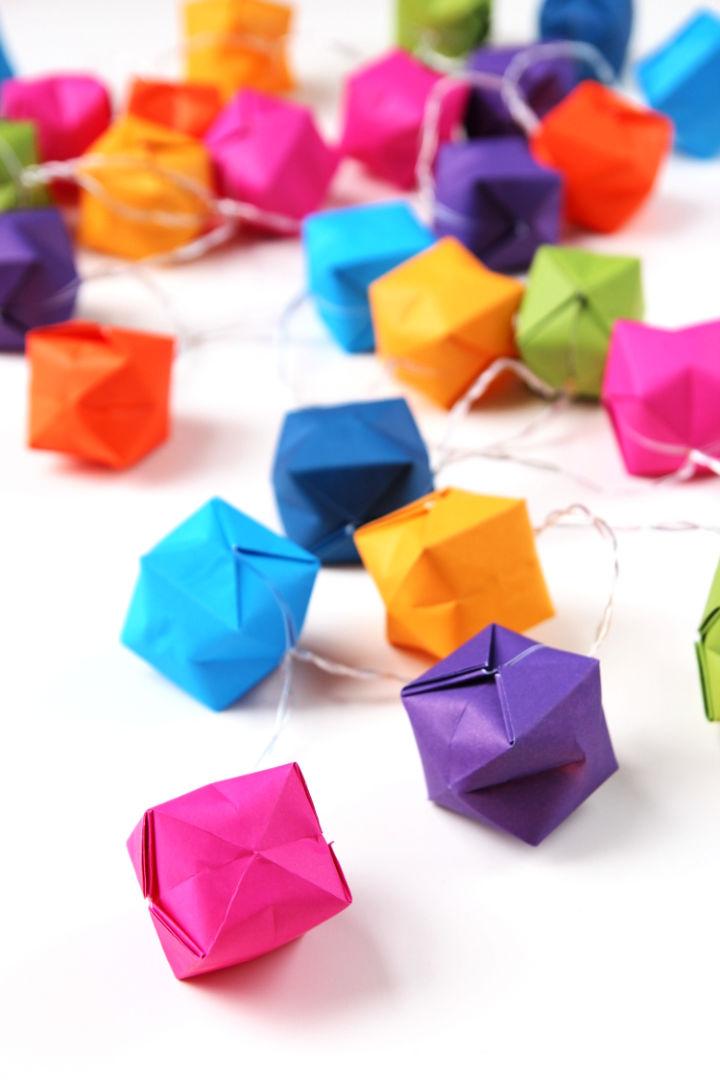
Transform your living space with the charm of DIY Origami Fairy Lights, as showcased on Gathering Beauty. These simple yet enchanting creations can elevate the ambiance of any room, from cozy reading nooks to festive party settings. Using just origami paper and a string of lights, you can craft beautiful paper lanterns that add a homemade touch to your decor. The process is straightforward, making it an ideal project for crafting enthusiasts of all skill levels. Dive into the step-by-step guide and light up your surroundings with a personalized glow.
9. Rectangular Origami Box – Step by Step Instructions
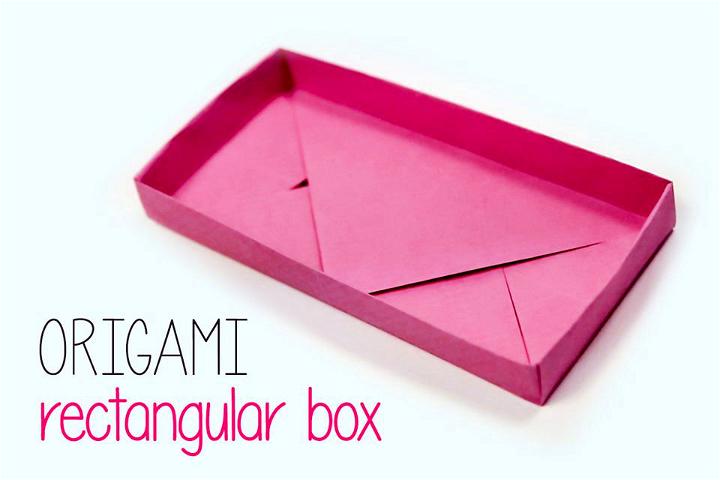
Ready to craft an origami envelope box? The Spruce Crafts offers a clear and engaging tutorial that guides you through each fold, transforming a simple square sheet of paper into a versatile creation. Ideal for enclosing party invitations or storing small trinkets, this origami project is a charming blend of practicality and creativity. With concise instructions and helpful images, you’ll master the art of paper folding in no time. Whether you’re planning a special event or just enjoy hands-on crafts, learning to make this origami envelope box is a rewarding endeavor.
10. DIY Origami Hinged Gift Boxes
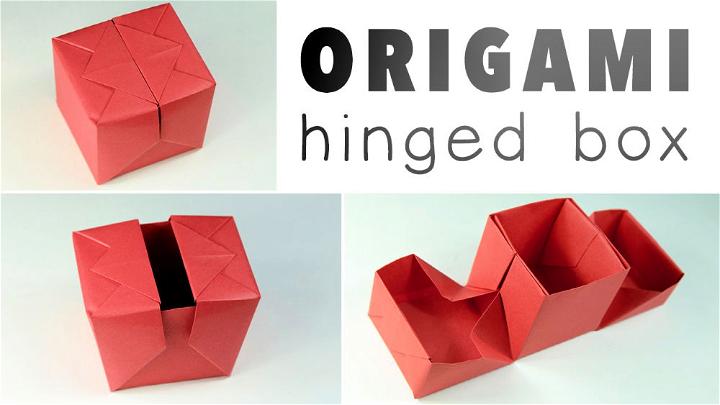
If you’re intrigued by the idea of making your own intricate origami hinged gift box, Paper Kawaii’s YouTube tutorial is a treasure trove of step-by-step guidance. This DIY project is perfect for those who enjoy paper crafts and are keen to challenge themselves with a modular origami design. The tutorial is designed to help you craft a beautiful box with hinged lids that swing open, an ideal choice for a unique wedding ring box or a special keepsake container.
With clear instructions, you’ll learn to measure, fold, and assemble the box using square sheets of paper, a ruler, pencil, and glue. Paper Kawaii suggests various paper sizes for different box dimensions, ensuring that you can tailor the craft to your desired size. The video is rated advanced due to the precision required, but with patience and practice, it becomes a manageable project for those with some origami experience.
11. Easy Peasy Origami Gift Box Tutorial
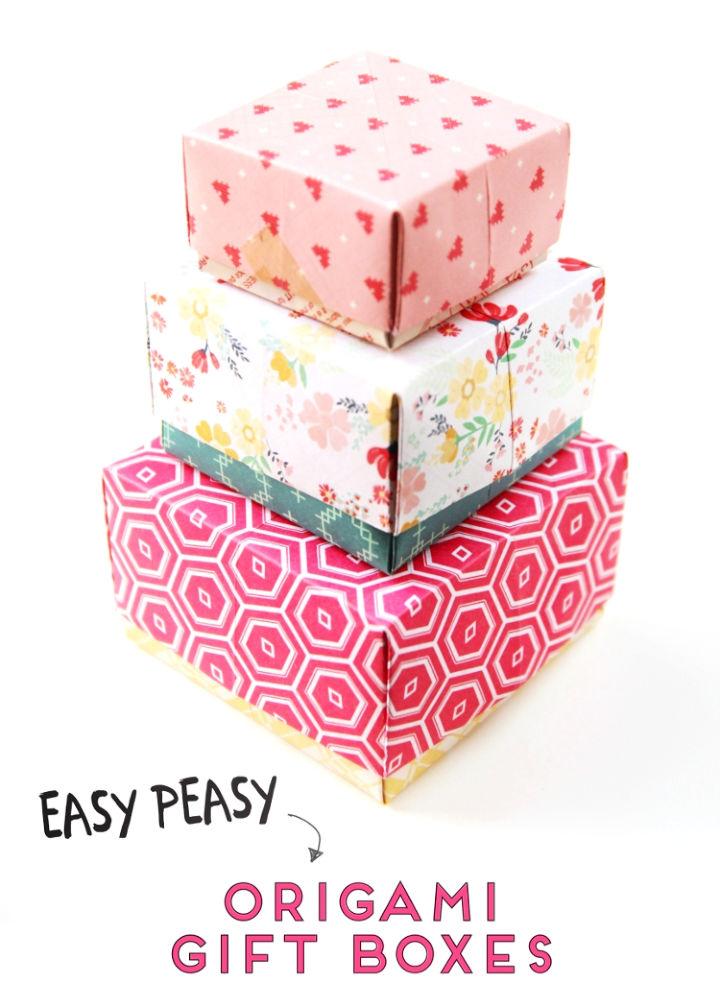
Learn to craft a charming origami gift box with a lid using the straightforward guide from Gathering Beauty. Ideal for wrapping gifts, organizing small items, or as a decorative desk accessory, this DIY project is perfect for adding a personal touch to your presentations. With easy-to-follow instructions and a helpful step-by-step photo tutorial, you’ll master the art of making these beautiful paper boxes in minutes.
Tailor them to your taste with your favorite patterned paper and make them in any size you desire. For a sturdy finish, opt for scrapbook paper or lightweight cardstock. Get creative and personalize your gift-giving with these handmade origami boxes.
12. How to Fold a Traditional Origami Box
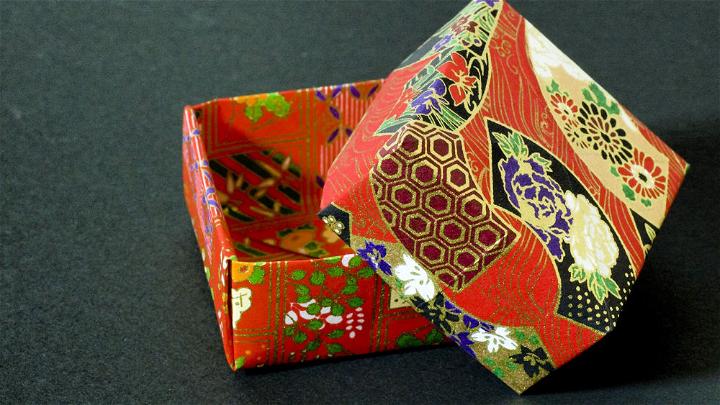
Ready to craft a traditional origami masu box? Origami.me provides clear, step-by-step instructions to help you make a beautiful paper box perfect for holding small treasures. Starting with a square sheet of paper, you’ll make precise folds to form a sturdy container that captures the essence of Japanese culture.
No need for tape or glue; the folds alone make a snug fit. And if you’re aiming to top your box with a lid, the guide includes tips for adjusting the size. Engage with this timeless origami project and delight in making a functional creation that’s both simple and elegant.
13. Rectangular Origami Box for Beginners
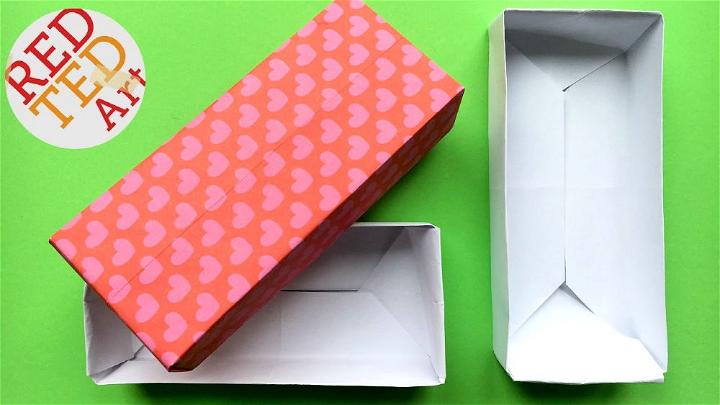
Craft a charming rectangular origami box with ease, following the step-by-step guide provided by Red Ted Art – Kids Crafts. Ideal for storing small items or presenting gifts, this origami project is perfect for anyone seeking a creative and functional craft. Using just two square sheets of paper, with one slightly smaller for the lid, you can personalize your box with decorations of your choice.
With clear instructions and a focus on precise folds, you’ll make a lovely paper box that’s both practical and pleasing to the eye. Whether used for organization or as a handmade gift container, your origami box is sure to impress.
14. Easy Origami Box Tutorial
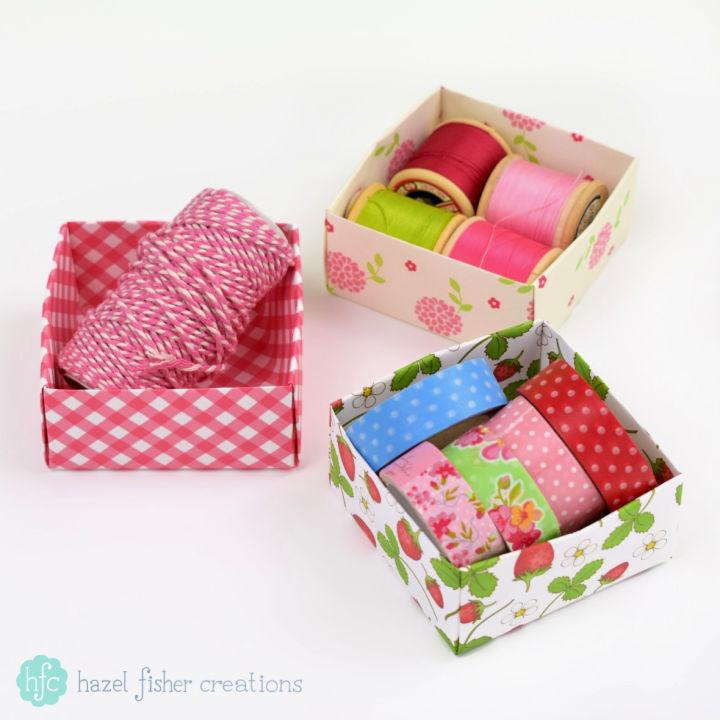
Discover how to craft charming origami boxes with this step-by-step tutorial. Ideal for storing small items or as personalized gift boxes, these creations add a touch of elegance to your craft collection. Use a variety of colored or patterned papers to customize your boxes, and experiment with different sizes for unique results.
With easy-to-follow instructions, you’ll learn to fold paper into beautiful boxes without the need for glue. Visit hfcSupplies for an array of printable scrapbooking papers to enhance your papercraft projects. Perfect for crafters at any skill level, this tutorial makes origami box-making simple and enjoyable.
15. How to Make Origami Box
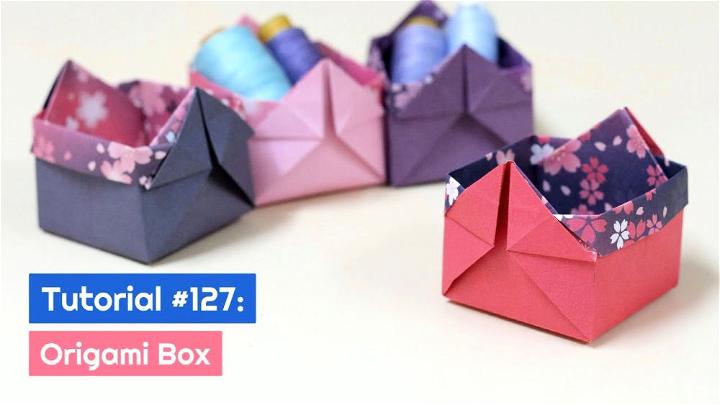
Step into the world of paper crafting with the DIY Origami Box Tutorial from The Idea King. In this engaging and easy-to-follow tutorial, viewers can learn how to make a charming origami box perfect for gifts, storage, or decorative purposes. With clear instructions and a visual guide, the video makes it simple to fold your way to a beautiful handmade box, regardless of your prior origami experience.
Embrace the satisfaction of crafting with paper and add a personal touch to your creations. Visit The Idea King for more inspiring ideas and tutorials that will help you elevate your crafting skills.
16. DIY Origami Pen Holder Box
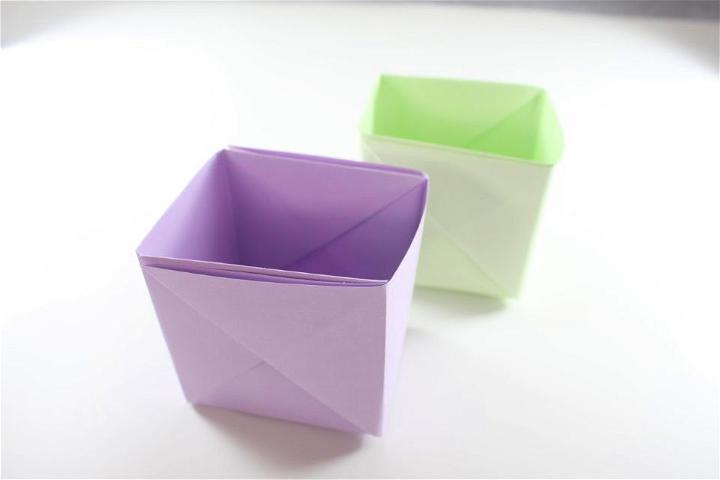
Uncover how to craft a versatile origami pen holder box with ease on Origami Japan. Perfect for organizing small accessories or even serving as a unique trash can, this paper folding project is accessible and rewarding. The instructions guide you through a simple 11-step process, starting with basic folds and culminating in a sturdy, attractive holder.
By selecting a durable or decorative paper, you can make a functional and stylish case that suits your personal taste. Follow these clear, step-by-step instructions to transform a simple sheet of paper into a practical pen holder box, enhancing your space with a touch of handmade charm.
17. Make Triangle Origami Boxes
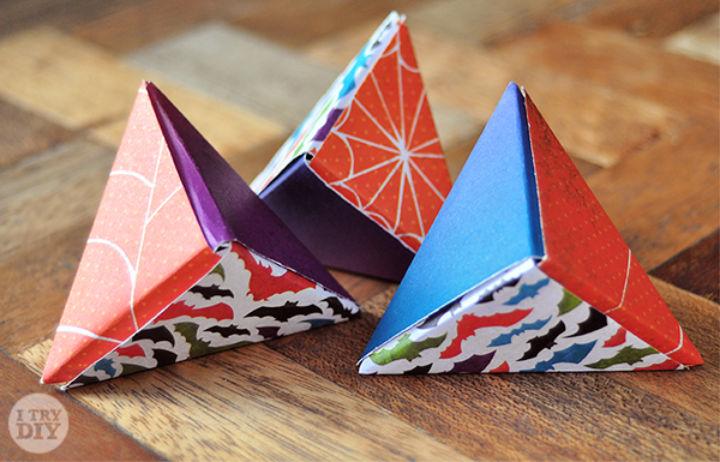
Get ready to sweeten up your gifting with a creative twist using I Try DIY‘s guide to crafting triangle origami boxes. Perfect for housing treats like Skittles or M&Ms, these charming little packages are sure to make your candy presentations stand out. The tutorial is straightforward, using just three squares of scrapbook paper and some simple folds to make a delightful triangular box.
This engaging and helpful guide makes it easy to understand each step, ensuring a fun crafting experience. Ideal for Halloween or any festive occasion, these origami boxes add a personal touch to your thoughtful gifts. Dive into the fun of DIY packaging and impress your friends and family with these unique candy holders.
18. How to Make Origami Box With Flaps
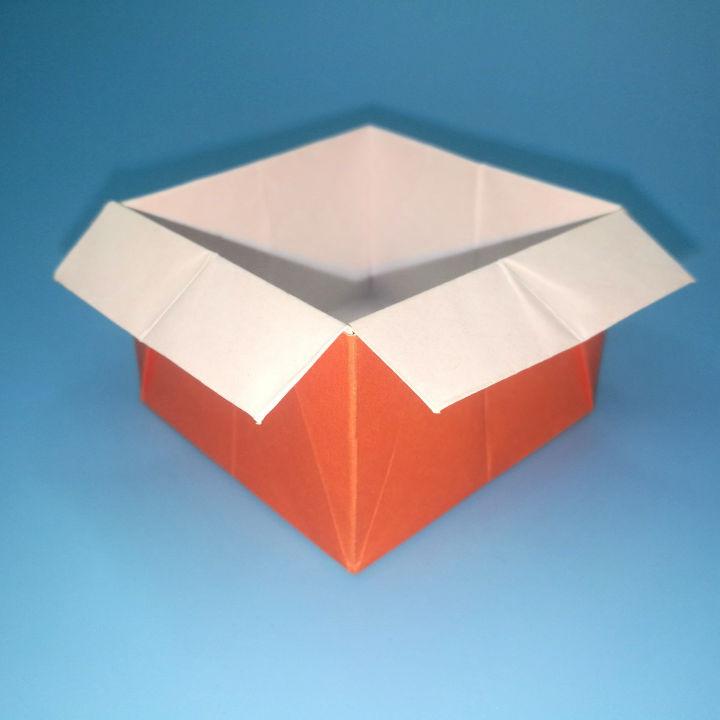
Ready to make an elegant origami box with flaps? Origami Tutorial provides clear, step-by-step instructions that will guide you through each fold and crease, making it simple to craft a beautiful box from a single square piece of paper. Perfect for gifts or home storage options, this box design adds a charming touch with its neat flaps.
Follow the instructions to transform a flat sheet into a functional and attractive origami creation. With precise folds and a bit of patience, you’ll be proud to display or use your handcrafted box. Happy folding!
19. DIY Rectangular Origami Box
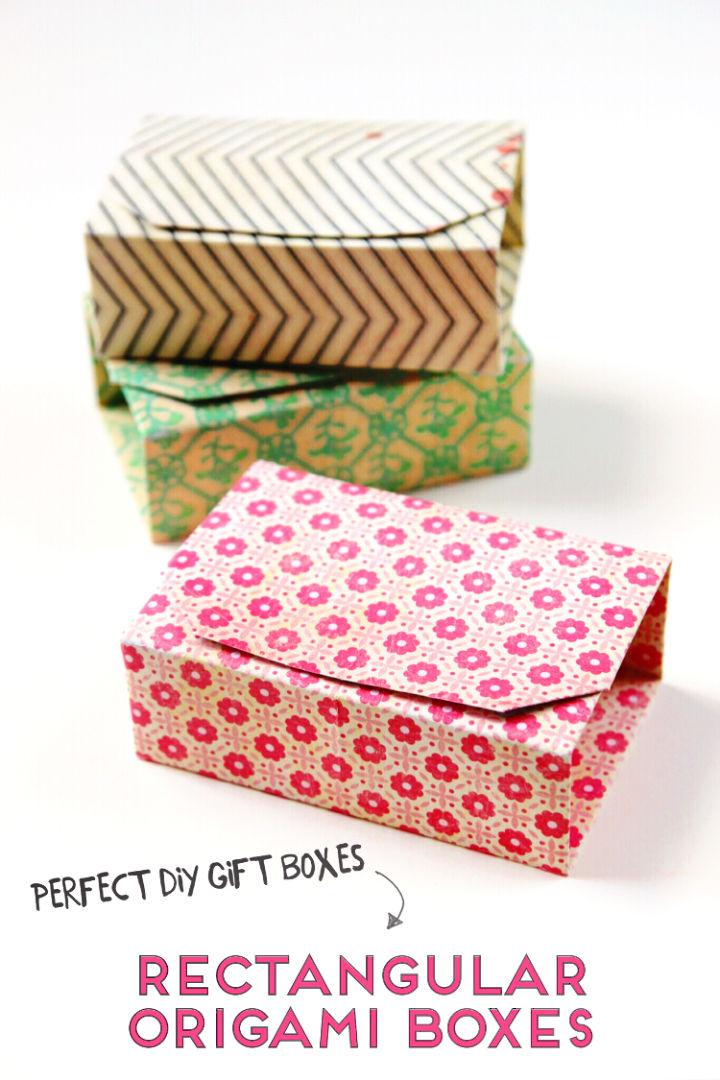
Looking to handcraft a unique gift box for a special someone? Gathering Beauty offers a fantastic tutorial on making an all-in-one rectangular origami box with just a single sheet of paper. This clever design unfolds to reveal a smaller square box inside, perfect for housing jewelry or sweet treats. With clear instructions, you can transform patterned scrapbook paper or any paper of your choice into a stunning, glue-free, and scissor-less presentation. Make your gifts stand out with this personalized touch that’s as enjoyable to make as it is to give.
20. DIY Masu Origami Box With a Lid
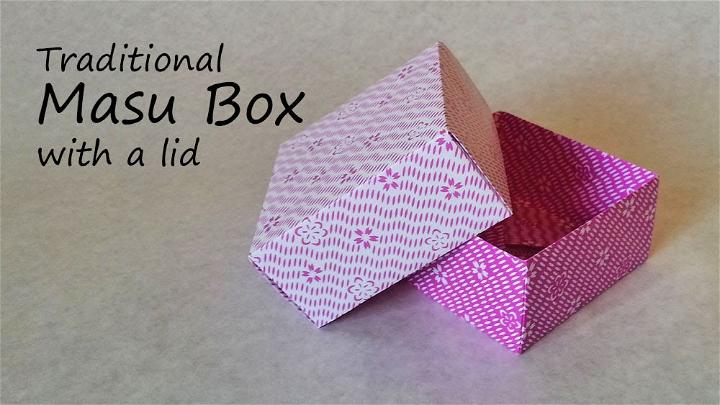
Explore the traditional craft of origami with Make-Origami.com’s guide on making a masu box, a classic Japanese square-shaped paper container. This instructional page offers clear, step-by-step instructions to help you fold your own elegant masu box, ideal for storing trinkets or serving as a thoughtful, handmade gift.
With easy-to-follow directions and helpful visuals, you’ll learn how to transform a simple square sheet of paper into a sturdy, functional box. Perfect for crafters who appreciate clean lines and practical design, the masu box tutorial is designed to be engaging and accessible, providing a satisfying creative experience.
Conclusion:
In conclusion, mastering the art of origami box folding is a craft that offers endless possibilities for gift-giving and storage solutions. With our 20 quick and easy origami box folding ideas, you now have access to a range of creative and practical designs. These step-by-step instructions cater to all skill levels, allowing you to transform simple sheets of paper into beautiful and functional creations. So grab your A4 papers and start folding your way to impressive origami boxes that are sure to captivate and organize in equal measure.
