So growing up, my parents always taught me to save money in the most creative ways they could find. And I really love them for it, because I`ve grown up into a responsible person and a person who knows how to handle their money, which is a really important skill in everyone’s life. So I decided that this post should be all about new and creative ways to save money, and also, if you have tons of mason jars, just lying around this might be your lucky day.
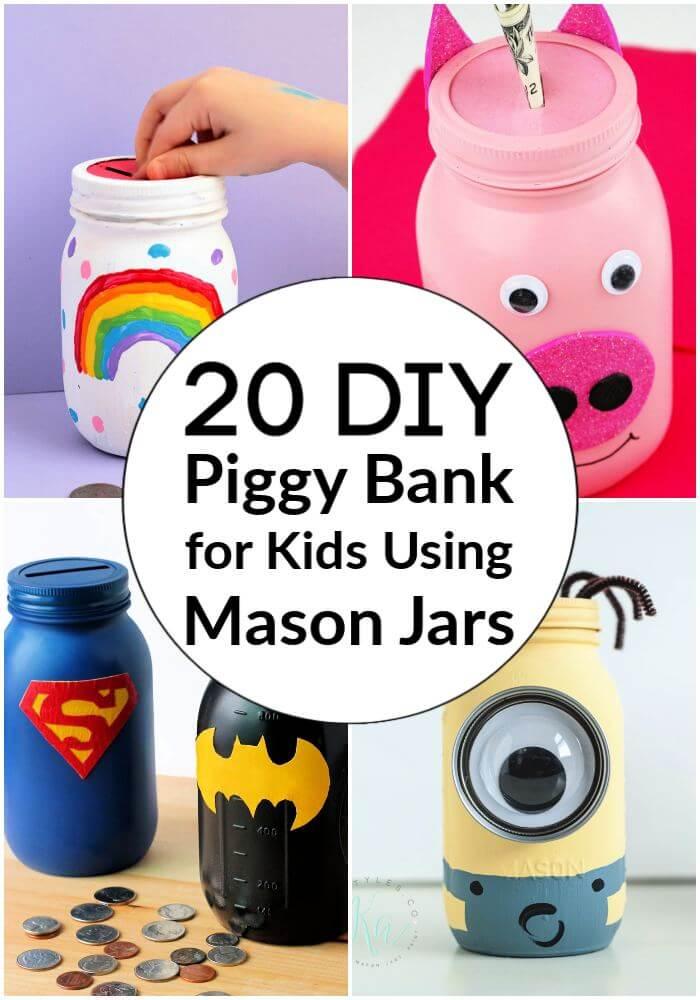
I have compiled 20 DIY Piggy Bank for kids Using Mason Jars, and the best part is that you will most definitely have fun making these piggy banks while finally finding a way to repurpose those mason jars you have. Also, this article is important for other reasons, and that is it will be a big part of your kid’s way of learning how to save money and making it a great part of their life. So pull up a comfy chair, pick the piggy bank you think your kids will love the most, and get to it.
These easy to make kids crafts are really super fun and simple to make that you shouldn’t have any problems finishing any of them. But in case you do get stuck, there is a well-written tutorial following each design. You can follow it step by step and also have fun in the process, which is also a very important part of the art of DIY. So no time to waste, it is time to save some money with these amazing DIY Piggy Bank Using Mason Jars.
Why Make DIY Piggy Banks Using Mason Jars
Making DIY piggy banks using mason jars is not only a crafty and enjoyable activity, but it also carries several benefits that make it a worthwhile endeavor:
- Promotes Saving: Encouraging children to save money is vital for teaching them about financial responsibility. A personalized piggy bank makes the concept of saving more tangible and fun.
- Recycles Materials: By repurposing mason jars, you’re contributing to environmental sustainability by reducing waste and reusing materials that might otherwise end up in landfills.
- Sparks Creativity: Decorating and customizing mason jars allow children and adults alike to express their creativity, which can be a fulfilling and relaxing experience.
- Customizable: Whether it’s superheroes, Disney characters, or simply a splash of glitter, DIY piggy banks can be tailored to suit anyone’s interests or decor preferences.
- Affordable: Mason jar piggy banks are a cost-effective craft. Most materials required can often be found at home or bought inexpensively at craft stores.
- Educational: Through the process of making a piggy bank, children can learn basic crafting skills and follow instructions, which are educational aspects of the activity.
- Bonding Activity: It’s a great project for family bonding. Spending time together while crafting can strengthen relationships and make lasting memories.
Incorporating these reasons, DIY piggy banks using mason jars are not only practical for saving coins but also serve as a creative outlet and an educational tool. It’s a simple, resourceful, and meaningful way to combine art with financial literacy.
How to Make Your Own Mason Jar Piggy Bank
Making a DIY Mason Jar Piggy Bank is a fun and fulfilling activity that teaches kids about saving money, while also being an eco-friendly way to reuse jars you have at home. Here’s a simple guide to help you make a personalized piggy bank that your kids will love.
Materials Needed:
- Mason jar with lid
- Paint and paintbrushes (acrylic or spray paint)
- Coin slot lid or sturdy plastic for making a slot
- Glue (hot glue gun recommended)
- Decorative materials (stickers, washi tape, glitter, etc.)
- Scissors or a box cutter
- Sandpaper (optional)
Instructions:
Step 1: Prepare Your Mason Jar
- Clean the jar: Make sure your mason jar is clean and dry. Remove any labels and sticky residue.
- Sand the lid: If you’re using a metal lid, lightly sand the surface for better paint adhesion.
Step 2: Paint the Jar
- Apply the base coat: Start by painting your jar with a base coat. You may need multiple coats for opaque coverage. Let it dry completely.
- Add details: Once the base coat is dry, add additional colors or designs. This is where you can get creative!
Step 3: Make the Coin Slot
- Option 1: Use a pre-made coin slot lid if available.
- Option 2: Trace a coin slot on the lid or a piece of sturdy plastic, then carefully cut it out with a box cutter.
Step 4: Decorate Your Piggy Bank
- Get creative: Use stickers, washi tape, or even glitter to decorate your piggy bank. You can theme it around your child’s favorite colors, characters, or interests.
- Attach decorations: Glue on any three-dimensional items like googly eyes or foam pieces for ears and snouts if making an animal-themed bank#### Step 5: Assemble the Piggy Bank
- Attach the slot: If you made your own coin slot, glue it securely to the underside of the jar lid.
- Seal the jar: Once all paint and glue is dry, screw the lid onto the jar.
Tips for Success:
- Durability: Seal your paint job with a clear coat of Mod Podge or similar sealer to make it last longer.
- Safety: If you’re cutting a coin slot, be cautious. It’s best for an adult to handle this step.
- Engage your kids: Involve your children in the design and decoration process. It’s a great way to bond and teach them about crafting and saving money.
Crafting your own Mason Jar Piggy Bank is an easy and enjoyable project. With a bit of creativity and some simple materials, you can make a functional and personalized way to save coins. It’s not only a great learning tool for kids but can also be a stylish addition to your home decor. Enjoy making your unique piggy bank and happy saving!
Frequently Asked Questions About DIY Piggy Banks Using Mason Jars
What materials do I need to make a DIY Mason Jar Piggy Bank?
To make a DIY Mason Jar Piggy Bank, you typically need the following materials:
- A clean and dry mason jar
- A lid for the jar (with a coin slot or make one)
- Paint (acrylic or spray paint)
- Brushes or sponges for painting
- Glue (a hot glue gun is recommended)
- Decorative elements (stickers, washi tape, glitter, etc.)
- Scissors or a box cutter (for adults to use)
- Optional: Sandpaper, Mod Podge or a clear sealer
How can I safely make a coin slot in the mason jar lid?
Making a coin slot in a mason jar lid should be done by an adult due to the risk of sharp edges. Follow these steps:
- Trace the Coin Slot: Use a coin to trace a slot shape on the lid.
- Cut the Slot: Carefully cut out the slot with a box cutter or strong scissors.
- File the Edges: Use a metal file to smooth any sharp edges to ensure safety.
Is it necessary to sand the lid before painting?
It is recommended to lightly sand a metal lid before painting to help the paint adhere better. However, if you’re using a plastic lid or one that already has a coating that paint can adhere to, sanding might not be necessary.
Can these DIY piggy banks be used as a learning tool for kids?
Absolutely! DIY piggy banks are not only fun to make but also serve as a practical educational tool to teach kids about saving money, following instructions, and expressing creativity.
How do I make sure the paint and decorations on my mason jar piggy bank last?
To ensure the longevity of your paint job and decorations:
- Let all paint layers dry completely before adding another layer or decoration.
- Use a clear sealer like Mod Podge to seal the paint and protect the decorations.
- Handle with care to prevent chips and scratches.
What are some creative ideas for decorating a mason jar piggy bank?
Get creative with your mason jar piggy bank by trying out these ideas:
- Themed Designs: Choose a theme like superheroes, animals, or favorite TV characters.
- Personalization: Use letter stickers to add a name or saving goal to the jar.
- Textures: Add dimension with pom-poms, foam shapes, or fabric.
- Colorful Patterns: Paint stripes, polka dots, or other patterns for a vibrant look.
How can I involve my kids in making a DIY Mason Jar Piggy Bank?
Involving kids in the creation process can be fun and rewarding:
- Let them choose the colors and themes for the piggy bank.
- Ask for their input on which decorations to use.
- Guide them in painting or adding stickers (if age-appropriate).
- Discuss the purpose of saving money and how the piggy bank will help them save for something special.
Can these piggy banks only be used for coins, or can I save bills in them too?
Mason jar piggy banks can be used to save both coins and bills. If you plan to save bills, make sure the coin slot is large enough or make a separate slot or opening for inserting paper money.
Remember to have fun with your DIY project, and enjoy the bonding experience as well as the satisfaction of making something both beautiful and practical.
Ice Cream Fund Mason Jar
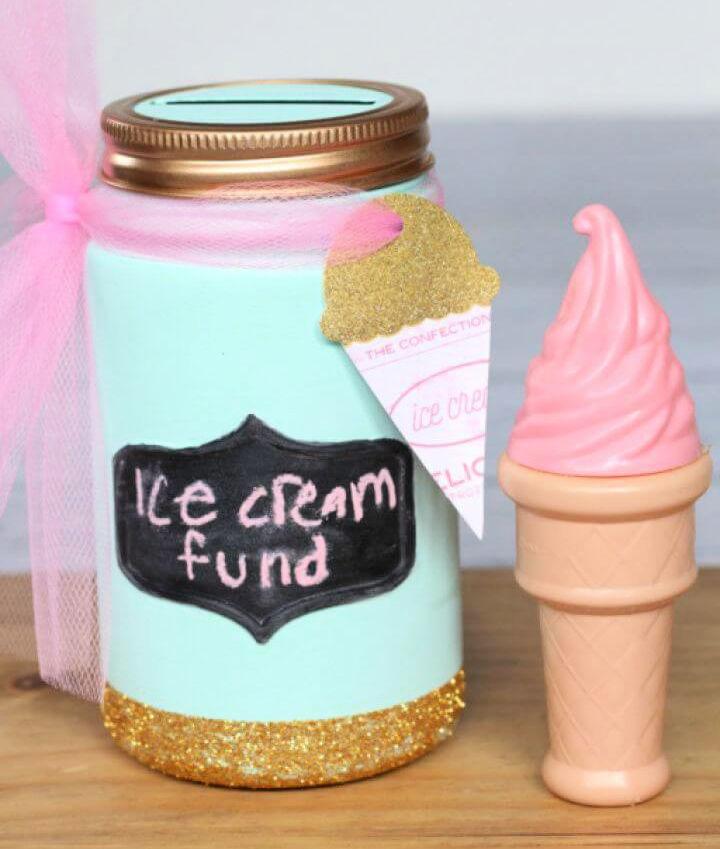
Craving a sweet savings spot for your ice cream fund? Yesterday On Tuesday offers a charming and creative solution with their Ice Cream Fund Mason Jar craft. This DIY project transforms a simple Mason jar into a delightful money collector for your frozen treat indulgences. The step-by-step guide is perfect for crafters who want to combine their love for ice cream with a touch of artistic flair.
With easy-to-follow instructions, you’ll apply paint, chalkboard labels, and even a dash of glitter to make a unique and functional piece. Perfect for saving up for those summer ice cream runs, your Mason jar will be both a decorative item and a conversation starter. Get crafting and make saving for your next scoop of ice cream a fun experience!
How To Make a Disney Savings Jar
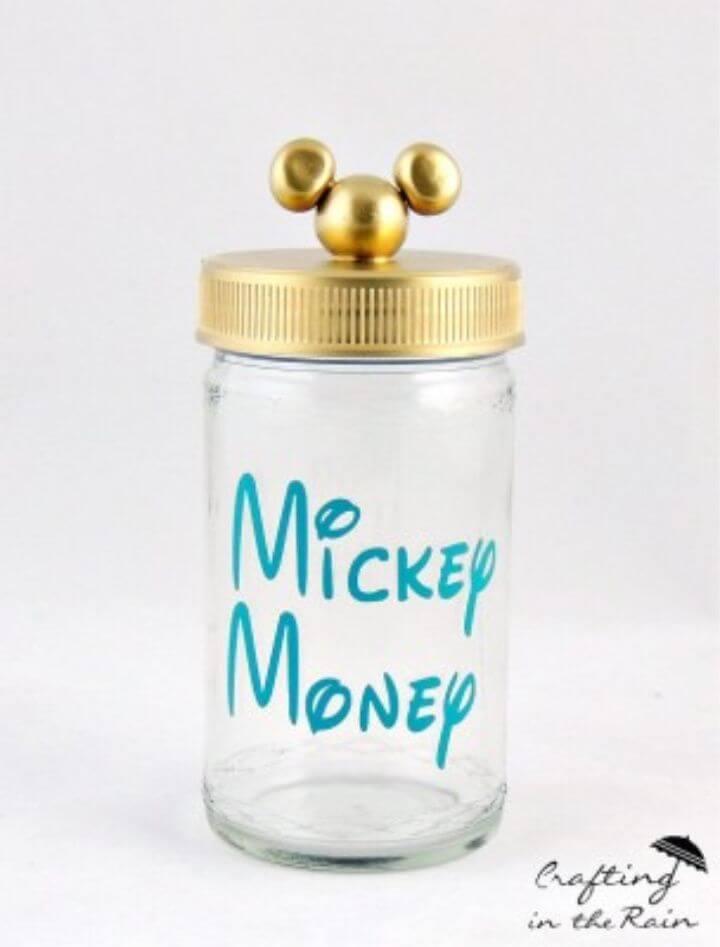
Get ready for your magical Disney vacation by crafting a charming Disney savings jar, as detailed by Undercover Tourist. This DIY project is perfect for the entire family to enjoy while preparing for the enchanting experience ahead. You’ll need a clean jar, clay, toothpicks, strong glue, spray paint, and decorative stickers or vinyl lettering.
Make a Mickey-inspired design by shaping the clay and attaching it to the jar’s lid. After painting and decorating, you’ll have a delightful savings vessel that will make watching your Disney fund grow almost as fun as the trip itself. Start saving today and let the anticipation build!
Awesome DIY Piggy Banks
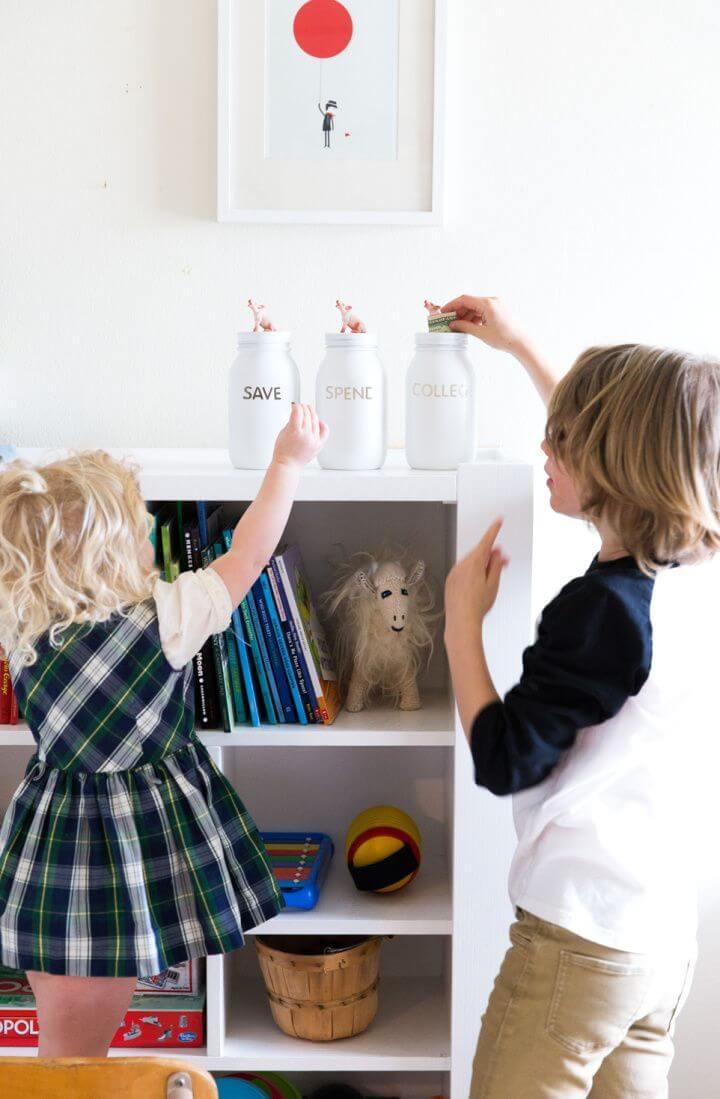
Looking to teach your kids the importance of saving money? Say Yes offers a creative and engaging way to get the whole family involved with DIY Piggy Banks. This hands-on activity not only promotes financial literacy but also provides a fun craft project. With simple materials like mason jars, slotted lids, and miniature pig figurines, you can make personalized banks labeled for spending, saving, and college funds.
The process is straightforward: decorate your jars, attach the pigs, and start filling them with savings. It’s an instructive approach that helps children understand the value of money and the benefits of saving for the future. Join in on this family-friendly endeavor and watch your savings grow together!
Sparkle & Shine DIY Mason Jar Coin Bank
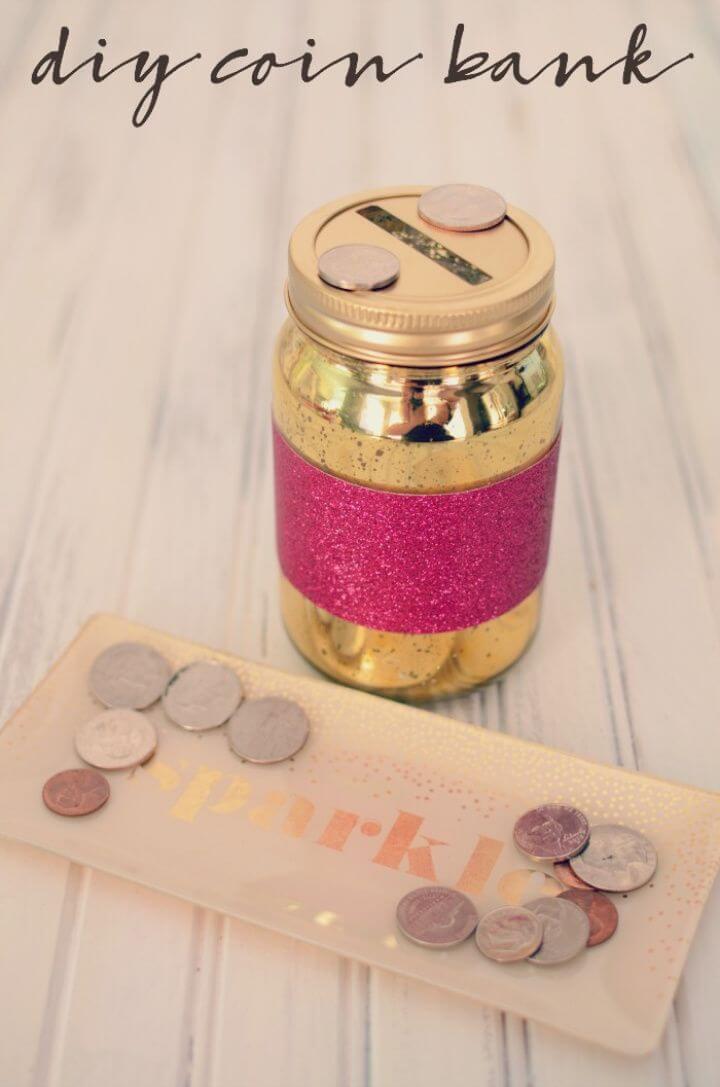
Transform your loose change into a decorative treasure with Taylor Bradford‘s DIY Coin Bank project. Kendra from Simply {Darr}ling shares an easy-to-follow guide on making a sparkling coin repository that’s not only practical but also adds a touch of glamour to your space. With simple materials like a gold mirrored mason jar, glitter tape, and some spray paint, you can craft a personalized coin bank that’s perfect for saving up for your favorite treats.
Opt for a color scheme that brings you joy, and enjoy watching your savings grow in style. This project is ideal for anyone seeking a creative way to manage their spare change with a homemade flair.
DIY Minnie & Mickey Mouse Mason Jar Money Banks
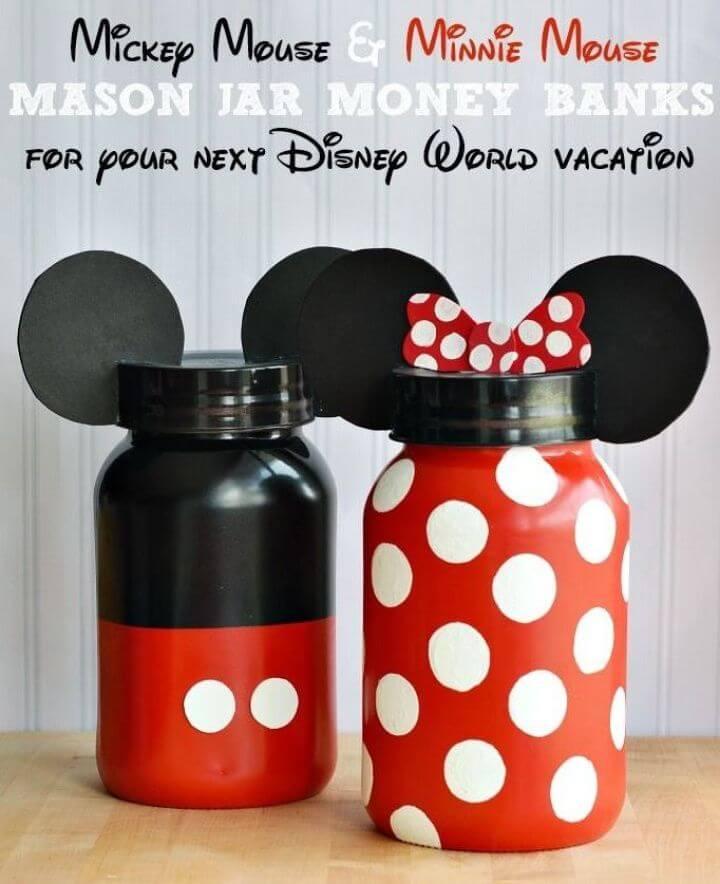
Crafting a Minnie & Mickey Mouse Mason Jar Money Bank is a charming and creative way to save your coins in style. KimberleyMarriott guides you through the simple steps to transform ordinary mason jars into beloved Disney characters. You’ll need basic supplies like spray paint, foam sheets, and a round sponge. The process involves painting, cutting, and assembling the jars with the iconic Mickey and Minnie designs.
Perfect for Disney fans or as a homemade gift, these money banks are not just functional; they’re also a delightful addition to any room. Follow the instructions, and you’ll have a fun and functional craft that encourages saving with a touch of magic.
Easy DIY Minion Mason Jar Coin Banks
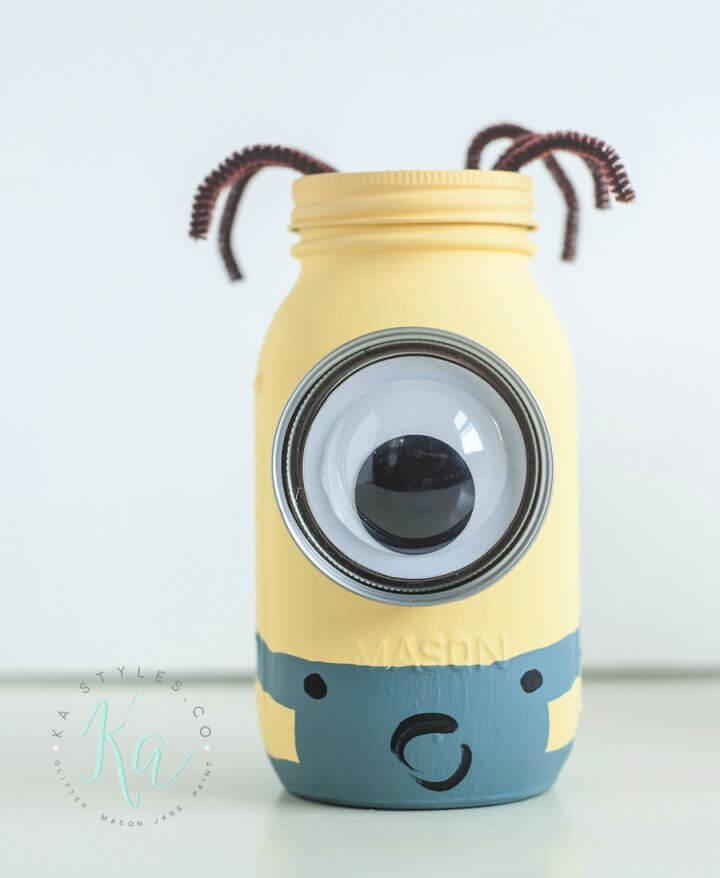
Transform your everyday mason jars into adorable Minion Mason Jar Coin Banks with guidance from KA Styles.co. Kelly showcases a fun and engaging project perfect for those who adore the Minions and enjoy a touch of creativity. With easy-to-follow instructions, you’ll learn how to mix acrylic paints to achieve the perfect minion yellow and denim blue, glue on playful googly eyes, and add pipe cleaner hair for a whimsical finish.
Ideal for kids saving their pennies, these coin banks are not only practical but also make for a charming craft activity. Dive into the world of DIY with this delightful Minion-themed mason jar tutorial and add a splash of joy to your crafting adventures.
How To Make Piggy Banks
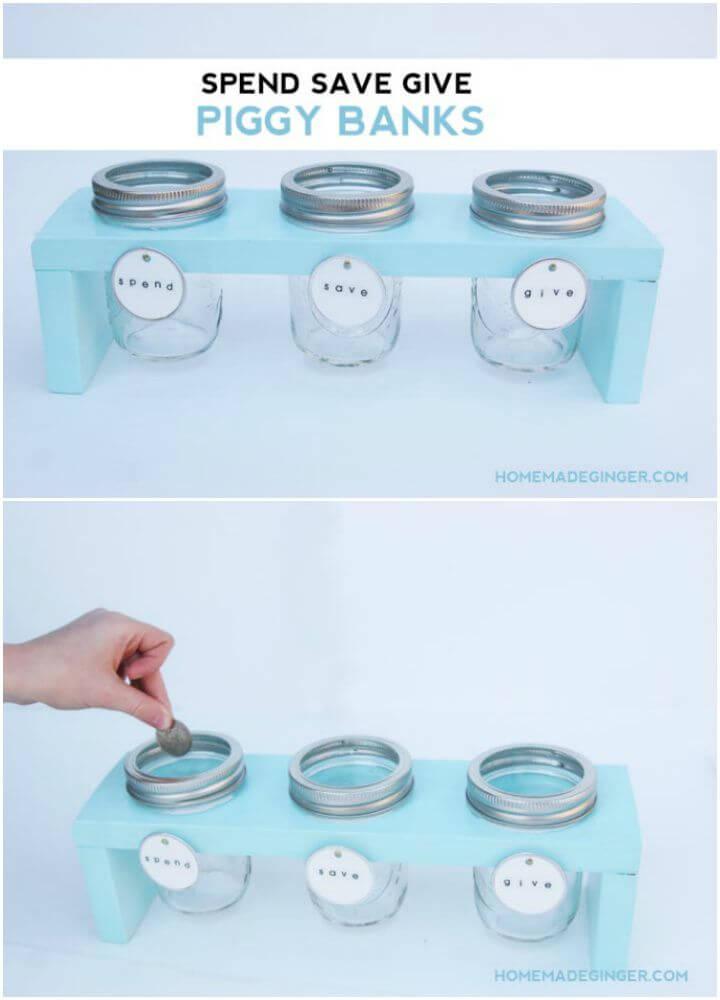
Teaching kids about saving money can be fun and educational with a homemade piggy bank. Homemade Ginger offers a simple DIY guide for crafting a unique three-part piggy bank that encourages children to manage their finances by categorizing funds into “spend,” “save,” and “give” sections.
The project uses a wooden stand and mason jars, making it a visually appealing and practical tool for financial learning. With easy-to-follow steps, basic materials, and a bit of creativity, parents and children can make a personalized piggy bank that makes learning about money management an engaging activity.
DIY Autospardose Mason Jar Coin Banks
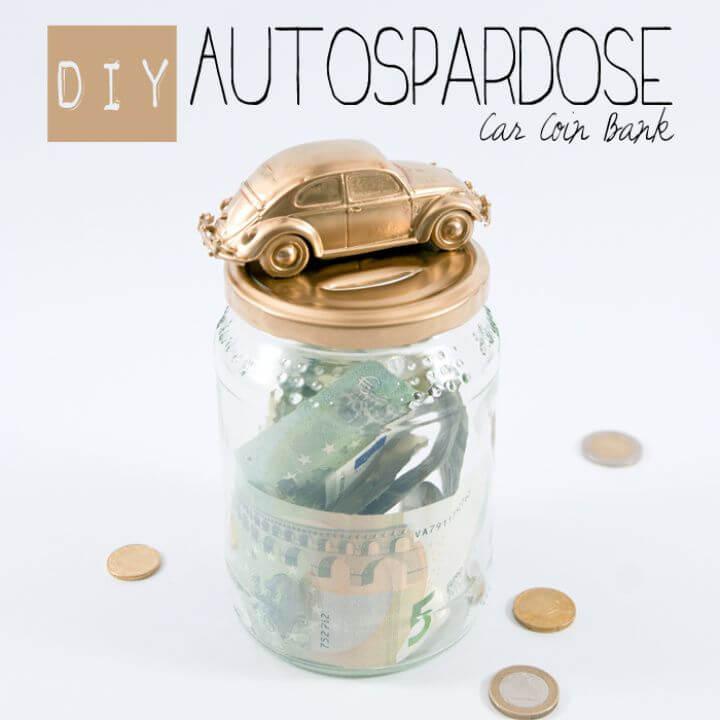
Ready to save up for your dream car or help a teenager work towards their driving ambitions? Johanna Rundel DIY Blog brings you an engaging step-by-step guide to making your very own car coin bank. With a clear list of materials and straightforward instructions, this tutorial makes it simple and fun to craft a personalized savings jar.
Perfect as a thoughtful gift or a practical decoration, this DIY project combines creativity with saving goals. Get ready to transform a simple pickle jar into a stylish coin bank with a touch of spray paint and a dash of imagination. Start crafting and watch your savings grow in style!
DIY a Mason Jar Superhero Bank
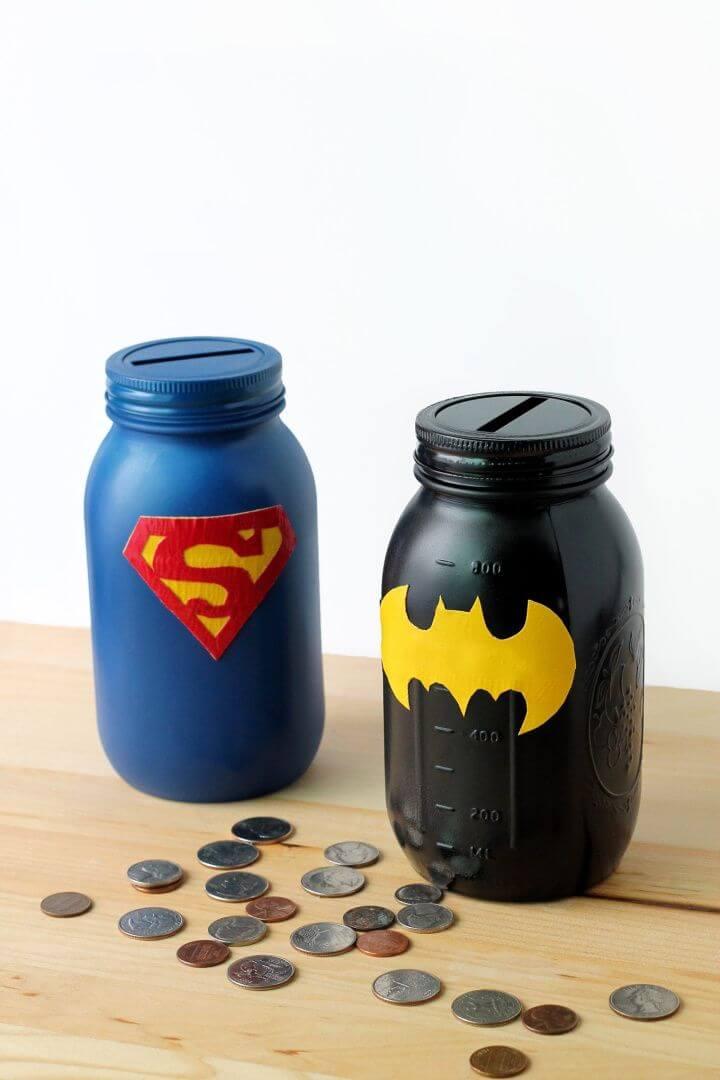
Making a Mason Jar Superhero Bank is a fun and educational DIY project for parents and children to enjoy together. Fireflies and Mud Pies guides you through an easy-to-follow process to craft these charming banks, ideal for teaching kids the value of saving, spending, and giving. Transform ordinary mason jars into vibrant, superhero-themed piggy banks with simple materials like spray paint, duct tape, and a few tools.
Not only do these banks serve as an engaging way for children to learn about money management, but they also make for a stylish addition to any superhero fan’s room decor. Get started on this creative journey and help your child take their first steps towards financial responsibility.
How To Make a Mason Jar Piggy Bank
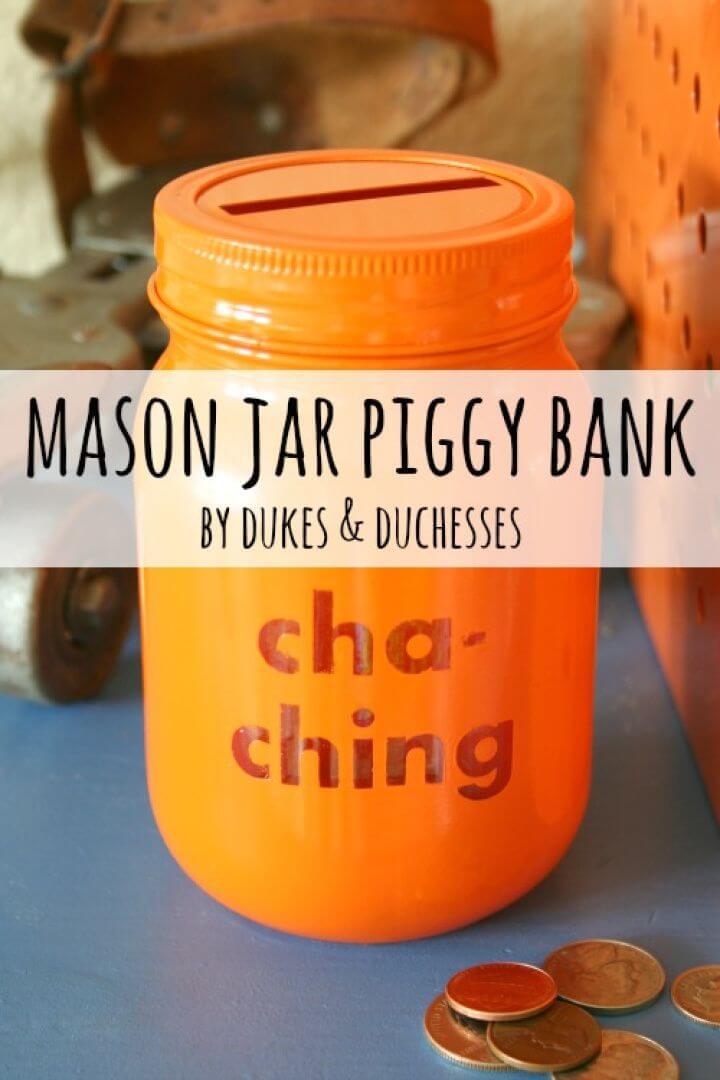
Transform a plain mason jar into a charming piggy bank with a few craft supplies and a dash of creativity. Dukes and Duchesses guide you through an engaging DIY project that’s not only fun but also practical. Grab a clean mason jar, the rim of its lid, a slotted piggy bank lid, and your favorite spray paint to get started.
Follow simple steps to customize your jar with vinyl letters and a pop of color. Perfect for saving for a dream vacation or teaching kids about money, these homemade piggy banks add a personal touch to your savings plan. Dive into crafting this easy, functional piece and watch your savings grow in style.
Amazing DIY Coin Bank – Free Tutorial
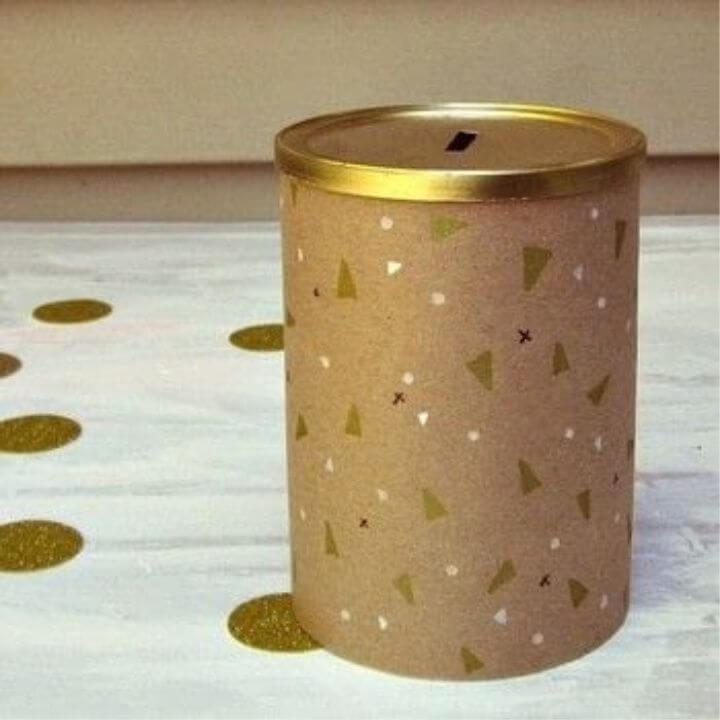
Transform a spare coffee can into a stylish coin bank with this simple DIY project from Cut Out and Keep. Begin by measuring your can and cutting wrapping paper to size, adding a bit extra for overlap. Customize your paper with any design—gold triangles or polka dots are chic options. Secure the paper around the can with decorative tape or a thin line of glue, ensuring it dries smoothly.
If the plastic lid isn’t to your liking, spray paint it in a matching hue. Finally, cut a slot in the lid for coins, fit it onto the can, and voila! You have an attractive coin bank that enhances your home decor while keeping your change organized.
DIY Piggy Bank Out Of A Mason Jar
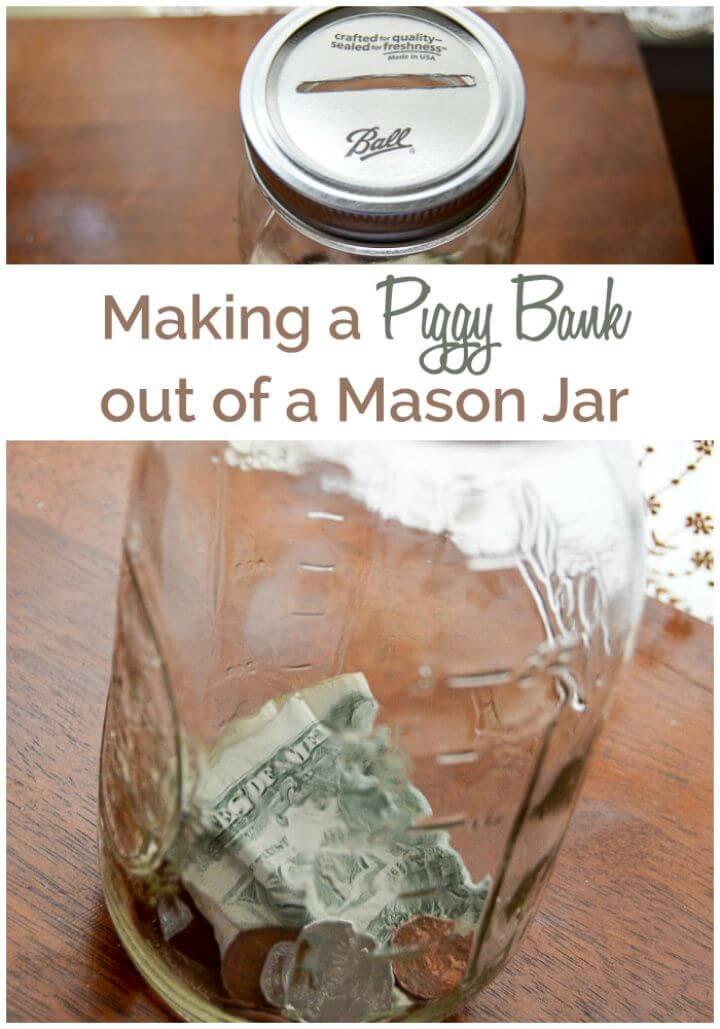
Even if you do not have time to get your hands crafty with the mason jars and make it look all fancy and fun, you can simply change it into a piggy bank! Yes, by making a slit in the Mason jar lid, you can easily turn into a simple piggy bank to save your loose change it! Details here shawnann
How To Make Rainbow Mason Jar Piggy Bank
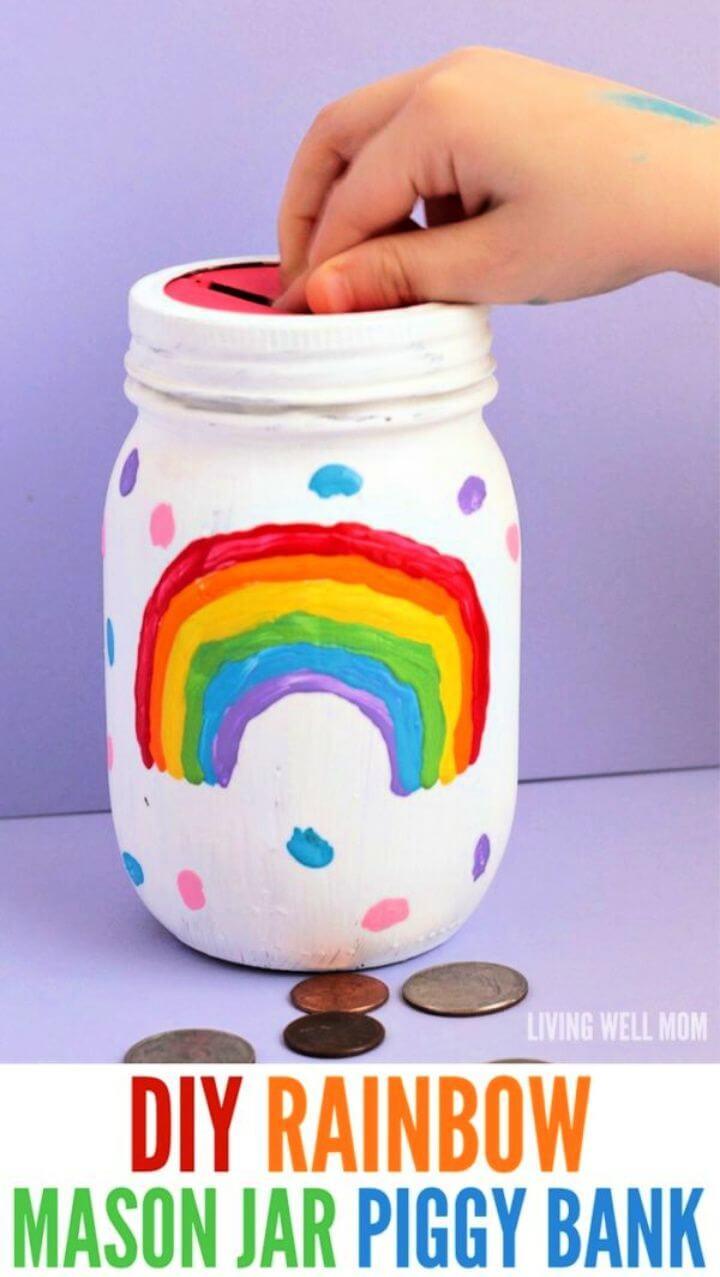
Make a vibrant Rainbow Mason Jar Piggy Bank with your kids for a fun and colorful craft that doubles as a lesson in saving money. Living Well Mom offers an easy-to-follow guide to transform an ordinary jar into a cheerful savings vessel. Gather acrylic paint, card stock, and a few other supplies to get started. Paint the jar white, add a rainbow or design of choice, and include a homemade coin slot.
Seal it with Mod Podge for durability. Not only will this DIY project spark creativity, but it will also encourage your children to deposit their allowance and watch their savings grow. Perfect for craft time, this mason jar piggy bank is a creative way to make financial learning enjoyable.
How To Decorate a Mason Jar Bank
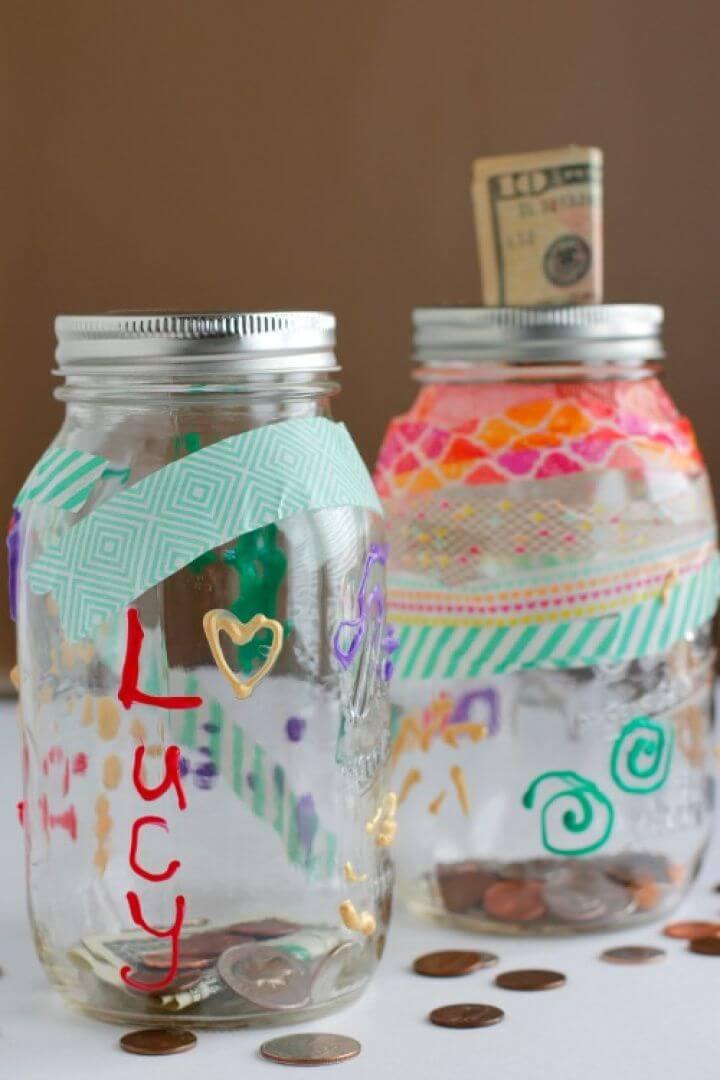
Teaching kids the value of saving money can be both fun and educational with a crafty twist. Make and Takes offers a creative way to engage children in financial responsibility through a DIY mason jar bank project. With just a few supplies like a mason jar, coin slot lid, and some decorative elements such as washi tape, stickers, and puffy paint, you can guide your child to make a personalized bank.
This hands-on activity not only fosters a sense of ownership but also visually demonstrates the growth of their savings. It’s an instructive and engaging method to instill good money habits early on, perfect for parents seeking practical and enjoyable learning experiences for their kids.
Awesome DIY Mason Jar Piggy Bank Craft
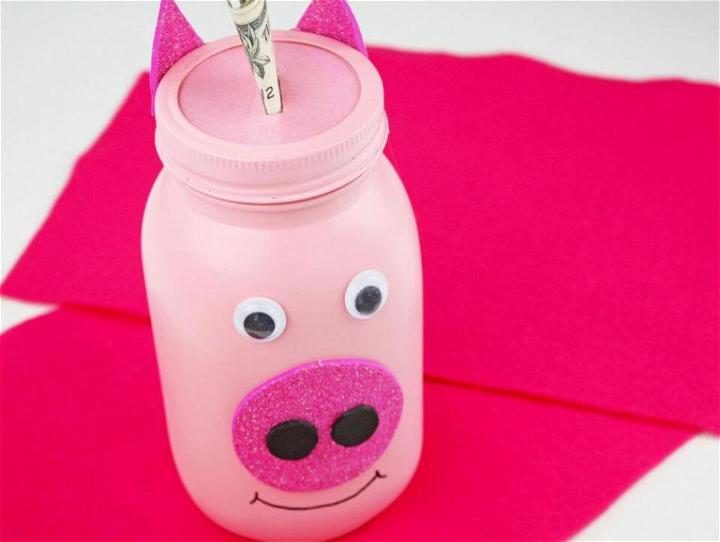
Get crafty with your kids and teach them the value of saving money with a DIY Mason Jar Piggy Bank project. This engaging activity from FUN365 combines creativity and financial education. Start by spray painting a mason jar with white primer, followed by a coat of pink acrylic paint for that classic piggy bank look. Cut out a snout and ears from pink foam, add some sparkle with glitter, and attach them to the jar.
Googly eyes bring the piggy to life, while a pink paper lid with a slit ensures coins can be saved securely. Complete the look with a curly pipe cleaner tail. This simple, yet delightful, piggy bank will have your little ones excited about saving in no time.
Easy DIY Jam Jar Piggy Bank
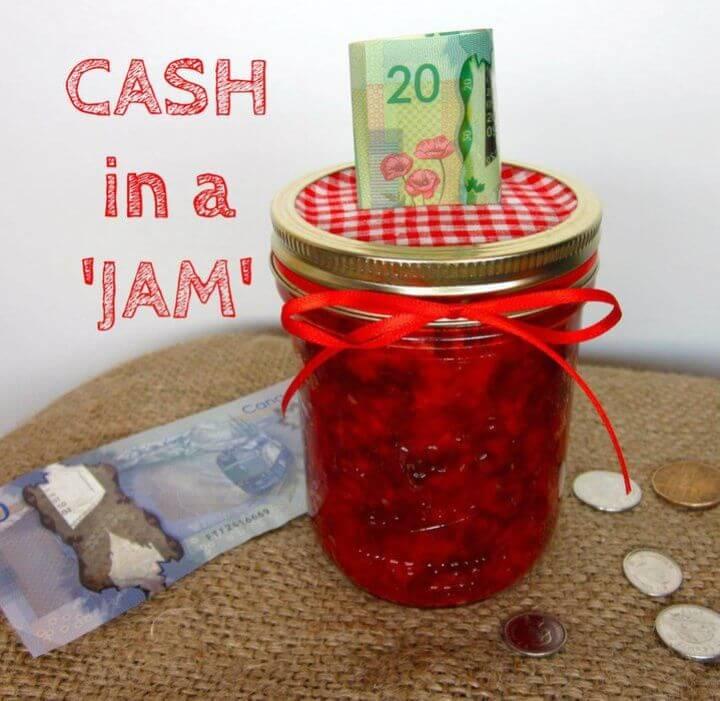
Transform an ordinary jam jar into a clever hiding spot for your savings with the Jam Jar Piggy Bank project from Instructables. Ideal for stashing away some emergency funds, this crafty creation mimics the look of a real strawberry jam jar, blending seamlessly into your kitchen. Not only is it a fun DIY activity, but it also offers a smart way to keep your cash concealed in plain sight.
Perfect for anyone who appreciates a touch of whimsy with their financial savvy, this piggy bank is both functional and charming. Get ready to save up for a rainy day with this unique and creative solution.
DIY Travel Themed Mason Jar Bank
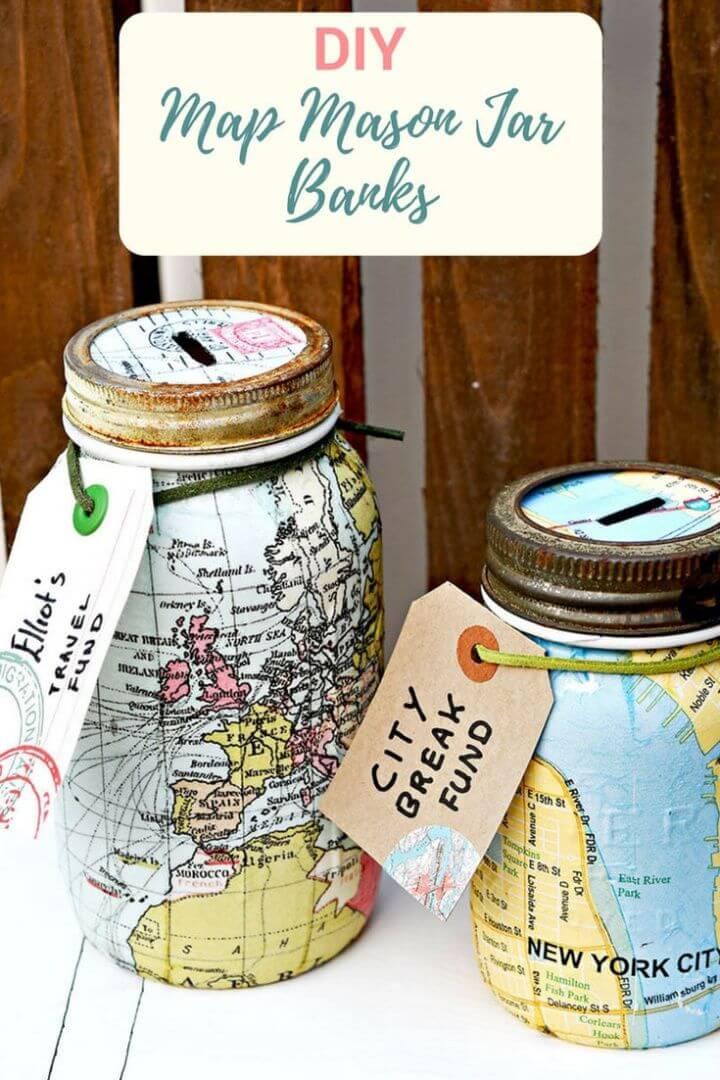
Looking to craft a unique and thoughtful gift? Pillar Box Blue offers a creative way to repurpose Mason jars into charming map-themed banks, perfect for those bitten by the travel bug. This DIY project is not only affordable but also simple to complete, requiring just a few materials like Mason jars, map paper napkins, Mod Podge, and spray paint.
With a step-by-step guide, you can transform a humble jar into a personalized saving spot for future adventures. Ideal for a friend with wanderlust or to inspire your own travel fund, these Mason jar banks are a delightful blend of functionality and style.
Cute DIY Mason Jar Piggy Bank
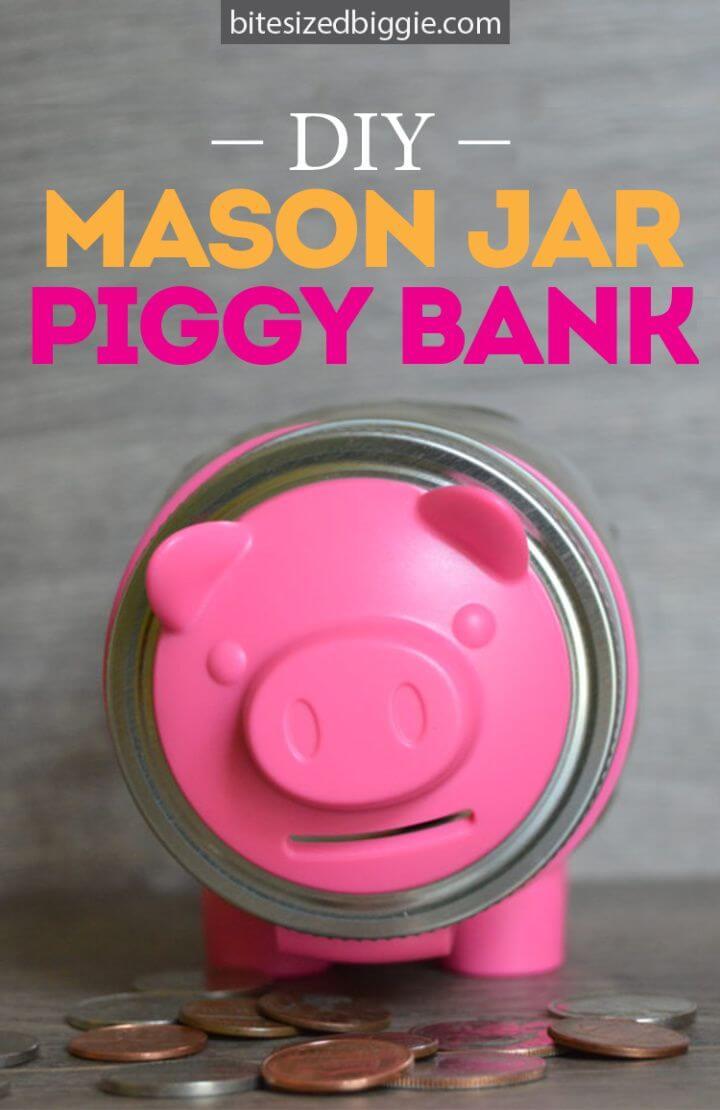
Transform a plain mason jar into a charming piggy bank with Bite Sized Biggie‘s DIY Mason Jar Piggy Bank kit. Perfect for crafting enthusiasts or anyone seeking a quick and engaging project, this kit includes everything you need to make a cute savings jar. With clear instructions, it’s effortless to align the adorable face and feet, ensuring your piggy bank has character and charm.
Ideal for personal use or as a thoughtful gift, this mason jar piggy bank not only recycles jars but also encourages saving. Get creative and personalize your piggy bank to add a special touch to any room or occasion.
Awesome DIY Mason Jar Piggy Banks
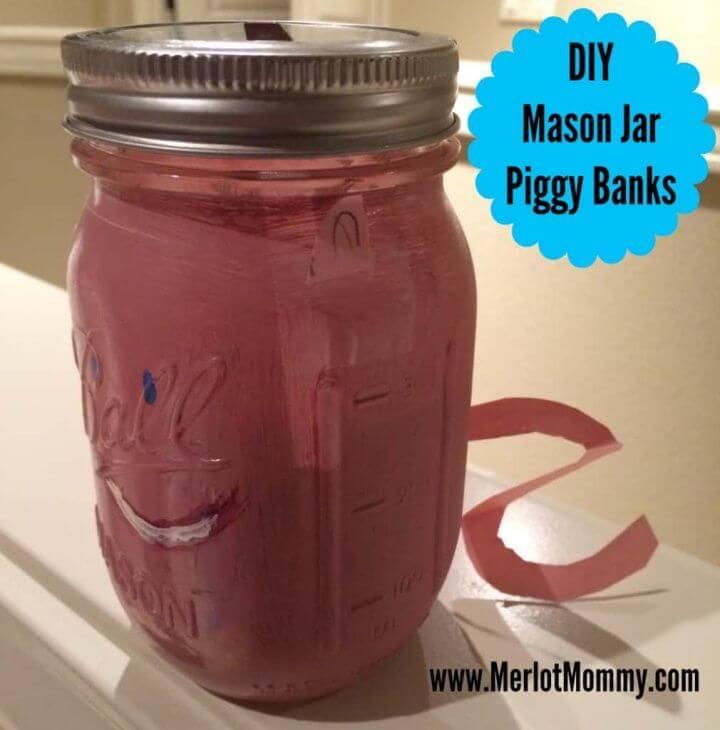
Unlock your creative potential with a fun and simple DIY project from Whisky + Sunshine. Transform ordinary Mason jars into charming piggy banks with this engaging craft. Ideal for an afternoon activity, these Mason jar banks require just a few materials and some imagination. Prep your workspace, paint, and customize your jars with ease.
Once dry, seal with enamel to protect your artwork. Perfect for saving up for small treats or teaching kids about money, these DIY piggy banks add a personalized touch to your home. Get crafting and watch your savings grow in style!
DIY Ball Mason Jar Piggy Banks For Under $5
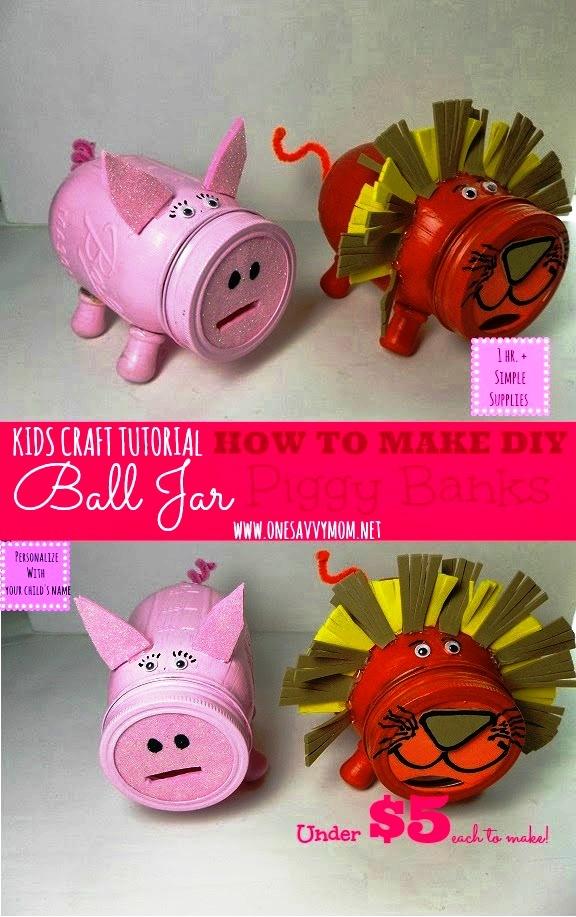
Get crafty with your kids and make adorable Ball Mason Jar Piggy Banks, a project that’s not only fun but also budget-friendly! With a few simple materials like a paintbrush, craft foam, acrylic paint, googly eyes, and a few other items, you can transform a regular mason jar into a charming piggy bank. Ideal for parents and children looking for a creative activity, this DIY craft from One Savvy Mom allows you to design any animal-themed bank you desire.
Follow the step-by-step guide, which includes painting, gluing, and decorating, to craft a personalized savings jar. Perfect for teaching kids the value of saving money, these piggy banks can also be customized with your child’s name for a special touch. Enjoy a delightful crafting session and make these cute piggy banks for under $5!
