Looking for inexpensive and creative ways to add charm to your outdoor space? DIY walkway ideas might be the perfect solution for you. Installing a walkway by yourself not only saves money but also gives your garden or yard a personal touch. From simple designs you can achieve in a day to more elaborate projects that might take a weekend, these 50 unique walkway ideas for garden, patio or landscape will suit your style and needs.
Next, we delve into how to install a pebble mosaic stepping stone walkway — a beautiful and functional addition to any outdoor space. This guide breaks down the process into manageable steps, from selecting your stones to the final maintenance, ensuring your path remains in top condition. Keep reading to transform your outdoor area into a picturesque landscape with these easy-to-follow walkway ideas.

Why Install a DIY Walkway?
Installing a DIY walkway in your garden or outdoor area is not just about enhancing the aesthetic appeal of your space. It’s a practical, budget-friendly project that offers numerous benefits, making it a smart choice for homeowners. Here’s why you should consider making your own walkway:
- Cost-Effective: DIY walkways eliminate the need for professional labor, which is often the most expensive part of such projects. You can also choose materials that fit your budget, further reducing costs.
- Personalization: By undertaking the project yourself, you have complete control over the design, materials, and layout of your walkway. This allows you to fully personalize the path to match your home’s style and your personal taste. Whether you prefer a rustic stone path or a chic paved walkway, you can tailor every aspect to suit your taste and home’s architecture.
- Enhanced Accessibility: A well-placed walkway improves the accessibility of your garden, making it easier to navigate and enjoy. It can connect different areas of your outdoor space, from patios to garden beds, in a coherent and visually pleasing manner.
- Increased Property Value: A beautiful and well-constructed walkway can increase the curb appeal of your property, potentially increasing its market value. It’s a practical investment that pays off in both the short and long term.
- Eco-Friendly Options: Opting for recycled or sustainable materials for your walkway project is not only good for your wallet but also for the planet. It’s an opportunity to reduce your carbon footprint while beautifying your space.
By choosing to install a DIY walkway, you’re embarking on a rewarding project that benefits your home, garden, and the environment. It’s a practical way to enhance your outdoor living area, making it more inviting and functional for years to come.
How to Design and Build a Paver Walkway
Designing and building a paver walkway can be a rewarding project that enhances the beauty and functionality of your outdoor space. Whether you’re aiming for a simple path or a striking patterned walkway, we’ll guide you through the steps from planning to completion. Let’s make this process as smooth and enjoyable as possible.
Planning Your Paver Walkway
Start with a Vision: Begin by picturing the style and path of your walkway. Do you prefer a straight path or a winding one? Select a pattern that complements your home’s architecture and landscape. Simple patterns like jack-on-jack or running bond are beginner-friendly, while herringbone or pinwheel offer a more intricate look.
Measure Your Space: The width of your walkway is crucial. A 48-inch width allows two people to walk side by side comfortably, though 36 inches is standard and fully accessible. Consider the overall length and shape according to your outdoor space and needs.
Check Regulations: Before diving into your project, it’s important to check with local building codes and homeowners association rules. Some areas might require a permit for this type of work.
Materials and Tools: Gathering the right materials and tools beforehand will make the process smoother. You’ll need pavers, interlocking paver base panels (or gravel paver base), sand, and polymeric sand for the joints. Tools might include a shovel, tamper, level, and broom. Enlist a helper, as pavers can be heavy.
Preparing the Area
Clear and Level: The first step is to clear the area of any grass, stones, or debris. Level the ground as much as possible to ensure a stable base for your walkway.
Mark the Area: Use stakes and string to outline the path of your walkway. This will serve as a guide for both excavation and laying your pavers.
Excavate: Dig the area to the required depth. This typically includes the height of your pavers, plus the base material. Remember, using interlocking paver base panels reduces the need for a deep gravel base.
Call Before You Dig: Always call 811 before starting any excavation to check for underground utilities.
Installing the Base
Lay the Foundation: For traditional gravel bases, lay down a 6-inch layer of gravel paver base, then compact it using a tamper. For projects using interlocking paver base panels, position the panels on the leveled ground, ensuring they’re tightly fitted together.
Add Sand Layer: A 1-inch layer of sand goes over the gravel base or directly on top of the base panels. This helps to level out the surface and prepare it for the pavers.
Laying the Pavers
Start Laying Pavers: Begin at one end or corner, laying each paver down snugly against the next. Use a level to ensure they are even. If using a pattern, keep your design in mind as you go.
Cutting Pavers: If your design requires cut pavers, use a masonry saw or a chisel and hammer. Always wear protective eyewear and gloves.
Finishing Touches
Jointing Sand: Once all pavers are laid, sweep polymeric sand into the joints between pavers. This special sand hardens and helps prevent weed growth and insect infestation.
Compact and Clean: Gently compact the pavers once more to ensure the sand settles into the joints. Then, clean off any excess sand from the surface.
Enjoy Your Walkway: With the hard work done, take a step back and admire your new paver walkway. It’s not just a path, but a lasting addition to your landscape.
Building a paver walkway requires effort, but the results are well worth it. By following these steps, you’ll make a functional and attractive walkway that enhances your outdoor space for years to come. Remember to take your time, measure carefully, and don’t hesitate to seek help if needed. Happy building!
How to Install a Pebble Mosaic Stepping Stone Walkway
Installing a pebble mosaic stepping stone walkway is a beautiful way to enhance your garden’s appearance and functionality. Not only does it provide a stable path, but it also adds a personalized touch to your outdoor space. Let’s guide you through the process in a clear and simple guide.
Choose Your Stones
First and foremost, select the pebbles or stones you wish to use. Opt for stones that are flat and roughly the same thickness for a more even surface. Consider color and size variation for a visually appealing mosaic.
Design Your Path
Sketch out the design of your path. Decide on the shape and size of your stepping stones and how they will be arranged in your garden. It’s helpful to lay this out in your garden to visualize the final look.
Prepare the Base
1. Clear the area where you’ll be laying your stepping stones, removing any grass, stones, or debris.
2. Level the ground, ensuring it is firm. You may need to dig a shallow foundation for each stepping stone for stability.
Make Your Mosaic Pavers
1. Lay out your stones on a flat surface, making the design for each stepping stone. Playing with different patterns before finalizing can spark creativity.
2. Prepare your mortar mix following the manufacturer’s instructions.
3. On a flat work surface, place a stepping stone mold or form. You can use a pre-made form or make your own with wood.
4. Pour the mortar into the mold, filling it halfway.
5. Gently press your stones into the mortar, following your design. Make sure the stones are embedded firmly and evenly.
6. Once all stones are in place, fill the mold with more mortar, covering the edges of your stones. Use a spatula or a similar tool to smooth out the top.
Let It Set
Allow your stepping stone to dry and set according to the mortar package’s instructions, typically for 24-48 hours. Be patient during this step to ensure your mosaic sets properly.
Place Your Stepping Stones
1. Prepare the spot in your garden where each stepping stone will go. You might need to remove a bit of soil to ensure each stone sits flush with the ground.
2. Place each stone into its designated spot.
3. Fill the gaps around each stepping stone with soil, sand, or small pebbles to secure them in place.
Maintenance
Your pebble mosaic stepping stones will require minimal maintenance. Regularly check for any loose stones and secure them back in place with a bit of mortar if necessary.
By following these steps, you can make a beautiful, durable, and functional pebble mosaic stepping stone walkway that enhances your garden’s aesthetic and usability. This project not only adds value to your home but also allows you to engage creatively with your outdoor space. Enjoy the process and the rewarding outcome of your effort!
DIY Walkway Ideas FAQS
Making a beautiful and functional walkway in your garden or outdoor area can enhance your home’s curb appeal and accessibility. Below, we answer some commonly asked questions to help you get started on your DIY walkway project.
What materials can I use for a DIY walkway?
- Pavers: Available in various shapes, sizes, and colors, offering flexibility in design.
- Gravel: Affordable and easy to install, perfect for rustic or cottage-style gardens.
- Wood: Ideal for a natural look, such as boardwalk-style paths in damp areas or gardens.
- Concrete: Durable and versatile, can be shaped or stamped for a custom appearance.
- Stone: Offers a timeless and sturdy option, including flagstone or natural rocks.
- Pebbles: Great for making mosaic patterns or for filling in between stepping stones.
How do I prepare the ground for a walkway?
- Measure and mark the path: Use stakes and string to outline your walkway.
- Clear the area: Remove grass, weeds, and debris from the marked path.
- Level the ground: Ensure the base is flat and compacted to prevent uneven settling.
- Add a base layer (optional): For certain materials like pavers or stones, a sand or crushed stone base can provide stability and drainage.
Can I install a walkway on a slope?
Yes, but it requires additional steps to ensure stability and prevent erosion. Consider making steps or using retaining wall blocks to manage the slope. It’s crucial to properly compact each layer and ensure adequate drainage to avoid shifting or settling.
How do I maintain my DIY walkway?
- Regular cleaning: Sweep or hose down your walkway to remove debris and dirt.
- Weed control: Pull weeds that grow between cracks or use a natural herbicide to keep the area clean.
- Replenish materials: For gravel or pebble paths, add more material as needed to keep the path level and full.
- Check for damage: Periodically inspect for cracks, loose stones, or uneven areas and repair as necessary.
How can I make my walkway more environmentally friendly?
- Use recycled materials: Look for reclaimed bricks, stones, or wood to reduce waste and add character to your walkway.
- Permeable options: Consider gravel, pebbles, or specially designed pavers that allow water to seep through and reduce runoff.
- Incorporate native plants: Line your walkway with local plants to support your region’s ecosystem and reduce water usage.
What are some creative walkway ideas?
- Glow-in-the-dark stones: Mix glow-in-the-dark powder with cement or use solar-powered lights for a walkway that lights up at night.
- Mosaic patterns: Make designs with pebbles or broken tiles for a unique and artistic pathway.
- Stepping stones with leaf imprints: Press leaves into wet concrete for a natural and whimsical pattern.
- Pallet wood walkway: Reuse wood pallets for a rustic and cost-effective garden path.
By considering these FAQs, you can successfully plan, install, and maintain a DIY walkway that enhances your outdoor space and meets your specific needs and preferences.
50 DIY Walkway Ideas You Can Install
Discover 50 DIY walkway ideas you can easily install at home. Transform your path today with our step-by-step guide and get walking on beauty!
1. Build a Stone Walkway for Your Patio
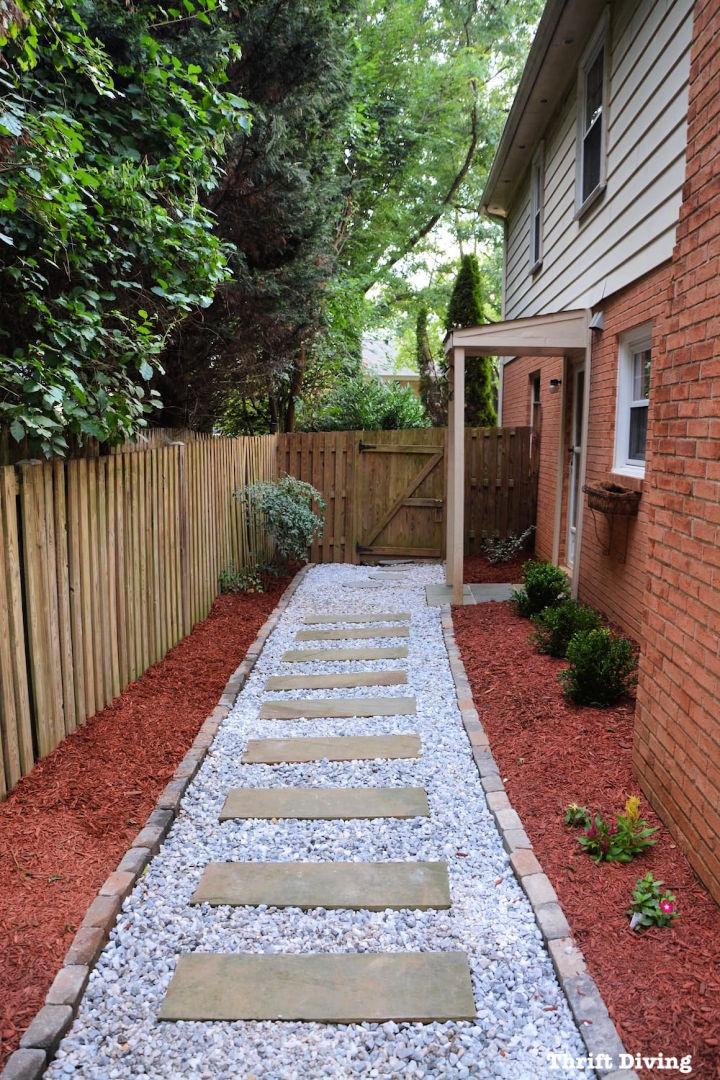
Transform your patio with a personalized DIY stone walkway by following Thrift Diving Blog‘s comprehensive guide. Step into a world where outdoor beauty meets functionality as you learn how to select the perfect stones, plan your pathway layout, and master the installation process.
This tutorial offers clear, actionable advice to enhance your yard, featuring tips on materials, maintenance, and design choices for a stunning result. Get ready to roll up your sleeves and craft a walkway that will be the envy of your neighborhood, making an inviting atmosphere for all your outdoor gatherings.
2. Pebble Mosaic Stepping Stone Walkway
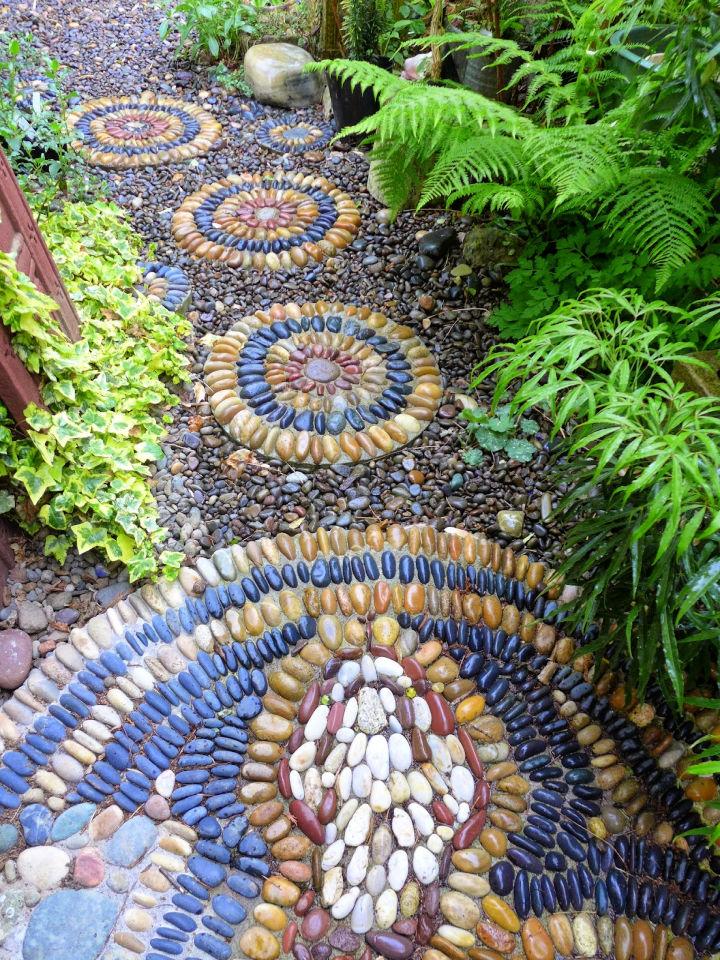
Discover how to make your own pebble mosaic stepping stone with this instructive guide. Learn the art of selecting the perfect stones and the importance of setting them correctly in mortar for a durable and beautiful result. Crafting a stepping-stone mosaic is a rewarding DIY project that adds a unique touch to any garden.
Get tips on materials, design, and techniques for constructing your stepping stone, ensuring it blends artistry with longevity. Start with simple shapes, and as your skills grow, you can tackle more intricate designs, making each step in your garden a reflection of your creativity and dedication. Jeffrey Gardens
3. Pretty DIY Gravel Walkway
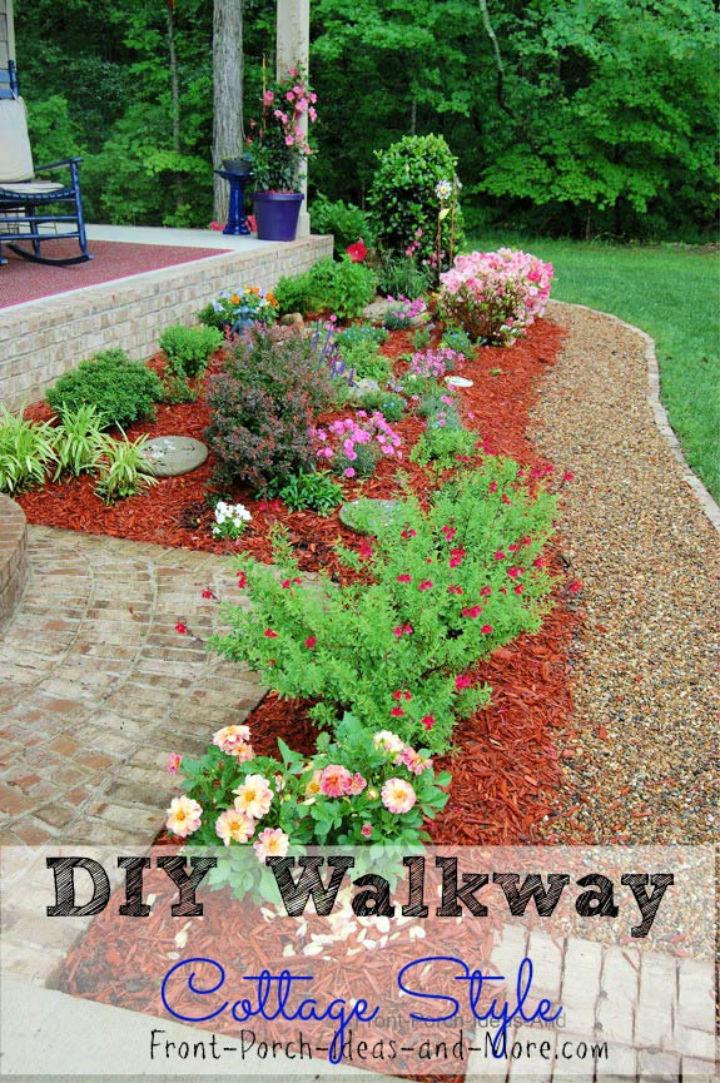
Making a DIY gravel walkway is a simple yet rewarding project that can enhance the appeal of any home. Nashville TN Homes for Sale by Adam Helton offers an instructive guide to building a gravel path that suits various house styles, from quaint cottages to sleek modern abodes. It’s an affordable option that can be customized with different edgings, stones, or pavers.
The process involves planning your layout, removing soil, installing edging, spreading a crushed stone base, and topping with gravel. For a solid foundation, compaction is key. Detailed steps and useful tips, like how much pea gravel to use, are available on their website to ensure a stable and attractive walkway that connects your outdoor spaces beautifully.
4. DIY Flagstone Walkway
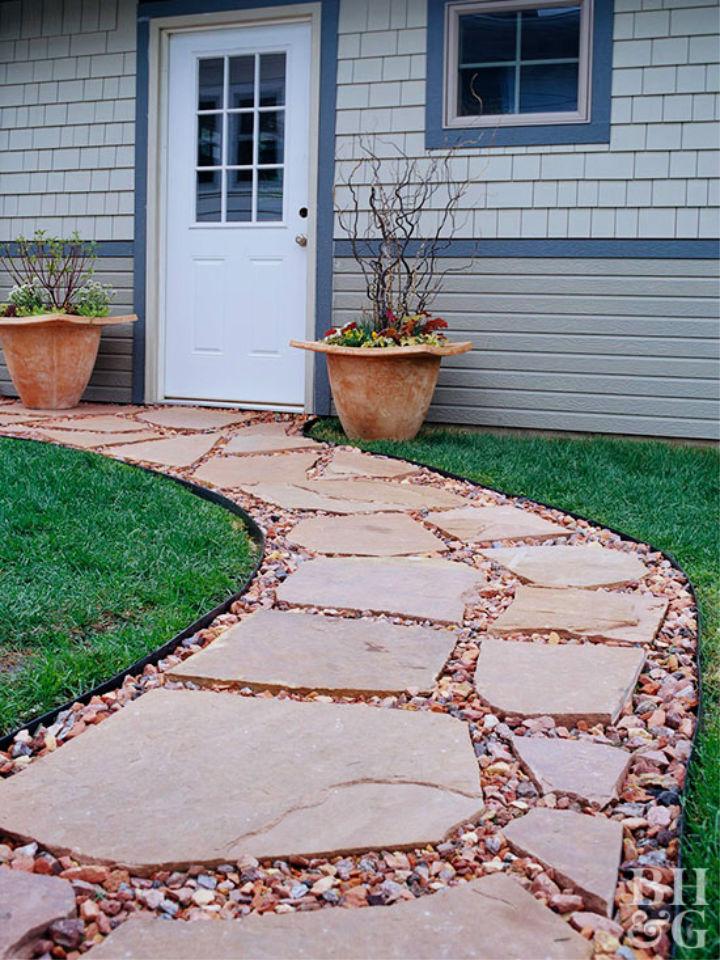
Transform your outdoor space with a DIY stone walkway by following the easy-to-understand instructions provided by Better Homes & Gardens. With clear, step-by-step guidance, you can choose from flagstone, gravel, or paver designs to enhance your garden’s aesthetic appeal and functionality.
These walkway ideas not only boost your yard’s charm but are also practical projects that you can accomplish in a weekend, ensuring a satisfying and productive DIY experience. Perfect for garden enthusiasts keen to personalize their landscape, these walkway designs offer a rewarding way to engage with your outdoor environment.
5. Pallet Wood Garden Walkway
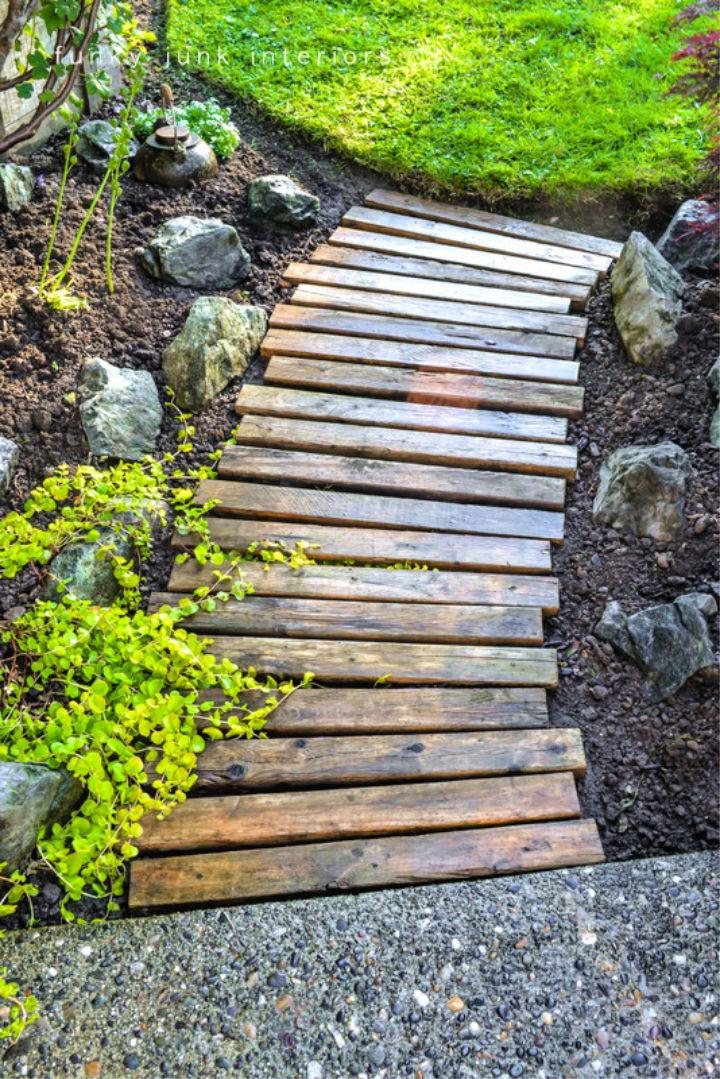
Transform your garden with a charming pallet wood walkway, courtesy of Funky Junk Interiors. This guide offers a step-by-step approach to making a picturesque path that’s both functional and stylish. Using reclaimed wood, you can craft a walkway that not only keeps your feet clean but also adds a rustic appeal to your outdoor space.
With simple tools like a miter saw, garden rake, and a bit of topsoil, you’ll have a new garden feature that’s as beautiful as it is easy to construct. Perfect for spring, this project is an affordable way to enhance your garden’s aesthetics and accessibility.
6. How to Build a Wooden Boardwalk
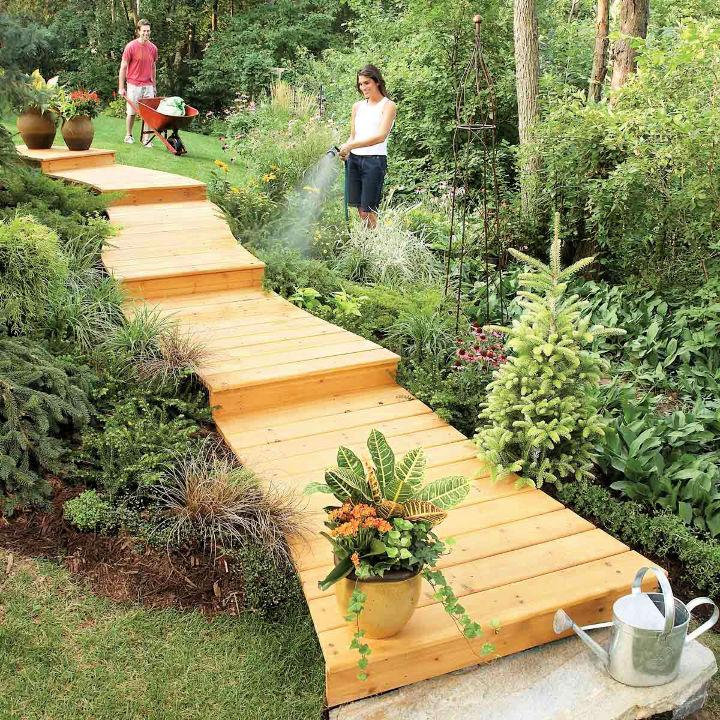
Transform your backyard with a charming wooden walkway that serves as a practical and aesthetic garden path. Perfect for uneven terrain or damp areas, this boardwalk-style project from Family Handyman can be built in a matter of days and doesn’t demand heavy labor like stone or concrete paths.
By using basic tools and materials such as treated lumber, decking boards, and pea gravel, you can make a durable and inviting walkway. The guide provides step-by-step instructions, ensuring you navigate the building process with confidence. Get ready to enhance your outdoor space with a DIY wooden walkway that marries functionality with rustic elegance.
7. Build a Brick Pathway in the Garden
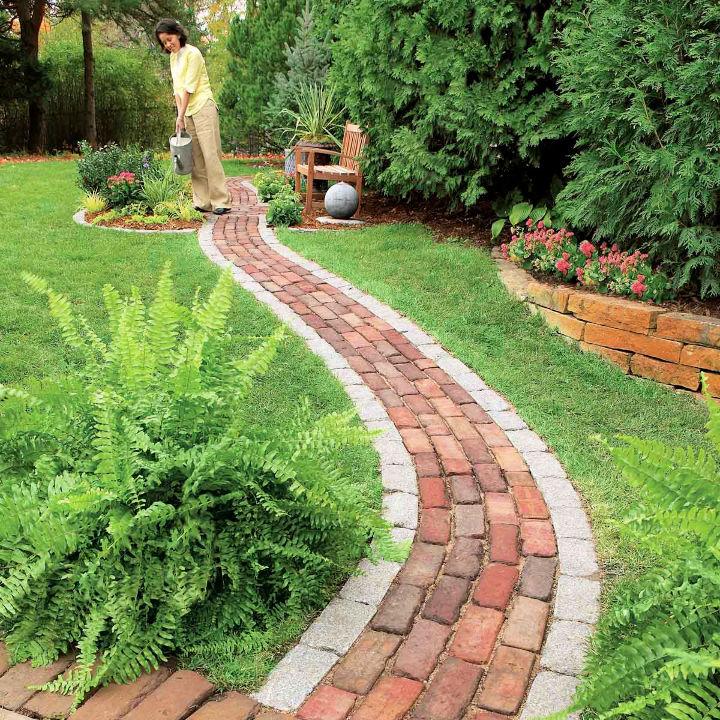
Transform your garden with a charming brick walkway using Family Handyman‘s comprehensive guide. Ideal for garden enthusiasts, this DIY project simplifies the process of laying a durable and attractive path. Discover step-by-step instructions, from preparing the site to laying the bricks, all achievable within a weekend.
This guide caters to intermediate skill levels and varies in cost, ensuring a tailor-made walkway that enhances the beauty of your outdoor space. Keep the tools handy, follow the informative steps, and enjoy the gratifying experience of making a functional garden feature that stands the test of time.
8. Paved & Stenciled Walkway
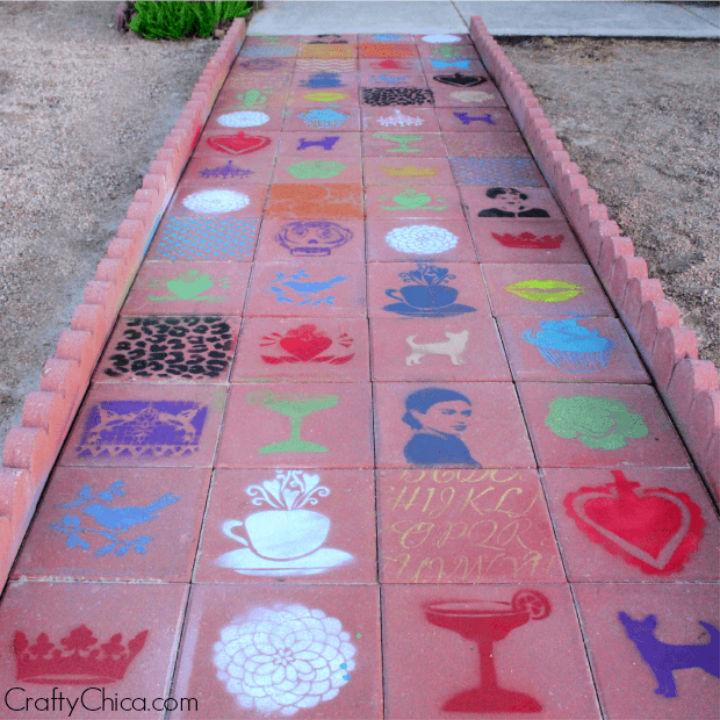
Transform your outdoor space with a charming paved and stenciled walkway, expertly crafted by Kathy Cano-Murillo at Crafty Chica. Dive into a creative project that’s not only easy on the wallet but also adds a personalized touch to your home exterior. Kathy’s step-by-step guide ensures a smooth installation, from leveling the ground with fine-grade sand to placing and securing the pavers.
Elevate the charm by stenciling unique designs, making your pathway a true reflection of your style. Perfect for gardens, patios, or play areas, it’s a durable addition that you can refresh with a simple touch-up. Get inspired and give your neighbors something to admire with this DIY walkway that proves both fun and functional.
9. Homemade Hillside Sidewalk
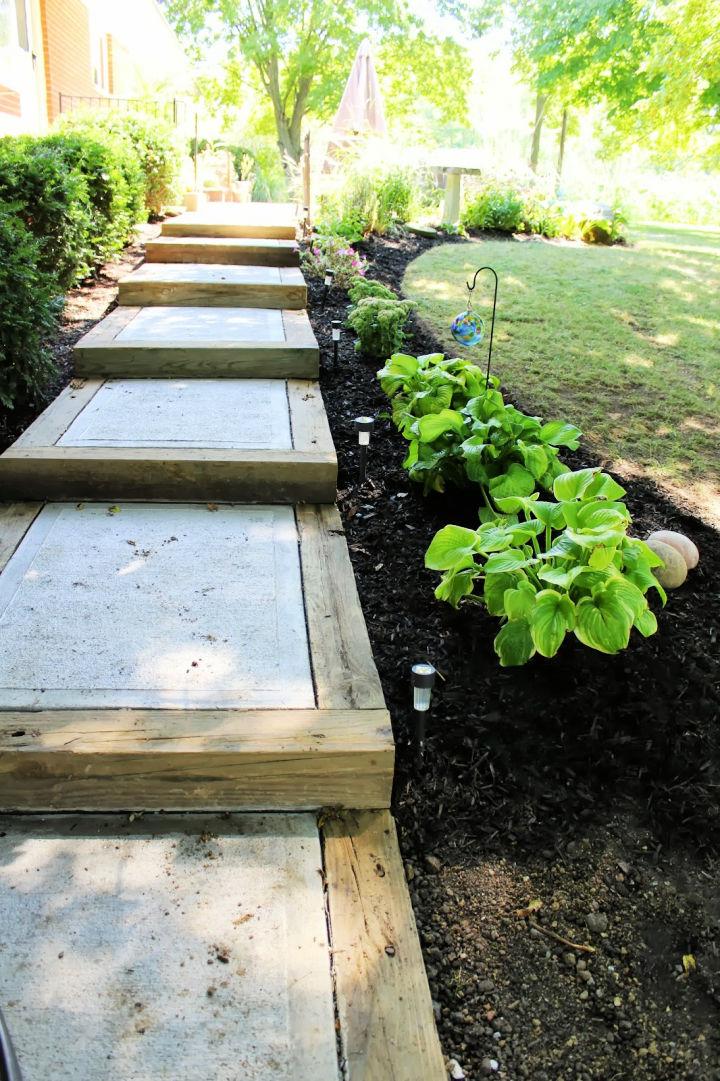
Transform your hillside into a practical and appealing space with a DIY sidewalk and stairs project. If your slope is an unsightly path of dirt, crafting a structured walkway can enhance both the functionality and aesthetics of your outdoor area. This detailed guide outlines a method using salvaged materials, such as 6×6 pressure-treated beams, to make a durable and cost-effective solution.
Learn how to calculate the necessary materials, frame steps, and secure them in place for stability. Incorporating stone foundations and choosing between gravel, brick, or concrete for the steps, this resource equips you with the knowledge to tackle the incline and achieve a stunning result. Perfect for complementing your ranch-style home and easing access between levels, this sidewalk project is a rewarding investment for your property. Ohio Thoughts
10. How to Make a Solar-Powered Walkway
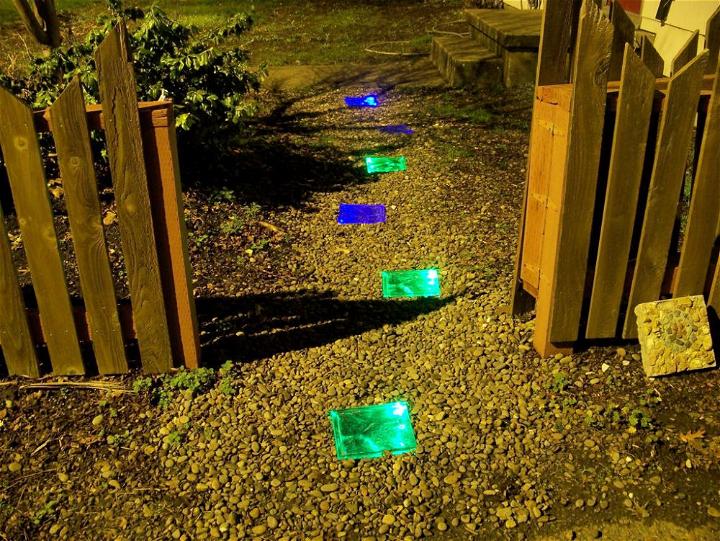
Illuminate your walkway with a touch of solar-powered magic using this step-by-step guide from Instructables. Learn how to separate the solar panel from the lighting element, and explore creative ways to light up glass blocks for an enchanting nighttime glow. This DIY project is perfect for those who enjoy tinkering with LEDs, solar panels, and adding a unique, eco-friendly flair to their outdoor space.
Discover how to harness the power of the sun to make a stunning and functional solar-powered walkway that lights up the night, providing a warm welcome to your home. With clear instructions and helpful tips, you can easily bring this project to life and enjoy the results of your handiwork.
11. DIY Brick Pathway Under $50
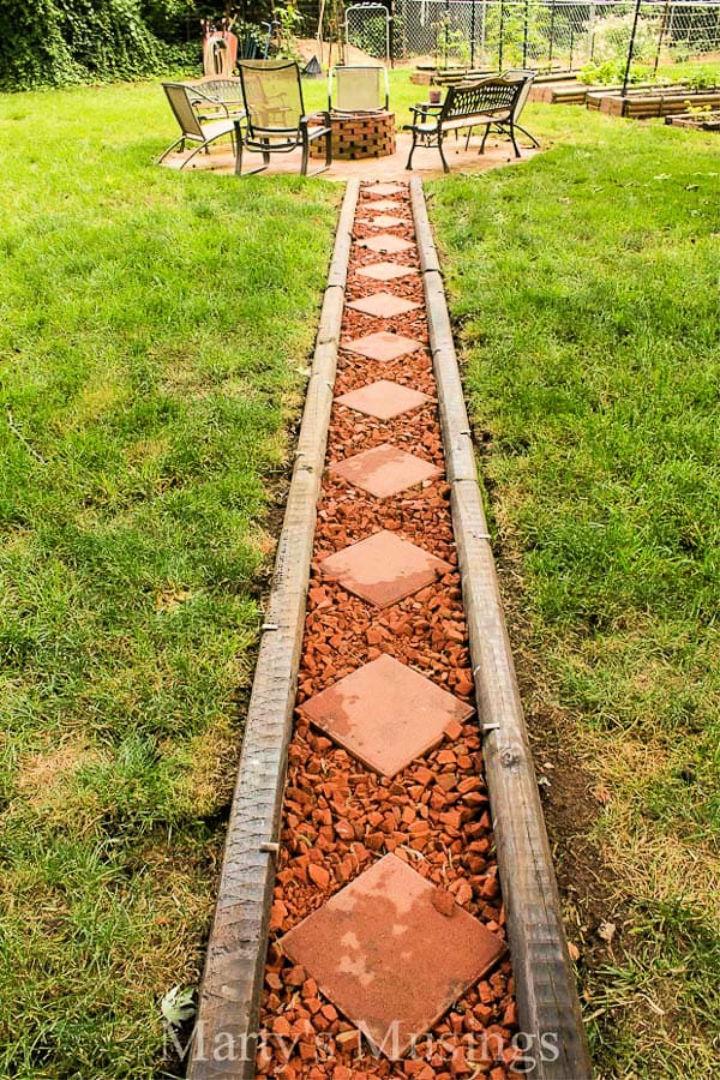
Transform your outdoor space with a touch of charm and functionality by learning how to lay a brick pathway with guidance from Marty’s Musings. Marty Walden provides a thorough step-by-step tutorial that is perfect for those looking to enhance their backyard on a budget.
Discover how to make a durable and attractive brick path that not only avoids the mess from pets but also adds character to your garden or lawn. This DIY project is filled with practical tips, making it accessible for anyone eager to improve their outdoor area. Join in and give your backyard a beautiful and cost-effective makeover.
12. Lace-like Stepping Stones Walkway
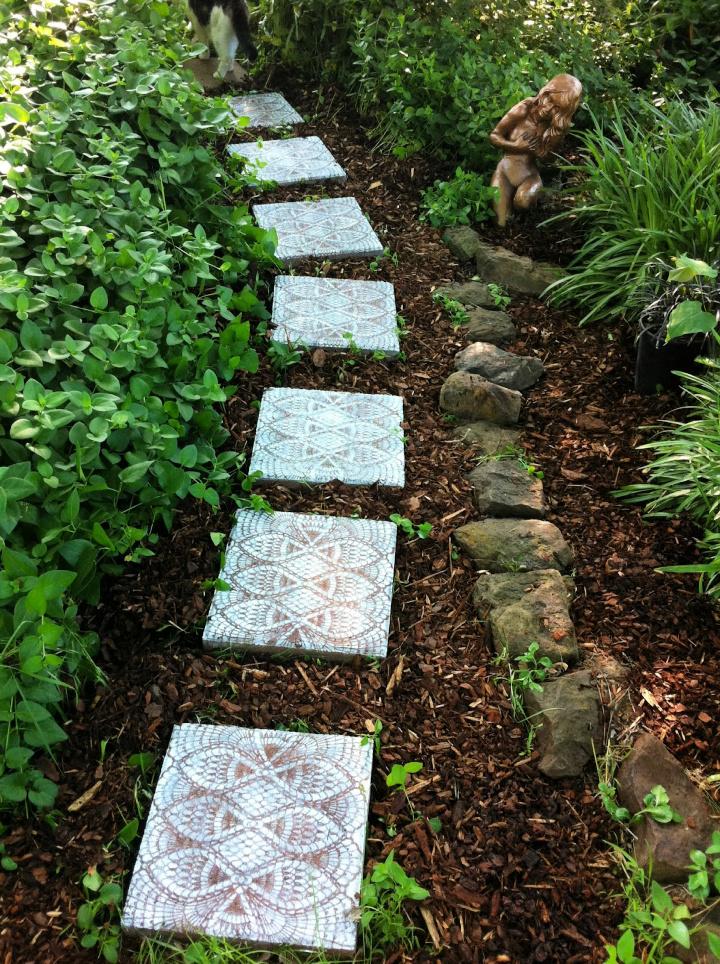
Transform your garden into a magical oasis with our step-by-step guide on making lace-like stepping stones! Perfect for DIY enthusiasts and home gardeners, this project is simple and adds a unique touch to any outdoor space. You’ll need some basic supplies like stepping stones, a lace or vinyl doily, outdoor spray paint, and sealer.
Our instructions ensure clarity and ease, guiding you through cleaning your stones, setting up your workspace, and achieving the intricate lace effect with paint. Finish by sealing the stones for durability and, for a whimsical nighttime effect, make them glow in the dark. Visit The Wuvie for a detailed, visual companion to this crafty adventure. Your garden will thank you for the charming, handcrafted pathway!
13. Cement Stepping Stones Walkway
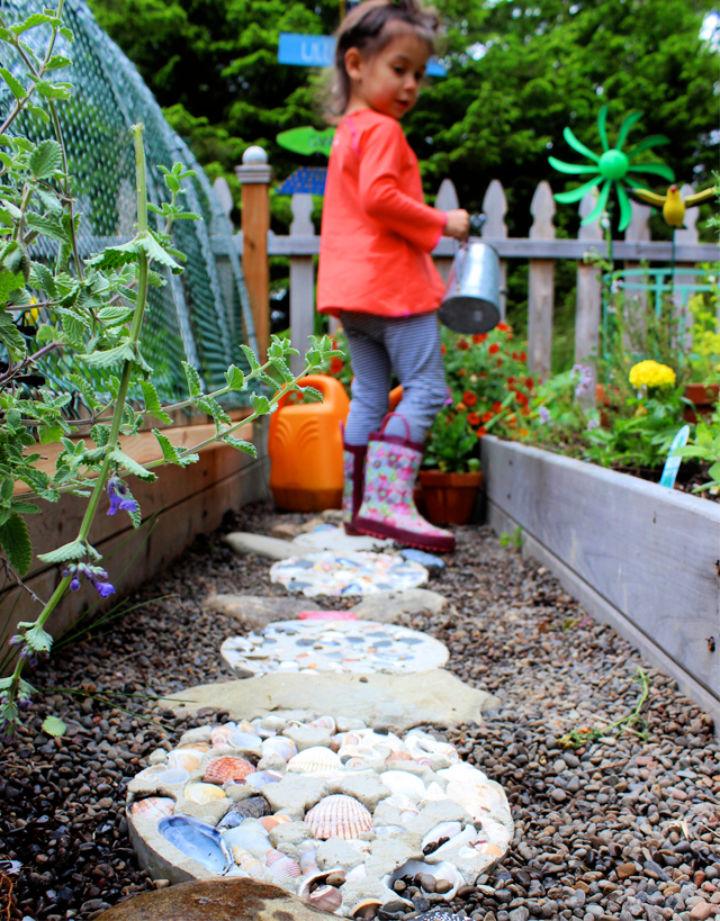
Making your own cement stepping stones is a charming addition to any backyard garden, turning family shell and rock collections into lasting memories. Start by selecting your favorite pieces and arranging them on plywood cutouts. Utilize Quick-Tube slices or an old cake pan as molds for a seamless process.
Mix Cement All with a touch of pea gravel and pour over your arranged treasures. After securing the molds with wood braces and allowing them to cure for 24 hours, your personalized stepping stones are ready to enhance any garden path. This hands-on project is a delightful way to personalize your outdoor space with a touch of family history. Alisa Burke
14. Simple DIY Paver Stone Walkway
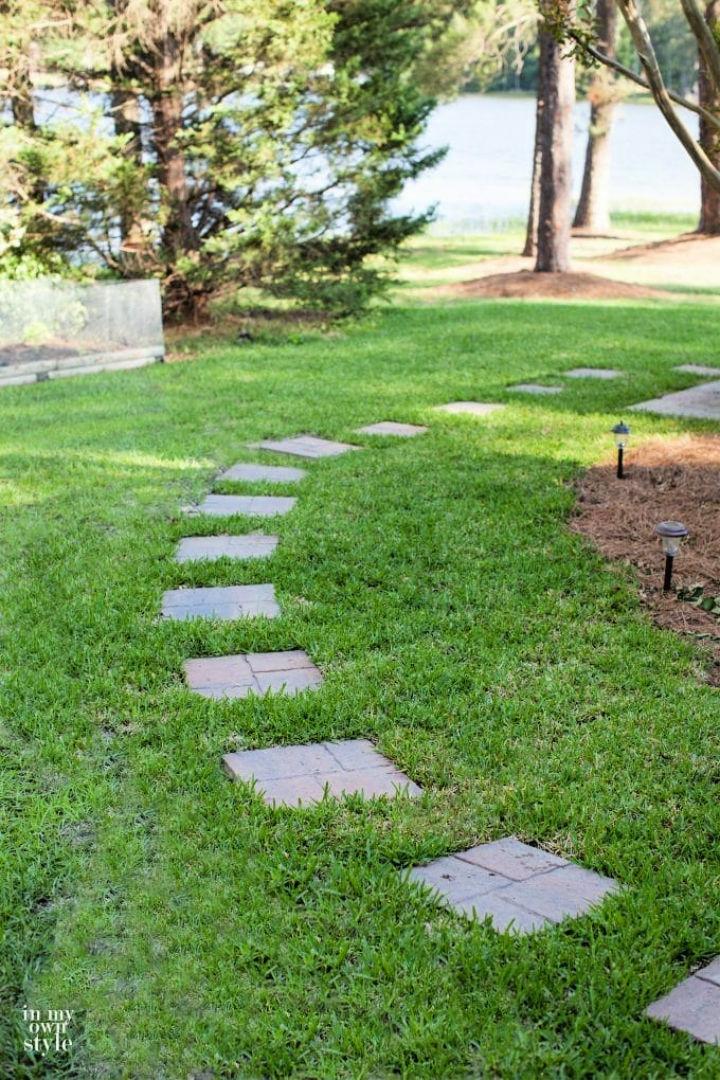
Making a paver stone walkway in your yard is a straightforward project that can significantly enhance your outdoor space. In My Own Style offers a simple guide to help you transform a patchy grass trail into an attractive, functional path with minimal effort. The tutorial is engaging and easy to follow, requiring just a few basic tools like a garden spade or machete and some ready-to-use paving stones from your local home improvement store.
Diane Henkler’s step-by-step instructions ensure that even those with no prior DIY experience can complete this project in a single day. By following this approach, you’ll enjoy a new walkway that not only looks great but is also seamlessly integrated with your lawn, making maintenance a breeze.
15. How to Lay a Flagstone Pathway
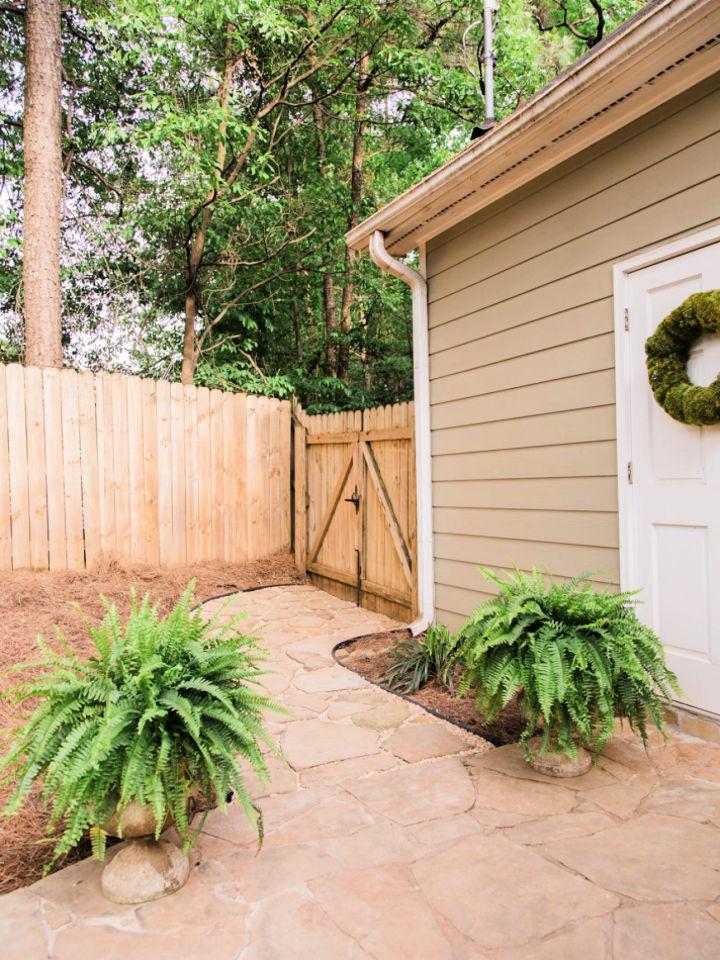
Transform your outdoor space with a stunning flagstone and gravel patio or pathway using HGTV‘s easy-to-follow guide. Kick off your project by clearing the area of debris and leveling the ground. Next, mark your desired path with paint and trench the edges to lay a secure border that’ll stand the test of time and weather. Roll out weed block material, stake the edges, and trim the excess for a maintenance-free foundation.
Pour a layer of sand and compact it, making a slightly elevated middle for optimal drainage. Arrange flagstones in a pattern that pleases your eye, ensuring stability and even spacing. Finally, spread pebbles or gravel and sweep them into the gaps for an attractive finish that also aids in water absorption. With these steps, you’ll make a durable and beautiful addition to your garden or yard.
16. How to Build a Stone Sidewalk or Garden Path
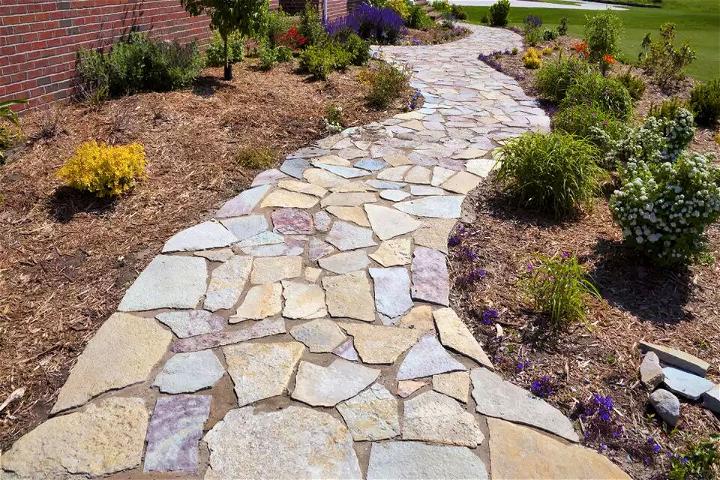
Transform your outdoor space with a touch of natural elegance by building your own natural stone sidewalk. The Spruce expertly guides you through the process with clear, step-by-step instructions, making it achievable for any DIY enthusiast. Selecting locally available stones for their authentic look and durability, this method involves laying the stones in a sand bed for stability, with the option of infusing personality by filling the gaps with gravel, sand, or even hardy plants. Make a functional and picturesque path that enhances your garden’s charm, and enjoy the satisfaction of crafting a long-lasting walkway that melds seamlessly with the landscape.
17. Build a Brick Walkway
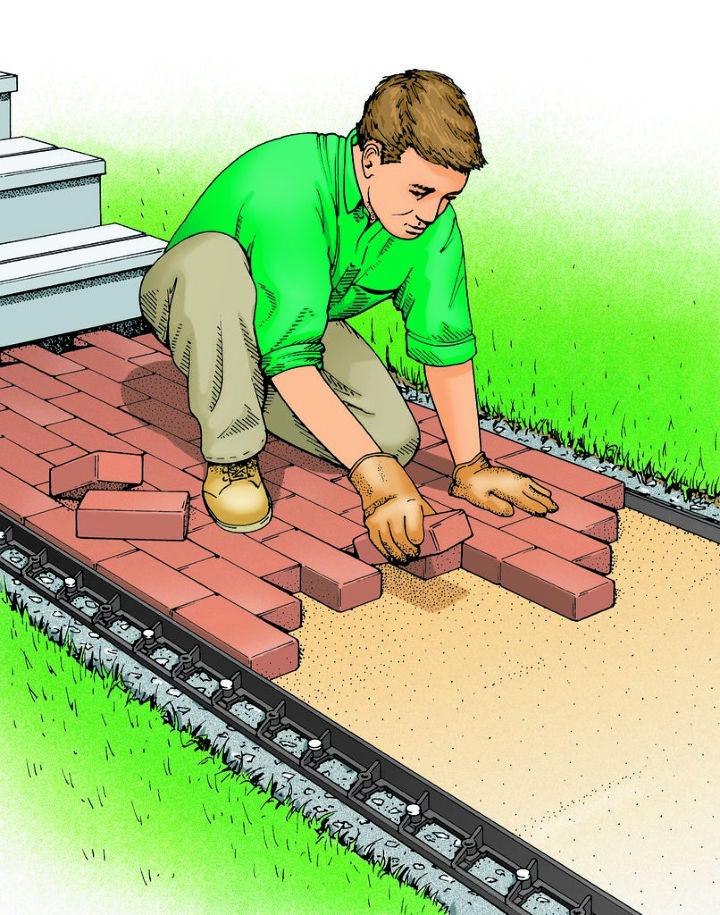
Making a brick walkway adds a touch of elegance and charm to any home, and Instructables offers a comprehensive guide for homeowners looking to enhance their outdoor space. Learn the essential steps to design, lay out, and secure bricks for a durable and aesthetically pleasing pathway.
This instructive guide is ideal for those who want to undertake a DIY project that results in a professional-looking walkway. With clear instructions and helpful tips, you can transform your garden or entryway into a welcoming brick masterpiece. Get ready to elevate your property’s curb appeal with a custom brick walkway that you can take pride in crafting yourself.
18. How To Install a Paver Walkway
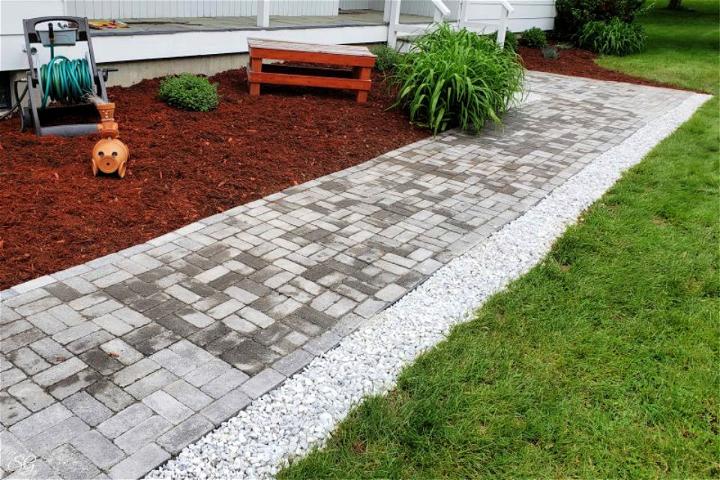
Eager to transform your outdoor space with a charming DIY paver walkway? Scrappy Geek‘s comprehensive guide makes it simple! Learn how to excavate the area, compact the base, and masterfully lay each paver. Our step-by-step tutorial includes innovative solutions like polyethylene paver base panels, which cut down on labor and materials. By following our practical tips, you’ll ensure proper water drainage and a stable foundation for your pathway. So grab your tools and get ready to enhance your home’s curb appeal with a professionally installed look.
19. DIY Brick and Stone Pathway
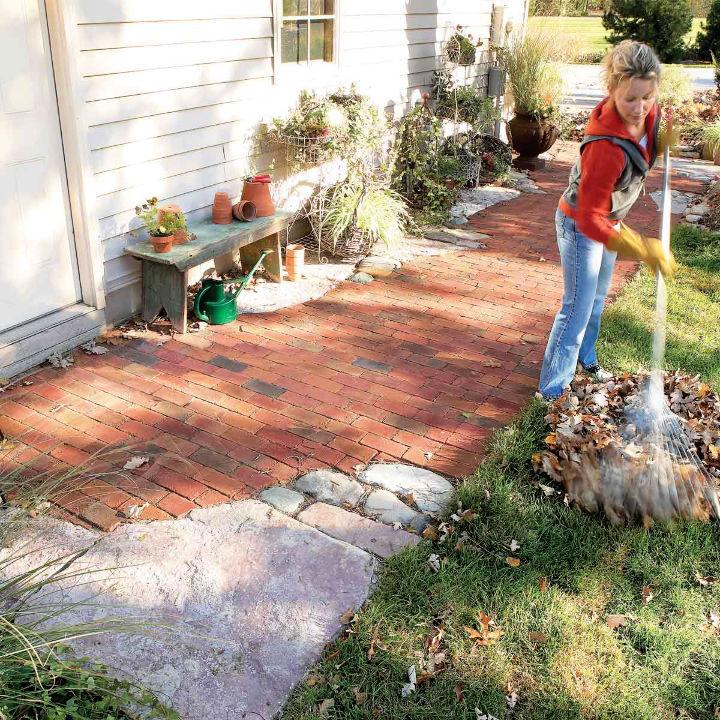
Transform your outdoor space into a charming haven with a custom-built brick and stone pathway. Family Handyman‘s guide offers practical steps to make a durable, crack-resistant walkway that effortlessly blends with your home’s aesthetic. Embarking on this project not only enhances the visual appeal but provides a stable surface for everyday use. Ideal for varying skill levels, this endeavor does require physical effort to maneuver materials.
With detailed instructions on choosing the right pavers and stones, preparing the site, laying a solid foundation, and ensuring proper drainage, your pathway will be a testament to both beauty and function. Remember, short bursts of hard work will result in a long-lasting pathway to enjoy for seasons to come.
20. Make a Beautiful Stone Walkway
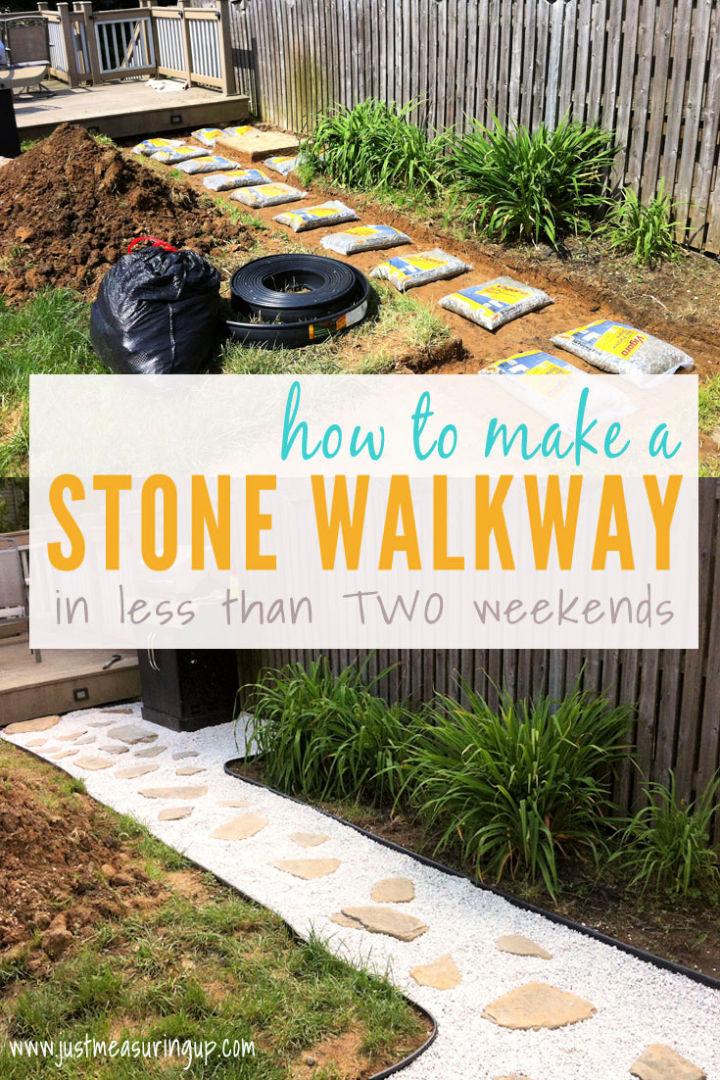
Transform your backyard into a picturesque retreat with Just Measuring Up‘s straightforward tutorial on crafting a stone walkway. Our guide is tailored to help DIYers make a beautiful and practical path to enhance their outdoor space over a single weekend. With step-by-step instructions, you can build a durable walkway, ensuring easy access to areas like detached decks or cozy garden nooks, regardless of weather conditions.
Not only does this project elevate the aesthetics of your yard, but it also adds functionality with minimal maintenance. Ready to upgrade your outdoor living? Dive into our easy-to-follow tutorial for a rewarding DIY experience and an impressive result that’s worth the effort and investment.
21. How to Install a Stone Walkway
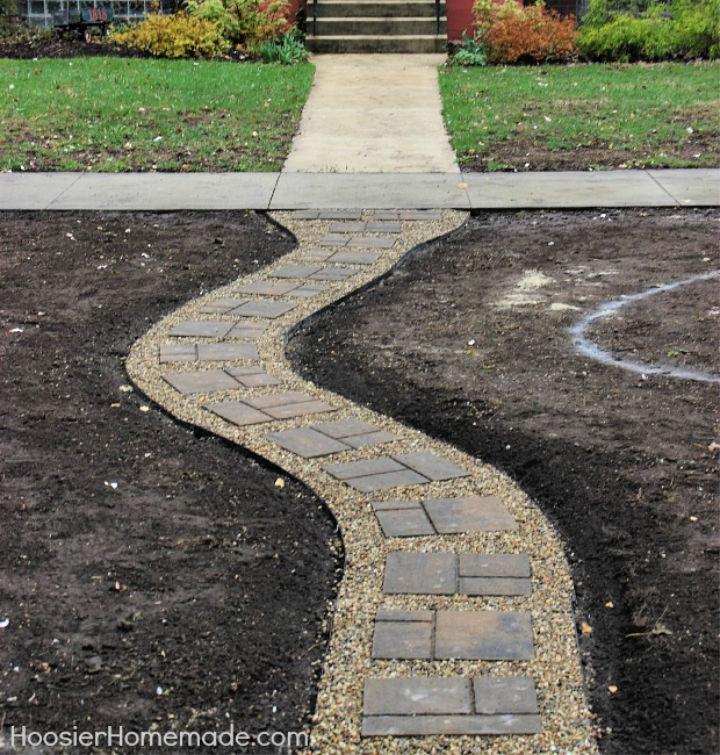
Ready to enhance your outdoor space with a DIY touch? Hoosier Homemade offers a comprehensive guide on installing a stone walkway that’s both economical and durable. Discover valuable tips on design, maintenance, and essential tools to ensure your walkway adds charm and functionality to your landscape.
With step-by-step instructions, you’ll learn how to prepare the ground, lay a stable base, and set stones for a beautiful path. Plus, you’ll find advice on selecting the right materials to fit your budget and aesthetic preferences. Dive into this helpful tutorial and transform your garden pathway today!
22. How to Make a Concrete Walkway
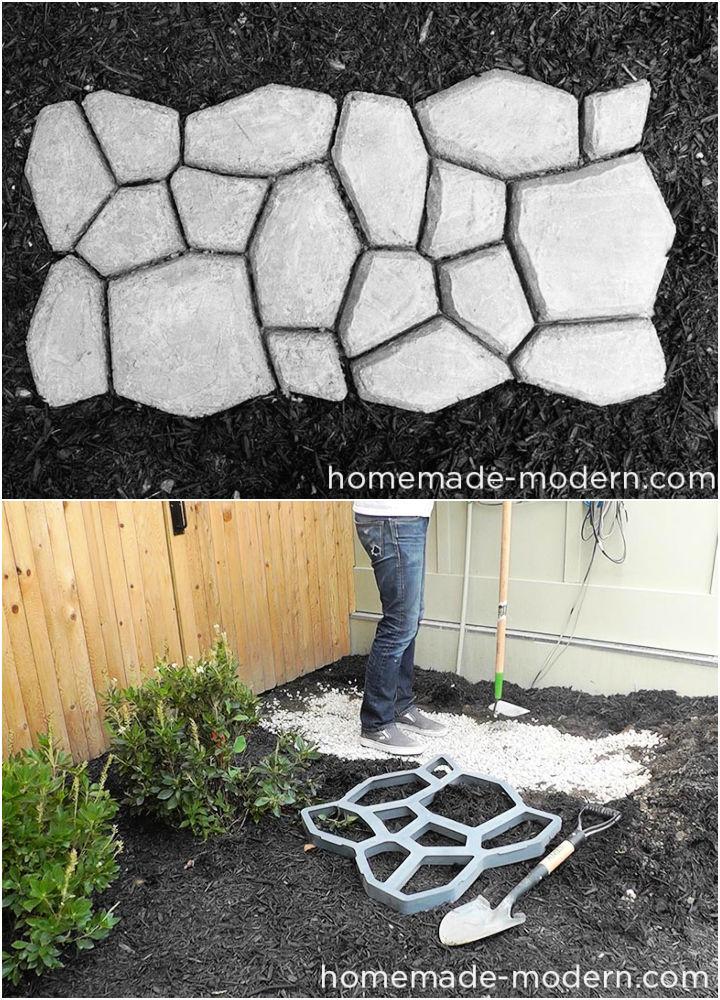
To make a beautiful and durable concrete walkway in your garden, start by leveling the ground meticulously. Once the ground is even, proceed to layer a bed of gravel, ensuring a solid foundation for the walkway. Carefully position the walkway form in your desired location, taking into account the flow and design of your garden.
Finally, fill the form with liquid concrete, allowing it to set and form a sturdy path. Don’t be afraid to experiment with different positions of the walkway form to achieve a natural and aesthetically pleasing look for your concrete walkway. Homemade Modern
23. How to Make Floating Concrete Steps
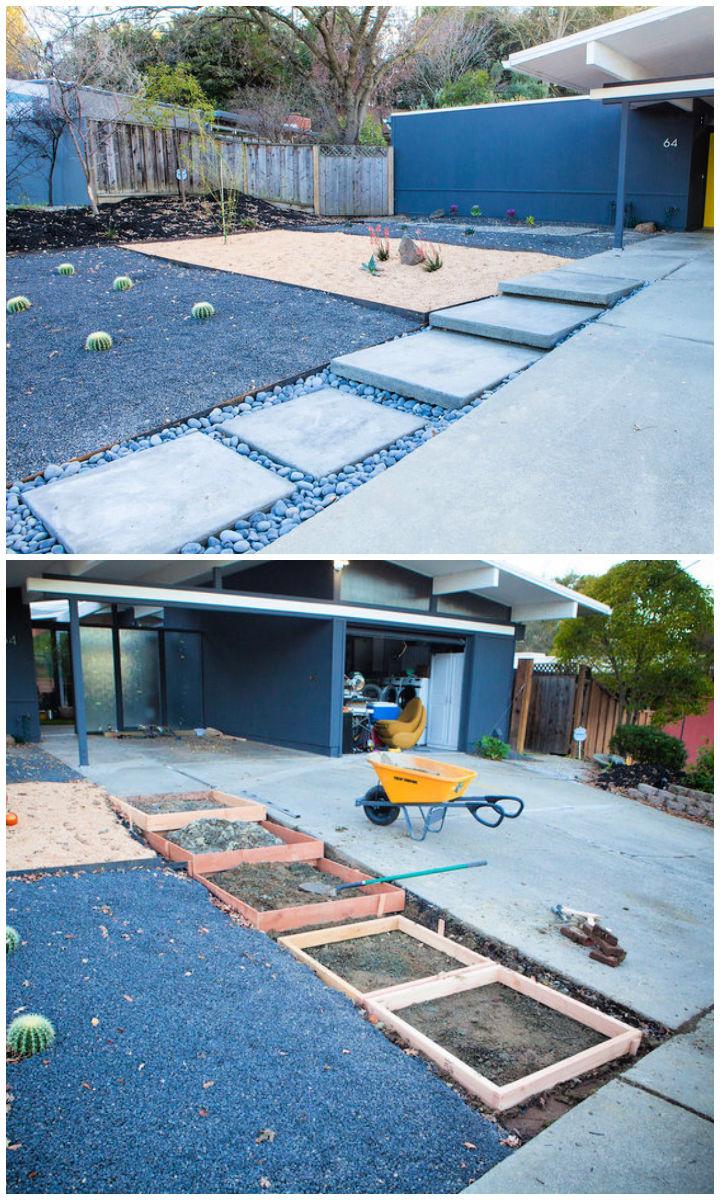
Making floating concrete steps can be a stylish and functional addition to your home’s walkway. At Destination Eichler, learn how to embark on this DIY project that combines modern aesthetics with practicality. The guide details materials, such as brick, pavers, and concrete, and covers the process from excavation to the final pour.
It emphasizes the need for patience, precision, and some hard work. With a focus on pour-in-place concrete walkways, the instructions include building wooden frames, pouring concrete, and adding optional mesh reinforcement. The result? A custom set of steps that complement the mid-century modern design while staying within budget.
Do you need a unique and cheap outdoor sitting place? Try these easy ideas for DIY garden bench to make the perfect spot to sit in your backyard.
24. Build a Wooden Walkway
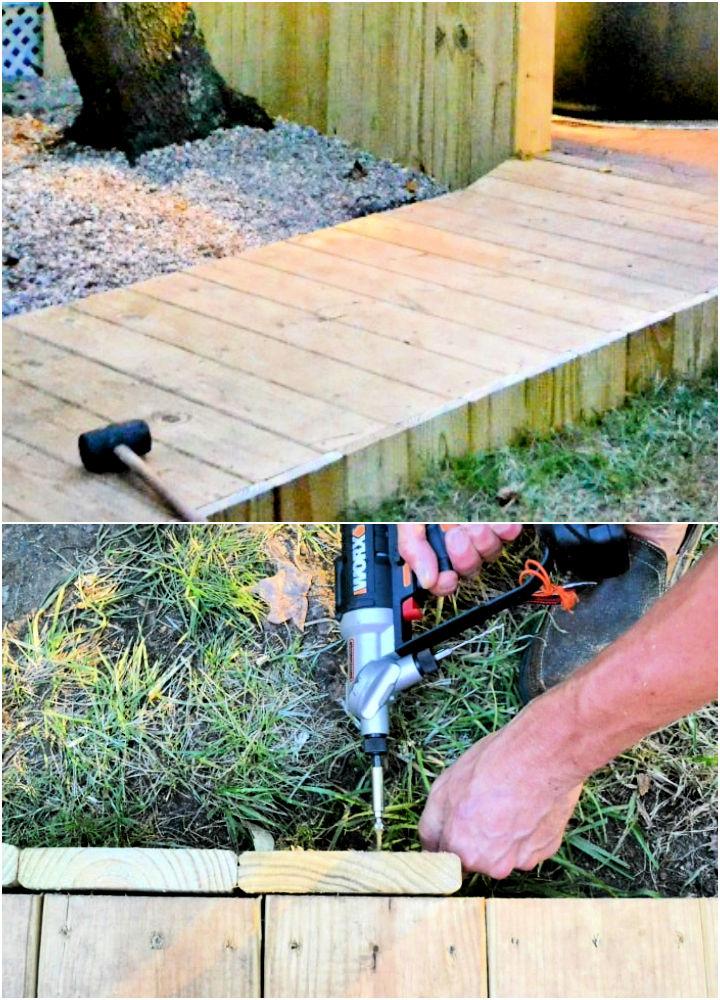
Building a wooden walkway is an excellent project for enhancing your outdoor space. Faithfully Free provides a comprehensive step-by-step tutorial to guide you through making a durable and visually appealing path. With clear instructions on measuring, cutting, and assembling the structure, you’ll learn how to construct a level, stable walkway that connects seamlessly with your patio. This tutorial empowers DIY enthusiasts to confidently tackle the task with helpful tips on material selection and tool usage. Get ready to transform your yard with a practical and attractive wooden walkway.
25. Upcycled Wood Pallet Garden Walkway
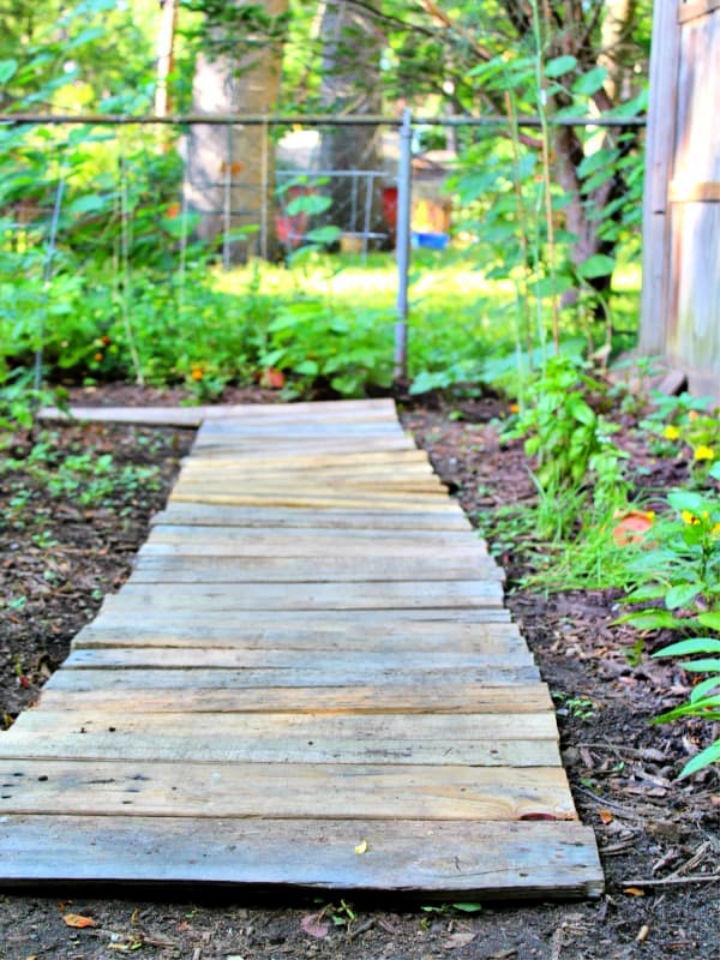
Make a stunning, eco-friendly garden walkway with upcycled wood pallets! The Homespun Hydrangea offers a simple and cost-effective tutorial to transform discarded pallets into an attractive, functional path that keeps mud at bay and adds charm to your outdoor space.
With basic tools like a circular saw and some creativity, you can craft a personalized walkway that enhances your garden’s aesthetic while also being kind to the planet. Get ready to elevate your garden’s look and enjoy a mud-free stroll after just a few hours of DIY fun.
26. Stenciled Garden Walkway Stepping Stones
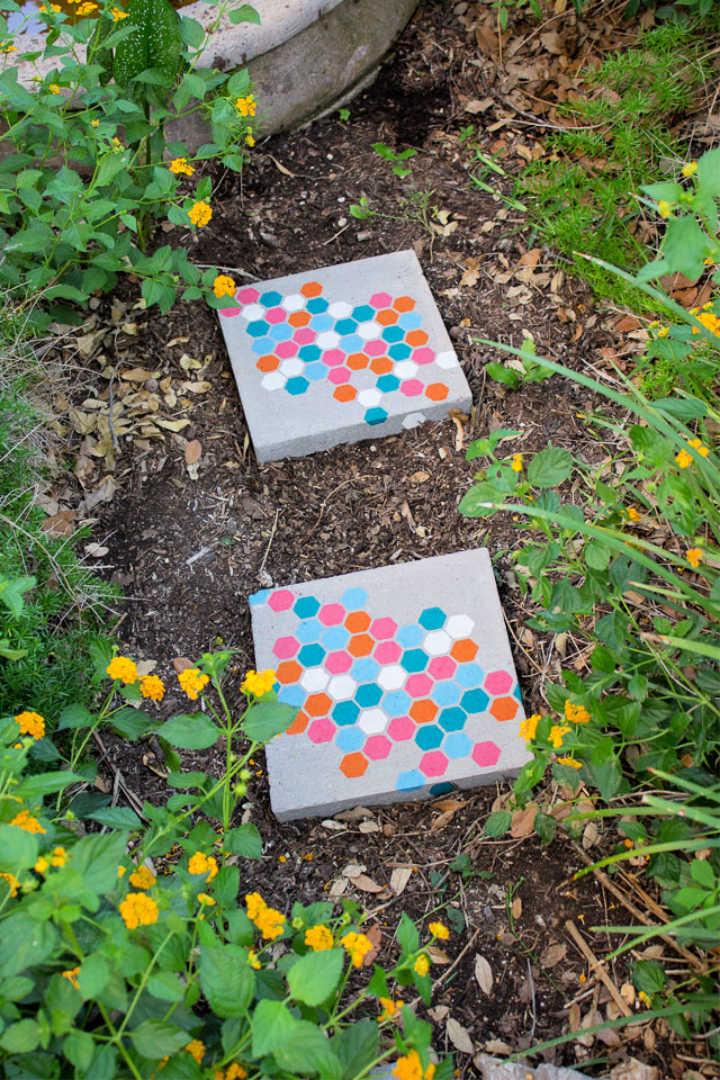
Transform your garden pathway into a colorful mosaic with easy-to-make stenciled stepping stones. Design Improvised‘s guide shows how to add a personal touch to concrete pavers using stencils and weather-resistant craft paints. Follow the simple steps to tape your stencil, apply paint with foam brushes, and position the design to your liking. It’s a quick, affordable project, with each stone costing little to make and taking just over an hour to complete. Place them in your yard for an instant uplift that lasts a season or more. Get creative and brighten up your outdoor space with these decorative and functional art pieces!
27. Inexpensive DIY Mulch and Stone Walkway
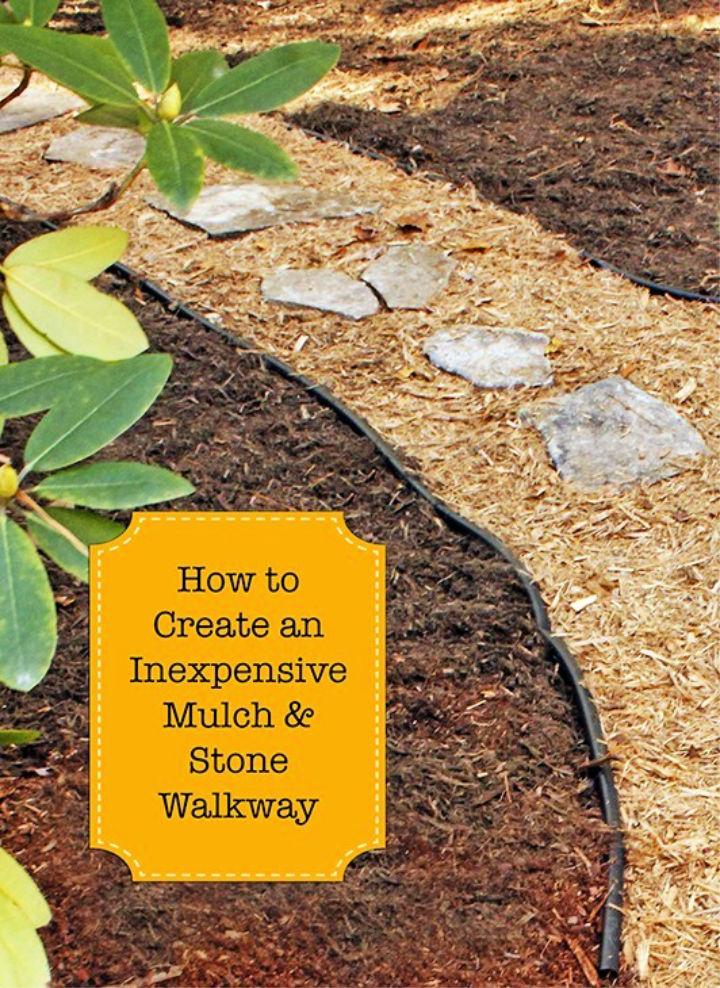
Transform your muddy yard into an attractive, mud-free path with a DIY Mulch and Stone Walkway project. Pretty Handy Girl offers a straightforward guide for making a functional and budget-friendly walkway using readily available materials from your local home improvement store.
By following simple steps that involve laying no-dig landscape edging and spreading contrasting mulch, you can enhance your outdoor space while keeping your home clean from tracked-in dirt. With this easy-to-understand, instructive approach, you can achieve a beautiful and practical walkway in just a few hours, all without the need for heavy digging or professional help.
28. DIY Stepping Stones
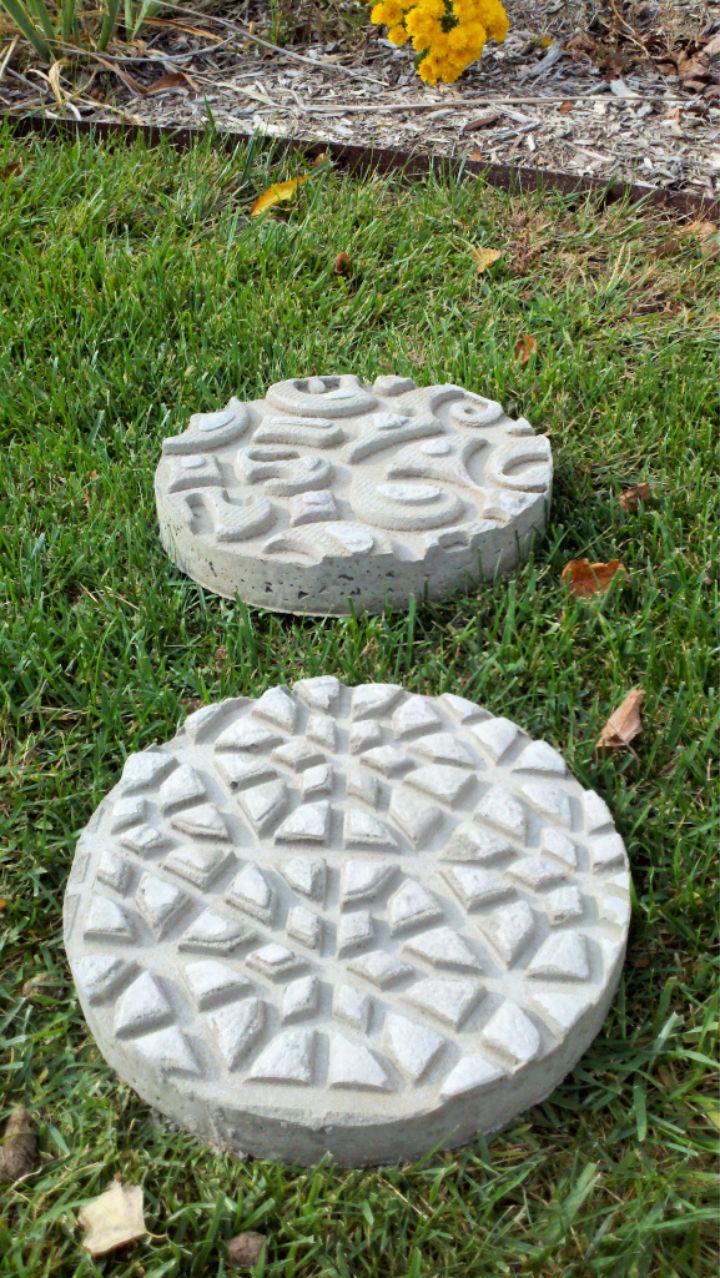
Making your own stepping stones is a rewarding project that adds a personal touch to your garden. The Mizelle Group provides a straightforward DIY guide to crafting these decorative elements. All you need is fine concrete, cardboard tubing, rubber doormat with a design, some common kitchen supplies, and a bit of creativity.
The process involves cutting tubing into rings, preparing them with oil, and filling them with concrete. Impress your doormat design, let it set, and voila! You’ll have unique stepping stones to enhance your outdoor space. It’s a fun and engaging way to personalize your garden while enjoying a hands-on activity.
29. DIY Barefoot Sensory Path
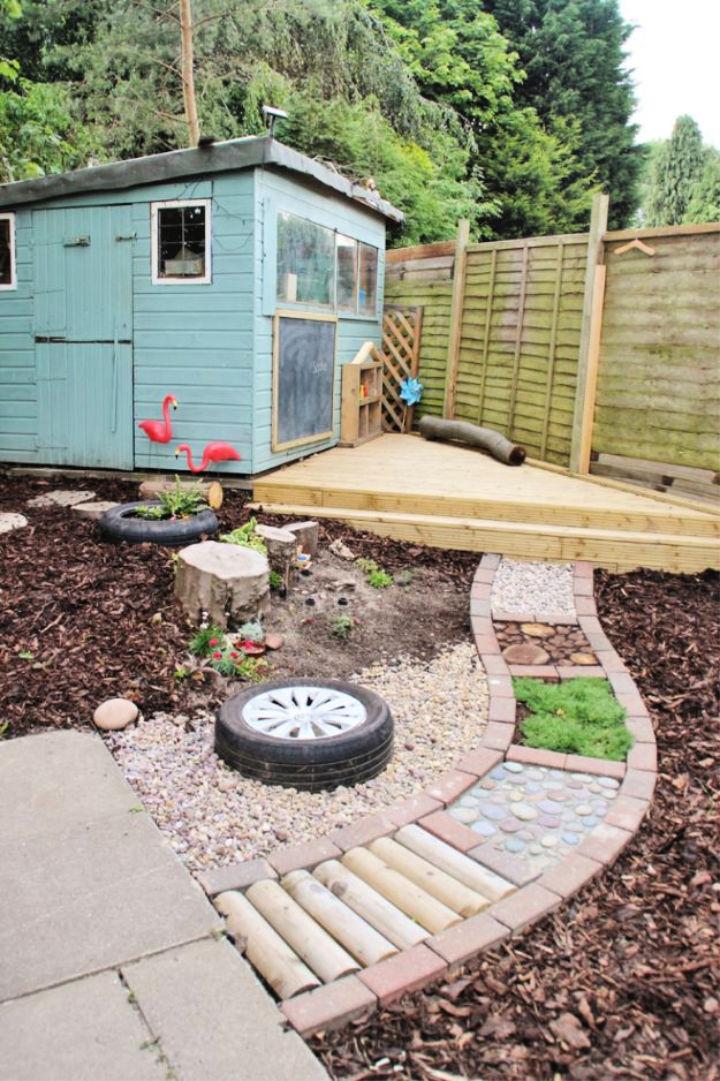
Transform your garden into a magical sensory experience for children with Play at Home Teacher‘s DIY Barefoot Sensory Path guide. This instructive blog offers a step-by-step process to make a delightful play area that engages the senses. From selecting materials to detailed construction tips, it empowers parents and educators to craft a safe and engaging outdoor space. With this resource, you’ll be equipped to design an interactive path that fosters curiosity and joy in little explorers, providing a unique way for kids to connect with nature right in their backyard.
30. Walkway Using Recycled Counter Top Granite Scrap
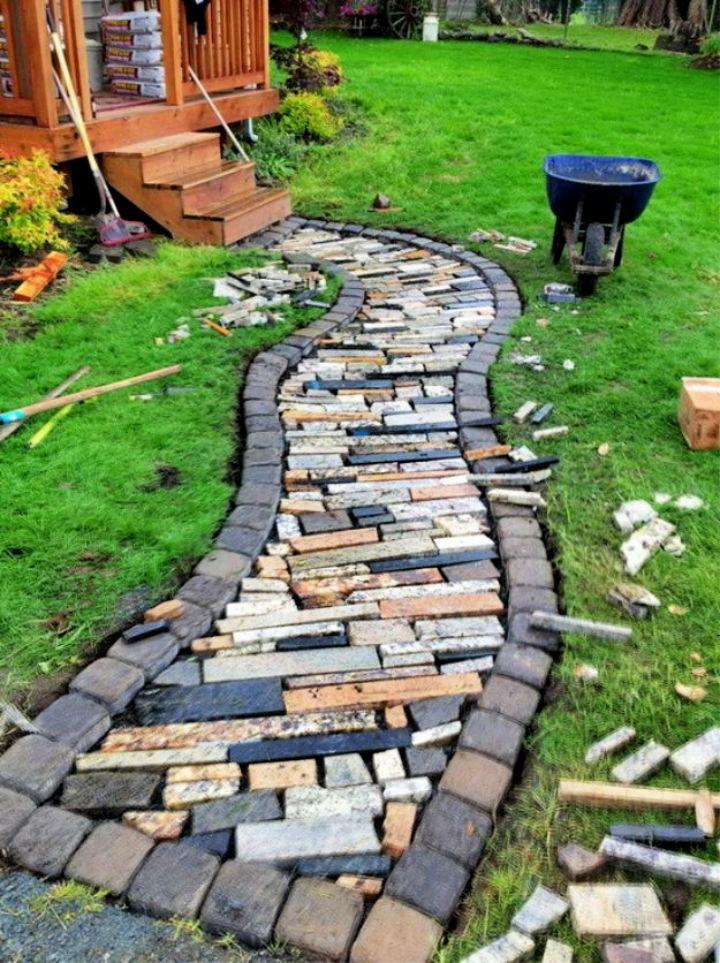
Making a stunning and sustainable walkway has never been easier with the innovative use of recycled granite scrap. Transform your garden path into a unique feature by repurposing leftover granite from countertop companies. RemoveandReplace.com guides you through the process step by step, from sourcing materials to laying out your design and sealing the stones.
Embrace this eco-friendly method to enhance your outdoor space with a durable and attractive granite pathway that stands out and impresses. With a focus on safety and aesthetics, learn how to craft a non-slip, beautifully arranged walkway that’s both functional and visually appealing.
31. Railroad Tie Walkway
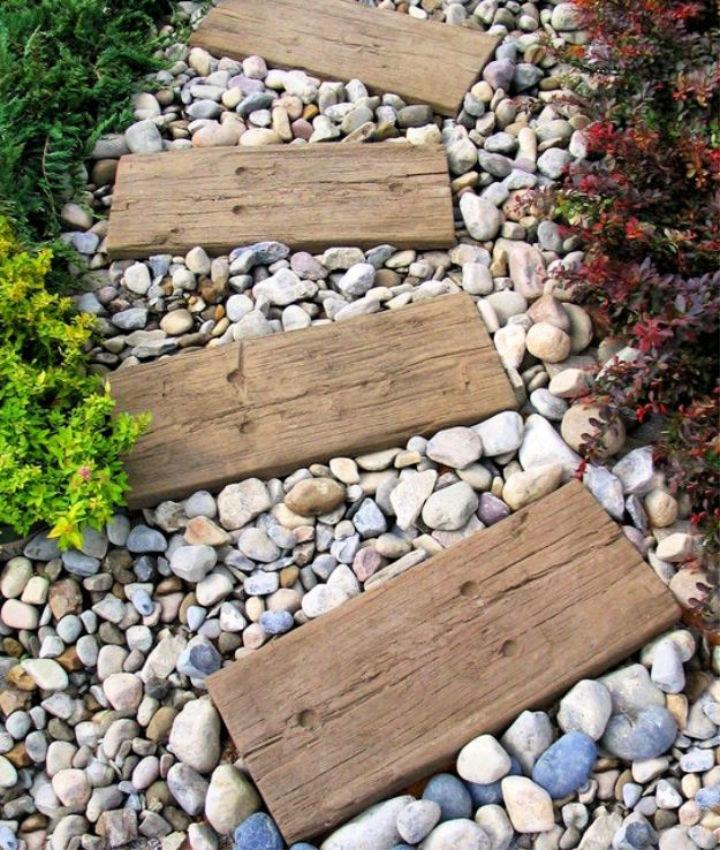
This walkway resembles a charming railroad, complete with delightful gaps filled with vibrant and eye-catching gravel. The wooden steps, peeking out from the walkway, add an adorable and inviting touch. To make this enchanting walkway, begin by excavating the garden ground, then carefully layer sand and gravel. Next, place the wooden step stones and sprinkle more gravel for a polished finish. Among our collection of walkway ideas, this particular design stands out as the simplest yet most captivating option.
32. Bluestone Walkway
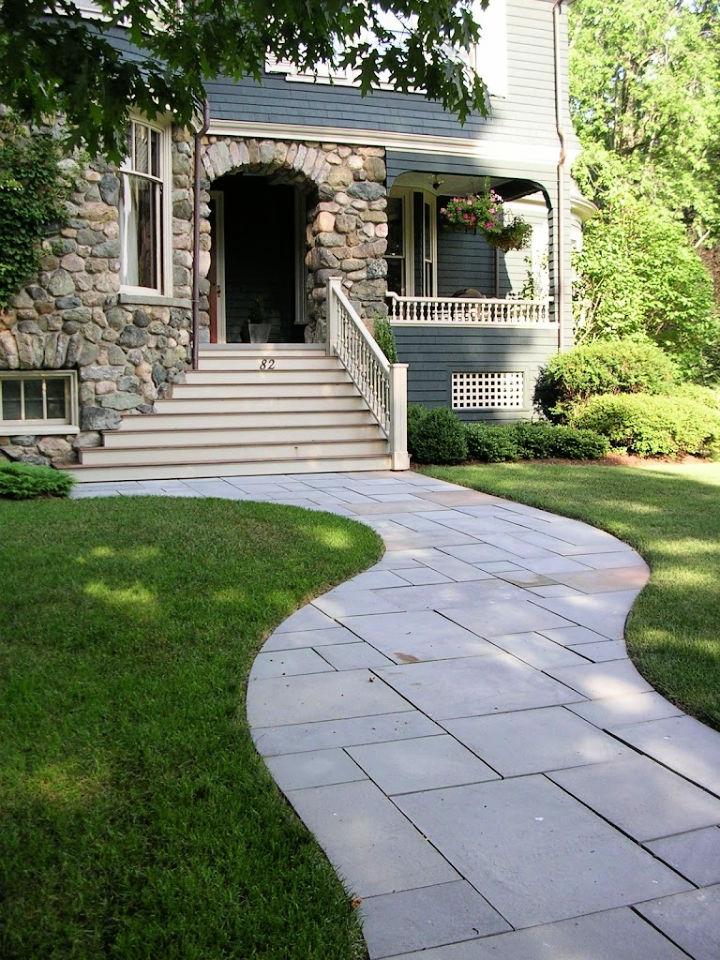
Transform your property with a stunning bluestone walkway that will significantly enhance its value. Imagine the exquisite visual appeal when the walkway perfectly complements the walls of your house. Make a picturesque scene by cutting out the walkway design in the garden ground, filling it with gravel, and layering a carefully prepared sand or mortar bed. As you meticulously add the bluestones, one by one, you’ll witness the walkway come to life, bringing a touch of elegance and charm to your entire outdoor space.
33. Flagstone Walkway Decorating Front Yard
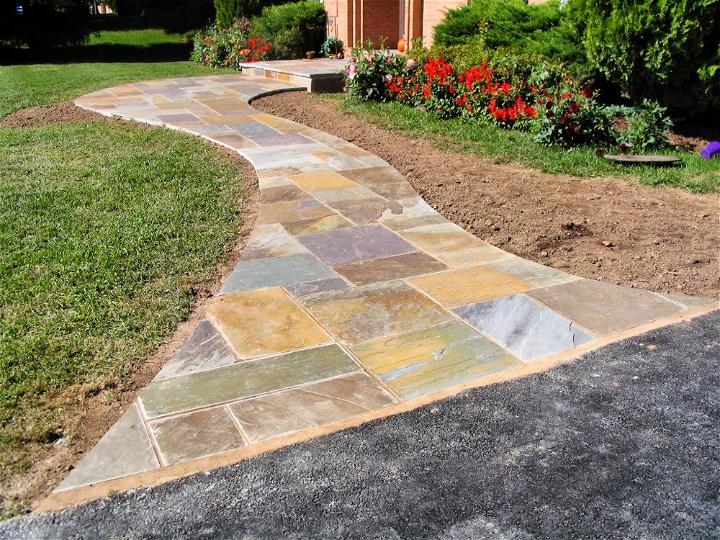
Spice up your front yard with this beautiful stone pathway that will gracefully enhance your outdoor space and elevate the overall appeal of your property. With no gaps to fill, you can make a solid flagstone floor that exudes elegance and charm, instantly jazzing up your patio and transforming the entire property into a captivating oasis. Let your creativity and skill shine as you craft a stunning and durable pathway that will leave a lasting impression on visitors and passersby.
34. Flagstone Walkway Design
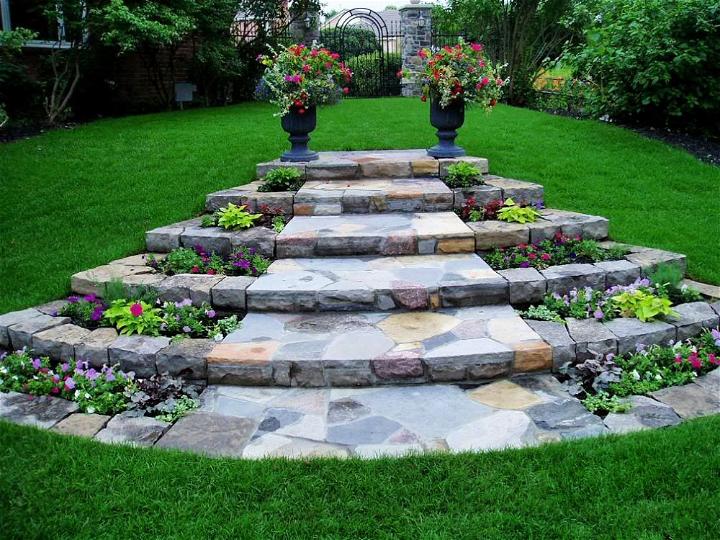
Make a stunning focal point in your lush green oasis with this exquisite stepped flagstone walkway. The walkway features beautifully crafted flagstone stair steps positioned elegantly in the center, surrounded by meticulously designed flower beds.
As you reach the end of the steps, you’ll be greeted by a majestic peak adorned with a pair of enchanting accent flower pots, adding a touch of charm and sophistication to your outdoor space. Immerse yourself in the beauty of nature as you traverse this enchanting walkway, transforming your garden into a captivating haven that will leave everyone in awe.
35. Arizona Flagstone Walkway
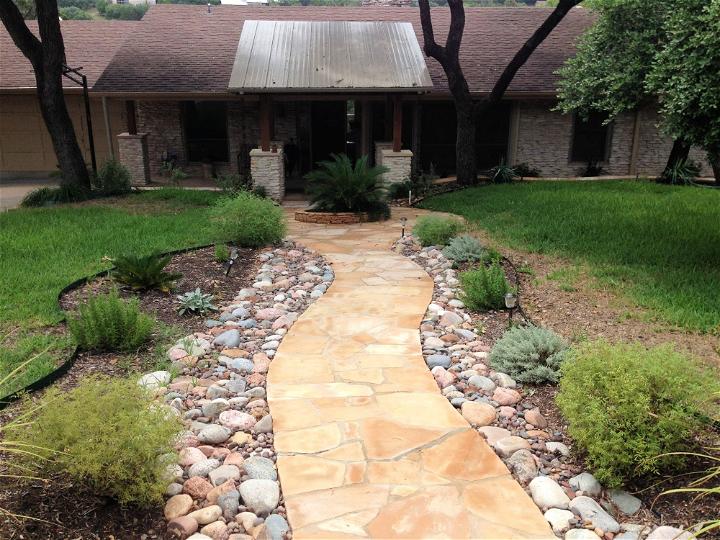
This fantastic flagstone is meticulously crafted with a beautifully designed stone edging that perfectly complements the solid flagstone floor in the center. Whether you choose to install it at your front porch or main home entrance, this exquisite addition will truly elevate the aesthetic appeal and overall value of your property. The best part is, you don’t need to possess advanced professional skills to effortlessly install it. With its user-friendly installation process, it’s as easy as pie and can be completed in no time at all.
36. Brick Concrete Walkway
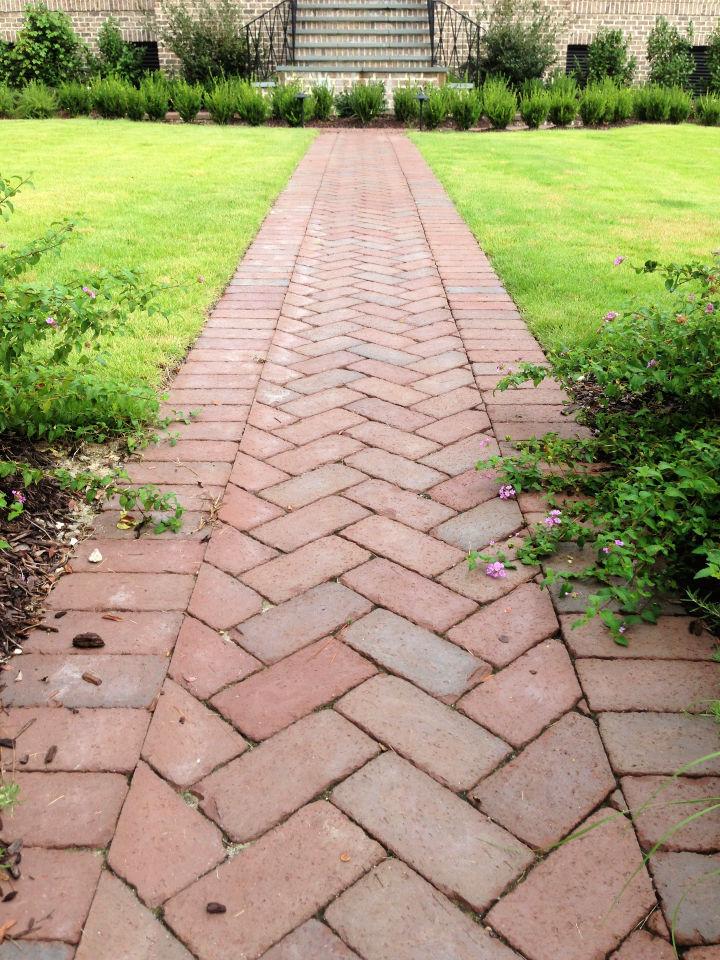
You will absolutely adore the exquisite brick arrangements showcased in this walkway. Not only are they incredibly solid and long-lasting, but they also offer a touch of timeless elegance. Whether you choose to install it with or without a decorative edging, the true highlight lies in the custom patterned arrangements of bricks meticulously laid on a sturdy sand bed. And to ensure utmost durability and perfection, don’t forget to complete the project by applying a layer of mortar. So go ahead, make a captivating pathway that will leave a lasting impression for years to come!
37. Building a Herringbone Brick Walkway
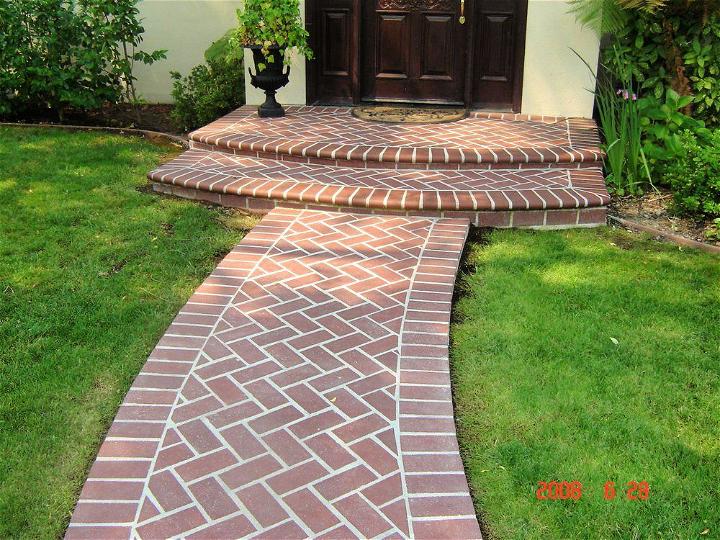
Are you looking for some inspiration for your brick walkway? Well, you’re in luck! Here’s a fantastic brick pattern idea that will surely captivate your senses. To begin, carefully remove the top layer of the garden ground, making a clean canvas. Next, add a layer of gravel, ensuring a stable foundation for your walkway. Then, gently spread a layer of sand over the gravel, making a smooth surface to lay your bricks.
Now comes the exciting part – arrange the bricks in a stunning herringbone pattern on the sand bed, making a visually pleasing and intricate design. Once completed, this exquisite brick walkway is guaranteed to elevate the charm of your patio and enhance your outdoor space. Get ready to be amazed!
38. Awesome Garden Path Ideas
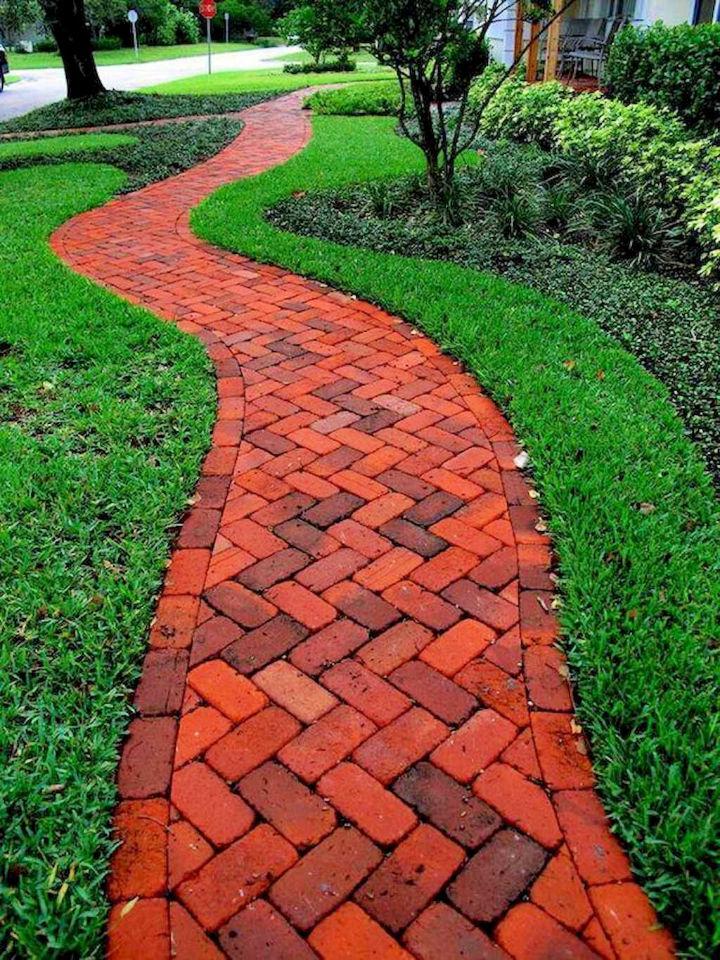
You will absolutely love the exquisite herringbone walkway created with these beautiful, high-quality bricks. This stunning addition will significantly enhance the aesthetics of your garden and patio, bringing a touch of elegance and charm. For a flawless finish, begin by installing the brick edging, followed by carefully making a sand or mortar bed. Finally, arrange the bricks in a captivating 45-degree herringbone pattern, adding a delightful visual appeal to your outdoor space. Get ready to enjoy the perfect combination of functionality and beauty!
39. Beautiful Garden Path and Walkway
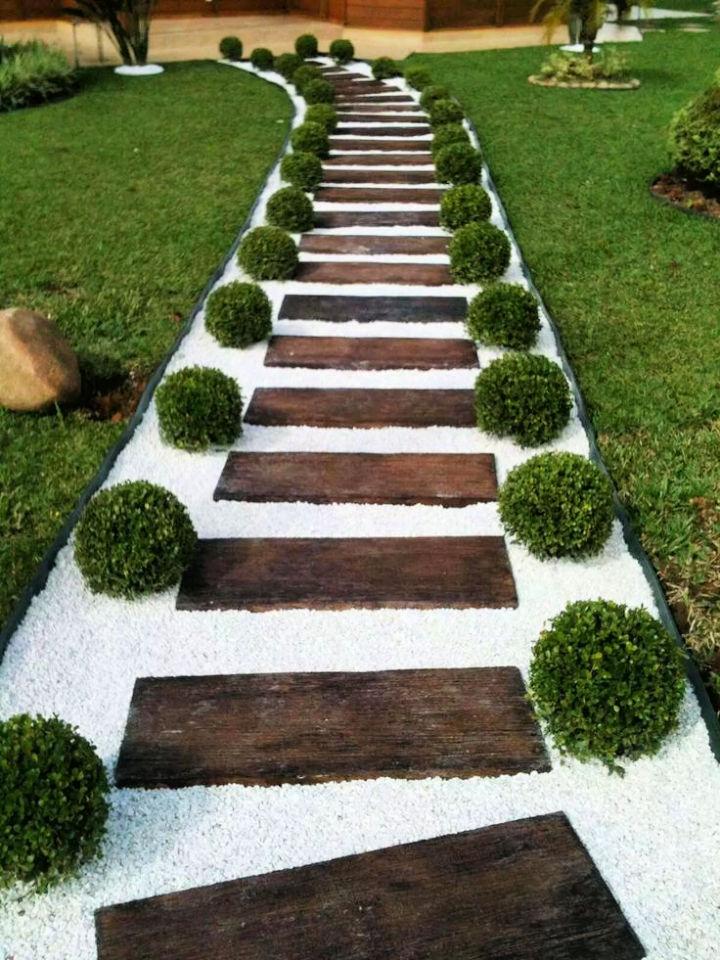
Just look at this breathtaking pathway leading to heaven—a perfect garden path that never fails to amaze at first sight. To make this enchanting walkway, start by carefully excavating the ground and considering the option to layer a fabric for added stability. Then, meticulously install decorative lawn edging, ensuring every detail is in place. Next, gently spread the pure white gravel, enhancing the overall beauty of this picturesque path. Finally, delicately position the wooden steps on the bed of white gravel, adding an extra touch of elegance to this captivating garden feature.
40. Backyard Walkway Idea
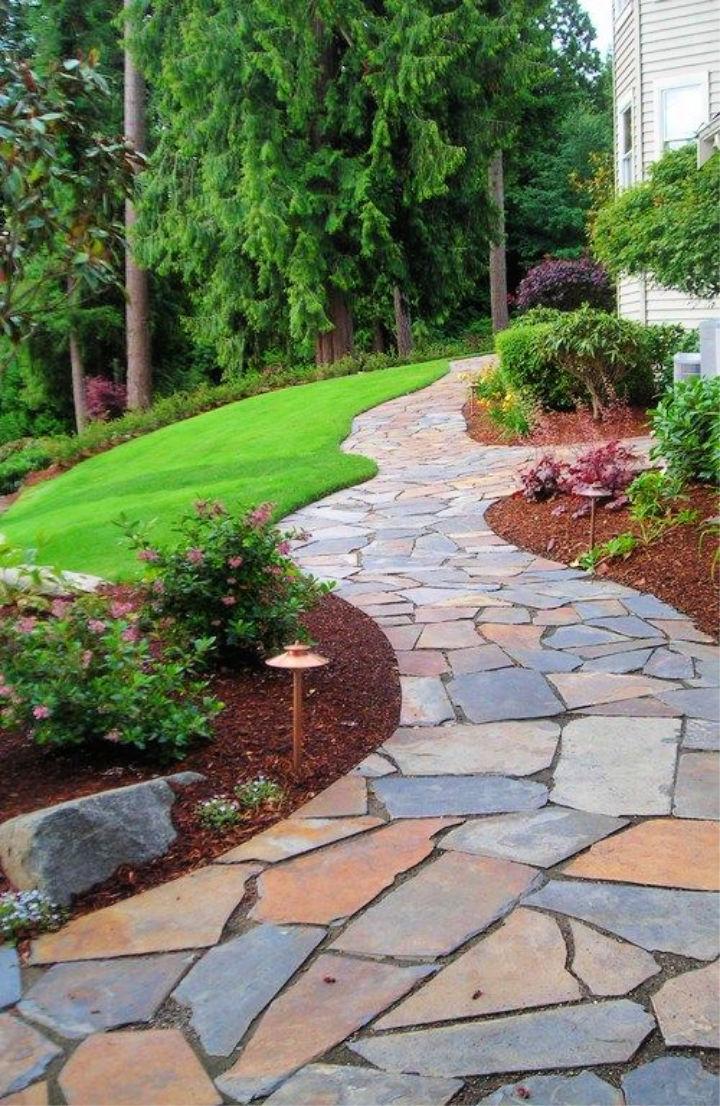
Design a unified and visually appealing look for your property and backyard by constructing a beautiful flagstone walkway. To begin, carefully outline the desired path, ensuring it complements the overall aesthetic of your outdoor space. Next, embark on the excavation process, meticulously digging the designated area for the walkway.
Once the groundwork is complete, proceed to install a fabric layer to prevent weed growth, followed by decorative edging to enhance the walkway’s design. To ensure durability, consider using either a sand or liquid cement bed as a solid foundation for the flagstones. Finally, take the time to thoughtfully arrange the flagstones, making an inviting and seamless pathway that adds charm to your property.
41. LED Concrete Walkway
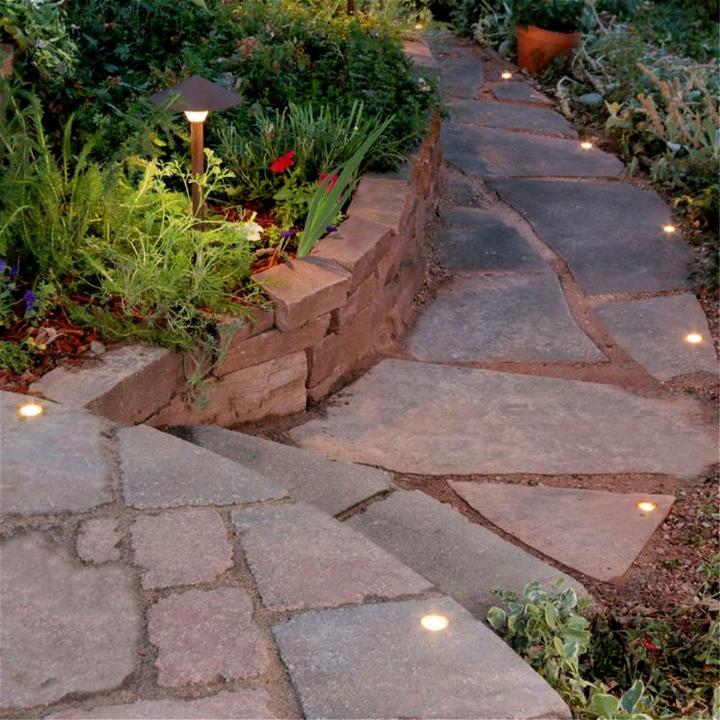
Transform your patio and green garden space into an enchanting oasis, even after sunset, with a mesmerizing LED concrete walkway. This captivating project begins with the installation of a flagstone stepped walkway, making a charming path that beckons exploration. To enhance its allure further, consider adorning the walkway with LED light edging, casting a warm and inviting glow.
For an eco-friendly touch, solar lights are an excellent choice, adding a touch of sustainability to your outdoor haven. While drilling the stone to accommodate the lights may pose a slight challenge, the end result will undoubtedly be worth the effort, transforming your outdoor space into a captivating sanctuary bathed in gentle illumination.
42. Magical Pebble Walkway
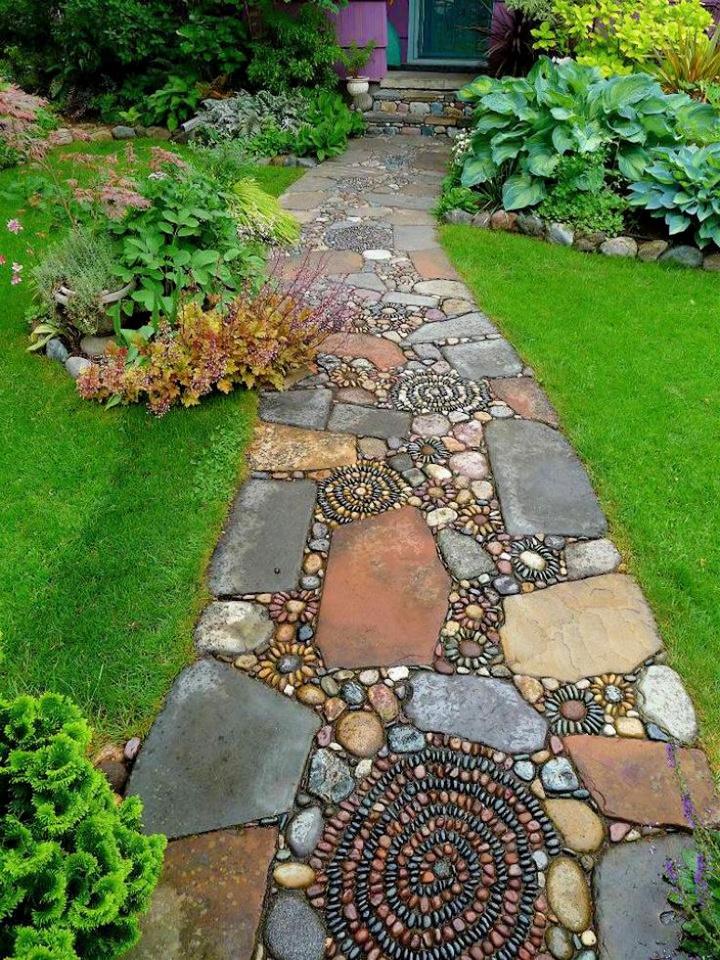
Make a picturesque pebble walkway that will add vibrant colors and charm to your garden. With a wide variety of magical patterns, these absorbing designs will captivate your senses. Begin by carefully cutting out the walkway road, then layer it with a sturdy mortar or cement foundation. As you start arranging the pebbles and stones, let your creativity flow, making intricate and unique patterns that feature enchanting flowers and graceful swirls. Elevate your garden decor to an entirely new level with this mesmerizing addition.
43. Make a Concrete Walkway
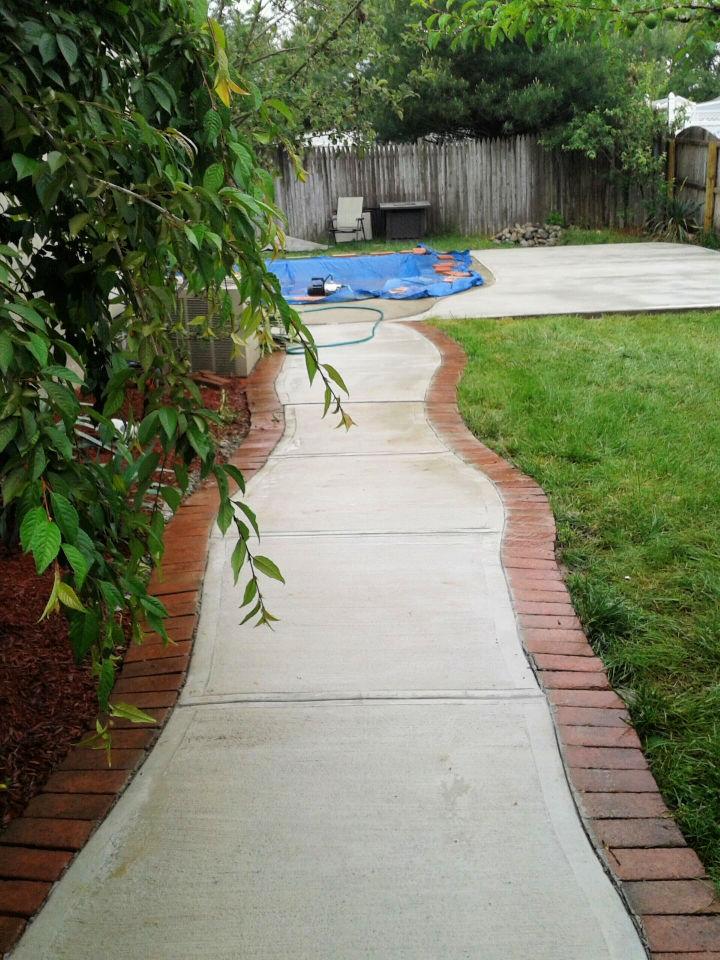
I want to express my immense gratitude to the sturdy and reliable concrete that has laid the foundation for this enchanting walkway. With its smooth and undulating surface, it captures the attention and becomes even more captivating with the addition of exquisite brick decorative edging.
The creation process involves the use of meticulously crafted wooden molds, which serve as the template for pouring the concrete and crafting each step of the walkway. By carefully pouring the concrete into the molds, we bring this vision to life, making a remarkable path that will stand the test of time.
44. Brick and Gravel Path
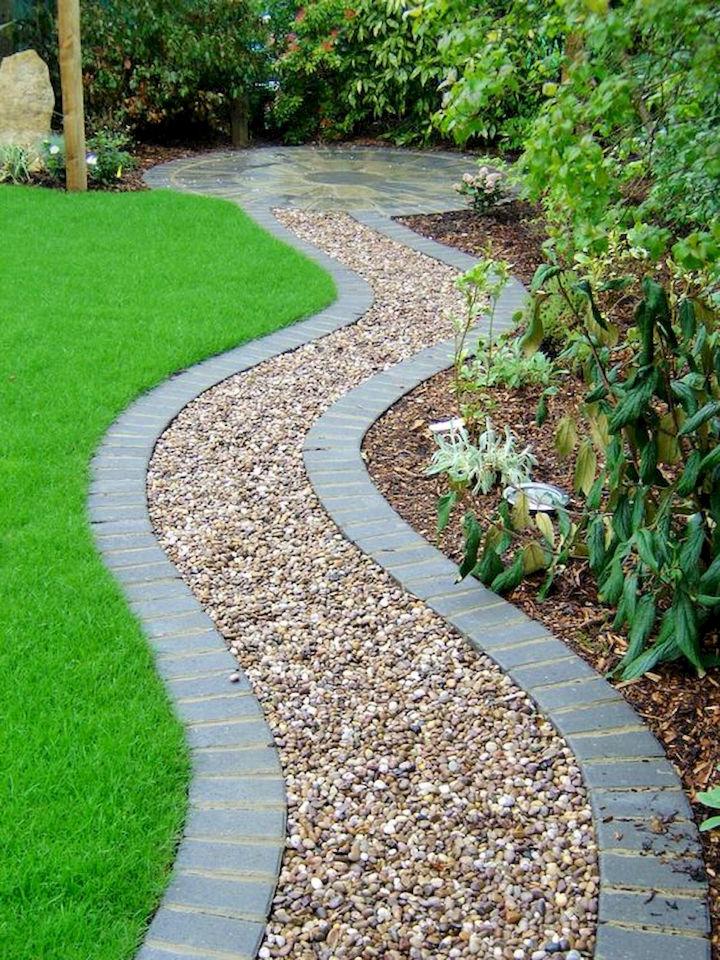
Transform your garden into a captivating oasis with this stunning brick and gravel alley. Imagine the exquisite combination of carefully laid bricks and meticulously selected gravel, elevating the visual appeal of your outdoor space to new heights. Not only will it enrich the aesthetic charm of your garden, but it will also leave your neighbors green with envy. Begin the transformation by meticulously excavating the designated area, ensuring a perfect canvas for your masterpiece.
Next, install high-quality fabric and meticulously crafted brick edging to make a sturdy foundation. Finally, top it off with a generous layer of gravel, adding the finishing touch that will truly make your garden shine. Get ready to revel in the beauty and allure of your garden as this brick-and-gravel alley becomes the envy of the neighborhood.
45. Flagstone Walkway With Gravel
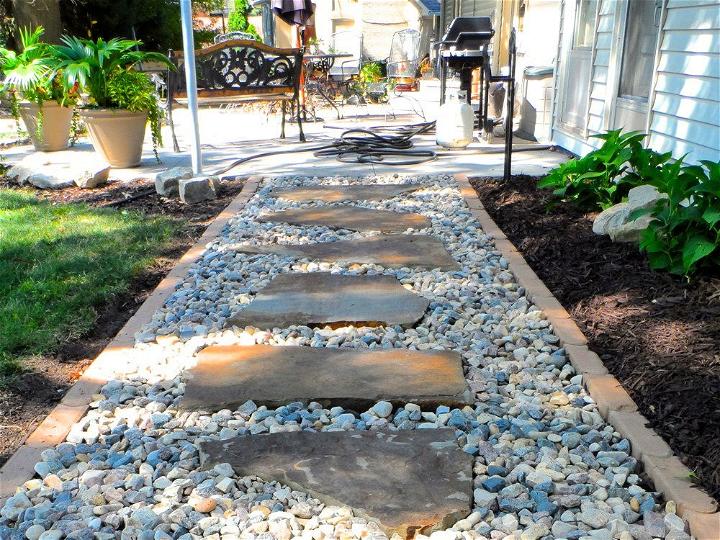
Construct a beautiful connection by linking the path from your home porch to your garden, front lawn, or even your backyard. This simple addition will transform your entire property into a heavenly oasis. Start by carefully cutting out the designated space and installing brick edging to outline the path. Next, lay down flagstones of sufficient thickness in the center, making a sturdy and visually appealing walkway.
Finally, complete the look by filling the gaps between the flagstones with decorative gravel, adding a touch of elegance to your outdoor space. Enjoy the tranquil ambiance and effortless charm this path will bring to your home.
46. River Gravel Walkway
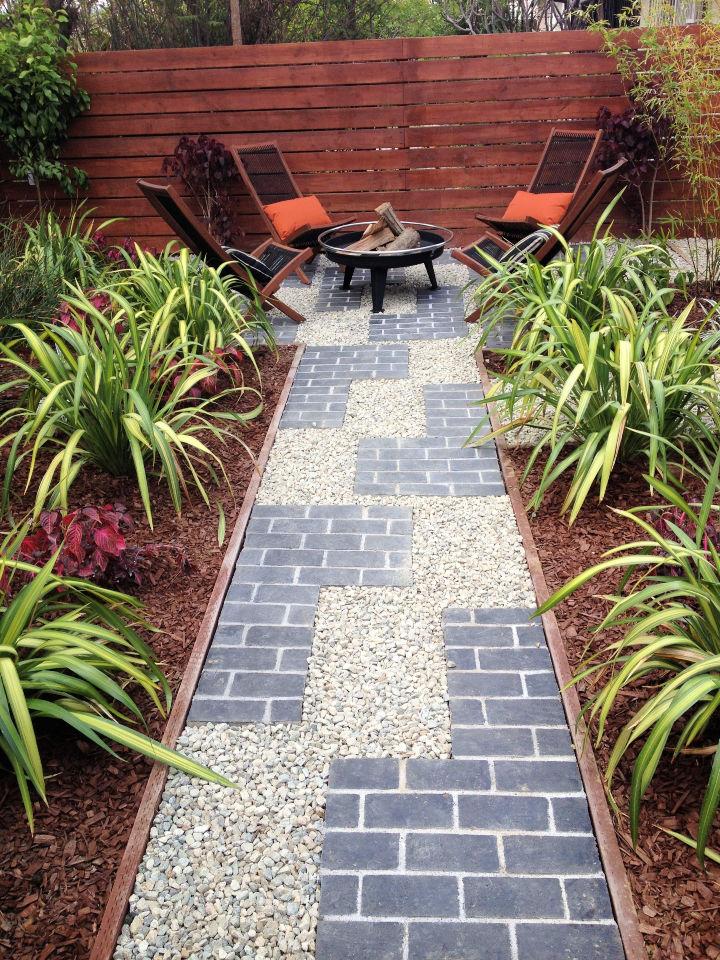
This particular project will receive a perfect score of ten out of ten due to its enchanting visual appeal and exceptional stability. To make this remarkable walkway, begin by excavating the designated area and carefully installing the brick and gravel sections. Enhance the aesthetic by incorporating accent wood borders or brick edging. Finally, complete the path by meticulously laying the river gravel, resulting in a beautiful and inviting walkway.
47. Pergola-Framed York Stone Walkway
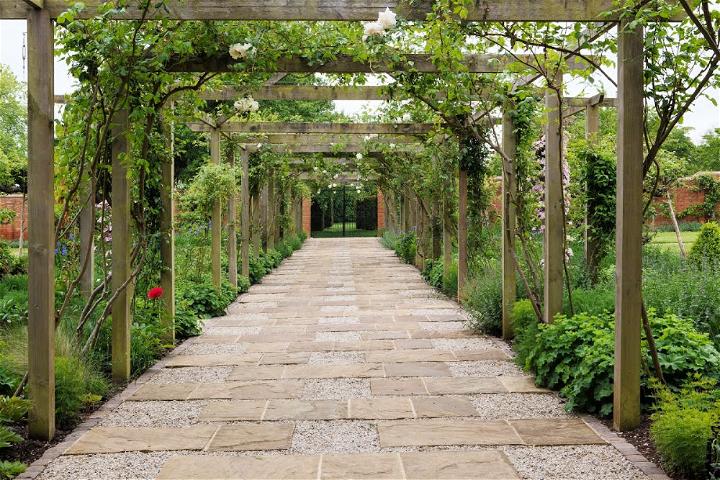
Transform your outdoor space into a true haven with a charming pergola-framed York stone walkway. Picture yourself strolling along this picturesque path, enveloped by the natural beauty of lush greenery. As you install the pergola-frame, using larger wooden posts and carefully crossing lengths, you’ll make a captivating structure that adds an enchanting touch to your walkway.
Opting for York stones ensures a durable and authentic look, perfectly blending into the surrounding environment. Soon enough, the pergola-frames will be adorned with vibrant greenery, making a captivating green roof that further enhances the allure of your outdoor oasis.
48. Wooden Walkway Designs
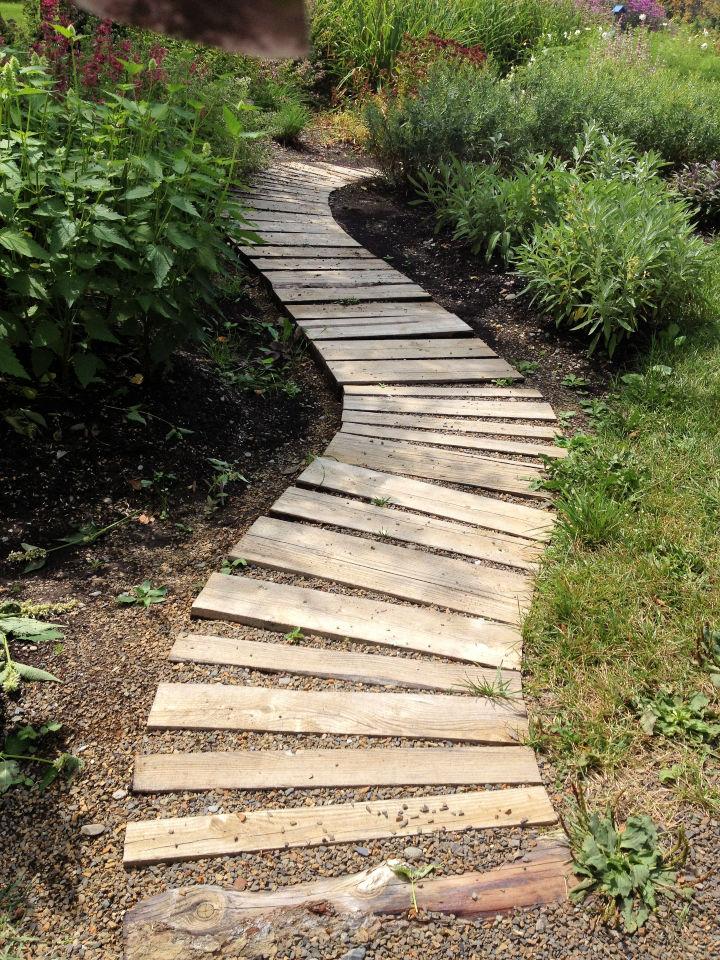
Building a wooden walkway is one of the easiest and quickest walkway ideas on our list. It involves cleaning and preparing the area, making a soft bed of sand. Once leveled, arrange the wood planks one by one to cover the entire walkway. This project can be done using free pallets. Enjoy a beautiful and functional wooden walkway in your outdoor space!
49. Garden Pallet Walkway Idea
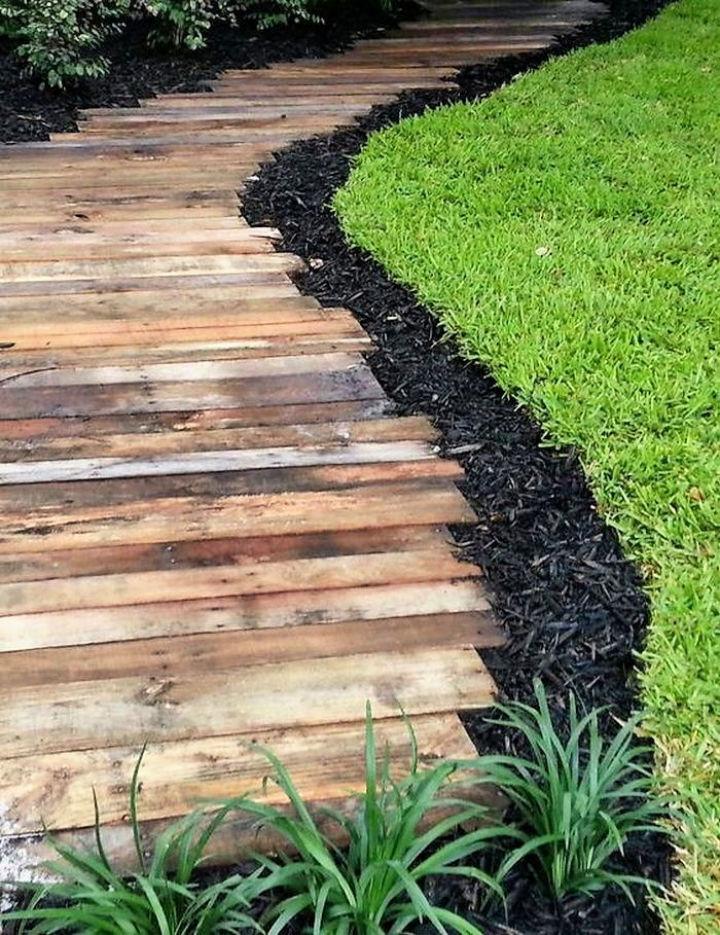
A big thanks to pallets for providing us with these adorable wooden garden walkway ideas. Not only are they cost-effective, but they also add a rustic charm to any outdoor space. To make this walkway, start by preparing the area – dig the space and add a layer of sand, gravel, or soil bed for stability. Then, carefully dismantle the pallets and gather a generous supply of wooden pieces. Arrange them flat, fitting them together like a puzzle, and voila! You have a beautiful and budget-friendly walkway that will enhance the aesthetic appeal of your garden.
50. Quick Wooden Walkway
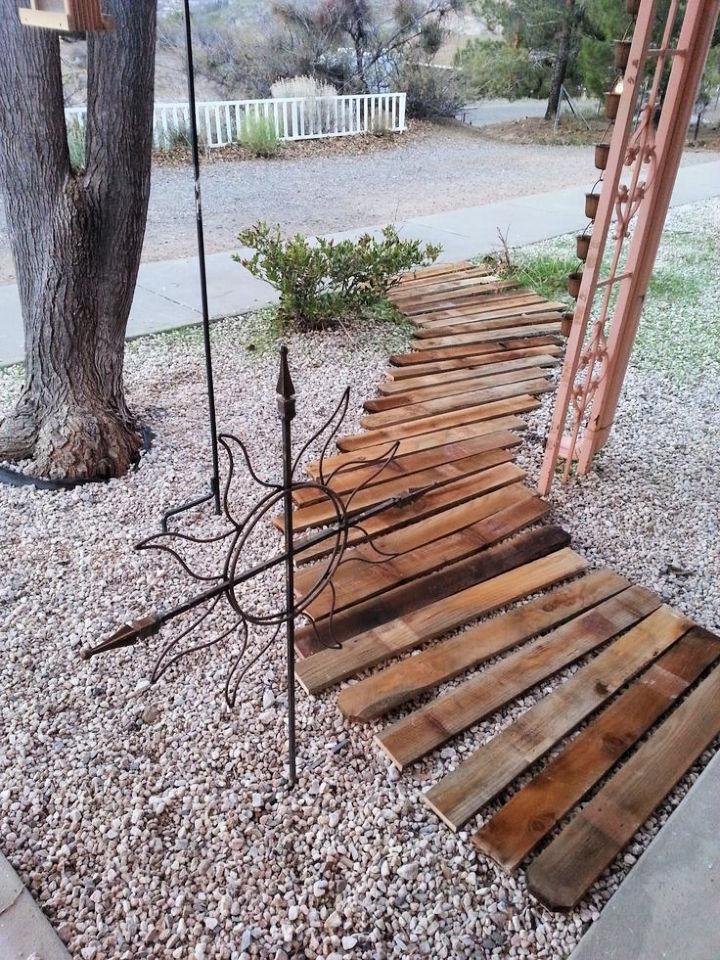
Are you looking for some amazing walkway ideas on a budget? One beginner-friendly garden walkway idea involves the simple yet charming arrangement of wood slats on a bed of gravel or sand. To start, take some quick measurements and mark an outline for your walkway. Then, carefully arrange the wooden slats within the marked area, making a beautiful and inviting wooden alley that adds a touch of elegance to your outdoor space. With this cost-effective solution, you can enjoy a stunning walkway without breaking the bank.
Do you have privacy concerns with your neighbors? With these easy outdoor privacy screen ideas, you can add much-needed privacy to your pool, patio sitting, and deck.
Conclusion:
In conclusion, making a personalized and budget-friendly walkway for your outdoor space is not only possible but also an incredibly rewarding DIY project. With the 50 DIY walkway ideas you can install by yourself, you have a plethora of options that cater to various styles, materials, and landscapes. From the elegance of a paver walkway to the rustic charm of a pebble mosaic stepping stone path, these ideas not only enhance your home’s curb appeal but also invite you to connect with your outdoor environment in a creative and sustainable way.
Remember, the key to a successful DIY walkway project lies in careful planning, preparation, and the joy of seeing your vision come to life. So, grab your tools and let these inspiring ideas guide you to transform your walkway into a beautiful and functional addition to your outdoor living space.
